Home>Energy>Home Insulation & Ventilation>How Do I Replace Weather Stripping On My Door
Home Insulation & Ventilation
How Do I Replace Weather Stripping On My Door
Modified: October 19, 2024
Learn how to replace weather stripping on your door to improve home insulation and ventilation. Follow our step-by-step guide for a more energy-efficient home.
(Many of the links in this article redirect to a specific reviewed product. Your purchase of these products through affiliate links helps to generate commission for Storables.com, at no extra cost. Learn more)
Introduction
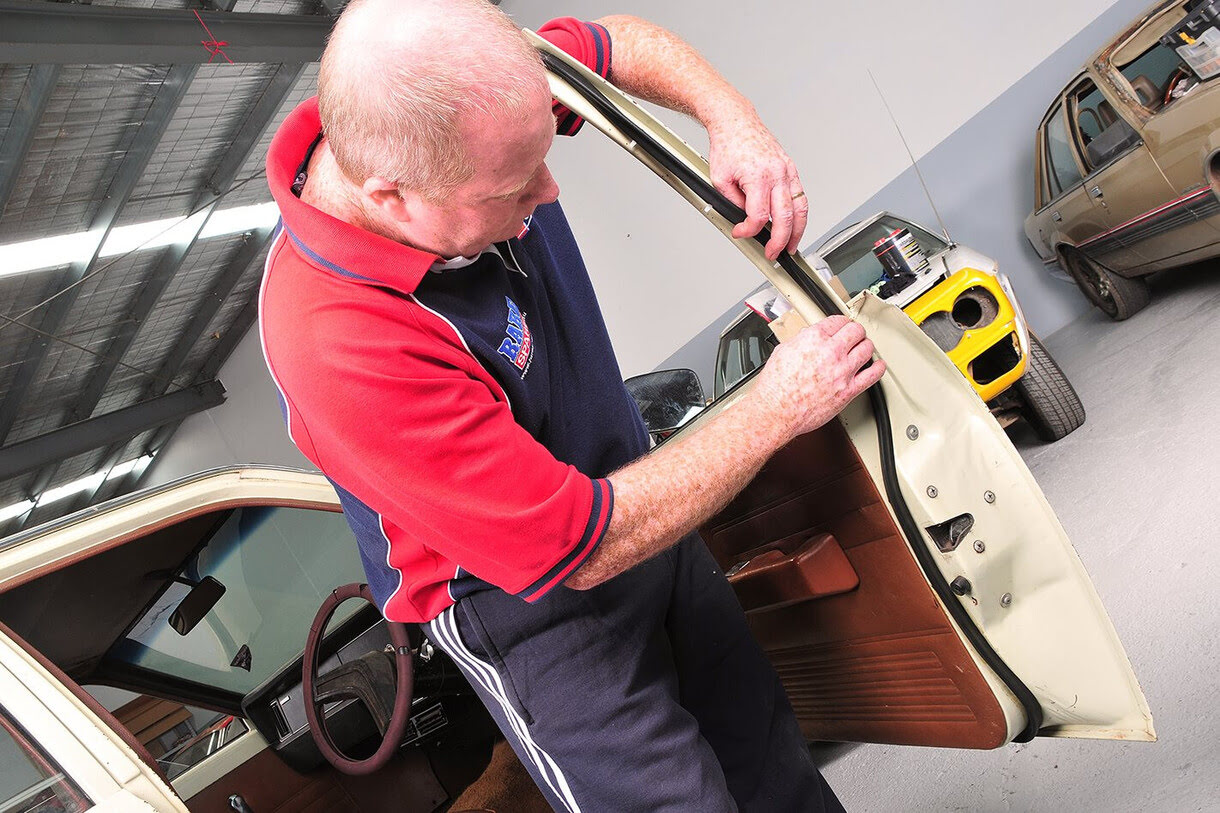
When it comes to maintaining a comfortable and energy-efficient home, the integrity of your doors plays a crucial role. Weather stripping, a simple yet effective component, helps to seal the gaps around doors, preventing drafts and moisture from entering your living space. Over time, weather stripping can wear out, leading to decreased insulation and potential energy loss. In this guide, we will explore the process of replacing weather stripping on your door, empowering you to enhance the efficiency and comfort of your home.
A properly sealed door not only contributes to a cozier indoor environment during extreme weather conditions but also helps to reduce energy consumption, leading to cost savings and environmental benefits. Whether you're a seasoned DIY enthusiast or a homeowner looking to tackle a practical home improvement project, understanding the ins and outs of weather stripping replacement is a valuable skill.
Throughout this article, we will delve into the essential tools and materials required for the task, the step-by-step process of removing old weather stripping and installing new weather stripping, and the subsequent testing and adjustment of the door to ensure optimal functionality. By the end of this comprehensive guide, you will feel equipped to confidently revitalize the weather stripping on your door, contributing to a more efficient and comfortable home environment.
Let's embark on this journey to elevate your home's insulation and energy efficiency by mastering the art of replacing weather stripping on your door.
Key Takeaways:
- Replacing weather stripping on your door is crucial for maintaining a cozy home and reducing energy costs. It involves removing old stripping, measuring and cutting new material, and testing the door for a secure seal.
- By using simple tools and materials, you can enhance your home’s insulation and energy efficiency. Replacing weather stripping not only saves energy but also contributes to a healthier living environment.
Understanding Weather Stripping
Weather stripping is a fundamental component of a door's structure, serving as a barrier to prevent air and moisture from infiltrating the interior of a building. It is typically made from a resilient and flexible material such as rubber, vinyl, or foam, designed to create a tight seal when the door is closed. This seal effectively blocks out drafts, dust, insects, and external noise, contributing to a more comfortable and energy-efficient indoor environment.
There are various types of weather stripping available, each catering to different door and window configurations. The most common types include:
- Felt Strips: Made from compressed felt, these strips are affordable and easy to install. However, they are less durable and may require frequent replacement.
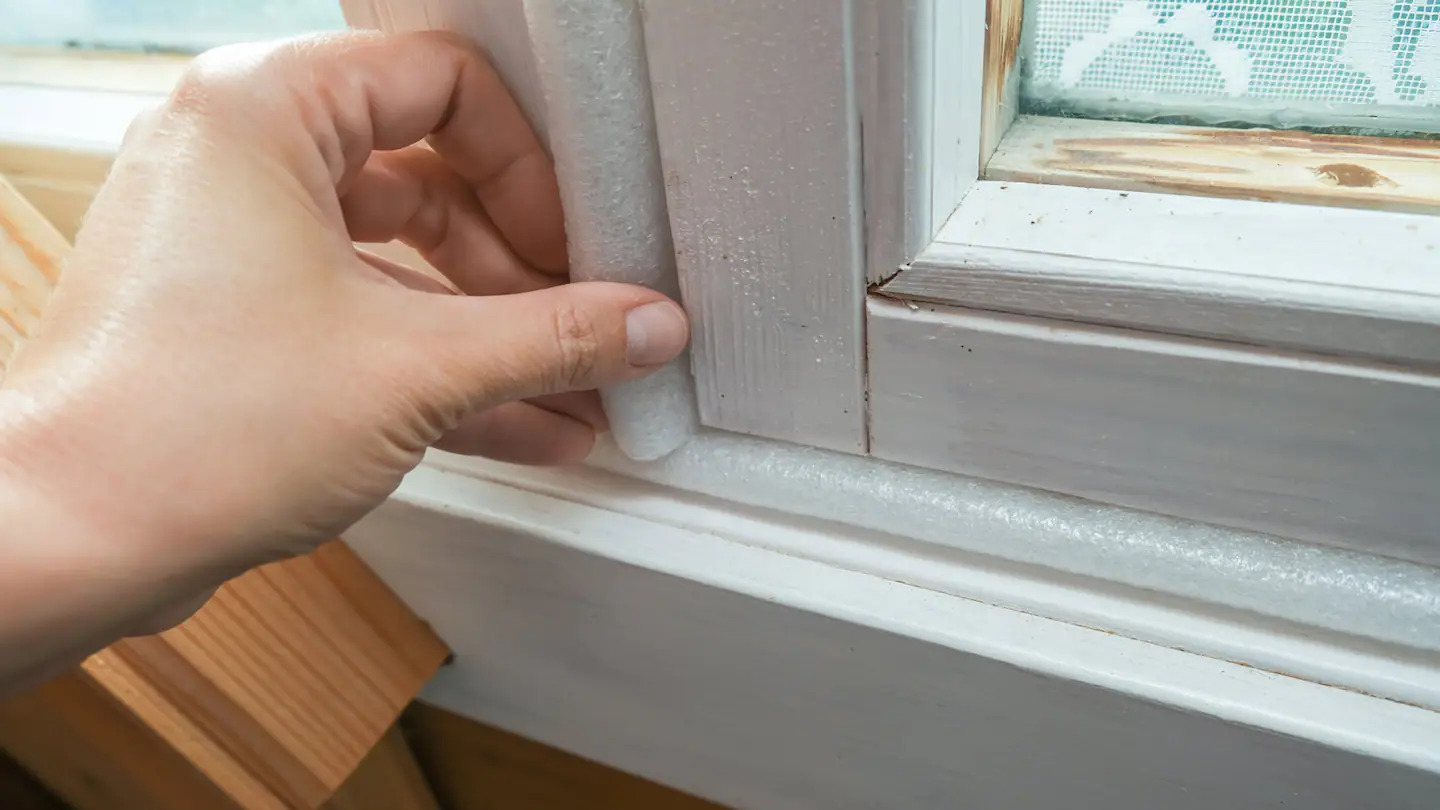
- Foam Tape: This self-adhesive option is simple to apply and cost-effective. It is best suited for irregularly shaped cracks and narrow gaps.
- V-Shaped Vinyl: Ideal for sealing the sides of double-hung or sliding windows, this type of weather stripping offers excellent insulation properties.
- Tubular Rubber Gasket: Commonly used for sealing the top and bottom of doors, this durable option provides effective protection against drafts and moisture.
- Magnetic Weather Stripping: Utilizing magnets to create a secure seal, this type is often used for metal doors and offers superior weather resistance.
Properly installed weather stripping not only enhances the comfort and energy efficiency of a home but also contributes to the longevity of the door and its surrounding structure. It minimizes the strain on heating and cooling systems, leading to reduced energy consumption and lower utility bills. Additionally, it plays a vital role in preserving indoor air quality by preventing the entry of pollutants and allergens, thereby creating a healthier living environment for occupants.
Understanding the significance of weather stripping and its impact on the overall integrity of your home empowers you to proactively maintain and optimize this essential feature. By familiarizing yourself with the various types of weather stripping and their applications, you can make informed decisions when selecting the most suitable option for your specific door configuration and environmental conditions.
Now that we have gained insight into the importance of weather stripping, let's proceed to explore the essential tools and materials needed to embark on the replacement process.
Tools and Materials Needed
Before embarking on the replacement of weather stripping for your door, it is essential to gather the necessary tools and materials to ensure a smooth and efficient process. Here is a comprehensive list of items you will require:
Tools:
- Utility Knife: A sharp utility knife will facilitate the precise cutting of the old weather stripping and the new material.
- Pry Bar or Putty Knife: This tool will aid in gently removing the existing weather stripping without causing damage to the door or frame.
- Tape Measure: Accurate measurements are crucial for ensuring the new weather stripping fits perfectly, making a tape measure indispensable.
- Screwdriver: Depending on the type of fasteners securing the old weather stripping, a screwdriver may be necessary for their removal.
- Hacksaw or Miter Saw: If you are using metal or rigid vinyl weather stripping, a hacksaw or miter saw will be essential for precise cutting.
- Caulking Gun: This tool will be required if you are using adhesive or caulk to secure the new weather stripping in place.
Materials:
- New Weather Stripping: Depending on the type of weather stripping suitable for your door and the dimensions required, ensure you have an adequate amount of new weather stripping on hand.
- Caulk or Adhesive: If your new weather stripping does not come with a self-adhesive backing, you will need caulk or adhesive to secure it in place.
- Screws or Nails: If the new weather stripping requires fasteners to be affixed to the door or frame, ensure you have the appropriate screws or nails available.
- Cleaner and Rag: Before installing the new weather stripping, it is essential to clean the door and frame to ensure optimal adhesion and a professional finish.
- Protective Gear: To ensure your safety during the replacement process, consider using gloves and safety goggles, especially when handling sharp tools or adhesives.
By having these tools and materials at your disposal, you can proceed with confidence, knowing that you are well-equipped to effectively replace the weather stripping on your door. With the preparation stage complete, let’s move on to the next step: removing the old weather stripping.
Removing Old Weather Stripping
Before installing new weather stripping, it is crucial to thoroughly remove the existing material to ensure a clean and effective application of the replacement. Here is a step-by-step guide to removing the old weather stripping from your door:
1. Assess the Condition:
Inspect the current weather stripping to determine its type and the method of attachment. This will guide you in selecting the appropriate tools and approach for removal.
2. Use a Pry Bar or Putty Knife:
Gently insert the pry bar or putty knife beneath the edge of the weather stripping and carefully pry it away from the door or frame. Exercise caution to avoid damaging the underlying surface.
3. Remove Fasteners:
If the weather stripping is secured with screws or nails, use a screwdriver to remove them. Take care to collect and safely store these fasteners for potential use with the new weather stripping.
Read more: How Often To Replace Weather Stripping
4. Clean the Surface:
Once the old weather stripping is completely removed, use a cleaner and rag to wipe the door and frame, removing any adhesive residue or debris. This step is essential to ensure optimal adhesion of the new weather stripping.
5. Inspect for Damage:
While the weather stripping is removed, take the opportunity to inspect the door and frame for any signs of damage or wear. Address any issues before proceeding with the installation of the new weather stripping.
By following these steps, you can effectively and safely remove the old weather stripping, setting the stage for the seamless installation of the new material. With the door surface prepped and free of remnants from the previous weather stripping, you are now ready to measure and cut the new weather stripping to size.
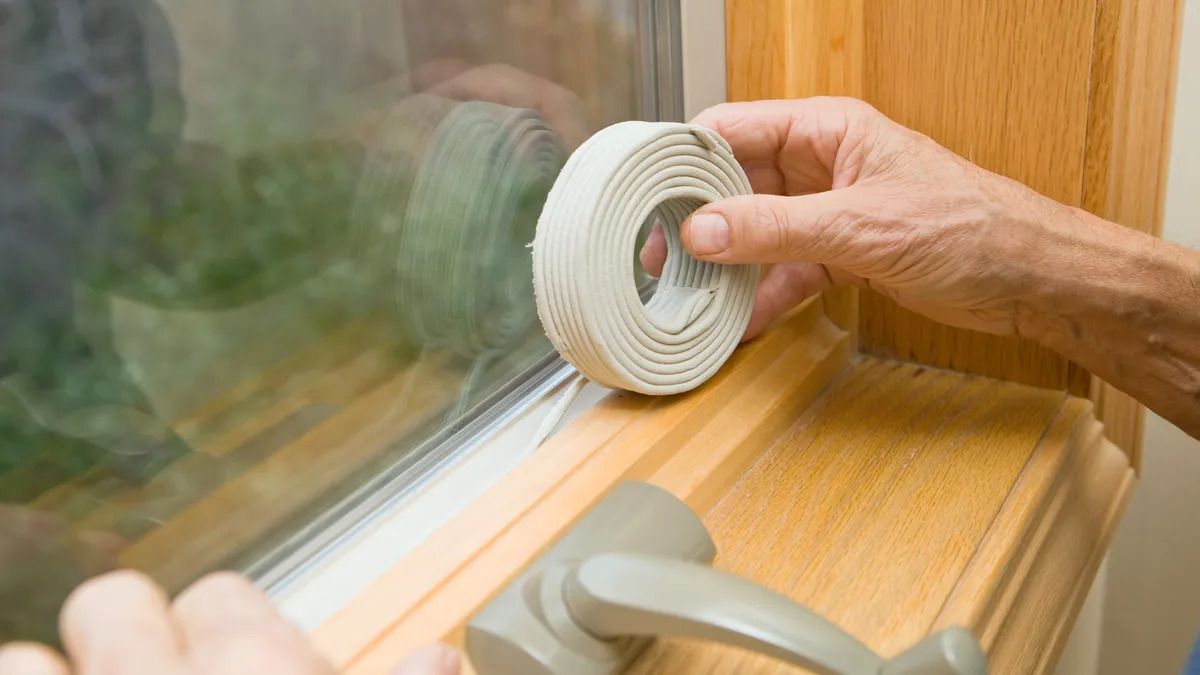
Measuring and Cutting New Weather Stripping
Accurate measurements and precise cutting are pivotal to ensuring the new weather stripping fits snugly and functions effectively. Follow these steps to measure and cut the new weather stripping for your door:
1. Measure the Door:
Using a tape measure, carefully determine the dimensions of the areas where the new weather stripping will be installed. Take measurements for the top, bottom, and sides of the door, ensuring accuracy.
Read more: What Kind Of Weather Stripping Do I Need
2. Add Allowance:
When cutting the new weather stripping, add a slight allowance to accommodate any irregularities or variations in the door’s surface. This additional length will ensure a secure and complete seal.
3. Use a Sharp Blade:
Whether you are working with foam, rubber, or vinyl weather stripping, a sharp utility knife or scissors will facilitate clean and precise cuts. Ensure the blade is suitable for the specific material to prevent tearing or jagged edges.
4. Test Fit:
After cutting the weather stripping to the measured dimensions, perform a test fit by gently placing it along the designated areas of the door. Verify that the fit is snug but not overly tight, allowing for smooth operation of the door.
5. Cut Miters for Corners:
If your door features angled or mitered corners, carefully cut the weather stripping at a 45-degree angle to ensure seamless and secure connections at these points. This step is crucial for maintaining a continuous seal around the entire perimeter of the door.
6. Double-Check Measurements:
Before proceeding with the installation, double-check the measurements and the fit of the new weather stripping to confirm that it aligns accurately with the door’s dimensions and contours.
By meticulously measuring and cutting the new weather stripping, you are laying the groundwork for a precise and effective installation. With the tailored weather stripping at the ready, it’s time to proceed to the next phase: installing the new weather stripping to rejuvenate the door’s insulation and sealing capabilities.
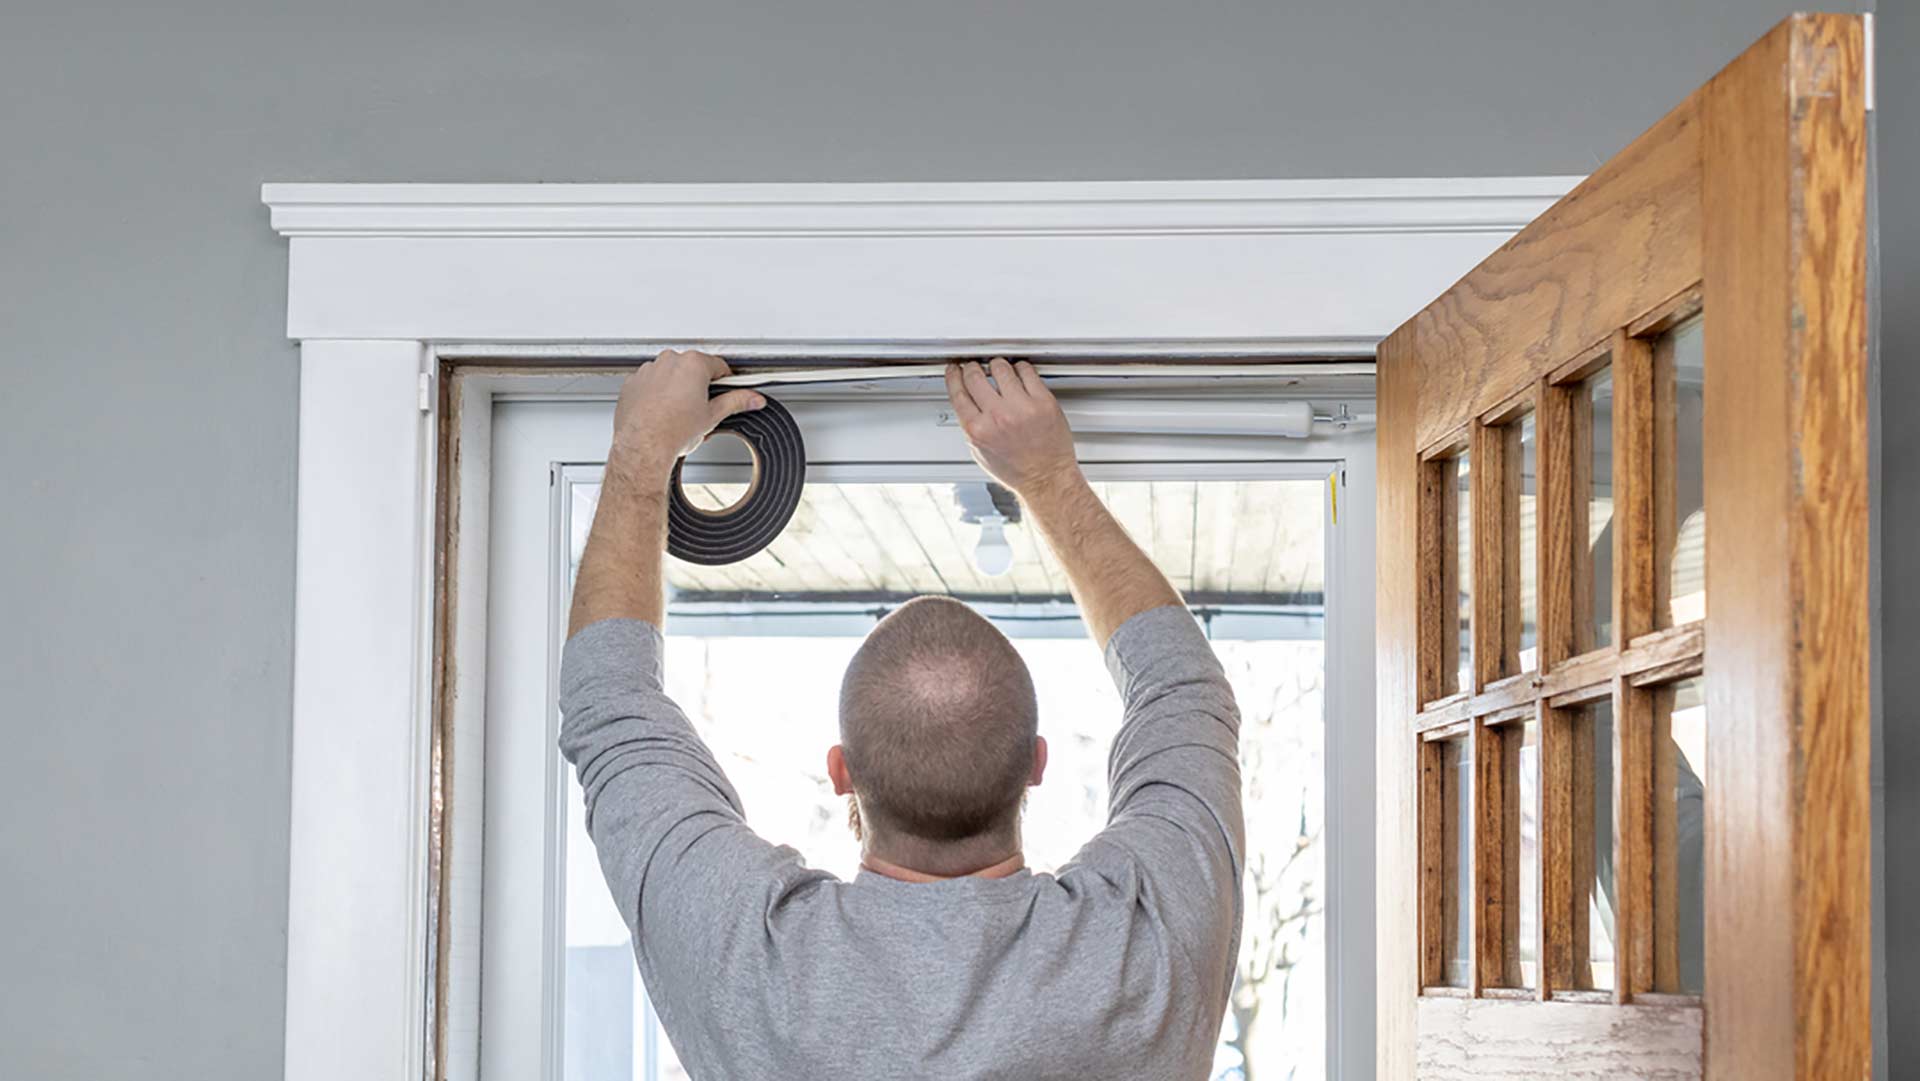
Installing New Weather Stripping
With the old weather stripping removed and the new material accurately measured and cut, it’s time to embark on the installation process. Follow these steps to seamlessly install the new weather stripping on your door:
1. Position the Weather Stripping:
Begin by aligning the pre-cut weather stripping along the designated areas of the door, ensuring that it fits snugly and uniformly. Take care to position it precisely to maintain a consistent seal around the entire perimeter.
2. Secure with Adhesive or Fasteners:
Depending on the type of weather stripping and its specific design, use an appropriate adhesive, caulk, or fasteners to secure it in place. Follow the manufacturer’s instructions for the recommended application method.
Read more: What Is The Best Weather Stripping For Doors
3. Apply Pressure:
Once the weather stripping is positioned and secured, apply firm and even pressure along its length to ensure proper adhesion and a tight seal. This step is vital for maximizing the effectiveness of the weather stripping in preventing drafts and moisture infiltration.
4. Address Corners and Joints:
Pay special attention to the corners and joints of the weather stripping, ensuring that they are securely connected and form a continuous barrier. Trim any excess material if necessary to achieve a seamless fit.
5. Allow for Proper Setting:
If you have used adhesive or caulk, allow sufficient time for it to set and cure as per the product’s instructions. This will ensure the longevity and durability of the installed weather stripping.
6. Perform a Visual Inspection:
After installing the weather stripping, visually inspect the entire perimeter of the door to confirm that the new material is uniformly and securely affixed. Address any areas that may require additional attention or adjustment.
By meticulously following these steps, you can effectively install the new weather stripping, revitalizing the door’s insulation and sealing capabilities. With the installation complete, the next crucial phase involves testing and adjusting the door to ensure optimal functionality and airtightness.
Read more: Where To Put Weather Stripping On Doors
Testing and Adjusting the Door
After installing the new weather stripping, it is essential to conduct thorough testing and make any necessary adjustments to guarantee that the door functions seamlessly and maintains a secure seal. Follow these steps to test and adjust the door after installing the new weather stripping:
1. Close and Inspect Gaps:
Close the door and carefully inspect the areas where the new weather stripping makes contact with the frame. Look for any gaps or inconsistencies that may compromise the seal. Note any areas that require additional attention.
2. Check for Smooth Operation:
Open and close the door several times to ensure that the new weather stripping does not impede its operation. Verify that the door moves smoothly and effortlessly without any resistance or interference from the installed material.
3. Perform a Draft Test:
On a windy day, or using a draft detector, check for any air leaks around the door. Pay close attention to the areas where the weather stripping meets the frame, as well as the bottom of the door. Address any detected drafts by adjusting the weather stripping or making necessary modifications.
4. Make Adjustments as Needed:
If gaps or drafts are identified during the testing phase, make targeted adjustments to the weather stripping. This may involve repositioning the material, trimming excess portions, or applying additional adhesive or caulk to reinforce the seal.
5. Verify Locking Mechanism:
Ensure that the door’s locking mechanism functions properly with the new weather stripping in place. Test the locking and latching mechanisms to confirm that they engage smoothly and securely without any hindrance from the installed material.
6. Recheck the Seal:
Once adjustments have been made, close the door again and reinspect the seal. Confirm that the weather stripping creates a consistent and airtight barrier around the entire perimeter of the door, effectively preventing drafts and moisture infiltration.
By diligently testing and adjusting the door post-installation, you can fine-tune the performance of the new weather stripping, ensuring that it effectively seals the door and contributes to enhanced insulation and energy efficiency. With the door now optimized for peak functionality, you have successfully completed the process of replacing the weather stripping, revitalizing its sealing capabilities and contributing to a more comfortable and efficient home environment.
Conclusion
Congratulations on successfully replacing the weather stripping on your door, a pivotal step toward enhancing the insulation, energy efficiency, and overall comfort of your home. By embarking on this practical home improvement project, you have not only fortified your living space against drafts and moisture but also taken a proactive step toward reducing energy consumption and utility costs.
Through the comprehensive process outlined in this guide, you have gained valuable insights into the significance of weather stripping, the essential tools and materials required, and the step-by-step procedures for removing old weather stripping, measuring and cutting new material, and installing it with precision. By meticulously testing and adjusting the door post-installation, you have ensured that the new weather stripping functions seamlessly, providing a secure and airtight seal.
By maintaining a properly sealed door, you have contributed to a more comfortable indoor environment, reduced the strain on heating and cooling systems, and potentially lowered your energy bills. Additionally, the enhanced insulation and protection against drafts and moisture can lead to a longer lifespan for your door and its surrounding structure.
As you revel in the accomplishment of this home improvement endeavor, take pride in knowing that you have not only elevated the functionality of your door but also made a meaningful contribution to the sustainability of your home. Your proactive approach to maintaining and optimizing the weather stripping exemplifies your commitment to creating a more energy-efficient and comfortable living space.
Armed with the knowledge and skills gained from this guide, you are well-equipped to tackle future home maintenance projects and empower others to enhance the efficiency and comfort of their living environments. By sharing your expertise and experiences, you can inspire others to embark on similar endeavors, fostering a community dedicated to sustainable and energy-conscious living.
With your door now fortified with new weather stripping, you can relish in the improved insulation, reduced energy losses, and a cozier indoor atmosphere. Your dedication to this endeavor serves as a testament to your commitment to creating a more sustainable and comfortable home, one practical improvement at a time.
Frequently Asked Questions about How Do I Replace Weather Stripping On My Door
Was this page helpful?
At Storables.com, we guarantee accurate and reliable information. Our content, validated by Expert Board Contributors, is crafted following stringent Editorial Policies. We're committed to providing you with well-researched, expert-backed insights for all your informational needs.


0 thoughts on “How Do I Replace Weather Stripping On My Door”