Home>Energy>Home Insulation & Ventilation>How To Replace Weather Stripping On A Sliding Glass Door
Home Insulation & Ventilation
How To Replace Weather Stripping On A Sliding Glass Door
Modified: October 19, 2024
Learn how to replace weather stripping on a sliding glass door for improved home insulation and ventilation. Step-by-step guide for a DIY project.
(Many of the links in this article redirect to a specific reviewed product. Your purchase of these products through affiliate links helps to generate commission for Storables.com, at no extra cost. Learn more)
Introduction
Welcome to the ultimate guide on how to replace weather stripping on a sliding glass door. Weather stripping plays a pivotal role in maintaining a comfortable and energy-efficient home environment. Over time, weather stripping can wear out, leading to drafts, energy loss, and decreased insulation effectiveness. By learning how to replace weather stripping on a sliding glass door, you can restore your home’s thermal efficiency and enhance its overall comfort.
Understanding the importance of weather stripping and knowing how to replace it empowers homeowners to take proactive steps in maintaining their living spaces. This comprehensive guide will walk you through the process, providing detailed instructions and valuable insights to ensure a successful weather stripping replacement project. Let’s dive in and equip ourselves with the knowledge and skills needed to tackle this essential home maintenance task.
Key Takeaways:
- Replacing weather stripping on a sliding glass door is crucial for maintaining a cozy home and saving energy. By following the steps in this guide, you can ensure a snug seal and a comfortable living space.
- Properly installed weather stripping prevents drafts and energy loss, contributing to lower bills and a greener home. Regular maintenance ensures long-term insulation performance and a cozy environment for your family.
Understanding Weather Stripping
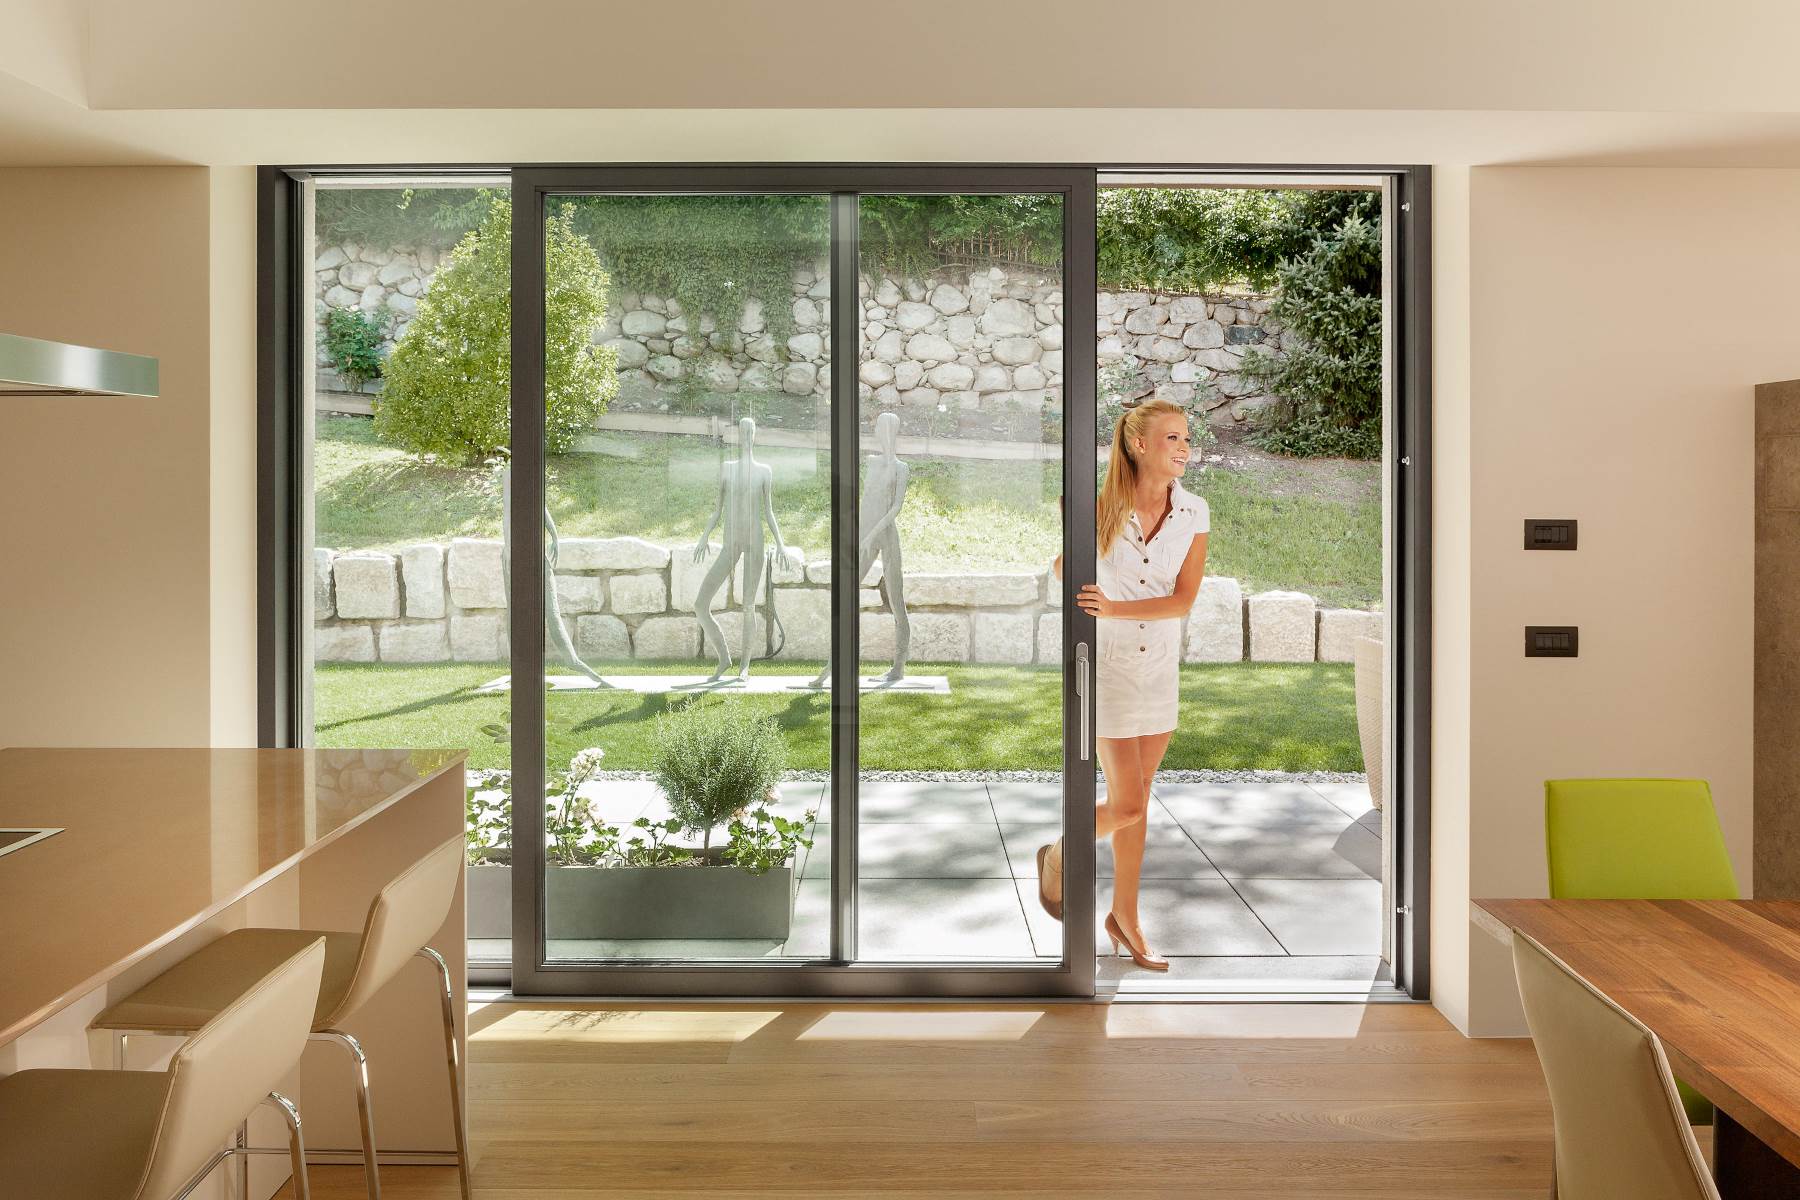
Weather stripping is a crucial component of a home’s insulation system, particularly for sliding glass doors. It serves as a barrier to prevent air and moisture infiltration, thereby contributing to energy efficiency and indoor comfort. Typically made from resilient materials such as rubber, vinyl, or foam, weather stripping is designed to create a tight seal when the door is closed, effectively blocking drafts and outdoor elements from entering the home.
For sliding glass doors, weather stripping is often located along the door frame and the edges of the door panels. Over time, exposure to the elements, temperature fluctuations, and regular usage can cause weather stripping to deteriorate, crack, or lose its sealing properties. When weather stripping becomes worn or damaged, it compromises the door’s ability to maintain a consistent indoor climate, leading to energy wastage and potential discomfort for occupants.
By understanding the role of weather stripping and recognizing the signs of wear and tear, homeowners can proactively address any issues to ensure optimal performance of their sliding glass doors. Regular inspection of weather stripping is essential, as it allows for early detection of damage, enabling timely replacement and preventing potential energy loss.
When replacing weather stripping, it’s important to select high-quality materials that are specifically designed for sliding glass doors. Choosing the right weather stripping ensures a proper seal and long-lasting effectiveness, promoting energy savings and a more comfortable living environment.
Tools and Materials Needed
Before embarking on the weather stripping replacement process for your sliding glass door, it’s essential to gather the necessary tools and materials. Having the right equipment at hand will streamline the project and ensure a successful outcome. Here’s a comprehensive list of the tools and materials you’ll need:
Tools:
- Screwdriver (flathead and Phillips head)
- Utility knife
- Tape measure
- Scissors
- Wire brush or sandpaper
- Hammer
- Work gloves
- Safety goggles
Materials:
- Replacement weather stripping (choose a type suitable for sliding glass doors, such as adhesive-backed foam, vinyl, or rubber weather stripping)
- Clean cloth
- Mild detergent or cleaning solution
- Denatured alcohol (for cleaning the door frame)
- Adhesive (if the new weather stripping does not come with adhesive backing)
Having these tools and materials readily available will facilitate a smooth and efficient weather stripping replacement process. It’s important to prioritize safety by wearing work gloves and safety goggles, especially when handling tools and working around the door’s components. Additionally, ensuring that the replacement weather stripping is compatible with sliding glass doors will contribute to a successful installation and long-term performance.
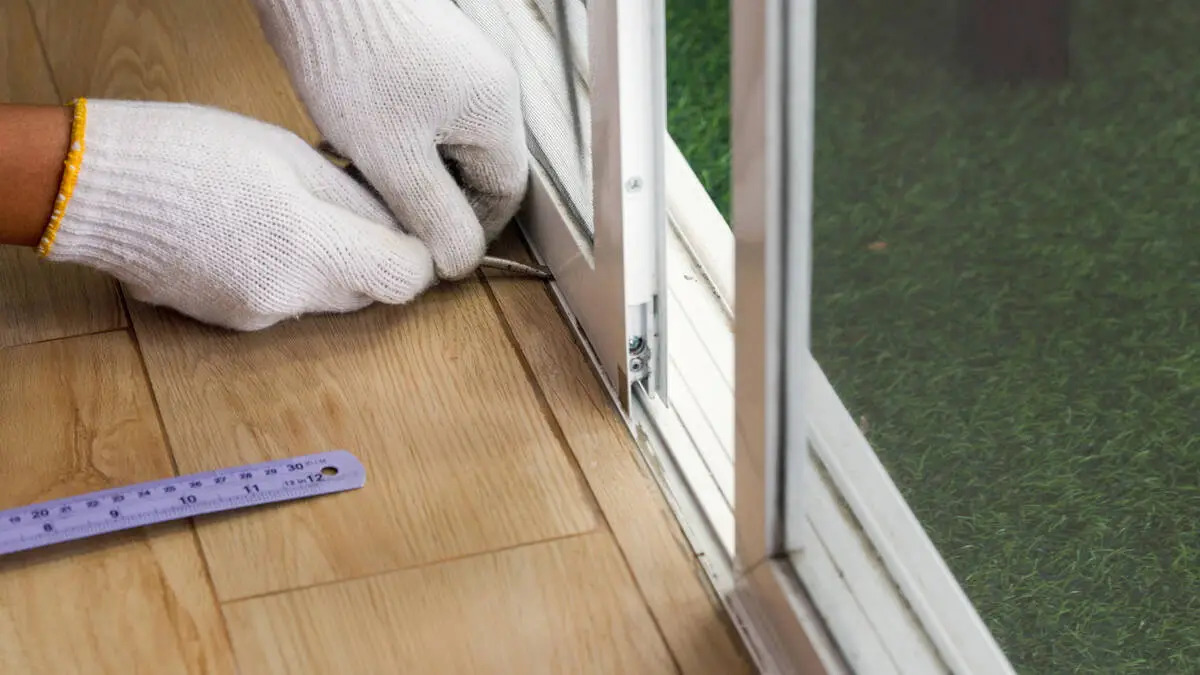
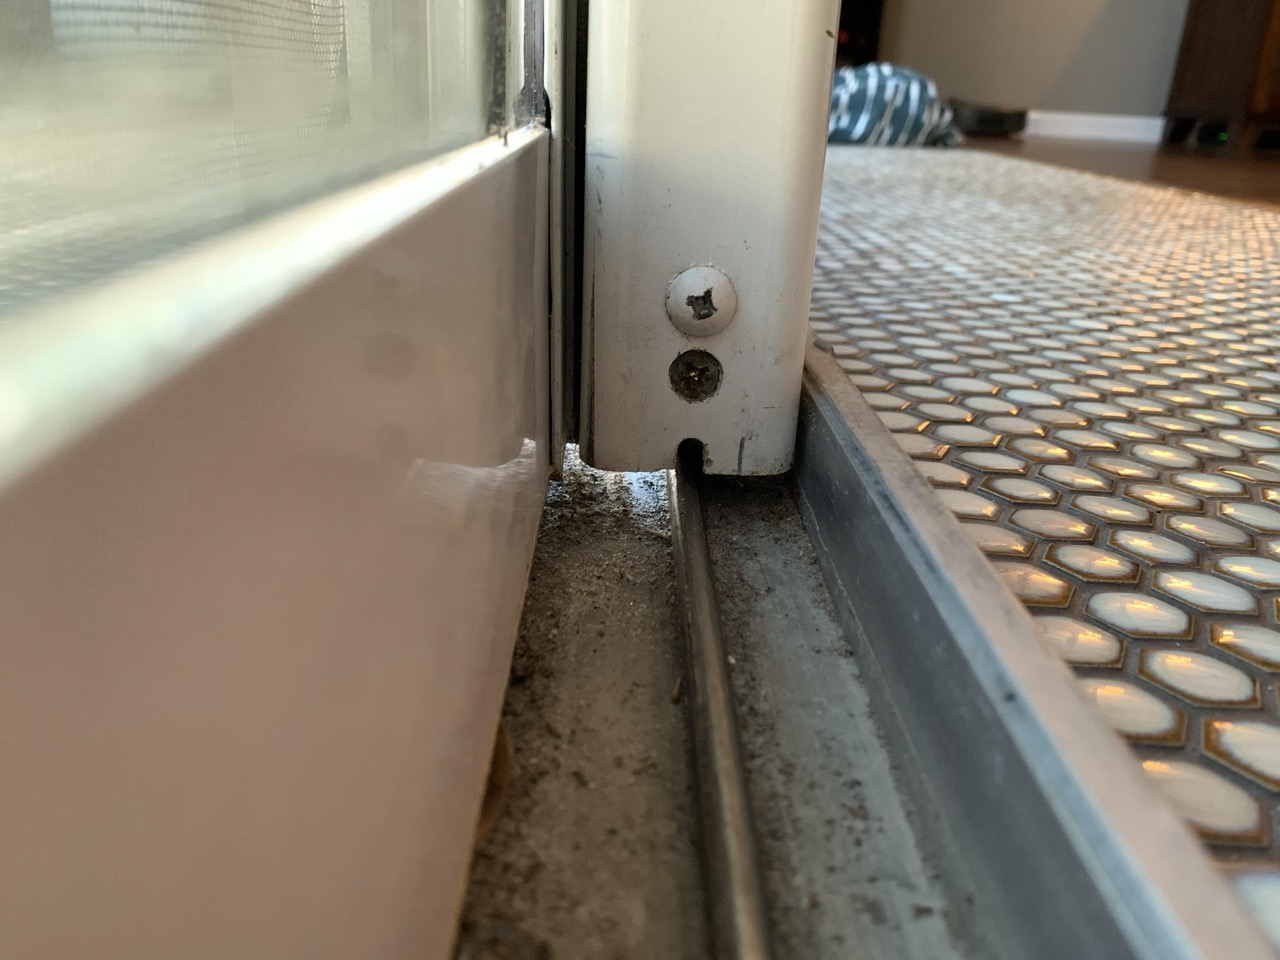
Removing the Old Weather Stripping
Before installing new weather stripping on your sliding glass door, it’s crucial to properly remove the old, worn-out weather stripping. This process requires careful attention to detail to ensure that the door frame and panels are thoroughly cleaned and prepared for the installation of the replacement weather stripping. Here’s a step-by-step guide on how to remove the old weather stripping:
1. Prepare the Work Area:
Begin by clearing the area around the sliding glass door to create a safe and unobstructed workspace. Remove any furniture or decor near the door to allow ample space for maneuvering and accessing the weather stripping.
2. Inspect the Existing Weather Stripping:
Carefully examine the current weather stripping to identify the attachment method and any adhesive or fasteners used to secure it in place. Note any areas of damage or deterioration, as these will need to be addressed during the removal process.
3. Loosen and Remove the Weather Stripping:
Using a flathead screwdriver, gently pry and lift the old weather stripping away from the door frame and panels. Take care to avoid damaging the door surfaces during this step. If the weather stripping is secured with adhesive, use a utility knife to carefully cut through the adhesive and release the stripping.
4. Clean the Door Frame and Panels:
Once the old weather stripping has been removed, thoroughly clean the door frame and panels to remove any residual adhesive, dirt, or debris. Use a clean cloth dampened with mild detergent or a suitable cleaning solution to wipe down the surfaces. For stubborn adhesive residue, denatured alcohol can be used to aid in the cleaning process.
5. Inspect for Damage:
While cleaning the door frame, inspect it for any signs of damage, such as rust, corrosion, or dents. Address any issues promptly to ensure that the new weather stripping will adhere properly and provide an effective seal.
By meticulously removing the old weather stripping and preparing the door surfaces, you create a clean and optimal environment for installing the replacement weather stripping. This meticulous approach sets the stage for a successful and long-lasting weather stripping replacement on your sliding glass door.
Measuring and Cutting New Weather Stripping
Once the old weather stripping has been removed and the door frame and panels are clean, it’s time to measure and cut the new weather stripping to fit the dimensions of your sliding glass door. Accurate measurements and precise cutting are essential for ensuring a proper seal and optimal performance. Here’s a detailed guide on how to measure and cut the new weather stripping:
1. Measure the Door Frame and Panels:
Using a tape measure, carefully determine the length of the door frame and the height of the door panels where the weather stripping will be installed. Take accurate measurements to ensure that the new weather stripping will cover the necessary areas and provide a snug fit.
Read more: How To Replace Glass In A Sliding Patio Door
2. Account for Corners and Angles:
If your sliding glass door features corners or angled sections, take precise measurements of these areas as well. It’s important to account for any irregularities in the door’s design to ensure that the weather stripping will conform to the contours of the frame and panels.
3. Cut the Weather Stripping to Size:
Using scissors or a utility knife, carefully cut the replacement weather stripping to match the measured dimensions. Take care to make clean, straight cuts, especially at any corners or angles. If the weather stripping is designed to interlock at the corners, follow the manufacturer’s instructions for cutting and joining the pieces seamlessly.
4. Test the Fit:
After cutting the weather stripping to size, perform a test fit by gently placing it along the door frame and panels. Ensure that the weather stripping aligns properly and provides full coverage without stretching or overlapping excessively. Make any necessary adjustments to the length or angle of the pieces to achieve a precise fit.
5. Trim Excess Material:
If the weather stripping extends beyond the intended areas or overlaps significantly, trim any excess material using scissors or a utility knife. The goal is to achieve a neat and tailored fit that effectively seals the gaps around the sliding glass door.
By meticulously measuring and cutting the new weather stripping, you set the stage for a seamless and effective installation. Taking the time to ensure precise dimensions and clean cuts will contribute to the overall performance and longevity of the weather stripping on your sliding glass door.
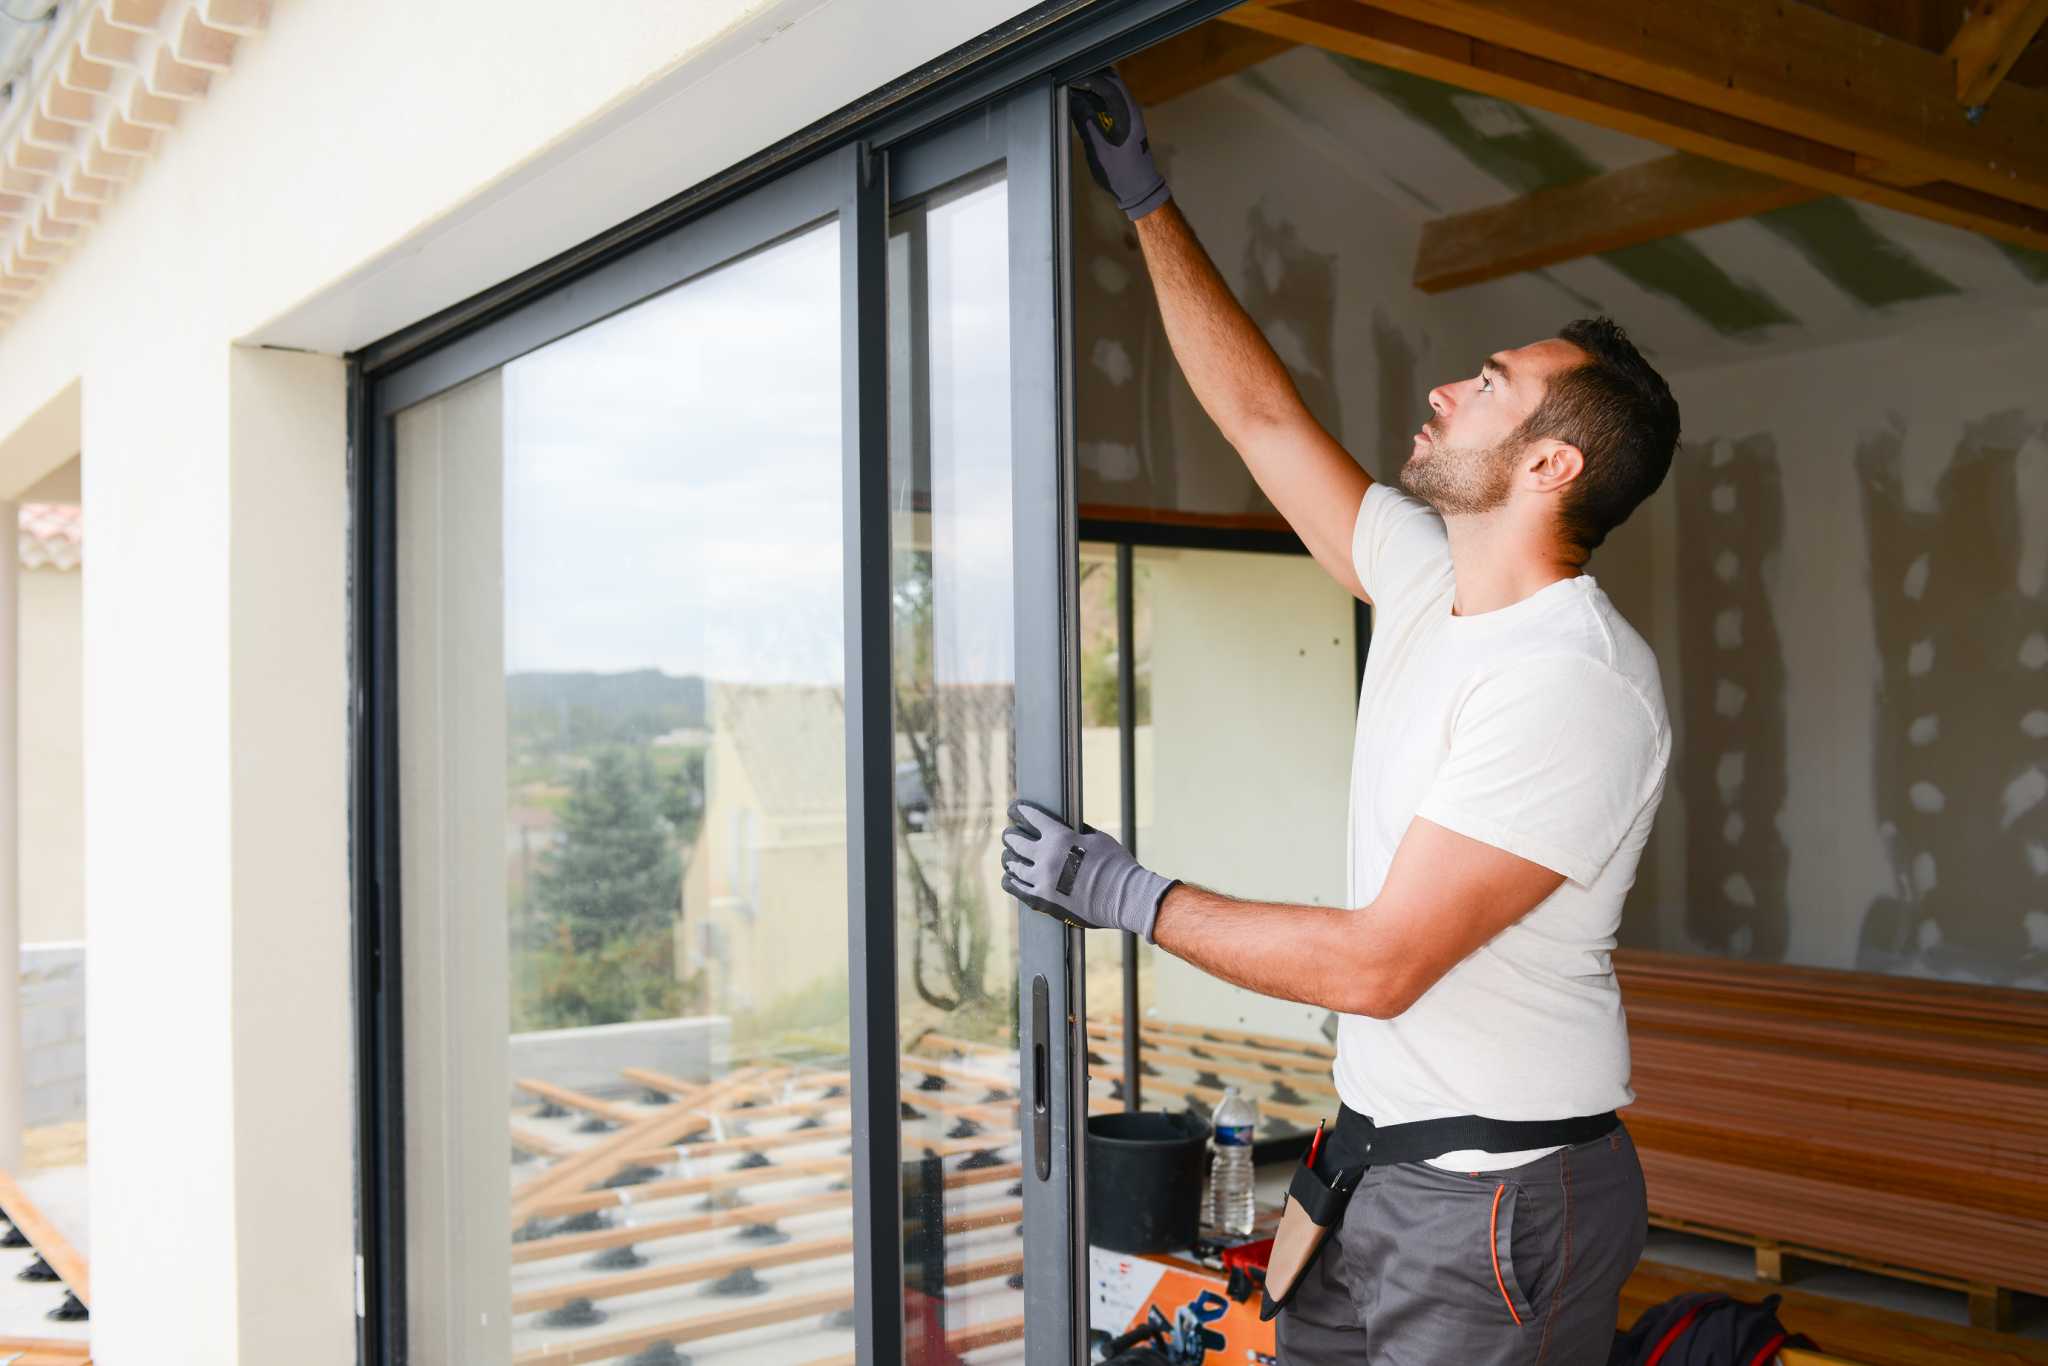
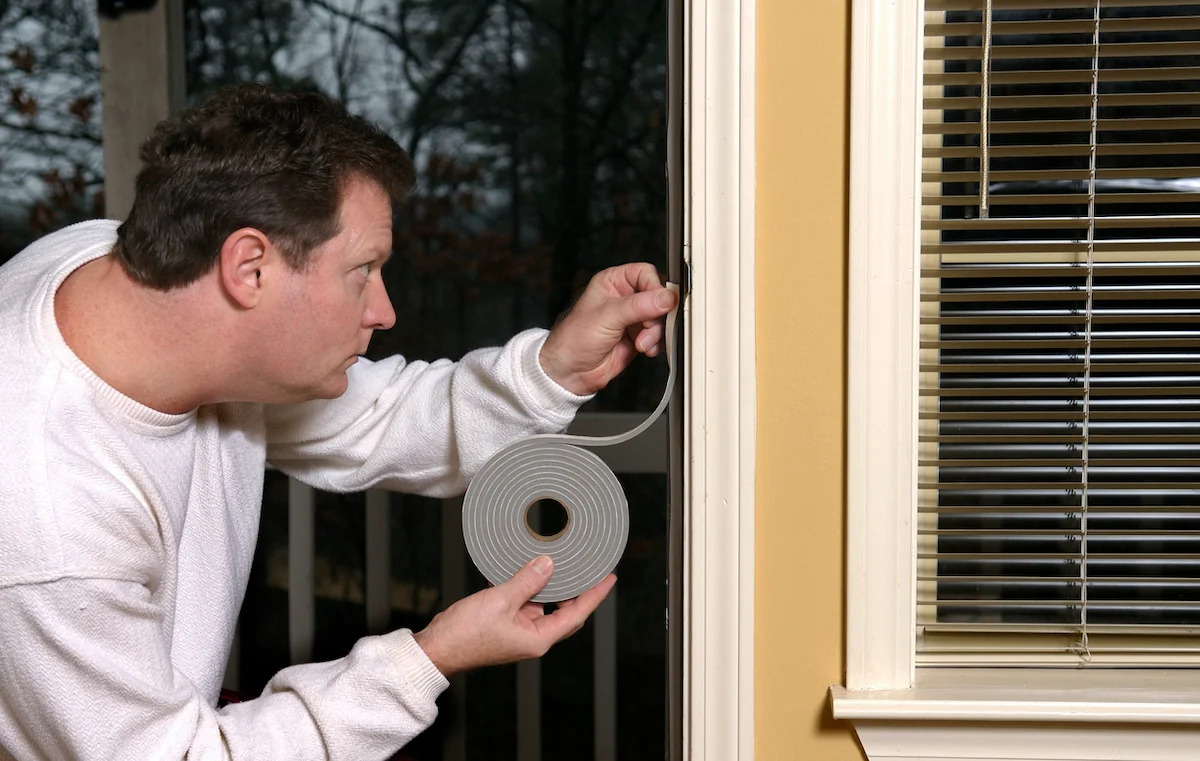
Installing the New Weather Stripping
With the new weather stripping accurately measured and cut to size, it’s time to proceed with the installation process. Proper installation is crucial for creating a tight seal and restoring the insulation effectiveness of your sliding glass door. Follow these step-by-step instructions to ensure a successful installation of the replacement weather stripping:
1. Prepare the Door Surfaces:
Before applying the new weather stripping, ensure that the door frame and panels are clean, dry, and free of any residual adhesive or debris. Use a clean cloth to wipe down the surfaces and remove any particles that may hinder the adhesion of the weather stripping.
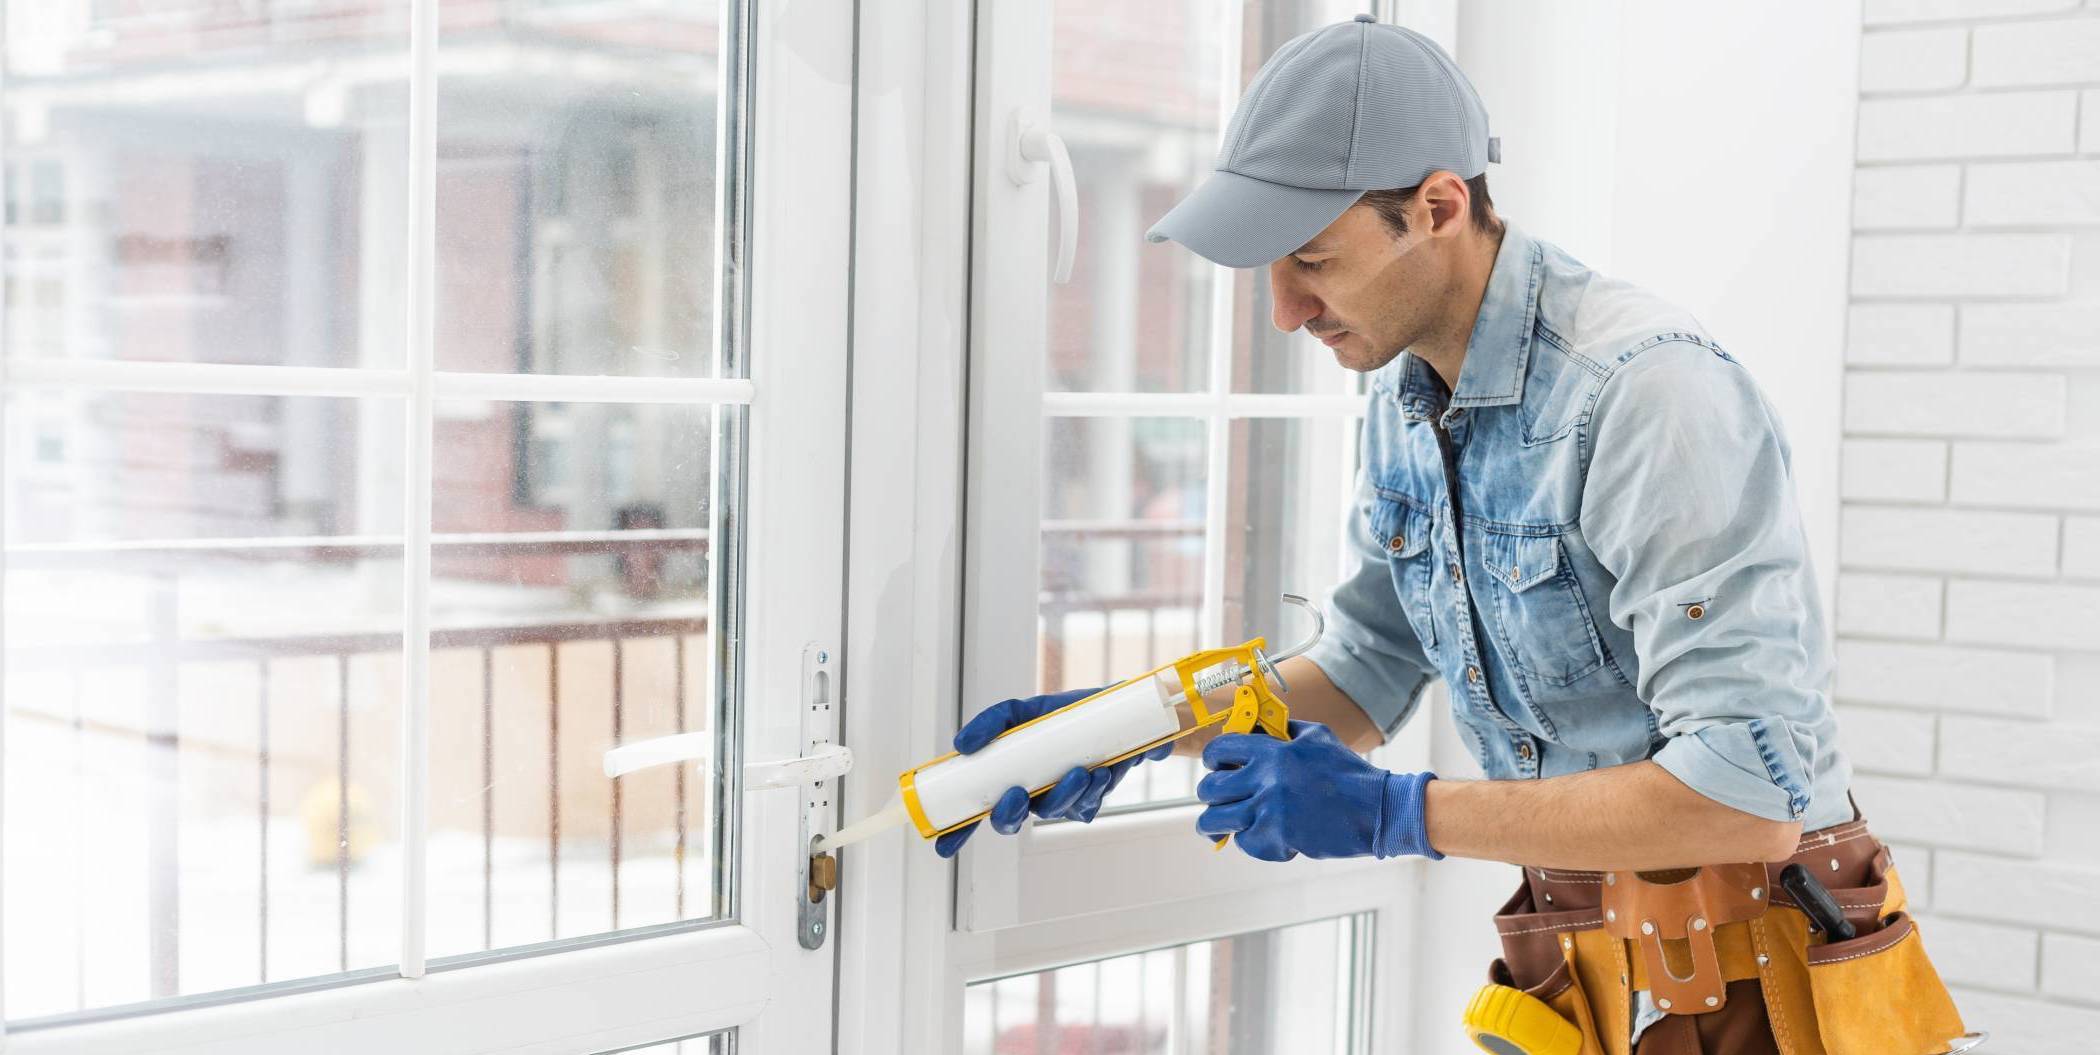
2. Apply Adhesive (if necessary):
If the replacement weather stripping does not come with adhesive backing, apply a suitable adhesive to the back of the stripping according to the manufacturer’s recommendations. Ensure that the adhesive is evenly distributed and covers the entire length of the weather stripping.
3. Position the Weather Stripping:
Carefully align the prepared replacement weather stripping along the door frame and panels, starting from one end and working your way to the other. Take care to position the stripping accurately, ensuring that it adheres securely and creates a consistent seal along the edges of the door.
Read more: How Often To Replace Weather Stripping
4. Press Firmly and Securely:
Once the weather stripping is in position, apply firm and even pressure along its length to secure it to the door surfaces. This ensures proper adhesion and promotes a strong bond between the stripping and the door frame, preventing air and moisture infiltration.
5. Address Corners and Joints:
If the door features corners or joints where the weather stripping needs to be joined or overlapped, follow the manufacturer’s instructions for seamless integration. Ensure that the corners and joints are properly sealed to maintain the integrity of the weather stripping.
6. Allow for Proper Adhesion:
After installing the new weather stripping, allow sufficient time for the adhesive to bond and set securely. Refer to the adhesive manufacturer’s guidelines for the recommended curing or setting duration before subjecting the door to regular use.
By following these installation steps diligently, you can effectively apply the new weather stripping to your sliding glass door, restoring its insulation properties and enhancing energy efficiency. A well-installed weather stripping contributes to a more comfortable and environmentally controlled living space.
Testing and Adjusting the Sliding Glass Door
After installing the new weather stripping, it’s essential to conduct thorough testing to ensure that the sliding glass door operates smoothly and effectively seals against air and moisture infiltration. Proper testing and potential adjustments are crucial for verifying the functionality of the weather stripping and optimizing the door’s performance. Follow these steps to test and adjust your sliding glass door after installing the replacement weather stripping:
Read more: How Much To Replace Sliding Glass Door
1. Open and Close the Door:
Carefully open and close the sliding glass door several times to assess its movement and resistance. Pay attention to any areas where the door may encounter friction or resistance, as these could indicate misaligned or improperly installed weather stripping.
2. Check for Consistent Seal:
While the door is closed, visually inspect the perimeter where the weather stripping makes contact with the frame and panels. Ensure that the stripping creates a consistent seal without gaps or areas of separation. Any irregularities in the sealing indicate the need for adjustments.
3. Perform a Draft Test:
To test the effectiveness of the new weather stripping, conduct a draft test by holding a lit candle or a thin strip of paper near the edges of the closed door. Observe any flickering of the flame or movement of the paper, as these indicate air leaks that compromise the seal. Address any detected drafts promptly.
4. Adjust the Weather Stripping (if necessary):
If discrepancies are identified during the testing phase, such as uneven sealing or air leaks, consider making adjustments to the weather stripping. This may involve repositioning the stripping, trimming excess material, or addressing any areas of misalignment to achieve a uniform and effective seal.
Read more: How To Replace Rollers On Sliding Glass Door
5. Lubricate the Door Tracks:
To enhance the smooth operation of the sliding glass door, apply a suitable lubricant to the tracks and rollers. This promotes ease of movement and reduces friction, contributing to the overall functionality of the door.
6. Re-test and Confirm Seal Integrity:
After making any necessary adjustments and lubricating the door tracks, re-test the door by repeating the open-close cycle and draft test. Confirm that the weather stripping now provides a consistent and airtight seal, effectively preventing drafts and maintaining insulation.
By meticulously testing and potentially adjusting the sliding glass door following the installation of new weather stripping, you ensure that the door operates optimally and contributes to a well-insulated living space. Regular maintenance and periodic testing will help maintain the effectiveness of the weather stripping and the overall functionality of the door.
Conclusion
Congratulations on successfully replacing the weather stripping on your sliding glass door! By undertaking this essential maintenance task, you’ve taken proactive steps to enhance the energy efficiency, comfort, and functionality of your home. The meticulous process of removing the old weather stripping, measuring, cutting, and installing the replacement, and testing and adjusting the door has contributed to a well-insulated and airtight sliding glass door.
Effective weather stripping is a vital component in maintaining a comfortable indoor environment and minimizing energy wastage. By creating a tight seal, the new weather stripping helps prevent drafts, air leaks, and moisture infiltration, contributing to lower energy bills and a more environmentally sustainable home.
Regular inspection and maintenance of weather stripping, along with other insulation elements in your home, are essential for preserving their effectiveness and prolonging their lifespan. By remaining attentive to the condition of weather stripping and addressing any signs of wear or damage promptly, you can ensure long-term insulation performance and comfort in your living space.
Remember that the successful replacement of weather stripping on your sliding glass door is just one aspect of comprehensive home maintenance. Regularly inspecting and maintaining other components, such as windows, doors, and insulation systems, will contribute to a well-functioning and energy-efficient home environment.
By staying proactive and informed about home maintenance best practices, you empower yourself to create a comfortable, sustainable, and energy-efficient living space for you and your family. Your dedication to maintaining the integrity of your sliding glass door and its weather stripping is a valuable investment in the overall quality of your home.
Thank you for joining us on this journey to learn about and execute the replacement of weather stripping on a sliding glass door. We hope this guide has equipped you with the knowledge and confidence to tackle this essential home maintenance task effectively.
Frequently Asked Questions about How To Replace Weather Stripping On A Sliding Glass Door
Was this page helpful?
At Storables.com, we guarantee accurate and reliable information. Our content, validated by Expert Board Contributors, is crafted following stringent Editorial Policies. We're committed to providing you with well-researched, expert-backed insights for all your informational needs.

0 thoughts on “How To Replace Weather Stripping On A Sliding Glass Door”