Home>Furniture & Design>Bathroom Accessories>How To Convert A Bathtub To A Walk-In Shower?
Bathroom Accessories
How To Convert A Bathtub To A Walk-In Shower?
Modified: August 28, 2024
Learn how to convert your bathtub to a walk-in shower with our top bathroom accessories. Create a safer and more accessible bathing space today!
(Many of the links in this article redirect to a specific reviewed product. Your purchase of these products through affiliate links helps to generate commission for Storables.com, at no extra cost. Learn more)
Assessing the Space
Before embarking on the exciting journey of converting a bathtub to a walk-in shower, it's crucial to thoroughly assess the space to ensure a seamless and successful transformation. This initial step sets the foundation for the entire project, allowing you to identify potential challenges and tailor the conversion to suit your specific needs.
Read more: How To Shower In A Bathtub?
Evaluating the Existing Layout
Begin by carefully examining the current layout of your bathroom. Take note of the dimensions, including the length, width, and height of the bathtub area. Assess the surrounding walls and flooring to determine their condition and suitability for the upcoming modifications. Additionally, consider the proximity of existing plumbing fixtures and electrical outlets, as these elements will play a pivotal role in the conversion process.
Determining Accessibility Requirements
Next, assess the accessibility needs of the individuals who will be using the walk-in shower. Consider factors such as mobility limitations, safety concerns, and any specific accommodations that may be necessary. By understanding these requirements, you can tailor the design and features of the walk-in shower to ensure optimal accessibility and comfort for all users.
Identifying Structural Considerations
It's essential to evaluate the structural integrity of the bathroom to determine if it can support the installation of a walk-in shower. This involves assessing the load-bearing capacity of the floor and walls, as well as identifying any potential obstacles that may impact the conversion process. By addressing these structural considerations upfront, you can proactively plan for any necessary reinforcements or modifications to accommodate the new shower configuration.
Considering Design Preferences
Finally, take the time to consider your design preferences and aesthetic vision for the walk-in shower. Whether you prefer a sleek, modern look or a more traditional style, assessing the space allows you to envision how the new shower will seamlessly integrate with the overall design of your bathroom. This step sets the stage for creating a cohesive and visually appealing space that aligns with your personal taste and complements the existing decor.
By thoroughly assessing the space and taking these key factors into account, you can lay the groundwork for a successful bathtub-to-walk-in-shower conversion. This thoughtful evaluation sets the stage for the subsequent planning and execution phases, ensuring that the end result meets your functional needs and design aspirations.
Key Takeaways:
- Assess the space before converting a bathtub to a walk-in shower. Consider dimensions, accessibility needs, structural integrity, and design preferences to ensure a successful transformation tailored to your specific requirements.
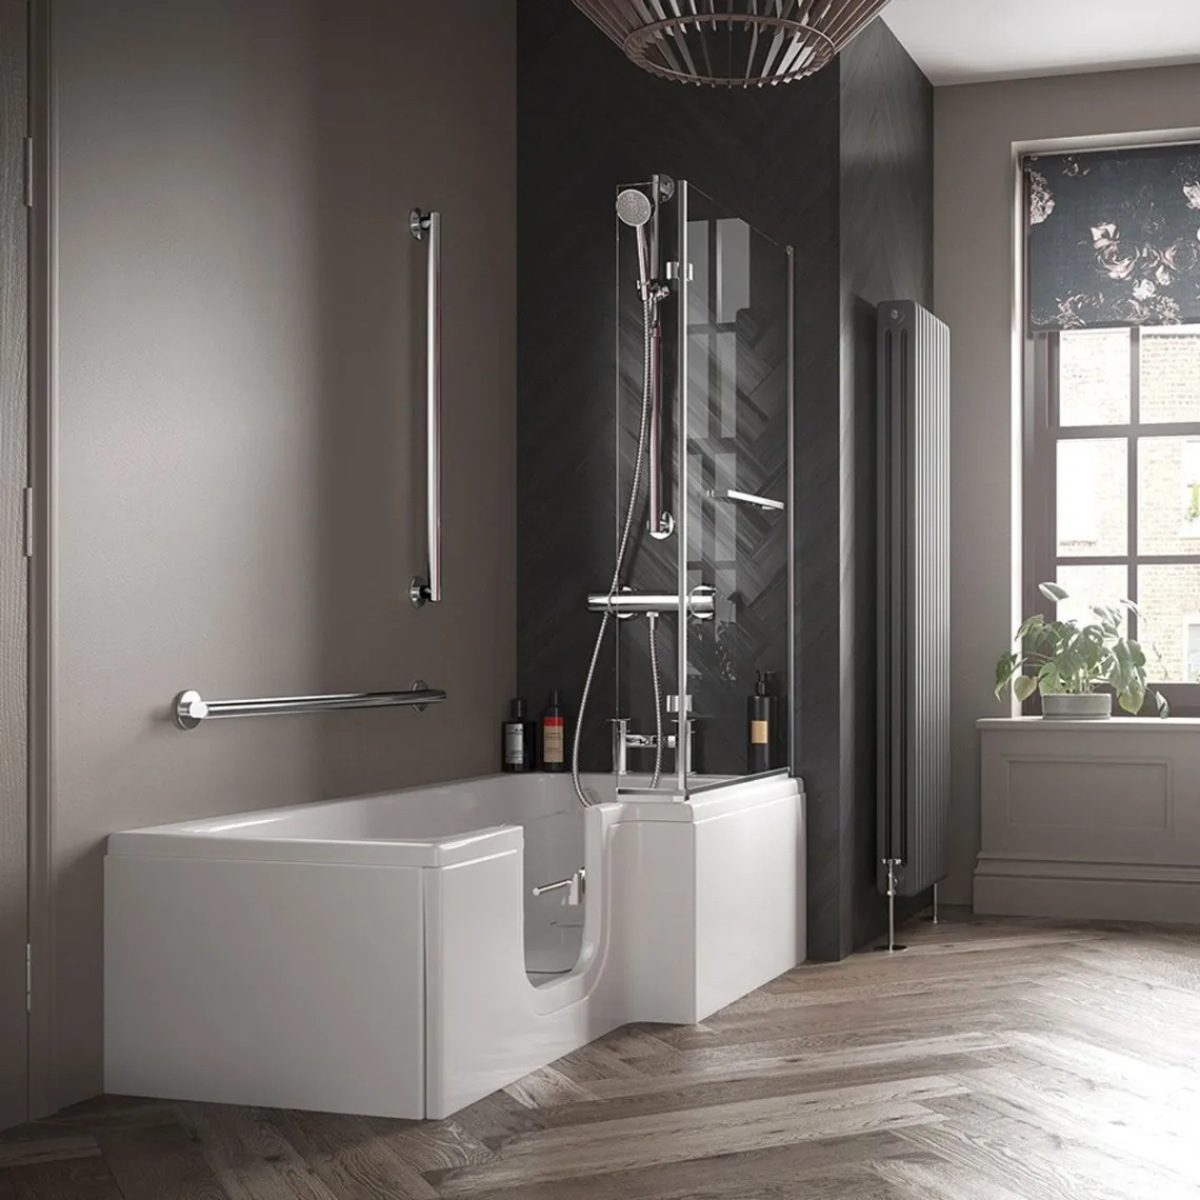
- Incorporate safety features like non-slip flooring, grab bars, adjustable showerheads, seating options, and clear glass doors into your walk-in shower design to create a safer and more inclusive bathing environment for users of all abilities.
Read more: How Does A Walk-In Bathtub Work?
Planning the Conversion
Planning the conversion from a bathtub to a walk-in shower is a critical phase that sets the stage for a successful and seamless transformation. This pivotal step involves meticulous consideration of various aspects, including design preferences, functional requirements, and logistical details. By approaching the planning process with thoroughness and foresight, you can ensure that the conversion aligns with your vision while addressing practical considerations.
Design Conceptualization
The planning phase begins with conceptualizing the design of the walk-in shower. Consider factors such as the desired size and layout, as well as the incorporation of specific features such as built-in seating, shelving, or niche storage. Visualizing the overall aesthetic and functionality of the walk-in shower allows you to articulate your design preferences and establish a clear direction for the conversion project.
Material Selection
Selecting the appropriate materials for the walk-in shower is a crucial aspect of the planning process. From the choice of tiles and grout to the selection of fixtures and hardware, each material contributes to the overall look, feel, and durability of the shower. Consider factors such as water resistance, ease of maintenance, and compatibility with the existing bathroom decor when making material decisions.
Plumbing and Electrical Considerations
During the planning phase, it's essential to evaluate the plumbing and electrical requirements for the walk-in shower. Assess the existing plumbing layout to determine if any modifications or additions are necessary to accommodate the new shower configuration. Similarly, consider the placement of electrical outlets and lighting fixtures to ensure optimal functionality and safety within the shower space.
Read more: How To Replace A Bathtub Shower
Accessibility and Safety Features
Incorporating accessibility and safety features into the design is a key consideration during the planning phase. Evaluate options such as grab bars, non-slip flooring, and adjustable showerheads to enhance accessibility and ensure a secure bathing experience for users of all abilities. By integrating these features into the initial planning, you can prioritize safety and convenience throughout the conversion process.
Budgeting and Timeline
Developing a comprehensive budget and timeline for the conversion project is an integral part of the planning phase. Consider the cost of materials, labor, and any additional services required for the conversion. Establishing a realistic timeline allows for efficient coordination of tasks and ensures that the project progresses smoothly from planning to execution.
By meticulously planning the conversion from a bathtub to a walk-in shower, you can lay a solid foundation for a successful and tailored transformation. This proactive approach enables you to align the design, functionality, and logistical aspects of the project, setting the stage for a seamless and satisfying transition to a new and improved shower experience.
Removing the Bathtub
Removing the bathtub is a pivotal step in the process of converting to a walk-in shower. This phase requires careful planning and precise execution to ensure a smooth transition from the existing fixture to the new shower configuration. The removal process involves several key steps, each of which contributes to the successful preparation of the space for the installation of the walk-in shower.
Assessment and Preparation
Before initiating the removal of the bathtub, it is essential to assess the surrounding area and prepare the workspace accordingly. Clear the bathroom of any personal items and ensure that the area around the bathtub is accessible. Additionally, turn off the water supply to the bathtub and disconnect any plumbing fixtures to prevent water leakage during the removal process.
Read more: How To Add Shower To Bathtub
Demolition of Surrounding Materials
Once the workspace is prepared, the next step involves the careful demolition of the surrounding materials, including tiles, wall panels, and any enclosures that may be present. This process requires precision to avoid damage to the underlying structure while effectively exposing the bathtub for removal. It is important to exercise caution and use appropriate tools to minimize disruption to the surrounding walls and flooring.
Disconnection of Plumbing Fixtures
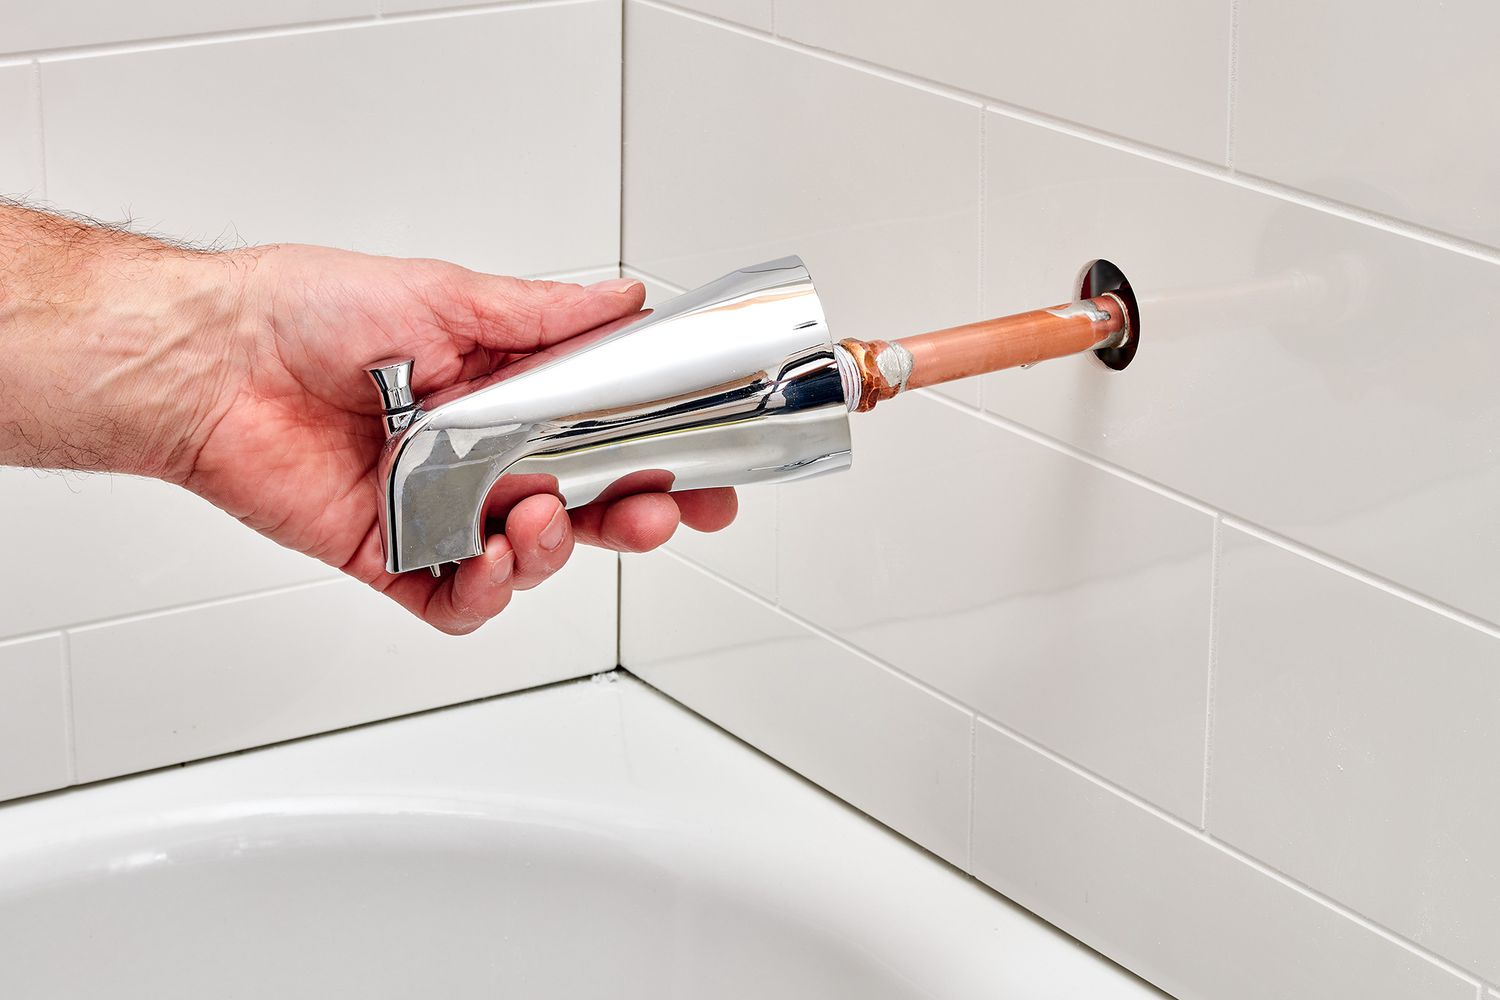
With the surrounding materials removed, the focus shifts to disconnecting the plumbing fixtures associated with the bathtub. This includes shutting off the water supply, disconnecting the drain, and removing any faucets or showerheads that may be installed. Thoroughly inspect the plumbing connections to ensure that they are properly sealed and free of any obstructions before proceeding with the removal.
Removal of the Bathtub
The actual removal of the bathtub involves lifting and maneuvering the fixture out of its existing space. Depending on the type of bathtub and its installation method, this step may require assistance from additional individuals to safely lift and transport the fixture out of the bathroom. Careful attention should be paid to avoid damaging the surrounding walls, flooring, and plumbing infrastructure during the removal process.
Clean-Up and Inspection
Once the bathtub has been successfully removed, it is important to conduct a thorough clean-up of the workspace. Remove any debris, clean the exposed area, and inspect the underlying structure for any signs of damage or deterioration. Addressing any issues at this stage ensures that the space is properly prepared for the subsequent installation of the walk-in shower.
By meticulously following these steps, the removal of the bathtub can be carried out with precision and care, setting the stage for the seamless transition to a walk-in shower. This phase marks a significant milestone in the conversion process, paving the way for the installation of the new shower and the realization of an enhanced bathing experience.
Installing the Walk-In Shower
The installation of the walk-in shower represents a transformative phase in the conversion process, marking the transition from the previous bathtub configuration to a modern and accessible shower space. This pivotal step involves a series of meticulous tasks and precise installations, each contributing to the realization of a functional and visually appealing walk-in shower.
Preparing the Substrate
The installation process commences with the preparation of the substrate to ensure a stable and secure foundation for the walk-in shower. This involves evaluating the condition of the existing flooring and walls, addressing any structural concerns, and implementing necessary reinforcements to support the new shower configuration. Additionally, the substrate is meticulously leveled and waterproofed to create a durable and moisture-resistant base for the shower installation.
Positioning the Shower Pan
The precise positioning of the shower pan is a critical aspect of the installation process. The shower pan serves as the base of the walk-in shower, providing a stable surface for bathing while effectively containing water within the shower area. Careful attention is paid to aligning the shower pan with the existing plumbing connections and ensuring a seamless integration with the surrounding flooring and walls.
Installing Wall Surrounds
The installation of wall surrounds plays a key role in defining the aesthetic and functional aspects of the walk-in shower. Whether utilizing tile, acrylic panels, or other materials, the wall surrounds are meticulously installed to create a visually cohesive and water-resistant enclosure for the shower space. Attention to detail is paramount to ensure precise measurements, secure attachment, and seamless integration with the shower pan and plumbing fixtures.
Read more: How To Turn A Shower Into A Bathtub?
Fitting Plumbing Fixtures
The installation of plumbing fixtures, including the showerhead, faucets, and controls, is a crucial step in completing the walk-in shower. Each fixture is carefully positioned and connected to the existing plumbing infrastructure, ensuring proper functionality and optimal water flow within the shower space. Additionally, the installation of a drain system is meticulously carried out to facilitate efficient water drainage from the shower area.
Sealing and Finishing Touches
As the installation nears completion, meticulous attention is given to sealing the joints, edges, and seams within the walk-in shower. This involves the application of waterproof sealants and grout to create a watertight enclosure, preventing moisture infiltration and ensuring the longevity of the installation. Furthermore, finishing touches such as trim, hardware, and accessories are added to enhance the visual appeal and functionality of the walk-in shower.
By meticulously executing each step of the installation process, the walk-in shower is seamlessly integrated into the bathroom space, offering a stylish, accessible, and rejuvenating bathing experience. The culmination of precise installations and attention to detail results in the realization of a functional and visually captivating shower space, marking the successful completion of the conversion from a bathtub to a walk-in shower.
Adding Safety Features
Incorporating safety features into the design of a walk-in shower is a paramount consideration, especially for individuals with mobility challenges or those seeking to create a secure bathing environment. By integrating thoughtful safety elements, the walk-in shower can offer enhanced accessibility and peace of mind for users of all abilities.
Non-Slip Flooring
The installation of non-slip flooring within the walk-in shower is a fundamental safety feature that minimizes the risk of slips and falls. Textured tiles or specialized non-slip coatings can be applied to the shower floor, providing traction and stability even when the surface is wet. This feature significantly reduces the potential for accidents, making the shower space safer and more accommodating for individuals with varying mobility levels.
Read more: How To Turn A Bathtub Into A Shower?
Grab Bars
Strategically placed grab bars offer essential support and stability within the walk-in shower. These fixtures are installed at key locations, such as near the entrance and alongside seating areas, to assist users in maneuvering safely within the shower space. By providing reliable handholds, grab bars contribute to a secure bathing experience, particularly for individuals who may require assistance or additional balance support.
Adjustable Showerheads
The inclusion of adjustable showerheads enhances the accessibility and comfort of the walk-in shower. These versatile fixtures can be positioned at varying heights to accommodate users of different statures and mobility requirements. Additionally, handheld showerheads offer greater flexibility, allowing users to direct the water flow with ease, promoting independence and convenience during bathing.
Seating Options
Incorporating built-in seating or fold-down benches within the walk-in shower provides a practical and secure resting area for users. These features offer a convenient solution for individuals who may benefit from seated bathing, ensuring comfort and stability while reducing the risk of fatigue or imbalance. By integrating seating options, the walk-in shower becomes more inclusive and accommodating for diverse user needs.
Clear Glass Doors
Opting for clear glass doors in the design of the walk-in shower contributes to a safer bathing environment. The transparency of the doors enhances visibility within the shower space, allowing caregivers or family members to monitor users from outside the shower. This feature promotes a sense of security and facilitates prompt assistance if needed, particularly for individuals requiring additional support during bathing.
By incorporating these safety features into the design of the walk-in shower, the bathing experience is elevated to prioritize accessibility, comfort, and security. These thoughtful additions not only enhance the functionality of the shower space but also promote independence and confidence for users, ensuring a safer and more inclusive bathing environment.
Read more: Why Put A Bathtub In The Shower
Finishing Touches
The final phase of the walk-in shower installation encompasses the meticulous attention to detail and the addition of finishing touches that elevate the overall aesthetic and functionality of the shower space. This critical stage involves the integration of elements that contribute to the visual appeal, durability, and user experience within the walk-in shower, ensuring that every aspect is thoughtfully considered and executed.
Grout and Sealant Application
The application of grout and sealant serves as a fundamental aspect of the finishing touches, contributing to the longevity and water resistance of the walk-in shower. Grout is meticulously applied to fill the joints between tiles, creating a cohesive and visually appealing surface while preventing moisture infiltration. Additionally, waterproof sealant is carefully administered along the seams and edges of the shower enclosure, ensuring a watertight barrier that safeguards the surrounding walls and flooring from water damage.
Trim and Hardware Installation
The installation of trim and hardware adds a polished and functional dimension to the walk-in shower. Trim pieces, such as bullnose tiles or metal edging, are meticulously fitted to provide a clean and finished look to the tile edges and transitions within the shower space. Furthermore, the addition of high-quality hardware, including shower door handles, towel bars, and robe hooks, enhances the convenience and accessibility of the shower area while complementing the overall design aesthetic.
Shower Accessories and Storage Solutions
Incorporating practical accessories and storage solutions within the walk-in shower enhances its functionality and user convenience. Built-in niches or shelving units are installed to provide a designated space for storing bathing essentials, such as shampoo, soap, and loofahs, ensuring a clutter-free and organized shower environment. Additionally, the inclusion of shower caddies, soap dishes, and seating accents further enhances the usability and comfort of the shower space.
Read more: How To Remove A Bathtub Shower Combo
Lighting and Ventilation Considerations
Thoughtful attention is given to lighting and ventilation within the walk-in shower to create a well-lit and comfortable bathing environment. Waterproof and corrosion-resistant light fixtures are strategically positioned to provide ample illumination, enhancing visibility and ambiance within the shower space. Similarly, the incorporation of efficient ventilation solutions, such as exhaust fans or operable windows, promotes air circulation and moisture control, contributing to a fresh and inviting shower experience.
Personalized Touches and Decor
The addition of personalized touches and decor elements infuses the walk-in shower with individual style and character. From vibrant accent tiles and decorative mosaics to custom glass etchings and artwork, these embellishments impart a unique and personalized aesthetic to the shower space, reflecting the homeowner's taste and personality. These decorative elements serve as the final flourishes that elevate the visual impact of the walk-in shower, creating a space that is both functional and visually captivating.
By meticulously attending to these finishing touches, the walk-in shower is transformed into a refined and inviting space that embodies both practicality and elegance. Each detail contributes to the overall cohesiveness and functionality of the shower area, culminating in a visually stunning and user-centric bathing environment that enhances the overall appeal and enjoyment of the bathroom.
Frequently Asked Questions about How To Convert A Bathtub To A Walk-In Shower?
Was this page helpful?
At Storables.com, we guarantee accurate and reliable information. Our content, validated by Expert Board Contributors, is crafted following stringent Editorial Policies. We're committed to providing you with well-researched, expert-backed insights for all your informational needs.

0 thoughts on “How To Convert A Bathtub To A Walk-In Shower?”