Home>Furniture & Design>Bathroom Accessories>How To Replace A Bathtub Shower
Bathroom Accessories
How To Replace A Bathtub Shower
Modified: August 28, 2024
Learn how to replace a bathtub shower with our step-by-step guide. Find the best bathroom accessories and upgrade your space today!
(Many of the links in this article redirect to a specific reviewed product. Your purchase of these products through affiliate links helps to generate commission for Storables.com, at no extra cost. Learn more)
Introduction
Replacing a bathtub shower is a significant home improvement project that can breathe new life into your bathroom. Whether you're looking to update the aesthetic appeal of your space or address functional issues, such as leaks or outdated fixtures, installing a new bathtub shower can transform your daily bathing experience. This comprehensive guide will walk you through the process, providing step-by-step instructions and valuable tips to ensure a successful and satisfying outcome.
By embarking on this project, you have the opportunity to customize your bathroom to suit your preferences and needs. From choosing the perfect showerhead to selecting the ideal tub surround, every decision you make contributes to the overall look and functionality of your bathing area. Additionally, replacing a bathtub shower allows you to address any underlying issues, such as water damage or mold, providing a fresh start for this essential part of your home.
Whether you're a seasoned DIY enthusiast or a first-time home improver, this guide is designed to equip you with the knowledge and confidence to tackle this project. With careful planning and attention to detail, you can achieve a professional-looking result that enhances the beauty and usability of your bathroom. So, roll up your sleeves, gather your tools, and let's dive into the process of replacing your bathtub shower.
Key Takeaways:
- Transform your bathroom by replacing a bathtub shower, enhancing both aesthetics and functionality. Follow the step-by-step guide for a rewarding DIY project.
- Customize your bathing space, address underlying issues, and create a refreshed and reliable bathroom with a new bathtub shower installation. Enjoy a personalized and inviting environment.
Step 1: Remove the Old Shower
Removing the old shower is the crucial first step in replacing a bathtub shower. Before starting this process, it's essential to gather the necessary tools and materials, including safety goggles, gloves, a utility knife, a pry bar, and a screwdriver. Additionally, it's advisable to turn off the water supply to the shower to prevent any accidental leaks or water damage during the removal process.
-
Disconnect the Water Supply: Begin by turning off the water supply to the shower. This can usually be done by locating the shut-off valves for the shower and turning them clockwise to stop the flow of water. Once the water supply is turned off, turn on the shower to drain any remaining water from the pipes.
-
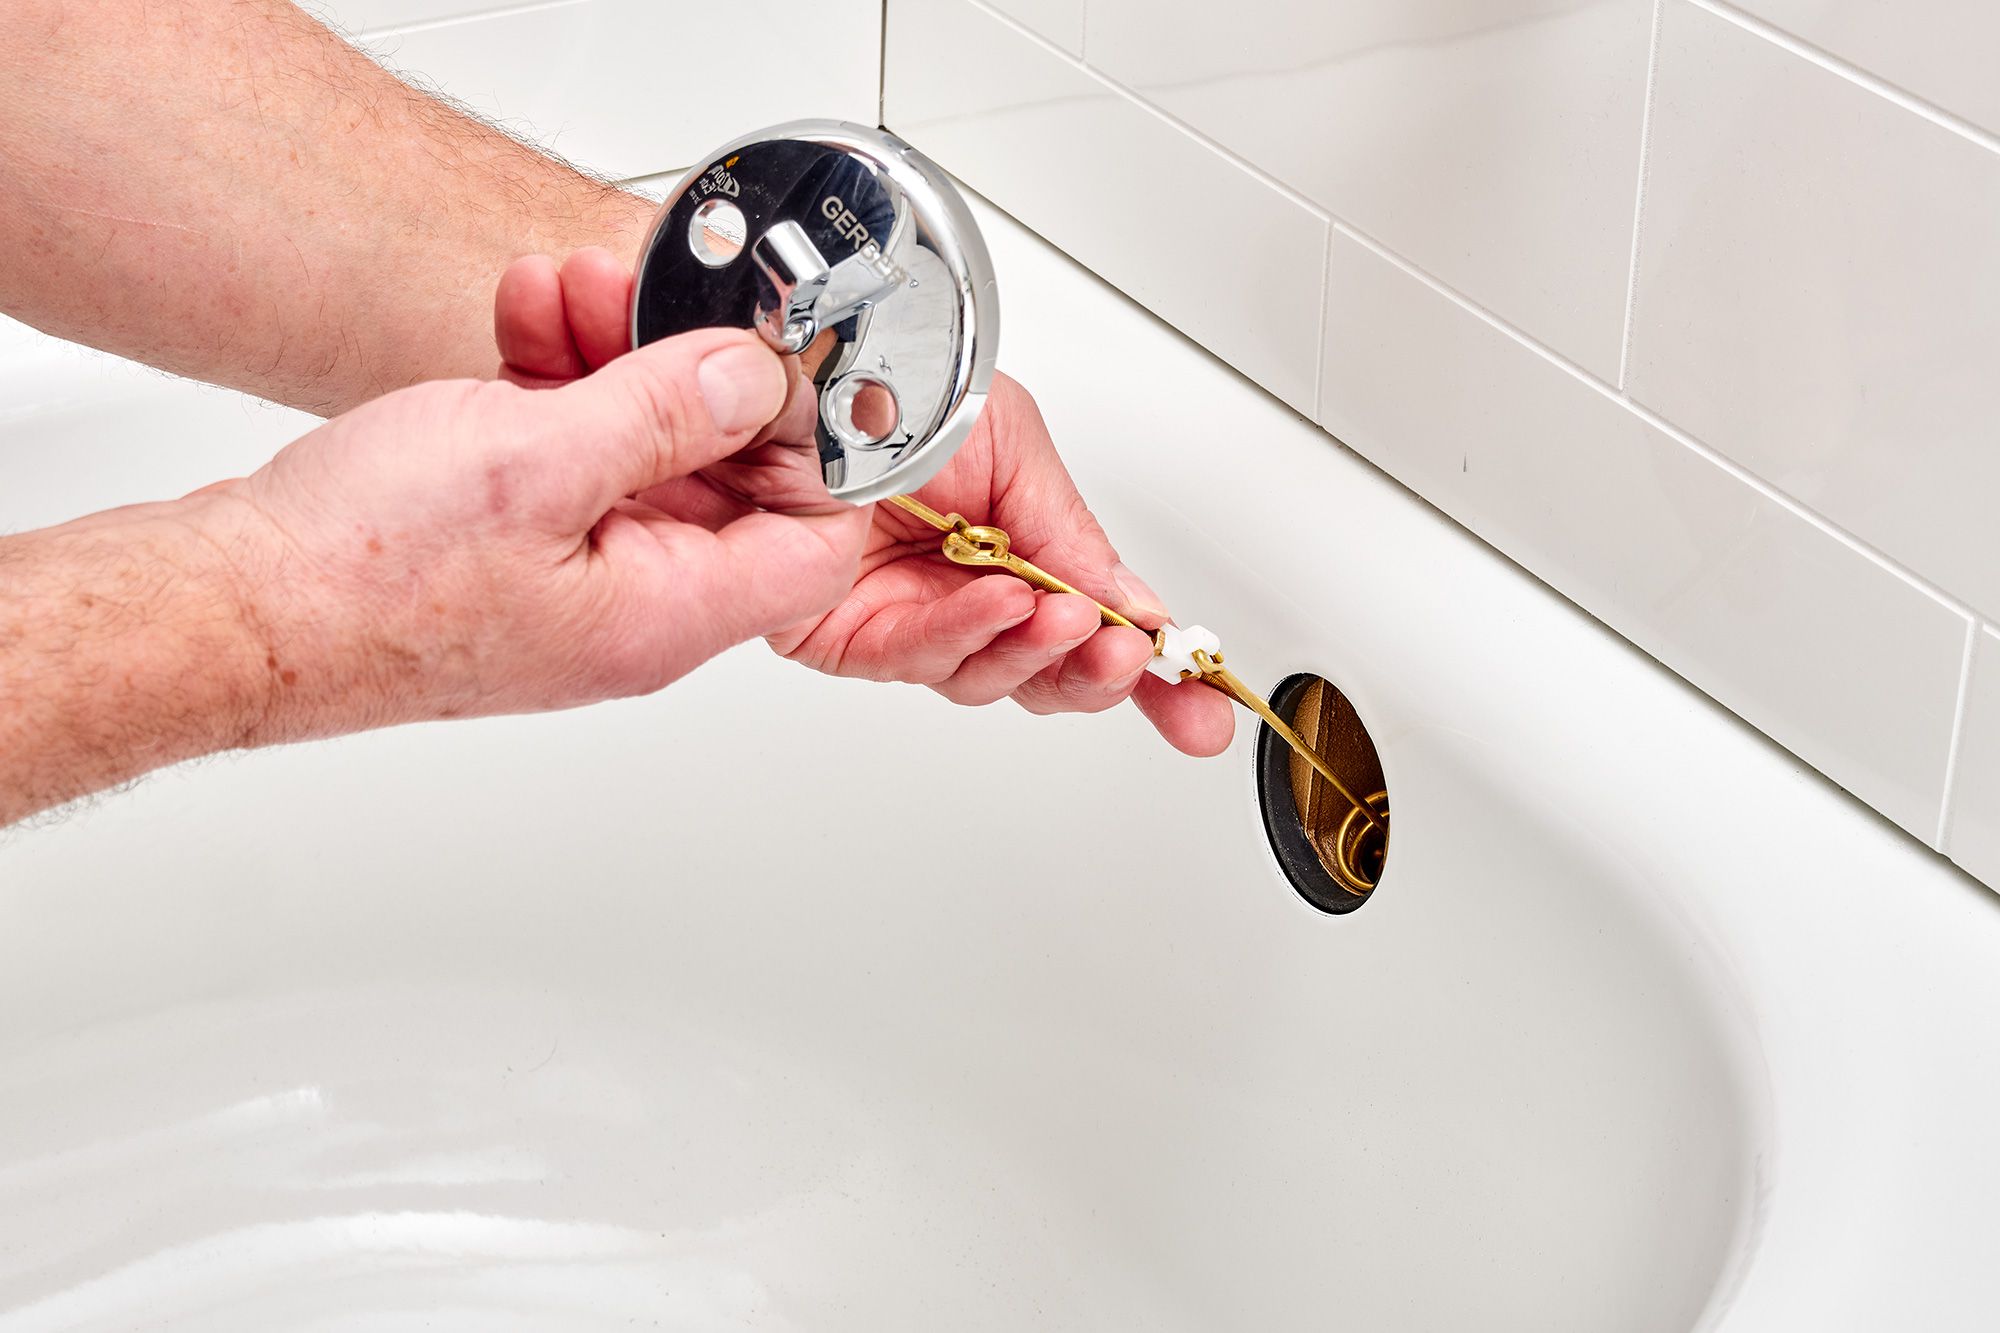
Remove Fixtures and Hardware: Using a screwdriver, carefully remove the showerhead, faucet handles, and any other fixtures or hardware attached to the shower. Set these items aside for disposal or potential reuse.
-
Detach the Surrounding Walls: If the shower is enclosed by walls, use a utility knife to cut through the caulking and any adhesive or sealant securing the walls to the surrounding structure. Once the walls are detached, carefully pry them away from the studs using a pry bar. Take caution to avoid damaging the walls or surrounding surfaces.
-
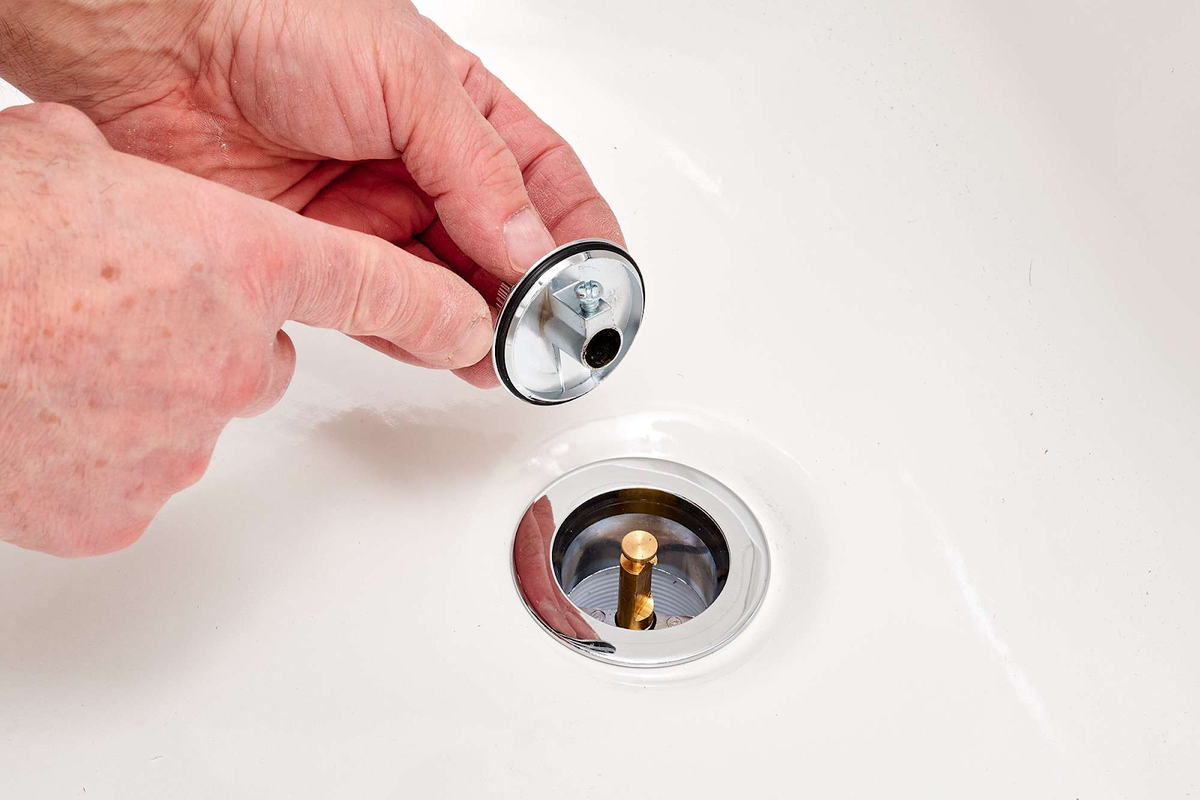
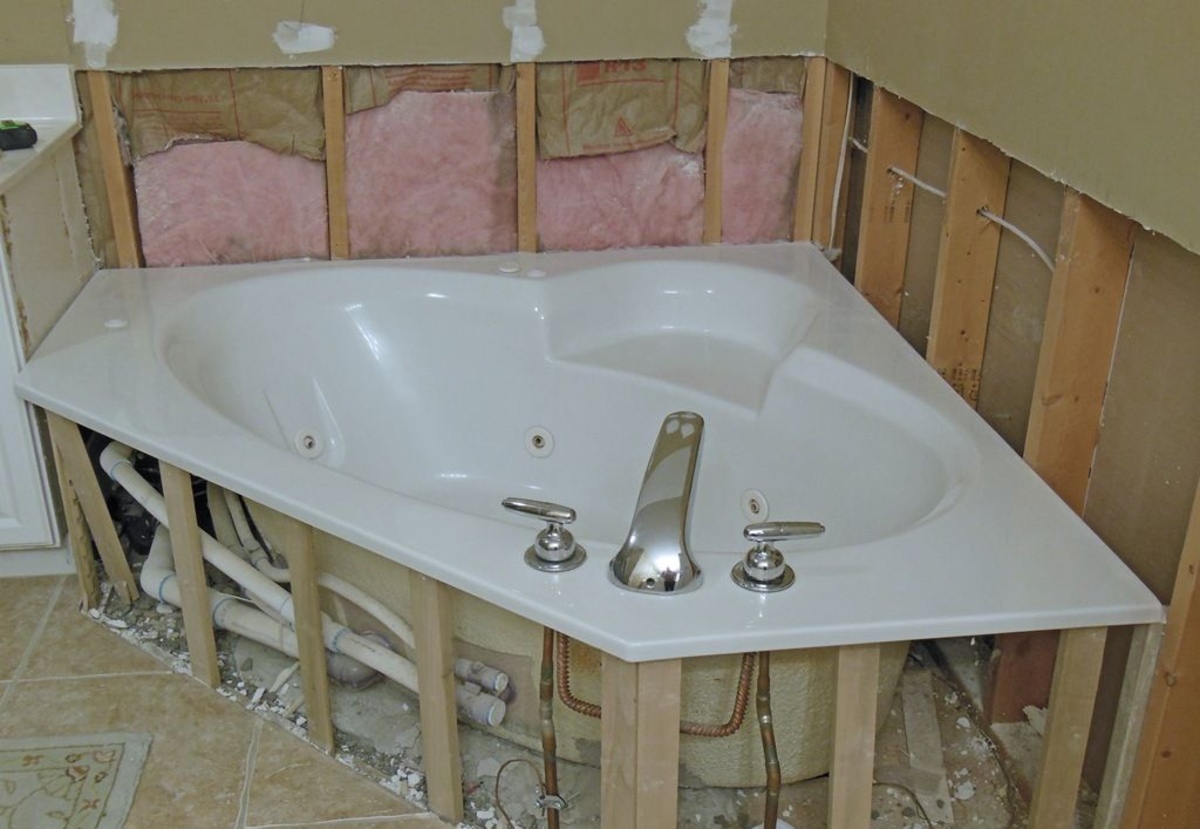
Uninstall the Shower Pan or Tub: If your shower includes a pan or bathtub, it's necessary to remove these components as well. Depending on the type of installation, this may involve disconnecting the drain, unscrewing the flange, and carefully lifting or maneuvering the pan or tub out of the space.
-
Inspect for Damage: With the old shower removed, take the opportunity to inspect the underlying structure for any signs of water damage, mold, or mildew. Addressing these issues at this stage can prevent future problems and ensure a solid foundation for the new bathtub shower installation.
By following these steps and exercising caution, you can successfully remove the old shower, clearing the way for the next phase of the project. With the old components out of the way, you're one step closer to achieving a refreshed and revitalized bathtub shower space.
Step 2: Prepare the Area
With the old shower removed, it's time to prepare the area for the installation of the new bathtub shower. This crucial step sets the foundation for a successful and seamless transition to the updated bathing space. Proper preparation ensures that the new components fit securely and function effectively, while also enhancing the overall aesthetic appeal of the bathroom. Here's a detailed guide on how to prepare the area for the new bathtub shower installation:
-
Clean and Clear the Space: Begin by thoroughly cleaning the area where the new bathtub shower will be installed. Remove any debris, dust, or remnants of the old shower to create a clean and blank canvas for the upcoming installation. This step also involves inspecting the walls, floor, and surrounding surfaces for any remaining adhesive, sealant, or imperfections that may hinder the installation process.
-
Address Structural Issues: Take this opportunity to assess the structural integrity of the walls, floor, and surrounding areas. Repair any damaged drywall, studs, or flooring to ensure a stable and level foundation for the new bathtub shower. Addressing structural issues at this stage prevents complications during the installation and promotes the longevity of the updated bathing space.
-
Measure and Plan: Accurate measurements are essential for a precise and professional-looking installation. Measure the dimensions of the space where the new bathtub shower will be placed, taking into account the location of plumbing fixtures, studs, and any existing features that may impact the installation. With these measurements in hand, you can plan the layout and placement of the new components, ensuring a seamless fit and optimal functionality.
-
Install Backer Board or Waterproofing: Depending on the type of bathtub shower being installed, it may be necessary to add a backer board or apply waterproofing materials to the walls and surrounding areas. Backer board provides a solid, moisture-resistant surface for tile installation, while waterproofing materials create a protective barrier against water damage. Follow the manufacturer's guidelines and best practices for installing backer board or applying waterproofing to ensure a durable and watertight enclosure for the new bathtub shower.
-
Prepare the Plumbing: If the new bathtub shower requires any adjustments to the plumbing, such as repositioning the showerhead or faucet, this is the time to make these modifications. Ensure that the plumbing connections are secure, and any necessary adjustments are made to accommodate the new fixtures and components.
By diligently preparing the area for the new bathtub shower, you set the stage for a successful and satisfying installation. This careful and methodical approach ensures that the new components fit seamlessly, function effectively, and contribute to a visually appealing and functional bathing space. With the area prepared, you're ready to move on to the next phase of the project: installing the new bathtub shower.
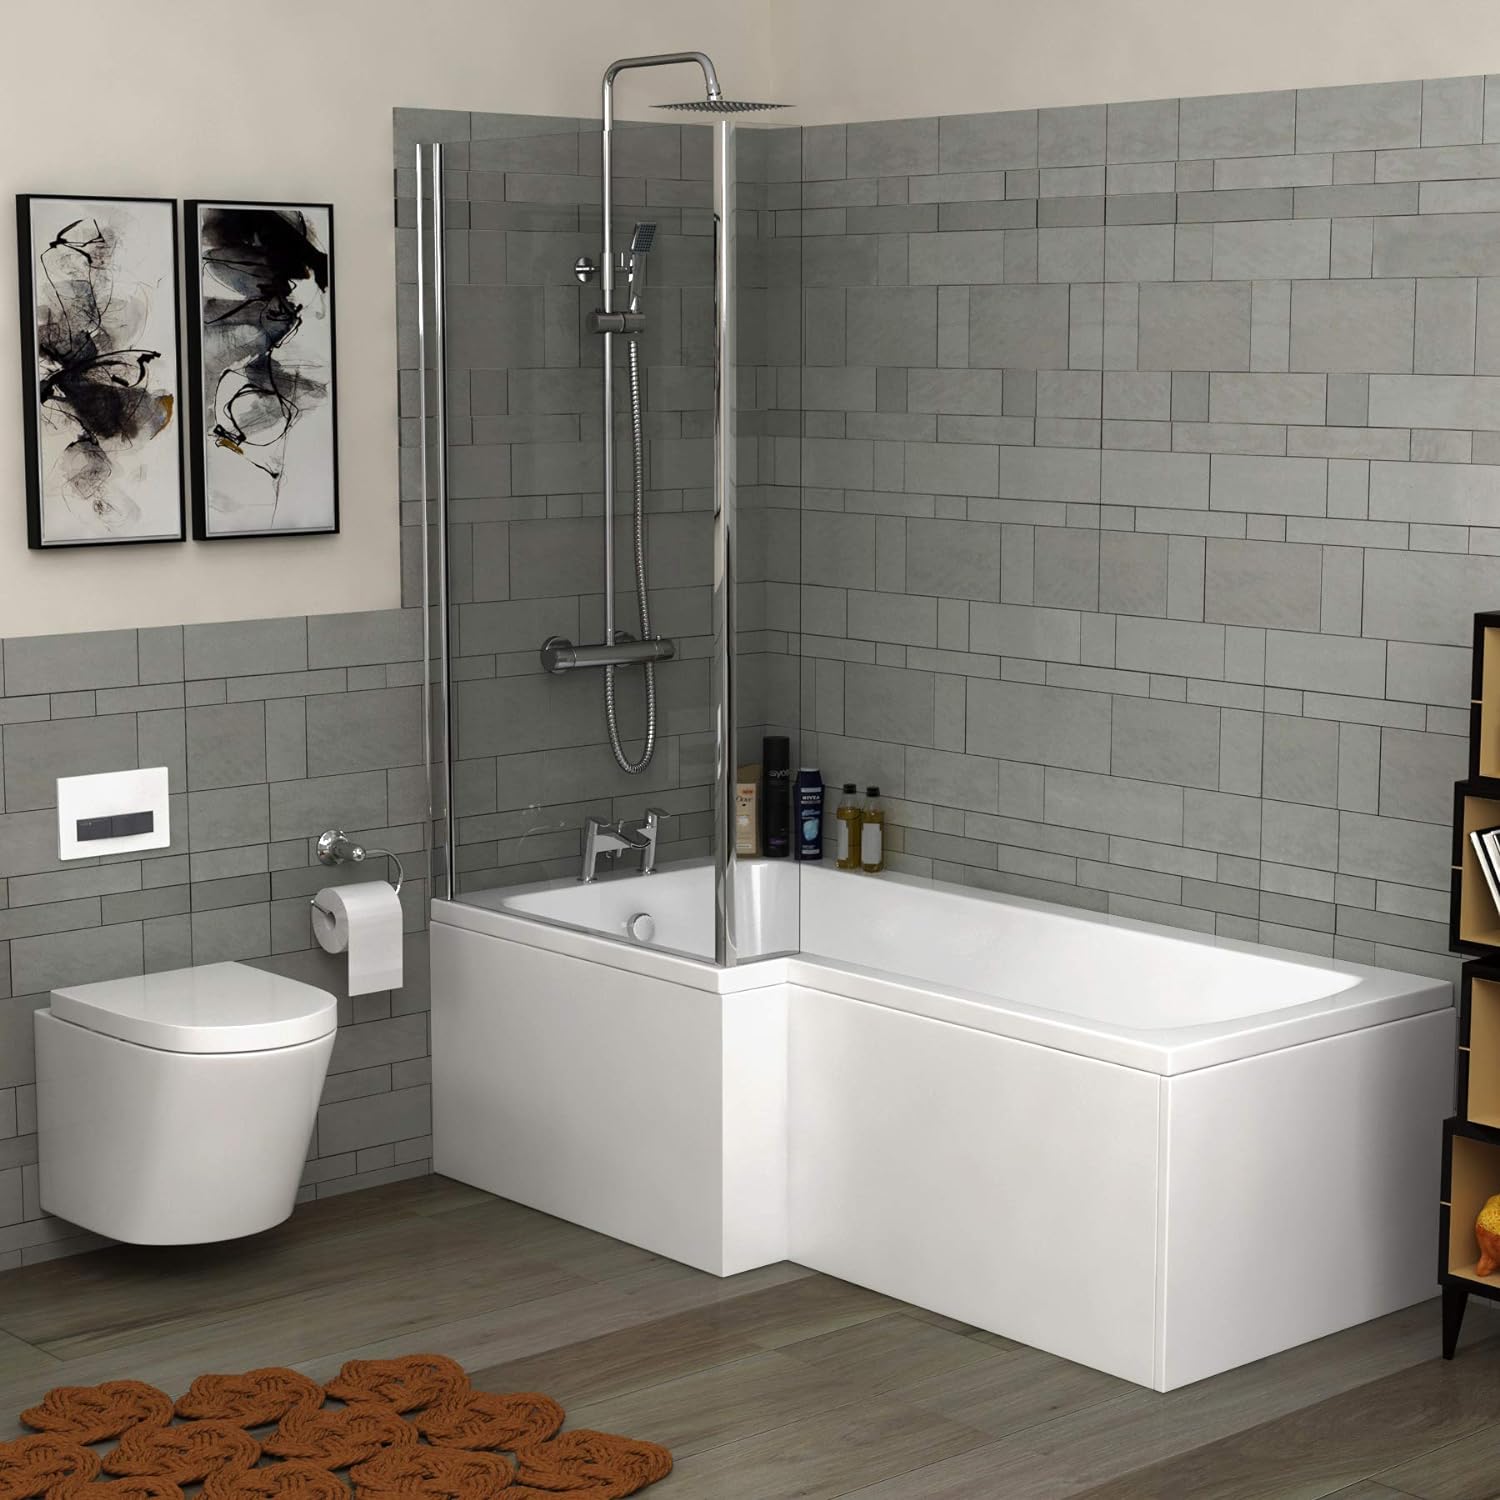
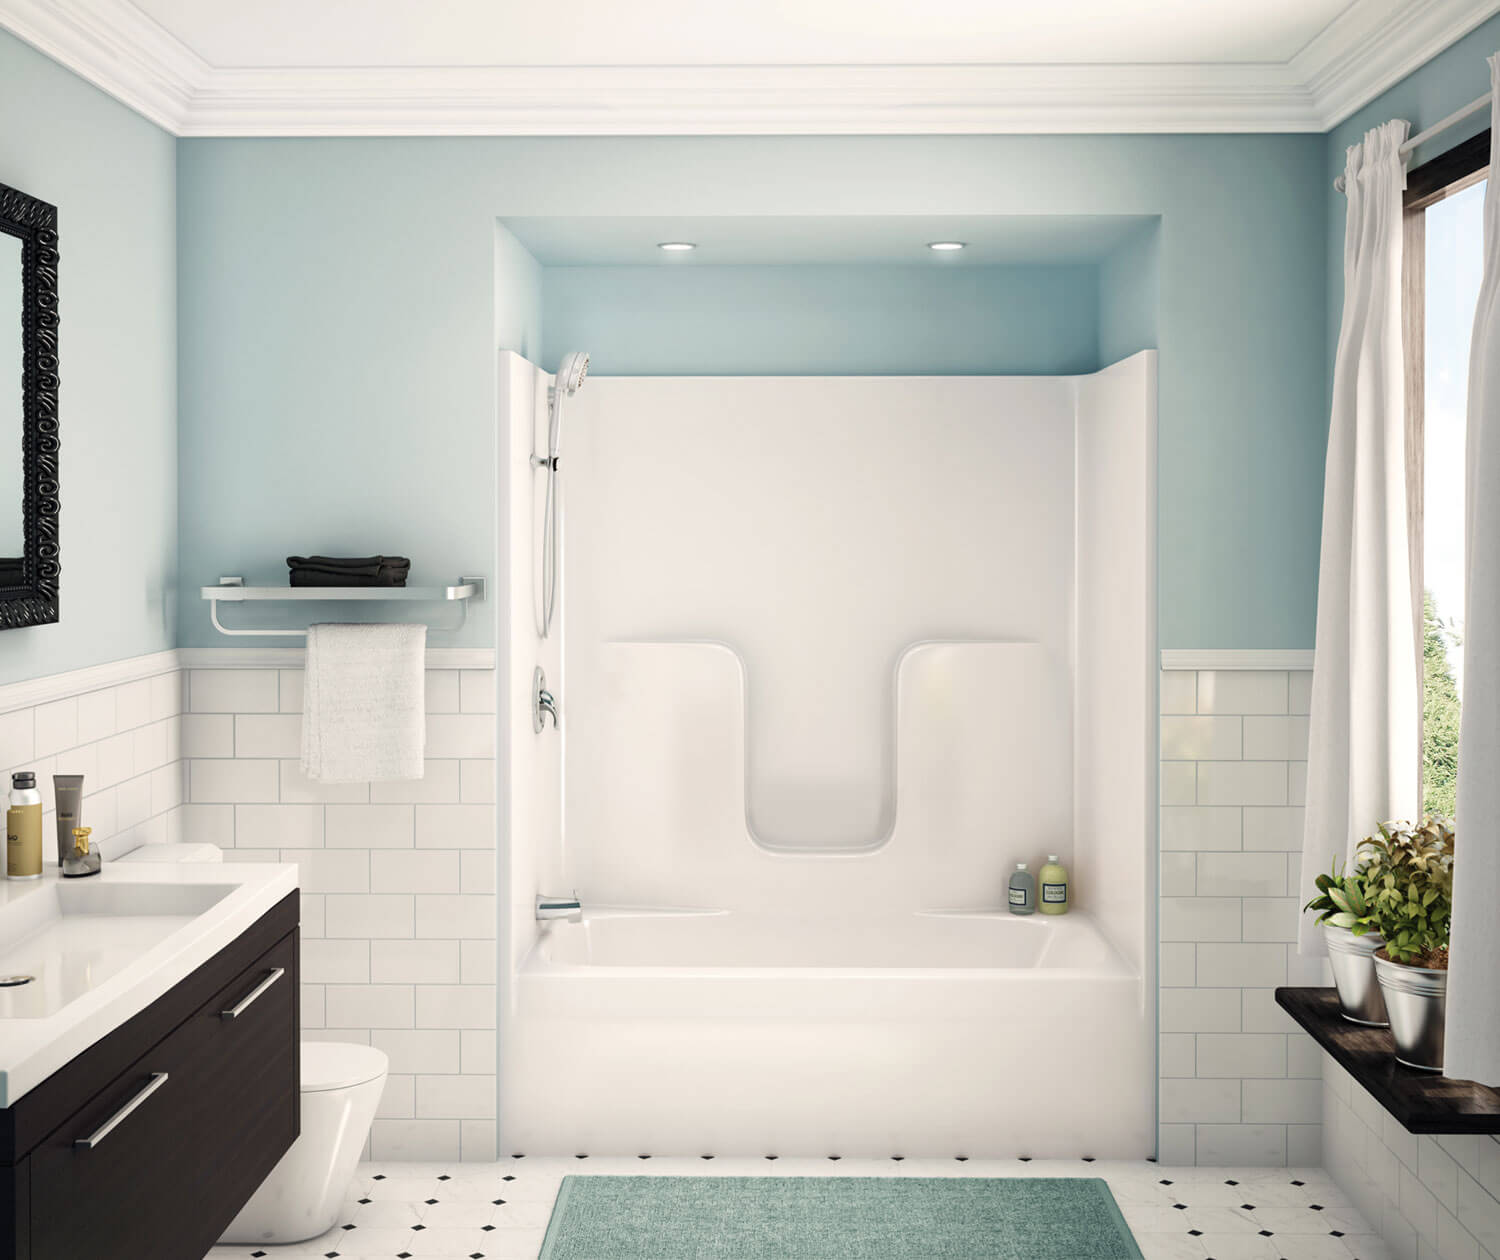
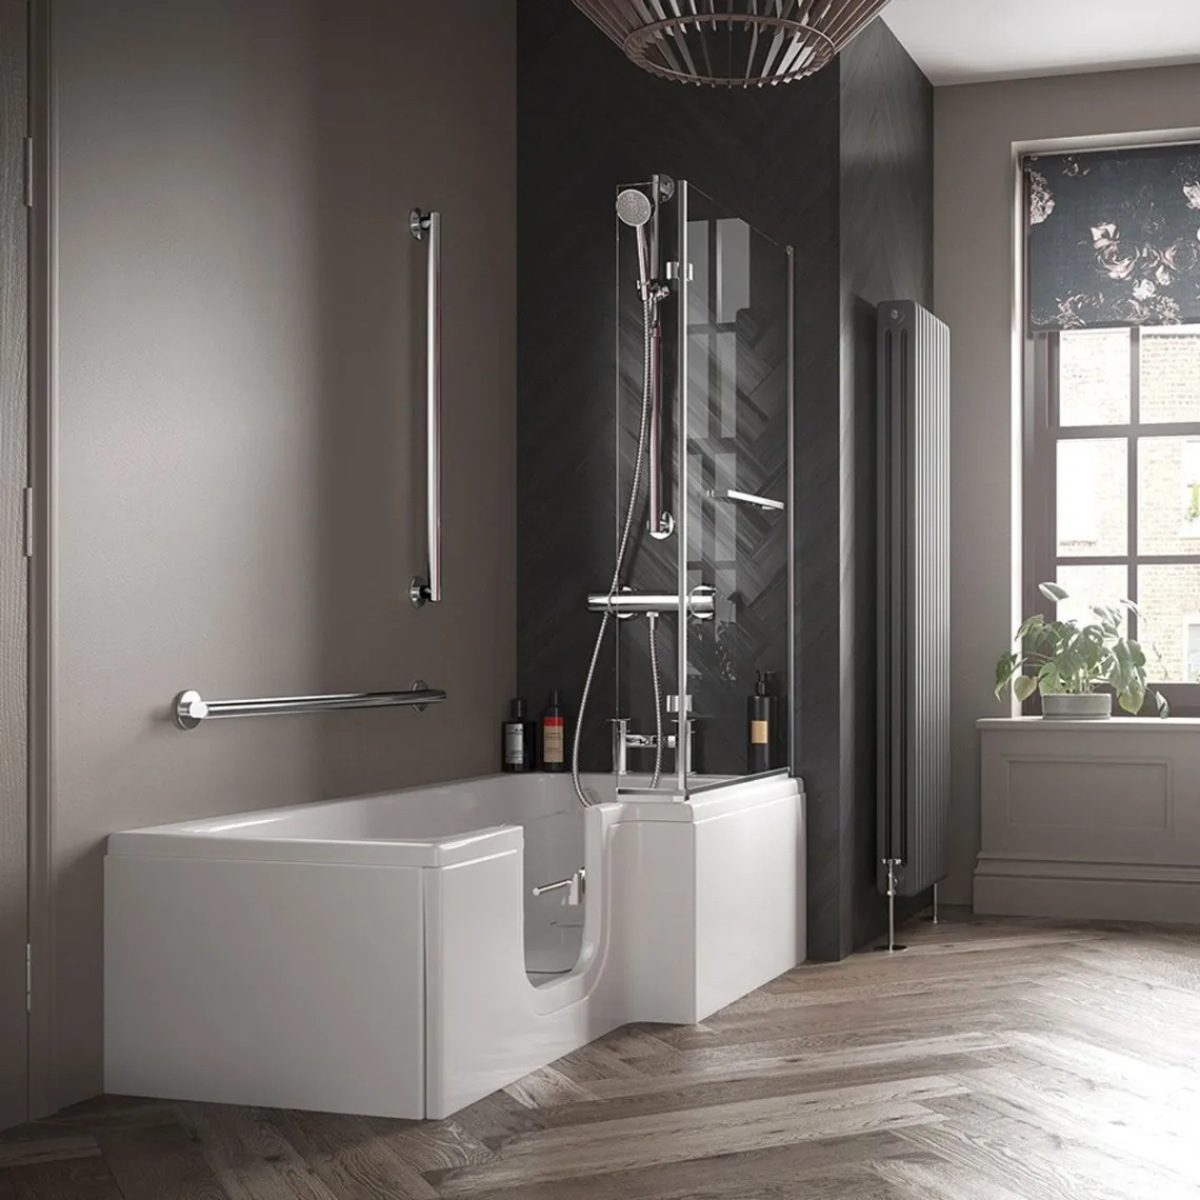
Step 3: Install the New Bathtub Shower
Installing the new bathtub shower marks a pivotal phase in the transformation of your bathroom. This step involves carefully placing and securing the new components to create a functional and visually appealing bathing space. Whether you've chosen a sleek and modern shower enclosure or a classic tub and surround combination, the installation process requires precision, attention to detail, and adherence to best practices. Here's a comprehensive guide on how to install the new bathtub shower, ensuring a seamless and professional outcome.
-
Position the Components: Begin by positioning the new bathtub or shower base in the designated area, ensuring that it aligns with the plumbing connections and fits securely against the walls. If you're installing a shower enclosure, carefully place the panels or walls in position, verifying that they are level and plumb. Pay close attention to the alignment and fit of the components, making any necessary adjustments to ensure a precise and snug installation.
-
Secure the Components: Once the bathtub or shower base is in place, secure it to the underlying structure using the recommended fasteners and installation methods. For shower enclosures, follow the manufacturer's guidelines for securing the panels to the walls and floor, ensuring a stable and secure fit. Take care to avoid over-tightening fasteners, which can lead to damage or distortion of the components.
-
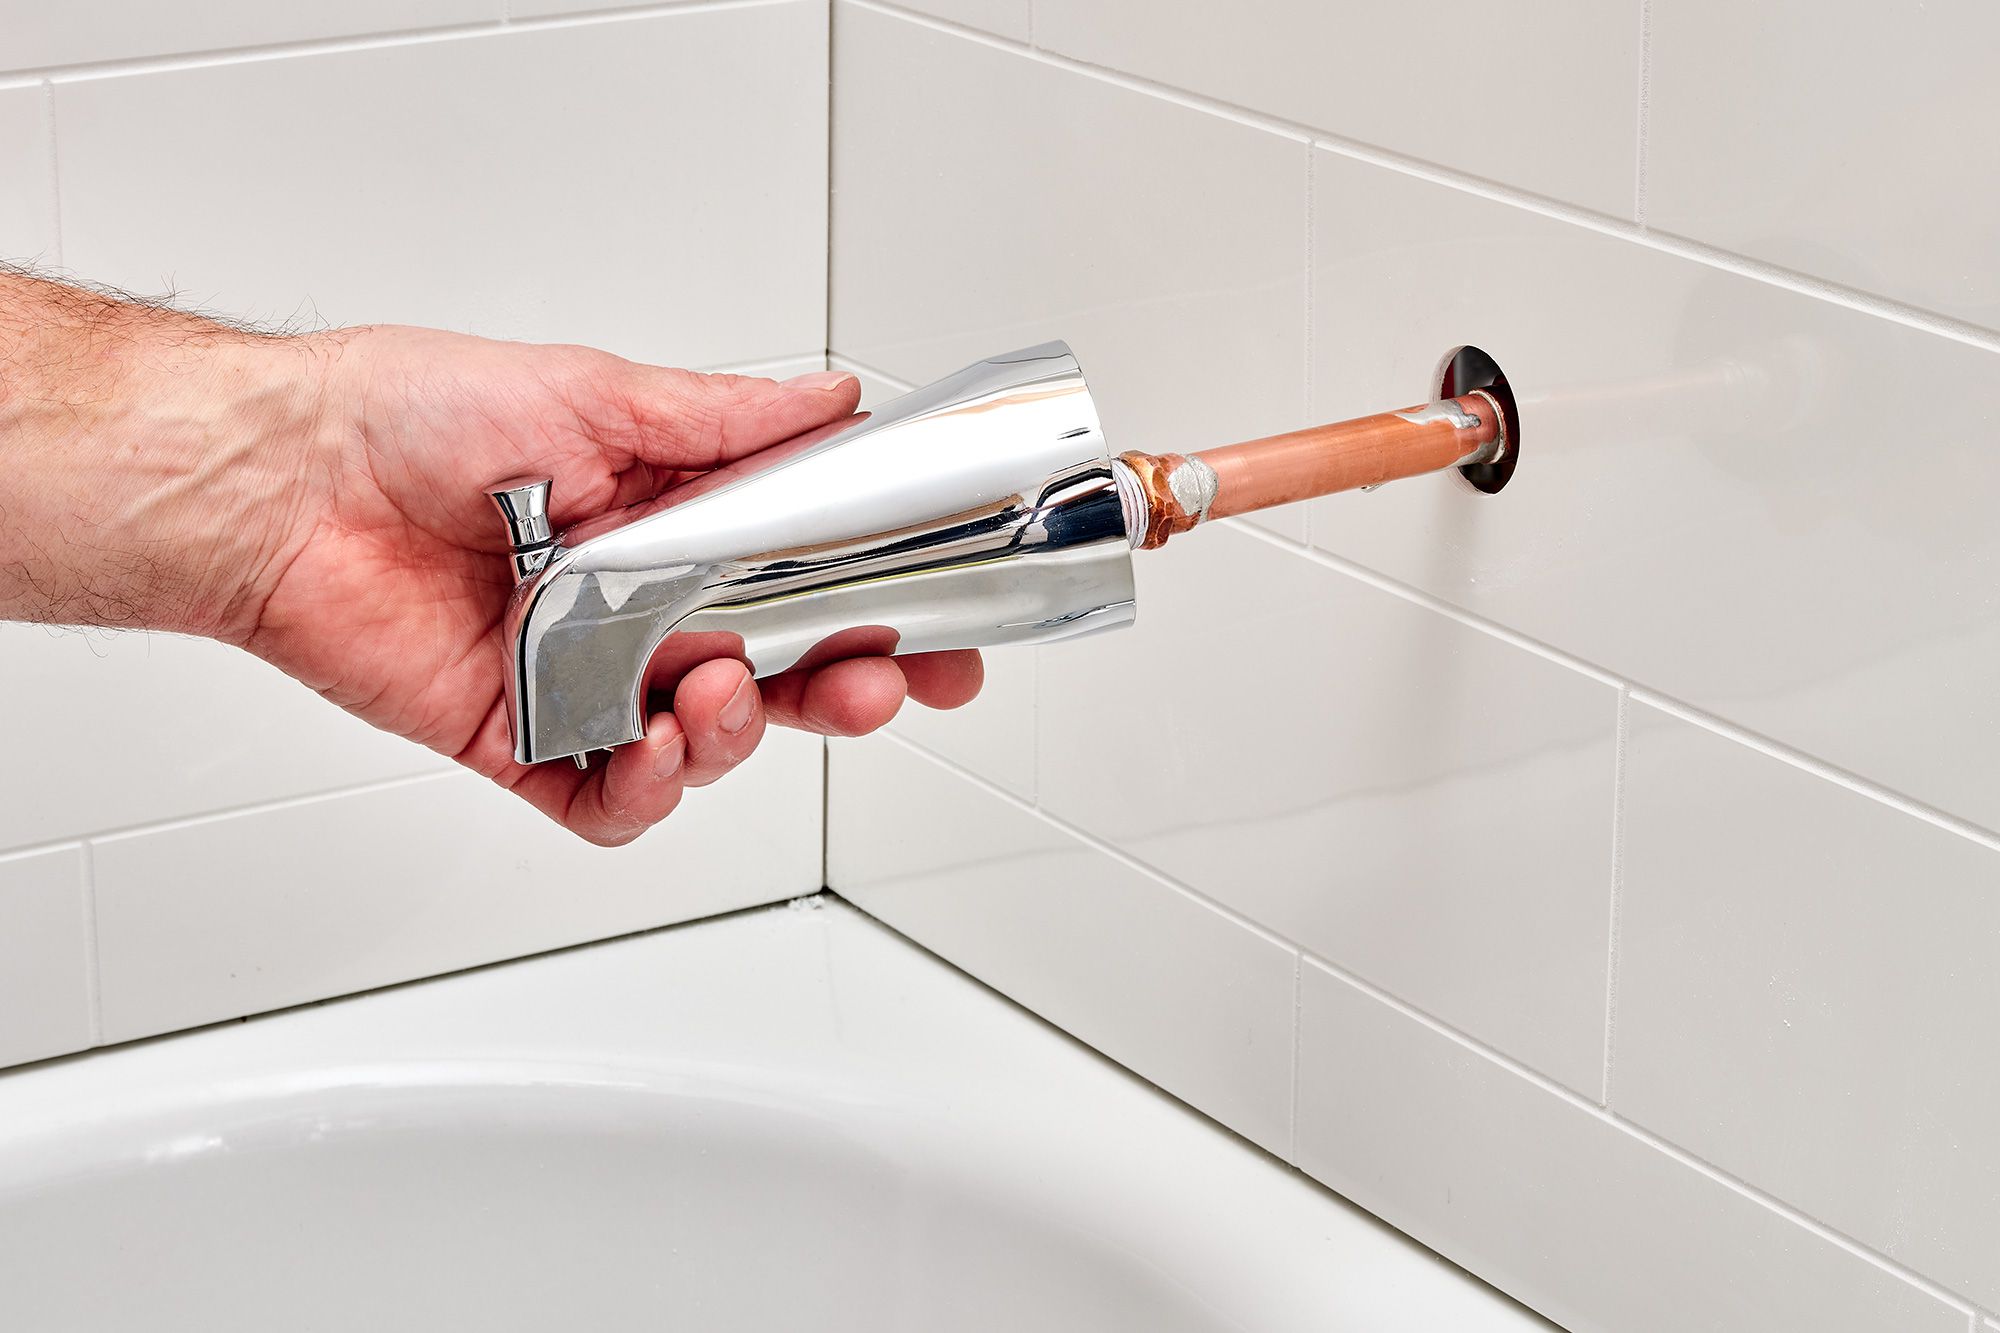
Install Plumbing Fixtures: If the new bathtub shower includes fixtures such as a showerhead, faucet, or handles, proceed to install these components according to the manufacturer's instructions. Carefully connect the plumbing lines, ensuring watertight seals and secure connections. Test the fixtures for proper functionality and address any leaks or issues before proceeding.
-
Seal and Caulk: With the bathtub or shower base in place and the fixtures installed, it's essential to seal and caulk the surrounding areas to prevent water infiltration and ensure a watertight enclosure. Use high-quality silicone caulk to seal the joints and seams, including the connection points between the walls and the bathtub or shower base. Proper sealing is crucial for preventing water damage and maintaining the integrity of the installation.
-
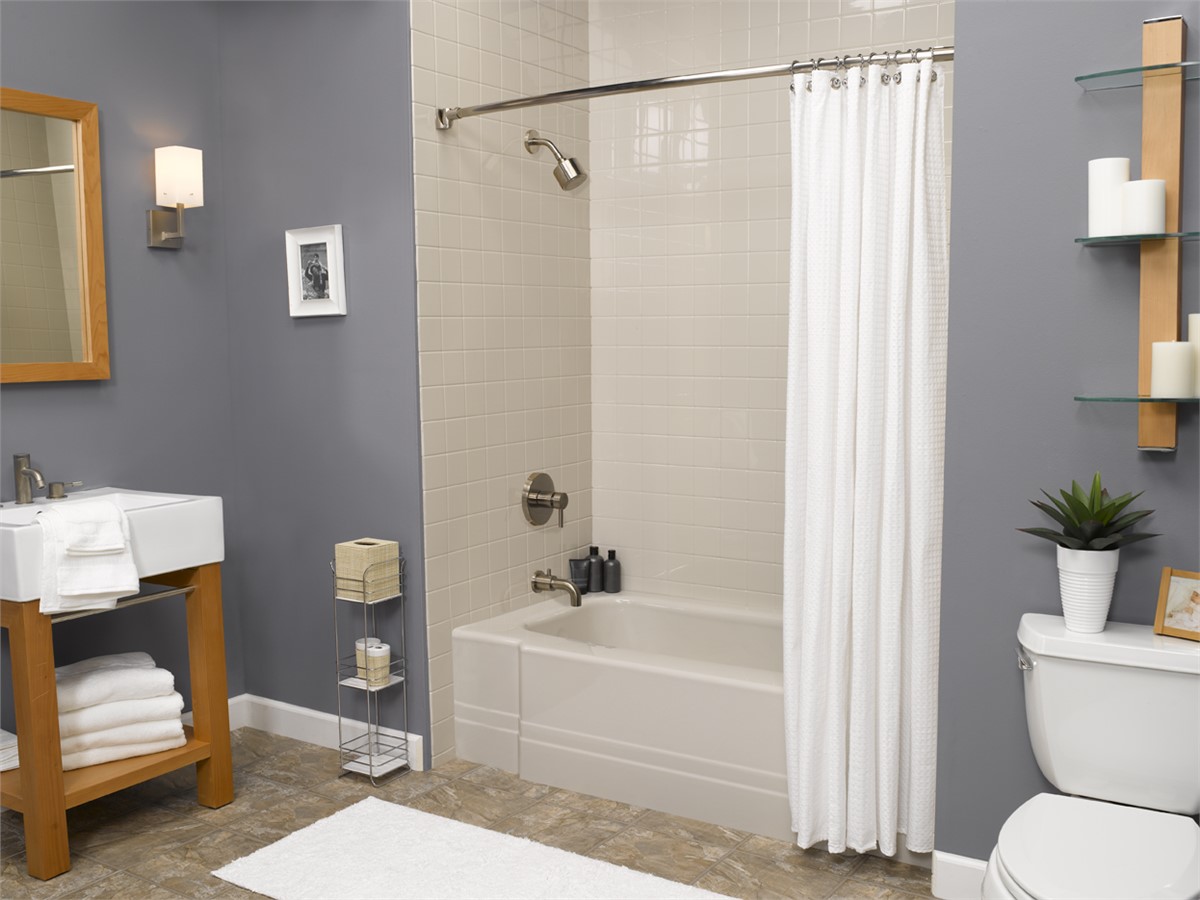
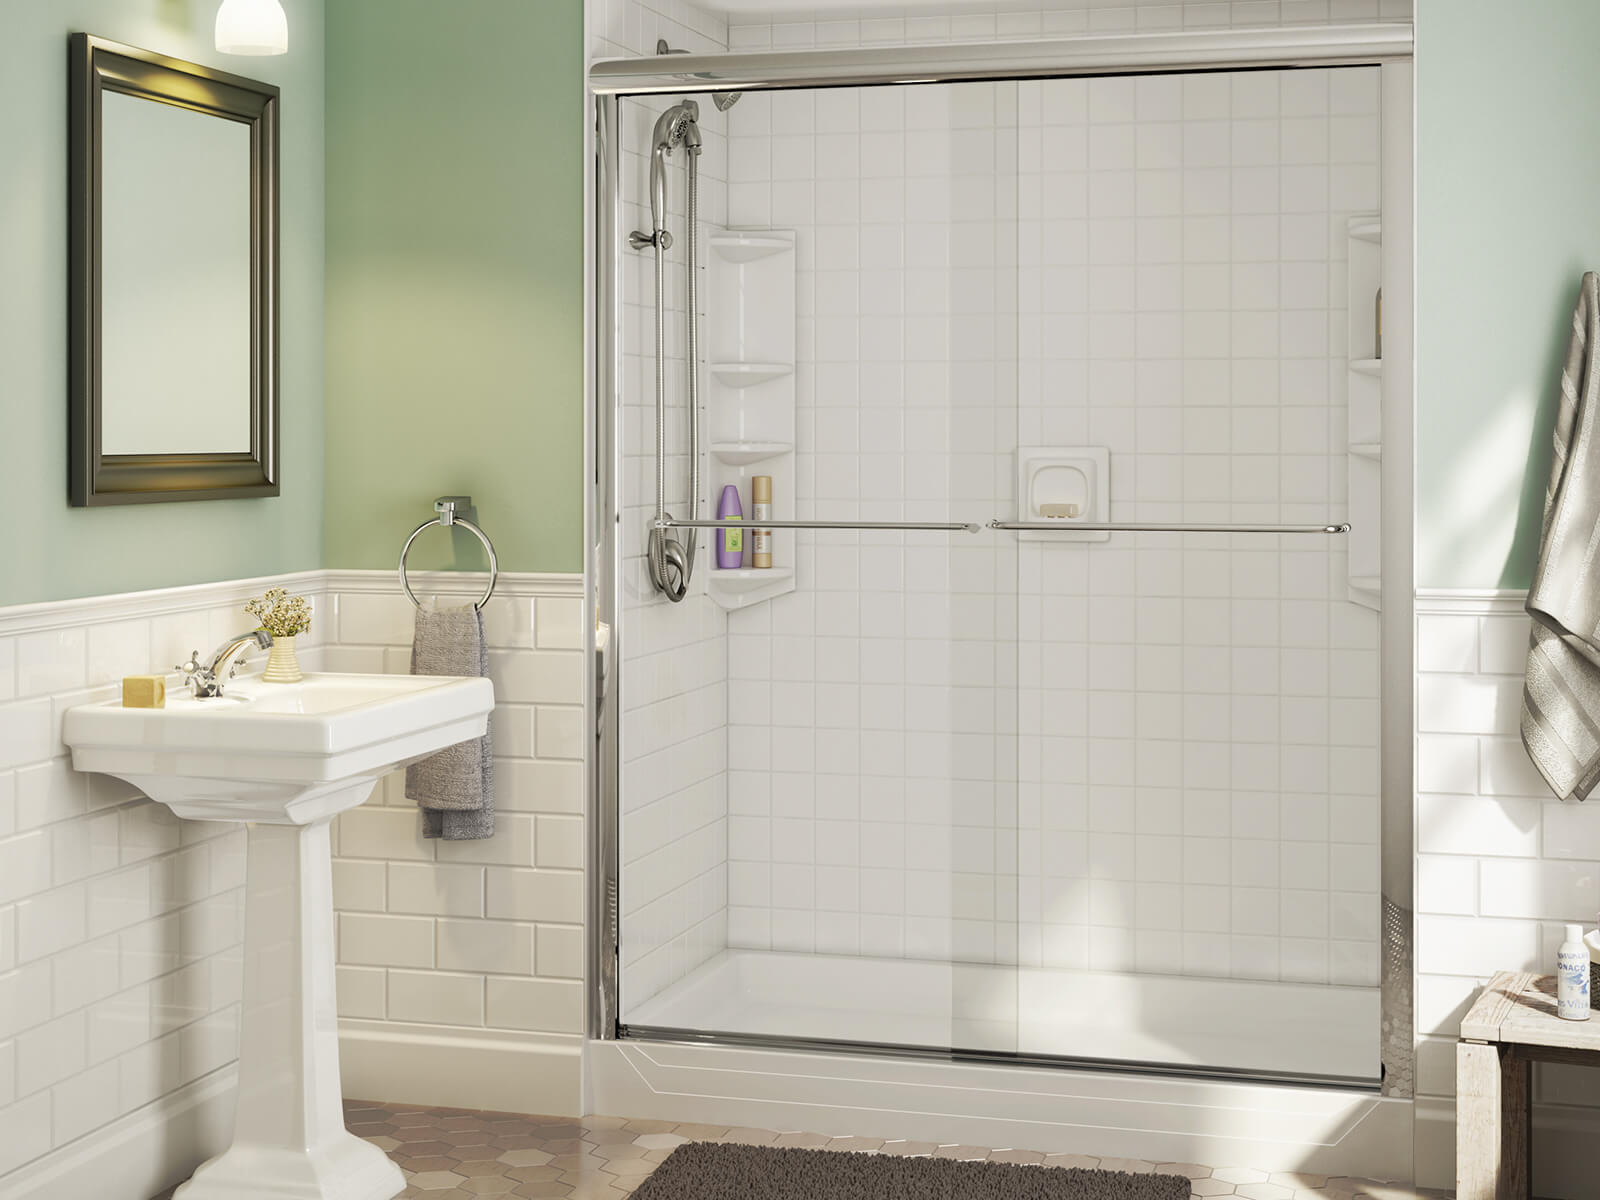
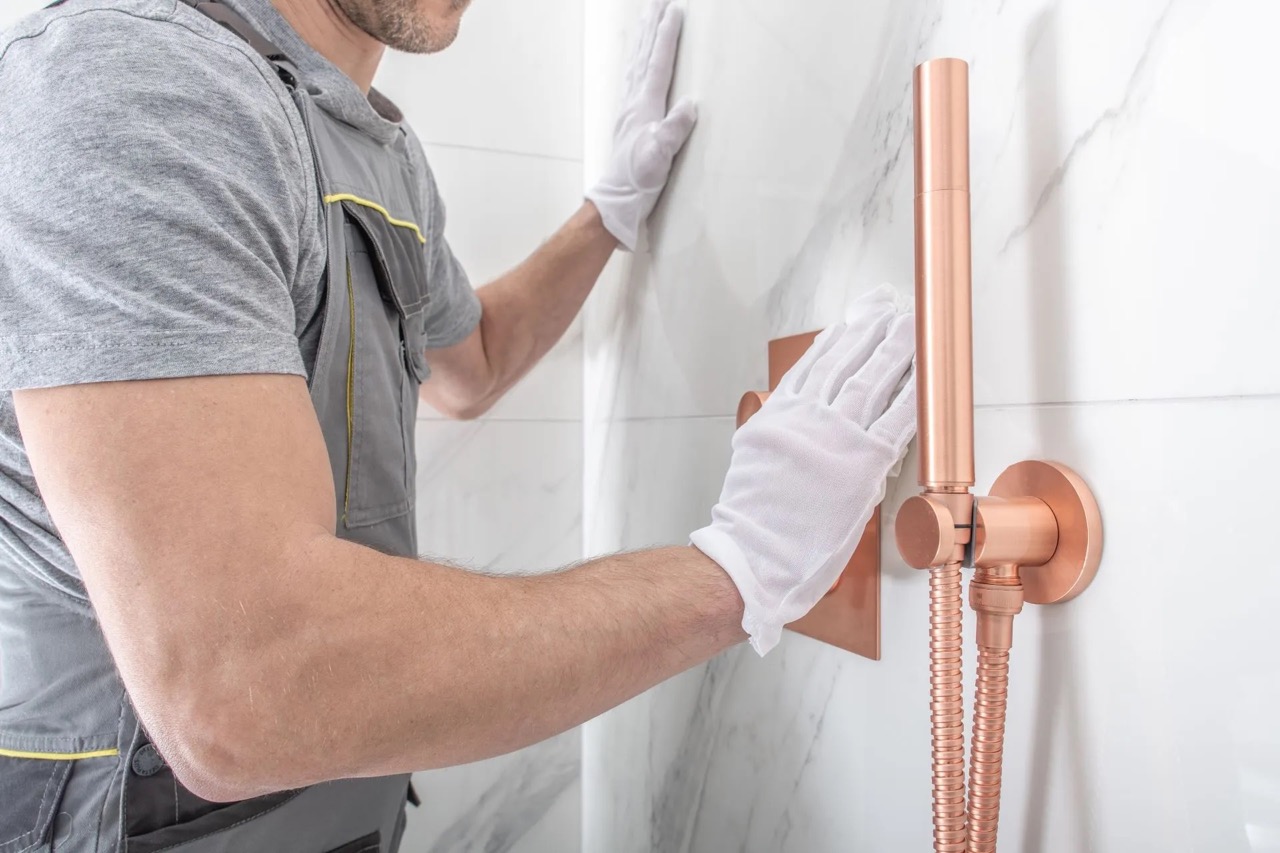
Complete the Surround: If you're installing a bathtub shower surround or tiling the walls, proceed to complete this step according to your design preferences and the manufacturer's recommendations. Whether you're applying adhesive-backed panels, tiling the walls, or installing a custom surround, follow the appropriate installation techniques to achieve a polished and cohesive look.
By following these steps and taking the time to ensure a precise and secure installation, you can successfully install the new bathtub shower, bringing your vision for a revitalized bathroom to fruition. With the components in place and the surrounding areas sealed and finished, the stage is set for enjoying a rejuvenated and functional bathing space.
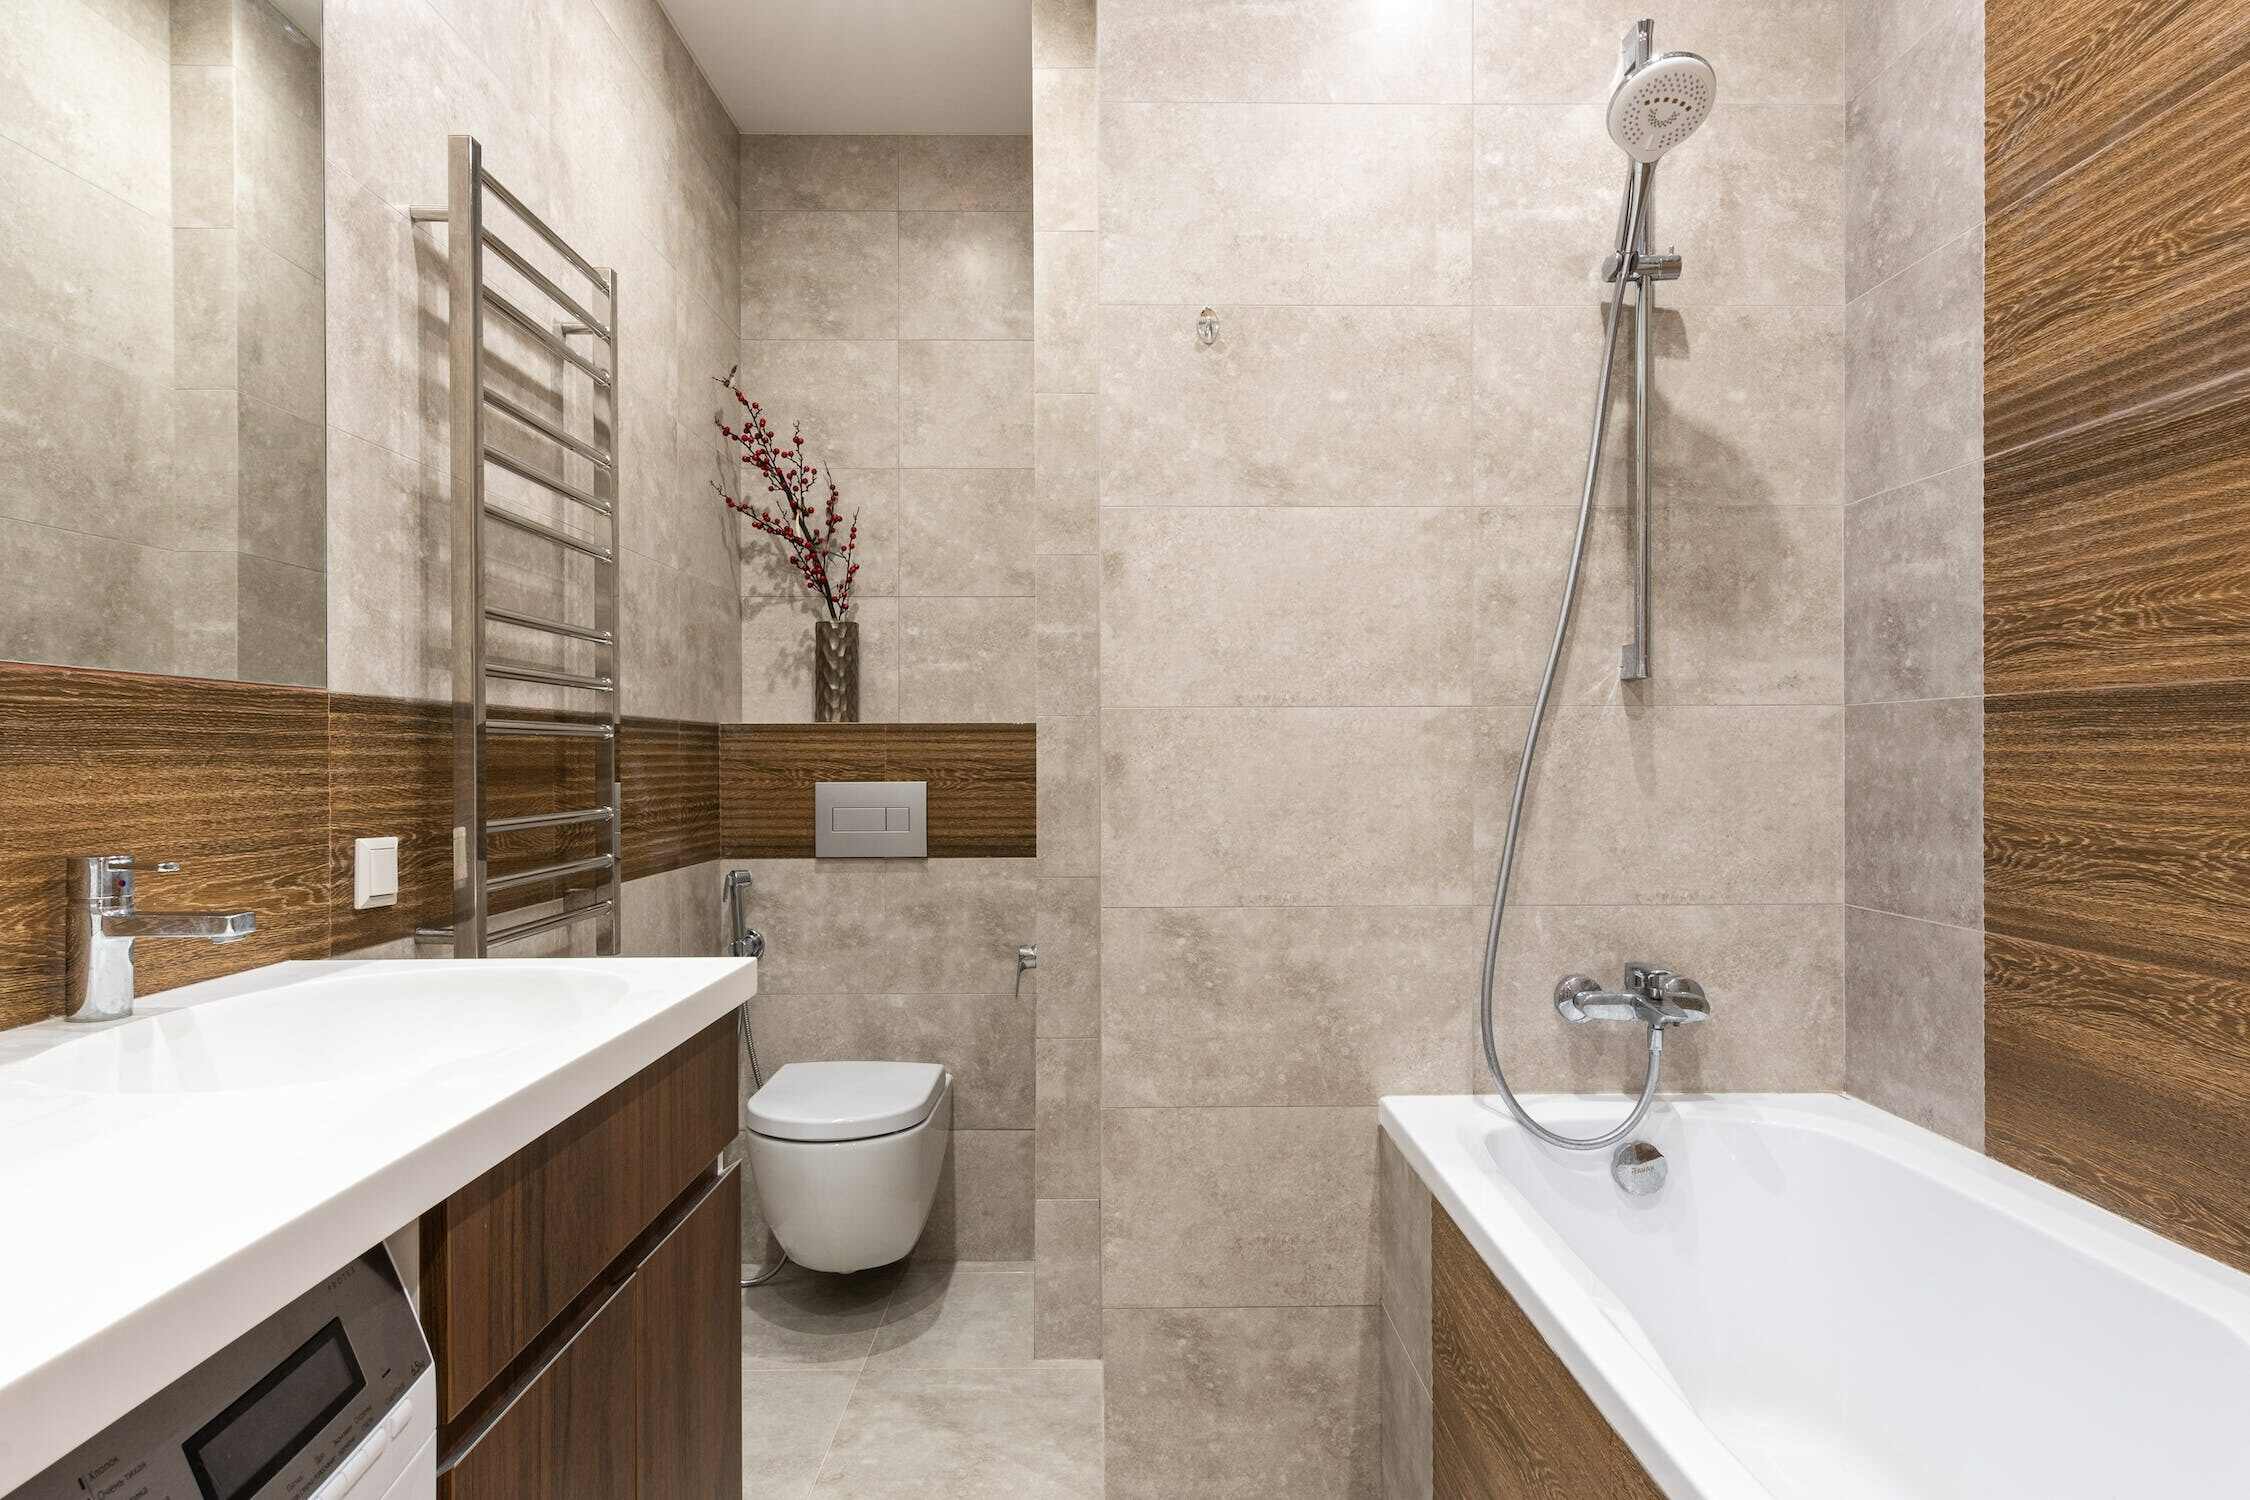
Step 4: Seal and Finish
Sealing and finishing the newly installed bathtub shower is a critical step that ensures the longevity, functionality, and visual appeal of the bathing space. This phase involves meticulous attention to detail and the application of appropriate materials to create a watertight and polished enclosure. By following best practices and utilizing high-quality sealants and finishing touches, you can elevate the overall look and performance of the new bathtub shower.
Read more: How To Shower In A Bathtub?
Seal the Joints and Seams
The first aspect of sealing and finishing involves addressing the joints and seams where the bathtub or shower base meets the surrounding walls. Using a high-quality silicone caulk that is specifically designed for wet environments, carefully apply a bead of caulk along the perimeter of the bathtub or shower base. This creates a watertight seal, preventing moisture from seeping into the underlying structure and causing damage over time. Pay close attention to the corners and edges, ensuring that the caulk is applied evenly and smoothly for a professional finish.
Caulk Around Fixtures
In addition to sealing the joints and seams, it's essential to apply caulk around the fixtures, such as the showerhead, faucet handles, and any other plumbing connections. This step not only enhances the visual appeal of the bathtub shower but also prevents water from infiltrating the gaps around the fixtures. Carefully apply a thin, uniform bead of caulk around the base of each fixture, smoothing it with a damp cloth or finger to create a clean and seamless finish.
Apply Finishing Touches
Once the sealing is complete, it's time to attend to the finishing touches that elevate the overall aesthetic of the bathtub shower. If you've installed a surround or tiled the walls, ensure that the edges and seams are neatly finished with matching trim pieces or grout. Pay attention to any exposed edges or transitions, applying the appropriate finishing materials to create a cohesive and polished look. Additionally, consider adding decorative elements, such as shelving, built-in niches, or accent tiles, to personalize the bathing space and enhance its functionality.
Test for Leaks
After sealing and finishing the bathtub shower, it's crucial to conduct a thorough inspection to ensure that the enclosure is watertight and free from leaks. Turn on the water supply and test the fixtures, paying close attention to the areas where sealing and finishing materials have been applied. Look for any signs of water seepage or moisture accumulation, addressing any issues promptly to maintain the integrity of the installation.
By meticulously sealing and finishing the bathtub shower, you not only enhance its visual appeal but also safeguard its structural integrity and functionality. This final step completes the installation process, leaving you with a rejuvenated and inviting bathing space that reflects your attention to detail and commitment to quality.
When replacing a bathtub shower, make sure to turn off the water supply before starting. Remove the old fixtures carefully to avoid damaging the surrounding walls. Consider hiring a professional if you’re not confident in your plumbing skills.
Read more: How To Add Shower To Bathtub
Conclusion
In conclusion, the process of replacing a bathtub shower is a rewarding endeavor that offers both practical and aesthetic benefits for your bathroom. By following the step-by-step guide outlined in this article, you have gained valuable insights into the meticulous process of removing the old shower, preparing the area, installing the new bathtub shower, and sealing and finishing the enclosure. Each phase of this project presents an opportunity to enhance the functionality, visual appeal, and structural integrity of your bathing space.
As you embark on this journey, it's important to approach the project with careful planning, attention to detail, and a commitment to quality. Whether you're a seasoned DIY enthusiast or a first-time home improver, the process of replacing a bathtub shower requires patience, precision, and a willingness to learn. By embracing these principles, you can achieve a professional-looking result that elevates the overall ambiance of your bathroom.
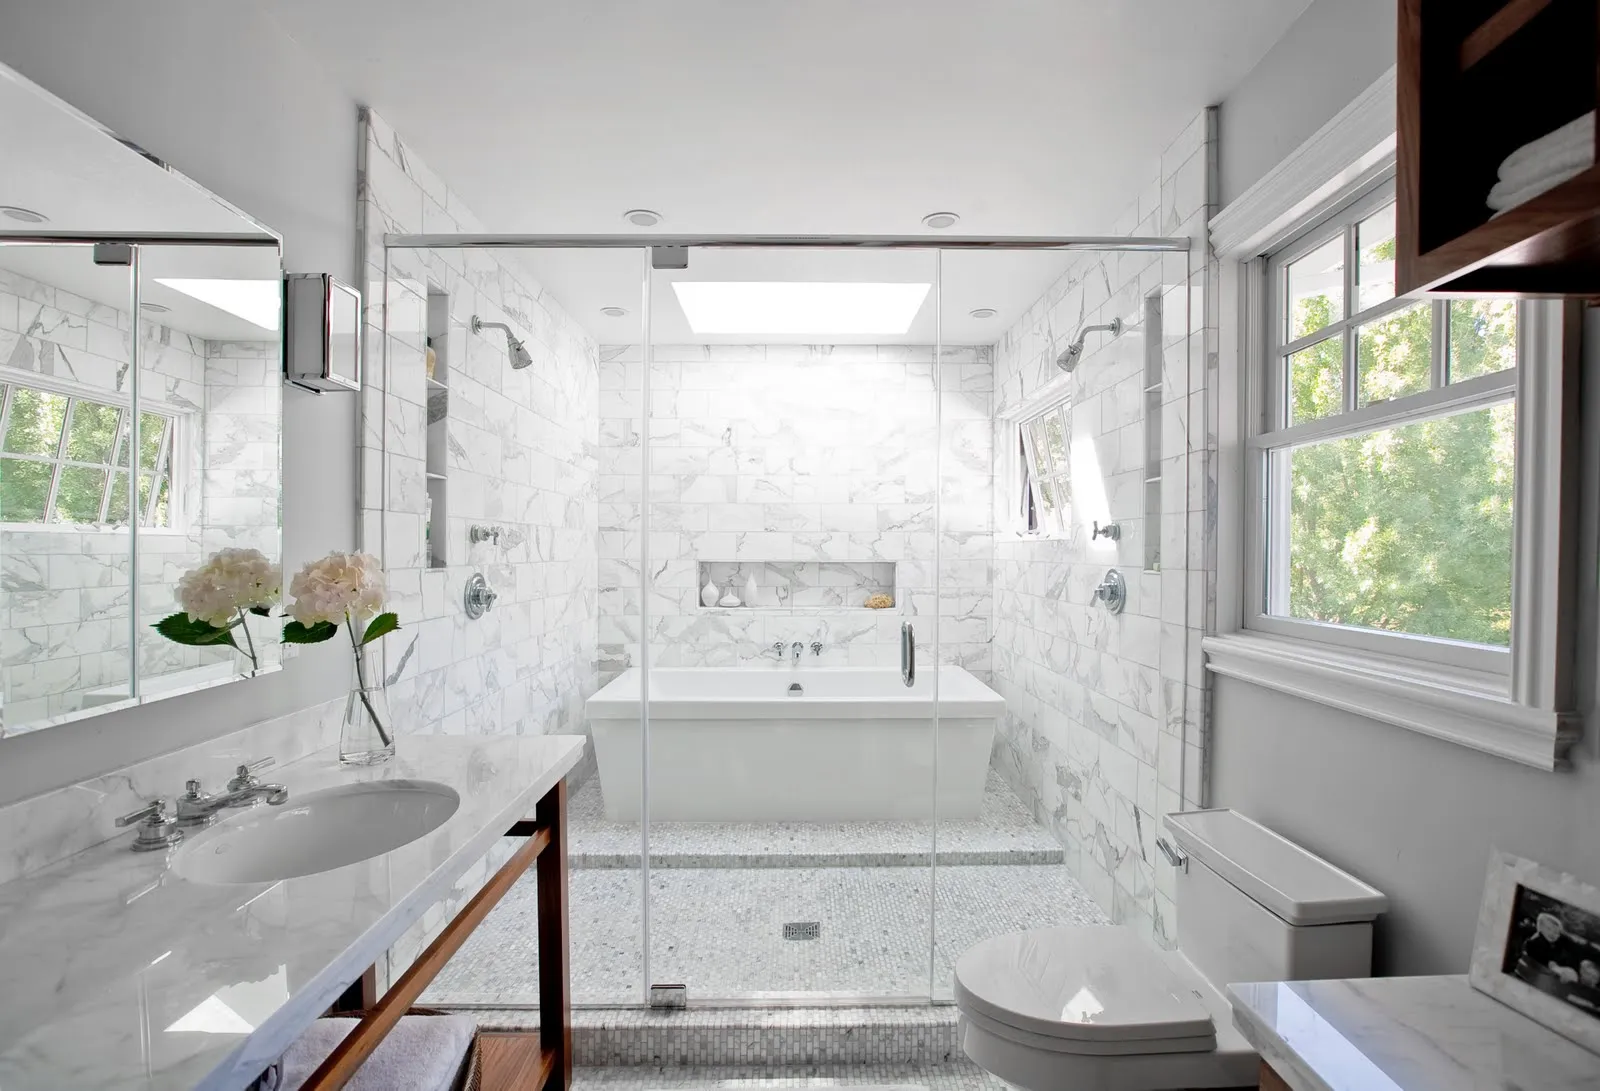
Furthermore, the act of replacing a bathtub shower allows you to customize your bathing space to align with your preferences and lifestyle. From selecting the perfect fixtures and materials to ensuring a watertight and durable installation, every decision you make contributes to the creation of a personalized and inviting environment. Whether you opt for a sleek and modern shower enclosure or a classic tub and surround combination, the possibilities for expressing your unique style and taste are endless.
Additionally, by replacing an outdated or malfunctioning bathtub shower, you have the opportunity to address underlying issues and prevent future problems. From repairing structural damage to upgrading plumbing fixtures, this project enables you to create a refreshed and reliable bathing space that enhances the overall value and comfort of your home.
In essence, the process of replacing a bathtub shower is a transformative journey that empowers you to revitalize and personalize one of the most essential areas of your home. By embracing the guidance provided in this comprehensive guide, you are well-equipped to embark on this project with confidence and achieve a result that reflects your vision for a rejuvenated and functional bathing space. So, roll up your sleeves, gather your tools, and embark on this exciting endeavor to create a bathroom that embodies your unique style and meets your practical needs.
Frequently Asked Questions about How To Replace A Bathtub Shower
Was this page helpful?
At Storables.com, we guarantee accurate and reliable information. Our content, validated by Expert Board Contributors, is crafted following stringent Editorial Policies. We're committed to providing you with well-researched, expert-backed insights for all your informational needs.


0 thoughts on “How To Replace A Bathtub Shower”