Home>Furniture & Design>Bathroom Accessories>How To Make A Bathtub Tray
Bathroom Accessories
How To Make A Bathtub Tray
Modified: October 18, 2024
Discover how to create a stylish and functional bathtub tray for your bathroom with our easy DIY guide. Elevate your bath time experience with this essential bathroom accessory. Ideal for relaxation and organization.
(Many of the links in this article redirect to a specific reviewed product. Your purchase of these products through affiliate links helps to generate commission for Storables.com, at no extra cost. Learn more)
Introduction
A bathtub tray, also known as a bath caddy, is a practical and stylish accessory that can elevate your bathing experience to new heights. This versatile piece not only provides a convenient surface for holding your essentials while you soak in the tub but also adds a touch of luxury to your bathroom. Whether you enjoy reading a book, sipping on a glass of wine, or indulging in a soothing spa-like experience, a well-crafted bathtub tray can enhance the ambiance and functionality of your bath time ritual.
Creating your own bathtub tray allows you to customize it to your specific needs and preferences, ensuring that it perfectly complements your bathing space. With just a few simple materials and a touch of creativity, you can craft a personalized bath caddy that reflects your style and serves as a practical solution for keeping your bath essentials within reach.
In this guide, we will walk you through the step-by-step process of making a bathtub tray, from measuring your bathtub to adding the finishing touches. Whether you are a seasoned DIY enthusiast or a novice crafter, this project offers an opportunity to unleash your creativity and enhance your bathroom with a handmade, functional piece. By following these instructions, you can embark on a rewarding DIY journey and ultimately enjoy the satisfaction of using a custom-made bathtub tray that enhances your relaxation and self-care routine.
Key Takeaways:
- Elevate your bathing experience with a personalized bathtub tray, crafted to fit your tub perfectly and reflect your unique style. Enjoy a luxurious soak with all your essentials within easy reach, adding a touch of creativity to your self-care routine.
- Transform a simple wooden plank into a functional and visually appealing bath caddy with handles, a protective finish, and optional accessories. Embrace DIY creativity to enhance your relaxation and infuse your bathroom with personalized charm.
Read more: How To Make A Tray Ceiling
Materials Needed
To embark on the journey of creating your own bathtub tray, you will need a selection of materials that are both practical and aesthetically pleasing. Gathering the following items will set the stage for a successful DIY project that culminates in a personalized bath caddy tailored to your preferences.
-
Wooden Plank: The foundation of your bathtub tray, a sturdy wooden plank will serve as the base for holding your bath essentials. Opt for a high-quality, durable wood that can withstand the humid environment of the bathroom.
-
Measuring Tape: Accurate measurements are crucial for ensuring that your bathtub tray fits securely across the width of your tub. A reliable measuring tape will be indispensable for this step.
-
Saw: A saw, such as a handsaw or a circular saw, will be essential for cutting the wooden plank to the desired size. This tool allows you to customize the tray to fit your specific bathtub dimensions.
-
Sandpaper: Smooth out any rough edges and create a polished finish on the wooden surface using sandpaper. This step is essential for both aesthetic appeal and safety.
-
Wood Finish or Sealant: Applying a protective finish or sealant to the wooden tray not only enhances its visual appeal but also guards against moisture damage, ensuring longevity.
-
Handles or Knobs: Adding handles to your bathtub tray not only serves a functional purpose but also contributes to its overall design. Choose handles or knobs that complement your bathroom decor and provide a comfortable grip.
-
Optional Accessories: Depending on your personal preferences, you may also consider incorporating additional elements such as a book stand, a wine glass holder, or a slot for holding a tablet or smartphone. These optional accessories can further customize your bathtub tray to suit your individual needs and enhance your bathing experience.
By gathering these materials, you will be well-equipped to commence the construction of your bathtub tray, setting the stage for a rewarding and personalized DIY project. With these essentials in hand, you can proceed to the next steps with confidence, knowing that you have everything you need to bring your vision to life.
Step 1: Measure Your Bathtub
Before diving into the construction of your custom bathtub tray, it is essential to begin with precise measurements of your bathtub. This foundational step ensures that the tray will fit securely and comfortably across the width of your tub, providing a stable surface for your bath-time essentials.
To start, gather your measuring tape and position yourself next to your bathtub. Begin by measuring the width of the tub from one end to the other, ensuring that the measuring tape rests securely against the inner edges. Take note of this measurement, as it will serve as the basis for the width of your bathtub tray.
Next, measure the length of the tub from the inner edge near the faucet to the inner edge at the opposite end. This measurement will determine the length of your bathtub tray, ensuring that it spans the entire width of the tub without leaving any gaps.
It is crucial to be meticulous and accurate when taking these measurements, as even a slight discrepancy can result in an ill-fitting tray. Double-check your measurements to confirm their accuracy before proceeding to the next step. Additionally, consider any specific features of your bathtub, such as curved edges or built-in fixtures, that may impact the design and placement of the tray.
By taking the time to measure your bathtub diligently, you lay the groundwork for a successful and tailored bathtub tray that seamlessly integrates with your bathing space. These precise measurements will guide the subsequent stages of the DIY project, allowing you to craft a functional and visually appealing tray that enhances your bathing experience.
With the measurements in hand, you are now ready to move on to the next step in creating your custom bathtub tray, bringing you one step closer to enjoying a personalized and practical addition to your bathroom.
Step 2: Cut the Wood to Size
With the precise measurements of your bathtub in hand, it's time to translate those dimensions into a perfectly sized wooden plank for your bathtub tray. Using a saw, carefully cut the wooden plank to match the width and length of your bathtub, ensuring a snug and secure fit. If you prefer rounded edges or a specific shape for your tray, this is the stage to shape the wood accordingly.
Begin by marking the measured dimensions on the wooden plank using a pencil or a marking tool. Double-check the markings to ensure accuracy before proceeding with the cutting process. When cutting the wood, it's crucial to maintain straight and even lines to achieve a clean and professional-looking result.
If you opt for a more intricate design, such as rounded corners or a contoured shape, take your time to execute the cuts precisely according to your desired specifications. Precision is key in this step, as it directly impacts the overall fit and aesthetic appeal of your bathtub tray.
As you work through the cutting process, prioritize safety by using appropriate protective gear and exercising caution with the saw. Whether you're using a handsaw or a circular saw, adhere to safety guidelines and work methodically to achieve the desired outcome.
Once the wood has been cut to the specified dimensions and shape, assess the fit by placing it across the width of your bathtub. Ensure that the tray sits securely and level, making any necessary adjustments to the size or shape as needed. This step is crucial for confirming that the wooden plank aligns perfectly with the dimensions of your bathtub, setting the stage for the subsequent stages of the DIY project.
By cutting the wood to the precise size and shape, you are one step closer to bringing your custom bathtub tray to life. With the foundation of the tray now established, you can proceed to the next stages of the project, each step bringing you closer to the fulfillment of your vision for a personalized and functional bath caddy.
When making a bathtub tray, be sure to measure the width of your bathtub accurately to ensure a snug fit. This will prevent the tray from sliding around while in use.
Step 3: Sand the Wood
After cutting the wooden plank to the desired size and shape, the next crucial step in creating your bathtub tray is to sand the wood to achieve a smooth and polished surface. Sanding serves multiple purposes, including refining the texture of the wood, removing any rough edges, and preparing the surface for the application of a protective finish or sealant.
Begin the sanding process by selecting a medium-grit sandpaper, typically in the range of 80 to 120 grit, to address any prominent imperfections and uneven surfaces on the wooden plank. Work methodically, applying even pressure as you move the sandpaper across the entire surface of the wood. This initial sanding stage aims to eliminate any rough spots and irregularities, creating a uniform and tactilely pleasing texture.
Following the initial sanding, transition to a fine-grit sandpaper, typically in the range of 180 to 220 grit, to further refine the surface of the wooden plank. This finer sandpaper smoothens out the wood, ensuring a sleek and polished finish that is both visually appealing and safe to handle. Pay particular attention to the edges and corners of the tray, as these areas may require additional care to achieve a seamless and comfortable feel.
As you sand the wood, periodically run your hand across the surface to assess its smoothness and detect any remaining rough patches. Continuously inspect the wood from different angles to identify any imperfections that require further attention. The goal is to achieve a velvety-smooth texture that enhances the overall aesthetic and functionality of the bathtub tray.
Once the sanding process is complete, wipe down the wooden plank with a clean, damp cloth to remove any residual dust and debris. This step prepares the wood for the application of a protective finish or sealant, ensuring that the surface is clean and ready to receive the next treatment.
By meticulously sanding the wood, you elevate the quality and visual appeal of your bathtub tray, setting the stage for the application of a protective finish that will enhance its durability and aesthetic charm. With the wood now smoothed to perfection, you are poised to proceed to the next stage of the DIY project, bringing you closer to the realization of your custom-made bath caddy.
Read more: How To Make A Bean Bag Lap Tray
Step 4: Add Handles
With the wooden plank meticulously crafted and prepared, the next pivotal step in creating your custom bathtub tray is to add handles that not only serve a functional purpose but also contribute to its overall aesthetic appeal. The handles not only facilitate easy transportation and placement of the tray but also enhance its visual appeal, adding a touch of sophistication to the final design.
When selecting handles for your bathtub tray, consider both practicality and style. Opt for handles or knobs that complement your bathroom decor and provide a comfortable grip for effortless maneuvering. Whether you prefer sleek and modern handles or rustic, vintage-inspired knobs, the choice of handles can significantly influence the overall look and feel of your bath caddy.
To begin the handle installation process, position the handles on the wooden plank, ensuring symmetrical placement and a balanced visual appeal. Mark the locations where the handles will be attached using a pencil or a marking tool, taking care to maintain uniformity and precision. Double-check the positioning to ensure that the handles align seamlessly and contribute to the tray's functionality.
Once the handle placements are marked, carefully drill pilot holes at the designated locations to accommodate the screws or bolts that will secure the handles to the wooden plank. Use a drill bit that matches the size of the screws or bolts to create clean and precise pilot holes, ensuring a secure and stable attachment for the handles.
With the pilot holes in place, affix the handles to the wooden plank using the appropriate screws or bolts, tightening them securely to guarantee a stable and reliable connection. As you install the handles, pay attention to their alignment and ensure that they are firmly attached, ready to withstand the demands of everyday use.
Upon completing the handle installation, assess the tray to ensure that the handles are securely fastened and contribute to the overall functionality and visual appeal of the bathtub tray. Test the handles by lifting and maneuvering the tray, confirming that they provide a comfortable and reliable grip for effortless transportation and placement.
By adding handles to your bathtub tray, you not only enhance its practicality but also infuse it with a personalized touch that reflects your unique style and preferences. With the handles in place, the bathtub tray evolves into a functional and visually appealing accessory that is ready to elevate your bathing experience to new heights.
With the handles seamlessly integrated into the design, you are now prepared to move on to the next stage of the DIY project, bringing you closer to the fulfillment of your vision for a personalized and practical bath caddy.
Step 5: Apply Finish
Applying a finish to your custom bathtub tray serves as the crowning touch, enhancing its visual allure and fortifying the wood against moisture and wear. The finish not only imbues the tray with a lustrous sheen but also safeguards it from the humid bathroom environment, ensuring longevity and resilience.
Before commencing the finishing process, consider the aesthetic effect you wish to achieve. Whether you prefer a natural, matte appearance that accentuates the wood's grain or a glossy, polished finish that exudes sophistication, the choice of finish can significantly influence the overall look of the tray.
Select a high-quality wood finish or sealant that aligns with your desired aesthetic and provides robust protection against moisture. Prior to application, ensure that the wooden plank is clean and free of any dust or debris, as a pristine surface is essential for the finish to adhere effectively.
Using a brush or cloth applicator, apply the chosen finish evenly across the entire surface of the wooden tray, working with the grain to achieve a seamless and uniform coating. Take care to cover all exposed areas, including the edges and corners, to ensure comprehensive protection and a consistent appearance.
After the initial application, allow the finish to dry according to the manufacturer's instructions. Depending on the type of finish used, this may involve a single coat or multiple layers to achieve the desired level of protection and sheen. Exercise patience during the drying process, allowing ample time for the finish to cure and bond with the wood effectively.
Once the finish has dried, assess the tray to ensure that the coating is uniform and free of imperfections. If necessary, lightly sand the surface between coats to achieve a smooth and flawless finish. Multiple coats may be applied to enhance the durability and visual appeal of the tray, with each layer contributing to its overall resilience and aesthetic charm.
Upon completing the finishing process, the wooden bathtub tray is transformed into a stunning and durable accessory that is ready to grace your bathing space. The lustrous finish not only accentuates the natural beauty of the wood but also fortifies it against the rigors of daily use, ensuring that your custom-made bath caddy remains a timeless and functional addition to your bathroom.
With the finish expertly applied, you are now prepared to savor the final stage of the DIY project, bringing you closer to the realization of your vision for a personalized and practical bath caddy.
Step 6: Enjoy Your New Bathtub Tray
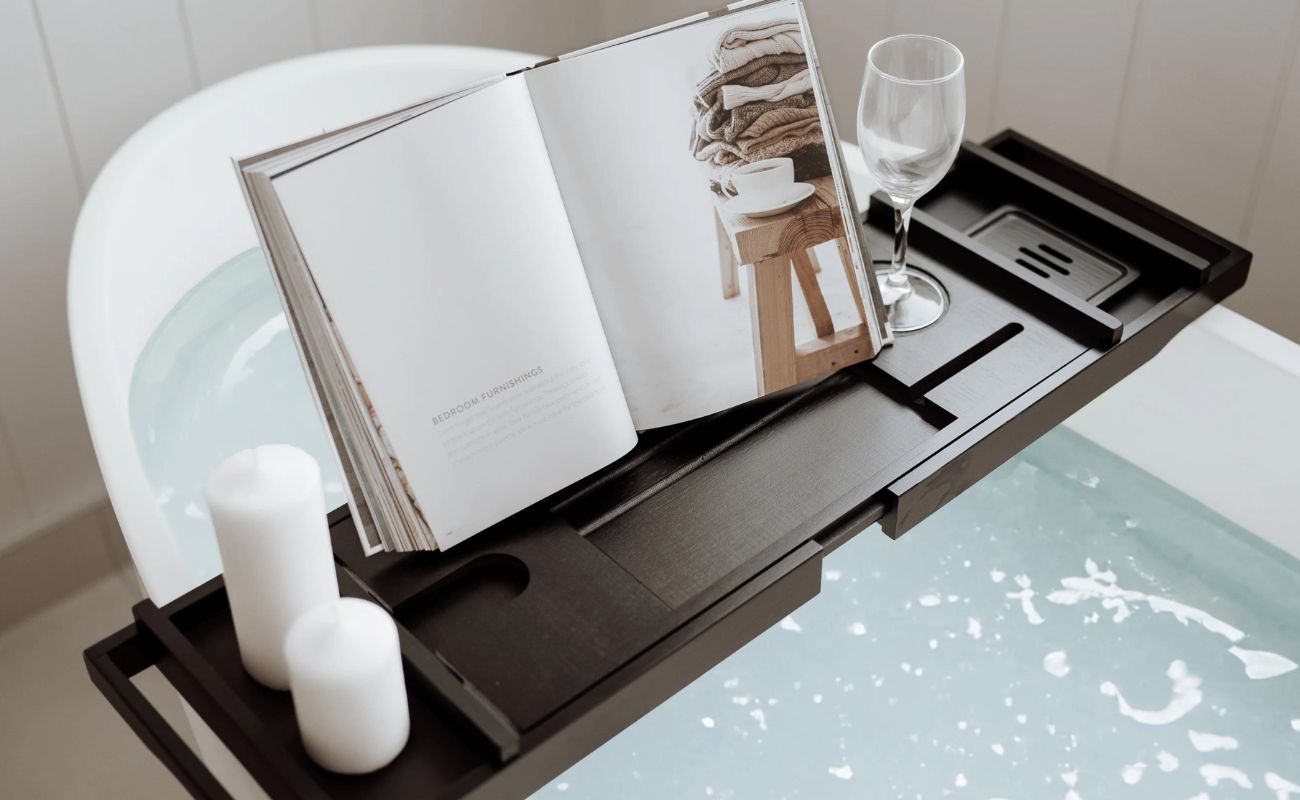
With the completion of your custom bathtub tray, the stage is set for you to revel in the delightful experience it brings to your daily bathing ritual. As you place the newly crafted tray across the width of your bathtub, a sense of satisfaction and accomplishment washes over you, knowing that you have created a practical and visually appealing accessory tailored to your preferences.
As you prepare for a relaxing soak, take a moment to appreciate the seamless integration of the tray with your bathing space. The snug fit and polished finish exude a sense of refinement, elevating the ambiance of your bathroom and setting the tone for a tranquil and indulgent bathing experience.
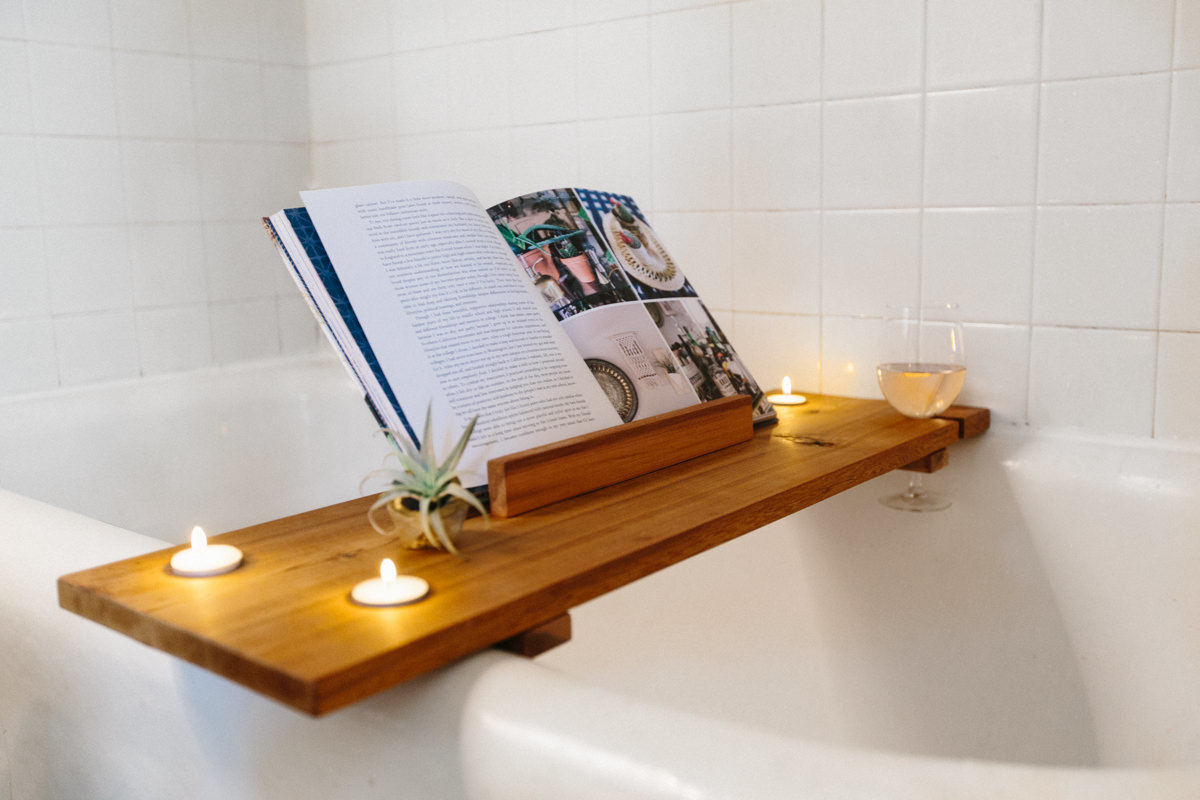
With your favorite book resting securely on the tray, a fragrant candle casting a soft glow, and a glass of your preferred beverage within easy reach, you settle into the warm embrace of the bath. The sturdy wooden surface provides a stable platform for your essentials, allowing you to unwind and immerse yourself in moments of pure relaxation.
As you luxuriate in the soothing waters, the convenience of having your bath-time necessities at arm's length becomes apparent. The thoughtfully added handles offer effortless maneuverability, allowing you to position the tray exactly where you need it without disrupting your tranquil repose.
The protective finish applied to the wood not only enhances the tray's visual allure but also instills confidence in its durability. You can immerse yourself in the bath, knowing that your custom-made tray is resilient against the humid environment of the bathroom, ensuring that it remains a steadfast companion for many indulgent baths to come.
The personalized touches, such as the carefully selected handles and the precise dimensions tailored to your bathtub, reflect your unique style and preferences. Every aspect of the tray, from its design to its functionality, embodies a sense of craftsmanship and individuality, enriching your bathing experience with a touch of personal flair.
As you emerge from the bath, refreshed and rejuvenated, the presence of the custom bathtub tray lingers as a testament to your creativity and ingenuity. Its seamless integration into your bathing routine has transformed a simple accessory into an indispensable part of your self-care regimen, enhancing the comfort and enjoyment of your daily moments of relaxation.
In the tranquil aftermath of your bath, the custom bathtub tray stands as a tangible symbol of your DIY prowess and your commitment to infusing your living spaces with personalized charm. It serves as a reminder that with a touch of creativity and craftsmanship, you can elevate the functionality and aesthetic appeal of everyday items, transforming them into cherished elements of your home.
As you bask in the afterglow of your bath, the custom bathtub tray stands as a testament to your ability to infuse practical items with a touch of personalized charm, transforming them into cherished elements of your home.
Frequently Asked Questions about How To Make A Bathtub Tray
Was this page helpful?
At Storables.com, we guarantee accurate and reliable information. Our content, validated by Expert Board Contributors, is crafted following stringent Editorial Policies. We're committed to providing you with well-researched, expert-backed insights for all your informational needs.


0 thoughts on “How To Make A Bathtub Tray”