Articles
How To Make A Tray Ceiling
Modified: August 27, 2024
Learn how to make a stunning tray ceiling with our informative articles. Enhance the beauty and elegance of your space with this DIY project.
(Many of the links in this article redirect to a specific reviewed product. Your purchase of these products through affiliate links helps to generate commission for Storables.com, at no extra cost. Learn more)
Introduction
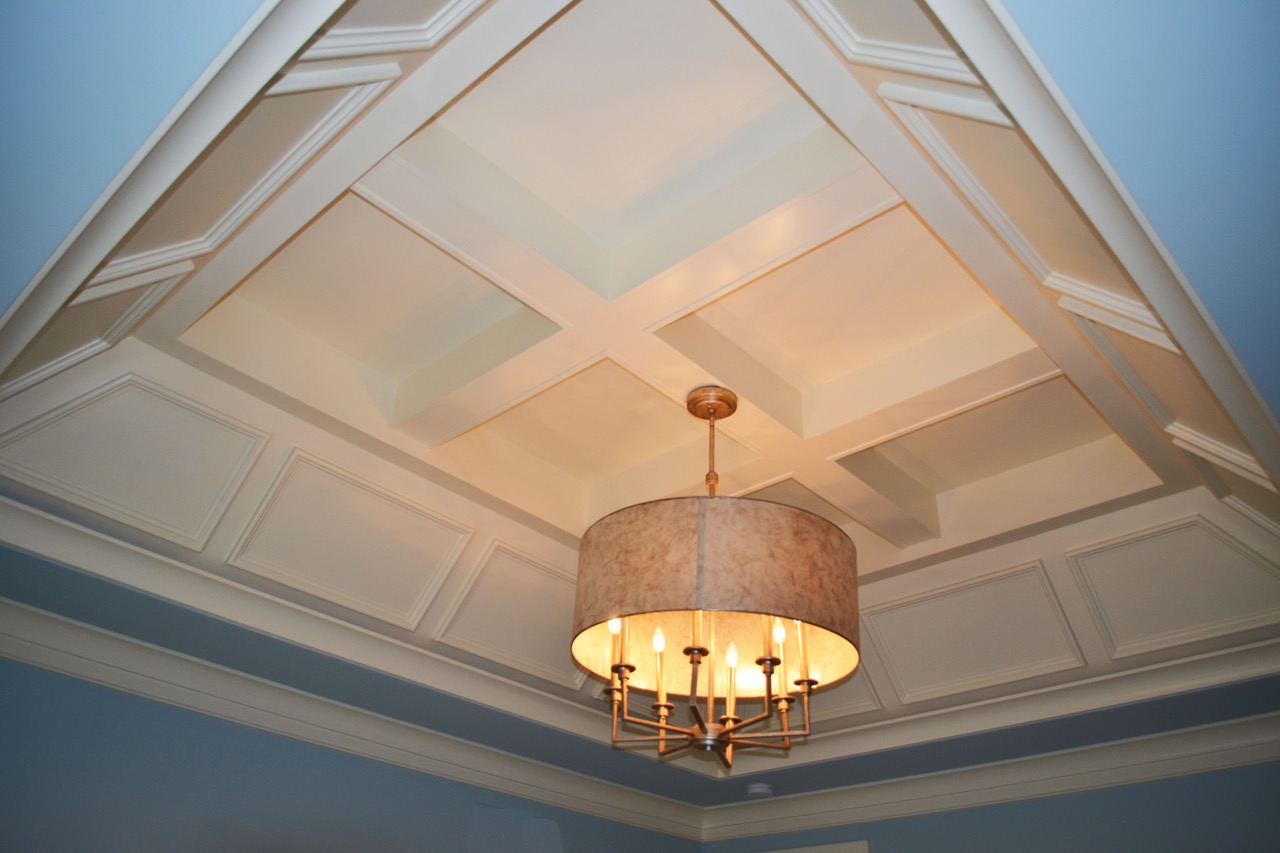
A tray ceiling is a unique architectural feature that adds depth and elegance to any room. It is often referred to as an inverted or recessed ceiling because it creates the illusion of an elevated or “tray-like” surface. This type of ceiling can be found in many upscale homes and commercial spaces, as it adds a touch of sophistication and visual interest.
Tray ceilings are popular for various reasons. They can make a room appear larger, create a sense of height, and provide an opportunity to incorporate decorative elements such as lighting fixtures or molding. Whether you are looking to upgrade the aesthetics of your living room, bedroom, or dining area, installing a tray ceiling can instantly transform the look and feel of your space.
In this article, we will discuss the benefits of a tray ceiling, the tools and materials needed for the installation process, as well as a step-by-step guide on how to make a tray ceiling yourself. So, gather your tools and let’s get started on this exciting and rewarding project!
Key Takeaways:
- Elevate your space with a stunning tray ceiling, adding depth, sophistication, and visual interest to any room. Follow the step-by-step guide for a rewarding and transformative DIY project.
- Enjoy the benefits of a tray ceiling, from enhanced visual appeal to the illusion of height, while adding value and elegance to your property. Gather your tools and embark on this exciting journey!
Read more: How To Paint A Tray Ceiling
What Is a Tray Ceiling?
A tray ceiling, also known as a recessed or inverted ceiling, is a decorative architectural feature that adds depth and visual interest to a room. It is characterized by a central portion that is elevated or recessed, creating a tray-like appearance. This unique design element can be found in various styles and can greatly enhance the overall aesthetics of a space.
Tray ceilings are typically constructed with multiple layers, including a flat, horizontal surface and one or more recessed or elevated levels. The central portion of the ceiling is usually at a higher elevation compared to the surrounding edges, creating a recessed effect. The size and shape of the tray can vary, ranging from a simple rectangular design to more intricate and elaborate patterns.
One of the defining features of a tray ceiling is the use of different materials and finishes to distinguish the various levels. The recessed or elevated portion is often adorned with decorative moldings, lighting fixtures, or other architectural details to accentuate its unique design. This allows for creative opportunities to add personality and style to a space.
Tray ceilings can be incorporated into any room in a house, including bedrooms, living rooms, dining areas, and even bathrooms. They are particularly popular in spaces with high ceilings as they add visual interest and break up the monotony of a large, open area. Additionally, tray ceilings can make a room appear larger by giving the illusion of added height and depth.
While tray ceilings are commonly found in more upscale or luxurious homes, they can be adapted to fit any design aesthetic. Whether you prefer a traditional, contemporary, or minimalist style, a tray ceiling can add a touch of elegance and sophistication to your space.
Now that you have a better understanding of what a tray ceiling is, let’s explore some of the benefits it can offer in terms of aesthetics and functionality.
Benefits of a Tray Ceiling
A tray ceiling offers numerous benefits, both in terms of aesthetics and functionality. Let’s explore some of the key advantages of incorporating a tray ceiling into your space:
- Enhanced Visual Appeal: One of the most noticeable advantages of a tray ceiling is the enhanced visual appeal it brings to a room. The recessed or elevated design creates a sense of depth and adds architectural interest to an otherwise plain ceiling. It can become a focal point, drawing the eyes upward and creating a feeling of grandeur.
- Illusion of Height: Tray ceilings can make a room feel more spacious by giving the illusion of added height. The elevated portion of the ceiling creates a sense of verticality, making the room appear larger and more open.
- Opportunity for Design Customization: Tray ceilings offer endless design possibilities, allowing you to customize the look to suit your personal style. From simple recessed designs to intricate patterns and decorative moldings, you can add architectural details that reflect your taste and elevate the overall ambiance of the room.
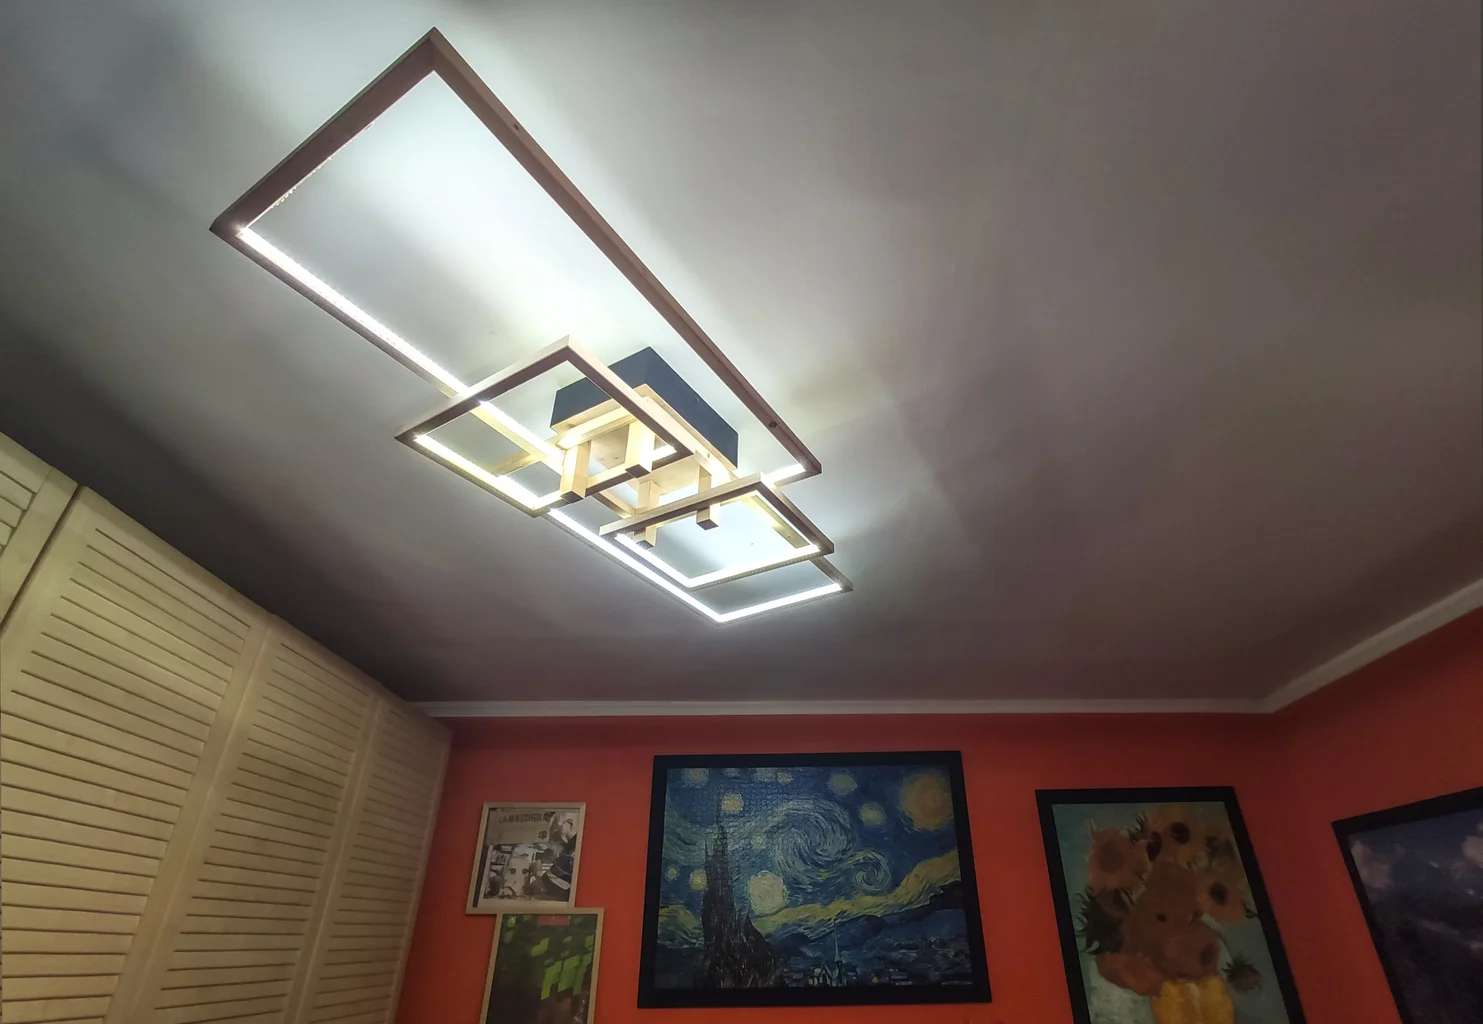
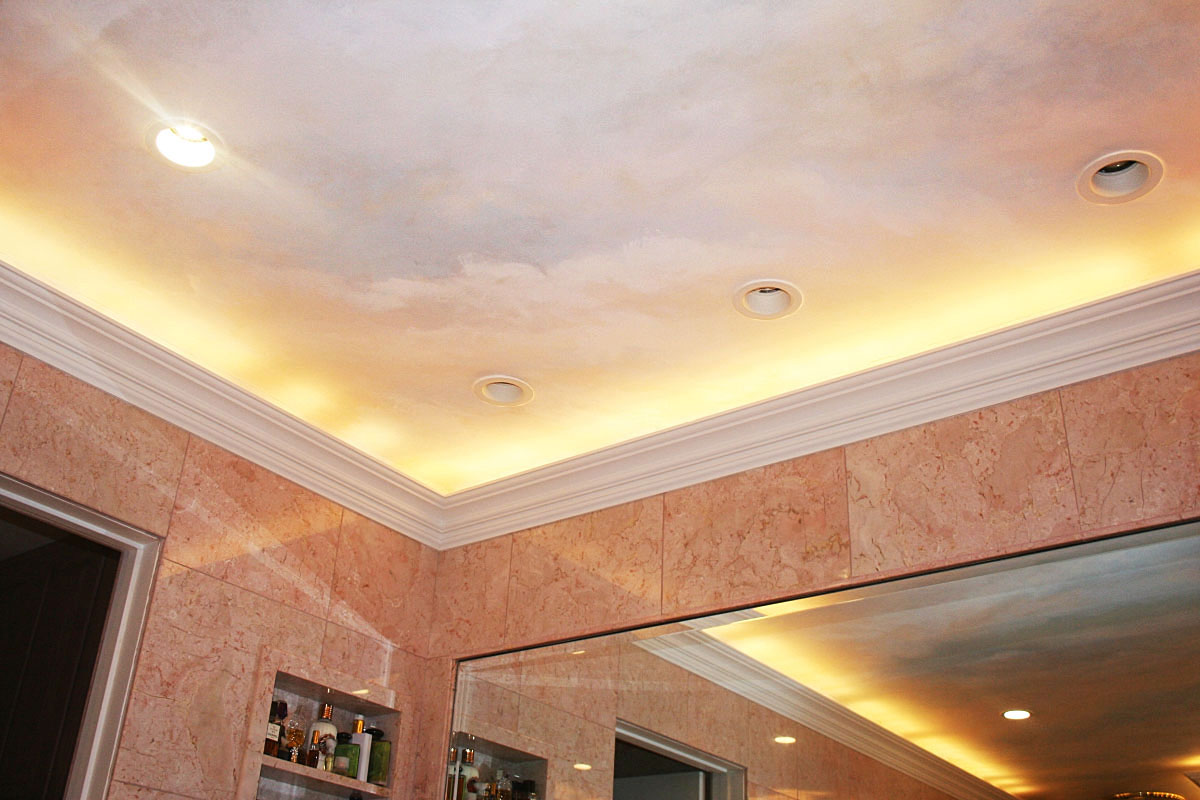
- Accentuate Lighting: The recessed or elevated levels of a tray ceiling provide the perfect opportunity to incorporate various lighting options. You can install recessed lights, chandeliers, pendant lights, or even rope lights to create a dramatic or cozy ambiance. These lighting fixtures can be strategically placed to highlight specific areas of the room or create a soft, indirect glow.
- No Sacrifice in Ceiling Height: Unlike other ceiling designs such as coffered or cathedral ceilings, a tray ceiling allows you to maintain the standard ceiling height. This means you can still have sufficient headroom while adding architectural interest and visual appeal to the space.
- Improved Acoustics: Depending on the materials used in the construction of a tray ceiling, it can help improve the acoustics of a room. The recessed or elevated areas can act as sound-absorbing panels, reducing echo and improving the overall sound quality in the space.
- Increases Property Value: A well-designed tray ceiling can significantly increase the value of your property. Potential buyers are often drawn to unique architectural features, and a tray ceiling can give your home a competitive edge in the real estate market.
These are just some of the benefits you can enjoy by incorporating a tray ceiling into your space. From its aesthetic appeal to functional advantages, a tray ceiling is a worthwhile investment that can transform the look and feel of any room.
Tools and Materials Needed
Before you begin the process of installing a tray ceiling, it’s important to gather all the necessary tools and materials. Here’s a list of what you’ll need for this project:
Tools:
- Measuring tape
- Pencil
- Level
- Circular saw or jigsaw
- Miter saw
- Nail gun or hammer
- Screwdriver
- Drywall saw or utility knife
- Hacksaw or reciprocating saw (if adding lighting)
- Paintbrush or roller
- Stud finder
Read more: How To Make A Bathtub Tray
Materials:
- Drywall sheets
- 2×4 lumber or MDF board
- Construction adhesive
- Screws
- Drywall tape
- Joint compound
- Sanding block or sandpaper
- Primer
- Paint
- Decorative molding
- Lighting fixtures (optional)
- Electrical wiring and connectors (if adding lighting)
It’s important to ensure that you have all the necessary tools and materials before starting the project to minimize any delays or interruptions.
Additionally, it’s crucial to prioritize safety during any construction project. Make sure to wear appropriate safety gear such as goggles, gloves, and a dust mask, and follow the manufacturer’s instructions for all tools and materials.
Now that you have all the tools and materials ready, let’s move on to the step-by-step process of installing a tray ceiling.
Step 1: Measure and Plan
Before you begin the installation process, it’s important to accurately measure the dimensions of the room and plan the design of your tray ceiling. Here’s a step-by-step guide to help you with this essential first step:
- Measure the ceiling: Use a measuring tape to measure the length and width of the room. Note down the dimensions to ensure accurate planning.
- Determine the size and shape of the tray: Consider the overall aesthetics of the room and the available space. Decide on the size and shape of the central portion of the tray ceiling. Common shapes include rectangular, square, oval, or even custom designs.
- Choose the height of the tray: Determine how high you want the central portion of the tray ceiling to be. This will depend on factors such as the ceiling height and the visual impact you want to achieve. Consider the proportions of the room and the size of any lighting fixtures you plan to incorporate.
- Plan the lighting: Decide on the placement and type of lighting you want in your tray ceiling. Whether it’s recessed lights, pendant lights, or a chandelier, map out the locations and the wirings needed. Ensure proper electrical planning and consult a professional if needed.
- Consider the materials and finishes: Select the materials and finishes you want to use for your tray ceiling, such as drywall for the main surface and decorative molding for added depth and visual interest. Take into account the existing decor and style of the room to create a cohesive look.
- Sketch the design: Use a pencil and paper, or even better, a digital design tool, to sketch out the tray ceiling design. This will help you visualize the end result and ensure clear communication with any contractors or professionals involved in the project.
By taking the time to measure and plan, you can ensure a smooth installation process and avoid any costly mistakes or design regrets. Once you have a well-thought-out plan in place, you can move on to gathering the materials and tools needed for the installation.
Next, we will explore the materials needed for the tray ceiling installation process.
Step 2: Gather Materials
Once you have measured and planned the design for your tray ceiling, the next step is to gather all the materials you will need for the installation. Here’s a list of materials commonly used for tray ceiling projects:
- Drywall Sheets: Purchase enough drywall sheets to cover the entire ceiling area and create the desired tray shape. Measure the dimensions of the central portion and the surrounding edges to determine the required amount of drywall.
- 2×4 Lumber or MDF Board: You will need this material to create the frame for the tray ceiling. The lumber or MDF board will provide support and structure to the ceiling. Measure and cut the pieces according to your design plan.
- Construction Adhesive: Use construction adhesive to secure the drywall sheets to the frame. This adhesive will ensure a strong bond and prevent any sagging or loosening over time.
- Screws: Choose screws that are suitable for attaching the drywall sheets to the frame. Make sure they are long enough to securely fasten the drywall without penetrating too deep.
- Drywall Tape: Apply drywall tape to cover the seams between the drywall sheets, creating a smooth and seamless surface. This tape will help prevent cracks or gaps from appearing over time.
- Joint Compound: Use joint compound or drywall mud to cover the drywall tape and fill any gaps or imperfections in the surface. This compound will create a smooth and even finish for painting.
- Sanding Block or Sandpaper: After applying the joint compound, use a sanding block or sandpaper to smooth out any rough areas and create a uniform surface. This will make the painting process easier and ensure a professional-looking finish.
- Primer: Apply a primer to the drywall surface before painting. This will help the paint to adhere better and provide a more even and long-lasting finish.
- Paint: Select your desired paint color and finish for the tray ceiling. Consider the overall color scheme of the room and choose a paint that complements the existing decor.
- Decorative Molding: If you want to add additional visual interest to your tray ceiling, consider purchasing decorative molding. Choose a style and design that matches the overall aesthetic of the room.
- Lighting Fixtures (Optional): If you plan to install lighting fixtures in your tray ceiling, gather the required fixtures along with any necessary electrical wiring and connectors.
Make sure to double-check your measurements and accurately determine the needed quantities of each material before making your purchases. It’s always a good idea to buy extra materials to account for any mistakes or unexpected needs during the installation process.
Now that you have gathered all the necessary materials, you are ready to move on to the next step: preparing the ceiling for the tray installation.
Step 3: Prepare the Ceiling
Before you can start installing the tray ceiling, it’s important to properly prepare the existing ceiling. This involves removing any existing fixtures, smoothing out any imperfections, and ensuring a clean and stable surface. Follow these steps to prepare the ceiling for your tray installation:
- Clear the area: Remove any furniture, light fixtures, or other items from the room to create a clear and open workspace. Cover the floor and any remaining furniture with drop cloths or plastic sheets to protect them from dust and debris.
- Turn off the power: If you are working with electrical fixtures, remember to turn off the power supply to avoid any potential electrical hazards. Safety should always be a priority when working with electrical components.
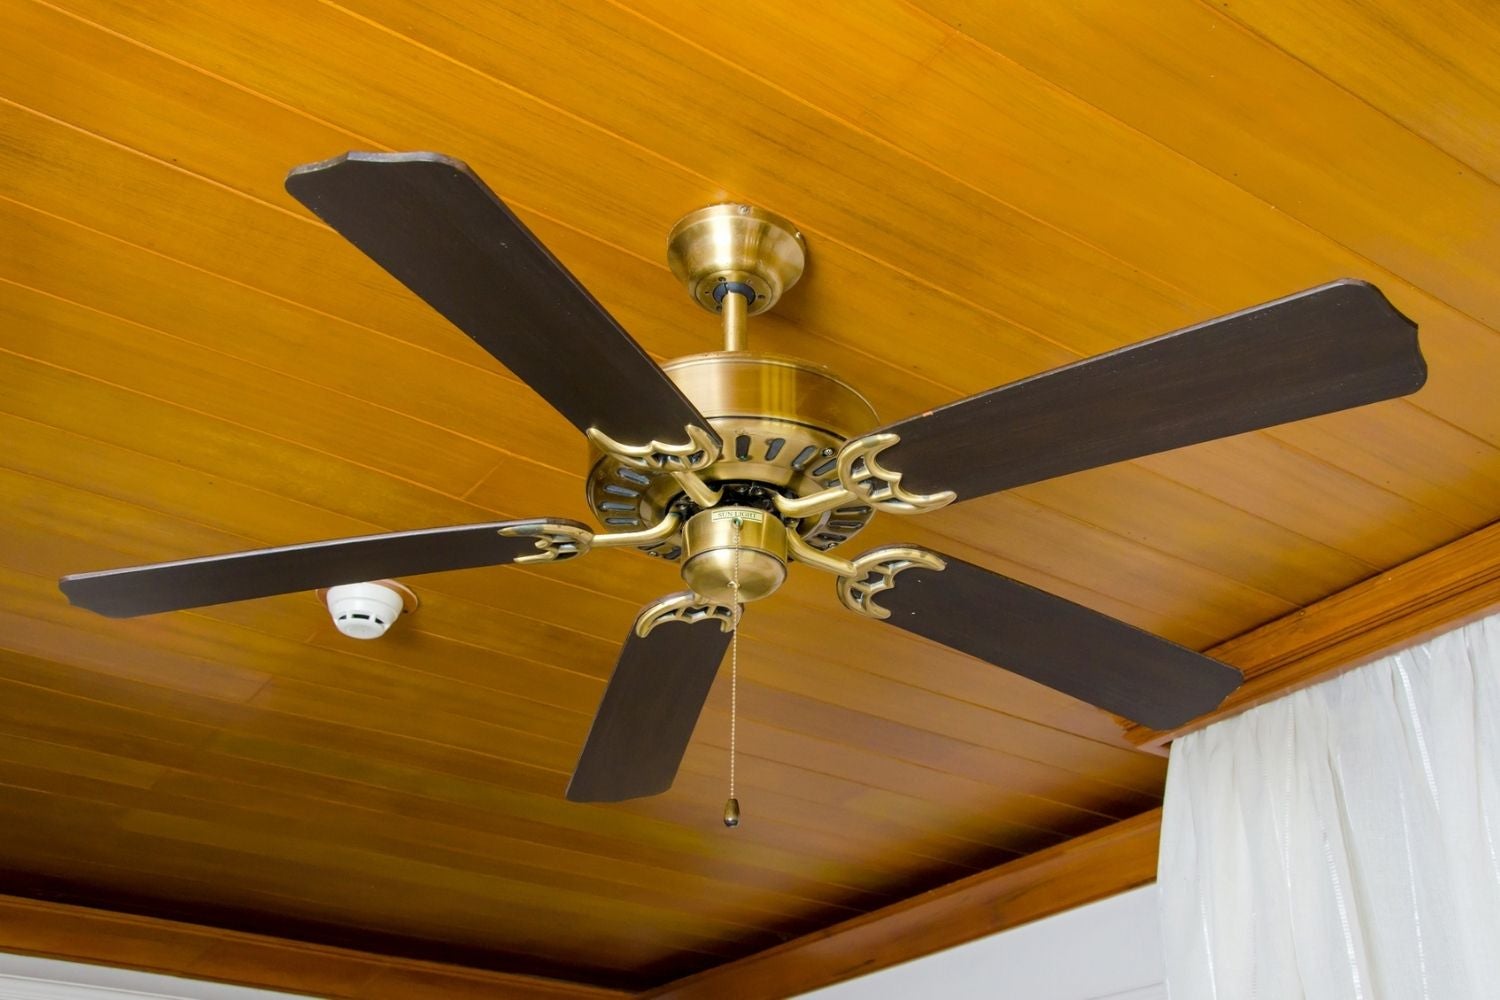
- Remove existing fixtures: Take down any light fixtures, ceiling fans, or other items attached to the existing ceiling. Carefully disconnect any electrical connections and remove the fixtures from the ceiling. Set the fixtures aside for reinstalling or replacement later.
- Inspect for damages: Thoroughly inspect the ceiling for any damages, cracks, or water stains. Repair any issues as necessary before proceeding with the tray ceiling installation. Patch up any holes or cracks using spackling compound or drywall mud and allow it to dry completely.
- Smooth out the surface: Use a sanding block or sandpaper to smooth out any rough areas on the ceiling. This will help create a seamless transition between the existing ceiling and the tray ceiling. Wipe away any dust or debris with a clean cloth.
- Locate and mark the ceiling joists: Use a stud finder to locate and mark the positions of the ceiling joists. This will help ensure that the frame for the tray ceiling is securely attached and provide additional stability.
By properly preparing the ceiling before installation, you will ensure a clean and stable foundation for your tray ceiling. This step is crucial in achieving a professional and long-lasting result. Once the ceiling is prepared, you can move on to the next step: installing the frame for the tray.
When framing a tray ceiling, be sure to measure and mark the desired height on the walls before starting. This will ensure a consistent and accurate result.
Read more: How To Make A Bean Bag Lap Tray
Step 4: Install the Frame
With the ceiling prepared, it’s time to start building and installing the frame for your tray ceiling. The frame will provide support for the tray and help create the desired recessed or elevated effect. Follow these steps to successfully install the frame:
- Measure and cut the framing material: Using the measurements and design plan from the earlier steps, cut the 2×4 lumber or MDF boards to the appropriate lengths for the frame. Use a circular saw or a miter saw to make precise cuts.
- Attach the frame to the ceiling: Position the cut pieces of framing material along the marked locations of the ceiling joists. Use a nail gun or hammer and screws to securely attach the frame to the ceiling. Make sure the frame is level and in line with the measurement and design plan.
- Install cross beams: Depending on the size of your tray ceiling and the design plan, you may need additional support in the form of cross beams. Cut the 2×4 lumber or MDF boards to the appropriate lengths and attach them perpendicular to the frame. This will provide additional stability and support for the tray ceiling.
- Ensure structural integrity: Double-check the frame and cross beams to ensure they are securely attached and sturdy. This will ensure the longevity and stability of your tray ceiling.
- Apply construction adhesive: Once the frame is in place, apply construction adhesive along the top surface of the frame. This will help bond the drywall sheets to the frame and prevent any sagging over time.
- Let the adhesive dry: Allow the construction adhesive to dry completely before proceeding with the next steps. Follow the manufacturer’s instructions for specific drying times.
By carefully measuring, cutting, and installing the frame, you will create a solid and stable structure for your tray ceiling. This step is crucial in achieving the desired effect and ensuring the longevity of your tray ceiling. Once the frame is securely in place, you can move on to the next step: installing the ceiling panels.
Step 5: Install the Ceiling Panels
With the frame in place, it’s time to install the ceiling panels, which will form the surface of your tray ceiling. Follow these steps to successfully install the ceiling panels:
- Measure and cut the drywall sheets: Measure the dimensions of the central portion and the surrounding edges of your tray ceiling. Using these measurements, cut the drywall sheets to fit the designated areas. Use a circular saw or jigsaw to make precise cuts.
- Attach the drywall sheets: Apply construction adhesive to the back of each drywall sheet, then carefully position them onto the frame. Press firmly to ensure a strong bond with the adhesive. Use a nail gun or screws to further secure the drywall sheets to the frame, placing them at regular intervals along the edges and seams. Make sure the drywall sheets are flush with the frame.
- Fill gaps and seams: Apply joint compound or drywall mud over the seams where the drywall sheets meet. Smooth out the compound using a putty knife, ensuring a seamless transition between the sheets. Fill any gaps or holes with the compound as well. Let the compound dry according to the manufacturer’s instructions.
- Apply drywall tape: Once the joint compound is dry, apply drywall tape over the seams to reinforce them. Use a putty knife to press the tape firmly into place, removing any air bubbles or wrinkles. Apply an additional layer of joint compound over the tape to create a smooth surface.
- Let the joint compound dry: Allow the joint compound to dry completely. Use a sanding block or sandpaper to smooth out any rough areas and create a uniform surface.
- Apply primer: Apply a coat of primer to the drywall surface. This will help the paint adhere better and provide a more even and long-lasting finish. Follow the manufacturer’s instructions for drying times.
- Paint the ceiling: Once the primer is dry, apply your desired paint color to the ceiling. Use a paint roller or brush to ensure an even and smooth application. Apply multiple coats if necessary, allowing each coat to dry before applying the next.
By following these steps, you will install and finish the ceiling panels for your tray ceiling. Take your time to ensure the panels are securely attached and the seams are properly filled and smoothed. Once the ceiling panels are complete, you can move on to the next step: adding lighting to your tray ceiling if desired.
Step 6: Add Lighting
Adding lighting to your tray ceiling can elevate the overall look and ambiance of the room. Follow these steps to successfully incorporate lighting into your tray ceiling:
- Plan the lighting layout: Determine the type of lighting fixtures you want to install and plan their placement. Recessed lights are commonly used for tray ceilings, but you can also consider pendant lights, chandeliers, or rope lights depending on your design preferences.
- Prepare the electrical wiring: If needed, consult with an electrician to ensure the proper wiring is in place for the desired lighting fixtures. Make sure to follow safety guidelines and local building codes when working with electrical components.
- Make openings for the lighting fixtures: Use a hacksaw or reciprocating saw to carefully cut openings in the drywall for the lighting fixtures. Follow the measurements and guidelines provided by the manufacturer of the fixtures.
- Install the lighting fixtures: Follow the manufacturer’s instructions for each lighting fixture to securely install them in the designated openings. Connect the wiring according to the electrical plans and ensure the fixtures are properly aligned and level.
- Connect the lighting to the electrical system: If you are comfortable working with electrical wiring, connect the lighting fixtures to the electrical system following the appropriate safety precautions. Alternatively, you can hire a licensed electrician to complete this step.
- Test the lighting: Once the fixtures are installed and connected, turn on the power and test each lighting element to ensure they are functioning properly. Make any necessary adjustments or repairs as needed.
By carefully planning and installing lighting fixtures in your tray ceiling, you can create a visually striking and well-lit space. The lighting will enhance the architectural features of the tray ceiling and provide a warm and inviting atmosphere.
Once the lighting is in place and functioning correctly, you can move on to the final step: adding the finishing touches to your tray ceiling.
Step 7: Finishing Touches
With the main components of your tray ceiling installed, it’s time to add the finishing touches to complete the look. These final touches will add polish and enhance the overall aesthetics of your tray ceiling. Follow these steps to add the finishing touches:
- Install decorative molding: Measure and cut decorative molding to fit along the edges of your tray ceiling. Attach the molding using construction adhesive and nails or screws. This molding will provide a decorative border and further accentuate the tray ceiling design.
- Fill any gaps or cracks: Inspect the tray ceiling for any remaining gaps or cracks. Use joint compound or spackling to fill these imperfections. Smooth out the compound and allow it to dry, then sand it down for a seamless finish.
- Apply a final coat of paint: Once the joint compound is dry and sanded, apply a final coat of paint to the tray ceiling. Use a paintbrush or roller to ensure a smooth and even application. Allow the paint to dry completely between coats.
- Clean up: Remove any drop cloths or plastic sheets from the room and clean up any debris. Wipe down the surfaces and ensure the room is ready for use.
- Reinstall fixtures and furniture: Reinstall any light fixtures, ceiling fans, or other items that were removed during the tray ceiling installation. Carefully connect any electrical components and ensure they are in proper working order.
- Style the room: Arrange furniture and decor in a way that highlights and complements your tray ceiling. Consider the overall design scheme and choose pieces that enhance the elegance and visual impact of the tray ceiling.
By adding these final touches, your tray ceiling will be complete and ready to impress. Take the time to ensure all the details are refined and cohesive, creating a stunning focal point in your room.
Remember to step back and admire your hard work. Your tray ceiling will undoubtedly enhance the overall aesthetics and value of your space.
Congratulations! You have successfully completed the installation of your tray ceiling. Enjoy the beauty and sophistication it adds to your home or space.
Read more: How To Make A Star Ceiling
Conclusion
Installing a tray ceiling is a rewarding project that can greatly enhance the look and feel of your space. With its unique design and architectural elegance, a tray ceiling adds depth, sophistication, and visual interest to any room. By following the step-by-step guide outlined in this article, you can successfully create a tray ceiling that transforms your space into a stylish and captivating environment.
We began with an introduction to tray ceilings, understanding what they are and the benefits they offer. From there, we explored the tools and materials needed for the installation process, ensuring you have everything necessary to complete the project. We then walked through each step, from measuring and planning, to preparing the ceiling, installing the frame, adding ceiling panels, incorporating lighting, and adding the finishing touches. Each step was carefully detailed to provide a comprehensive guide for tackling the installation process with confidence.
Throughout the process, it is important to prioritize safety and attention to detail. Take the time to measure accurately, follow safety guidelines, and ensure proper installation techniques. By doing so, you can achieve a professional-looking tray ceiling that not only enhances the aesthetics of your space but also adds value to your property.
Remember to infuse your personal style and creativity into the project. Customize your tray ceiling by selecting the appropriate lighting fixtures, decorative molding, and paint color to complement your overall design scheme. Don’t be afraid to let your personality shine through in the process.
Lastly, step back and admire your completed tray ceiling. Revel in the transformation and enjoy the beauty and sophistication it brings to your room. Your tray ceiling will undoubtedly be a captivating focal point that elicits admiration from all who enter.
So, gather your tools, follow the steps outlined in this guide, and embark on the journey of creating a stunning tray ceiling. Best of luck with your project!
Frequently Asked Questions about How To Make A Tray Ceiling
Was this page helpful?
At Storables.com, we guarantee accurate and reliable information. Our content, validated by Expert Board Contributors, is crafted following stringent Editorial Policies. We're committed to providing you with well-researched, expert-backed insights for all your informational needs.


0 thoughts on “How To Make A Tray Ceiling”