Home>Furniture & Design>Bathroom Accessories>How To Remove A Stuck Bathtub Stopper

Bathroom Accessories
How To Remove A Stuck Bathtub Stopper
Modified: October 19, 2024
Learn how to easily remove a stuck bathtub stopper and fix your bathroom accessories with our step-by-step guide. Say goodbye to the frustration of a jammed stopper!
(Many of the links in this article redirect to a specific reviewed product. Your purchase of these products through affiliate links helps to generate commission for Storables.com, at no extra cost. Learn more)
Introduction
Dealing with a stuck bathtub stopper can be a frustrating and inconvenient experience. Whether you're preparing for a relaxing soak or trying to address a clogged drain, a stubborn stopper can quickly derail your plans. However, with the right approach and a bit of know-how, you can effectively tackle this common bathroom issue. In this comprehensive guide, we'll explore the step-by-step process of removing a stuck bathtub stopper, providing you with the insights and techniques needed to regain control of your bathtub's drainage system.
A stuck bathtub stopper can manifest in various forms, from a pop-up stopper that refuses to budge to a lift-and-turn stopper that seems welded in place. Regardless of the specific type of stopper you're contending with, the methods outlined in this guide are designed to address a wide range of scenarios. By following these steps, you can gain a clearer understanding of the underlying causes of the obstruction and implement effective strategies to resolve the issue.
Whether you're a seasoned DIY enthusiast or a homeowner looking to save on repair costs, learning how to remove a stuck bathtub stopper is a valuable skill. Not only does it empower you to take proactive measures when faced with a malfunctioning stopper, but it also allows you to maintain your bathtub's functionality without having to rely solely on professional assistance.
By the end of this guide, you'll be equipped with the knowledge and techniques necessary to tackle a stuck bathtub stopper with confidence. From assessing the situation to utilizing specialized tools and exploring alternative methods, each step in the process is designed to provide a comprehensive approach to resolving this common household dilemma. So, roll up your sleeves and get ready to reclaim control of your bathtub's drainage system as we delve into the essential steps for removing a stuck bathtub stopper.
Key Takeaways:
- Don’t let a stuck bathtub stopper ruin your day! Assess the situation, gather the right tools, and try lubricant, plunging, or a drain snake before calling a professional for help.
- With the right tools and techniques, you can conquer a stubborn bathtub stopper. From lubricant to a plunger and even removing the overflow plate, there are creative ways to regain control of your bathtub’s drainage system.
Read more: How To Make A Homemade Bathtub Stopper
Step 1: Assess the situation
Before diving into the process of removing a stuck bathtub stopper, it's crucial to assess the situation thoroughly. Understanding the type of stopper and the nature of the obstruction will guide your approach and help you determine the most effective course of action.
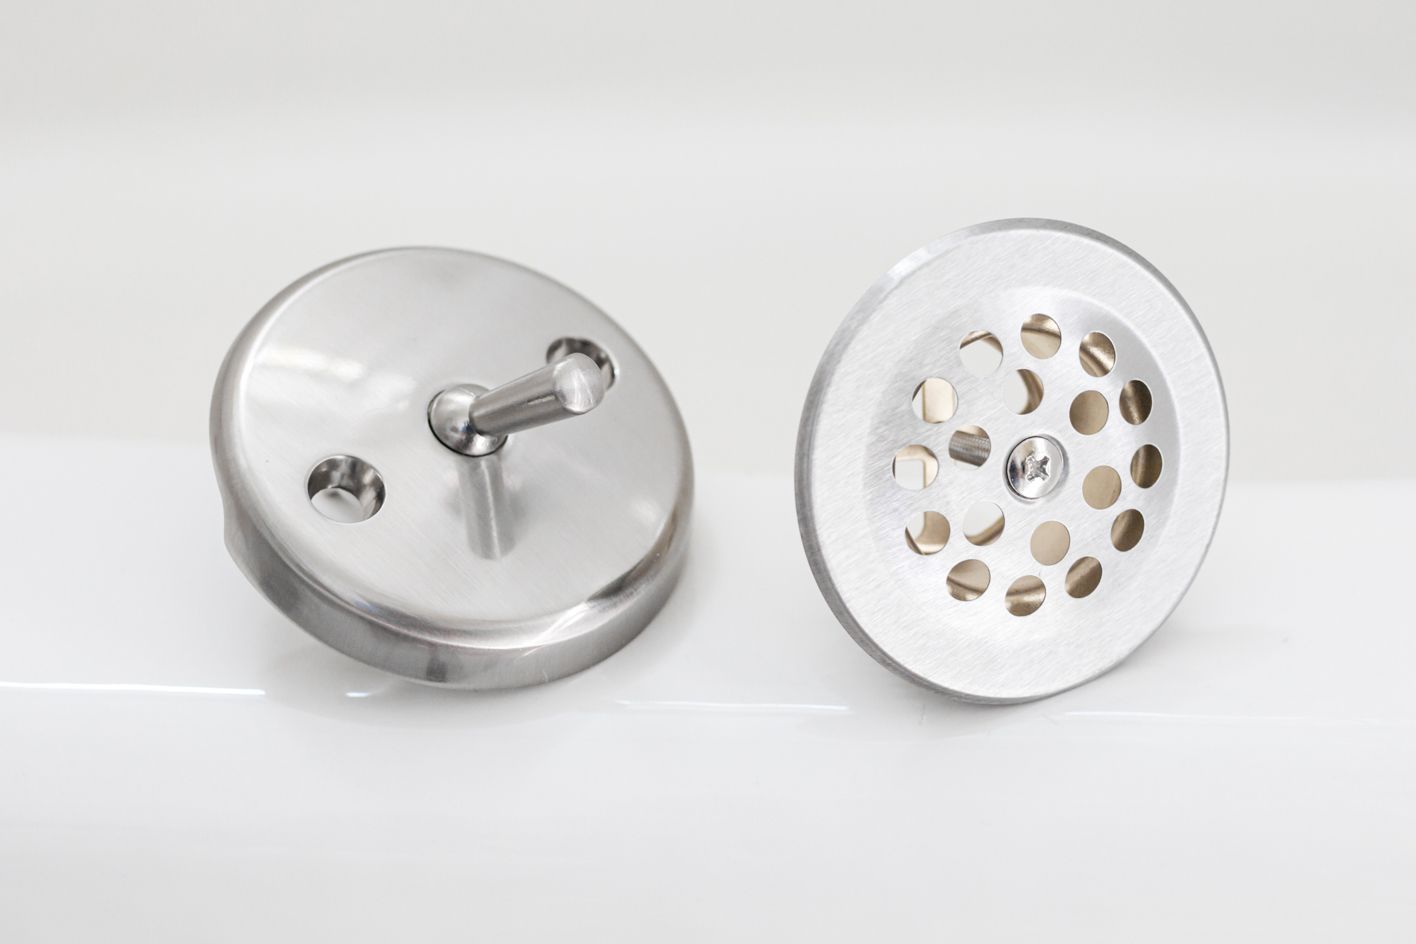
Start by identifying the type of bathtub stopper you're dealing with. Common types include the pop-up stopper, the lift-and-turn stopper, and the push-and-pull stopper. Each type operates differently and may require specific techniques for removal. For instance, a pop-up stopper is typically controlled by a lever behind the bathtub faucet, while a lift-and-turn stopper requires a twisting motion to engage or disengage.
Next, examine the condition of the stopper and the drain. Is the stopper visibly damaged or corroded? Are there any visible obstructions, such as hair or debris, clogging the drain? Understanding these factors will help you determine the underlying cause of the stopper's resistance and inform your approach to resolving the issue.
Additionally, consider the history of the bathtub stopper. Has it been sticking for a prolonged period, or did the obstruction occur suddenly? Understanding the timeline of the issue can provide valuable insights into potential causes, such as gradual wear and tear versus a sudden mechanical failure.
Furthermore, assess the accessibility of the stopper and the surrounding components. Are there any visible screws, bolts, or mechanisms that secure the stopper in place? Understanding the structural elements of the stopper and its housing will inform your approach to disassembly and removal.
By thoroughly assessing the situation, you can gain a comprehensive understanding of the factors contributing to the stuck bathtub stopper. This initial step sets the stage for the subsequent actions, allowing you to approach the removal process with clarity and confidence. With a clear understanding of the stopper's type, condition, history, and accessibility, you're ready to proceed to the next steps and implement targeted strategies to address the obstruction effectively.
Step 2: Gather necessary tools
As you embark on the journey to remove a stuck bathtub stopper, having the right tools at your disposal is essential for a successful outcome. The following tools are commonly utilized in the process of addressing a stubborn stopper and ensuring a smooth removal process:
-
Adjustable Pliers: A pair of adjustable pliers is indispensable for gripping and turning the components of various types of bathtub stoppers. Whether you're dealing with a lift-and-turn stopper or a push-and-pull stopper, adjustable pliers provide the necessary leverage to manipulate and disengage the stopper mechanism.
-
Screwdriver Set: A set of screwdrivers, including both flathead and Phillips head varieties, is essential for accessing and removing screws or fasteners that secure the stopper in place. Depending on the design of your bathtub stopper, you may encounter screws or retaining clips that require precise manipulation for disassembly.
-
Plunger: In some cases, a plunger can be a valuable tool for dislodging a stuck bathtub stopper. By creating suction and pressure within the drain, a plunger can help release the stopper's grip and facilitate its removal. Ensure that the plunger's rubber cup forms a tight seal over the drain opening for optimal effectiveness.
-
Drain Snake: A drain snake, also known as a plumbing auger, is a flexible tool designed to navigate through the drain and dislodge obstructions such as hair, soap scum, or debris. If the stuck stopper is accompanied by a clogged drain, a drain snake can help clear the pathway and alleviate any underlying blockages.
-
Lubricant: Utilizing a lubricant, such as silicone-based grease or penetrating oil, can aid in loosening the stuck components of the bathtub stopper. Applying a small amount of lubricant to the stopper's moving parts and the surrounding mechanisms can reduce friction and resistance, making it easier to manipulate and remove the stopper.
-
Bucket: Having a bucket on hand is practical for collecting water and debris that may emerge during the removal process. By placing a bucket strategically beneath the drain area, you can contain any water or sediment that arises, minimizing potential mess and facilitating a cleaner workspace.
By gathering these essential tools, you'll be well-prepared to tackle the challenge of removing a stuck bathtub stopper. Each tool serves a specific purpose in addressing different aspects of the removal process, from disassembly and manipulation to drain clearing and maintenance. With these tools at your disposal, you can approach the subsequent steps with confidence, knowing that you have the necessary resources to navigate the intricacies of the removal process effectively.
Step 3: Apply lubricant
When faced with a stubborn bathtub stopper, the application of lubricant can serve as a valuable ally in the removal process. Lubricants, such as silicone-based grease or penetrating oil, work to reduce friction and resistance within the stopper mechanism, making it easier to manipulate and disengage the stuck components. This step is particularly effective for addressing stoppers that have become seized or corroded over time, impeding their movement and causing them to resist removal.
To apply the lubricant, start by identifying the key moving parts of the bathtub stopper. These may include the pivot rod, linkage assembly, or any visible joints or connections that facilitate the stopper's operation. Once identified, apply a small amount of lubricant to these components, ensuring that it penetrates the areas where friction is most likely to occur. For instance, if dealing with a lift-and-turn stopper, focus on lubricating the twisting mechanism and the interface between the stopper and the drain.
As you apply the lubricant, take care to distribute it evenly and avoid excessive application, which can lead to messy spills and unnecessary waste. The goal is to create a thin, protective layer of lubricant that penetrates the tight spaces and crevices within the stopper mechanism, effectively reducing the resistance that impedes its movement.
After applying the lubricant, allow it some time to work its magic. The penetrating properties of certain lubricants enable them to seep into tight spaces and dissolve rust or corrosion, gradually loosening the grip of the stuck components. This waiting period provides the lubricant with the opportunity to exert its effects, preparing the stopper for subsequent manipulation and removal attempts.
It's important to note that while lubricants can significantly improve the maneuverability of a stuck bathtub stopper, they may not always yield immediate results, especially in cases of severe corrosion or mechanical damage. However, incorporating this step into the removal process sets the stage for smoother and more controlled manipulation of the stopper, laying the groundwork for subsequent techniques to take effect.
By applying lubricant to the key components of the stuck bathtub stopper, you're taking proactive measures to mitigate the resistance and friction that hinder its removal. This strategic approach sets the stage for the subsequent steps, allowing you to build upon the improved maneuverability facilitated by the lubricant application. With the stopper primed for further manipulation, you're ready to explore additional techniques and strategies to address the stubborn obstruction effectively.
Step 4: Use a plunger
When confronting a stubborn bathtub stopper, employing a plunger can serve as a practical and effective strategy to dislodge the obstruction and facilitate the stopper's removal. The plunging action creates a surge of pressure and suction within the drain, potentially loosening the stopper's grip and promoting its release from the housing.
To initiate the plunging process, ensure that the bathtub's overflow opening is adequately covered to create a sealed environment for the plunging action. If the bathtub features an overflow plate, use a rag or duct tape to seal off the opening, preventing air from escaping and maximizing the pressure generated by the plunger.
Next, position the plunger over the drain opening, ensuring a tight seal between the rubber cup of the plunger and the surface surrounding the stopper. The effectiveness of the plunging action hinges on the creation of a strong seal, allowing the plunger to generate sufficient pressure and suction within the drain.
With the plunger in place, perform a series of vigorous plunges, exerting downward pressure and then pulling upward to create a pumping motion. This action generates alternating surges of pressure and suction within the drain, potentially dislodging the stuck stopper and freeing it from its seized position.
Throughout the plunging process, maintain a steady and consistent rhythm, allowing the pressure and suction to work their magic within the drain. Depending on the severity of the stopper's resistance, it may be necessary to perform multiple rounds of plunging to achieve the desired effect.
After completing the plunging process, assess the status of the stuck bathtub stopper. If the plunging action has been successful, the stopper may exhibit increased maneuverability or show signs of dislodgment. In such cases, proceed to gently manipulate the stopper using the appropriate tools, such as adjustable pliers or a screwdriver, to guide it out of the drain housing.
If the plunger fails to yield the desired results, consider exploring alternative techniques, such as utilizing a drain snake or removing the overflow plate, to address the stuck stopper effectively.
By incorporating the use of a plunger into the removal process, you're leveraging the power of pressure and suction to dislodge the stuck bathtub stopper. This methodical approach complements the preceding steps, providing an additional avenue for addressing the stubborn obstruction and advancing towards a successful resolution. With the plunging action set in motion, you're poised to explore further strategies and techniques to overcome the challenge of a stuck bathtub stopper effectively.
Try using a pair of pliers to grip the knob of the bathtub stopper and twist it counterclockwise to loosen it. If that doesn’t work, you may need to use a lubricant like WD-40 to help loosen it.
Read more: How To Replace Stopper In A Bathtub
Step 5: Try a drain snake
When traditional methods such as lubrication and plunging have failed to dislodge a stubborn bathtub stopper, turning to a drain snake can offer a practical and effective solution. Also known as a plumbing auger, a drain snake is a versatile tool designed to navigate through the drain and dislodge obstructions that may be impeding the stopper's movement. By leveraging the flexible and probing nature of a drain snake, you can target and address underlying blockages that contribute to the stopper's resistance, ultimately facilitating its removal.
To initiate the use of a drain snake, begin by extending the coiled end of the snake into the drain opening, ensuring that it navigates past any initial obstructions and reaches the underlying pathway of the drain. As you feed the drain snake into the drain, maintain a steady and controlled approach, allowing the tool to navigate through the twists and turns of the drain's internal structure.
Once the drain snake has reached the obstruction, whether it be a buildup of hair, soap scum, or debris, begin to rotate the handle of the snake in a clockwise motion. This rotational movement enables the auger end of the snake to engage with and dislodge the blockage, gradually breaking it apart and clearing the pathway within the drain.
As you continue to rotate the drain snake, be attentive to any signs of progress, such as a reduction in resistance or the sensation of the snake navigating through the obstruction. This tactile feedback indicates that the drain snake is effectively addressing the underlying blockage, potentially alleviating the factors contributing to the stuck bathtub stopper.
After thoroughly navigating the drain with the snake and addressing any identified obstructions, carefully retract the snake from the drain, taking care to dislodge and remove any dislodged debris or buildup that may have accumulated on the auger end. This ensures that the drain snake is clear of any residual obstructions and ready for future use.
Following the use of a drain snake, reassess the maneuverability of the stuck bathtub stopper. If the obstruction was rooted in underlying blockages within the drain, the use of a drain snake may have effectively alleviated these factors, leading to improved movement and accessibility of the stopper.
By incorporating the use of a drain snake into the removal process, you're harnessing the targeted and probing capabilities of this specialized tool to address the root causes of the stuck bathtub stopper. This methodical approach complements the preceding steps, providing an additional avenue for dislodging obstructions and advancing towards a successful resolution. With the drain snake's intervention, you're poised to explore further strategies and techniques to overcome the challenge of a stuck bathtub stopper effectively.
Step 6: Remove the overflow plate
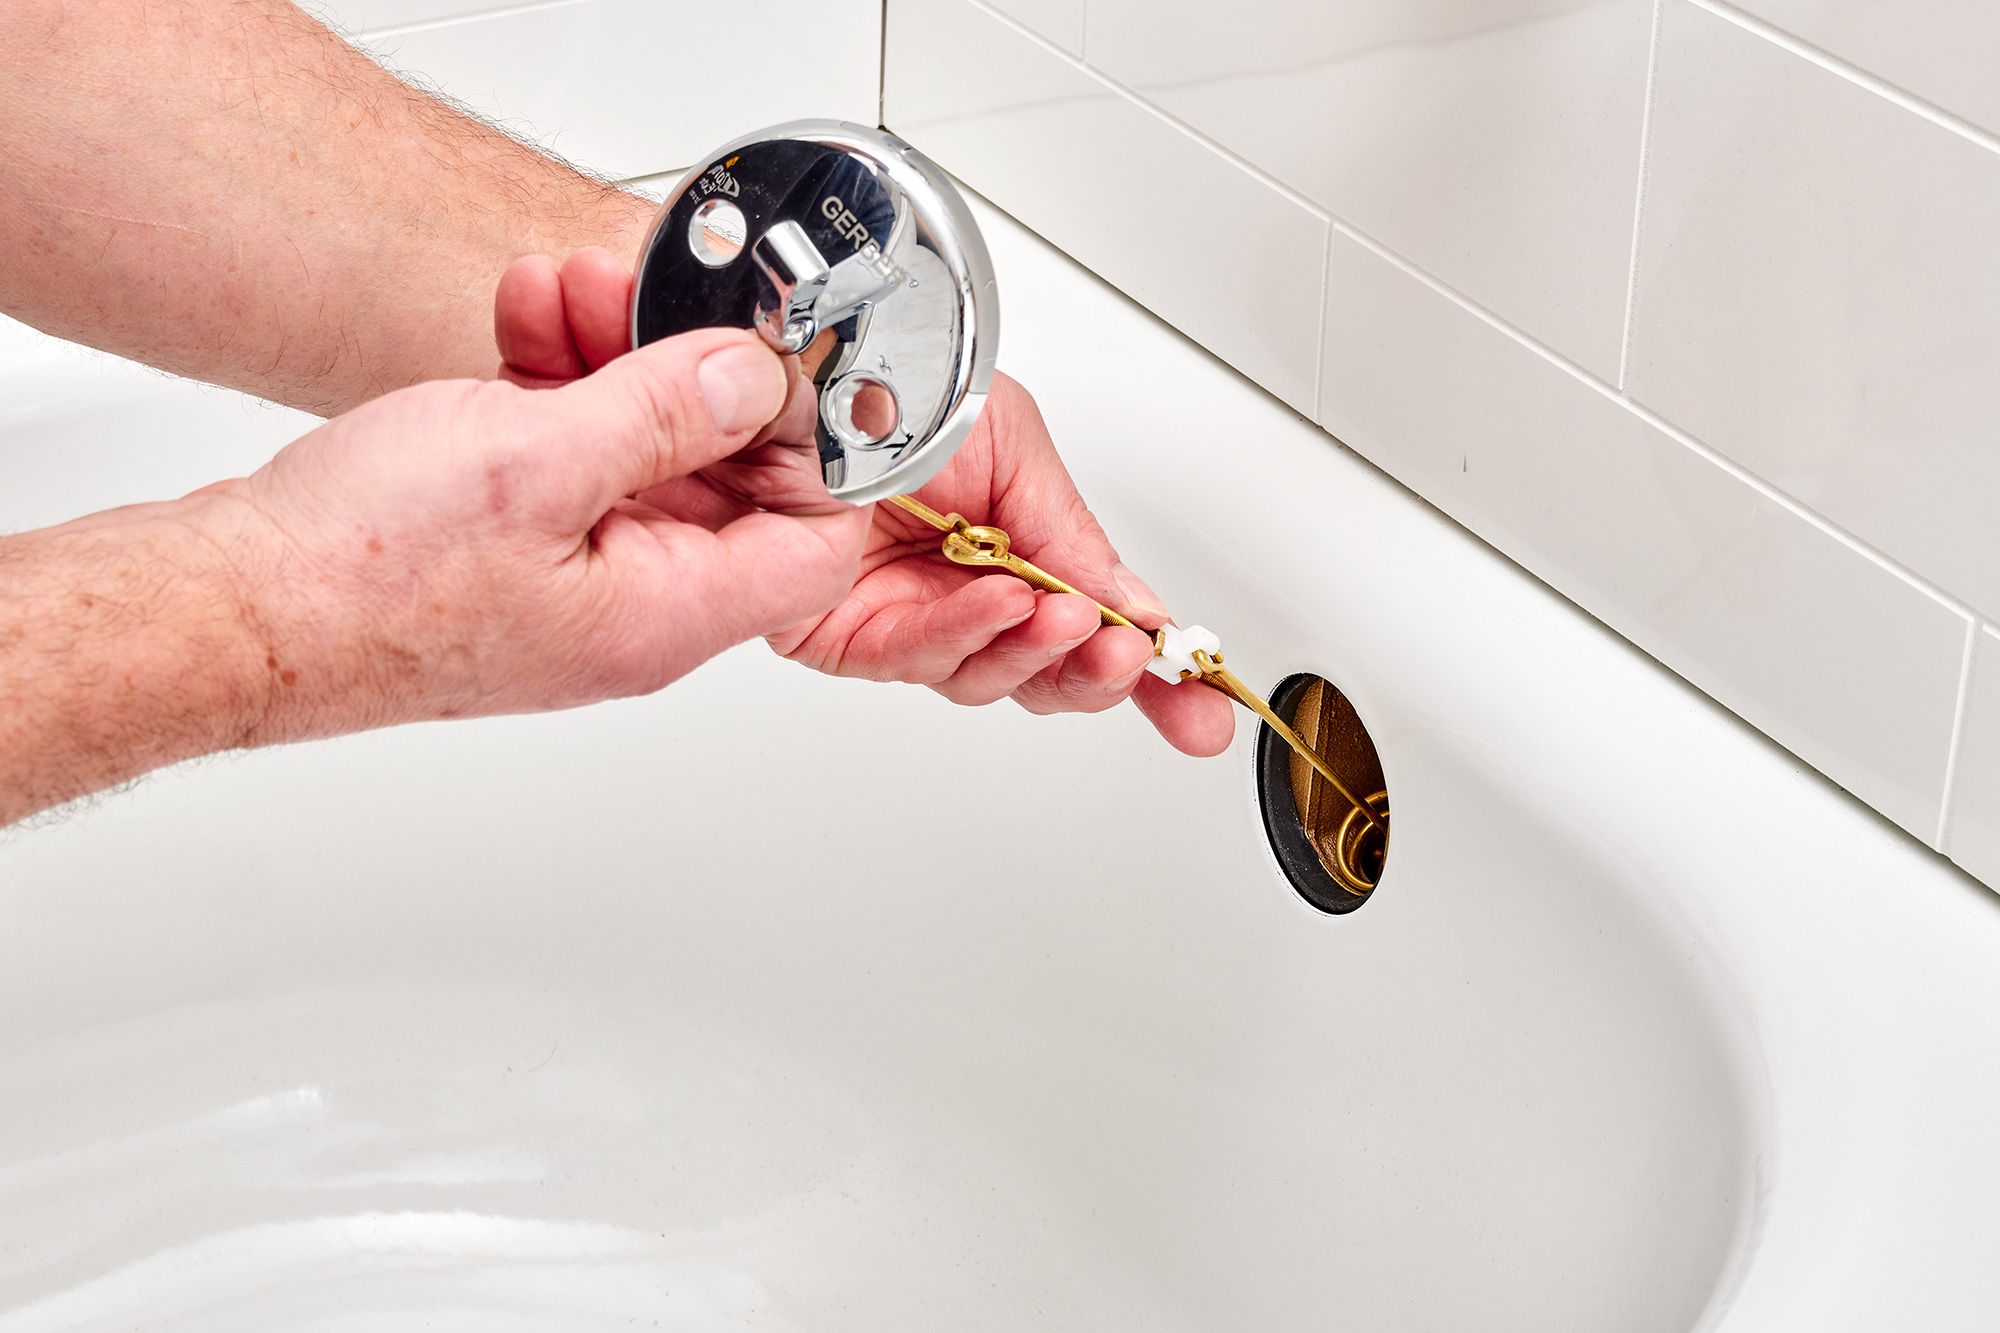
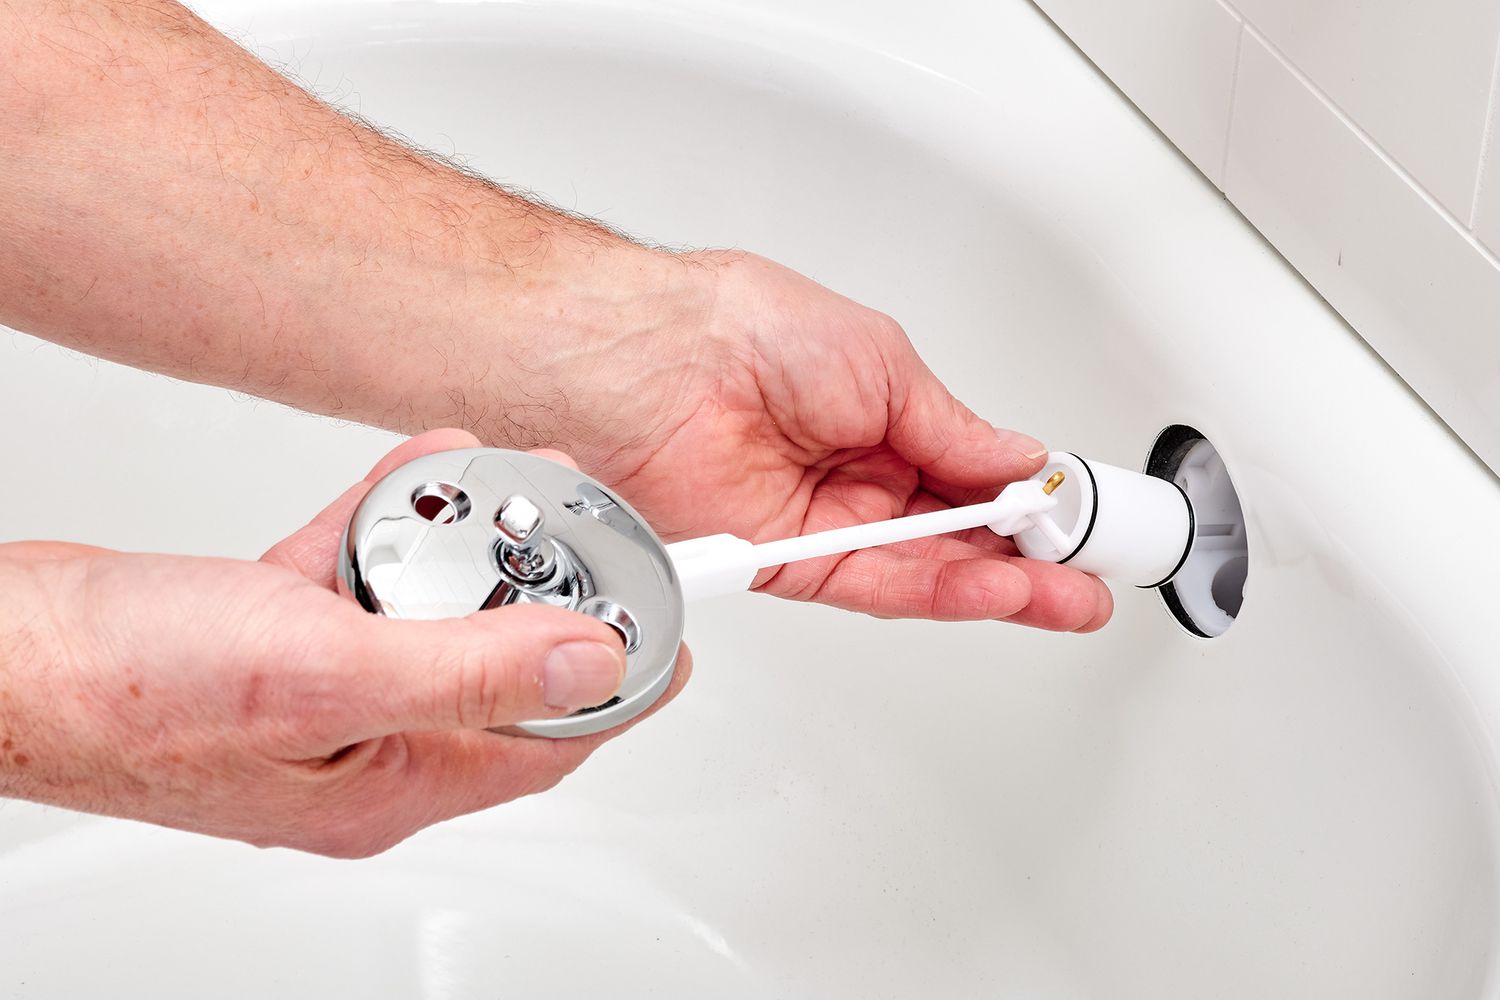
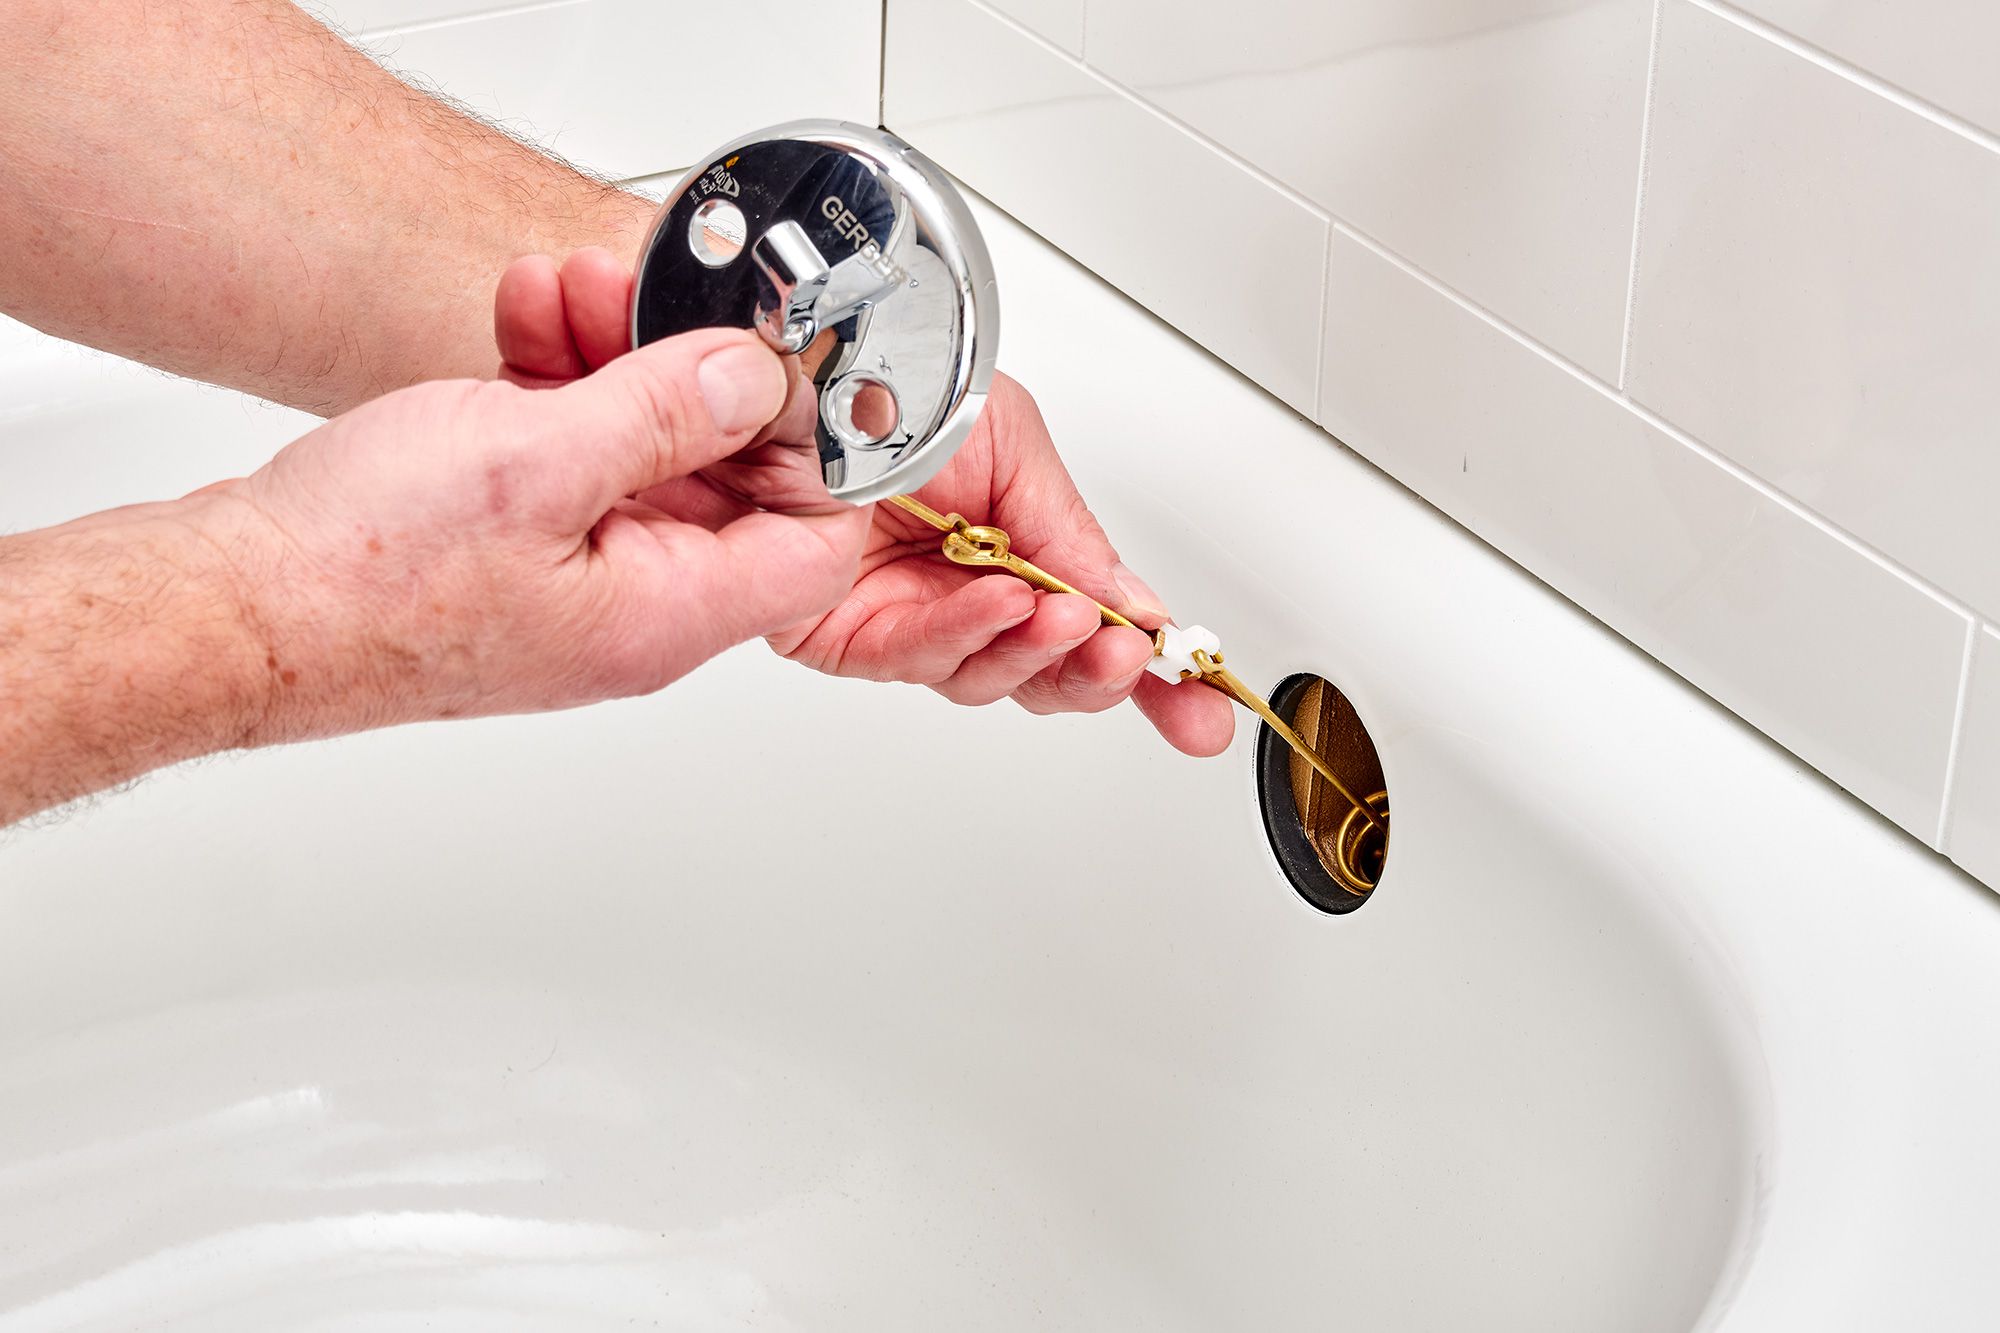
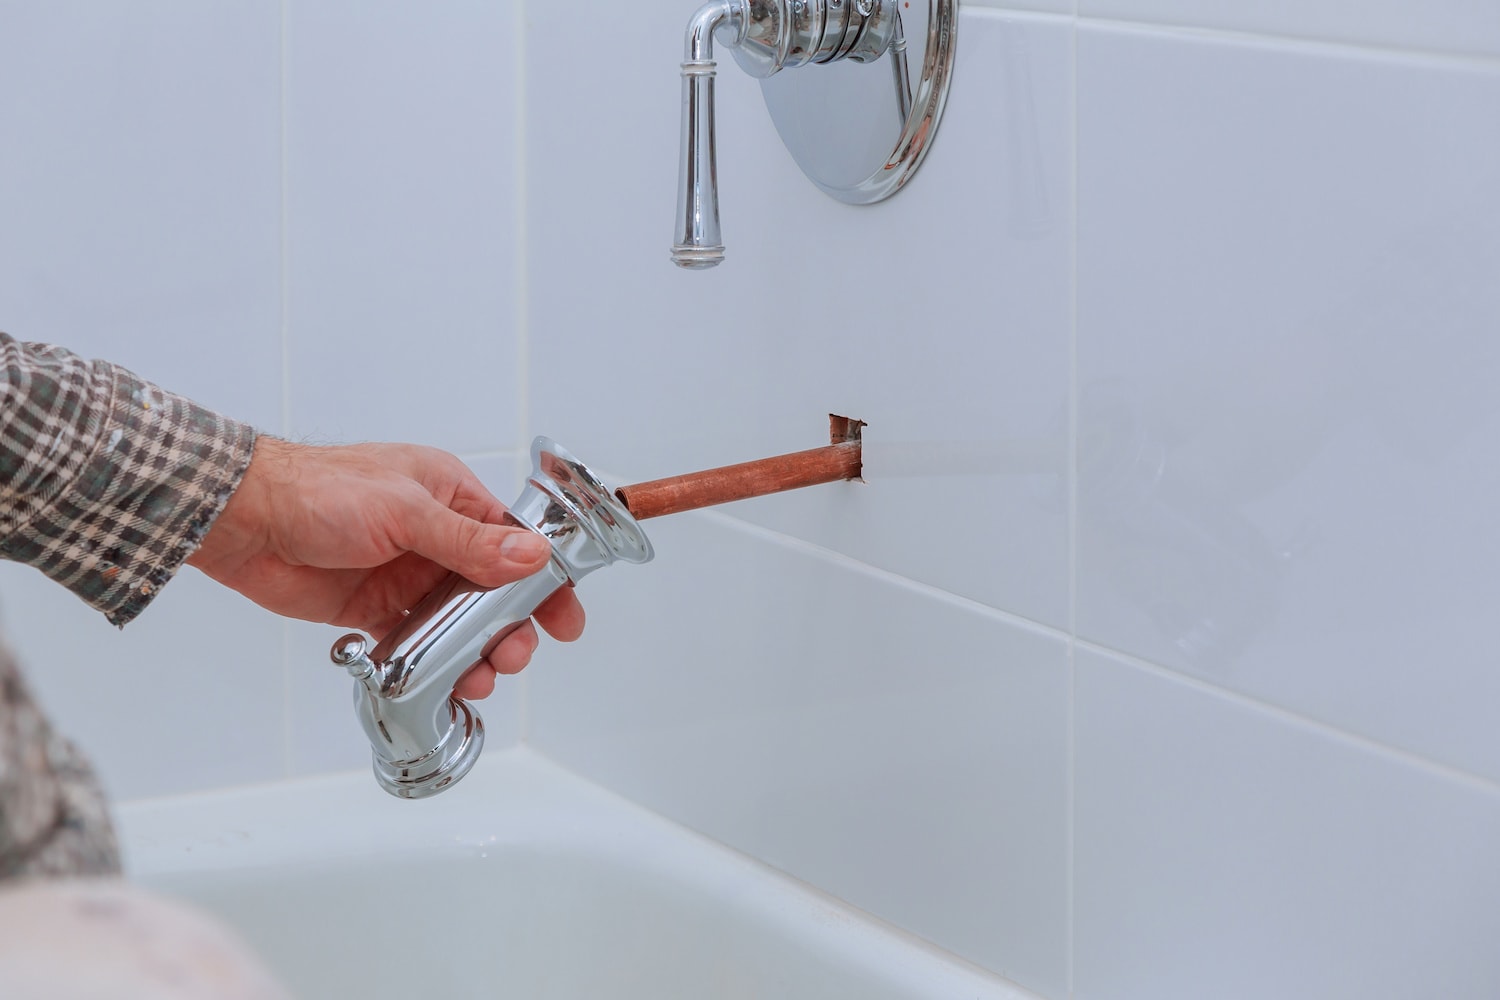
When traditional methods such as lubrication, plunging, and drain snake usage have not succeeded in dislodging a stubborn bathtub stopper, turning attention to the overflow plate can offer a practical and effective solution. The overflow plate, typically located beneath the faucet and above the drain, serves as a crucial access point for reaching the internal mechanisms of the bathtub's drainage system. By removing the overflow plate, you gain direct access to the linkage and stopper assembly, allowing for targeted manipulation and disengagement of the stuck components.
To begin the process of removing the overflow plate, it's essential to locate and identify the plate's position on the bathtub. The overflow plate is often secured in place by screws or retaining clips, which may be concealed beneath a cover plate or decorative cap. Using a flathead or Phillips head screwdriver, carefully remove any visible screws or fasteners that secure the overflow plate to the bathtub's wall. If the screws are concealed beneath a cover plate, gently pry the cover plate away to reveal and access the fasteners.
Once the screws or retaining clips have been removed, carefully detach the overflow plate from the bathtub's wall, taking care to note the arrangement of the internal components and any associated linkage or stopper mechanisms. As you remove the overflow plate, be mindful of any attached components, such as the linkage rod or lever, which may be connected to the bathtub's stopper assembly.
With the overflow plate successfully removed, you now have direct access to the internal mechanisms of the bathtub's drainage system. This newfound accessibility allows for targeted manipulation and disengagement of the stuck bathtub stopper, providing an opportunity to address the obstruction from a different vantage point. By leveraging this access, you can visually inspect the linkage and stopper assembly, identify any potential sources of resistance or malfunction, and implement precise techniques to facilitate the removal of the stuck components.
Following the removal of the overflow plate, reassess the maneuverability of the stuck bathtub stopper, taking advantage of the enhanced accessibility and visibility provided by the open access point. By leveraging this strategic approach, you're poised to explore further strategies and techniques to overcome the challenge of a stuck bathtub stopper effectively.
Step 7: Call a professional if all else fails
In the event that all previous attempts to remove a stuck bathtub stopper have proven unsuccessful, it may be time to seek the expertise of a professional plumber or a qualified technician. While DIY approaches can often address common household issues, certain scenarios, such as severely corroded or mechanically compromised stoppers, may necessitate the specialized skills and tools that professionals can provide.
Calling a professional offers several distinct advantages when faced with a stubborn bathtub stopper. Experienced plumbers possess in-depth knowledge of various types of stoppers and the underlying mechanisms that govern their operation. This expertise enables them to assess the specific challenges presented by a stuck stopper and devise targeted strategies for its removal.
Furthermore, professionals are equipped with specialized tools and equipment designed to address complex plumbing issues. In cases where a stuck stopper is accompanied by underlying drain obstructions or structural complications, professionals can leverage advanced tools, such as power augers or drain cameras, to diagnose and resolve the underlying issues effectively.
Additionally, engaging a professional ensures that the removal process is conducted with precision and care, minimizing the risk of inadvertent damage to the bathtub or its associated components. Professionals are adept at navigating the intricacies of bathtub plumbing systems, allowing them to approach the removal of a stuck stopper with a thorough understanding of the underlying mechanisms and potential points of resistance.
Moreover, seeking professional assistance can provide peace of mind, knowing that the removal process is being handled by skilled and experienced individuals. Professionals can offer insights into the condition of the bathtub stopper, potential causes of the obstruction, and preventive measures to mitigate future issues, empowering homeowners with valuable knowledge and guidance.
Ultimately, calling a professional represents a proactive and pragmatic approach to addressing a stubborn bathtub stopper when all other methods have been exhausted. By leveraging the expertise, tools, and insights that professionals bring to the table, homeowners can navigate the challenge of a stuck stopper with confidence, knowing that they are taking decisive steps towards a successful resolution.
Conclusion
In conclusion, the process of removing a stuck bathtub stopper encompasses a series of strategic steps and techniques designed to address a common yet challenging household issue. From assessing the nature of the obstruction to leveraging specialized tools and alternative methods, each stage of the removal process offers valuable insights and approaches for regaining control of the bathtub's drainage system.
By thoroughly assessing the situation and identifying the type, condition, and accessibility of the stuck stopper, homeowners can gain a comprehensive understanding of the factors contributing to the obstruction. This initial step sets the stage for targeted and informed decision-making, guiding subsequent actions with clarity and purpose.
Gathering the necessary tools, including adjustable pliers, a screwdriver set, a plunger, a drain snake, lubricant, and a bucket, ensures that homeowners are well-prepared to address the stuck stopper effectively. These essential tools serve as instrumental allies in navigating the intricacies of the removal process, providing the means to disassemble, manipulate, and clear obstructions within the bathtub's drainage system.
The application of lubricant, the use of a plunger, and the exploration of a drain snake offer practical and methodical strategies for dislodging the stuck stopper and addressing underlying blockages. These techniques leverage the power of pressure, suction, and targeted probing to mitigate resistance and facilitate the stopper's removal, offering homeowners a diverse array of approaches to tackle the challenge.
Furthermore, the option to remove the overflow plate and seek professional assistance provides additional avenues for addressing stubborn stoppers that defy conventional methods. By leveraging open access points and the expertise of professionals, homeowners can navigate complex scenarios with confidence, knowing that they are taking proactive measures to resolve the issue effectively.
In the face of a stubborn bathtub stopper, the journey towards resolution may require a combination of patience, persistence, and strategic decision-making. By embracing the insights and techniques outlined in this comprehensive guide, homeowners can approach the removal process with confidence, equipped with the knowledge and resources needed to overcome the challenge of a stuck stopper.
Ultimately, the process of removing a stuck bathtub stopper empowers homeowners to take proactive measures in maintaining their bathtub's functionality and addressing common plumbing issues. By leveraging a combination of assessment, tools, techniques, and professional expertise, homeowners can navigate the complexities of a stuck stopper with resilience and determination, ensuring that their bathing experience remains uninterrupted and enjoyable.
Frequently Asked Questions about How To Remove A Stuck Bathtub Stopper
Was this page helpful?
At Storables.com, we guarantee accurate and reliable information. Our content, validated by Expert Board Contributors, is crafted following stringent Editorial Policies. We're committed to providing you with well-researched, expert-backed insights for all your informational needs.


0 thoughts on “How To Remove A Stuck Bathtub Stopper”