Home>Furniture & Design>Bathroom Accessories>How To Remove An Old Bathtub Spout
Bathroom Accessories
How To Remove An Old Bathtub Spout
Modified: August 17, 2024
Learn how to remove an old bathtub spout with our step-by-step guide. Upgrade your bathroom accessories with ease. Expert tips and tricks.
(Many of the links in this article redirect to a specific reviewed product. Your purchase of these products through affiliate links helps to generate commission for Storables.com, at no extra cost. Learn more)
Introduction
Removing an old bathtub spout may seem like a daunting task, but with the right tools and a clear understanding of the process, it can be a manageable DIY project. Over time, bathtub spouts can become worn, corroded, or simply outdated, prompting the need for replacement. Whether you're looking to upgrade to a more modern design or simply need to address a leaky or malfunctioning spout, this guide will walk you through the step-by-step process of removing an old bathtub spout and installing a new one.
By following these instructions, you can save time and money by tackling this home improvement project on your own. Before you begin, it's important to gather the necessary tools and materials, which will typically include an adjustable wrench, a pipe wrench, plumber's tape, and the new bathtub spout. Additionally, you may need a screwdriver, depending on the type of spout you are working with.
Taking the time to familiarize yourself with the process and gather the required items will set the stage for a smooth and successful spout replacement. Remember, safety is paramount, so be sure to turn off the water supply before starting the removal process. With a clear plan in place and the right tools at your disposal, you'll be well-equipped to tackle this project with confidence.
Now, let's dive into the step-by-step process of removing an old bathtub spout and installing a new one, ensuring that your bathroom not only functions optimally but also reflects your personal style and preferences.
Key Takeaways:
- Removing an old bathtub spout and installing a new one is a manageable DIY project that can save time and money. With the right tools and steps, you can upgrade your bathroom with confidence.
- By following the step-by-step process, you can transform your bathroom fixtures and gain valuable skills in plumbing maintenance. This DIY project empowers you to personalize and enhance your living space.
Read more: How To Remove A Bathtub Spout
Step 1: Gather the necessary tools and materials
Before embarking on the task of removing an old bathtub spout, it's crucial to gather the essential tools and materials that will facilitate a smooth and efficient process. By ensuring that you have everything you need at the outset, you can minimize interruptions and complete the project with confidence.
Here's a comprehensive list of the tools and materials you'll likely need for this undertaking:
-
Adjustable Wrench: This versatile tool will enable you to grip and turn nuts and bolts of various sizes, providing the necessary leverage to loosen and remove the old bathtub spout.
-
Pipe Wrench: A pipe wrench is essential for gripping and turning pipes and fittings. Its adjustable design allows for a secure grip, making it an indispensable tool for this project.
-
Plumber's Tape: Also known as Teflon tape, plumber's tape is used to create a tight seal between threaded plumbing connections. It helps prevent leaks and ensures a secure fit for the new bathtub spout.
-
New Bathtub Spout: Depending on your preferences and the specific requirements of your bathroom, you'll need a new bathtub spout to replace the old one. Whether you opt for a diverter spout, a slip-on spout, or a threaded spout, be sure to select a replacement that aligns with your existing plumbing setup.
-
Screwdriver: In some cases, a screwdriver may be necessary for removing screws that secure the old bathtub spout in place. Be prepared with a flathead or Phillips head screwdriver, as required.
By assembling these tools and materials before you begin, you'll be well-prepared to tackle the task at hand. This proactive approach will help streamline the process and minimize the risk of delays or complications. With the necessary items within reach, you can proceed confidently to the next step of turning off the water supply in preparation for removing the old bathtub spout.
Step 2: Turn off the water supply
Before you begin the process of removing the old bathtub spout, it is crucial to turn off the water supply to the bathtub. This step is essential to prevent any water flow and ensure a safe working environment. By shutting off the water supply, you can avoid potential leaks, water wastage, and unnecessary mess during the spout replacement process.
To turn off the water supply, locate the shut-off valve connected to the bathtub. In most cases, the shut-off valve is positioned near the bathtub or within the bathroom. It may be found on the wall behind the bathtub or underneath the fixture. Once you have located the shut-off valve, turn it in a clockwise direction to close it completely. This action will stop the flow of water to the bathtub, allowing you to proceed with the spout removal without any water-related complications.
If you encounter any difficulty in locating the shut-off valve for the bathtub, consider shutting off the main water supply to your home. The main shut-off valve is typically situated near the water meter or where the main water line enters the house. By turning off the main water supply, you can effectively halt water flow to all fixtures and appliances in your home, including the bathtub.
After turning off the water supply, it is advisable to open the bathtub faucet to drain any remaining water from the pipes. This step will help minimize the amount of water that may spill out when the old spout is removed, reducing the risk of water damage and making the process more manageable.
By taking the time to turn off the water supply and drain the pipes, you can create a safe and controlled environment for the subsequent steps of removing the old bathtub spout and installing the new one. This proactive approach will contribute to a smooth and efficient spout replacement process, allowing you to proceed with confidence and peace of mind.
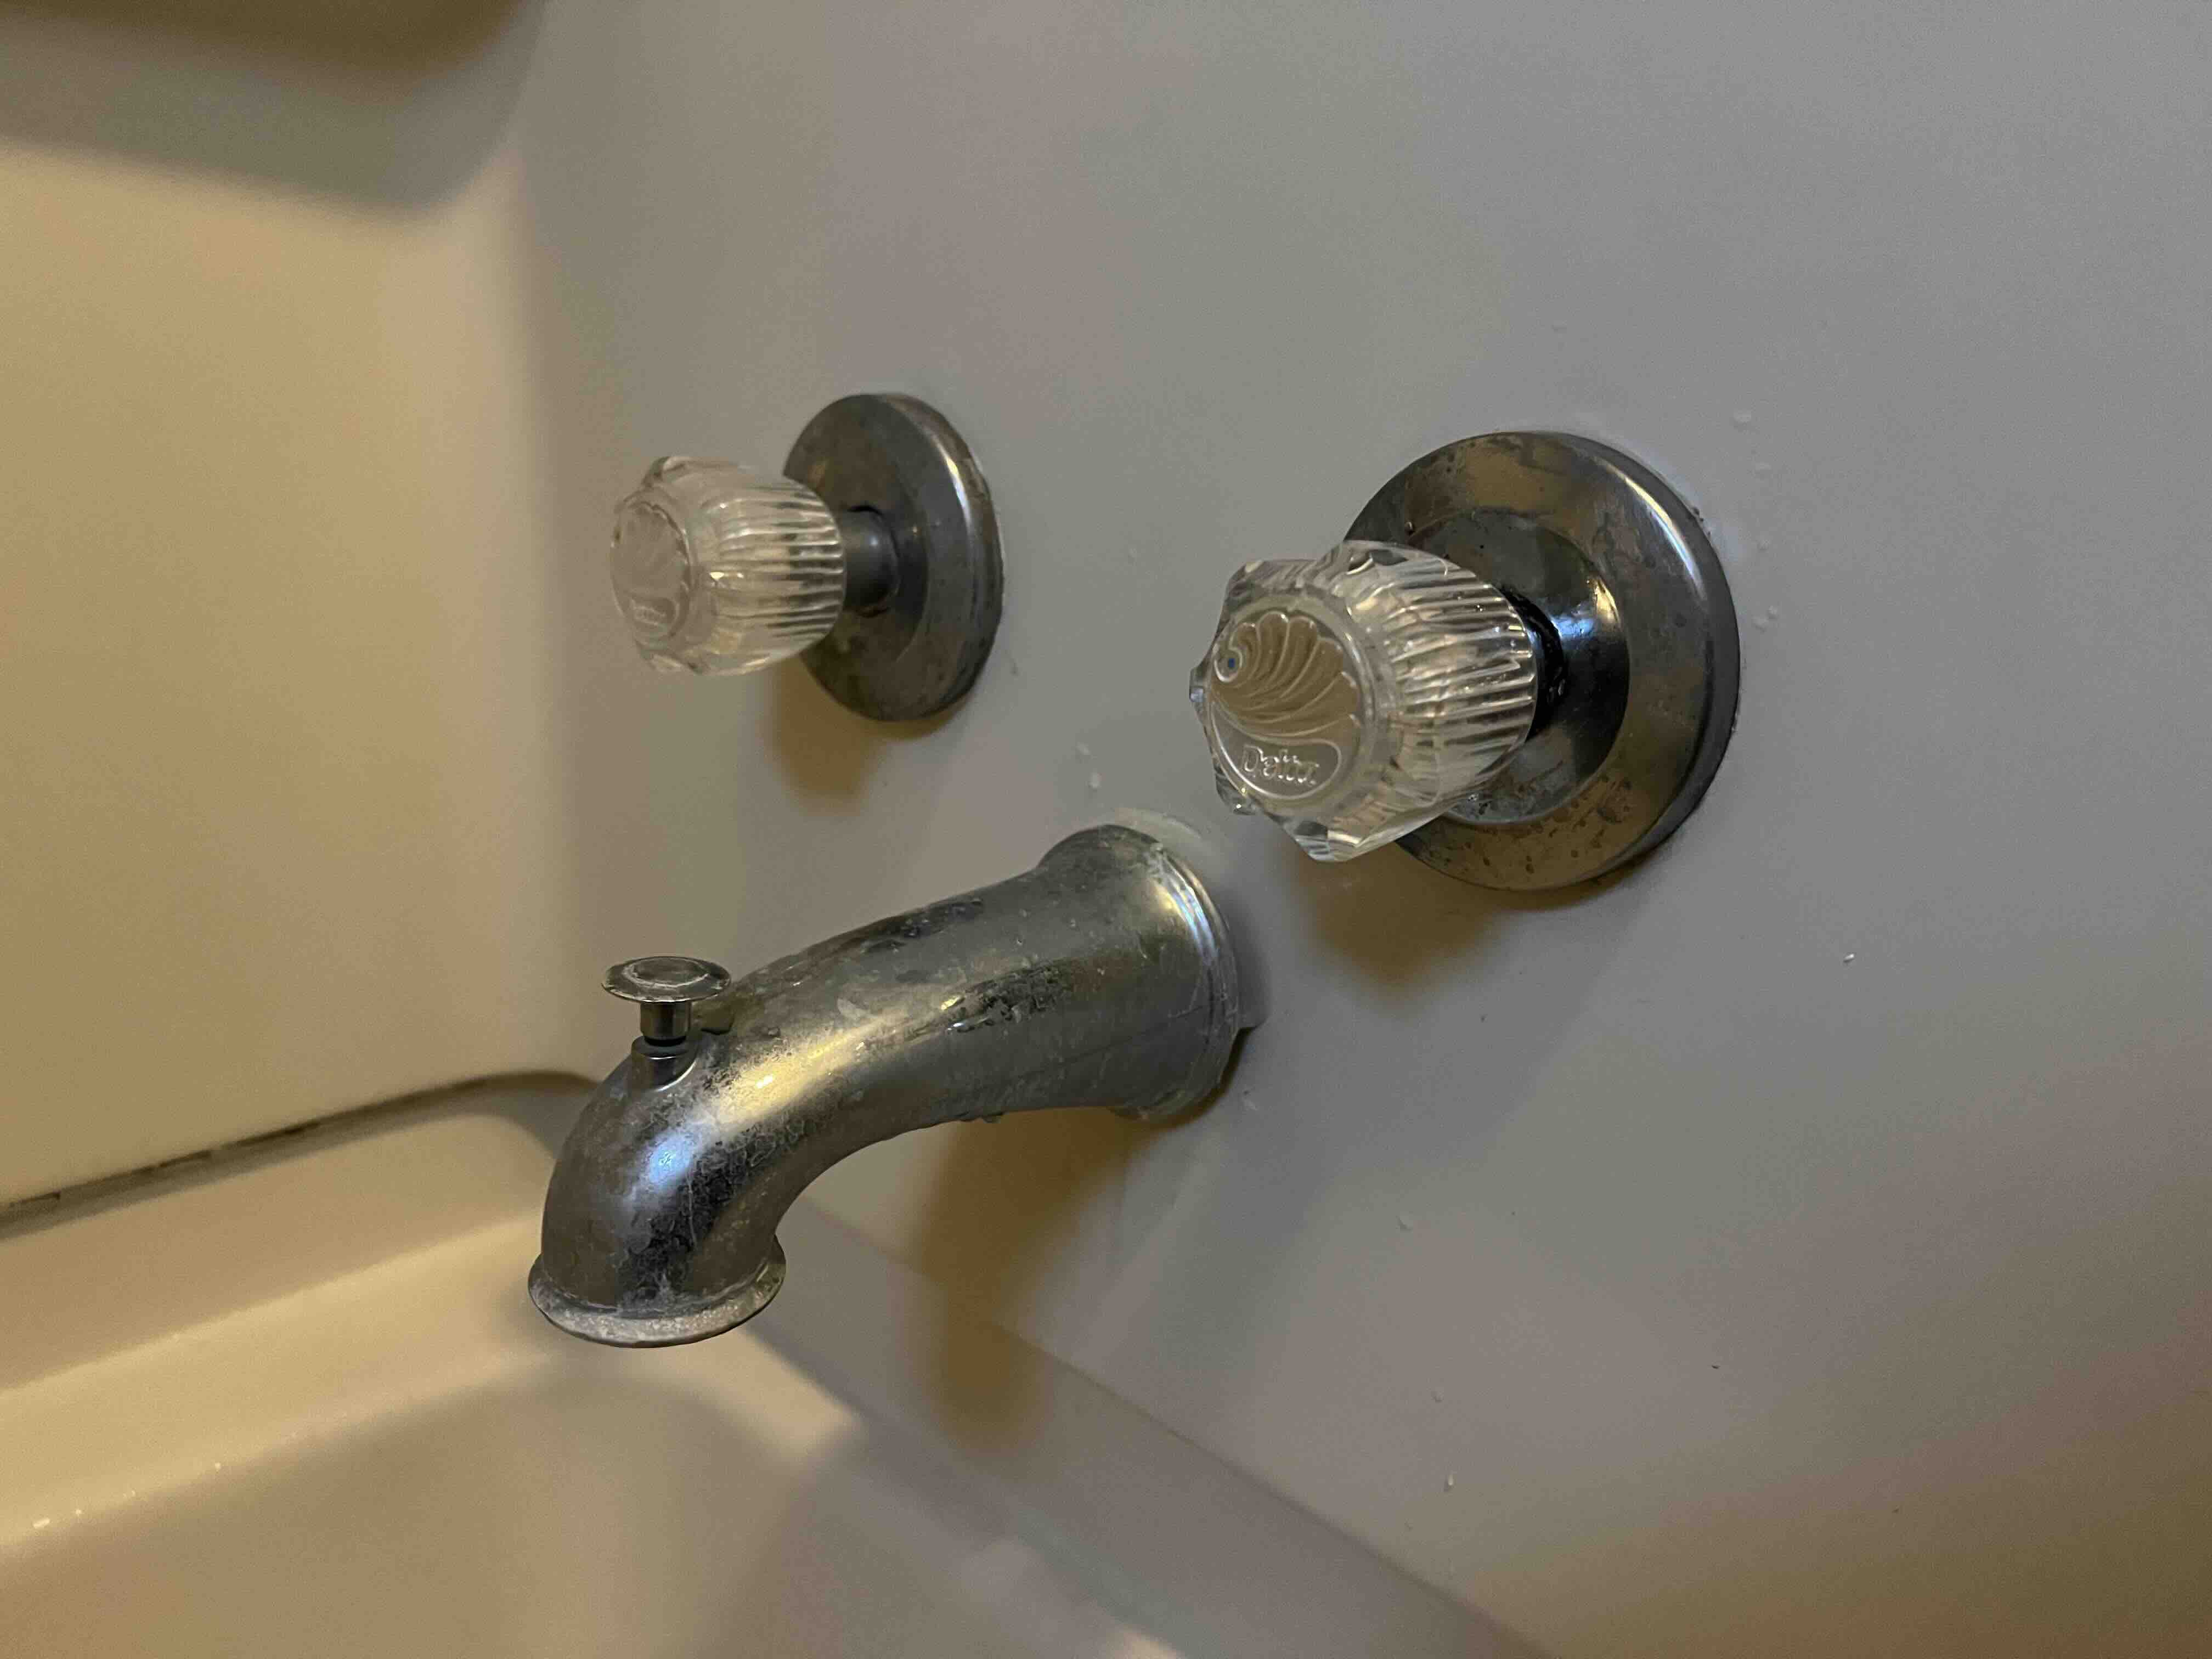
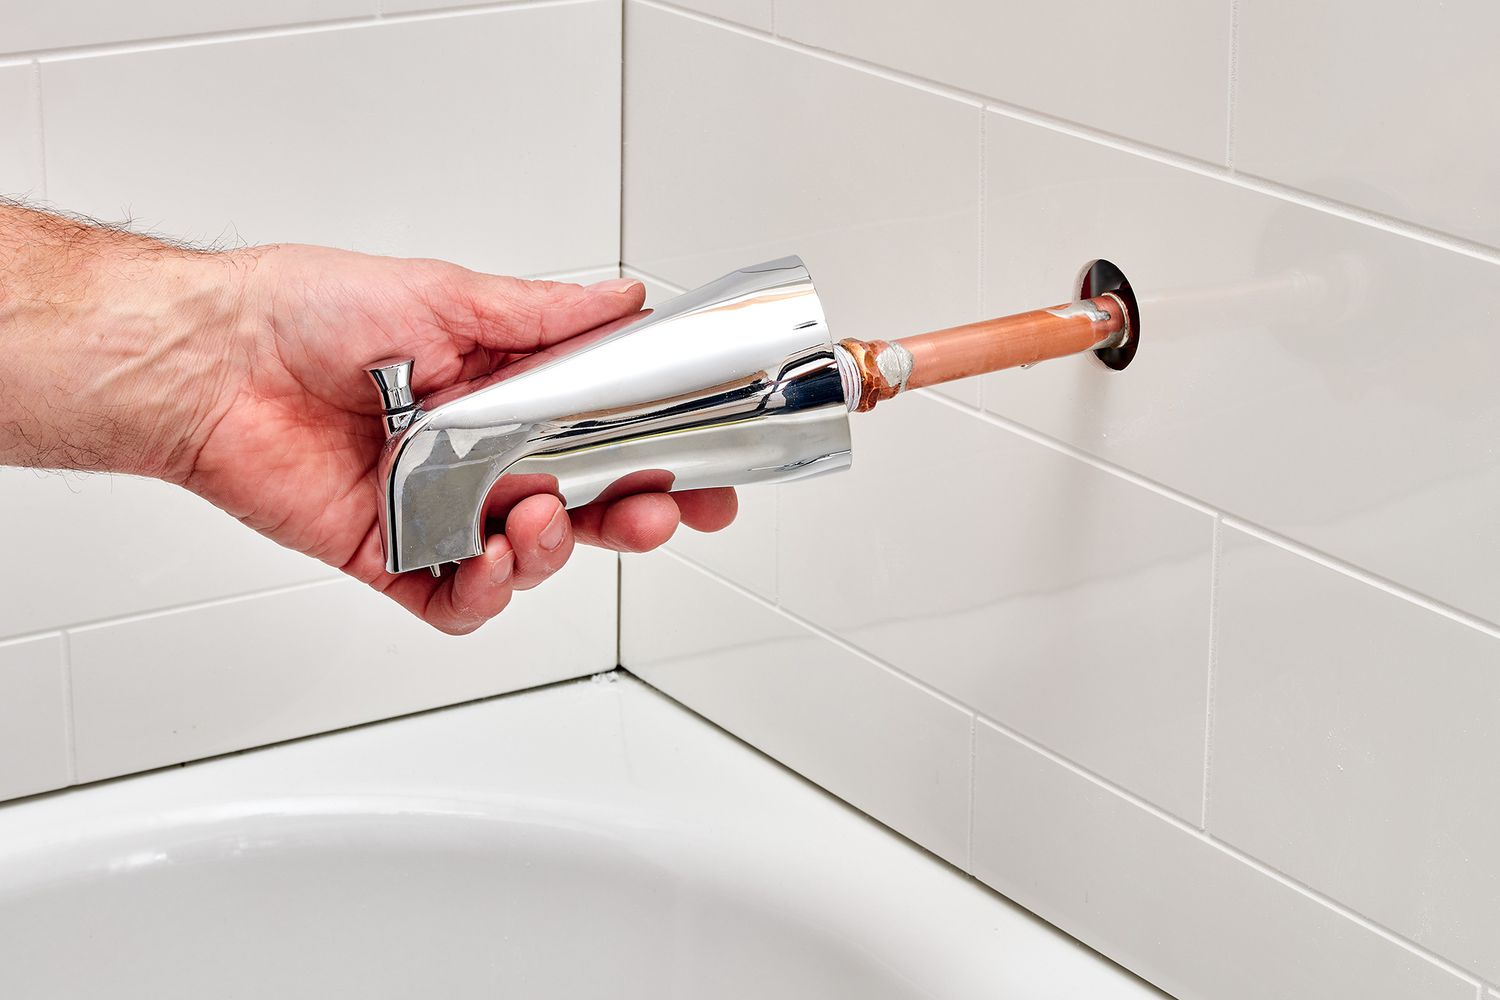
Step 3: Remove the old bathtub spout
With the water supply turned off and the necessary tools at hand, you are now ready to tackle the task of removing the old bathtub spout. The specific method for removing the spout may vary depending on the type of spout you have, but the following general steps will guide you through the process.
-
Identify the Type of Bathtub Spout:
Before proceeding, it's essential to determine the type of bathtub spout you have. There are generally three common types: screw-on spouts, slip-on spouts, and threaded spouts. Each type may require a slightly different approach for removal. -
Access the Spout Connection:
Depending on the design of your bathtub spout, you may need to remove a cover plate or access panel to gain visibility and access to the connection point. Use a screwdriver to remove any screws or fasteners that secure the cover plate or panel in place. -
Loosen the Spout:
If you have a screw-on spout, you will likely find a setscrew located underneath the spout near the wall. Use an appropriate-sized hex key or screwdriver to loosen and remove the setscrew. For slip-on spouts, you may need to twist the spout counterclockwise to release it from the pipe. Threaded spouts can be unscrewed by turning them counterclockwise. -
Apply Lubricant if Necessary:
In some cases, bathtub spouts may become stuck due to corrosion or mineral buildup. If you encounter resistance when attempting to loosen the spout, consider applying a penetrating lubricant to the connection point. Allow the lubricant to penetrate for a few minutes before attempting to remove the spout again. -
Gently Remove the Spout:
Once the spout is loosened, carefully pull it away from the wall or pipe. Exercise caution to avoid damaging the surrounding tiles or wall surface. If the spout is stubborn, use a pipe wrench or adjustable wrench to provide additional leverage while twisting or pulling it off. -
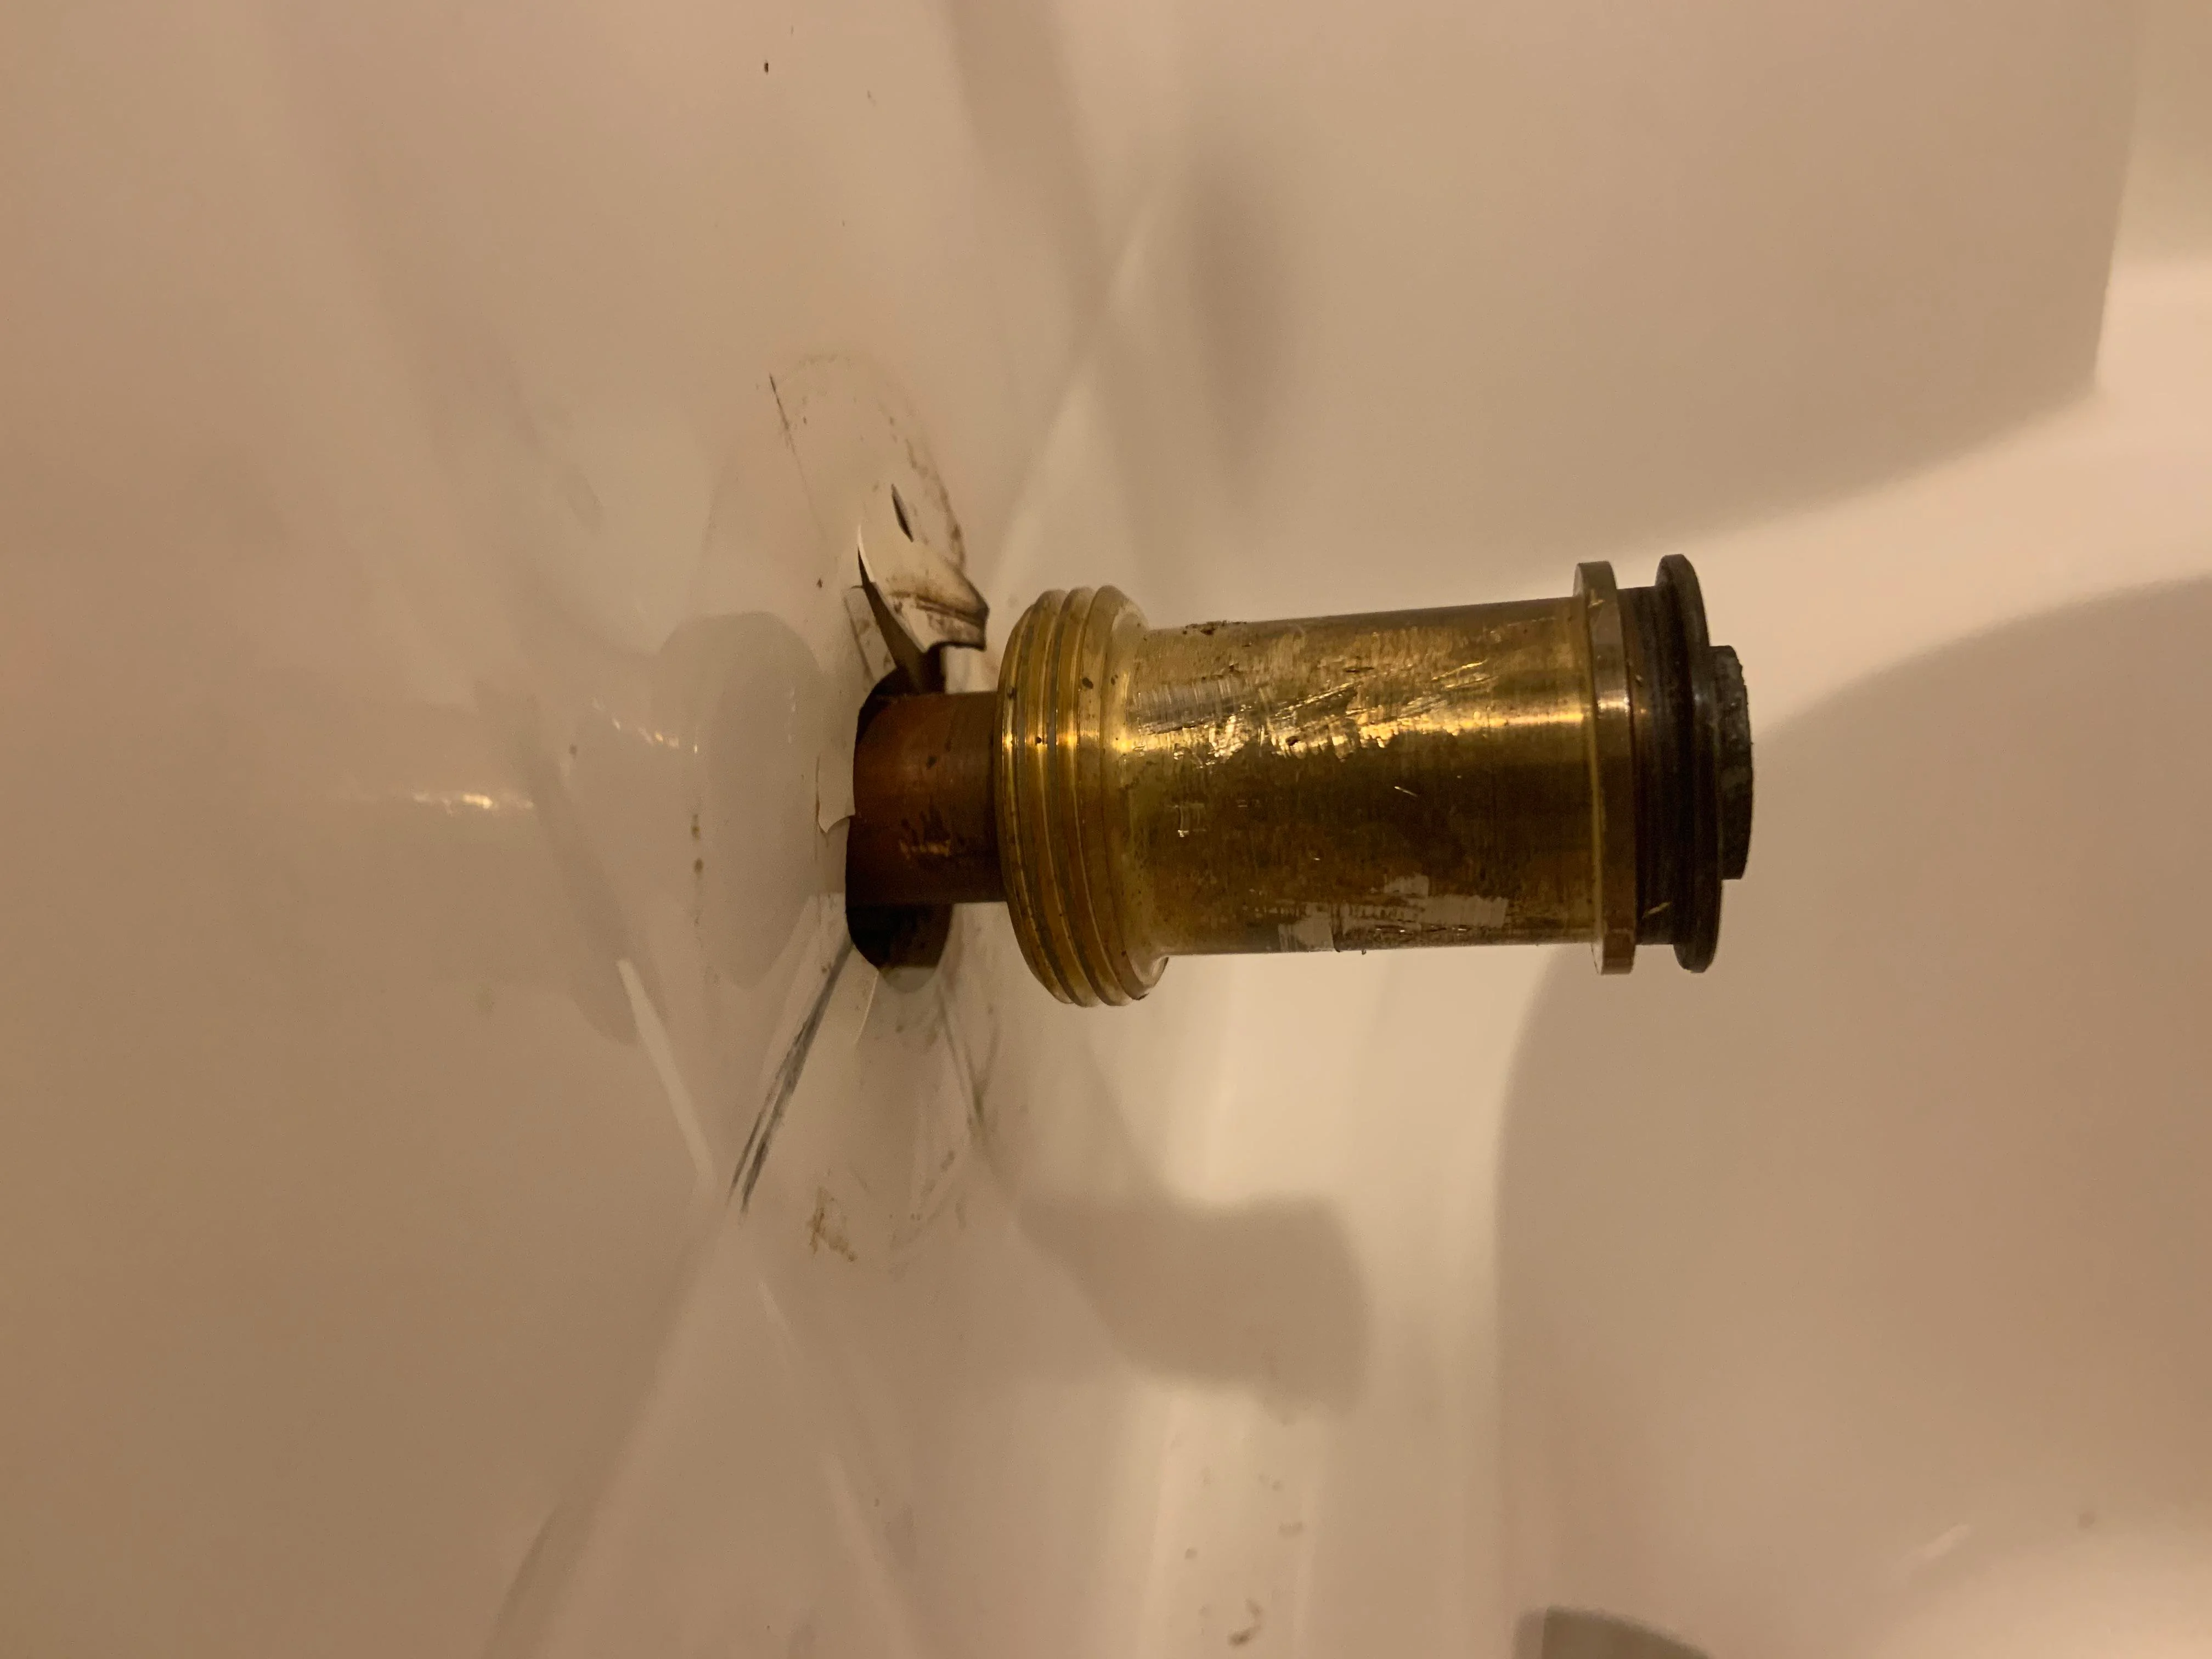
Inspect the Pipe and Clean the Connection:
After removing the old bathtub spout, take a moment to inspect the pipe and clean the connection point. Remove any debris, old plumber's tape, or residue that may be present. This step will ensure a clean and secure surface for installing the new spout.
By following these steps, you can successfully remove the old bathtub spout and prepare the area for the installation of the new spout. With the old spout out of the way, you are now ready to proceed to the next step of cleaning the pipe and preparing for the new spout installation.
Use a pipe wrench to loosen the spout by turning it counterclockwise. If it’s stuck, use penetrating oil and let it sit for a few hours before trying again. Once loose, unscrew the spout and remove it from the wall.
Step 4: Clean the pipe and prepare for the new spout
After successfully removing the old bathtub spout, it's essential to devote attention to cleaning the pipe and preparing the area for the installation of the new spout. This step is crucial for ensuring a secure and leak-free connection, as well as optimizing the performance and longevity of the new spout.
Begin by inspecting the pipe from which the old spout was removed. Check for any residual plumber's tape, debris, or corrosion that may have accumulated on the pipe's threads or surface. Use a clean cloth or rag to wipe away any buildup and ensure that the pipe is clean and free of obstructions.
Next, apply a thin layer of plumber's tape to the threads of the pipe. Plumber's tape, also known as Teflon tape, is a crucial component for creating a watertight seal between the pipe and the new bathtub spout. To apply the tape, start at the end of the pipe and wrap it around the threads in a clockwise direction. Be sure to overlap the tape as you wrap it to ensure complete coverage of the threads.
As you apply the plumber's tape, take care to avoid excessive stretching or tearing, as this can compromise its effectiveness. The goal is to create a snug and uniform layer of tape that will facilitate a secure and leak-resistant connection when the new spout is installed.
Once the plumber's tape is in place, inspect the pipe to ensure that the tape is securely wrapped around the threads without any gaps or irregularities. This meticulous approach will help guarantee a reliable seal and prevent potential leaks once the new spout is installed.
With the pipe cleaned and the plumber's tape applied, the area is now primed for the installation of the new bathtub spout. By taking the time to prepare the pipe in this manner, you are laying the groundwork for a successful and durable spout replacement, setting the stage for the final step of installing the new spout and testing its functionality.
Now that the pipe is clean and ready, you can confidently proceed to the next step of installing the new bathtub spout, knowing that the groundwork has been meticulously laid for a secure and reliable connection.
Read more: How To Remove Old Caulking From Bathtub
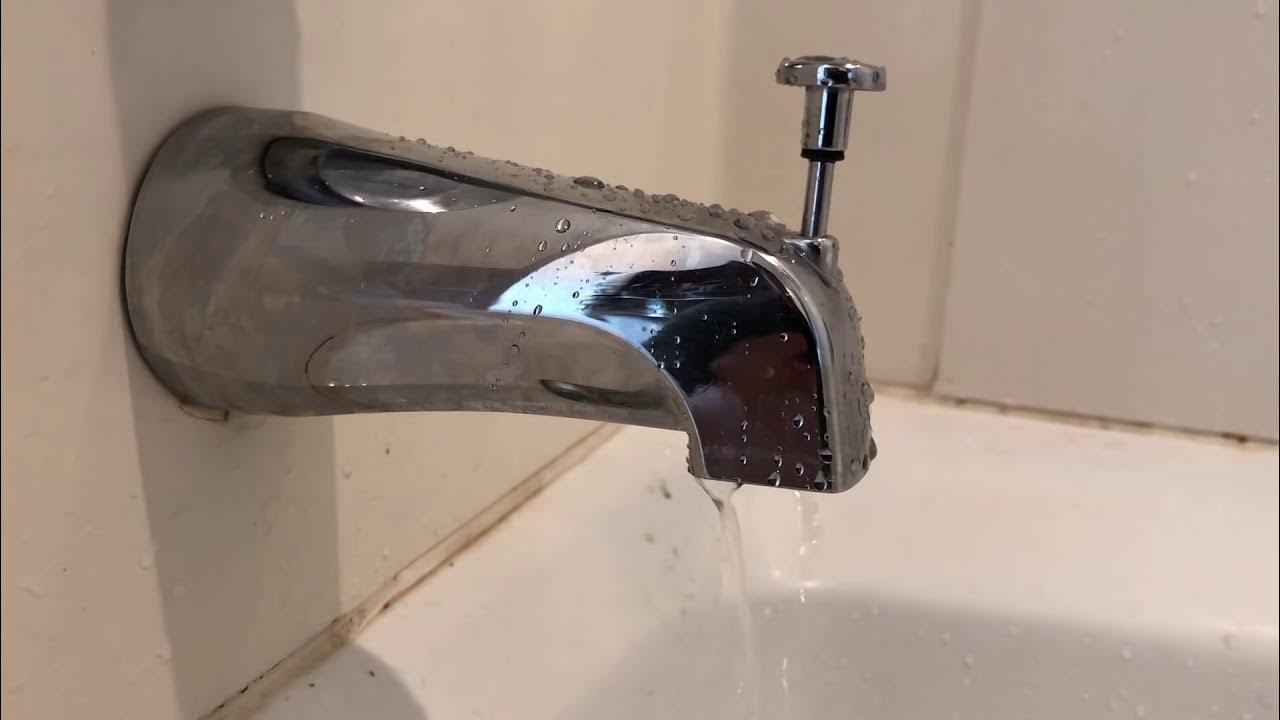
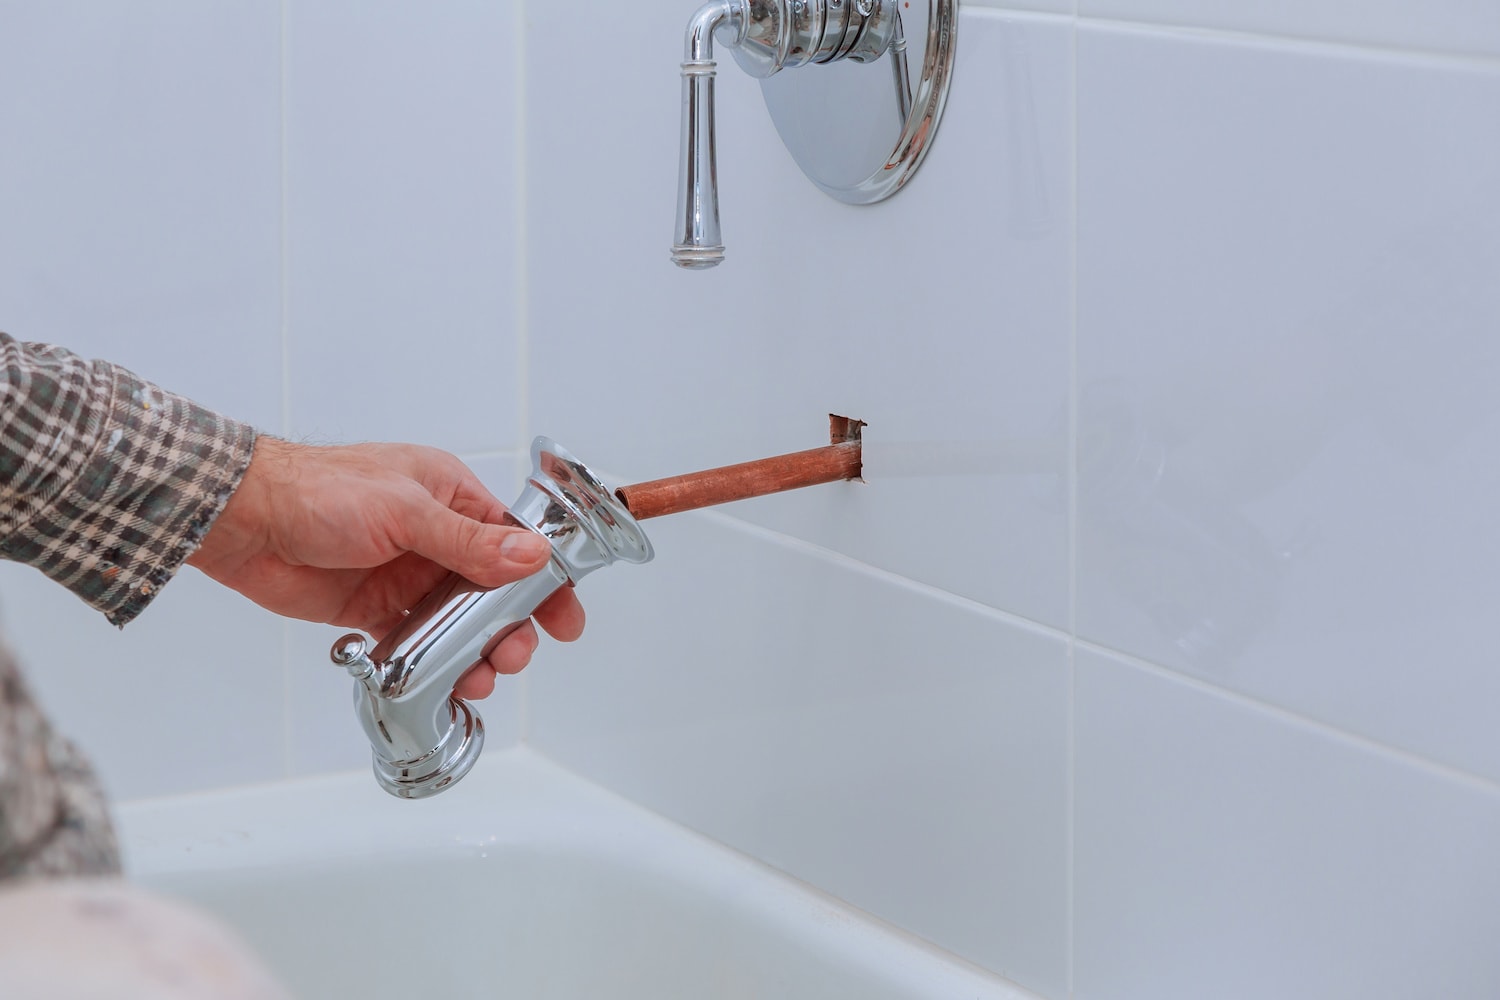
Step 5: Install the new bathtub spout
With the pipe cleaned and prepared, you are now ready to embark on the pivotal step of installing the new bathtub spout. This process marks the culmination of your efforts to replace the old spout and breathe new life into your bathroom fixtures. By following the steps outlined below, you can confidently proceed with the installation, ensuring a secure and functional connection for your new spout.
-
Select the Correct Spout Type: Before proceeding, ensure that the new bathtub spout is compatible with your existing plumbing setup. Whether you have a diverter spout, a slip-on spout, or a threaded spout, it's crucial to match the new spout to the specific requirements of your bathroom. Confirm that the spout is designed for either a copper pipe or a threaded connection, depending on your plumbing configuration.
-
Apply Plumber's Tape: If the new spout requires a threaded connection, apply plumber's tape to the threads of the spout in a clockwise direction. This step will facilitate a tight and leak-resistant seal when the spout is installed onto the pipe. Ensure that the plumber's tape is wrapped securely around the threads, providing a uniform layer for optimal sealing.
-
Align and Secure the Spout: Position the new bathtub spout over the pipe, ensuring that it aligns correctly with the connection point. For slip-on spouts, push the spout onto the pipe and twist it in a clockwise direction to secure it in place. If you have a threaded spout, carefully thread it onto the pipe by turning it in a clockwise direction. Use a pipe wrench or adjustable wrench to provide additional leverage and ensure a snug fit.
-
Tighten the Connection: Once the spout is in position, use a wrench to tighten the connection securely. Exercise caution to avoid over-tightening, as this can damage the spout or the pipe. Strike a balance between a firm connection and the preservation of the spout and pipe integrity.
-
Check for Leaks: After installing the new bathtub spout, turn on the water supply and test the spout for any signs of leaks. Inspect the connection point and the surrounding area for any water seepage. If leaks are detected, revisit the connection and ensure that the spout is securely attached and sealed with the plumber's tape.
By meticulously following these steps, you can successfully install the new bathtub spout, ushering in a fresh and functional addition to your bathroom. With the new spout in place, you are now prepared to proceed to the final step of turning on the water supply and testing the functionality of the newly installed spout.
Step 6: Turn on the water supply and test the new spout
With the new bathtub spout securely installed, the final step involves turning on the water supply and testing the functionality of the newly integrated fixture. This critical phase ensures that the spout operates as intended, delivering a steady flow of water without any leaks or malfunctions. By meticulously following the steps outlined below, you can conclude the spout replacement process with confidence and assurance.
-
Turn on the Water Supply: Return to the shut-off valve for the bathtub and turn it in a counterclockwise direction to restore the water supply. As the water flows back into the pipes, listen for any unusual sounds or vibrations that may indicate a potential issue with the spout installation. Ensure that the shut-off valve is fully open to allow for maximum water flow to the spout.
-
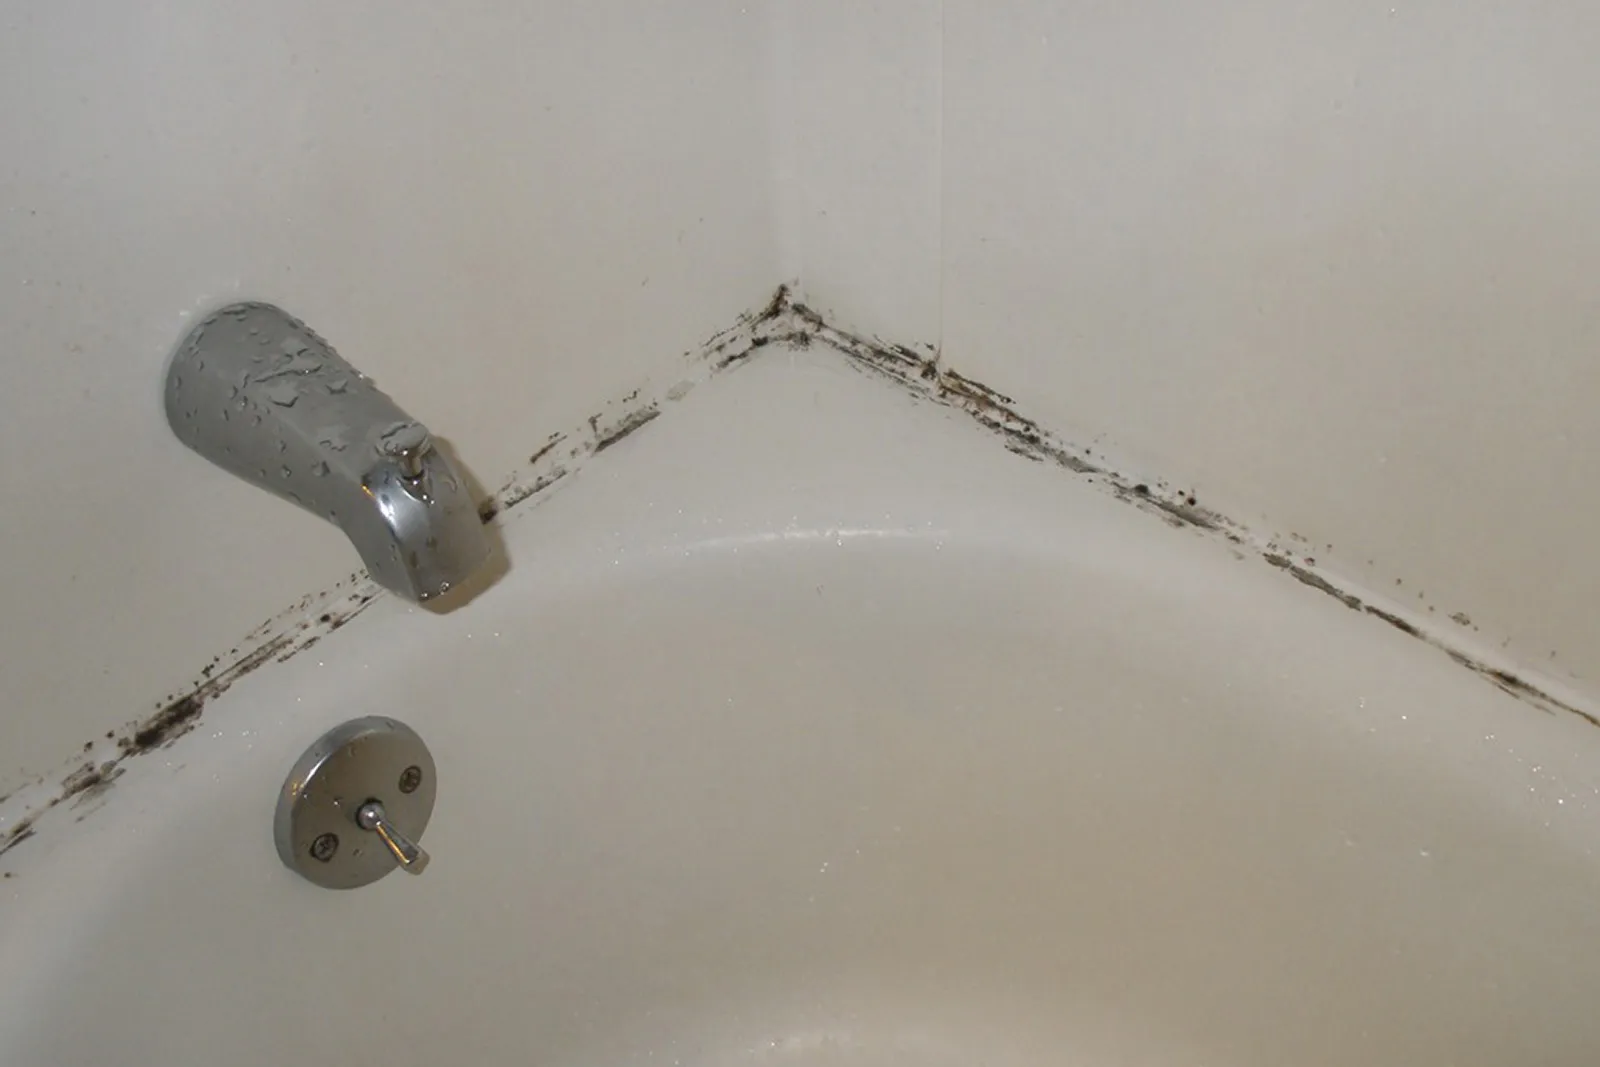
Inspect for Leaks: Once the water supply is restored, closely inspect the area around the new bathtub spout for any signs of leaks or drips. Check the connection point between the spout and the pipe, as well as the surrounding wall or tiling. Run your fingers along the base of the spout to detect any moisture that may indicate a leak. Additionally, observe the flow of water from the spout to confirm that it is steady and free from irregularities.
-
Test the Diverter Function (if applicable): If your new bathtub spout includes a diverter for directing water to the showerhead, test this functionality to ensure that it operates smoothly. Activate the diverter lever or mechanism and observe the transition of water flow from the spout to the showerhead. Verify that the diverter effectively redirects the water without any leaks or disruptions.
-
Check for Proper Sealing: Examine the area where the spout meets the wall or tiling to confirm that it is sealed effectively. Look for any gaps or gaps that may allow water to seep behind the spout, potentially causing damage to the surrounding surfaces. A secure and watertight seal is essential for maintaining the integrity of the installation and preventing water-related issues.
-
Adjust and Fine-Tune as Needed: If you encounter any issues during the testing phase, such as minor leaks or inadequate sealing, make the necessary adjustments to address these concerns. Tighten the spout connection, reapply plumber's tape if required, and ensure that all components are functioning as intended. Take the time to fine-tune the installation to achieve optimal performance.
By diligently carrying out these steps, you can conclude the spout replacement process with the confidence that the new bathtub spout is fully operational and seamlessly integrated into your bathroom fixtures. The thorough testing and inspection ensure that the installation is reliable and free from any potential issues, allowing you to enjoy the enhanced functionality and aesthetic appeal of your updated bathtub spout.
Conclusion
In conclusion, the process of removing an old bathtub spout and installing a new one is a rewarding endeavor that not only enhances the functionality of your bathroom but also allows you to personalize and update your fixtures according to your preferences. By following the step-by-step guide outlined in this article, you have gained valuable insights into the meticulous process of spout replacement, empowering you to undertake this DIY project with confidence and proficiency.
Throughout the journey of spout replacement, you have embarked on a transformative experience, starting with the gathering of essential tools and materials to create a solid foundation for the project. The deliberate steps of turning off the water supply, removing the old spout, and preparing the pipe for the new installation have equipped you with the skills and knowledge necessary to navigate the intricacies of plumbing maintenance and improvement.
As you meticulously installed the new bathtub spout and tested its functionality, you have not only revitalized a key element of your bathroom but also honed your ability to engage in hands-on home improvement projects. The attention to detail and the commitment to achieving a secure and reliable installation reflect your dedication to maintaining a functional and aesthetically pleasing living space.
Furthermore, the successful completion of the spout replacement process underscores your resourcefulness and capability as a DIY enthusiast. By embracing the challenge of spout replacement, you have demonstrated your willingness to take on practical tasks and enhance your home environment through proactive and skillful initiatives.
As you reflect on the journey from removing the old bathtub spout to installing the new one, you can take pride in the knowledge and expertise you have acquired. The newfound confidence in handling plumbing-related projects and the satisfaction of witnessing the tangible results of your efforts serve as a testament to your ability to tackle home improvement tasks with proficiency and determination.
In essence, the process of removing an old bathtub spout and installing a new one transcends the realm of mere maintenance; it embodies a journey of empowerment, skill development, and the fulfillment of your vision for an inviting and functional living space. With the completion of this project, you have not only upgraded a fundamental fixture in your home but also enriched your DIY repertoire, paving the way for future endeavors and accomplishments.
Frequently Asked Questions about How To Remove An Old Bathtub Spout
Was this page helpful?
At Storables.com, we guarantee accurate and reliable information. Our content, validated by Expert Board Contributors, is crafted following stringent Editorial Policies. We're committed to providing you with well-researched, expert-backed insights for all your informational needs.
0 thoughts on “How To Remove An Old Bathtub Spout”