Home>Furniture & Design>Bathroom Accessories>How To Remove Drain Plug In Bathtub

Bathroom Accessories
How To Remove Drain Plug In Bathtub
Modified: September 2, 2024
Learn how to remove a drain plug in your bathtub with our easy step-by-step guide. Find the best bathroom accessories for your needs. Unlock the secrets to a clog-free bathtub!
(Many of the links in this article redirect to a specific reviewed product. Your purchase of these products through affiliate links helps to generate commission for Storables.com, at no extra cost. Learn more)
Introduction
Removing a drain plug from a bathtub may seem like a daunting task, but with the right tools and a bit of know-how, it can be a straightforward process. Over time, drain plugs can become clogged with hair, soap scum, and other debris, leading to slow drainage or complete blockages. By learning how to remove the drain plug, you can effectively address these issues and ensure that your bathtub drains efficiently.
In this guide, we will walk you through the step-by-step process of removing a drain plug from your bathtub. Whether you're dealing with a standard pop-up drain plug or a different type of stopper, this comprehensive tutorial will equip you with the knowledge and skills needed to tackle this common household maintenance task.
By following the instructions outlined in this guide, you'll be able to maintain the functionality of your bathtub drain and prevent potential plumbing issues. So, gather your tools and let's get started on removing that stubborn drain plug!
Key Takeaways:
- Say goodbye to clogged drains! Learn how to remove different types of bathtub drain plugs with simple tools and steps. Keep your bathtub draining efficiently and prevent plumbing issues.
- Prepare, loosen, remove, and clean! Master the art of removing a bathtub drain plug to maintain optimal drainage and ensure a hassle-free bathing experience. Get equipped with the right skills and knowledge.
Read more: How To Remove Delta Bathtub Drain Plug
Tools and Materials Needed
Before embarking on the task of removing a drain plug from your bathtub, it's essential to gather the necessary tools and materials. Having the right equipment at your disposal will streamline the process and ensure that you can tackle the job effectively. Here's a comprehensive list of the tools and materials you'll need:
-
Adjustable Wrench: An adjustable wrench is a versatile tool that will come in handy for loosening and removing the drain plug. Ensure that the wrench is appropriately sized to fit the drain plug's securing nut.
-
Screwdriver Set: A set of screwdrivers, including both flathead and Phillips head varieties, will be useful for accessing and manipulating certain types of drain plugs.
-
Needle-Nose Pliers: These specialized pliers feature long, narrow jaws, making them ideal for reaching into tight spaces and grasping small components. Needle-nose pliers are particularly useful for extracting certain types of drain plugs.
-
Plumber's Putty: Plumber's putty is a malleable, waterproof sealing compound that can be used to create a watertight seal around the drain opening once the plug has been removed.
-
Rubber Gloves: It's advisable to wear rubber gloves to protect your hands from any grime, debris, or cleaning products that you may encounter during the drain plug removal process.
-
Safety Goggles: Safety goggles are essential for safeguarding your eyes from any splashing water, cleaning solutions, or debris that may be dislodged while working on the drain plug.
-
Cleaning Solution: Depending on the condition of the drain plug and the surrounding area, you may need a suitable cleaning solution to remove accumulated grime and residue.
-
Old Towels or Rags: Keep a supply of old towels or rags on hand to wipe up any spills and to protect the bathtub surface from potential scratches or damage.
-
Flashlight: A flashlight will be invaluable for illuminating the area around the drain, especially if the bathroom lighting is insufficient.
By ensuring that you have these tools and materials readily available, you'll be well-prepared to tackle the task of removing the drain plug from your bathtub. With the right equipment at your disposal, you can proceed with confidence, knowing that you have everything you need to complete the job effectively.
Step 1: Prepare the Area
Before diving into the process of removing the drain plug from your bathtub, it's crucial to prepare the surrounding area to ensure a smooth and efficient undertaking. By taking the time to prepare the space, you can minimize potential mess and create a conducive environment for working on the drain plug. Here's a detailed breakdown of the steps involved in preparing the area:
Clear the Surrounding Space
Begin by clearing any items or accessories from the area surrounding the bathtub. This includes toiletries, bath mats, and any other objects that could obstruct your movement or impede access to the drain. Clearing the space will provide you with ample room to maneuver and work comfortably.
Protect the Bathtub Surface
To safeguard the surface of the bathtub from potential scratches or damage, lay down old towels or rags. These protective layers will serve as a cushioning barrier and prevent any tools or equipment from inadvertently scratching or marking the bathtub surface during the drain plug removal process.
Read more: How To Plug Bathtub Drain Without Plug
Gather Necessary Tools and Materials
Ensure that all the required tools and materials are within easy reach. Organize them in a designated area near the bathtub to facilitate quick access during the task. Having the tools readily available will streamline the process and prevent unnecessary interruptions as you work on removing the drain plug.
Put on Safety Gear
Prioritize your safety by donning rubber gloves and safety goggles. The rubber gloves will protect your hands from grime and cleaning solutions, while the safety goggles will shield your eyes from any splashing water or debris. Wearing safety gear is essential for minimizing the risk of injury and ensuring a secure working environment.
Adequate Lighting
Assess the lighting in the bathroom and, if necessary, bring in a portable flashlight to illuminate the area around the drain. Adequate lighting is crucial for enhancing visibility and ensuring that you can effectively inspect and work on the drain plug without any hindrances.
By meticulously preparing the area before commencing the drain plug removal process, you can set the stage for a successful and hassle-free undertaking. Taking these preparatory steps will contribute to a more organized and efficient workflow, ultimately leading to a smoother experience as you work through the subsequent stages of removing the drain plug from your bathtub.
Step 2: Loosen the Drain Plug
Loosening the drain plug is a critical step in the process of removing it from the bathtub. Depending on the type of drain plug mechanism in place, the method for loosening it may vary. Here's a detailed guide on how to effectively loosen the drain plug:
Read more: How To Plug An Overflow Drain In Bathtub?
Assess the Type of Drain Plug
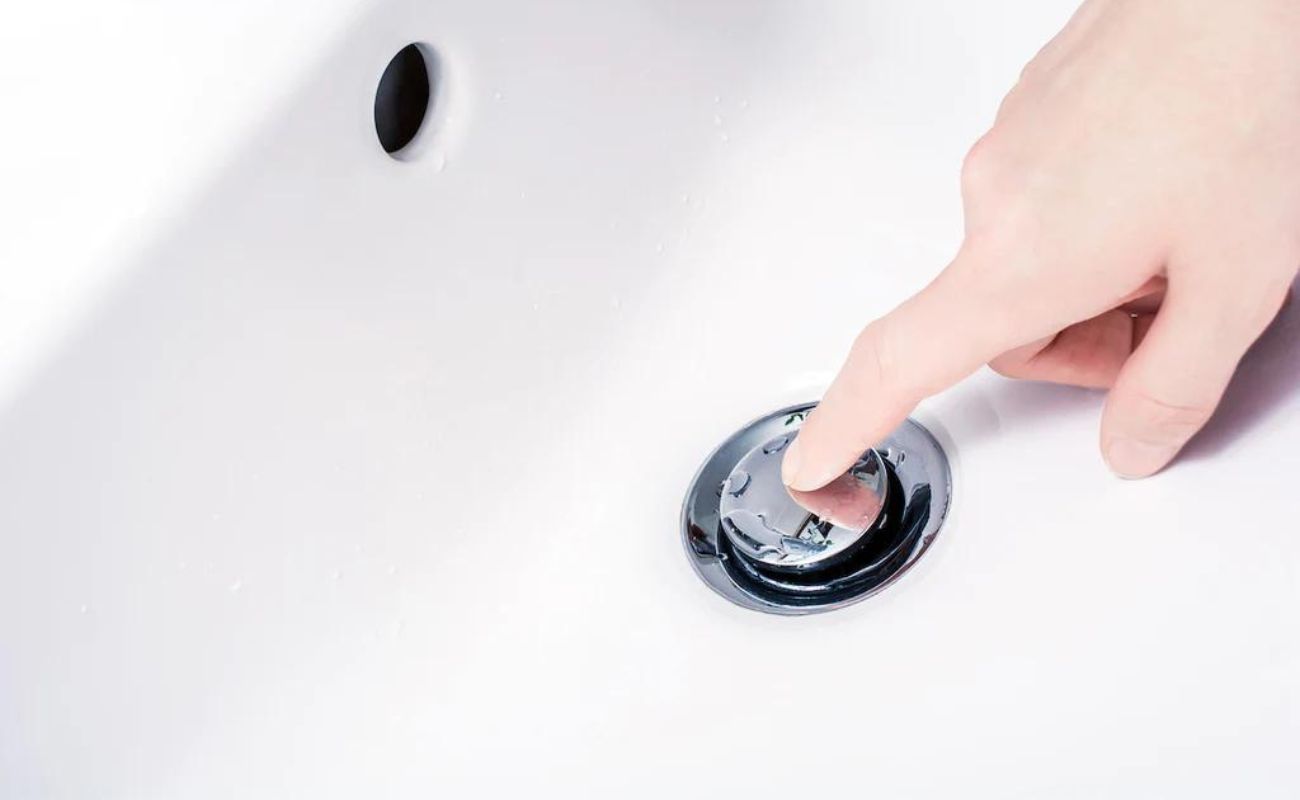
Begin by identifying the specific type of drain plug installed in your bathtub. Common varieties include pop-up stoppers, lift-and-turn stoppers, push-and-pull stoppers, and toe-touch stoppers. Each type may require a slightly different approach for loosening and removal.
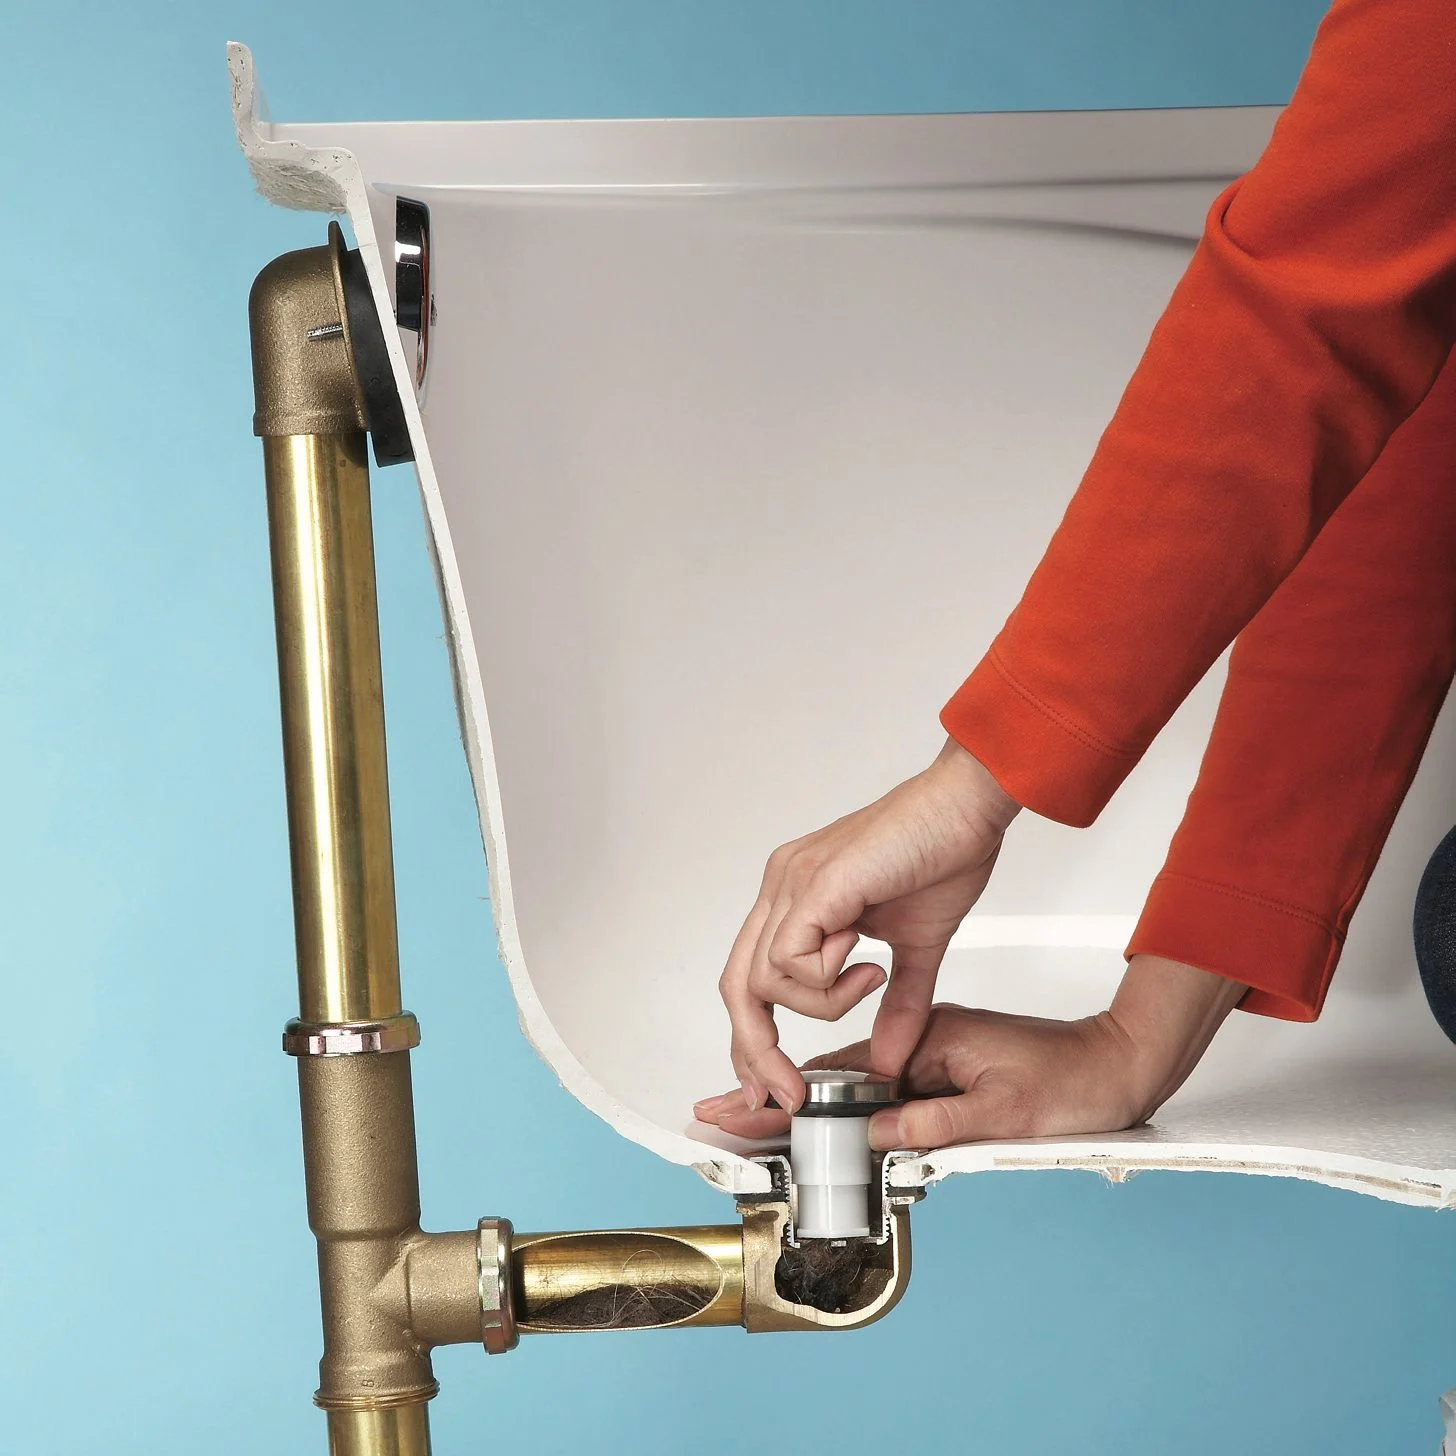
Access the Drain Mechanism
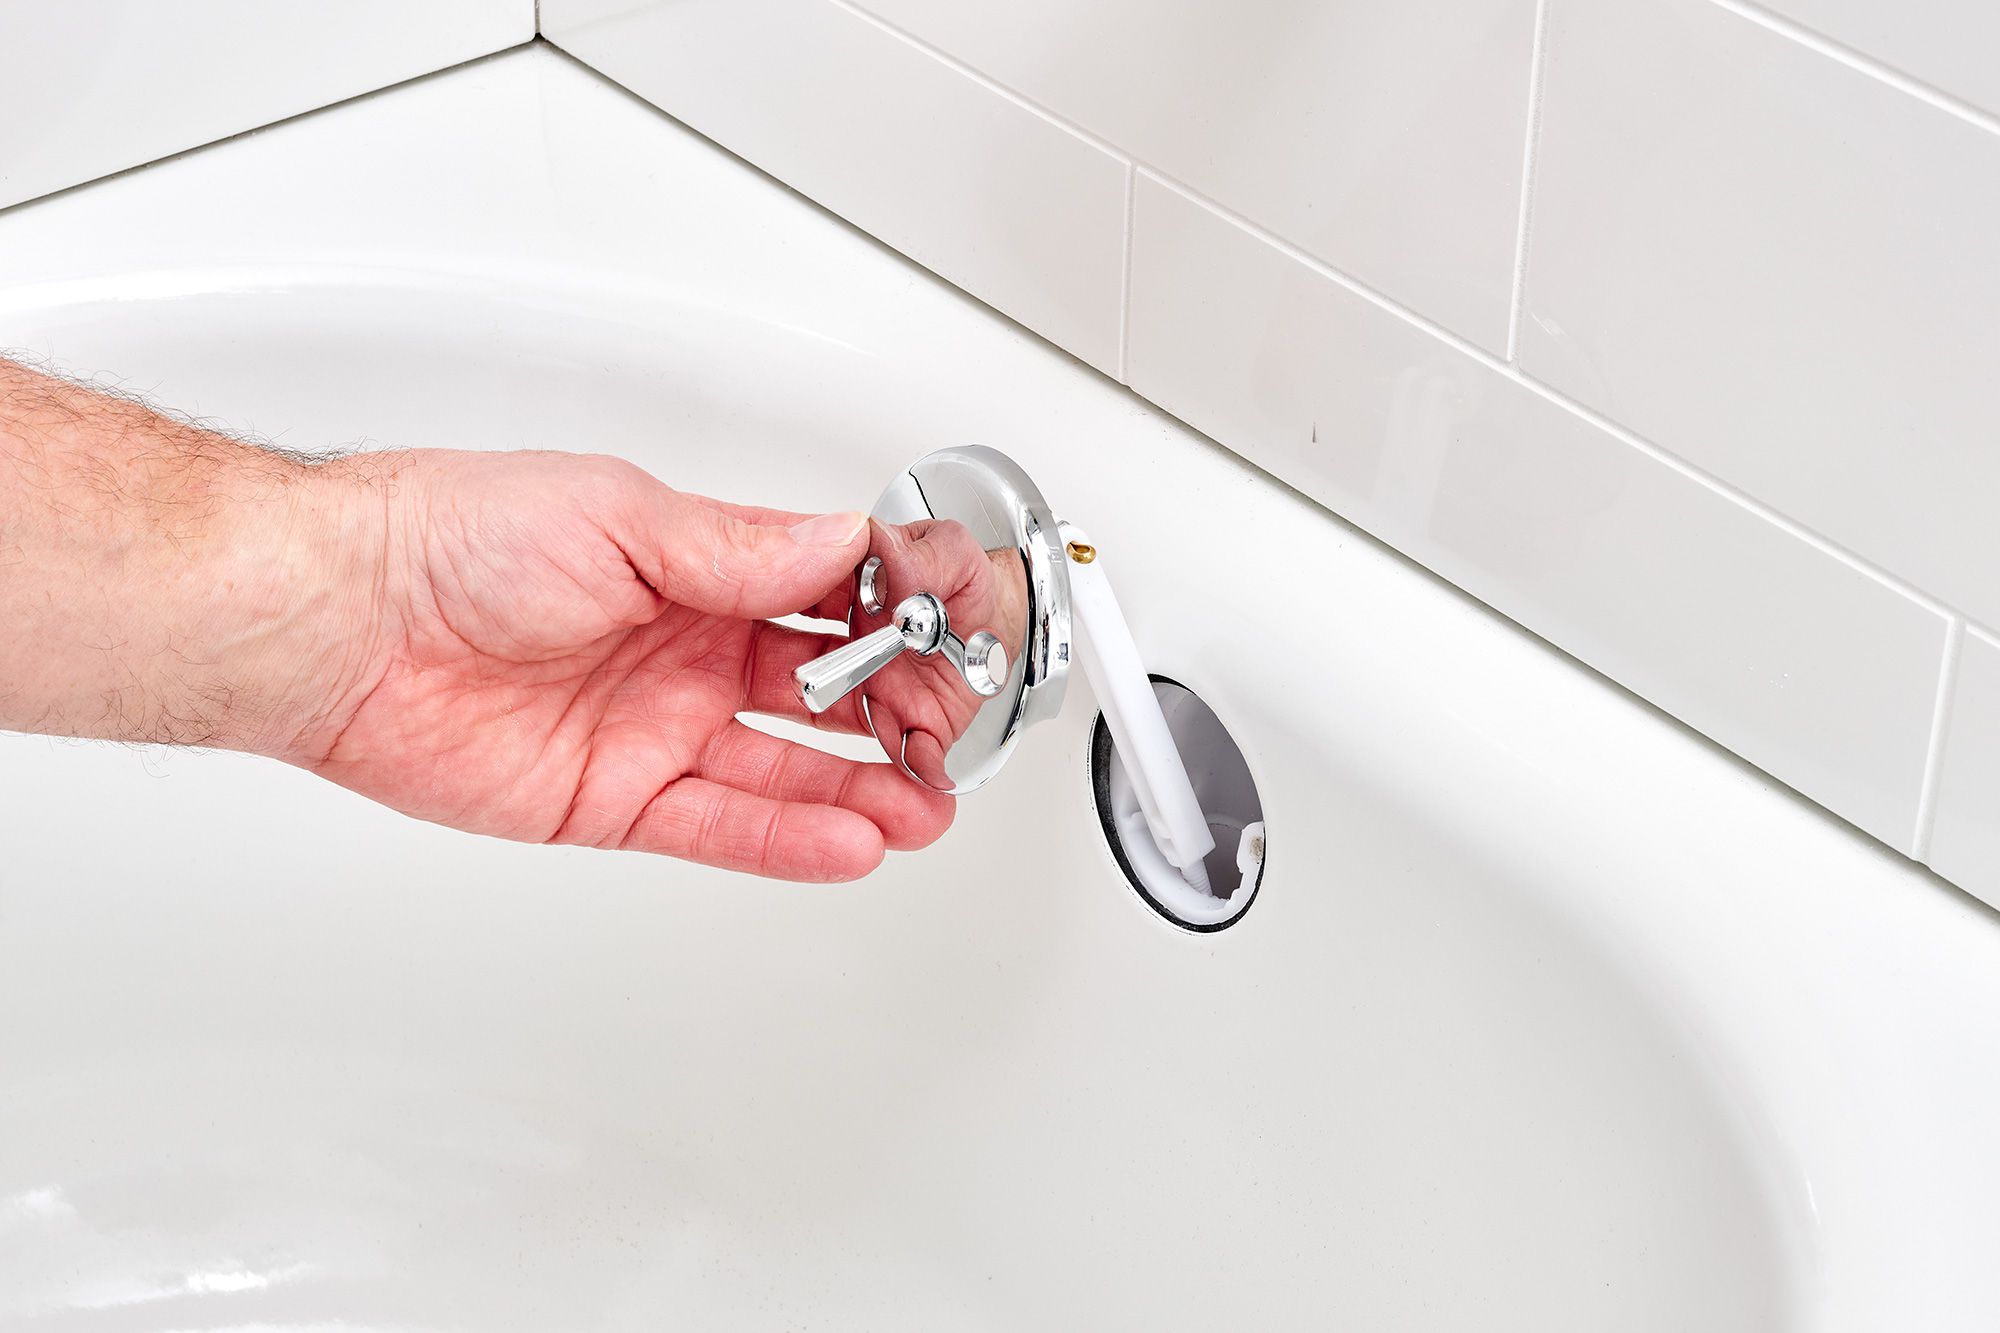
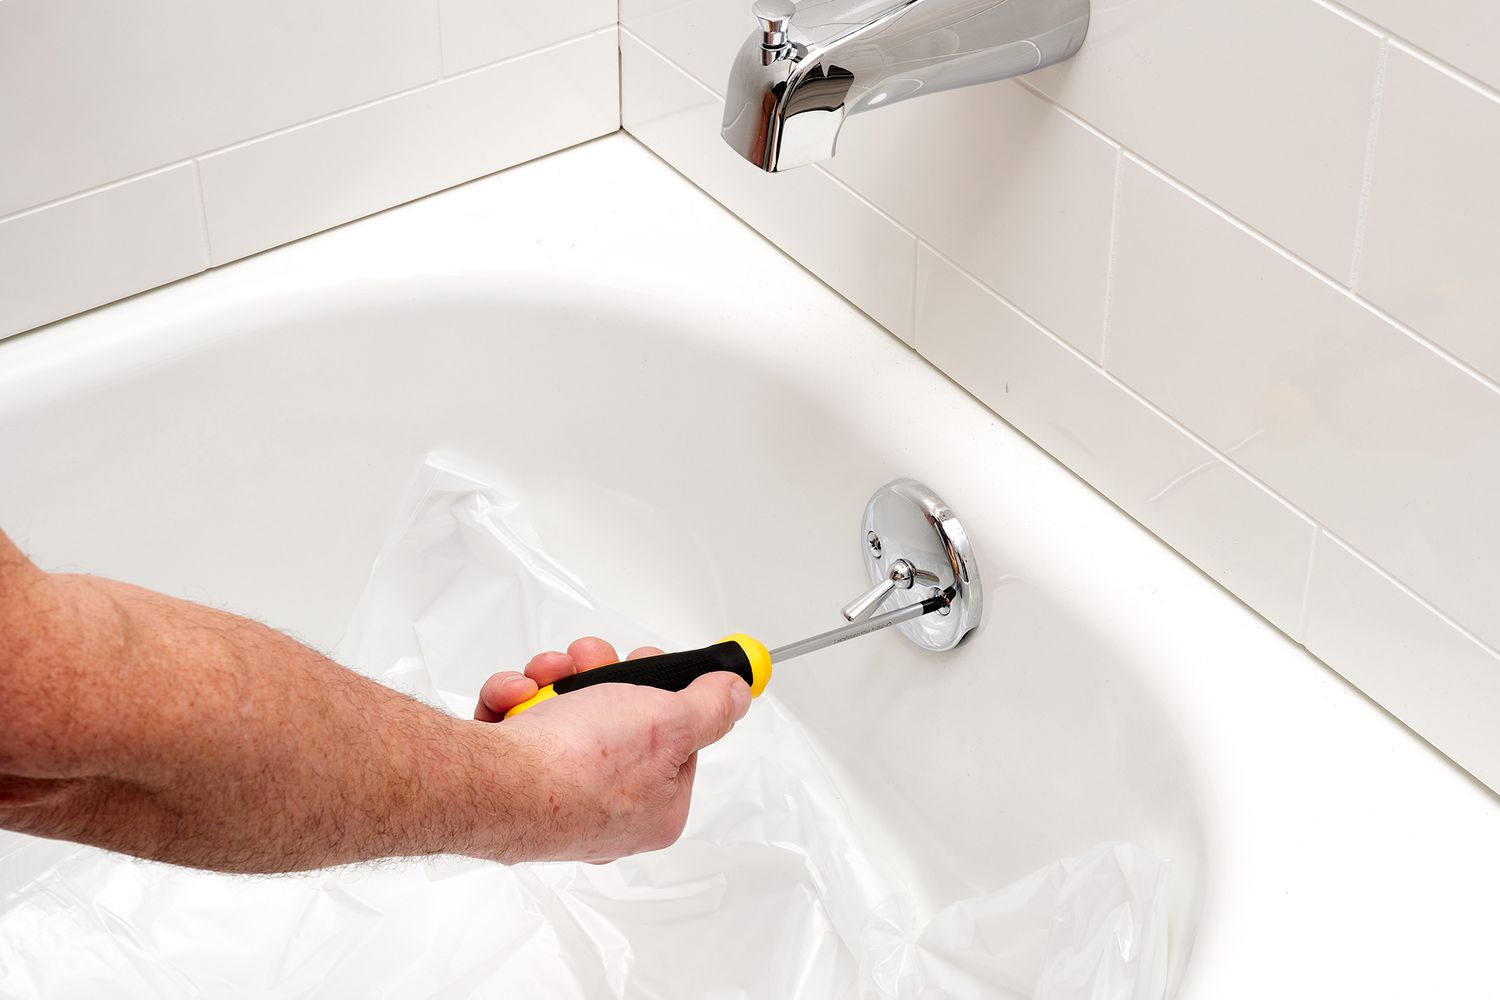
For pop-up stoppers, access the drain mechanism by locating the overflow cover plate on the bathtub wall. Remove the screws securing the cover plate and carefully pull it away to reveal the linkage and adjustment rod connected to the drain plug.
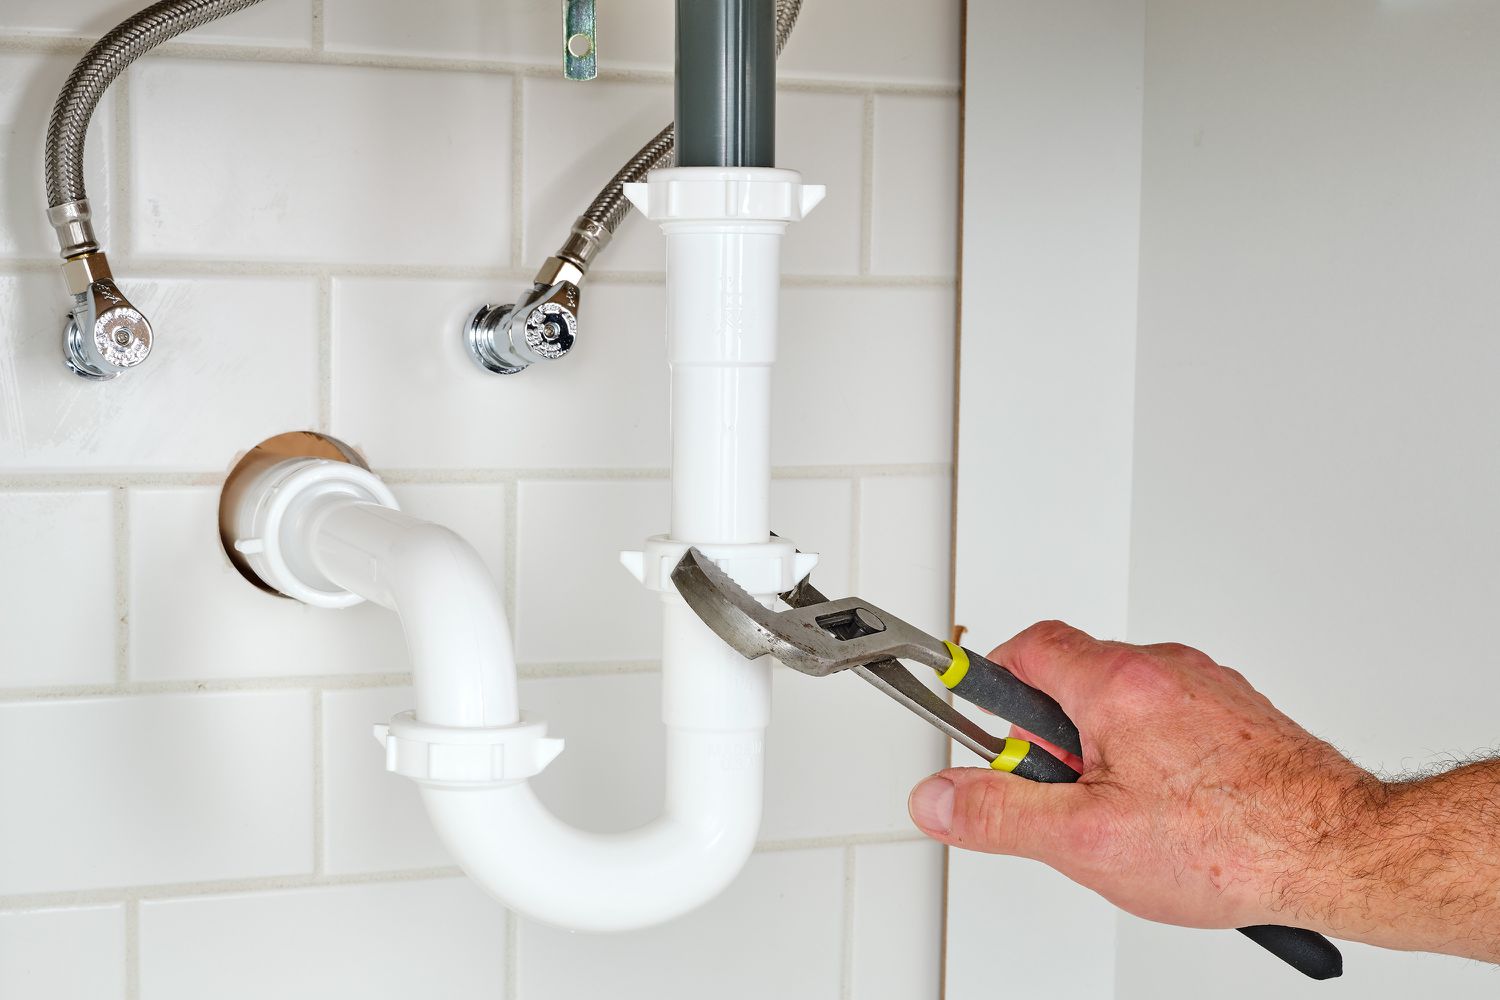
Loosen the Securing Nut
Using an adjustable wrench, locate the securing nut that fastens the drain plug in place. Position the wrench around the nut and turn it counterclockwise to loosen. Apply steady, controlled pressure to avoid damaging the nut or surrounding components.
Apply Lubricant (If Necessary)
If the securing nut is stubborn and resistant to loosening, applying a lubricant such as WD-40 can help to ease the process. Spray a small amount of lubricant onto the nut and allow it to penetrate for a few minutes before attempting to loosen it again.
Read more: How To Remove Bathtub Drain Flange
Use Needle-Nose Pliers (If Applicable)
For certain types of drain plugs, such as lift-and-turn or push-and-pull stoppers, a pair of needle-nose pliers may be required to loosen the mechanism. Insert the pliers into the drain and grip the crossbars or other protruding components, then rotate counterclockwise to release the stopper.
Test for Loosening
After applying the appropriate method for your specific drain plug type, test the plug to determine if it has loosened. Gently lift or twist the stopper to assess its movement. If it moves freely or shows signs of loosening, proceed to the next step of removing the drain plug.
By following these detailed steps, you can effectively loosen the drain plug in preparation for its removal. Taking the time to assess the type of drain plug and employing the appropriate techniques will set the stage for a successful continuation of the removal process.
Step 3: Remove the Drain Plug
With the drain plug successfully loosened, the next step involves the actual removal of the plug from the bathtub. This phase of the process requires careful maneuvering and attention to detail to ensure that the drain plug is extracted without causing any damage to the surrounding components. Here's a comprehensive guide on how to effectively remove the drain plug:
Pop-Up Stoppers
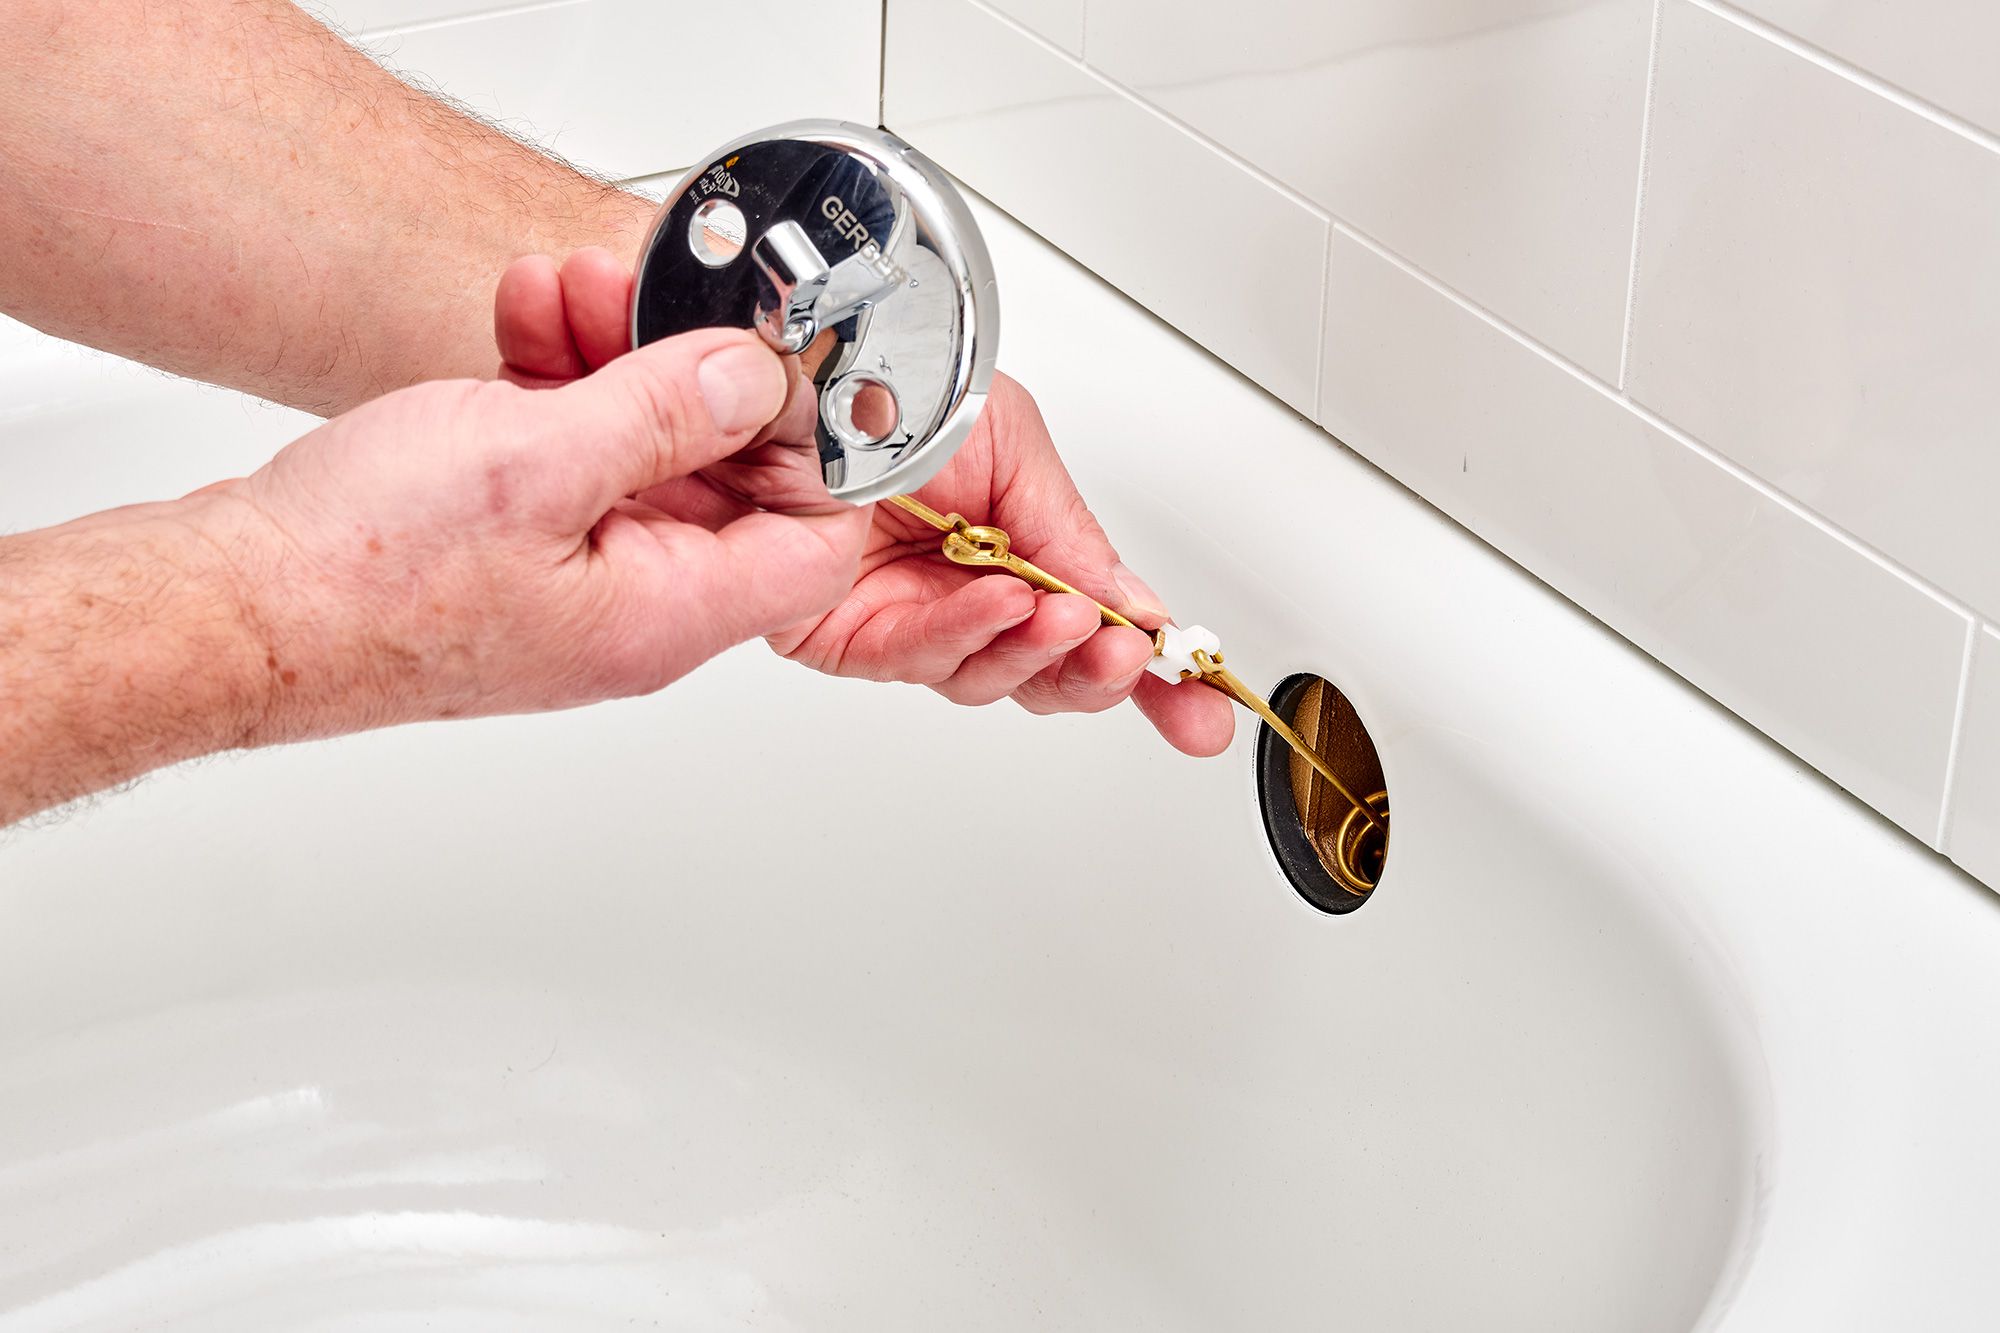
For bathtubs equipped with pop-up stoppers, the removal process begins by disconnecting the linkage and adjustment rod from the overflow cover plate. Carefully extract the linkage and adjustment rod from the overflow pipe, ensuring that any accompanying seals or gaskets are also removed.
Once the linkage and adjustment rod are detached, reach into the drain opening and grasp the stopper. Lift it out gently, taking care not to force or damage the surrounding components. Inspect the stopper for any accumulated debris or residue, and clean it thoroughly before reinstallation.
Read more: How To Remove Sand From A Bathtub Drain
Lift-and-Turn Stoppers
To remove a lift-and-turn stopper, rotate the stopper counterclockwise to unthread it from the drain fitting. Apply steady, controlled pressure to avoid any abrupt movements that could potentially damage the stopper or the drain mechanism. Once the stopper is unthreaded, carefully lift it out of the drain opening.
Inspect the lift-and-turn stopper for any debris or buildup, and clean it meticulously to ensure optimal functionality. Additionally, take this opportunity to clean the drain opening and surrounding area to remove any accumulated grime or residue.
Push-and-Pull Stoppers
For push-and-pull stoppers, the removal process involves pulling the stopper out of the drain opening. Grasp the stopper firmly and apply upward pressure to disengage it from the drain fitting. Exercise caution to avoid any sudden movements that could lead to damage or dislodgment of the stopper.
Once the push-and-pull stopper is removed, thoroughly clean it and inspect for any obstructions or buildup. Simultaneously, clean the drain opening and surrounding components to ensure a clear and unobstructed pathway for water drainage.
Toe-Touch Stoppers
Toe-touch stoppers can be removed by twisting them counterclockwise to unthread them from the drain fitting. Apply controlled force to rotate the stopper and unseat it from the drain opening. Once unthreaded, carefully lift the stopper out of the drain, taking care not to damage the surrounding components.
After removing the toe-touch stopper, conduct a thorough cleaning of both the stopper and the drain opening. Eliminate any accumulated debris or residue to facilitate unimpeded water flow and optimal drainage efficiency.
By following these detailed steps tailored to specific types of drain plugs, you can effectively remove the drain plug from your bathtub without encountering unnecessary complications. This meticulous approach ensures that the removal process is executed with precision and care, setting the stage for a successful resolution of any drainage issues and the restoration of optimal bathtub functionality.
Step 4: Clean and Inspect the Drain
After successfully removing the drain plug from your bathtub, the next crucial step involves thoroughly cleaning and inspecting the drain to ensure optimal functionality and prevent future issues. This phase of the process is essential for maintaining a clear and unobstructed drainage pathway, as well as identifying any potential concerns that may require attention. Here's a detailed guide on how to effectively clean and inspect the drain:
Read more: How Do You Remove The Drain From A Bathtub?
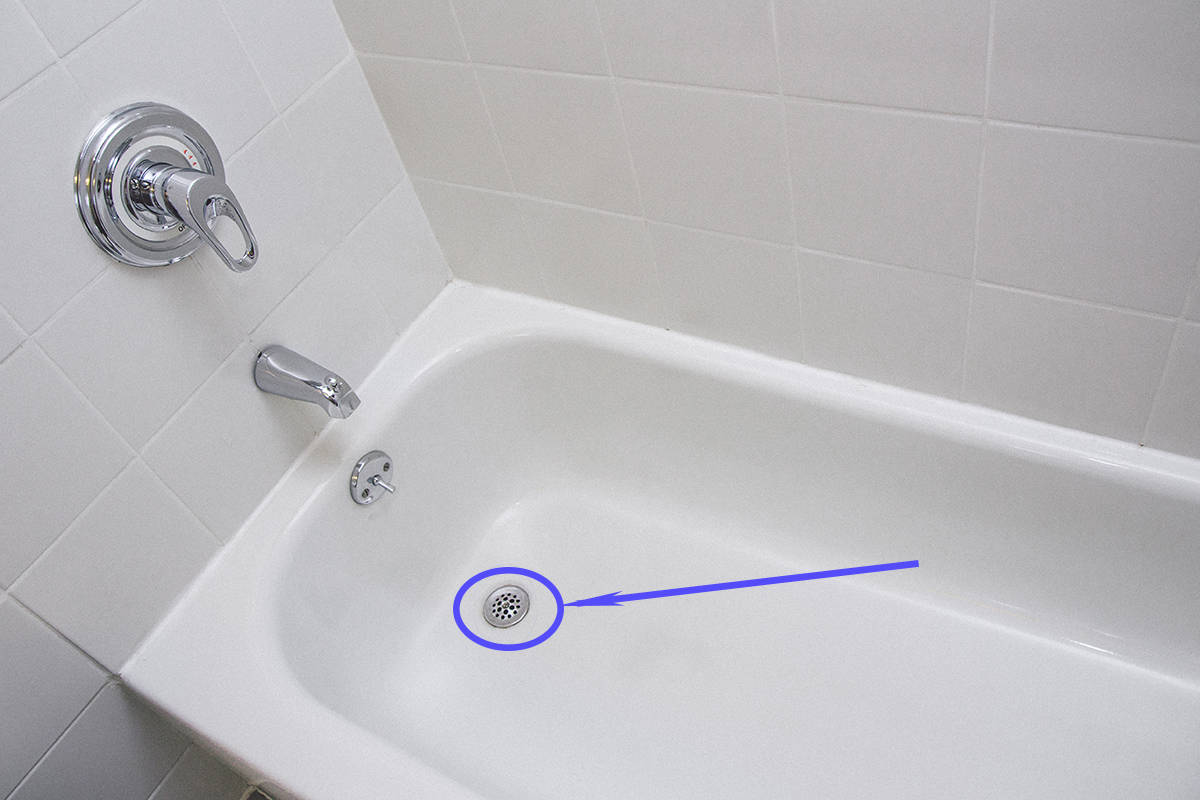
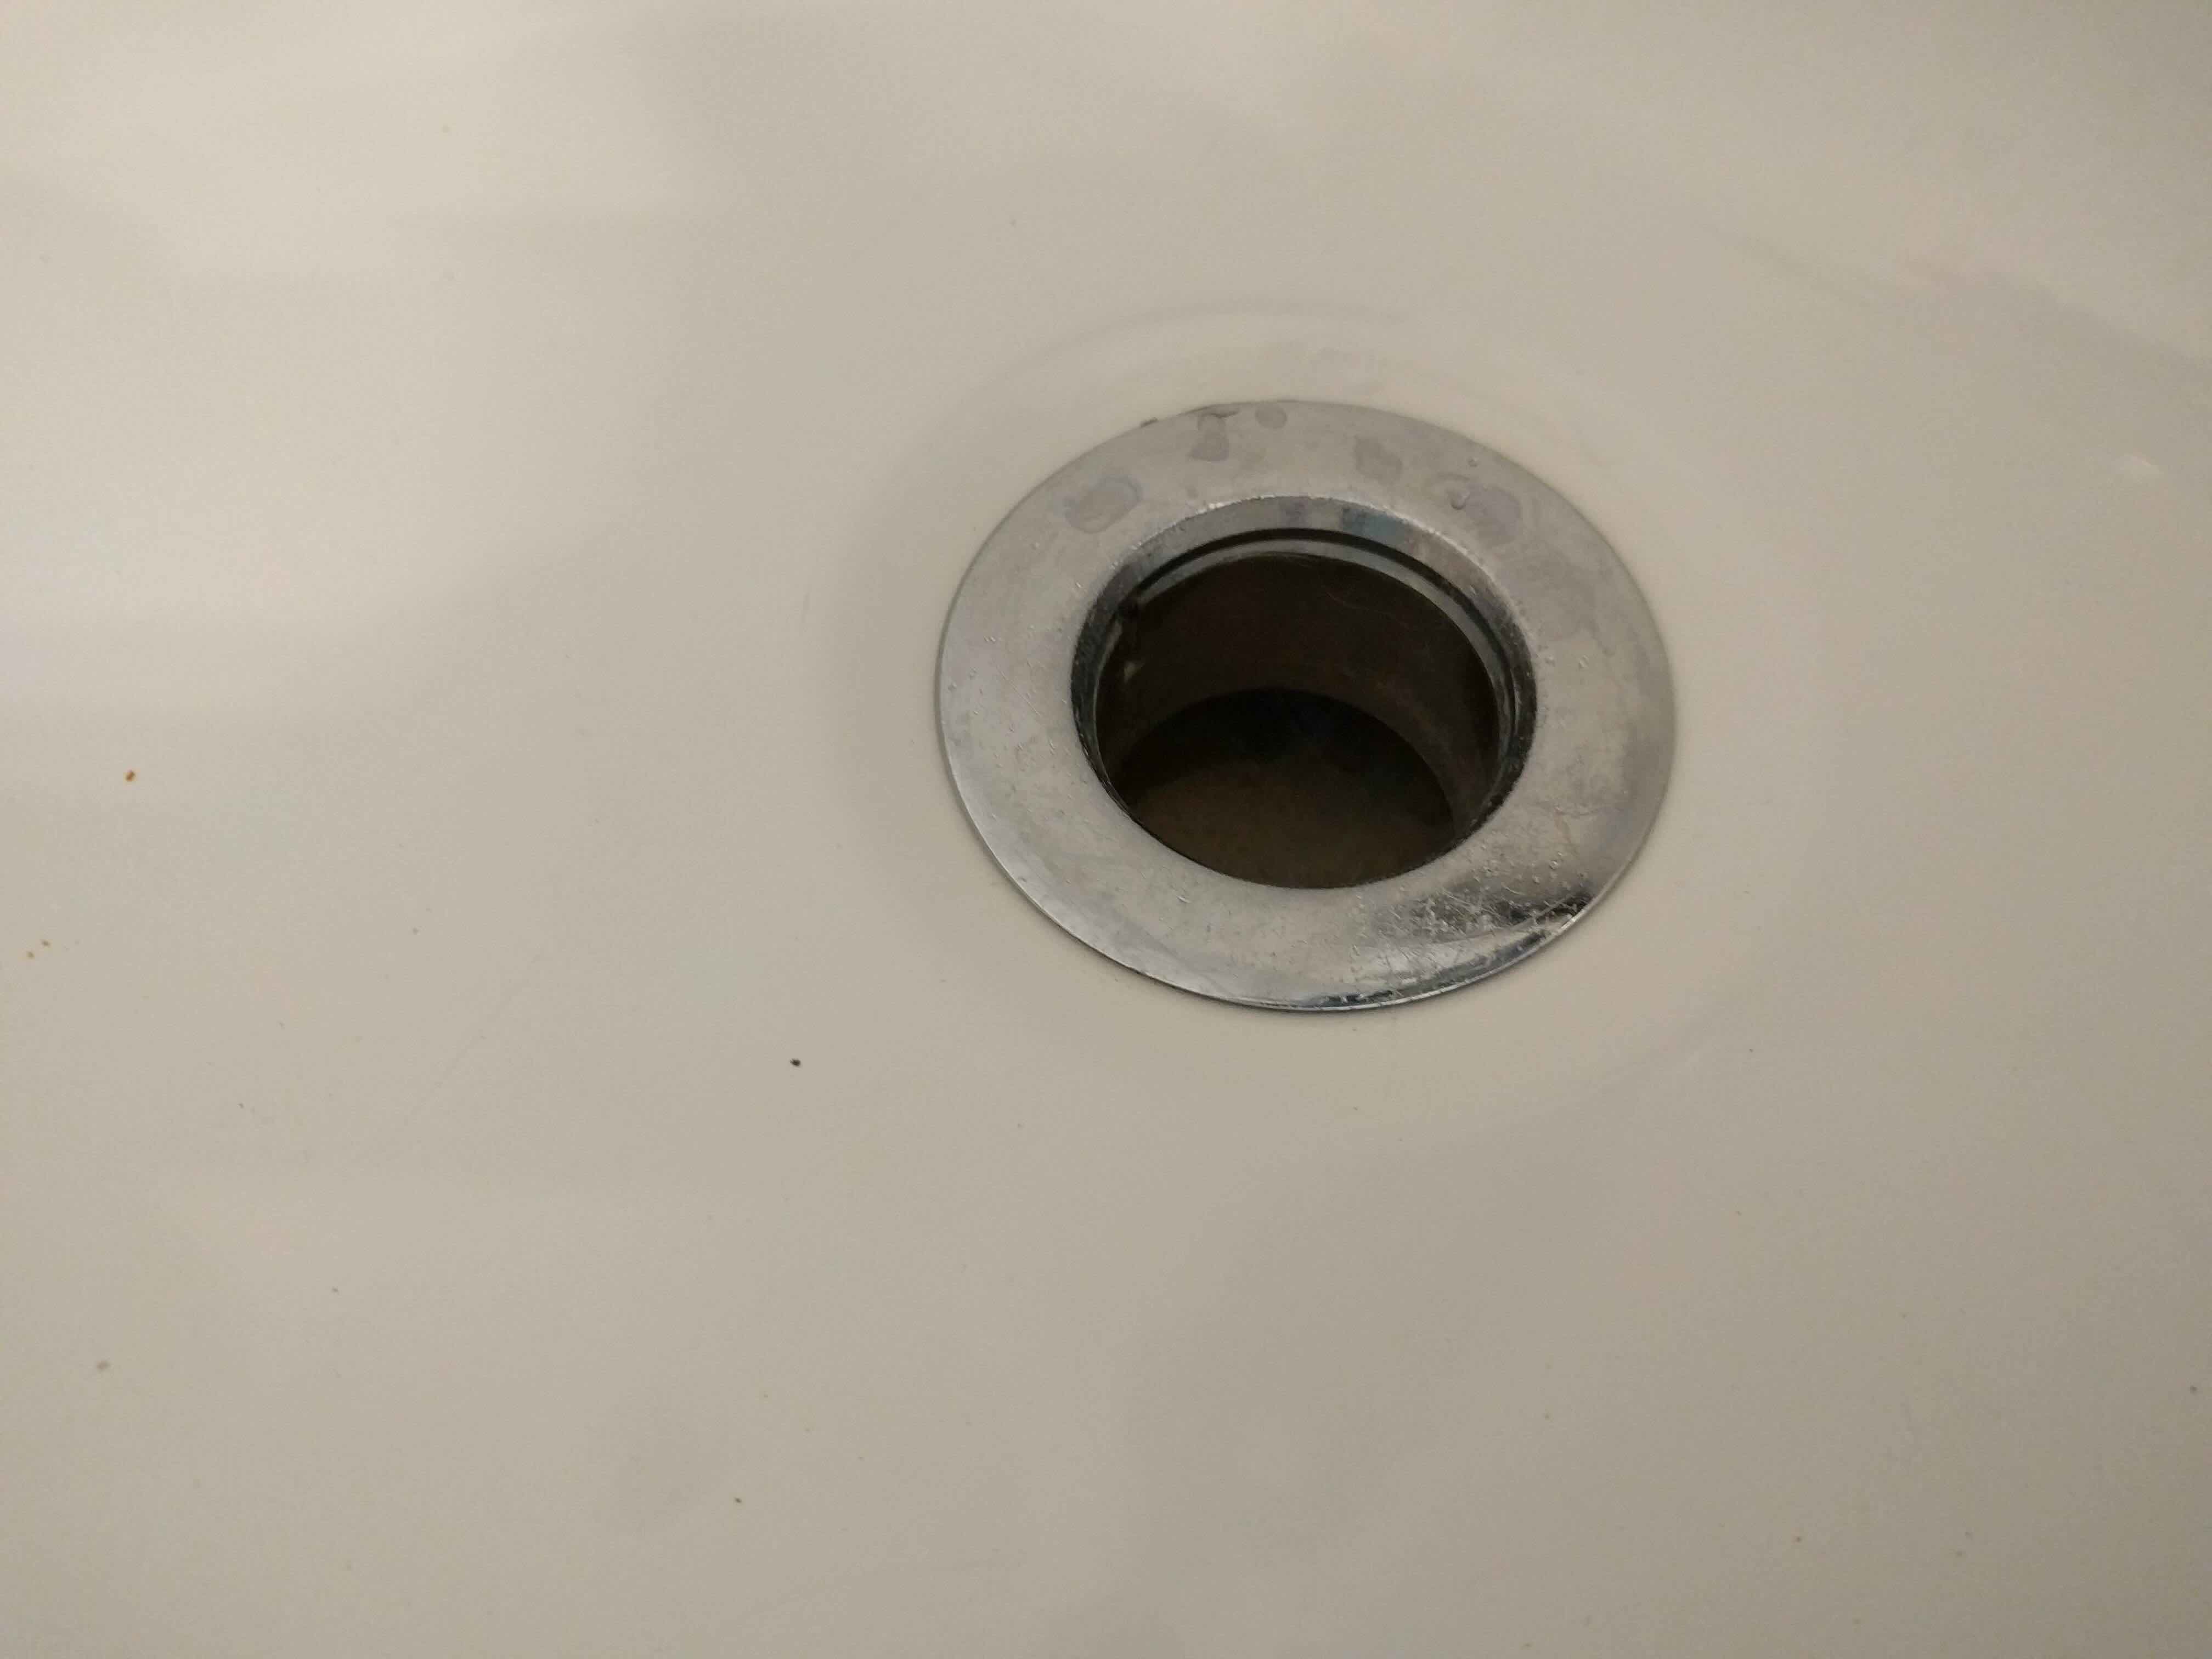
Clear Debris and Residue
Begin by visually inspecting the drain opening for any visible debris, hair, or residue that may have accumulated over time. Use a pair of needle-nose pliers or a small tool to carefully extract any lodged debris, ensuring that the drain opening is free from obstructions that could impede water flow.
Clean the Drain Components
Utilize a suitable cleaning solution to thoroughly clean the drain components, including the flange, drain fitting, and surrounding areas. A mixture of warm water and mild soap can be effective for removing accumulated grime and residue. Use a brush or cloth to scrub the components, ensuring that all surfaces are meticulously cleaned.
Inspect for Damage or Wear
While cleaning the drain components, take the opportunity to inspect for any signs of damage, corrosion, or wear. Check the condition of the drain flange, gaskets, and seals, ensuring that they are intact and free from deterioration. Additionally, assess the drain fitting for any indications of rust or degradation that may compromise its functionality.
Test Drainage Efficiency
After cleaning and inspecting the drain components, test the drainage efficiency by running water into the bathtub. Observe the rate at which the water drains and assess whether any issues such as slow drainage or pooling occur. This evaluation will provide valuable insights into the effectiveness of the drain cleaning process and highlight any persisting concerns.
Read more: How To Unfreeze Bathtub Drain
Apply Plumber's Putty (If Necessary)
If the inspection reveals any compromised seals or gaskets, consider applying plumber's putty to create a watertight seal around the drain opening. Plumber's putty is a versatile sealing compound that can effectively address minor leaks or gaps, ensuring that the drain operates efficiently without any water seepage.
By meticulously cleaning and inspecting the drain, you can proactively address potential drainage issues and maintain the optimal functionality of your bathtub. This thorough approach not only promotes efficient water drainage but also contributes to the long-term preservation of your plumbing system, ultimately ensuring a hassle-free bathing experience.
Conclusion
In conclusion, mastering the art of removing a drain plug from your bathtub is a valuable skill that empowers you to address common drainage issues and maintain the optimal functionality of your plumbing system. By following the comprehensive steps outlined in this guide, you can confidently tackle the task of removing various types of drain plugs, from pop-up stoppers to lift-and-turn and push-and-pull stoppers, with precision and ease.
The process begins with thorough preparation, including clearing the surrounding area, protecting the bathtub surface, and ensuring that all necessary tools and materials are readily available. This meticulous preparation sets the stage for a smooth and organized workflow, minimizing potential disruptions and enhancing the overall efficiency of the task.
As you progress through the steps of loosening and removing the drain plug, it's essential to tailor your approach to the specific type of stopper in place. Whether it's disconnecting the linkage for pop-up stoppers, unthreading lift-and-turn stoppers, or twisting toe-touch stoppers, each method requires careful maneuvering and attention to detail to ensure a successful removal without causing damage to the surrounding components.
Once the drain plug is removed, the subsequent phase involves thorough cleaning and inspection of the drain components. Clearing debris and residue, meticulously cleaning the drain components, and inspecting for any signs of damage or wear are crucial steps in maintaining a clear and unobstructed drainage pathway. Additionally, testing the drainage efficiency and applying plumber's putty, if necessary, further contribute to the optimal functionality of the drain.
By mastering the process of removing a drain plug from your bathtub, you can effectively address drainage issues, prevent potential plumbing concerns, and ensure a seamless bathing experience. This newfound expertise empowers you to take proactive measures in maintaining your plumbing system, ultimately contributing to the longevity and efficiency of your bathtub and its associated components.
In essence, the ability to remove a drain plug from your bathtub is a valuable skill that enhances your confidence in addressing common household maintenance tasks. With the knowledge and skills acquired from this guide, you are well-equipped to maintain the functionality of your bathtub drain and enjoy a hassle-free bathing experience for years to come.
Frequently Asked Questions about How To Remove Drain Plug In Bathtub
Was this page helpful?
At Storables.com, we guarantee accurate and reliable information. Our content, validated by Expert Board Contributors, is crafted following stringent Editorial Policies. We're committed to providing you with well-researched, expert-backed insights for all your informational needs.

0 thoughts on “How To Remove Drain Plug In Bathtub”