Home>Furniture & Design>Bathroom Accessories>How To Vent A Basement Bathroom Exhaust Fan
Bathroom Accessories
How To Vent A Basement Bathroom Exhaust Fan
Modified: August 30, 2024
Learn how to properly vent a basement bathroom exhaust fan to prevent moisture and mold. Find the best bathroom accessories for efficient ventilation.
(Many of the links in this article redirect to a specific reviewed product. Your purchase of these products through affiliate links helps to generate commission for Storables.com, at no extra cost. Learn more)
Introduction
Ventilating a basement bathroom is crucial for maintaining good air quality and preventing moisture buildup. Proper ventilation not only eliminates odors but also helps to reduce the risk of mold and mildew growth. One of the key components of a well-ventilated bathroom is the exhaust fan, which plays a vital role in removing stale air and moisture from the space.
In this comprehensive guide, we will walk you through the essential steps to effectively vent a basement bathroom exhaust fan. From determining the optimal location for the fan to installing the ductwork and connecting the exhaust fan, we will cover everything you need to know to ensure proper ventilation in your basement bathroom.
By following the steps outlined in this guide, you can create a comfortable and healthy environment in your basement bathroom, enhancing the overall livability of your home. Let's dive into the details and learn how to vent a basement bathroom exhaust fan for optimal air circulation and moisture control.
Key Takeaways:
- Proper ventilation of a basement bathroom exhaust fan is crucial for maintaining good air quality, reducing moisture, and preventing mold growth. Follow the steps to create a healthier and more comfortable bathroom environment.
- Choosing the right location, fan size, and ductwork route, and ensuring proper installation and testing are essential for effective basement bathroom exhaust fan ventilation. Prioritize air quality and comfort for a better home environment.
Read more: How To Fix Bathroom Exhaust Fan
Step 1: Determine the best location for the exhaust fan
The first and most crucial step in venting a basement bathroom exhaust fan is determining the optimal location for its installation. The ideal placement of the exhaust fan ensures efficient air circulation and effective removal of moisture and odors. Here's how to identify the best location for your exhaust fan:
Consider Airflow and Moisture Levels
Assess the layout of your basement bathroom to identify areas where moisture tends to accumulate. Typically, near the shower or bathtub is a prime location due to the high moisture levels generated during bathing. Additionally, consider the airflow patterns within the bathroom to determine where stagnant air tends to linger.
Proximity to the Exterior
Locating the exhaust fan as close to the exterior wall as possible is advantageous for efficient ventilation. This allows for a shorter and more direct ductwork route, minimizing bends and turns that can impede airflow. If your basement bathroom is situated far from an exterior wall, you may need to plan for a longer ductwork route to ensure proper ventilation.
Accessibility for Installation
Ensure that the chosen location provides easy access for installation and future maintenance. Access to the attic or an exterior wall for ductwork installation should be considered when determining the placement of the exhaust fan.
Noise Considerations
While the primary focus is on functionality, it's also important to consider the noise level of the exhaust fan. Placing the fan away from living areas and bedrooms can help minimize the disturbance caused by its operation.
Compliance with Building Codes
Check local building codes and regulations to ensure compliance with the required distance between the exhaust fan and potential sources of moisture. Adhering to these guidelines is essential for safety and functionality.
By carefully evaluating these factors, you can determine the best location for your basement bathroom exhaust fan. Once the optimal placement is identified, you can proceed to select the right size and type of exhaust fan for your specific ventilation needs.
Step 2: Choose the right size and type of exhaust fan
Selecting the appropriate size and type of exhaust fan is crucial for ensuring effective ventilation in your basement bathroom. The fan's capacity to remove air and moisture is determined by its size, measured in cubic feet per minute (CFM). Here's a detailed look at how to choose the right exhaust fan for your specific needs:
Calculate the Required CFM
Begin by calculating the required CFM for your basement bathroom. A simple formula involves multiplying the bathroom's square footage by the ceiling height and then dividing the result by 7. This provides a general estimate of the CFM needed to adequately ventilate the space. However, additional factors such as the presence of a shower or bathtub, the number of fixtures, and the bathroom's use frequency should also be considered when determining the required CFM.
Read more: What Is An Exhaust Fan
Consider Noise Levels
When choosing an exhaust fan, consider its noise level, measured in sones. Lower sone ratings indicate quieter operation. For a basement bathroom, where noise may be more noticeable due to the lack of ambient sounds, selecting a fan with a lower sone rating can contribute to a more peaceful environment.
Evaluate Energy Efficiency
Opt for an energy-efficient exhaust fan to minimize long-term operational costs. Look for fans with the ENERGY STAR® certification, which indicates that they meet strict energy efficiency guidelines set by the Environmental Protection Agency. Energy-efficient models not only reduce electricity consumption but also contribute to environmental sustainability.
Choose the Right Type
Select the appropriate type of exhaust fan based on your bathroom's specific requirements. For example, if your basement bathroom lacks a window, consider a fan with a built-in light to provide additional illumination. Additionally, if your bathroom experiences frequent steam and moisture buildup, a fan with a built-in humidity sensor can automatically activate when excess moisture is detected, ensuring efficient ventilation.
Seek Professional Advice
If you're uncertain about the best exhaust fan for your basement bathroom, seek advice from a professional. An experienced HVAC technician can assess your ventilation needs and recommend the most suitable fan based on factors such as the bathroom's layout, usage patterns, and existing ductwork.
By carefully considering these factors and selecting the right size and type of exhaust fan, you can ensure optimal ventilation and air quality in your basement bathroom. Once the fan is chosen, the next step involves planning the ductwork route for effective air circulation.
Read more: Where Does A Bathroom Exhaust Fan Vent To
Step 3: Plan the ductwork route
Planning the ductwork route is a critical step in ensuring the efficient operation of your basement bathroom exhaust fan. The ductwork serves as the pathway for transporting stale air and moisture from the bathroom to the exterior of your home. A well-designed ductwork route minimizes airflow restrictions and promotes optimal ventilation. Here's a detailed guide on how to plan the ductwork route for your basement bathroom exhaust fan:
Assess the Optimal Path
Begin by assessing the most direct and unobstructed path for the ductwork from the exhaust fan to the exterior of your home. Ideally, the ductwork should follow a straight and vertical route to facilitate smooth airflow. Minimize the number of bends and turns in the ductwork to prevent air resistance, which can impede the fan's effectiveness.
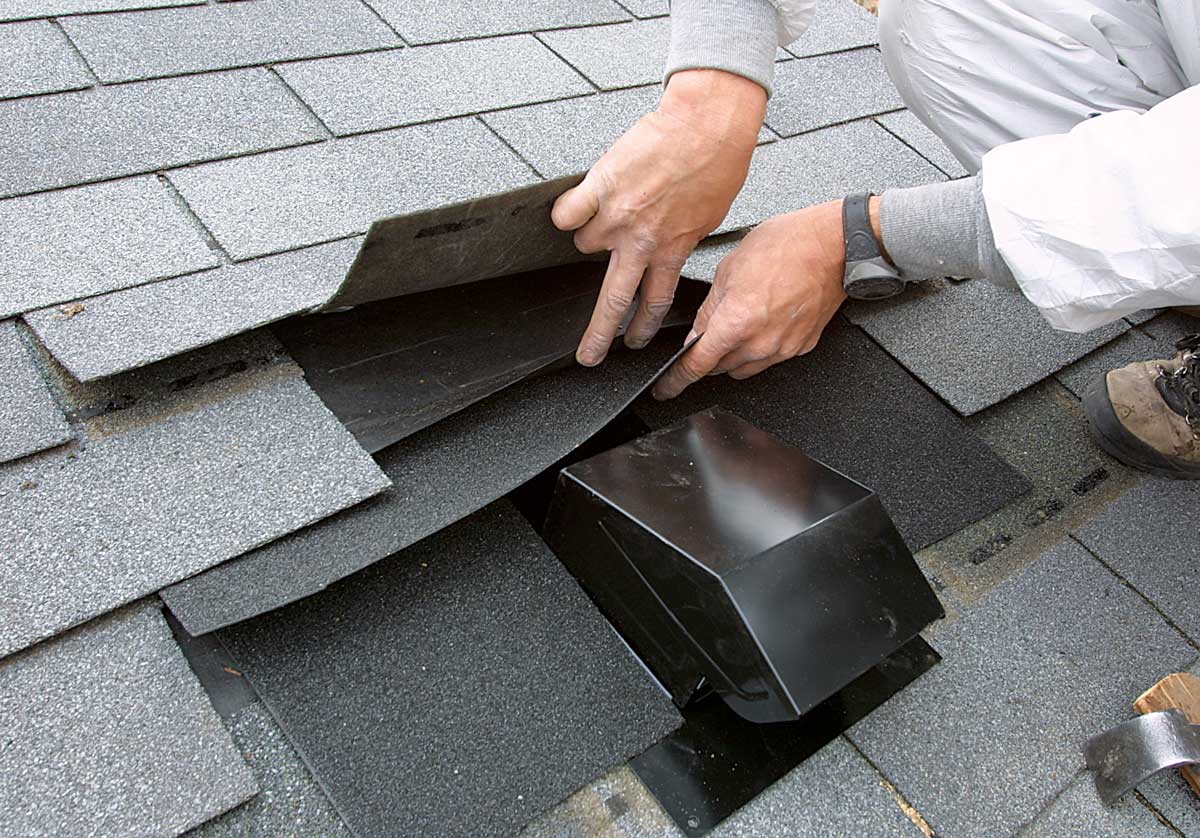
Consider Exterior Vent Placement
Determine the ideal location for the exterior vent where the stale air will be expelled. The vent should be positioned away from windows, doors, and outdoor living spaces to prevent the discharged air from re-entering the home. Additionally, ensure that the vent is installed at a sufficient distance from ground level to prevent debris and moisture infiltration.
Evaluate Structural Obstacles
Take into account any structural obstacles, such as beams, joists, or plumbing, that may impact the ductwork route. Plan the pathway around these obstacles to maintain a clear and unobstructed airflow. If necessary, consult with a professional to address any structural challenges and ensure the ductwork route complies with building codes and regulations.
Read more: How To Change Bathroom Exhaust Fan
Choose Ductwork Materials
Select the appropriate ductwork materials based on your basement bathroom's layout and the distance to the exterior vent. Flexible aluminum or rigid metal ducts are commonly used for exhaust fan ductwork due to their durability and smooth interior surfaces that minimize airflow resistance. Avoid using plastic ducts, as they are prone to damage and can restrict airflow.
Ensure Proper Insulation
If the ductwork route passes through unconditioned spaces, such as the attic or crawl space, it's essential to insulate the ducts to prevent condensation and heat loss. Proper insulation helps maintain the temperature of the expelled air and reduces the risk of moisture buildup within the ductwork, which can lead to mold growth and structural damage.
By meticulously planning the ductwork route, you can optimize the performance of your basement bathroom exhaust fan, ensuring effective ventilation and moisture control. Once the ductwork route is planned, the next step involves the installation of the ductwork to establish a seamless pathway for the expelled air to exit the home.
Step 4: Install the ductwork
Installing the ductwork is a pivotal phase in the process of venting a basement bathroom exhaust fan. Proper installation ensures that the expelled air and moisture are effectively directed from the bathroom to the exterior of the home, contributing to a well-ventilated and moisture-free environment. Here's a detailed guide on how to install the ductwork for your basement bathroom exhaust fan:
-
Gather the Necessary Tools and Materials: Before commencing the installation, gather the essential tools and materials, including duct pipes, elbows, mounting brackets, foil tape, screws, and a duct cap for the exterior vent. Ensure that the selected ductwork materials are compatible with the exhaust fan and meet the required specifications for efficient airflow.
-
Cut and Assemble the Duct Pipes: Measure and cut the duct pipes to the appropriate lengths based on the planned ductwork route. Use a sharp utility knife or tin snips to achieve clean and precise cuts. Assemble the duct pipes, elbows, and connectors according to the planned pathway, ensuring a secure and airtight fit between the components.
-
Secure the Ductwork in Place: Use mounting brackets or straps to secure the ductwork along the planned route. Ensure that the duct pipes are adequately supported and fastened to prevent sagging or dislodging over time. Secure the ductwork to structural elements such as joists or rafters using appropriate fasteners to maintain stability.
-
Seal the Joints and Connections: Apply foil tape to seal the joints and connections between the duct pipes, elbows, and connectors. The use of foil tape ensures airtight seals, preventing air leaks and maintaining the efficiency of the ductwork system. Proper sealing is essential for directing the expelled air directly to the exterior vent without any leakage into the home.
-
Install the Exterior Vent: Position the exterior vent in the predetermined location, ensuring that it is securely attached to the exterior wall. Use screws to affix the vent cap in place, providing a weatherproof and pest-resistant outlet for the expelled air. Verify that the vent cap opens freely to allow for unobstructed airflow.
-
Inspect and Test the Ductwork: Once the installation is complete, conduct a thorough inspection of the entire ductwork system to ensure proper alignment, secure fastening, and sealed connections. Test the exhaust fan to verify that the expelled air is effectively directed through the ductwork and exits through the exterior vent without any obstructions or leaks.
By meticulously following these steps, you can successfully install the ductwork for your basement bathroom exhaust fan, establishing a clear pathway for the expelled air to exit the home. With the ductwork in place, the next crucial step involves connecting the exhaust fan to the ductwork to complete the ventilation system.
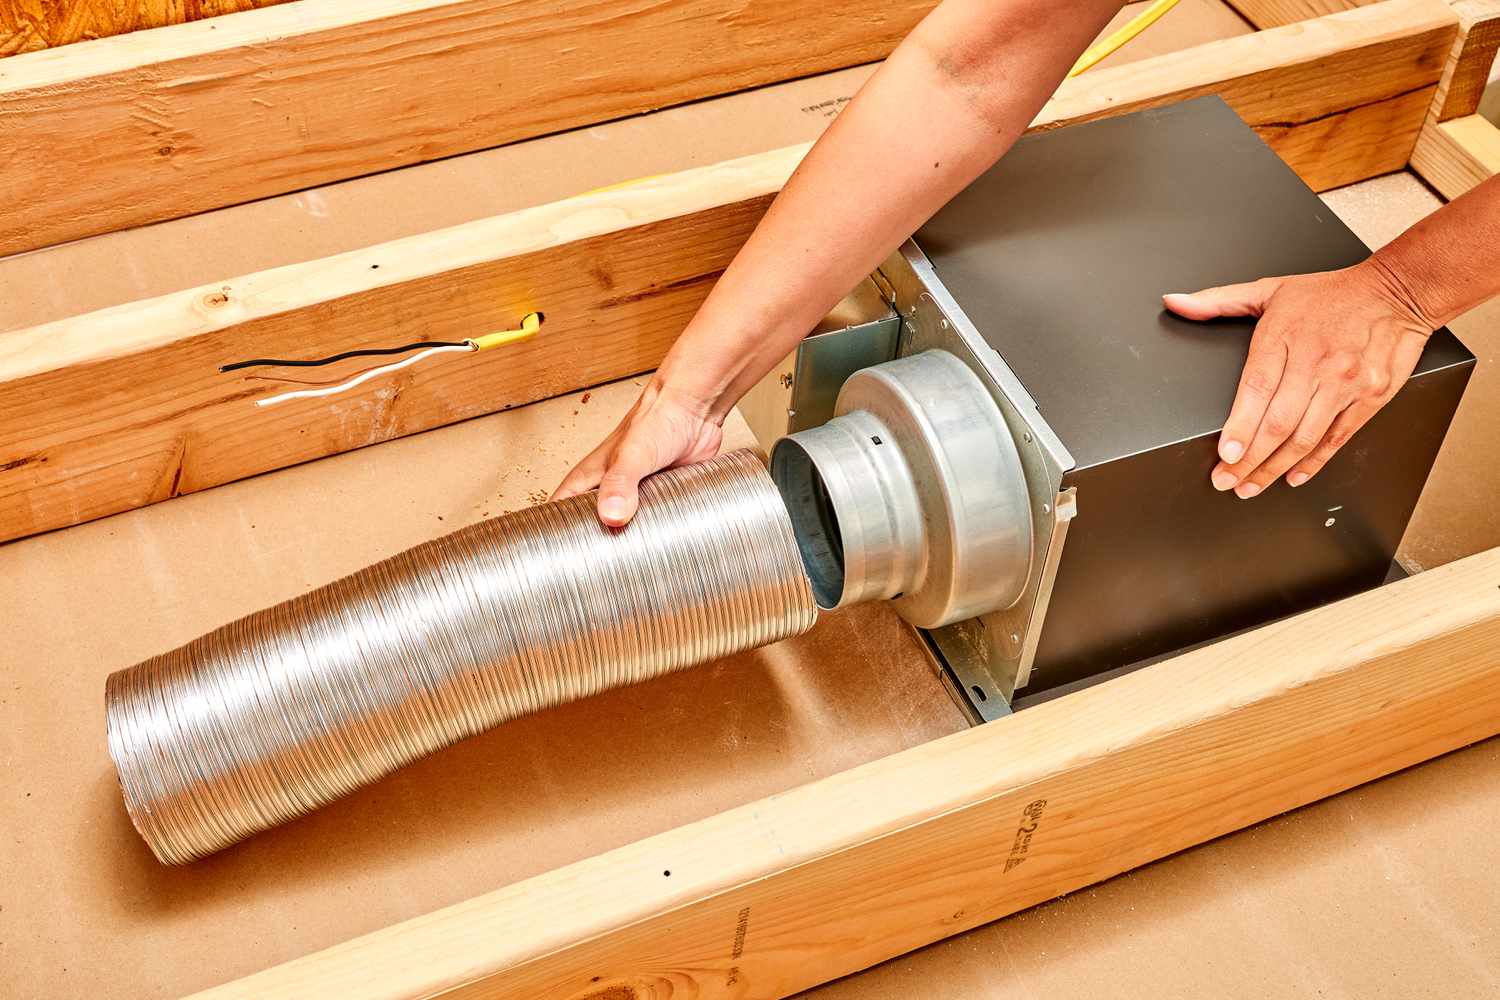
Step 5: Connect the exhaust fan to the ductwork
Connecting the exhaust fan to the ductwork is a pivotal stage in the process of venting a basement bathroom. This step ensures that the exhaust fan effectively expels stale air and moisture from the bathroom, directing it through the ductwork and out of the home. Here's a detailed guide on how to connect the exhaust fan to the ductwork for optimal ventilation and moisture control:
-
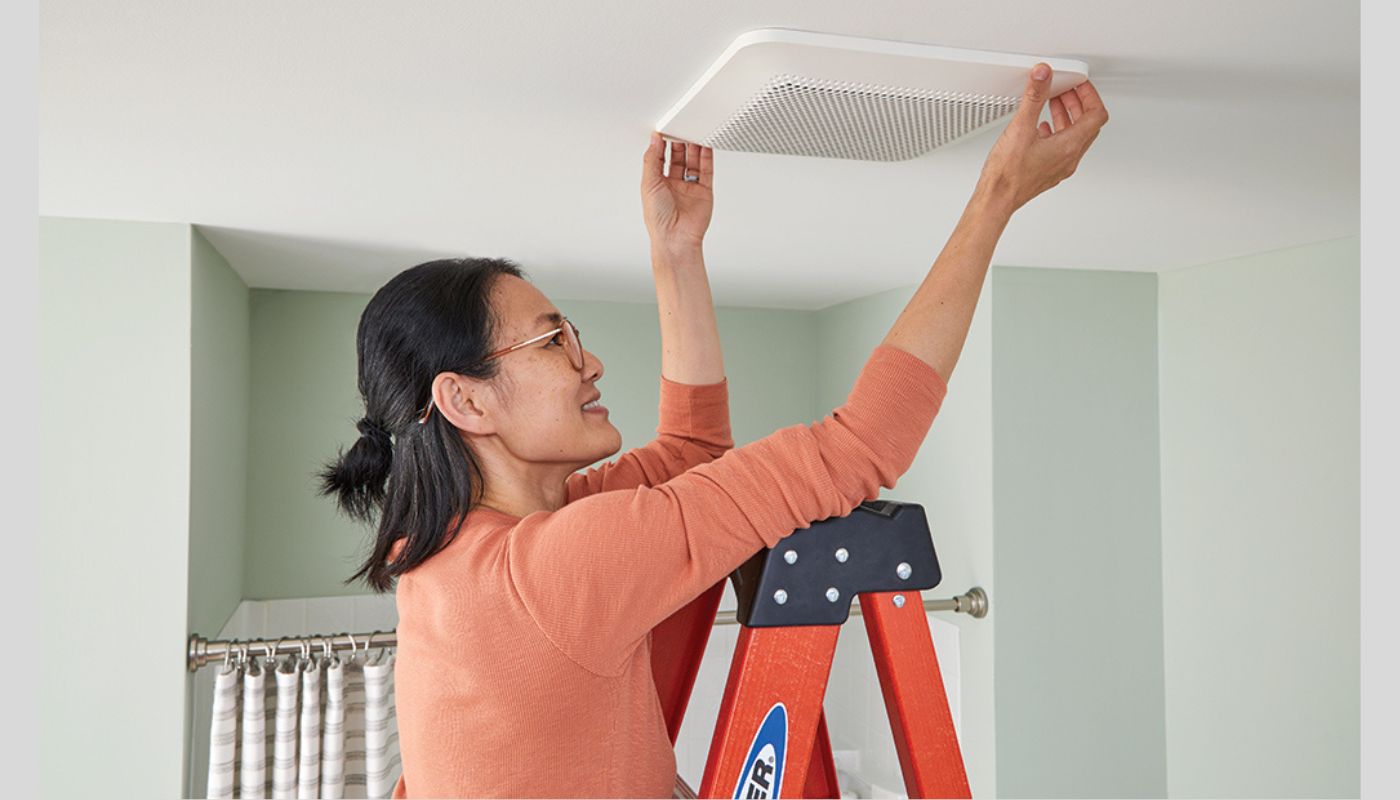
Position the Exhaust Fan: Begin by positioning the exhaust fan in the predetermined location, ensuring that it aligns with the opening in the ceiling or wall where the ductwork will be connected. Secure the fan in place according to the manufacturer's instructions, ensuring stability and proper alignment for the duct connection.
-
Attach the Duct Connector: Install a duct connector or transition piece to the exhaust port of the fan. The connector should provide a secure and airtight interface between the fan and the ductwork. Use appropriate fasteners or clamps to ensure a reliable connection that prevents air leaks.
-
Seal the Connection: Apply foil tape or mastic sealant around the joint between the duct connector and the exhaust port of the fan. Proper sealing is essential to prevent air leakage and ensure that the expelled air is directed exclusively into the ductwork for efficient ventilation.
-
Secure the Ductwork Connection: Connect the ductwork to the installed connector, ensuring a snug and secure fit. Use clamps or fasteners to secure the duct to the connector, preventing dislodgment or air leaks. Verify that the connection is airtight and free from any gaps that could compromise the airflow.
-
Electrical Wiring: If the exhaust fan requires electrical wiring, follow the manufacturer's instructions to complete the wiring connections. Ensure that the electrical components are installed in compliance with local building codes and regulations. If you are uncertain about the electrical installation, consider consulting a qualified electrician for assistance.
-
Test the Exhaust Fan: Once the exhaust fan is connected to the ductwork and the electrical components are properly installed, test the fan to verify its functionality. Ensure that the fan operates smoothly and expels air through the ductwork without any obstructions or unusual noises.
By meticulously following these steps, you can successfully connect the exhaust fan to the ductwork, establishing a seamless pathway for the expelled air to exit the home. With the exhaust fan effectively integrated into the ductwork, the ventilation system is poised to maintain optimal air quality and moisture control in your basement bathroom.
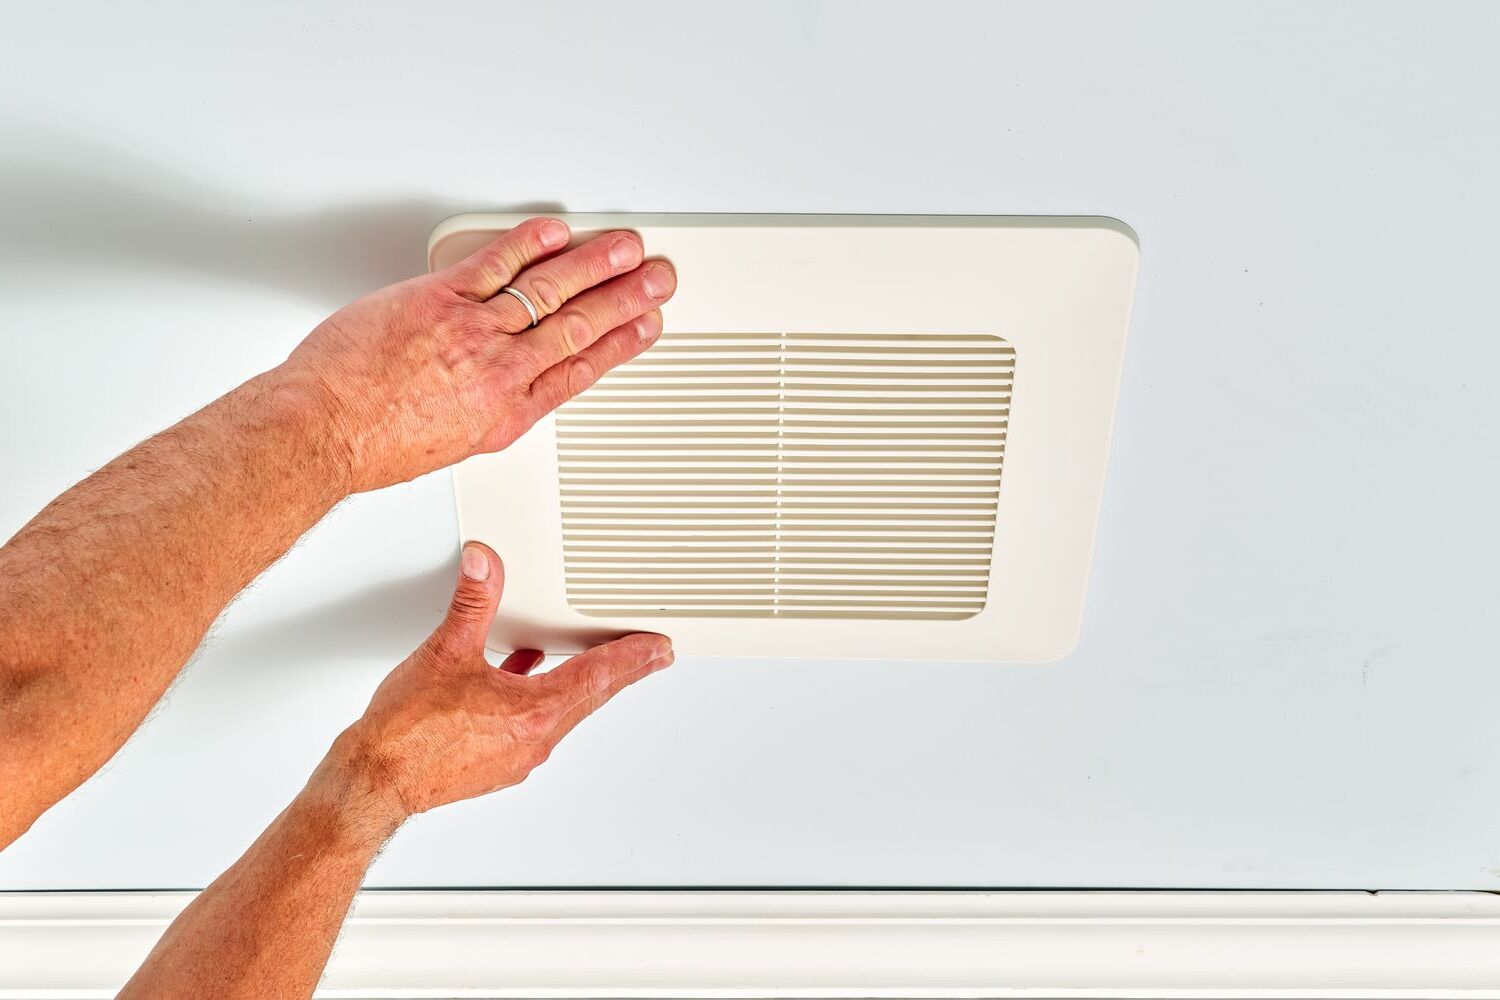
Step 6: Test the exhaust fan
After completing the installation of the exhaust fan and connecting it to the ductwork, the final crucial step is to test the functionality of the exhaust fan. Proper testing ensures that the fan operates as intended, effectively expelling stale air and moisture from the basement bathroom. Here's a detailed guide on how to test the exhaust fan to verify its performance and functionality:
-
Power On the Fan: Switch on the exhaust fan to initiate the testing process. Listen for the sound of the fan motor and the airflow being expelled. The fan should start smoothly without any unusual noises or vibrations, indicating that it is functioning properly.
-
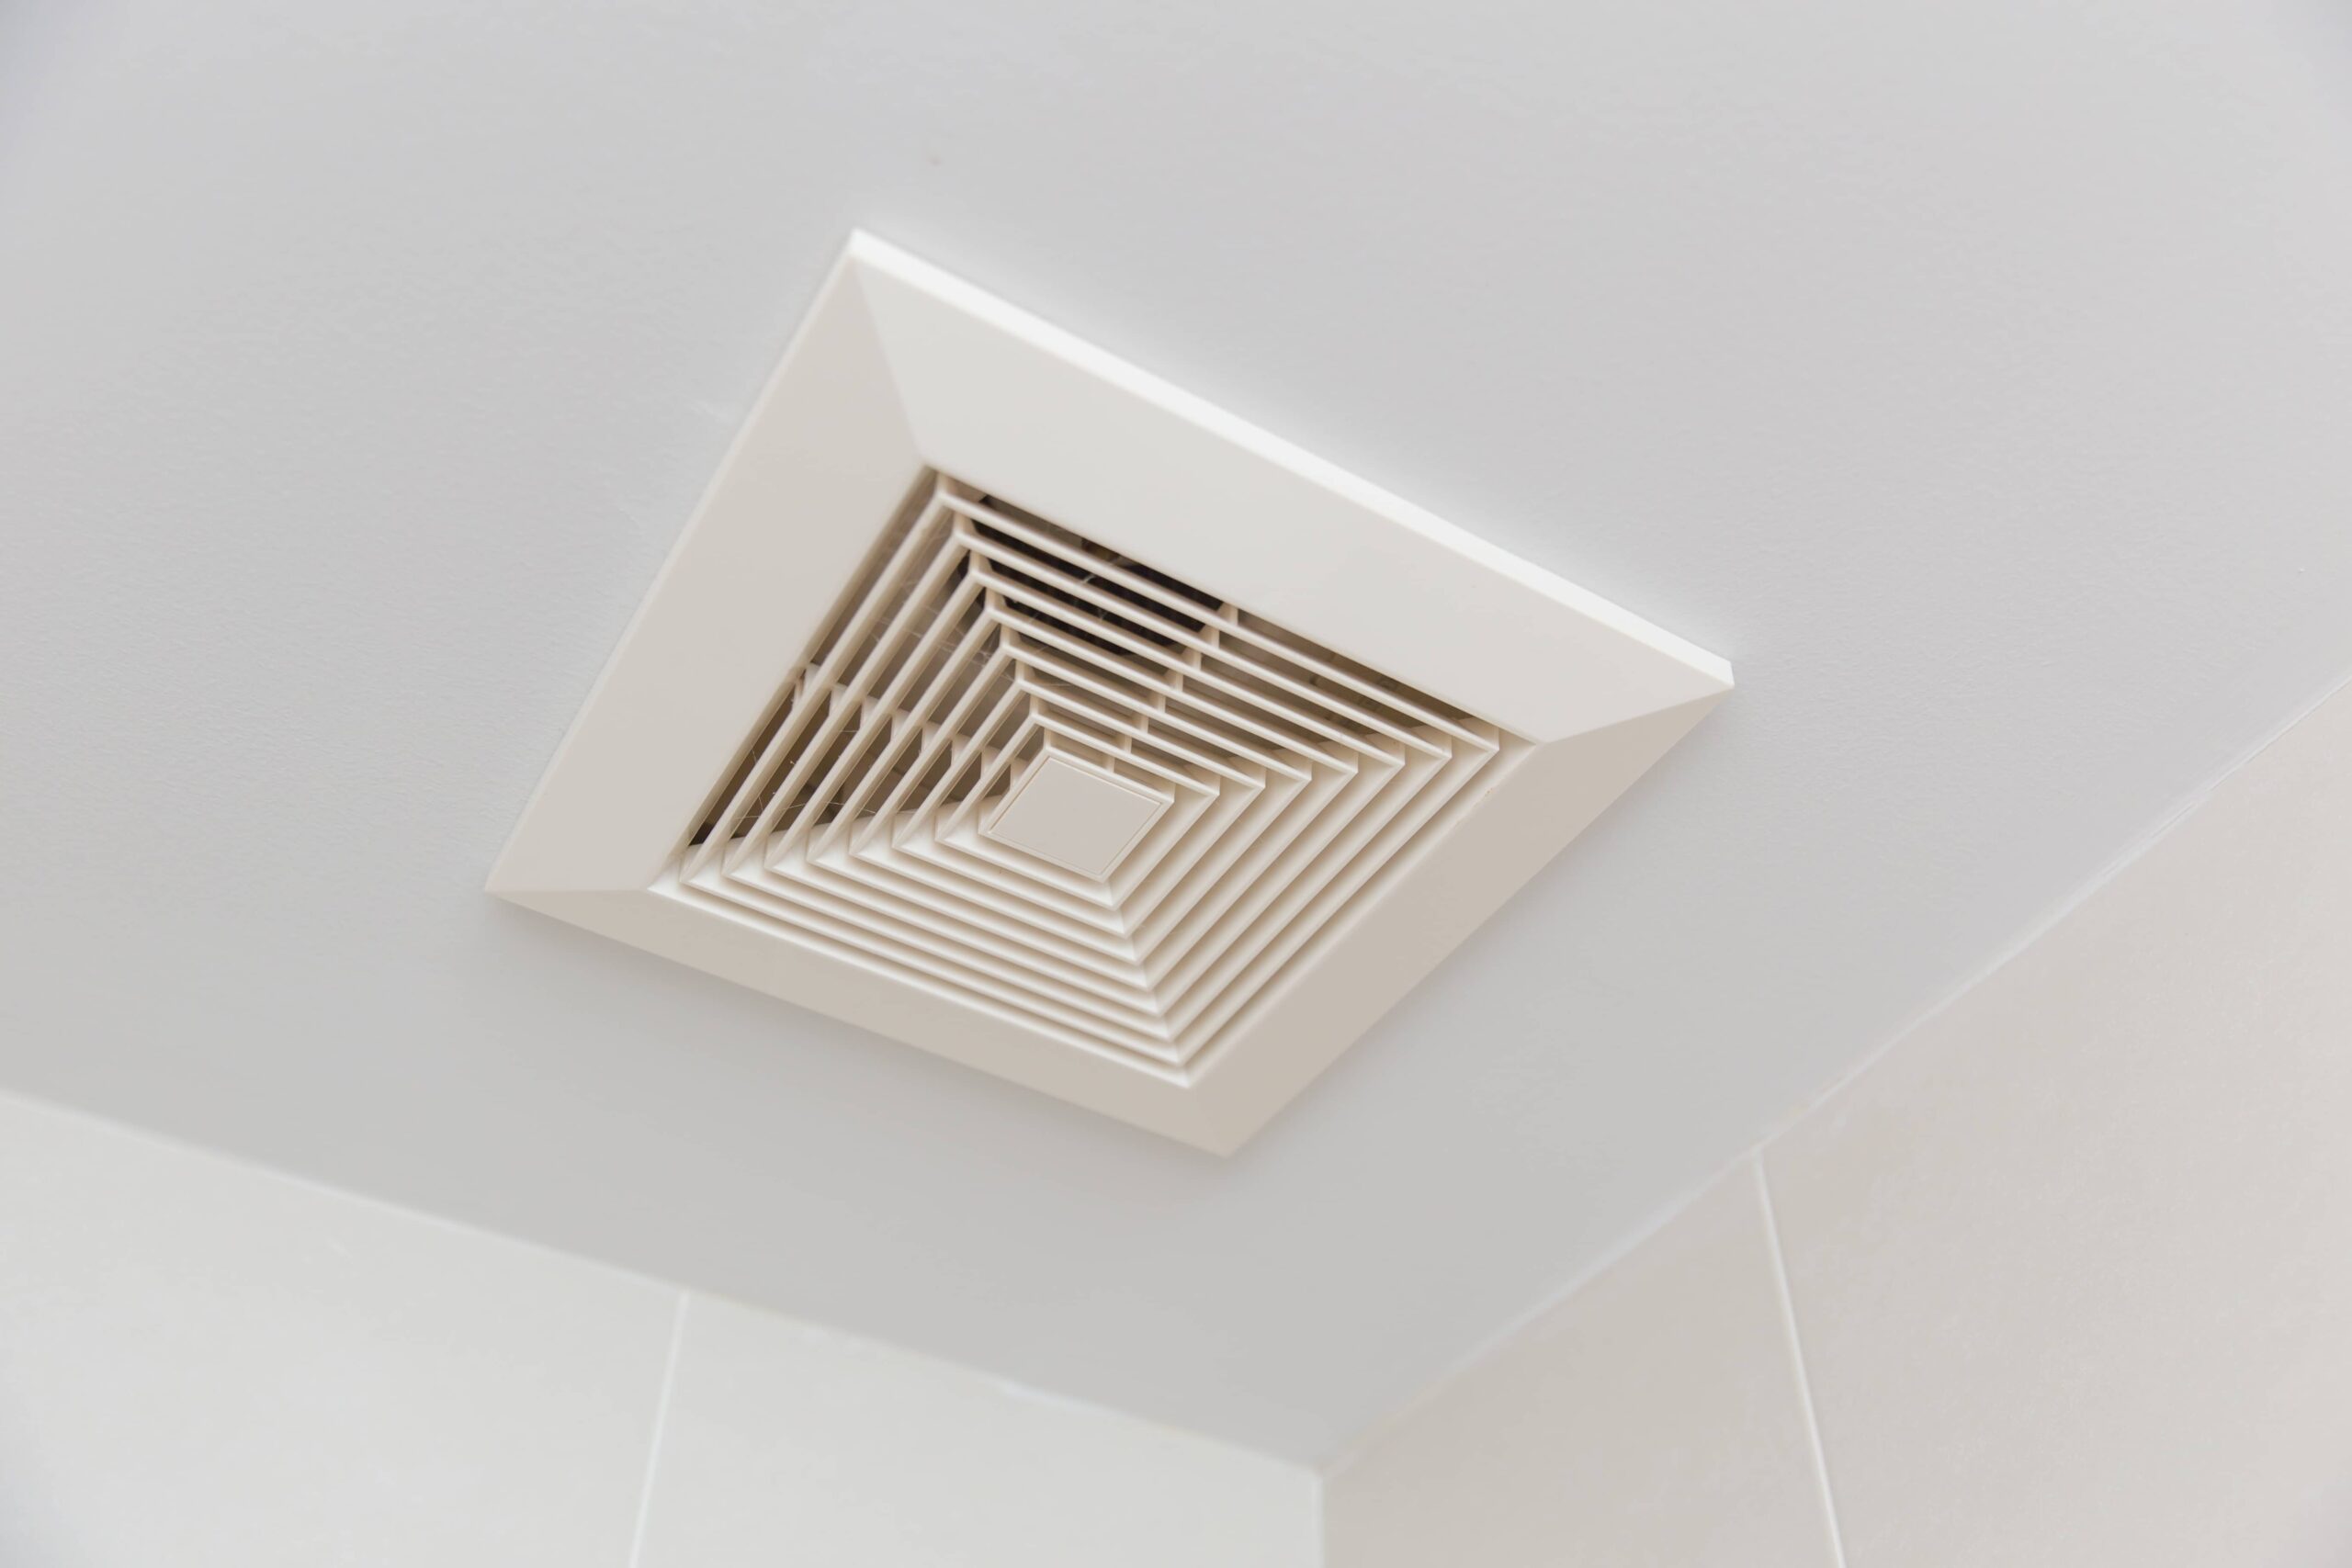
Airflow Verification: Place your hand near the exhaust grille to feel the airflow. A properly functioning exhaust fan should expel a noticeable stream of air, indicating that it is effectively removing stale air and moisture from the bathroom. Verify that the airflow is consistent and strong, reflecting the fan's capacity to ventilate the space.
-
Moisture and Odor Removal: If the bathroom is currently experiencing high humidity or lingering odors, observe whether the exhaust fan effectively reduces moisture levels and eliminates odors. The fan should gradually improve air quality and reduce humidity, contributing to a more comfortable and pleasant environment.
-
Ductwork Inspection: While the fan is operational, inspect the entire ductwork system to ensure that air is being expelled through the exterior vent without any obstructions or leaks. Verify that the exterior vent cap opens freely and that the expelled air is directed away from the home's exterior to prevent re-entry.
-
Timer and Controls: If the exhaust fan is equipped with a timer or additional controls, test these features to ensure they function as intended. Verify that the fan can be operated and adjusted according to your specific ventilation needs, providing flexibility in managing air circulation and moisture control.
-
Compliance with Building Codes: Confirm that the exhaust fan installation and operation comply with local building codes and regulations. Ensure that the fan's capacity, ductwork installation, and exterior vent placement align with the prescribed guidelines for safe and effective ventilation.
By meticulously testing the exhaust fan and verifying its performance, you can ensure that your basement bathroom is equipped with a reliable and efficient ventilation system. A properly functioning exhaust fan contributes to improved air quality, reduced moisture levels, and enhanced comfort, creating a healthier and more enjoyable environment in your home.
Conclusion
In conclusion, effectively venting a basement bathroom exhaust fan is essential for maintaining optimal air quality, controlling moisture levels, and creating a comfortable living environment. By following the comprehensive steps outlined in this guide, you can ensure that your basement bathroom is equipped with a reliable and efficient ventilation system.
From determining the best location for the exhaust fan to selecting the right size and type of fan, planning the ductwork route, installing the ductwork, connecting the exhaust fan, and testing its functionality, each step plays a crucial role in establishing a well-ventilated and moisture-controlled bathroom space.
Proper ventilation not only eliminates odors and reduces humidity but also helps prevent the growth of mold and mildew, safeguarding the structural integrity of your home and the health of its occupants. Additionally, a well-ventilated bathroom contributes to a more pleasant and inviting atmosphere, enhancing the overall livability of your home.
By carefully considering factors such as airflow patterns, noise levels, energy efficiency, and compliance with building codes, you can make informed decisions when selecting an exhaust fan and planning its installation. Attention to detail during the installation process, including securing the ductwork, sealing connections, and testing the fan's functionality, ensures that the ventilation system operates effectively and reliably.
Furthermore, seeking professional advice when necessary and adhering to local building codes and regulations are essential practices that contribute to the successful venting of a basement bathroom exhaust fan.
Ultimately, the efforts invested in venting a basement bathroom exhaust fan yield significant benefits, including improved air circulation, reduced moisture-related issues, and a more enjoyable bathroom environment. By implementing the insights and guidelines provided in this guide, you can create a basement bathroom that prioritizes air quality and comfort, enhancing the overall quality of your home.
In conclusion, proper ventilation is a fundamental aspect of a well-maintained home, and venting a basement bathroom exhaust fan is a key component of achieving this goal. With the knowledge and guidance presented in this guide, you are well-equipped to embark on the journey of enhancing your basement bathroom's ventilation system, contributing to a healthier and more inviting living space.
Frequently Asked Questions about How To Vent A Basement Bathroom Exhaust Fan
Was this page helpful?
At Storables.com, we guarantee accurate and reliable information. Our content, validated by Expert Board Contributors, is crafted following stringent Editorial Policies. We're committed to providing you with well-researched, expert-backed insights for all your informational needs.


0 thoughts on “How To Vent A Basement Bathroom Exhaust Fan”