Articles
How To Install Roof Vent For Bathroom Fan
Modified: October 20, 2024
Learn how to install a roof vent for your bathroom fan with our informative articles.
(Many of the links in this article redirect to a specific reviewed product. Your purchase of these products through affiliate links helps to generate commission for Storables.com, at no extra cost. Learn more)
Introduction
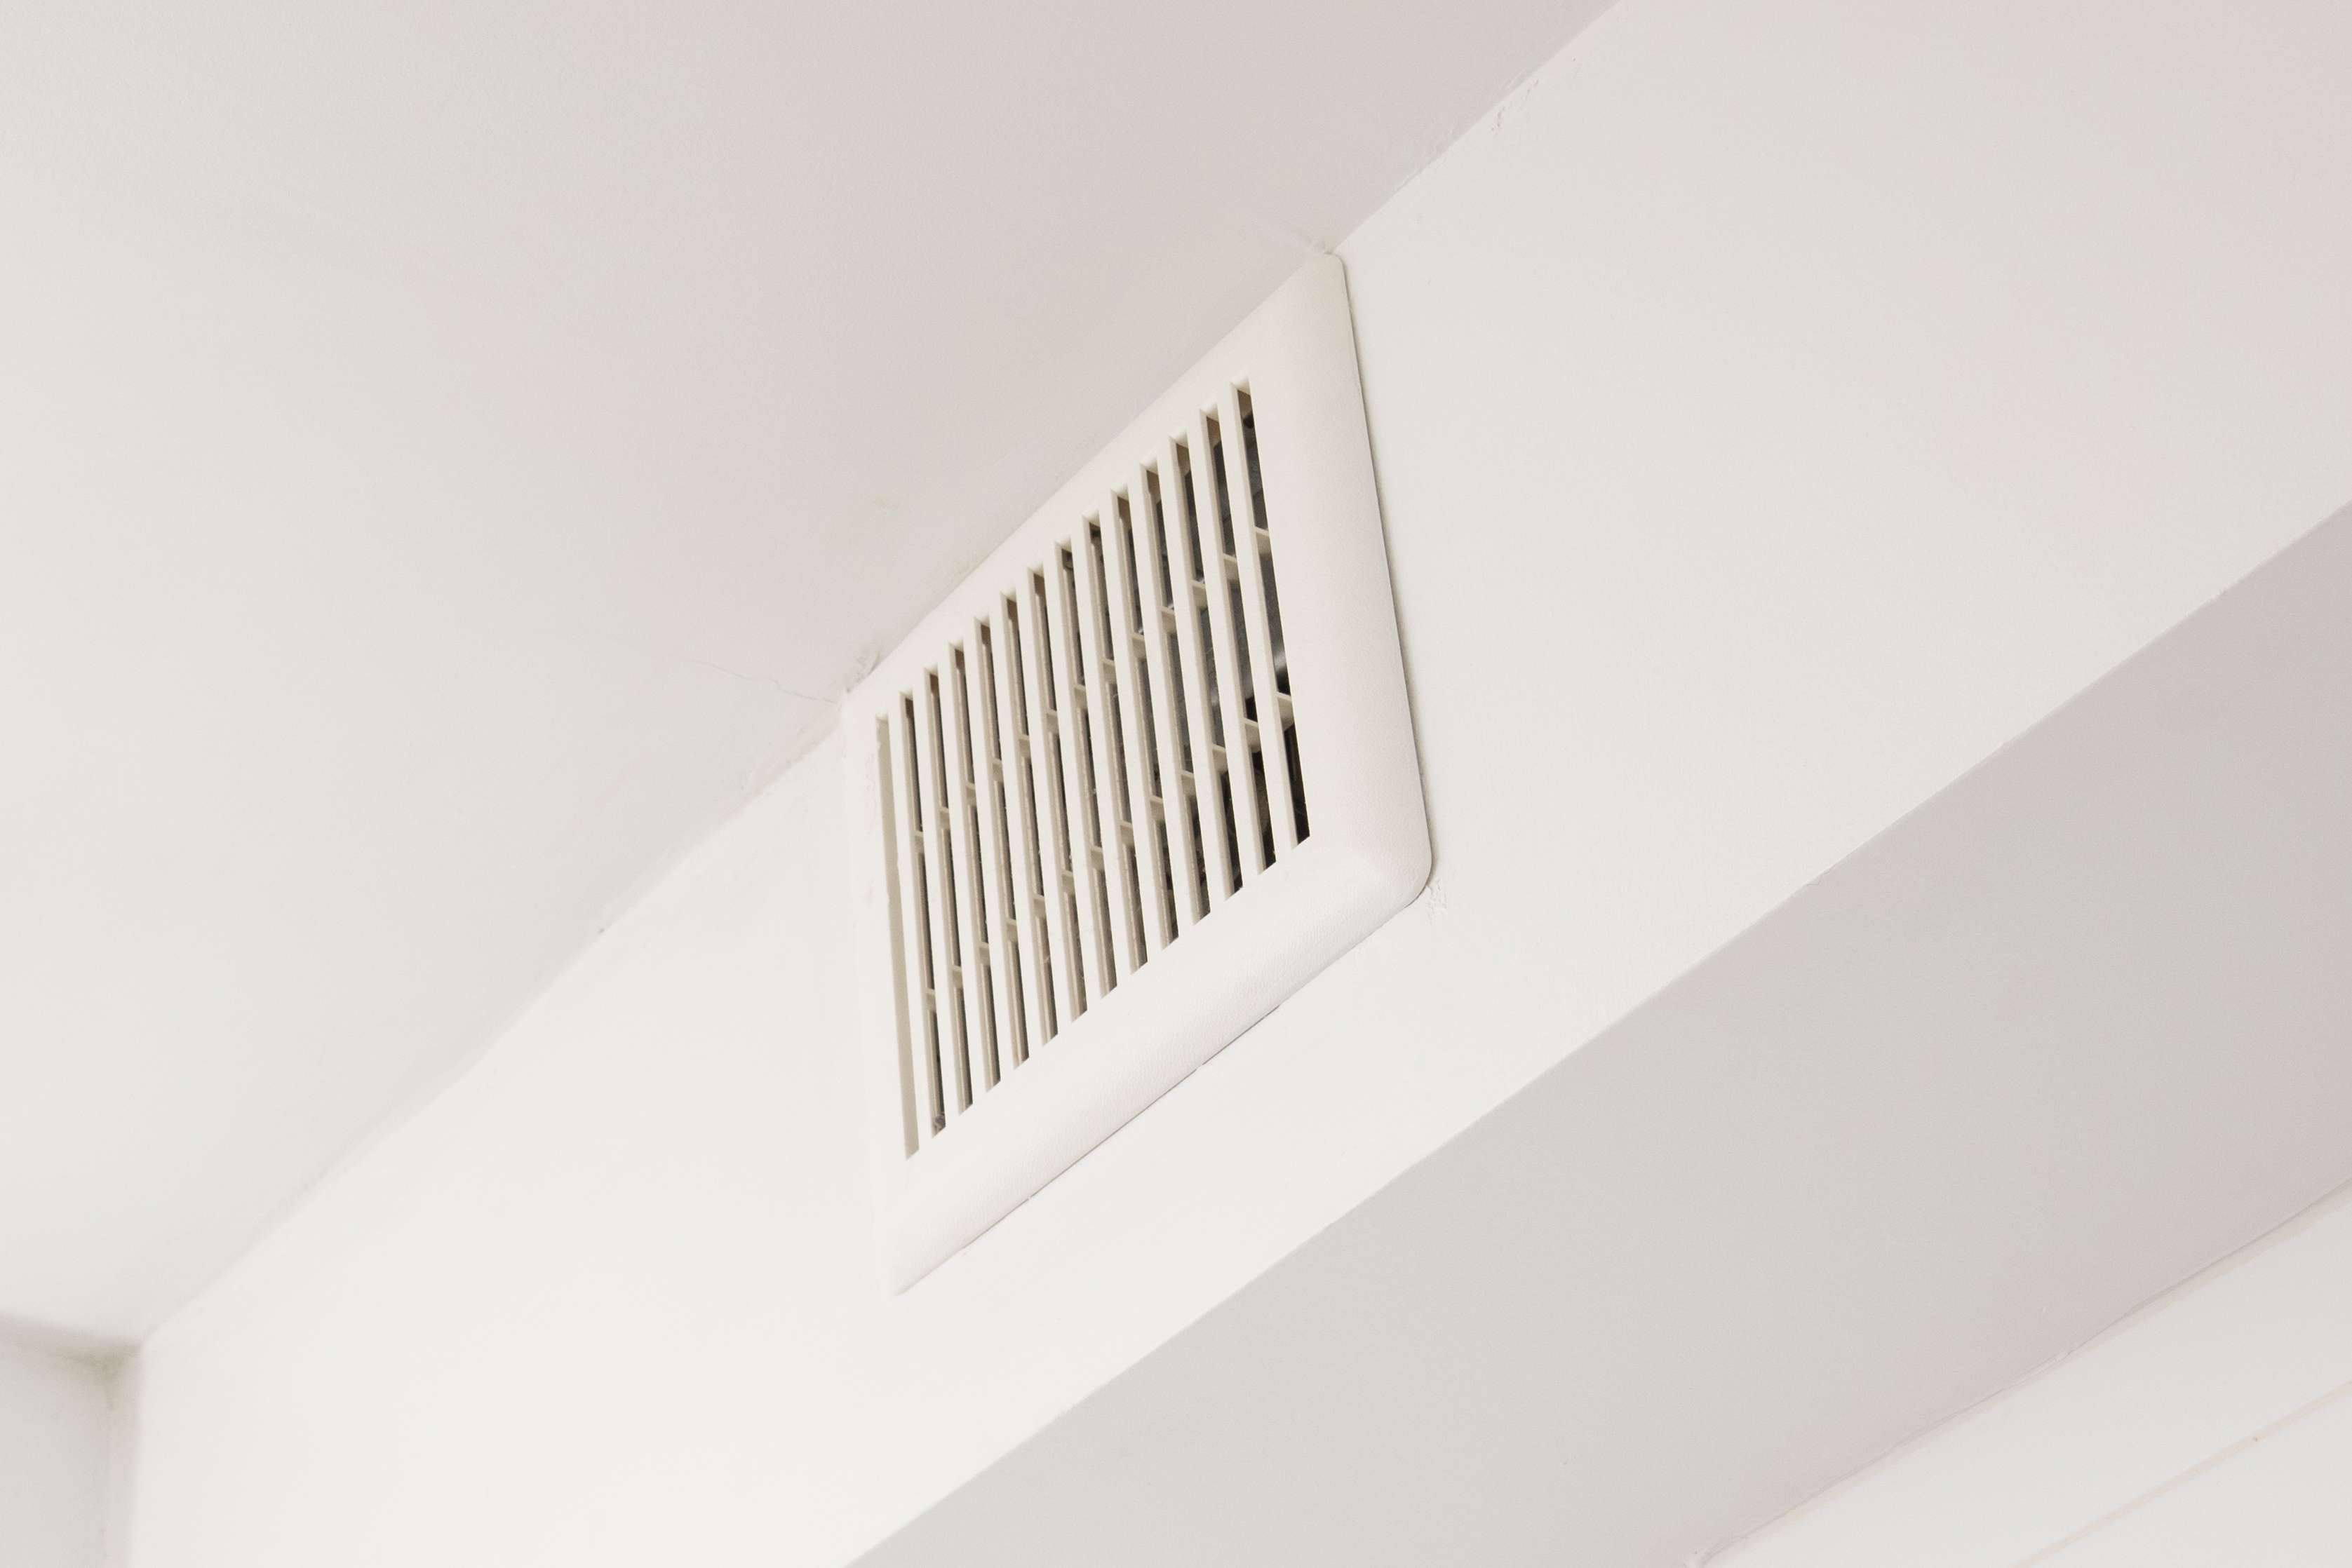
Installing a roof vent for a bathroom fan is an essential step in maintaining proper ventilation and preventing moisture buildup in your bathroom. Poor ventilation can lead to mold growth, unpleasant odors, and even structural damage. A roof vent helps to eliminate excess humidity, steam, and airborne particles, ensuring a healthy and comfortable bathroom environment.
In this article, we will guide you through the step-by-step process of installing a roof vent for your bathroom fan. From gathering the necessary tools and materials to testing the fan and vent for proper operation, we will cover everything you need to know to successfully complete this project.
Before we begin, it is important to note that installing a roof vent requires working at heights and dealing with roofing materials. If you are uncomfortable or inexperienced with these tasks, it is recommended to hire a professional to ensure the job is done safely and correctly. However, if you are confident in your abilities and have the necessary tools, let’s dive in and get started!
Key Takeaways:
- Proper installation of a roof vent for your bathroom fan is crucial for maintaining a healthy and mold-free bathroom environment. Follow the step-by-step guide to ensure efficient ventilation and improved indoor air quality.
- Testing the fan and vent for proper operation is essential to identify any potential issues and ensure effective moisture removal. Enjoy the benefits of a comfortable and odor-free bathroom space with a successfully installed roof vent.
Read more: How To Install A Roof Vent
Step 1: Gather the necessary tools and materials
Before you begin the installation process, it is important to gather all the tools and materials you will need. Having everything on hand will save you time and ensure a smooth installation process.
Here is a list of the essential tools and materials you will need:
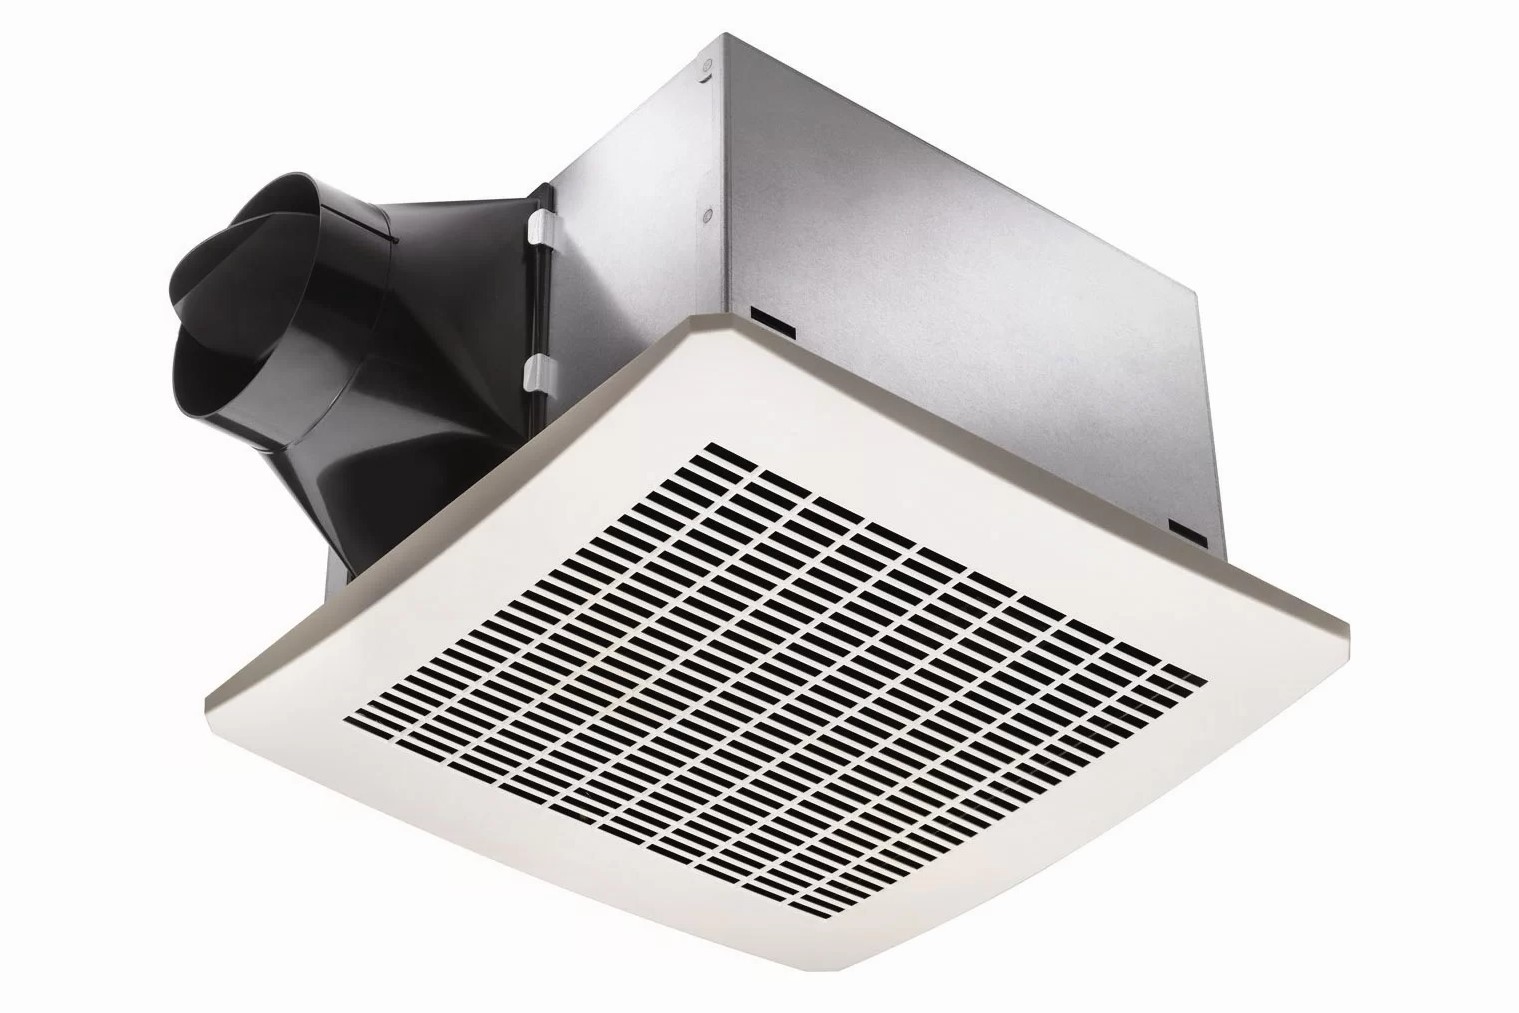
- Bathroom fan: Ensure you have a suitable bathroom fan that meets the ventilation needs of your space. Choose a fan that is specifically designed for roof vent installation.
- Roof vent kit: Purchase a roof vent kit that includes all the necessary components, including the vent, flashing, and weather sealant.
- Tape measure: Use a tape measure to measure the dimensions of your bathroom ceiling to ensure proper fit and installation.
- Pencil or marker: Mark the locations and measurements on the roof and bathroom ceiling to guide you during the installation process.
- Safety goggles and gloves: Ensure you have appropriate safety gear to protect your eyes and hands during the installation.
- Ladder or scaffolding: Depending on the height of your roof, you will need a sturdy ladder or scaffolding to safely access the installation area.
- Power drill: A power drill will be used to create holes for the vent installation.
- Screws: Get screws that are compatible with your roof material. These will be used to secure the vent and flashing.
- Silicone sealant: Use a weatherproof silicone sealant to seal any gaps and prevent water leakage.
- Roofing adhesive: If needed, roofing adhesive can strengthen the bond between the vent and the roof surface.
Make sure you have all the necessary tools and materials before you start the installation process. Having everything on hand will allow for a smoother and more efficient installation.
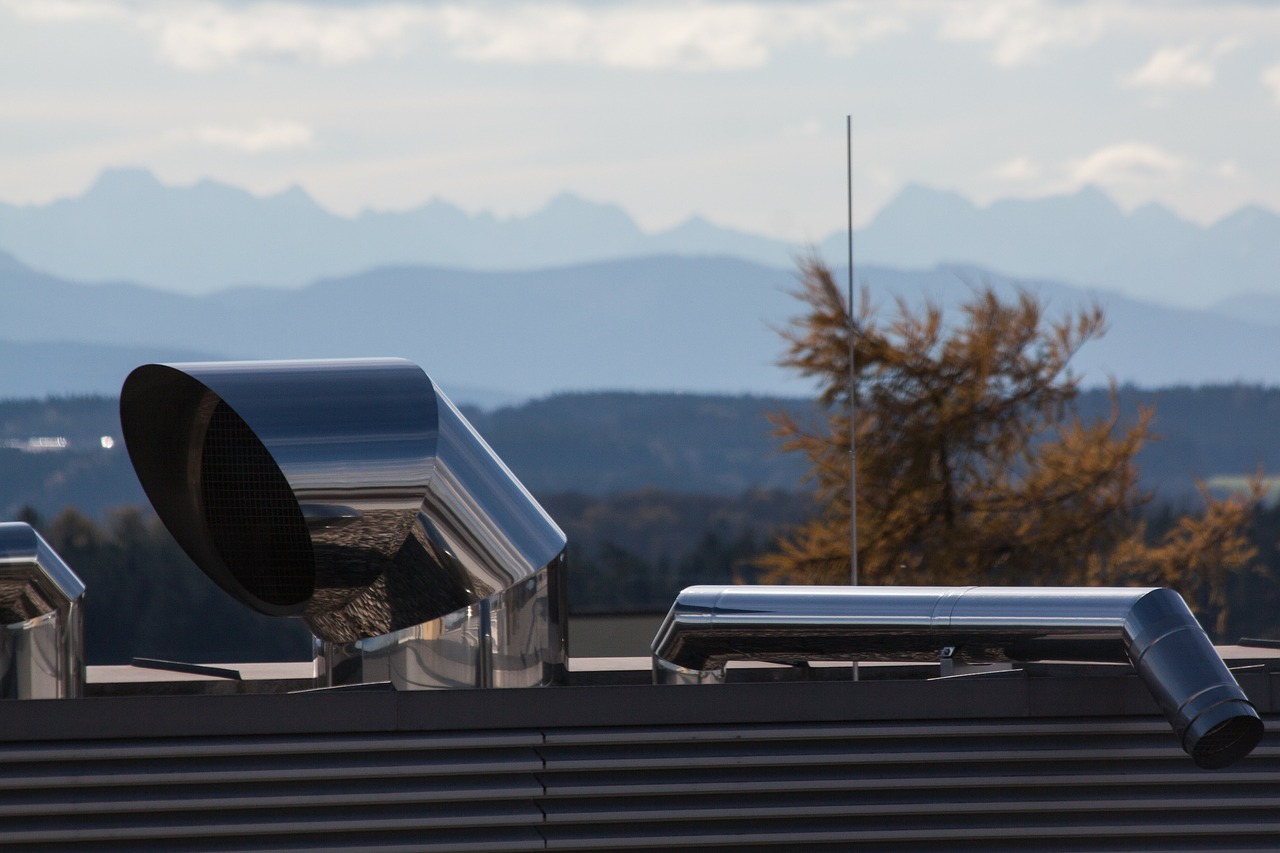
Step 2: Choose the right location for the roof vent
Choosing the right location for the roof vent is crucial for effective ventilation and proper functioning of your bathroom fan. Here are a few factors to consider when selecting the placement of the roof vent:
- Roof slope: Take into account the slope of your roof. Ideally, the roof vent should be installed on a section of the roof with a minimal slope to prevent water pooling and potential leaks.
- Distance from the fan: The roof vent should be placed as close to the bathroom fan as possible to maximize airflow efficiency. Measure the distance between the fan and the potential vent location to ensure it falls within recommended guidelines.
- Obstructions: Avoid installing the vent near any obstructions such as chimneys, skylights, or roof vents from other systems. Keep a clear area around the vent for optimum airflow.
- Structural considerations: Take into account the structural components of your roof, such as rafters or joists. Ensure the chosen location avoids interference with these components to maintain the integrity of your roof structure.
It is important to consult the manufacturer’s instructions for your specific bathroom fan and roof vent kit. They may have specific guidelines or requirements for vent placement that you should follow for optimal performance.
Once you have identified the ideal location for the roof vent, mark it on the roof surface using a pencil or marker. Be precise and ensure the markings are clear and visible for the installation process.
By choosing the right location for the roof vent, you will ensure optimal ventilation and the successful operation of your bathroom fan.
Step 3: Mark the location on the roof
Once you have chosen the appropriate location for your roof vent, the next step is to mark the specific spot on the roof where the vent will be installed. This marking will serve as a guide during the installation process.
Here’s how to mark the location on the roof:
- Measurements: Use a tape measure to determine the exact dimensions of the vent and its flashing. This will help you accurately position the vent on the roof surface.
- Pencil or marker: With the measurements in mind, use a pencil or marker to mark the perimeter of the vent on the roof. Ensure that the markings are visible and easily distinguishable.
- Center point: Locate the center point of the vent and mark it on the roof. This will help you align the vent properly during installation.
- Roof slope: Consider the slope of your roof while marking the location. If needed, use a level to ensure the markings align with the slope and maintain a proper installation angle.
Take your time to make accurate and clear markings on the roof. This will ensure that the vent is installed in the correct location and prevent any potential issues or complications.
Remember to follow any additional guidelines provided by the manufacturer of the roof vent kit. They may have specific instructions on vent placement or roof marking that you should adhere to for a successful installation.
With the location marked on the roof, you are now ready to move on to the next step: preparing the roof for installation.
Step 4: Prepare the roof for installation
Before installing the roof vent for your bathroom fan, it is crucial to prepare the roof to ensure a secure and watertight installation. Proper preparation will help prevent leaks and ensure the longevity of your roof vent.
Here are the steps to prepare the roof:
- Clear the area: Remove any debris, leaves, or other obstructions from the roof surface. Clearing the area will provide a clean working space and prevent any potential damage to the vent or flashing.
- Double-check markings: Verify that the markings for the vent location are accurate and aligned with the center point. If necessary, make any adjustments or corrections before proceeding.
- Inspect the roof: Conduct a thorough inspection of the roof to identify any damage or potential issues. Look for cracked or broken shingles, missing tiles, or other signs of wear and tear. Repair any damaged areas before proceeding with the installation.
- Apply roofing adhesive (if needed): Depending on the type of roof vent and the instructions provided by the manufacturer, you may need to apply roofing adhesive to the underside of the vent. This adhesive helps create a strong and secure bond between the vent and the roof surface.
- Install the flashing: The flashing helps to create a watertight seal around the vent. Follow the manufacturer’s instructions to position and secure the flashing correctly. Ensure that it aligns with the markings on the roof and covers the appropriate area around the vent.
- Seal any gaps: Apply a generous amount of weatherproof silicone sealant around the edges of the flashing to seal any gaps and prevent water infiltration. Smooth out the sealant to ensure a tight seal.
Take your time during the preparation process to ensure everything is in order. By properly preparing the roof, you will greatly reduce the risk of water leaks and enhance the overall performance of your bathroom fan vent.
With the roof prepared, it’s time to move on to the next step: installing the roof vent itself.
When installing a roof vent for a bathroom fan, make sure to choose a location that is clear of any obstructions and allows for proper ventilation. Use a vent cap with a damper to prevent backdrafts and keep out pests. Be sure to follow all local building codes and regulations.
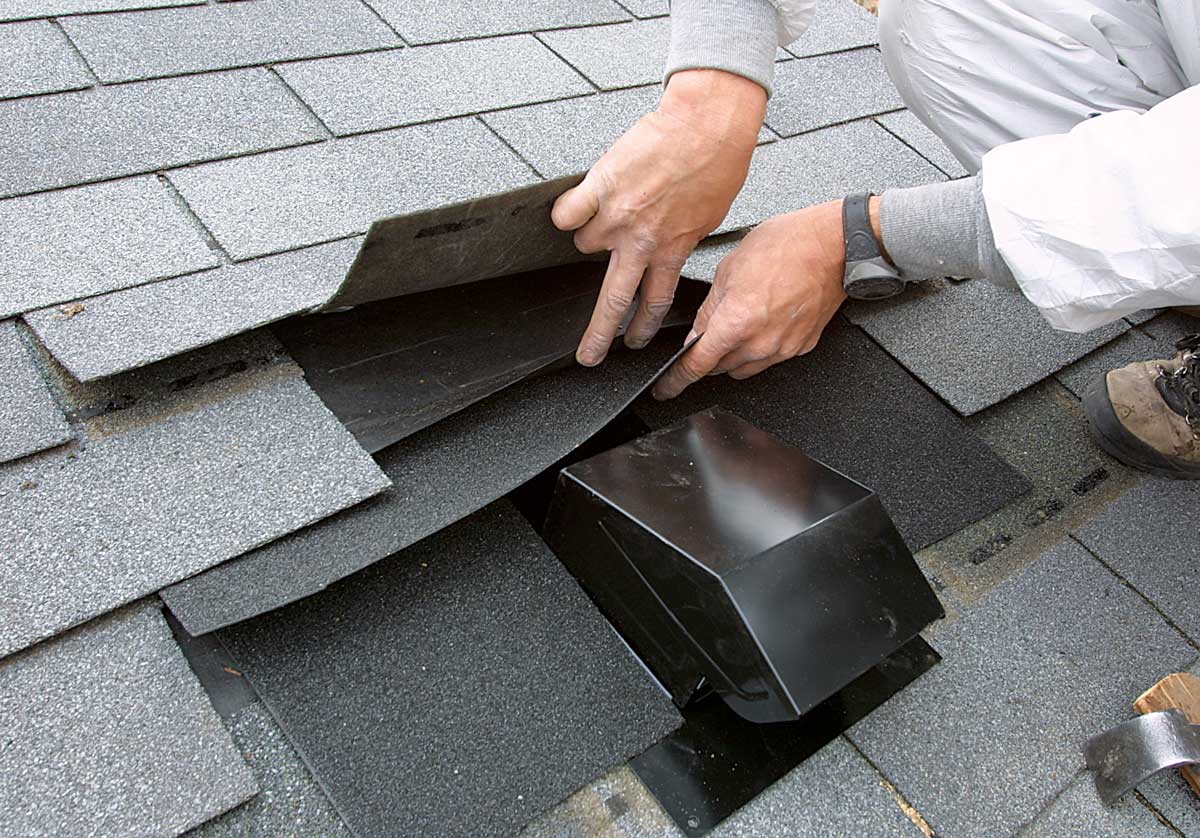
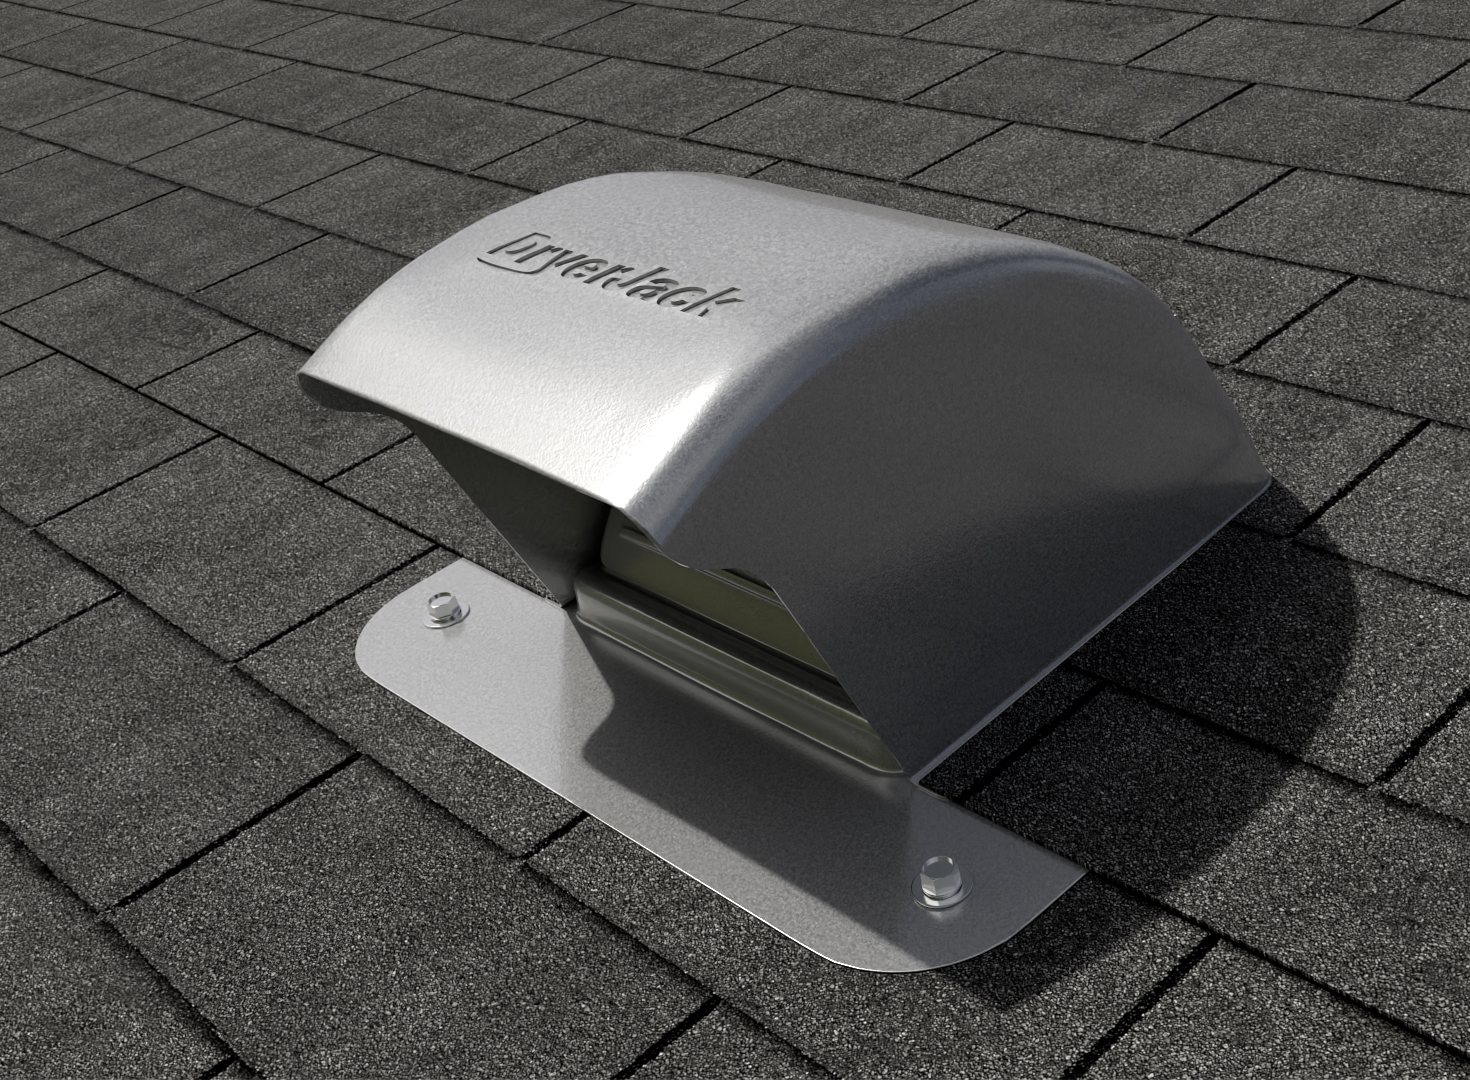
Step 5: Install the roof vent
Now that the roof is properly prepared, it’s time to install the roof vent for your bathroom fan. The installation process will vary depending on the specific vent kit you have, so be sure to follow the manufacturer’s instructions carefully. Here’s a general guide to help you through the installation:
- Position the vent: Place the roof vent in the previously marked location, ensuring it is centered and aligned properly. Double-check that it is level and sits flush with the roof surface.
- Secure the vent: Depending on the vent kit, you may need to use screws or other fasteners to secure the vent in place. Follow the manufacturer’s instructions to ensure a secure and stable installation.
- Attach the flashing: Align the flashing with the vent and roof surface, following the manufacturer’s instructions. Secure the flashing to the roof using screws or other provided fasteners. Make sure it overlaps the vent and roof surface to create a water-resistant barrier.
- Apply sealant: Use a weatherproof silicone sealant to seal any gaps between the vent, flashing, and roof surface. Apply a generous amount around the edges to create a watertight seal and prevent leaks.
- Inspect and clean: Take a moment to inspect the installed vent and flashing to ensure everything is securely in place and there are no visible gaps or signs of damage. Clean up any excess sealant or debris from the installation area.
Always refer to the manufacturer’s instructions for specific recommendations and guidelines during the installation process. They may provide additional steps or instructions that are specific to their product.
Once the roof vent is properly installed, you are ready to move on to the next step: connecting the bathroom fan to the vent.
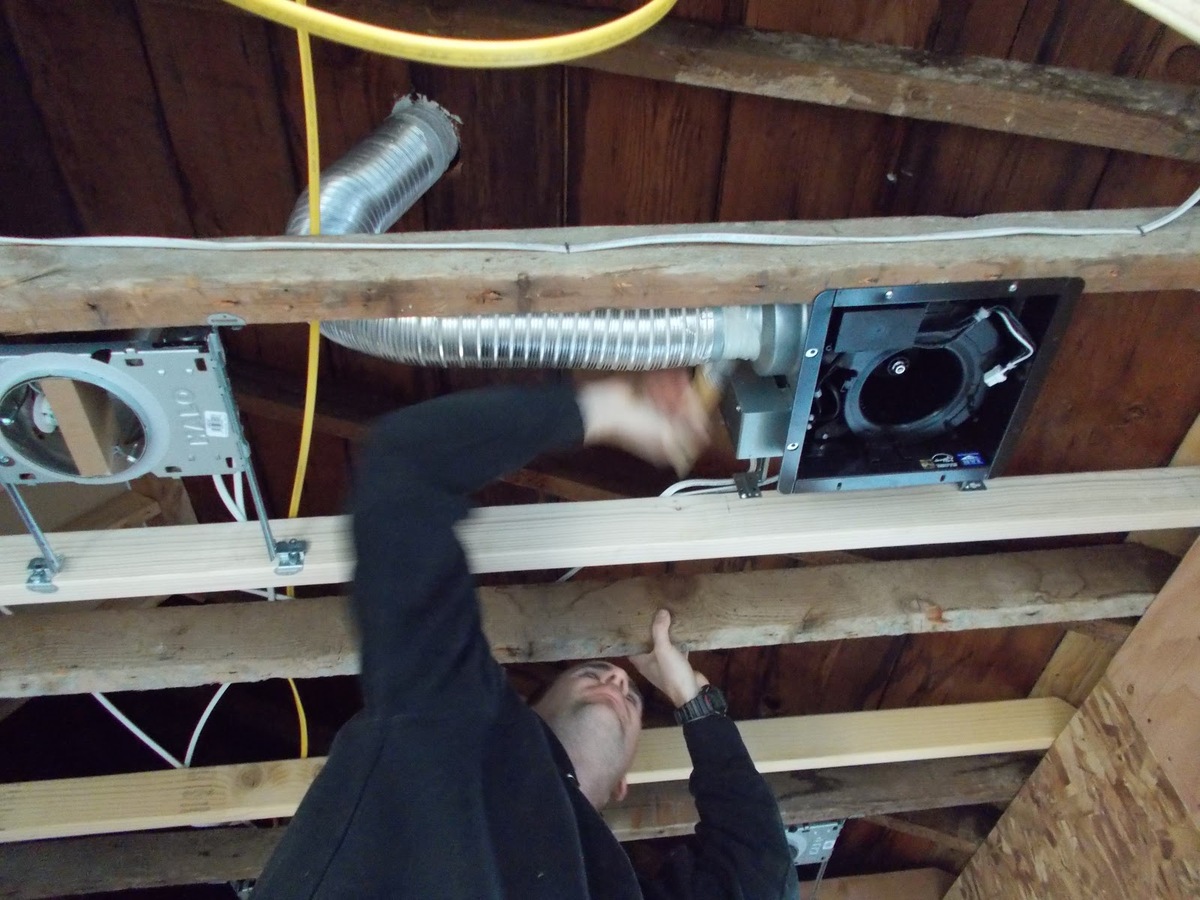
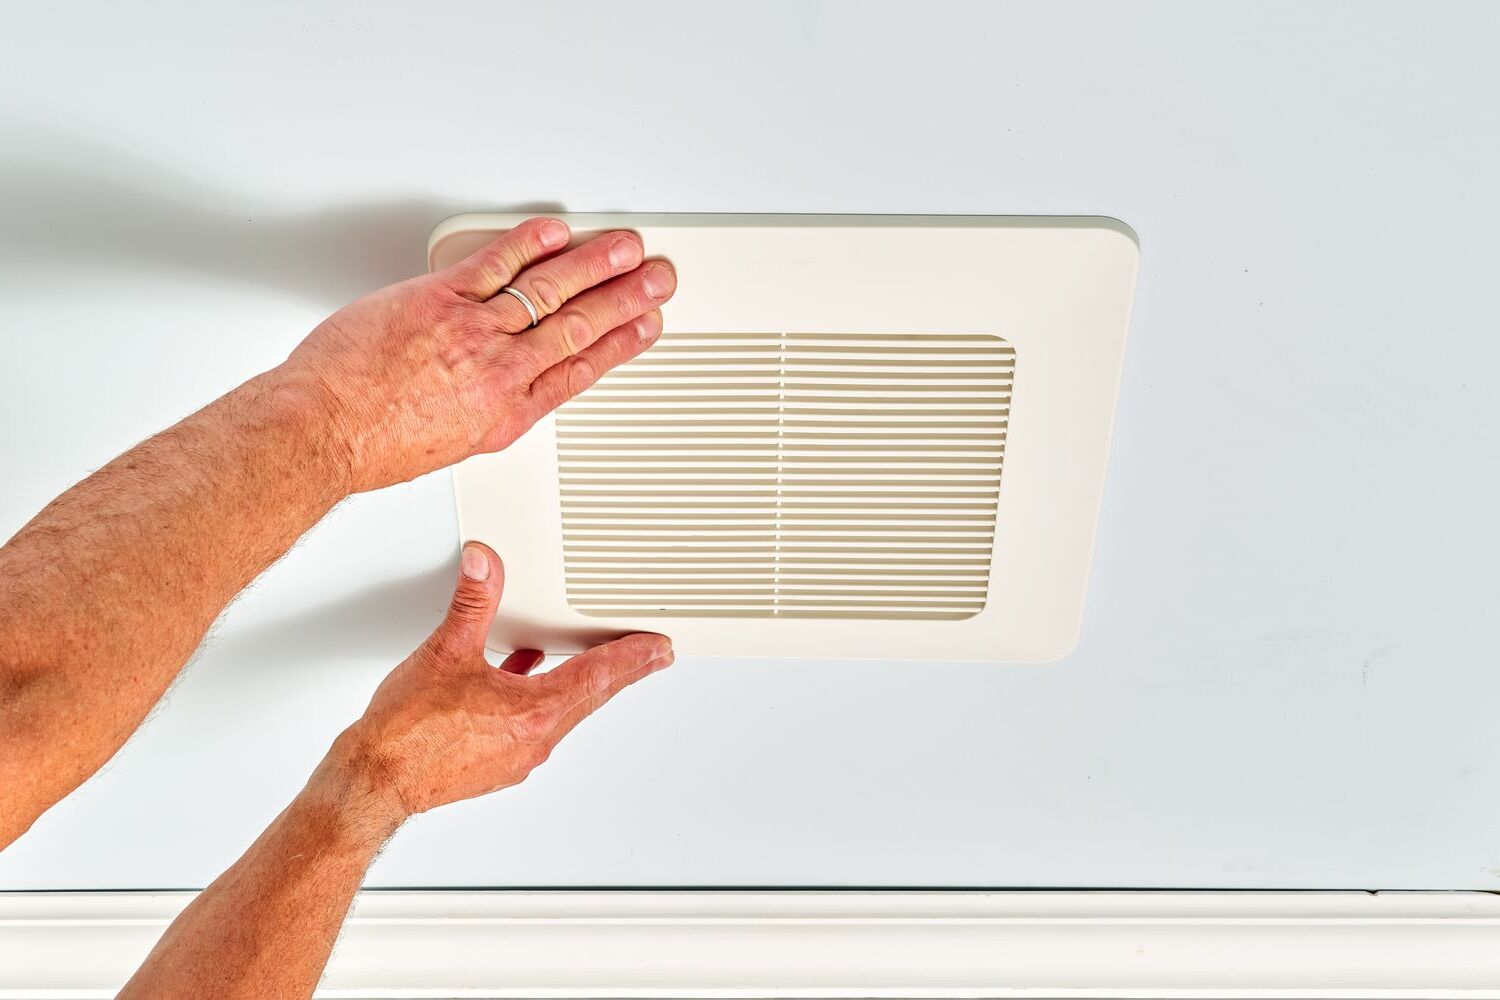
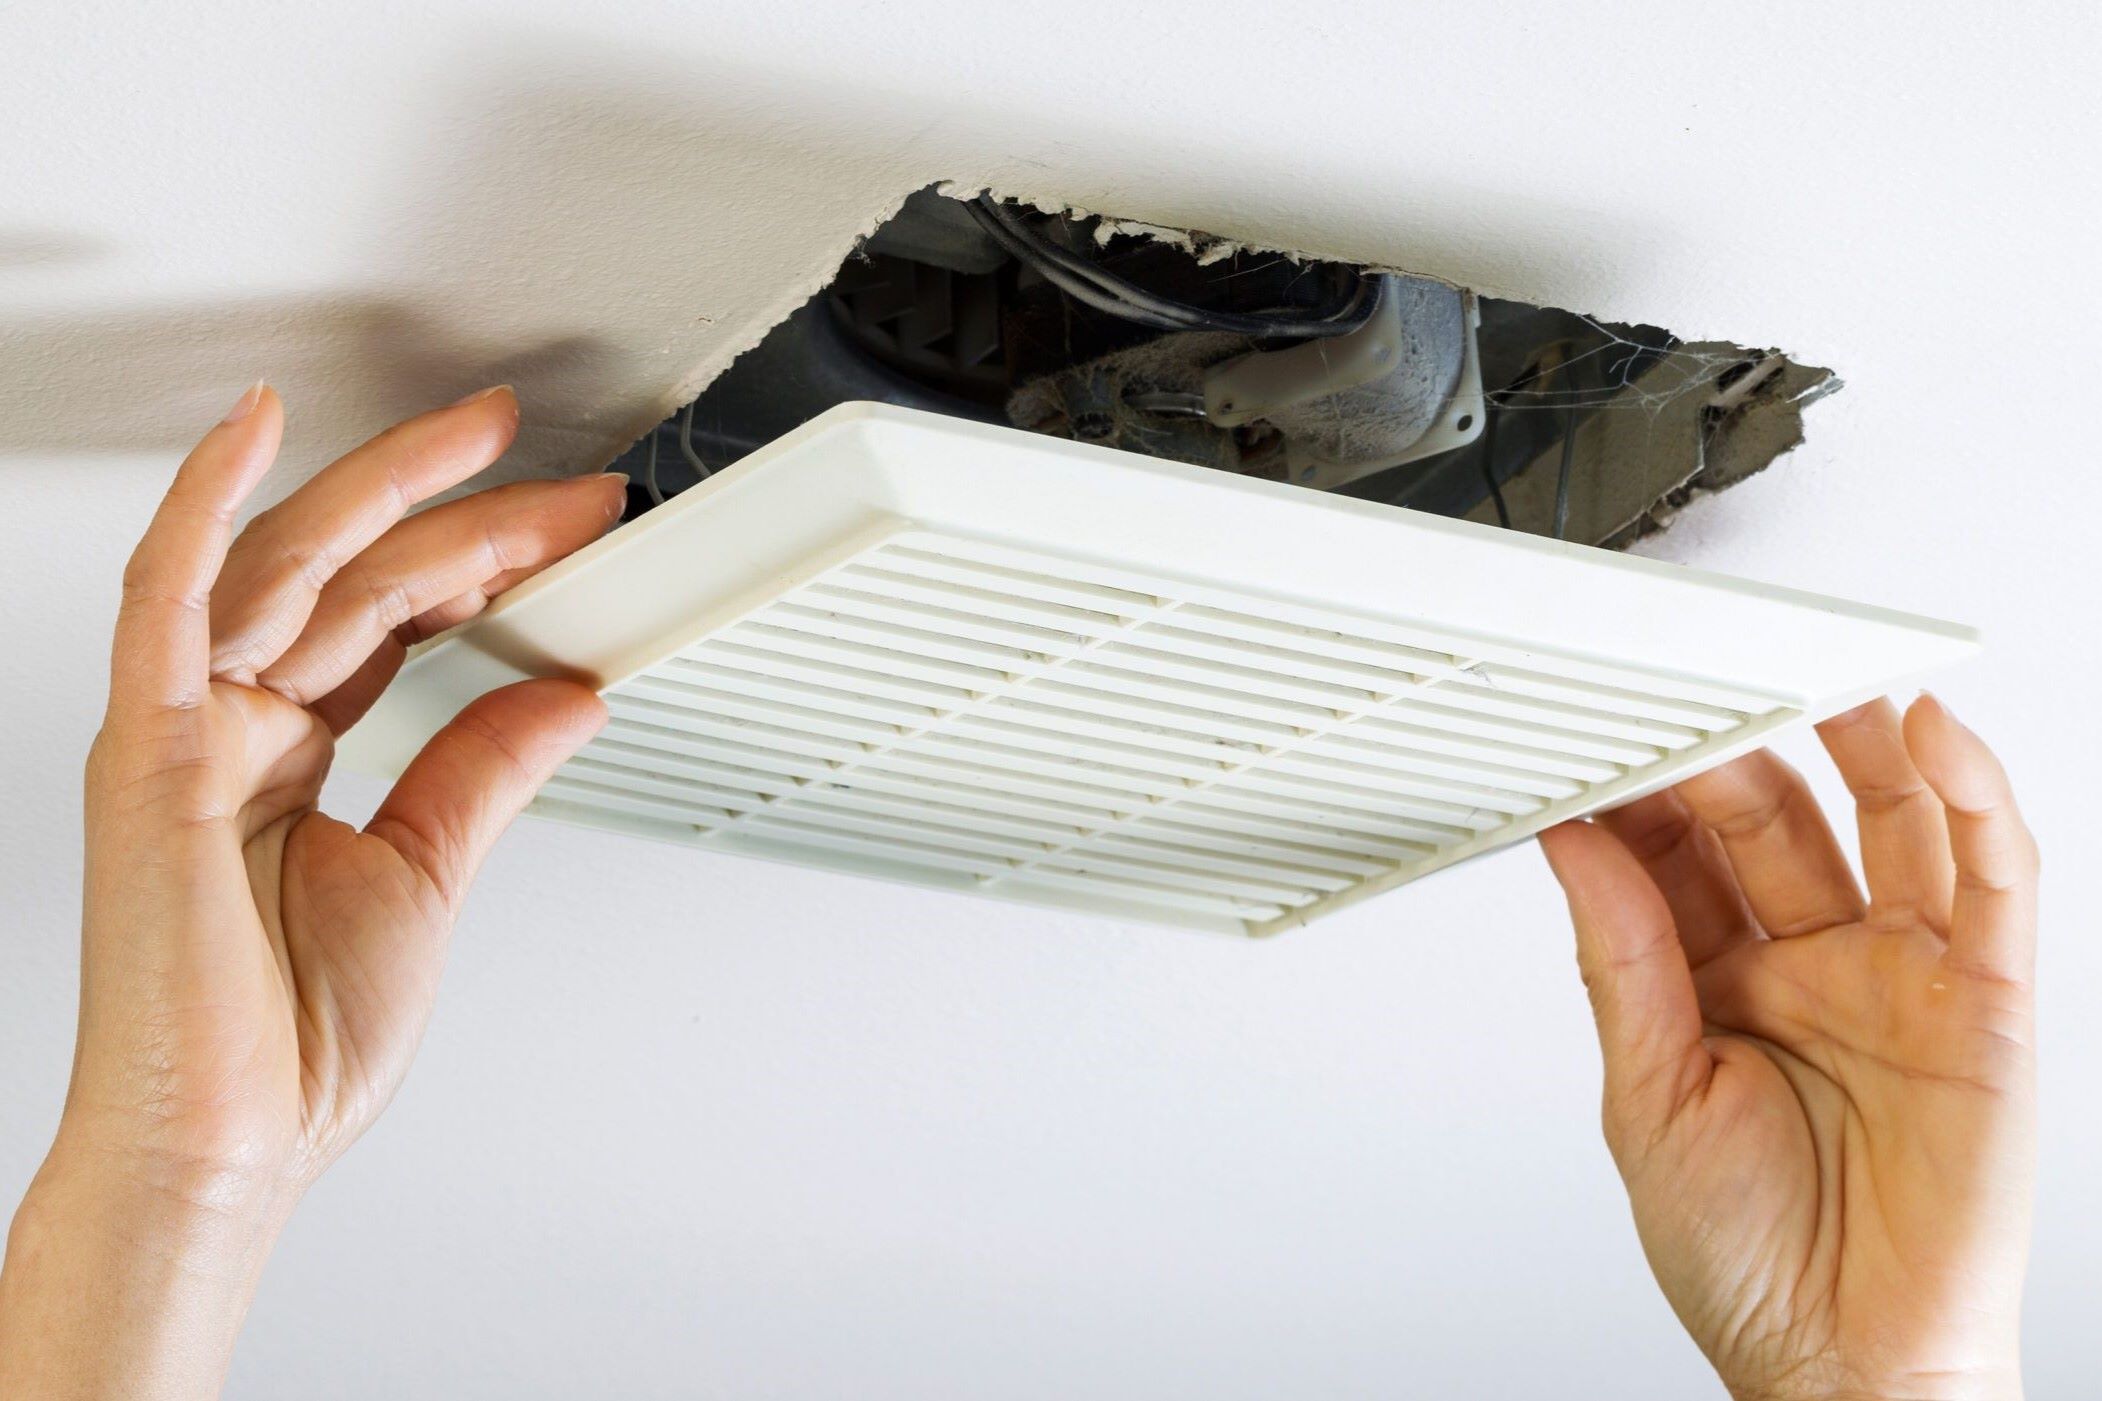
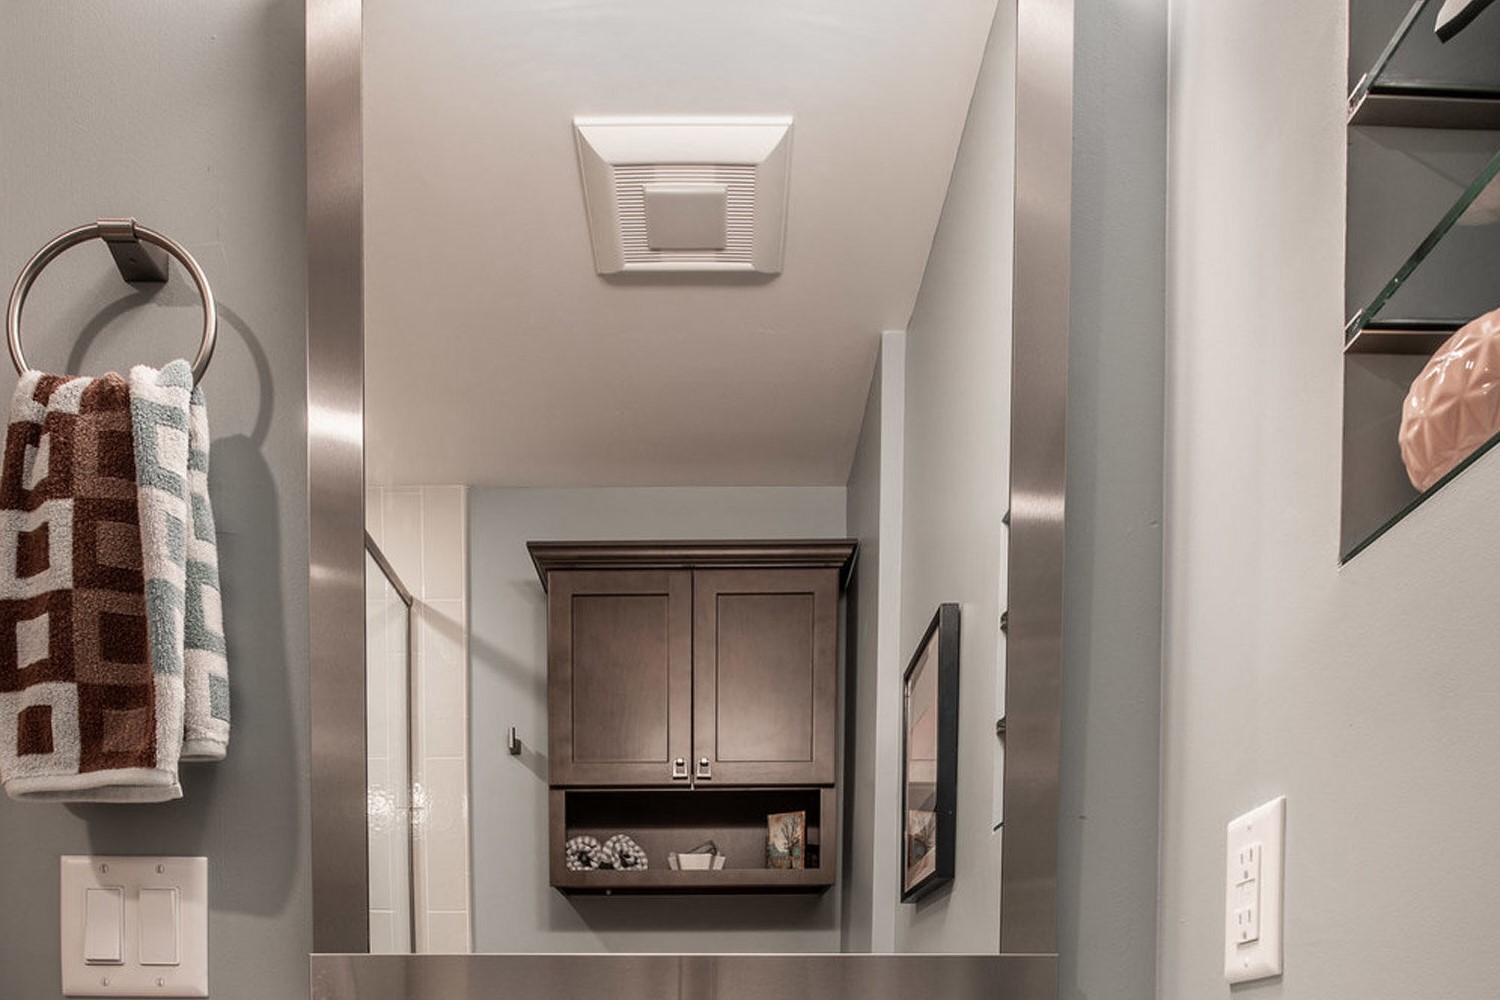
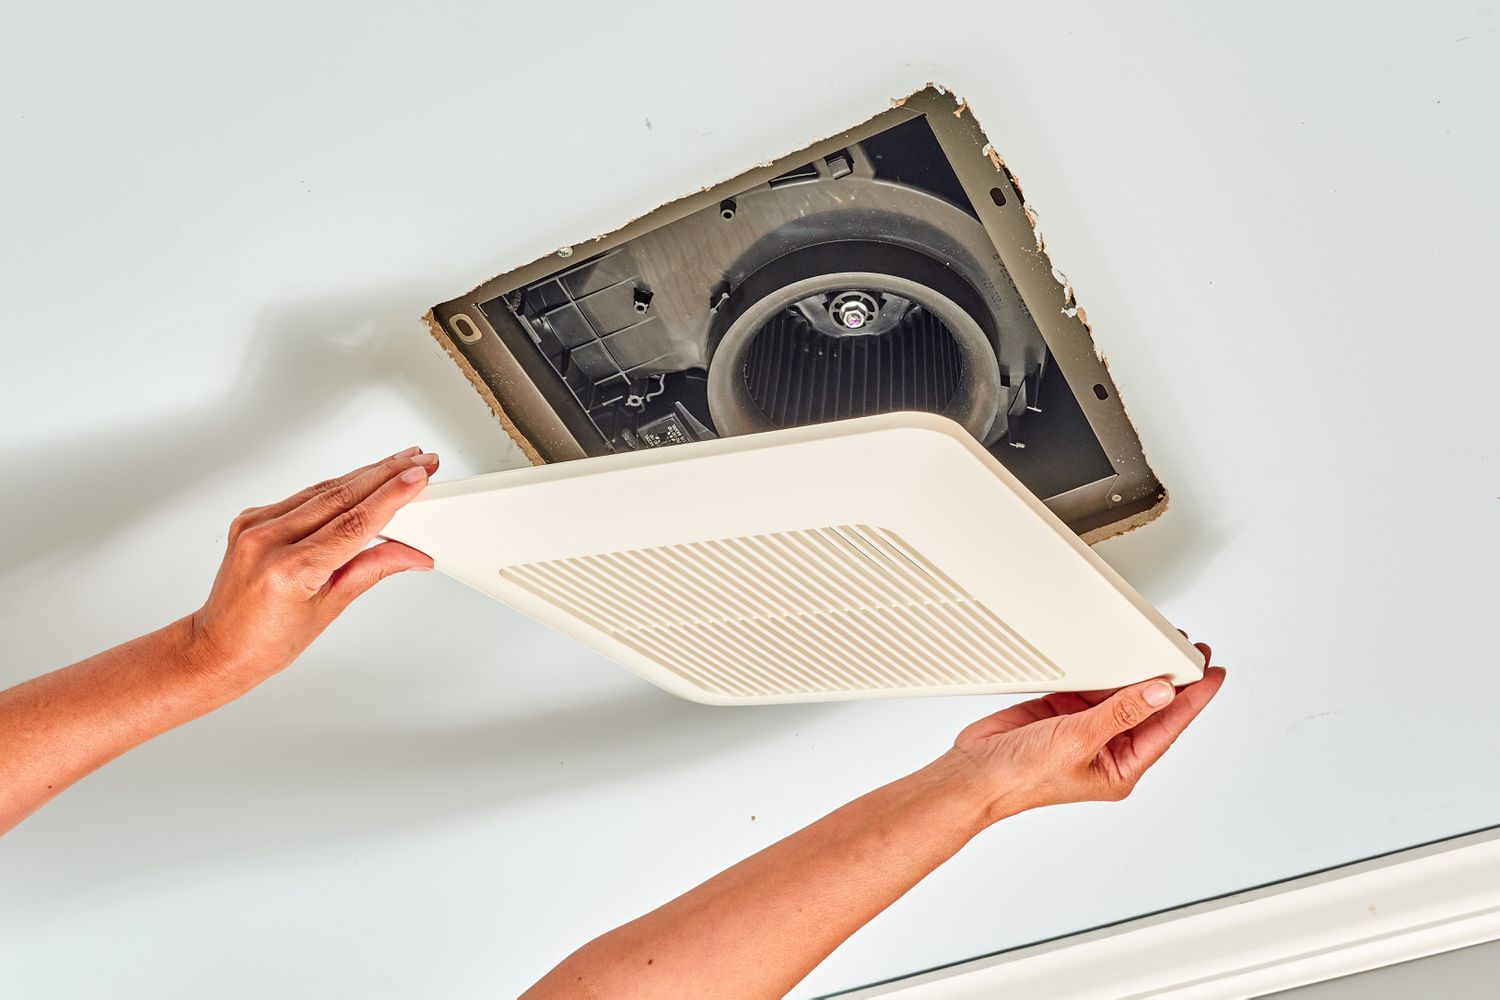
Step 6: Connect the bathroom fan to the vent
After successfully installing the roof vent, the next step is to connect the bathroom fan to the vent. This will complete the ventilation system and ensure proper airflow from the fan to the outside.
Follow these steps to connect the bathroom fan to the vent:
- Access the fan: Locate the access point of the bathroom fan where it connects to the ductwork. This is typically found in the attic or ceiling space.
- Measure and cut: Measure the length of the duct connecting the fan to the vent. Use a utility knife or appropriate cutting tool to cut the duct to the required length, ensuring a secure and proper fit.
- Attach the duct connector: Attach a duct connector to the end of the duct that will connect to the vent. Ensure it is secure and properly aligned.
- Secure with duct tape or clamps: Use duct tape or adjustable clamps to securely fasten the duct to the vent and the bathroom fan. This will prevent any air leaks and ensure proper airflow through the vent system.
- Seal any gaps: Apply silicone sealant or duct sealant to any gaps or connections to create a tight seal and prevent air leakage.
It’s essential to ensure a proper and secure connection between the bathroom fan and the vent. This will allow for efficient airflow and prevent any loss of ventilation.
Always refer to the manufacturer’s instructions for your specific bathroom fan and vent kit. They may have additional guidelines or recommendations for connecting the fan to the vent.
With the bathroom fan successfully connected to the vent, you’re almost finished! The next step is to secure the roof vent in place.
Step 7: Secure the roof vent in place
Once you have connected the bathroom fan to the vent, it’s important to secure the roof vent in place to ensure stability and prevent any potential issues in the future. Securing the roof vent will provide a solid and reliable installation that will withstand weather elements and maintain proper ventilation.
Follow these steps to secure the roof vent:
- Double-check alignment: Ensure that the roof vent is still centered and aligned properly with the markings you made earlier. Make any necessary adjustments if needed.
- Use screws or fasteners: Referencing the manufacturer’s instructions, use the appropriate screws or fasteners provided with the vent kit to secure the vent to the roof. Insert them into the designated holes and tighten them to secure the vent firmly in place.
- Examine the seal: Inspect the seal between the flashing, roof, and vent. Look for any gaps or areas that require additional sealing. Apply weatherproof silicone sealant to fill in any gaps and create a watertight barrier.
- Inspect for proper fit: Verify that the vent sits flush with the roof surface and there are no visible gaps or loose connections. This will ensure a secure fit and prevent any potential leaks.
By securely fastening the roof vent in place, you are ensuring the longevity and effectiveness of the ventilation system. A properly secured vent will withstand weather conditions and maintain proper airflow from the bathroom fan to the outside.
Remember to follow any additional instructions from the manufacturer for specific guidelines on securing the roof vent. This will help ensure a successful installation that meets the manufacturer’s recommendations.
With the roof vent securely in place, it’s time to move on to the final step: testing the fan and vent for proper operation.
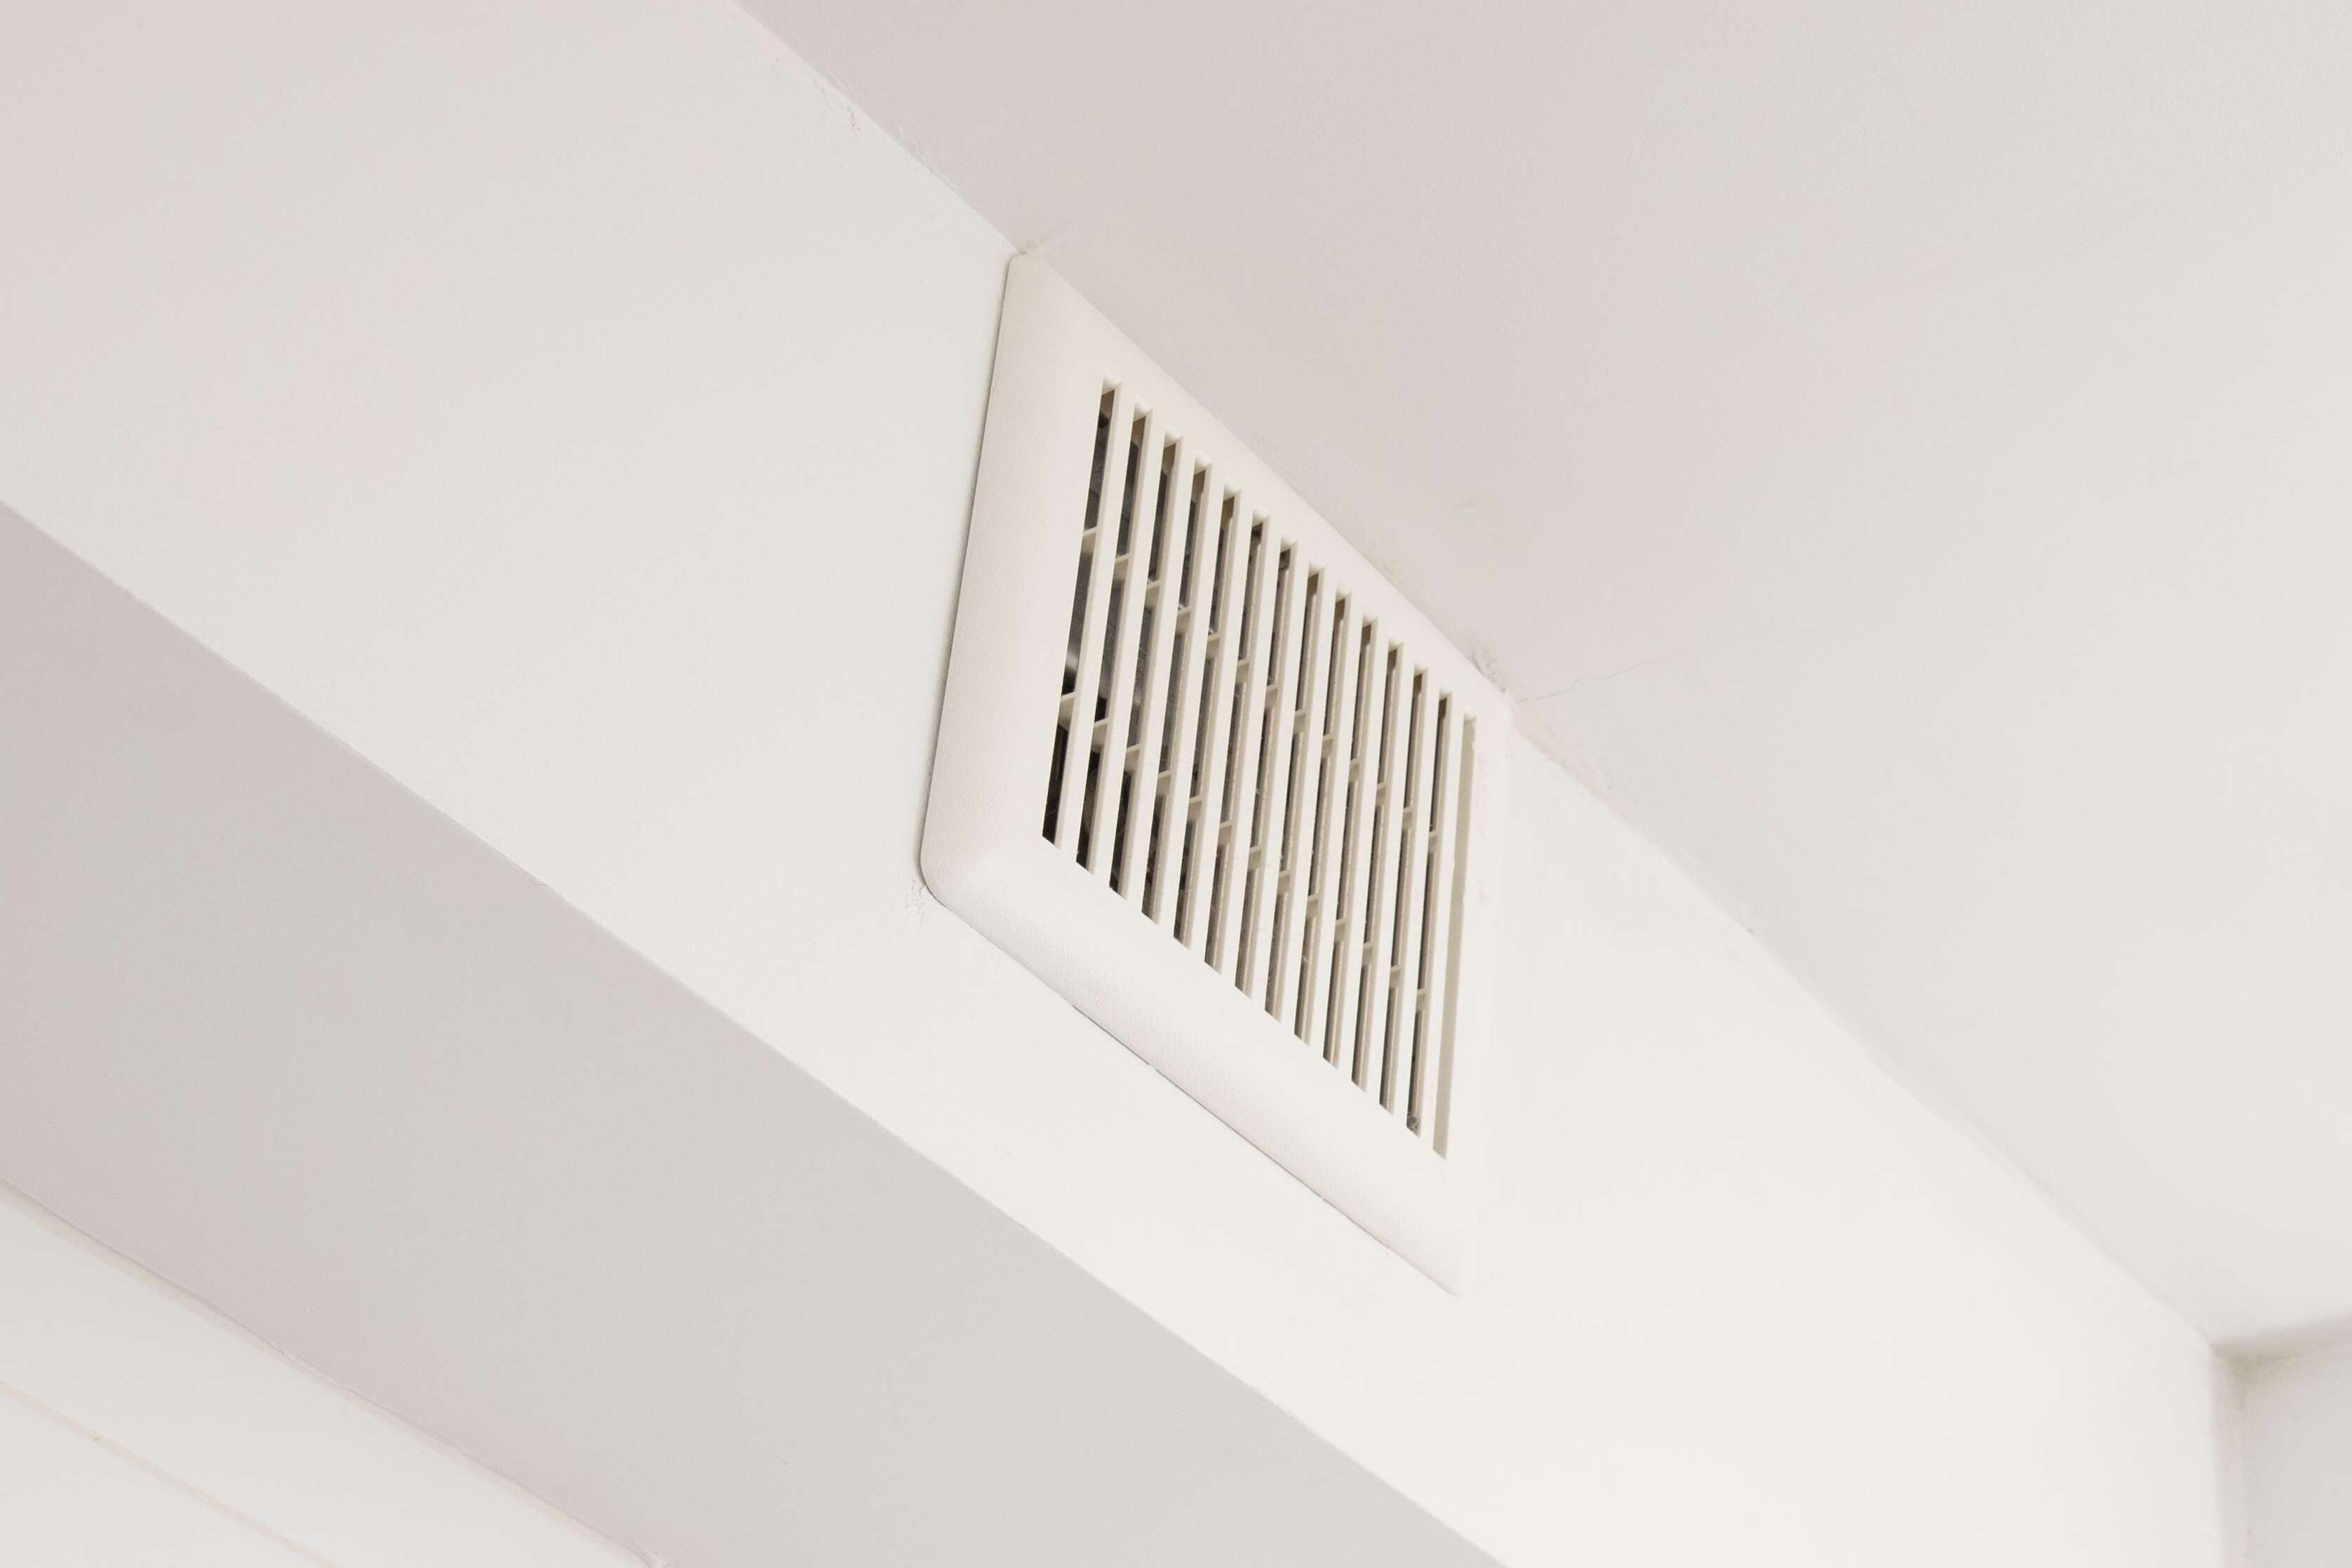
Step 8: Test the fan and vent for proper operation
After completing the installation of the roof vent for your bathroom fan, it is crucial to test the system to ensure it is functioning properly. Testing will help identify any potential issues or adjustments that may be needed, allowing you to address them before fully relying on the ventilation system.
Follow these steps to test the fan and vent:
- Turn on the fan: Switch on the bathroom fan and observe its operation. Ensure that the fan is running smoothly and effectively removing excess moisture and odors from the bathroom.
- Check the vent airflow: Go outside and inspect the roof vent for airflow. You should feel a steady and consistent flow of air coming out of the vent. A strong airflow indicates proper ventilation.
- Listen for unusual noises: Pay attention to any unusual noises or vibrations coming from the fan or vent. Uncommon sounds may indicate a loose connection or a problem with the fan motor. If you hear anything unusual, consider contacting a professional for further inspection.
- Inspect the vent for leaks: After running the fan for a few minutes, inspect the roof and ceiling around the vent for any signs of moisture or water leakage. If you notice any leaks, there may be a problem with the installation or sealant. Address the issue promptly to prevent further damage.
Testing the fan and vent for proper operation is essential to ensure that the ventilation system is effectively removing moisture and promoting a healthy bathroom environment. Take the time to carefully assess the fan and vent performance, making any necessary adjustments or repairs if needed.
If you encounter any issues during the testing phase or are uncertain about the results, it may be beneficial to consult a professional to ensure proper ventilation and address any potential concerns.
With the fan and vent successfully tested and operating correctly, congratulations! You have completed the installation of the roof vent for your bathroom fan.
Read more: How To Install A Dryer Vent Through The Roof
Conclusion
Installing a roof vent for your bathroom fan is a crucial step in ensuring proper ventilation and maintaining a healthy bathroom environment. By following the step-by-step guide outlined in this article, you can successfully install a roof vent and enjoy the benefits of improved air circulation, reduced moisture buildup, and enhanced indoor air quality.
Throughout the installation process, it is important to gather the necessary tools and materials, choose the right location for the roof vent, mark the location on the roof, prepare the roof for installation, install the roof vent, connect the bathroom fan to the vent, secure the roof vent in place, and test the fan and vent for proper operation.
Remember to always refer to the manufacturer’s instructions for specific guidelines and recommendations for your particular bathroom fan and roof vent kit. Adhering to these instructions will ensure a successful and safe installation.
If you are uncomfortable with working at heights or handling roofing materials, it is highly recommended to seek the assistance of a professional to avoid any potential hazards and ensure a proper installation.
By properly installing a roof vent for your bathroom fan, you can maintain a comfortable, odor-free, and mold-free bathroom environment, promoting overall well-being and prolonging the lifespan of your bathroom fan and roof.
Take the necessary steps to ensure a successful installation, and enjoy the benefits of improved ventilation and a healthier bathroom space for years to come.
After mastering roof vent installation, why not tackle more home projects? Our guide on DIY home improvement offers practical advice for transforming spaces with your own hands. Additionally, if repairs are on your mind, dive into our comprehensive article on home repair. Both pieces are packed with tips to ensure success in your next home endeavor.
Frequently Asked Questions about How To Install Roof Vent For Bathroom Fan
Was this page helpful?
At Storables.com, we guarantee accurate and reliable information. Our content, validated by Expert Board Contributors, is crafted following stringent Editorial Policies. We're committed to providing you with well-researched, expert-backed insights for all your informational needs.
0 thoughts on “How To Install Roof Vent For Bathroom Fan”