Home>Furniture & Design>Interior Design Trends>How To Install Shower Glass Doors
Interior Design Trends
How To Install Shower Glass Doors
Modified: October 20, 2024
Learn the latest interior design trends for installing shower glass doors. Upgrade your bathroom with modern and stylish glass door designs.
(Many of the links in this article redirect to a specific reviewed product. Your purchase of these products through affiliate links helps to generate commission for Storables.com, at no extra cost. Learn more)
Introduction
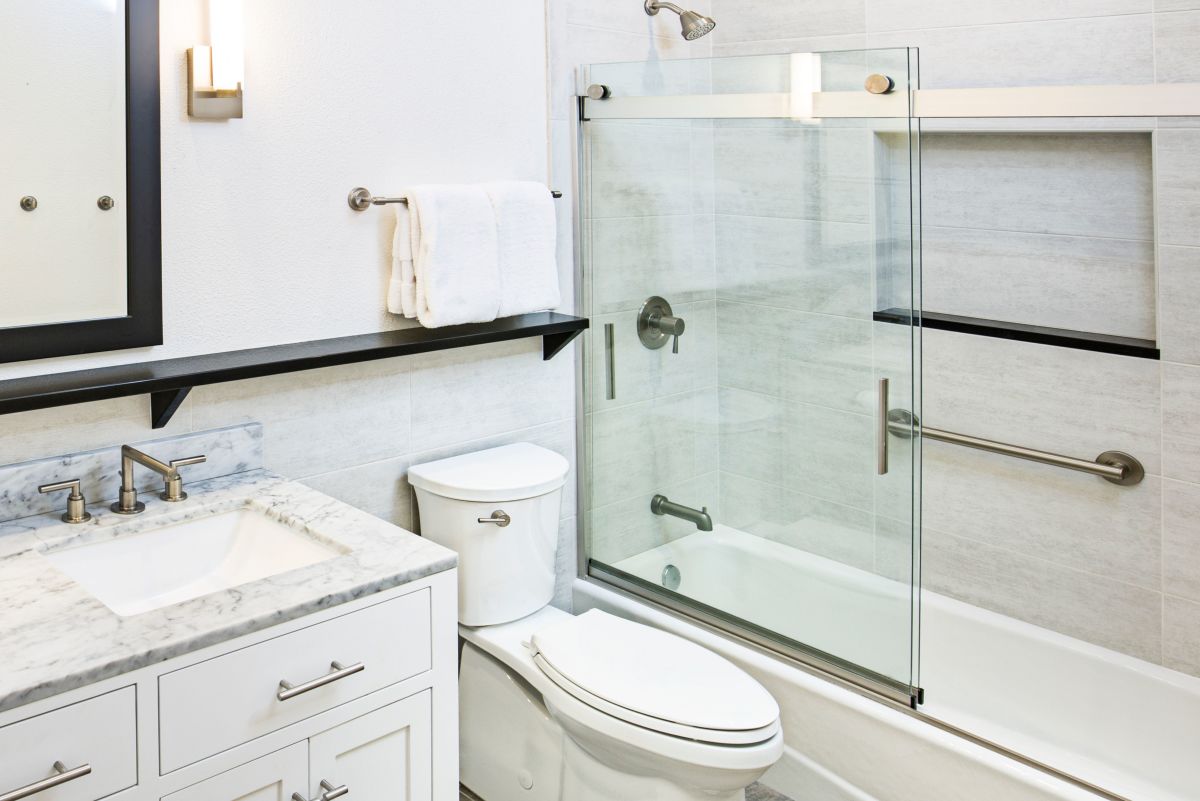
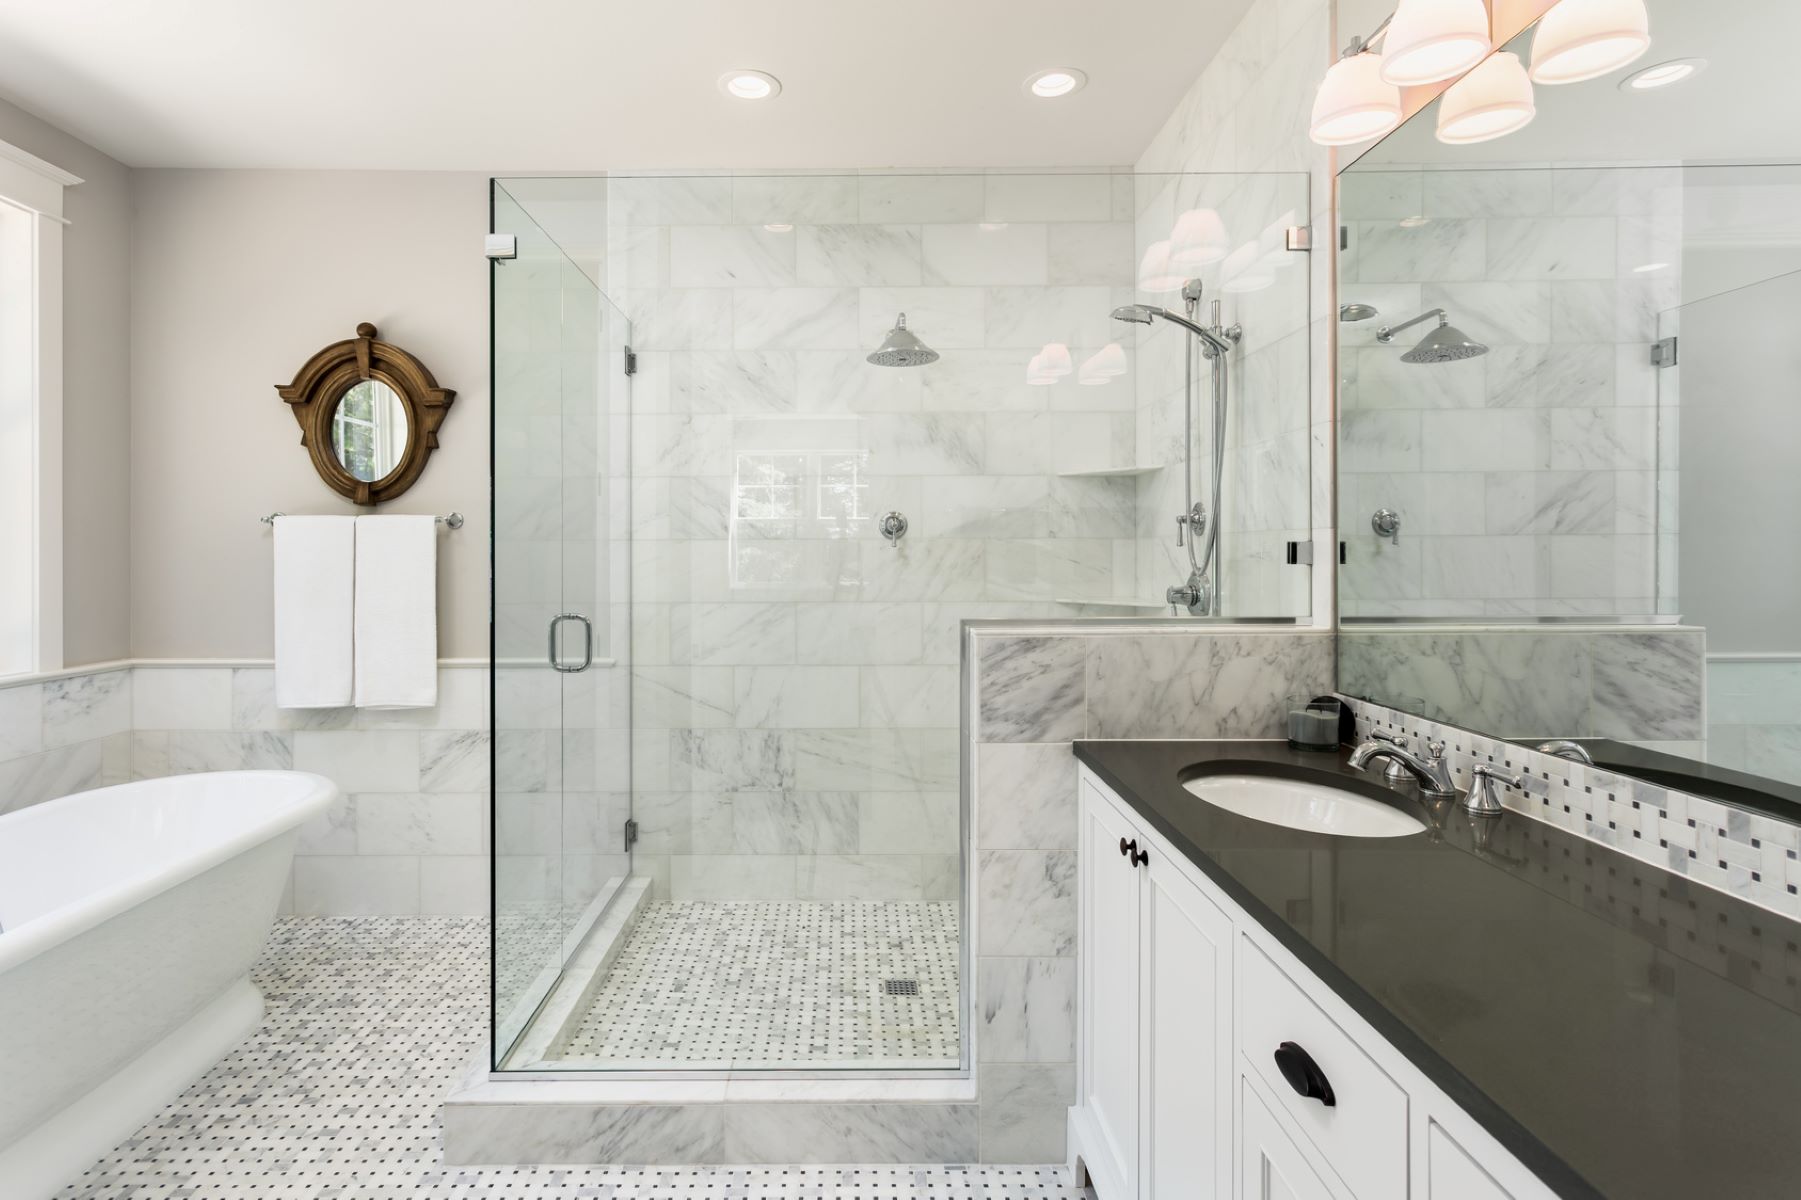
Installing shower glass doors is a fantastic way to elevate the look and functionality of your bathroom. Not only do these doors add a touch of elegance and modernity to the space, but they also create a seamless and open feel, making the bathroom appear larger and more inviting. Whether you're renovating an existing bathroom or building a new one, the process of installing shower glass doors can be a rewarding and transformative experience.
In this comprehensive guide, we will walk you through the step-by-step process of installing shower glass doors. From measuring the shower area to choosing the right glass doors and completing the installation, we will cover everything you need to know to successfully complete this project. By following these instructions, you can achieve a professional-looking result while adding value to your home.
Before diving into the installation process, it's important to note that installing shower glass doors requires careful planning, precise measurements, and attention to detail. While the task may seem daunting at first, with the right tools, materials, and guidance, you can tackle this project with confidence and achieve stunning results.
Whether you're a seasoned DIY enthusiast or a first-time homeowner looking to take on a new challenge, this guide is designed to provide you with the knowledge and confidence to install shower glass doors like a pro. So, roll up your sleeves, gather your tools, and let's embark on this exciting journey to transform your bathroom with the installation of sleek and stylish glass doors.
Key Takeaways:
- Elevate your bathroom with sleek and stylish shower glass doors. Follow our step-by-step guide for a rewarding DIY project that adds elegance and functionality to your home.
- Transform your shower space with precision and skill. From measuring to installation, create a luxurious and inviting enclosure that enhances the value of your home.
Read more: DIY Guide To Installing A Glass Shower Door
Step 1: Measure the Shower Area
Before embarking on the installation of shower glass doors, it is crucial to begin with accurate measurements of the shower area. This initial step lays the foundation for a seamless and successful installation process. Here's a detailed breakdown of how to measure the shower area effectively:
Gather the Necessary Tools
To begin, gather the essential tools for accurate measurements. You will need a measuring tape, level, and pencil. These tools will enable you to take precise measurements and ensure that the glass doors fit perfectly within the shower space.
Measure the Width and Height
Start by measuring the width and height of the shower opening. Use the measuring tape to determine the width from wall to wall at the top, middle, and bottom of the opening. This is important because walls are not always perfectly straight, and taking multiple measurements will account for any variations.
Next, measure the height of the opening from the top of the tub or shower base to the top of the opening. Again, take measurements at various points to accommodate any irregularities in the walls or floor.
Check for Plumb and Level
Using a level, ensure that the walls of the shower are plumb and the threshold is level. This step is crucial as it will impact the installation of the glass doors. If the walls are not plumb or the threshold is not level, adjustments may be necessary before proceeding with the installation.
Read more: How To Install Glass Shower Panel
Consider Any Design Preferences
Take into account any design preferences or specific requirements for the glass doors. For example, if you prefer a wider door opening or a specific height for the doors, factor these preferences into your measurements.
Document the Measurements
Once you have taken accurate measurements of the shower area, document the width, height, and any relevant notes or observations. Having these measurements on hand will guide you in selecting the appropriate glass doors and components for the installation.
By meticulously measuring the shower area and documenting the dimensions, you are setting the stage for a smooth and precise installation of the glass doors. This attention to detail in the initial phase will contribute to the overall success and visual appeal of the completed project.
With the shower area accurately measured, you are now ready to move on to the next step in the installation process: choosing the right glass doors for your shower space.
Step 2: Choose the Right Glass Doors
Selecting the right glass doors for your shower space is a pivotal decision that significantly influences the overall aesthetic and functionality of the bathroom. With a myriad of options available, it's essential to consider various factors to ensure that the chosen doors align with your design preferences, budget, and practical requirements. Here's a comprehensive guide to help you navigate the process of choosing the perfect glass doors for your shower:
Consider the Shower Layout and Space
Begin by assessing the layout and dimensions of your shower space. Take into account the size and configuration of the shower area, including any alcoves or unique architectural features. Understanding the spatial dynamics will guide you in determining whether a sliding door, pivot door, or hinged door is the most suitable option for your specific layout.
Read more: How To Remove Glass Shower Doors
Evaluate Glass Door Styles
Explore the diverse styles of glass doors available in the market, such as framed, frameless, semi-frameless, and frosted glass options. Each style offers distinct visual characteristics and functional attributes. Frameless doors, for instance, create a sleek and minimalist look, while framed doors provide structural support and a classic aesthetic. Consider the overall design theme of your bathroom and select a door style that complements the existing decor while adding a touch of sophistication.
Assess Glass Thickness and Quality
The thickness and quality of the glass are crucial factors to consider when choosing glass doors. Thicker glass panels offer enhanced durability and a luxurious feel, contributing to a premium shower experience. Additionally, opt for tempered safety glass, which is designed to withstand impact and minimize the risk of breakage. Prioritizing quality and safety ensures that your glass doors will stand the test of time and provide a secure enclosure for your shower.
Explore Hardware and Finishes
Pay attention to the hardware and finishes available for glass doors, including handles, hinges, and tracks. These components not only contribute to the functionality of the doors but also serve as design elements that can elevate the overall look of the shower space. Whether you prefer sleek, modern hardware or traditional, ornate finishes, selecting hardware that aligns with your style preferences will enhance the cohesiveness of the bathroom design.
Budget and Long-Term Investment
Factor in your budget and long-term investment goals when choosing glass doors. While it's important to stay within budget, consider the value that high-quality, well-crafted doors bring to your home. Investing in durable, aesthetically pleasing glass doors can enhance the resale value of your property and provide long-term satisfaction.
By carefully considering these aspects and exploring the diverse options available, you can confidently select the right glass doors that harmonize with your vision for a stylish and functional shower space. With the doors chosen, you are now prepared to move forward with the next steps in the installation process, bringing you closer to the realization of your dream bathroom.
Read more: How To Adjust Glass Shower Door Hinges
Step 3: Prepare the Shower Area
Preparing the shower area is a crucial step that sets the stage for the seamless installation of glass doors. By ensuring that the shower space is properly prepped, you can create an optimal environment for the successful integration of the doors while safeguarding the structural integrity of the surrounding surfaces. Here's a detailed breakdown of the essential tasks involved in preparing the shower area:
Clear the Surrounding Space
Begin by clearing the shower area and its immediate surroundings of any obstructions, including toiletries, bath accessories, and bath mats. Clearing the space provides unobstructed access for the installation process and minimizes the risk of damage to personal items during the installation.
Clean and Inspect the Shower Enclosure
Thoroughly clean the shower enclosure, including the walls, floor, and existing shower door or curtain. Removing any soap scum, residue, or mold ensures that the surfaces are clean and ready for the installation of the glass doors. Additionally, inspect the enclosure for any signs of damage or deterioration, such as loose tiles or grout, and address any necessary repairs before proceeding.
Protect Adjacent Surfaces
Safeguard adjacent surfaces, such as the bathroom floor and walls outside the shower area, by covering them with protective materials. Use drop cloths or plastic sheeting to shield these surfaces from dust, debris, and potential damage during the installation process. Taking this precautionary measure helps maintain the overall cleanliness and integrity of the bathroom space.
Read more: How To Tighten Glass Shower Door Handle
Ensure Proper Ventilation
Verify that the shower area has adequate ventilation to facilitate the drying of adhesives and sealants used during the installation. Proper ventilation helps expedite the curing process and minimizes the risk of moisture-related issues in the future. If necessary, consider running a fan or opening windows to promote air circulation during and after the installation.
Address Plumbing and Waterproofing
Inspect the plumbing fixtures within the shower area to ensure that they are in good working condition and free from leaks. Additionally, assess the waterproofing of the shower enclosure, paying attention to the integrity of the waterproof membrane, caulking, and grout. Address any plumbing or waterproofing concerns to prevent potential issues that could compromise the installation of the glass doors.
By meticulously preparing the shower area through these essential steps, you are laying a solid foundation for the successful installation of glass doors. This proactive approach not only streamlines the installation process but also contributes to the long-term durability and functionality of the shower enclosure. With the shower area meticulously prepared, you are now ready to progress to the subsequent steps, bringing you closer to the realization of your vision for a stunning and functional shower space.
Step 4: Install the Bottom Track
The installation of the bottom track is a critical step in the process of installing shower glass doors. The bottom track serves as the foundation for the glass panels, providing stability and support while ensuring a secure and functional enclosure. Here's a detailed guide on how to effectively install the bottom track for your shower glass doors:
Gather the Necessary Tools and Materials
Before commencing the installation, gather the essential tools and materials required for installing the bottom track. You will need a drill, screws, screwdriver, level, measuring tape, and the bottom track kit, which typically includes the track, vinyl sweep, and any accompanying hardware. Ensuring that all the necessary components are readily available will streamline the installation process and minimize interruptions.
Read more: How To Install A Dog Door In A Glass Door
Measure and Mark the Placement
Begin by measuring the width of the shower threshold to determine the precise placement of the bottom track. Use a measuring tape to ascertain the exact dimensions, accounting for any variations in the threshold's width. Once the measurements are obtained, mark the placement of the bottom track on the threshold using a pencil or masking tape. Ensuring that the track is aligned with the shower opening and positioned evenly is crucial for a balanced and symmetrical installation.
Prepare the Threshold
Before installing the bottom track, ensure that the threshold is clean and free of any debris or obstructions. Thoroughly clean the surface to promote optimal adhesion and prevent potential issues with the installation. Additionally, verify that the threshold is level and free from any irregularities that could impede the proper placement of the bottom track.
Install the Bottom Track
Position the bottom track along the marked placement on the threshold, ensuring that it is aligned with the shower opening and level using a spirit level. Once the track is positioned correctly, secure it in place by drilling pilot holes through the track and into the threshold. Subsequently, fasten the track using the appropriate screws, ensuring a firm and stable attachment. Take care to avoid over-tightening the screws, as this could potentially damage the track or the threshold.
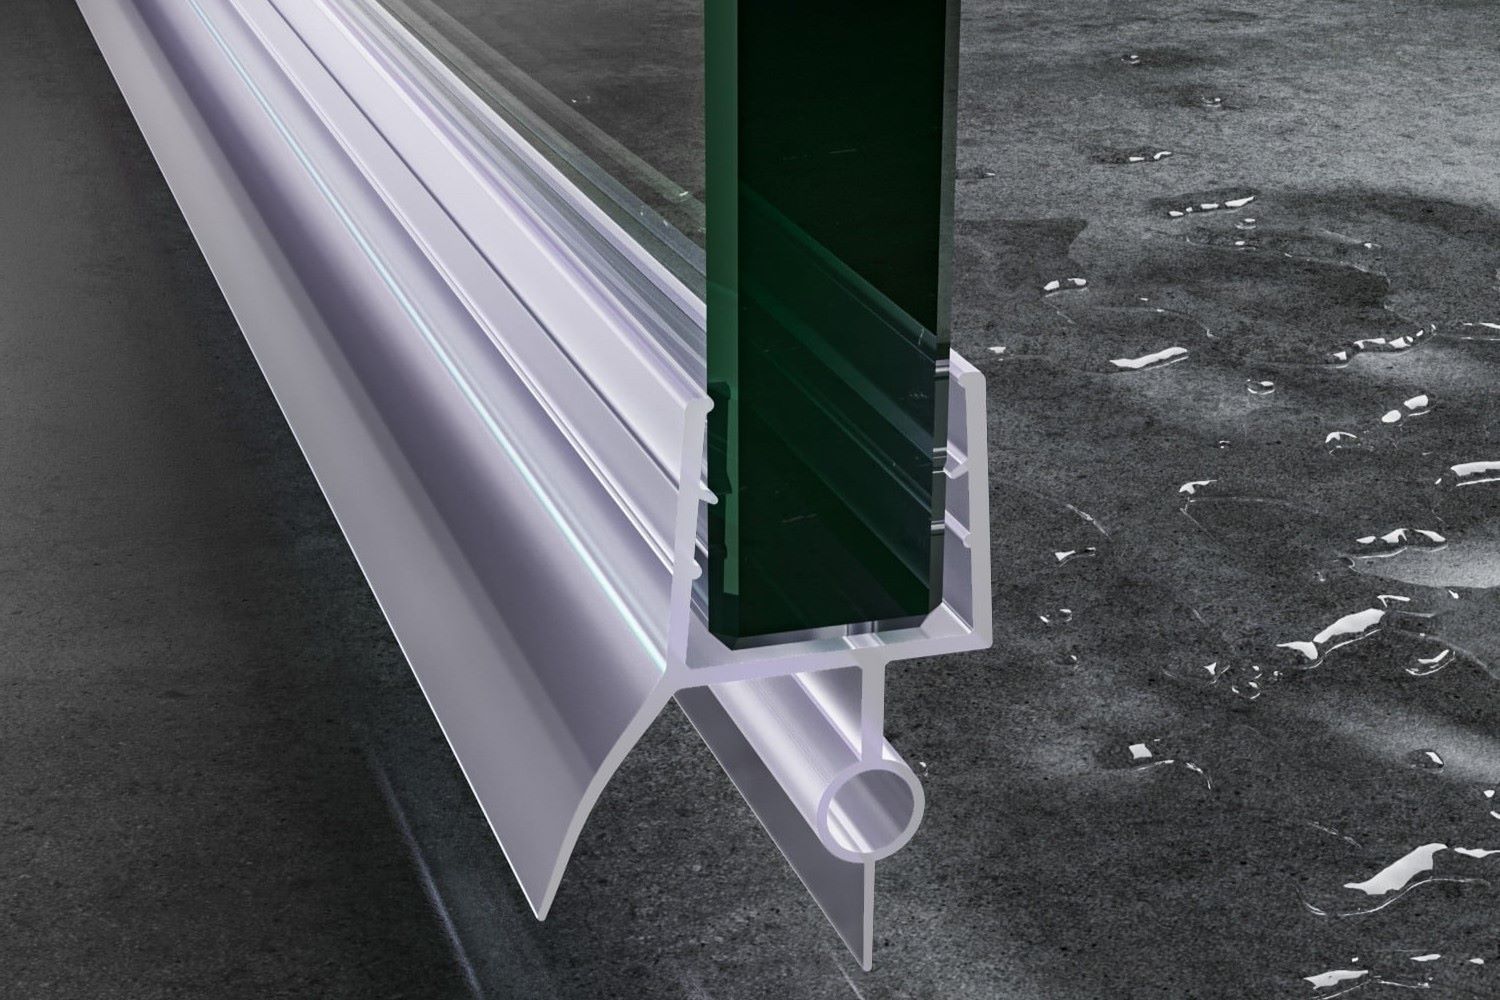
Attach the Vinyl Sweep
After securing the bottom track, attach the vinyl sweep to the inner edge of the track. The vinyl sweep serves as a seal to prevent water from escaping the shower enclosure, enhancing the functionality of the glass doors. Ensure that the sweep is securely affixed and extends to the full width of the opening, providing effective water containment.
By meticulously following these steps, you can effectively install the bottom track for your shower glass doors, laying the groundwork for the subsequent stages of the installation process. With the bottom track securely in place, you are now prepared to advance to the next pivotal steps, bringing you closer to the completion of your shower glass door installation project.
Read more: How To Install A Sliding Glass Door
Step 5: Install the Side Tracks
The installation of side tracks is a pivotal phase in the process of installing shower glass doors, as these tracks play a crucial role in providing structural support and ensuring the seamless operation of the doors. Here's a comprehensive guide on how to effectively install the side tracks for your shower glass doors:
Gather the Necessary Tools and Materials
Before commencing the installation, it is essential to gather all the necessary tools and materials required for installing the side tracks. You will need a drill, screws, screwdriver, level, measuring tape, and the side track kit, which typically includes the tracks, rollers, and any accompanying hardware. Ensuring that all the essential components are readily available will streamline the installation process and minimize interruptions.
Read more: How To Install A Dog Door In A Glass Door
Measure and Mark the Placement
Begin by measuring the height of the shower opening to determine the precise placement of the side tracks. Use a measuring tape to ascertain the exact dimensions, taking into account any variations in the height of the opening. Once the measurements are obtained, mark the placement of the side tracks on the walls using a pencil or masking tape. Ensuring that the tracks are aligned with the vertical edges of the shower opening and positioned evenly is crucial for a balanced and symmetrical installation.
Prepare the Walls
Before installing the side tracks, ensure that the walls are clean and free of any debris or obstructions. Thoroughly clean the surfaces to promote optimal adhesion and prevent potential issues with the installation. Additionally, verify that the walls are plumb and free from any irregularities that could impede the proper placement of the side tracks.
Read more: How To Install Glass Fireplace Doors
Install the Side Tracks
Position the side tracks along the marked placements on the walls, ensuring that they are aligned with the vertical edges of the shower opening and level using a spirit level. Once the tracks are positioned correctly, secure them in place by drilling pilot holes through the tracks and into the walls. Subsequently, fasten the tracks using the appropriate screws, ensuring a firm and stable attachment. Take care to avoid over-tightening the screws, as this could potentially damage the tracks or the walls.
Attach the Rollers
After securing the side tracks, attach the rollers to the top and bottom edges of the glass panels. The rollers enable the glass doors to glide smoothly within the side tracks, facilitating effortless opening and closing. Ensure that the rollers are securely affixed and aligned with the tracks, allowing for seamless movement of the glass doors.
By meticulously following these steps, you can effectively install the side tracks for your shower glass doors, setting the stage for the subsequent phases of the installation process. With the side tracks securely in place, you are now prepared to advance to the next pivotal steps, bringing you closer to the completion of your shower glass door installation project.
Step 6: Install the Glass Panels
The installation of glass panels marks a significant milestone in the process of installing shower glass doors, as these panels not only define the enclosure but also contribute to the aesthetic appeal and functionality of the shower space. Here's a comprehensive guide on how to effectively install the glass panels for your shower glass doors:
Prepare the Glass Panels
Before proceeding with the installation, ensure that the glass panels are clean, free of any debris, and undamaged. Thoroughly inspect the panels for any imperfections or chips, as these could compromise the integrity of the doors. Additionally, verify that the panels are of the correct dimensions and align with the measurements of the shower opening. Taking these preparatory steps ensures a smooth and successful installation process.
Position the Glass Panels
Carefully position the glass panels within the installed side tracks, ensuring that they align with the bottom track and are plumb using a spirit level. It is crucial to verify that the panels are positioned evenly and parallel to the side tracks, as this will impact the overall stability and functionality of the doors. Take precise measurements and adjustments to guarantee a perfect fit within the enclosure.
Secure the Glass Panels
Once the panels are correctly positioned, secure them within the side tracks using the appropriate hardware, such as screws or clips. Follow the manufacturer's guidelines for the recommended installation method, ensuring that the panels are firmly anchored in place. Pay close attention to the alignment and spacing of the panels to maintain a uniform and symmetrical appearance.
Test the Movement
After securing the glass panels, test the movement of the doors within the tracks to ensure smooth and effortless operation. Open and close the doors several times to verify that they glide seamlessly without any obstructions or resistance. Address any issues related to the movement of the panels, such as misalignment or friction, to guarantee optimal functionality.
Apply Sealant
Once the glass panels are securely installed and verified for smooth movement, apply a high-quality sealant along the edges of the panels to create a watertight seal. The sealant helps prevent water leakage and enhances the overall integrity of the enclosure. Ensure that the sealant is applied evenly and covers all exposed edges of the glass panels.
By meticulously following these steps, you can effectively install the glass panels for your shower glass doors, bringing you closer to the completion of your installation project. With the glass panels in place, you are now prepared to progress to the subsequent steps, further refining the functionality and visual appeal of your shower space.
Read more: How To Keep Glass Shower Doors From Spotting
Step 7: Install the Door
The installation of the door is a pivotal stage in the process of installing shower glass doors, as it represents the final step in creating a functional and visually striking enclosure. Here's a comprehensive guide on how to effectively install the door for your shower glass doors:
Prepare the Door
Before proceeding with the installation, ensure that the door is clean, free of any debris, and undamaged. Thoroughly inspect the door for any imperfections or blemishes, as these could detract from the overall aesthetic and functionality. Additionally, verify that the door aligns with the measurements of the shower opening and complements the design of the glass panels. Taking these preparatory steps ensures a seamless integration of the door into the enclosure.
Position the Door
Carefully position the door within the installed side tracks, ensuring that it aligns with the bottom track and is plumb using a spirit level. It is crucial to verify that the door is positioned evenly and parallel to the side tracks, as this will impact the overall stability and functionality. Take precise measurements and adjustments to guarantee a perfect fit within the enclosure.
Secure the Door
Once the door is correctly positioned, secure it within the side tracks using the appropriate hardware, such as hinges or brackets. Follow the manufacturer's guidelines for the recommended installation method, ensuring that the door is firmly anchored in place. Pay close attention to the alignment and spacing of the door to maintain a uniform and symmetrical appearance.
Test the Movement
After securing the door, test its movement within the tracks to ensure smooth and effortless operation. Open and close the door several times to verify that it glides seamlessly without any obstructions or resistance. Address any issues related to the movement of the door, such as misalignment or friction, to guarantee optimal functionality.
Apply Finishing Touches
Once the door is securely installed and verified for smooth movement, apply any finishing touches, such as attaching the door handle or knob. Ensure that the hardware is installed securely and complements the overall design of the shower glass doors. Additionally, verify that the door aligns with the adjacent glass panel, creating a cohesive and visually appealing enclosure.
By meticulously following these steps, you can effectively install the door for your shower glass doors, bringing you closer to the completion of your installation project. With the door in place, you have successfully transformed your shower space, creating a stylish and functional enclosure that enhances the overall ambiance of your bathroom.
Step 8: Seal and Finish the Installation
The final step in installing shower glass doors involves sealing and finishing the installation to ensure a watertight and visually appealing enclosure. This critical phase not only enhances the functionality of the doors but also contributes to the overall aesthetic and longevity of the shower space.
Apply Sealant
Begin by applying a high-quality sealant along the edges of the glass panels and the door. The sealant serves as a protective barrier, preventing water from seeping through the gaps and ensuring a watertight seal. Carefully run a bead of sealant along the vertical edges where the glass panels meet, as well as along the bottom edge of the door. It is essential to apply the sealant evenly and thoroughly to create a secure and durable seal.
Caulk the Perimeter
Next, apply caulk along the perimeter of the shower enclosure where the glass meets the walls and threshold. This additional layer of protection further reinforces the waterproofing of the installation, minimizing the risk of water leakage and moisture damage. Use a smooth, consistent motion to apply the caulk, ensuring that it adheres firmly to the surfaces and forms a seamless barrier.
Clean and Polish
After the sealant and caulk have been applied, thoroughly clean the glass panels, door, and surrounding surfaces to remove any excess sealant, caulk, or debris. Use a non-abrasive cleaner and a soft cloth to achieve a streak-free and polished finish. This final cleaning step not only enhances the visual appeal of the installation but also ensures that the glass doors are pristine and free from any residues.
Inspect and Test
Once the sealant and caulk have been applied and the surfaces are cleaned, conduct a comprehensive inspection of the installation. Verify that the sealant and caulk are uniformly applied and free from any gaps or imperfections. Test the functionality of the doors by opening and closing them to ensure smooth and effortless movement within the tracks. Address any irregularities or issues to guarantee the optimal performance of the glass doors.
Final Touches
To complete the finishing touches, inspect the hardware, such as handles, hinges, and tracks, to ensure that they are securely fastened and aligned. Make any necessary adjustments to achieve a cohesive and visually appealing appearance. Additionally, take a moment to admire the transformation of your shower space, appreciating the enhanced elegance and functionality that the glass doors bring to the bathroom.
By meticulously sealing and finishing the installation, you have not only created a secure and watertight enclosure but also elevated the overall ambiance of your bathroom. The attention to detail in this final step ensures that your shower glass doors are not only visually stunning but also built to withstand the test of time, providing a luxurious and functional shower experience for years to come.
Conclusion
In conclusion, the installation of shower glass doors represents a transformative endeavor that elevates the aesthetic appeal and functionality of the bathroom space. By following the comprehensive step-by-step guide outlined in this article, you have gained the knowledge and confidence to embark on this rewarding project with precision and skill.
The meticulous process of measuring the shower area, selecting the right glass doors, and preparing the shower space lays the groundwork for a seamless and successful installation. These initial steps not only ensure a perfect fit for the glass doors but also contribute to the long-term durability and visual harmony of the enclosure.
The subsequent stages, including installing the bottom track, side tracks, glass panels, and the door, are pivotal in creating a secure and visually striking enclosure. Attention to detail in positioning, securing, and testing the movement of the glass components guarantees a flawless integration that enhances the overall ambiance of the shower space.
The final steps of sealing and finishing the installation further reinforce the functionality and waterproofing of the glass doors, culminating in a luxurious and visually appealing shower enclosure. The application of sealant and caulk, coupled with meticulous cleaning and inspection, ensures that the installation is not only aesthetically pleasing but also built to withstand the rigors of daily use.
As you admire the stunning transformation of your shower space, it's important to take pride in the accomplishment of installing shower glass doors. Not only have you added a touch of elegance and modernity to your bathroom, but you have also created a functional and inviting shower enclosure that enhances the overall value of your home.
The journey of installing shower glass doors is not merely a home improvement project; it is a testament to your dedication to creating a space that embodies sophistication, comfort, and style. With the completion of this installation, you have unlocked the potential of your bathroom, creating a sanctuary where luxury and functionality converge seamlessly.
In essence, the installation of shower glass doors is a testament to your commitment to enhancing your living environment, one meticulous step at a time. As you revel in the beauty and functionality of your newly installed glass doors, take pride in the craftsmanship and attention to detail that have brought this vision to life.
Frequently Asked Questions about How To Install Shower Glass Doors
Was this page helpful?
At Storables.com, we guarantee accurate and reliable information. Our content, validated by Expert Board Contributors, is crafted following stringent Editorial Policies. We're committed to providing you with well-researched, expert-backed insights for all your informational needs.

0 thoughts on “How To Install Shower Glass Doors”