Home>Storage Ideas>Bathroom Storage>How To Build A Shower Enclosure For Your DIY Bathroom Remodel
Bathroom Storage
How To Build A Shower Enclosure For Your DIY Bathroom Remodel
Modified: August 22, 2024
Learn how to build a stylish and functional shower enclosure for your DIY bathroom remodel, with a special focus on maximizing bathroom storage.
(Many of the links in this article redirect to a specific reviewed product. Your purchase of these products through affiliate links helps to generate commission for Storables.com, at no extra cost. Learn more)
Introduction
Welcome to the ultimate guide on how to build a shower enclosure for your DIY bathroom remodel. A well-designed and functional shower can transform your bathroom into a luxurious and relaxing space. Whether you’re looking to upgrade your existing shower or starting from scratch, this article will provide you with step-by-step instructions to create a stunning shower enclosure.
Before we dive into the details, it’s important to understand the benefits of a well-designed shower enclosure. Not only does it enhance the visual appeal of your bathroom, but it also adds value to your home. With proper planning and execution, you can create a shower that fits your style and meets your storage needs.
In this guide, we’ll cover everything from planning your shower enclosure to adding the finishing touches. You’ll learn about the materials and tools you’ll need, how to prepare the shower space, and how to install the shower base. We’ll also discuss the process of building the walls of the enclosure and installing the shower door or curtain.
Whether you prefer a sleek and modern look or a more traditional and cozy vibe, there are various design options to choose from. With the right combination of materials and accessories, you can create a shower enclosure that perfectly reflects your personal style.
Throughout the article, we’ll provide valuable tips and insights to ensure a successful DIY project. Additionally, we’ll optimize the content with relevant keywords to improve the visibility of your website in search engines.
So, grab your tools and let’s get started on creating the shower enclosure of your dreams!
Key Takeaways:
- Transform your bathroom into a luxurious oasis by following step-by-step instructions to build a stunning shower enclosure that reflects your personal style and meets your storage needs.
- Elevate your daily routine with a well-designed and functional shower enclosure that enhances the visual appeal of your bathroom and adds value to your home.
Planning Your Shower Enclosure
Before diving into the construction process, it’s crucial to spend some time planning your shower enclosure. Proper planning will ensure that you have all the necessary materials and tools and that your design aligns with your vision.
The first step in planning your shower enclosure is determining its size and layout. Consider the available space in your bathroom and the desired functionality of your shower. Do you want a spacious enclosure with room for multiple showerheads and storage shelves, or are you looking for a compact and minimalist design? Think about how you’ll be using the shower and what features are important to you.
Next, decide on the type of shower base you want to install. There are various options available, including pre-fabricated bases, custom tile bases, and pan liners. Each option has its advantages and considerations, so do some research and choose the one that best suits your needs and budget.
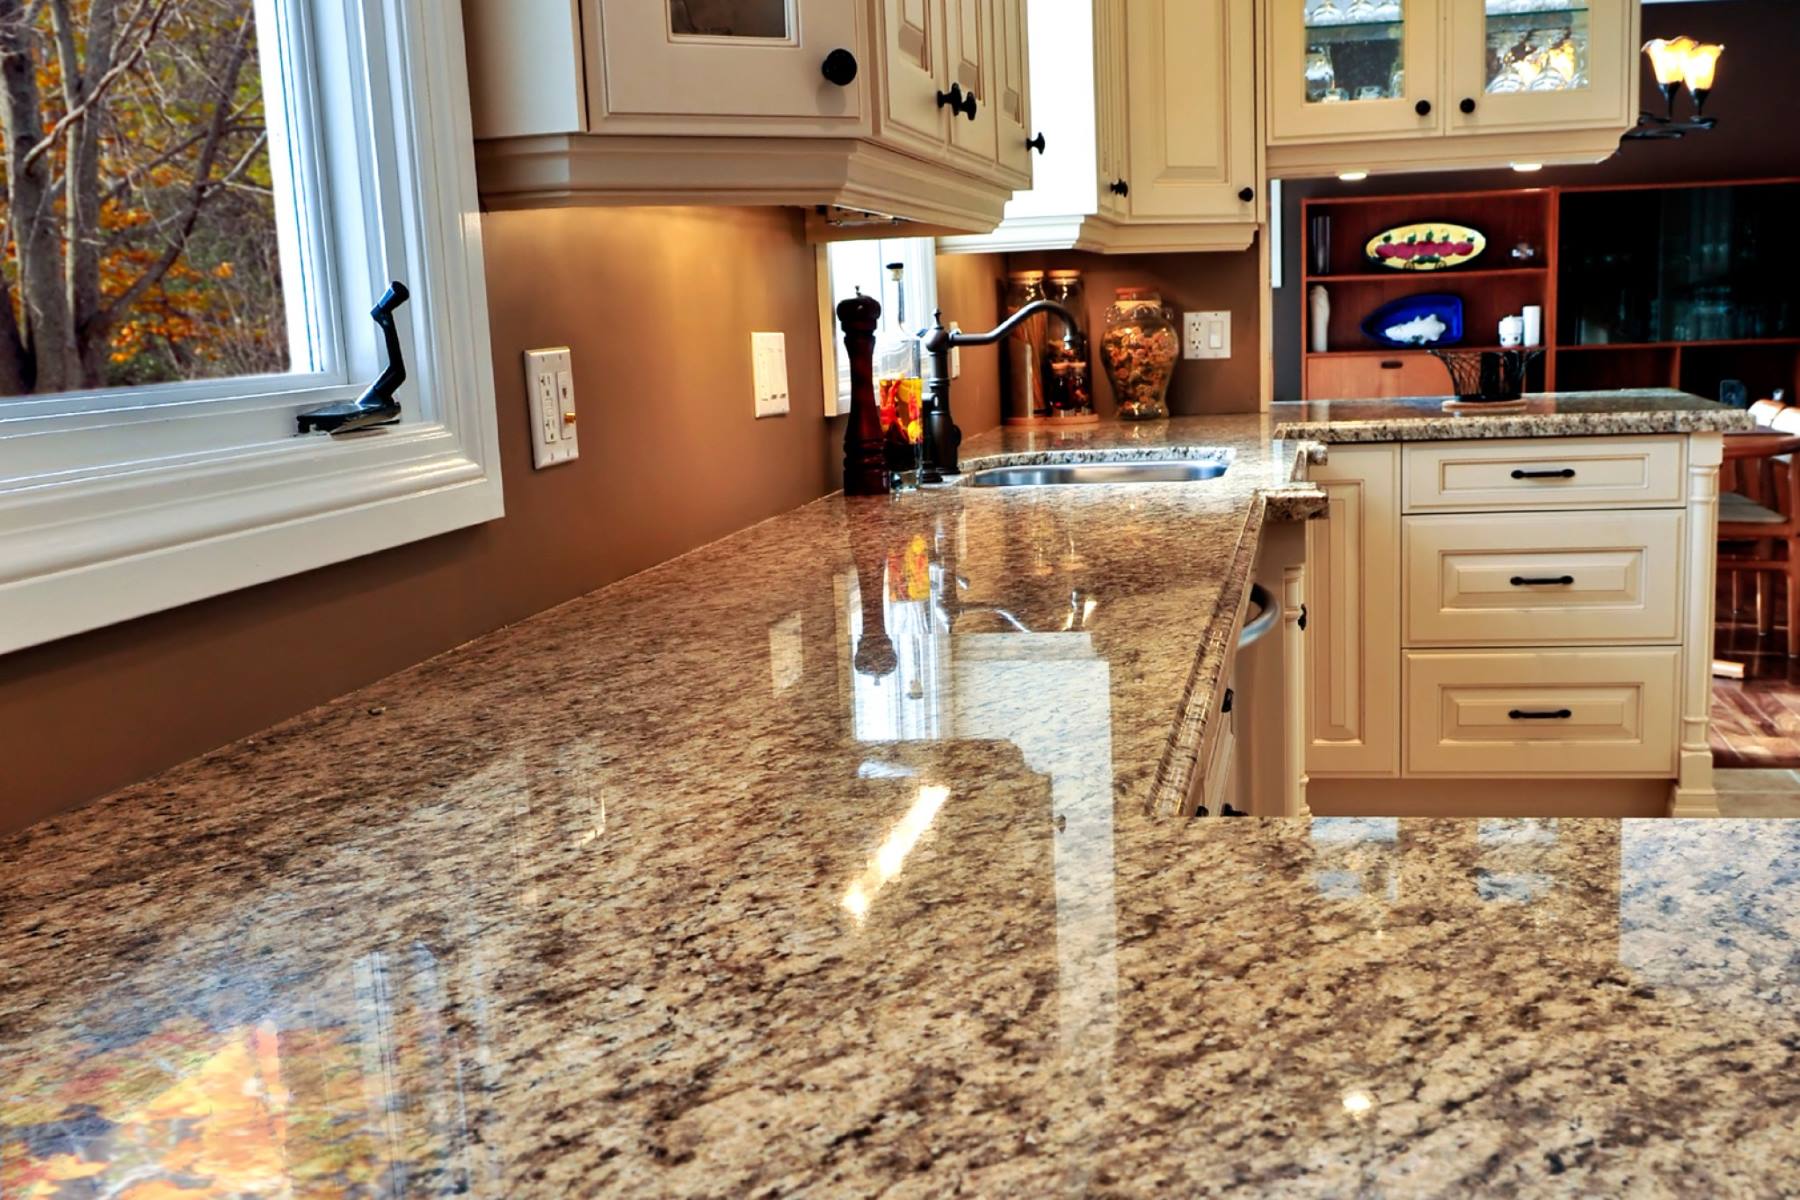
Once you’ve determined the size and base type, it’s time to think about the walls of your shower enclosure. You can choose between tiled walls, acrylic panels, or a combination of both. Consider the maintenance requirements, durability, and aesthetic appeal of each option. Take into account factors such as water resistance, ease of cleaning, and overall design cohesion with the rest of your bathroom.
Another important aspect to consider during the planning phase is the shower door or curtain. This will depend on the design of your shower and personal preference. If you opt for a shower door, decide on the type of door you want – sliding, hinged, or pivot. Measure the dimensions accurately to ensure a proper fit.
Additionally, think about any additional features or accessories you’d like to incorporate into your shower enclosure. This could include built-in storage shelves, niches, or seating areas. Consider how these elements will enhance the functionality and convenience of your shower.
Lastly, keep your budget in mind throughout the planning process. Determine how much you’re willing to spend on materials, tools, and any professional assistance you may require. It’s important to have a realistic budget in place to avoid any unexpected surprises.
By taking the time to carefully plan your shower enclosure, you’ll have a clear vision of the final result and ensure a smoother construction process. Next, we’ll discuss the materials and tools you’ll need to bring your design to life.
Gathering Materials and Tools
Once you’ve planned your shower enclosure, it’s time to gather the necessary materials and tools to bring your design to life. The exact materials and tools will depend on the specifics of your project, but here’s a general overview to get you started:
Materials:
- Shower base: Whether you choose a pre-fabricated base or decide to build a custom-tile base, ensure you have the appropriate materials on hand. This may include acrylic or fiberglass pans, mortar, waterproofing membranes, and tiles.
- Shower walls: Depending on your design preference, you’ll need materials such as tiles, backer boards, adhesive, grout, and waterproofing membranes.
- Shower door or curtain: If you choose a shower door, make sure to purchase the appropriate size and type, along with any necessary hardware. If you prefer a curtain, choose a durable and water-resistant material.
- Add-ons: Consider any additional features or accessories you want to incorporate into your shower, such as storage shelves, niches, benches, or hooks. Ensure you have the necessary materials for these elements.
- Plumbing supplies: Depending on the extent of your project, you may need plumbing supplies such as pipes, valves, fittings, and waterproof sealant.
Tools:
- Measuring tape: Accurate measurements are essential for a successful installation, so have a measuring tape or ruler on hand.
- Level: Ensure your enclosure is properly aligned by using a level to check for horizontal and vertical balance.
- Power drill: A power drill will come in handy for drilling holes and installing screws.
- Trowel: If you’re working with mortar or adhesive, a trowel will help you evenly spread the material.
- Tile cutter: If you’re installing tiles, a tile cutter or wet saw will be necessary to ensure accurate cuts and smooth edges.
- Caulking gun: Use a caulking gun to apply waterproof sealant and caulk around the edges of your enclosure.
- Screwdriver: A screwdriver is essential for installing hardware, such as shower door handles or brackets.
- Safety equipment: Don’t forget safety goggles, gloves, and a dust mask to protect yourself during the construction process.
Before starting your project, double-check your materials and tools list to ensure you have everything you need. If you’re unsure about any specific items, consult with a professional or refer to installation guides and tutorials for guidance.
With all the necessary materials and tools gathered, you’re now ready to move on to the next phase of the process: preparing the shower space. We’ll cover this step in detail in the next section.
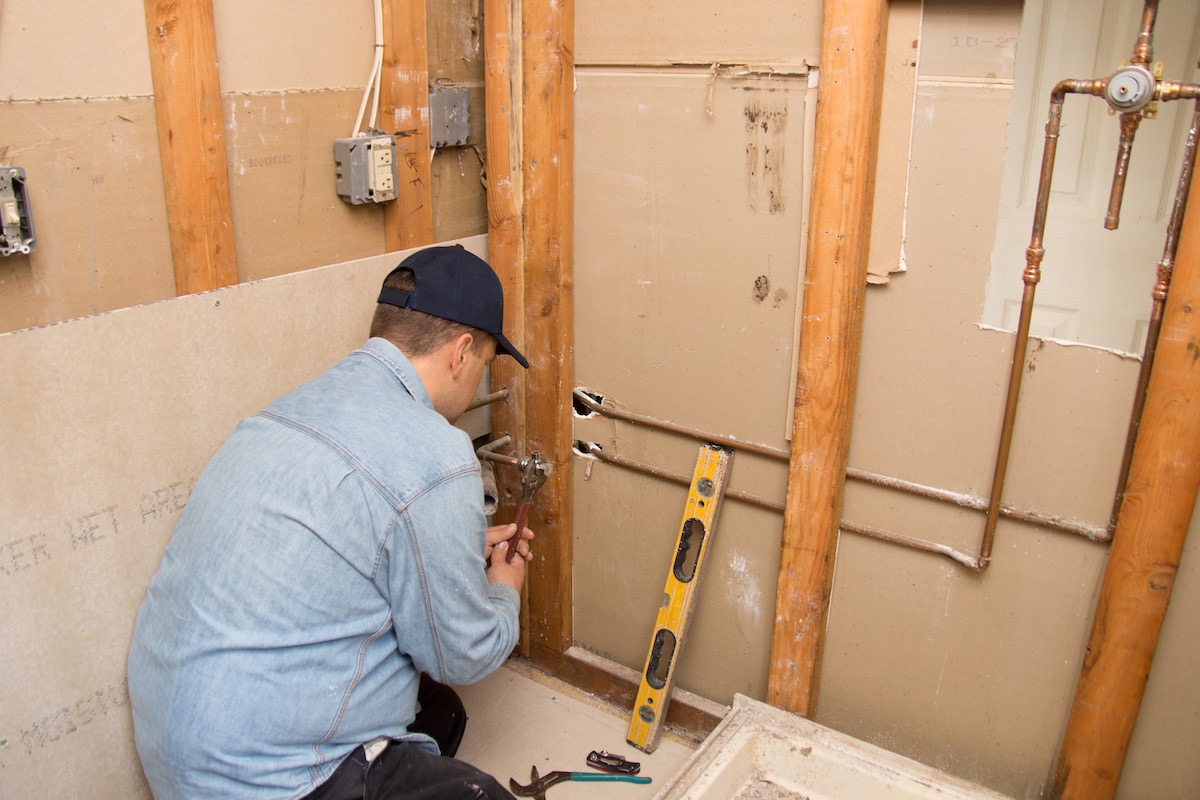
Preparing the Shower Space
Before you can start building your shower enclosure, it’s crucial to properly prepare the shower space. This involves removing any existing fixtures, assessing the condition of the walls and floor, and making necessary repairs. Follow these steps to ensure a solid foundation for your shower enclosure:
Step 1: Clear the area: Start by removing any existing fixtures, such as shower curtains, rods, shelves, or cabinets. Clear out any personal items or clutter from the space to provide a clean slate for your project.
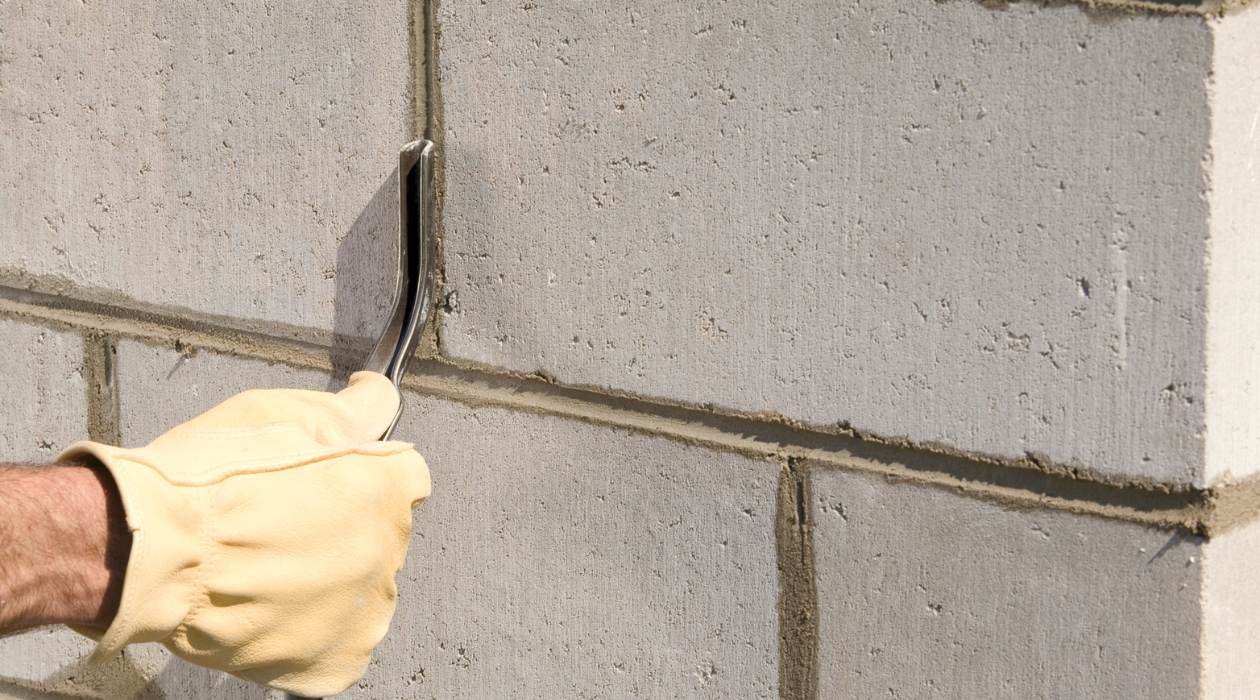
Step 2: Assess the walls and floor: Inspect the walls and floor for any signs of damage, moisture, or weakness. Look out for mold, mildew, or cracks in the tiles or grout. Address any issues before proceeding with the installation to prevent future problems.
Step 3: Make repairs: If you find any damage or issues with the walls or floor, take the necessary steps to make repairs. This may involve replacing damaged tiles, re-grouting, or applying a waterproofing membrane to prevent moisture penetration.
Step 4: Waterproofing: To protect your shower enclosure and prevent leaks, apply a waterproofing membrane to the walls and floor. This will create a barrier against water and ensure the longevity of your installation. Follow the manufacturer’s instructions for proper application.
Step 5: Install a vapor barrier: If your bathroom has an exterior wall, consider installing a vapor barrier to prevent moisture from seeping through. This will help maintain a dry and mold-free environment within your shower enclosure.
Step 6: Level the floor: Use a level to check the floor for any unevenness. If necessary, add self-leveling compound to ensure a perfectly level surface for your shower base. This will prevent water pooling and ensure proper drainage.
Step 7: Install cement backer board: If you’re installing tile walls, it’s essential to have a stable and moisture-resistant surface. Install cement backer boards on the walls using screws. Ensure the boards are level and properly secured.
Step 8: Test the plumbing: Before proceeding further, test the plumbing for any leaks or issues. Turn on the water and check for any drips or leakage. Make any necessary repairs before moving on.
By properly preparing the shower space, you’ll create a solid foundation for your shower enclosure installation. This step is crucial for ensuring the long-term durability and functionality of your project. With the preparation complete, you’re now ready to proceed with installing the shower base. We’ll delve into this step in the next section.
Installing the Shower Base
Now that you’ve prepared the shower space, it’s time to move on to one of the most critical steps in building your shower enclosure: installing the shower base. The shower base provides a sturdy and level surface for your shower floor and helps ensure proper drainage. Follow these steps for a successful installation:
Step 1: Measure and mark: Start by measuring the dimensions of your shower space and transferring those measurements onto the shower base. Use a pencil or marker to mark the cut lines where the base needs to be trimmed to fit the space.
Step 2: Cut the shower base (if necessary): If the base doesn’t perfectly fit the dimensions of your shower space, use a saw or a utility knife to carefully trim the base along the marked cut lines. Take your time and make precise cuts to achieve a perfect fit.
Step 3: Position the shower base: Carefully lift the shower base and position it in the designated area. Ensure that it aligns with the markings on the walls and floor. Use a level to check for proper leveling and adjust if necessary.
Step 4: Connect the drain: Follow the manufacturer’s instructions to connect the drain of the shower base to the plumbing system. This may involve applying plumber’s putty or silicone sealant and tightening the drain assembly properly.
Step 5: Secure the base: Once the positioning and leveling are correct, secure the shower base to the floor and walls. Depending on the specific base, this may involve using screws, nails, or adhesive. Follow the manufacturer’s guidelines for proper installation techniques.
Step 6: Test for stability: After securing the base, test it for stability by applying pressure and ensuring it doesn’t shift or move. If you notice any instability, reposition and secure the base accordingly until it feels solid and secure.
Step 7: Seal the edges: Use a waterproof sealant or caulk to seal the edges where the shower base meets the walls and floor. This will prevent water from seeping underneath the base and causing damage.
Step 8: Allow for proper curing time: Depending on the type of shower base and adhesive used, allow sufficient time for the materials to cure and set. Follow the manufacturer’s recommendations for the specific product.
By following these steps, you’ll successfully install the shower base, creating a sturdy and level foundation for your shower enclosure. With the base in place, you’re now ready to move on to the next step: building the walls of the enclosure. We’ll explore this process in detail in the next section.
When building a shower enclosure for your DIY bathroom remodel, make sure to waterproof the walls and floor properly to prevent water damage and mold growth. Use waterproofing materials and follow manufacturer’s instructions carefully.
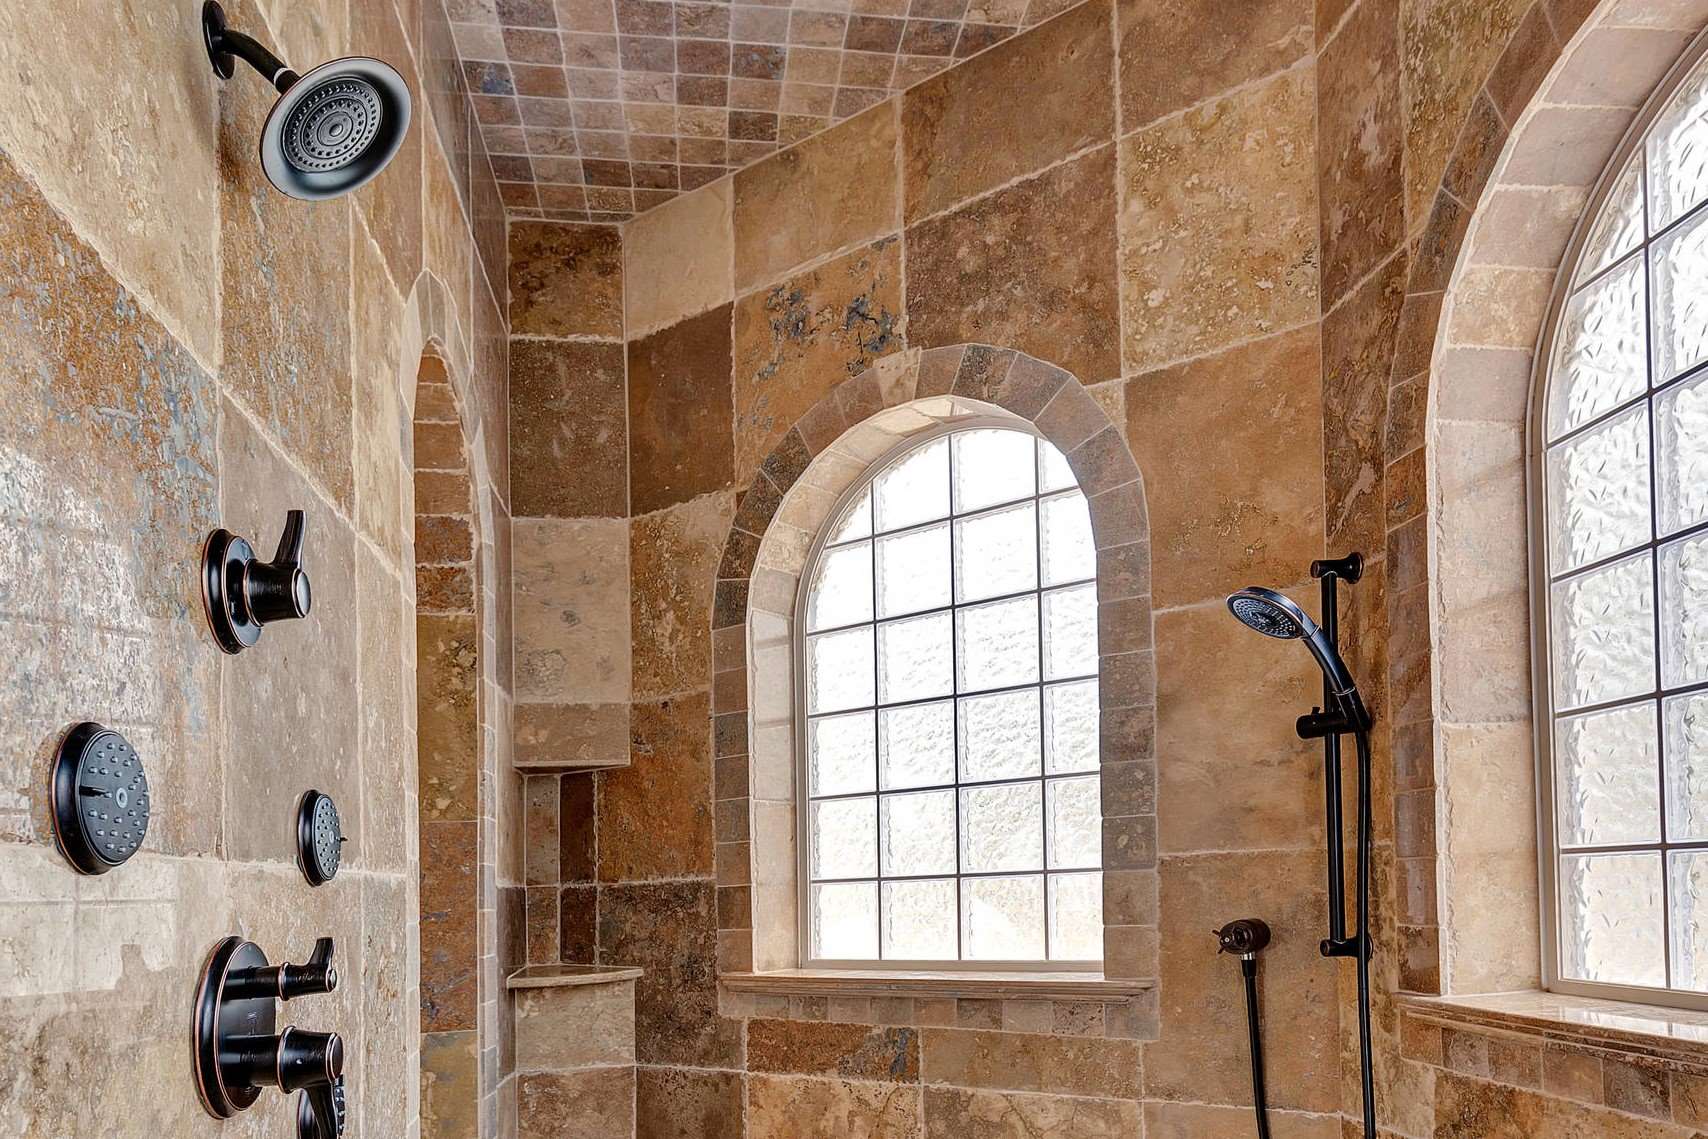
Building the Walls of the Enclosure
With the shower base securely in place, it’s time to move on to the next step in constructing your shower enclosure: building the walls. The walls of your shower enclosure not only provide structural support but also add to the overall aesthetics of your bathroom. Here’s a step-by-step guide to building the walls:
Step 1: Measure and plan: Measure the height and width of each wall in your shower enclosure. Use these measurements to plan the placement of tiles or panels, accounting for any specific patterns or designs you have in mind.
Step 2: Prepare the walls: Ensure that the walls are clean and free from any dust or debris. If you’re working with painted walls, consider sanding them lightly to create a rough surface for better tile adhesion.
Step 3: Install backer board: Install cement backer boards on the walls to create a stable and moisture-resistant surface. Cut the boards to fit the measurements of each wall, leaving space for any fixtures or openings. Secure the backer boards to the walls using screws, ensuring they are level and properly anchored.
Step 4: Apply waterproofing membrane: To protect the walls from moisture, apply a waterproofing membrane over the backer boards. Follow the manufacturer’s instructions for proper application, including the use of adhesive or fasteners to secure it in place.
Step 5: Install tiles or panels: Begin installing the tiles or panels, starting from the bottom and working your way up. Apply tile adhesive or panel adhesive to the backer board and press the tiles or panels firmly into place. Use tile spacers or guidelines to ensure consistent spacing between each tile or panel.
Step 6: Cut tiles or panels: Use a tile cutter or a wet saw to make any necessary cuts for tiles or panels that don’t fit perfectly in the designated space. Measure carefully and use appropriate safety equipment when cutting.
Step 7: Apply grout: Once the adhesive has dried and the tiles or panels are firmly in place, it’s time to apply grout. Mix the grout according to the manufacturer’s instructions and use a grout float to spread it over the joints between the tiles or panels. Remove any excess grout with a damp sponge, being careful not to remove too much from the joints.
Step 8: Allow for curing time: Give the adhesive and grout sufficient time to cure and dry according to the manufacturer’s recommendations. Avoid using the shower until the curing process is complete.
Step 9: Apply sealant: Once the grout is completely dry, apply a waterproof sealant over the grout lines and any other areas that require extra protection against water penetration. This will help maintain the integrity of your shower walls.
By following these steps, you’ll successfully build the walls of your shower enclosure, creating a stylish and functional space. The next step is to install the shower door or curtain, which we’ll explore in detail in the next section.
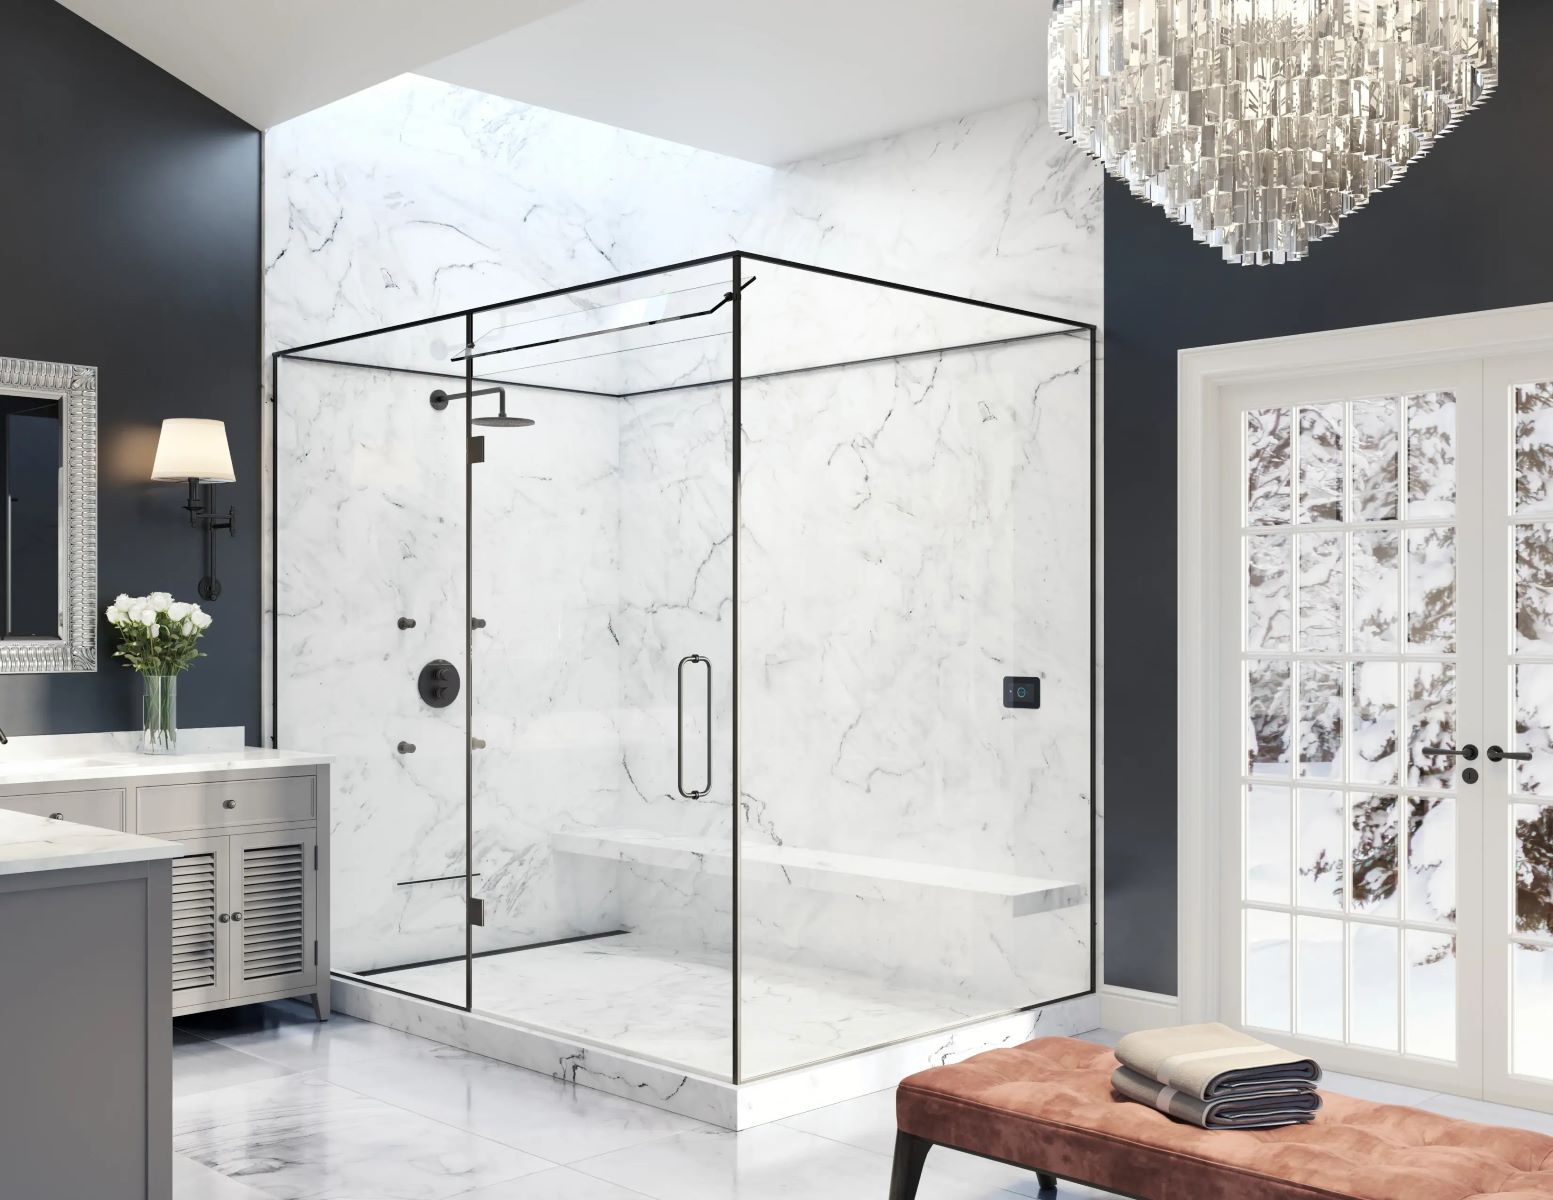
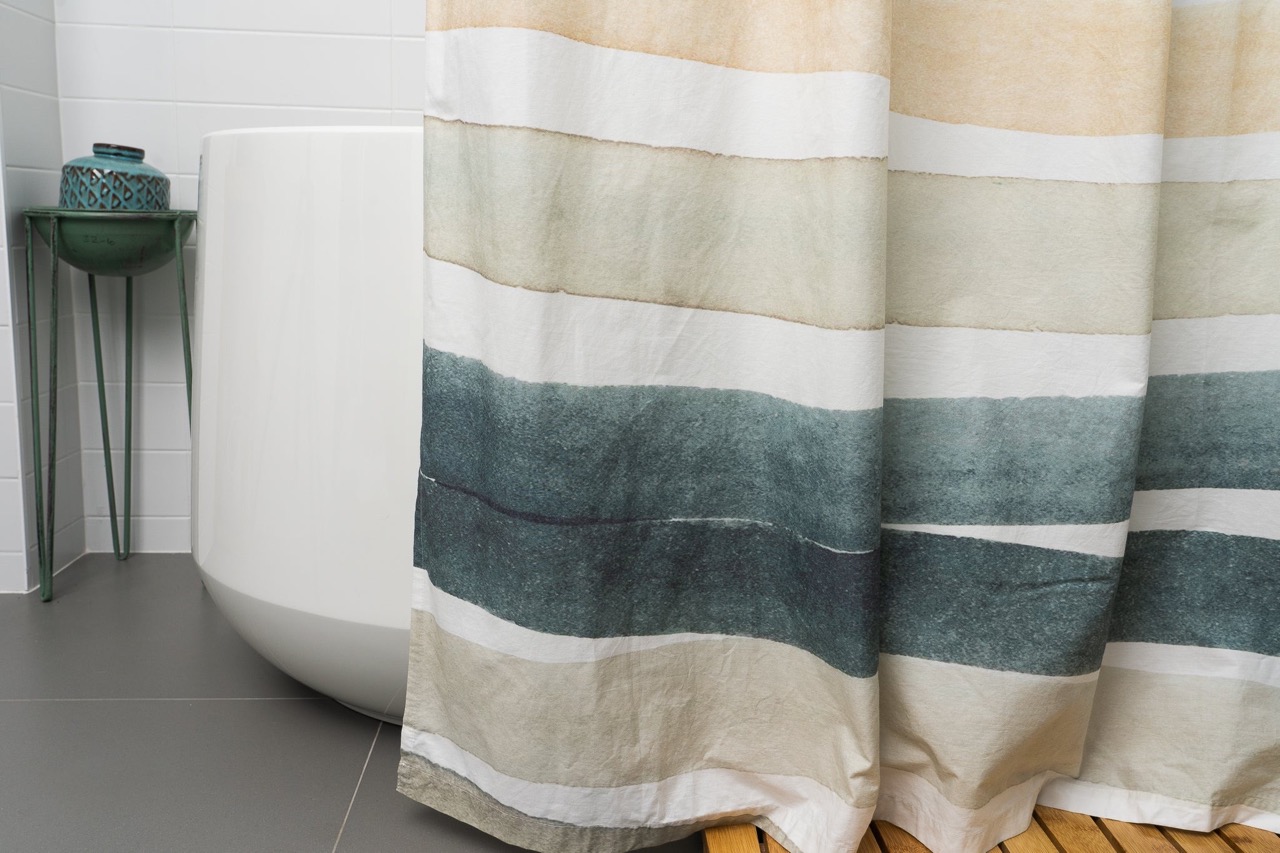
Installing the Shower Door or Curtain
With the walls of your shower enclosure complete, it’s time to focus on the final touch: installing the shower door or curtain. The choice between a shower door or curtain depends on your personal preference, budget, and the design of your bathroom. Here’s a step-by-step guide to help you with the installation process:
Step 1: Measure the opening: Measure the width and height of the shower opening to determine the size of the door or curtain you’ll need. Take accurate measurements to ensure a proper fit.
Step 2: Choose the type of shower door or curtain: There are several options available when it comes to shower doors, such as sliding doors, hinged doors, or pivot doors. Consider the space available and your design preferences when selecting the type of door that suits your needs. Alternatively, if you prefer a shower curtain, choose a durable and water-resistant material.
Step 3: Install the shower door: If you’ve chosen a shower door, follow the manufacturer’s instructions for installation. This may involve attaching the hinges or rollers to the door and mounting the door on the designated area. Ensure that the door is level and aligned properly.
Step 4: Install the shower curtain: If you’ve opted for a shower curtain, install a tension rod or curtain rod according to the manufacturer’s instructions. Choose a rod that fits the width of the shower opening and secure it in place. Hang the shower curtain on the rod, making sure it extends to the appropriate length and covers the entire opening.
Step 5: Test the functionality: Once the shower door or curtain is installed, test its functionality by opening and closing it. Ensure that it moves smoothly and seals properly to prevent water from leaking out of the enclosure.
Step 6: Make any necessary adjustments: If you encounter any issues with the shower door or curtain, such as misalignment or improper sealing, make the necessary adjustments. This may involve tightening or adjusting the hinges, rollers, or rods to ensure a proper fit.
Step 7: Add finishing touches: Consider adding any additional features or accessories that enhance the functionality and appearance of your shower enclosure. This could include towel hooks, shelves, or a shower caddy for added convenience.
By following these steps, you’ll successfully install the shower door or curtain, completing the construction of your shower enclosure. The final step is to add the finishing touches, which we’ll explore in the next section.
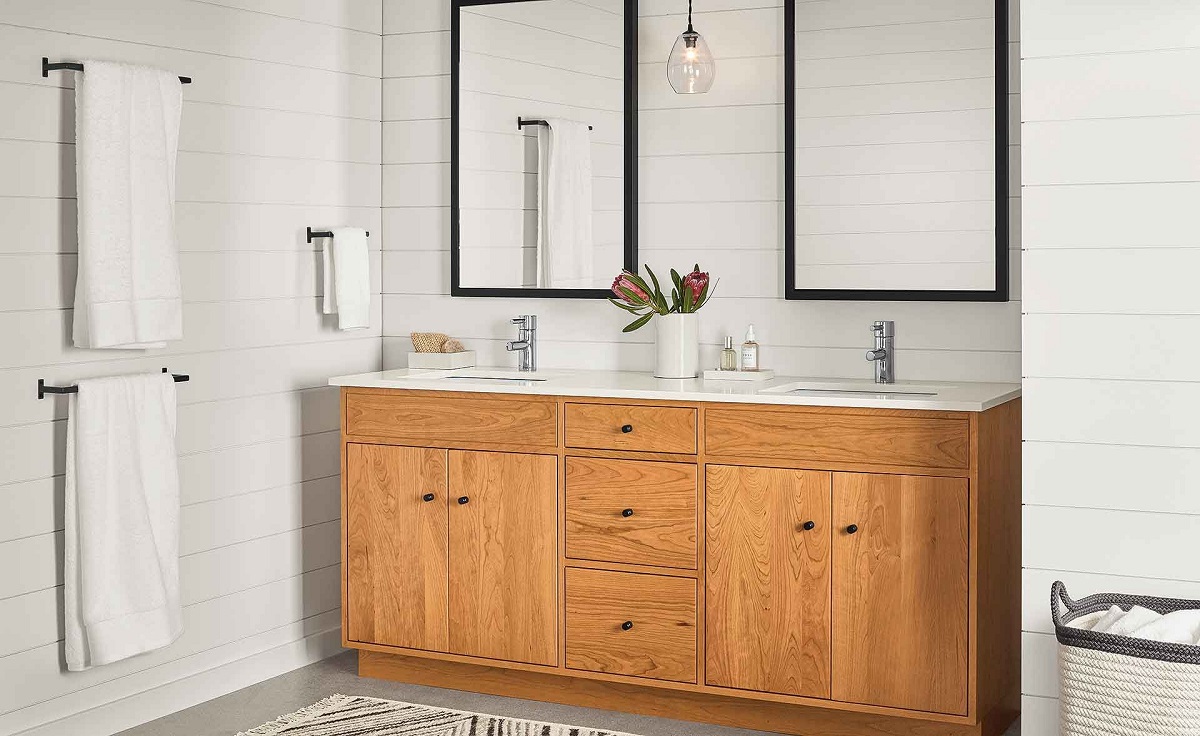
Adding Finishing Touches
Congratulations! You’re almost done with your DIY shower enclosure. Now it’s time to add those final finishing touches that will enhance the overall aesthetic and functionality of your bathroom. Here are some ideas to consider:
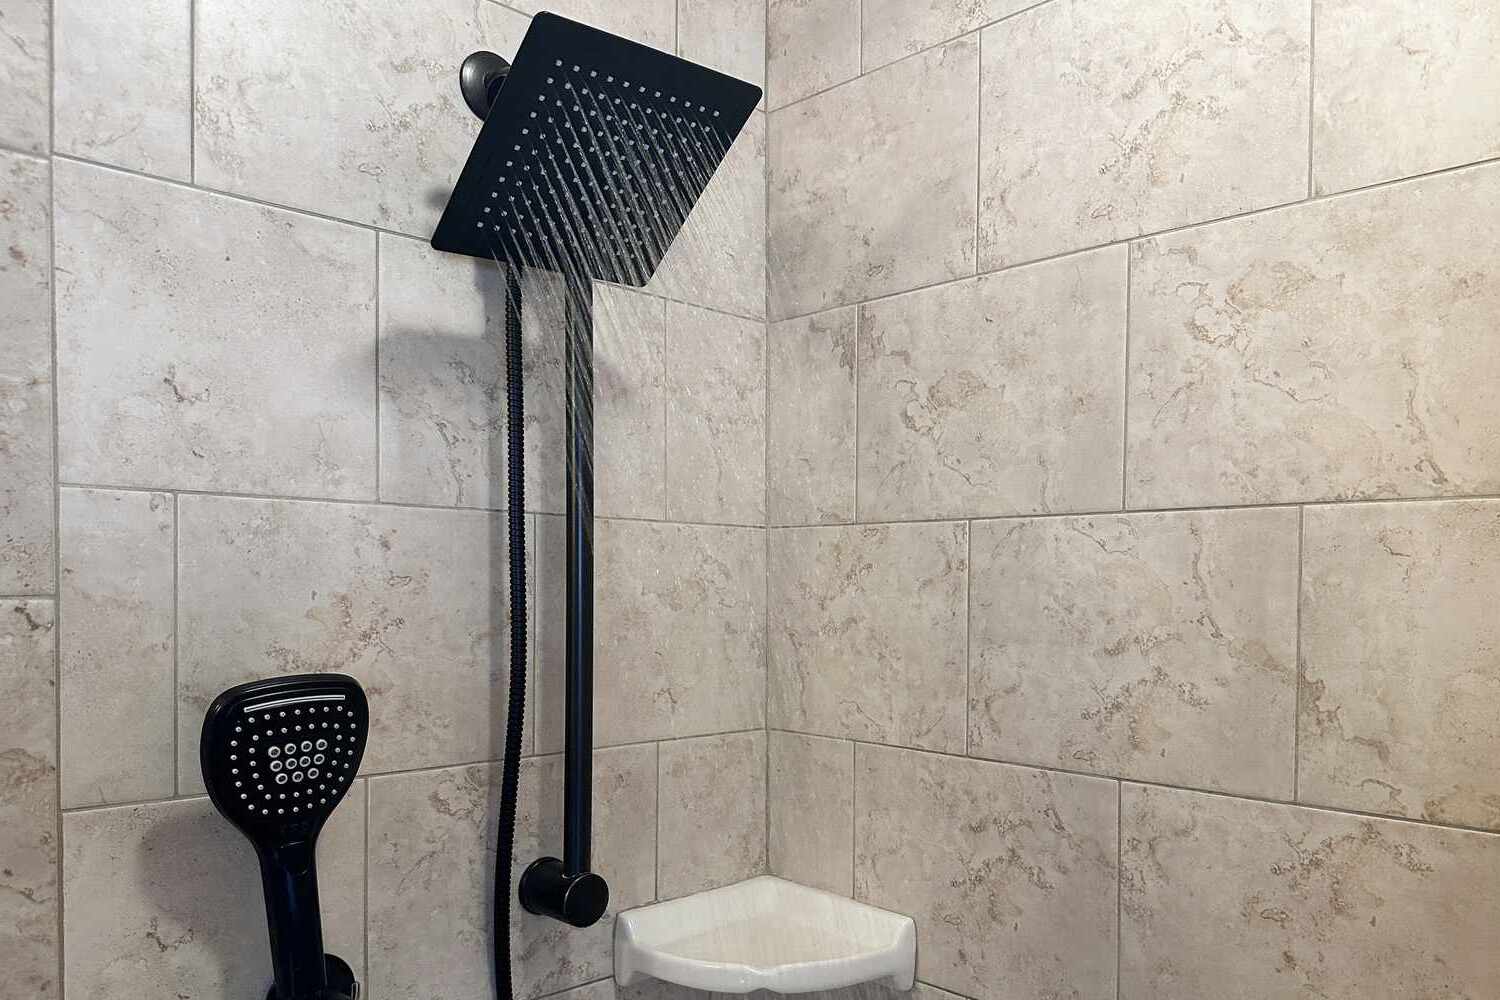
1. Hardware and fixtures: Upgrade your shower enclosure with stylish and functional hardware and fixtures. Choose coordinating knobs, handles, faucets, and showerheads that complement the overall design of your bathroom. Consider materials like chrome, brass, or brushed nickel for a modern and polished look.
2. Shelving and storage: Install shelves or storage units in your shower enclosure to keep your bathroom essentials organized and within reach. Consider corner shelves, recessed niches, or hanging baskets for extra storage options. Make sure to choose materials that are resistant to water and moisture.
3. Lighting: Enhance the ambiance of your shower enclosure with the right lighting. Install waterproof and moisture-resistant lighting fixtures to create a soothing and relaxing atmosphere. Consider recessed light fixtures or LED strip lighting for a sleek and modern look.
4. Decorative accents: Add decorative accents to personalize your shower enclosure. Hang artwork, place potted plants, or incorporate decorative tiles into the design. Choose elements that complement the style and theme of your bathroom to create a cohesive and inviting space.
5. Mirrors: Install a mirror within your shower enclosure to add functionality and create the illusion of a larger space. Make sure to use a waterproof and fog-resistant mirror, placed strategically to maximize its usability.
6. Grout and sealant maintenance: Regularly inspect and maintain the grout and sealant in your shower enclosure. Clean and reseal the grout lines as needed to prevent water damage and maintain the integrity of your walls and floors. This will help prolong the lifespan of your shower enclosure.
7. Personal touches: Finally, don’t forget to add your personal touches to make the space truly yours. Hang your favorite shower curtain or add a touch of color with decorative towels and bathmats. Consider adding scented candles or aromatherapy oils to create a spa-like ambiance.
With these finishing touches, your DIY shower enclosure will be transformed into a functional and visually appealing space. Remember to regularly clean and maintain your shower enclosure to keep it looking its best.
Now that you’ve completed the installation and added the finishing touches, step back and admire your handiwork. You’ve successfully built a shower enclosure that reflects your style and meets your storage needs. Enjoy your newly transformed bathroom oasis!
Conclusion
Congratulations on successfully completing your DIY shower enclosure! You have taken an important step in transforming your bathroom into a functional and visually appealing space. By following the step-by-step instructions in this guide, you have built a shower enclosure that reflects your style and meets your storage needs.
Throughout the process, you carefully planned your shower enclosure, gathered the necessary materials and tools, prepared the shower space, installed the shower base, built the walls, and added the finishing touches. Each step was crucial in creating a solid and beautiful shower enclosure.
A well-designed and functional shower enclosure can truly enhance your daily routine and provide a luxurious and relaxing experience. From the shower base to the walls, every element contributes to the functionality, durability, and aesthetic appeal of your shower.
Remember to regularly clean and maintain your shower enclosure to keep it looking its best. This includes wiping down surfaces, cleaning the grout, and addressing any maintenance issues promptly to avoid potential damage in the long run.
Now, it’s time to enjoy your newly transformed space. Take a moment to appreciate your hard work and immerse yourself in the comfort and functionality of your DIY shower enclosure. Whether you’re starting your day with a refreshing shower or winding down with a soothing bath, your new shower enclosure will provide you with a sanctuary in the comfort of your own home.
Thank you for following this comprehensive guide on how to build a shower enclosure for your DIY bathroom remodel. We hope this article has provided you with the necessary knowledge and inspiration to create a stunning shower enclosure that meets your needs and elevates your bathroom experience.
Happy showering!
Frequently Asked Questions about How To Build A Shower Enclosure For Your DIY Bathroom Remodel
Was this page helpful?
At Storables.com, we guarantee accurate and reliable information. Our content, validated by Expert Board Contributors, is crafted following stringent Editorial Policies. We're committed to providing you with well-researched, expert-backed insights for all your informational needs.


0 thoughts on “How To Build A Shower Enclosure For Your DIY Bathroom Remodel”