Home>Furniture & Design>Interior Design Trends>How To Install Glass Shower Panel
Interior Design Trends
How To Install Glass Shower Panel
Modified: August 30, 2024
Learn how to elevate your interior design with the latest trend of installing glass shower panels. Enhance your bathroom's aesthetic and functionality today!
(Many of the links in this article redirect to a specific reviewed product. Your purchase of these products through affiliate links helps to generate commission for Storables.com, at no extra cost. Learn more)
Introduction
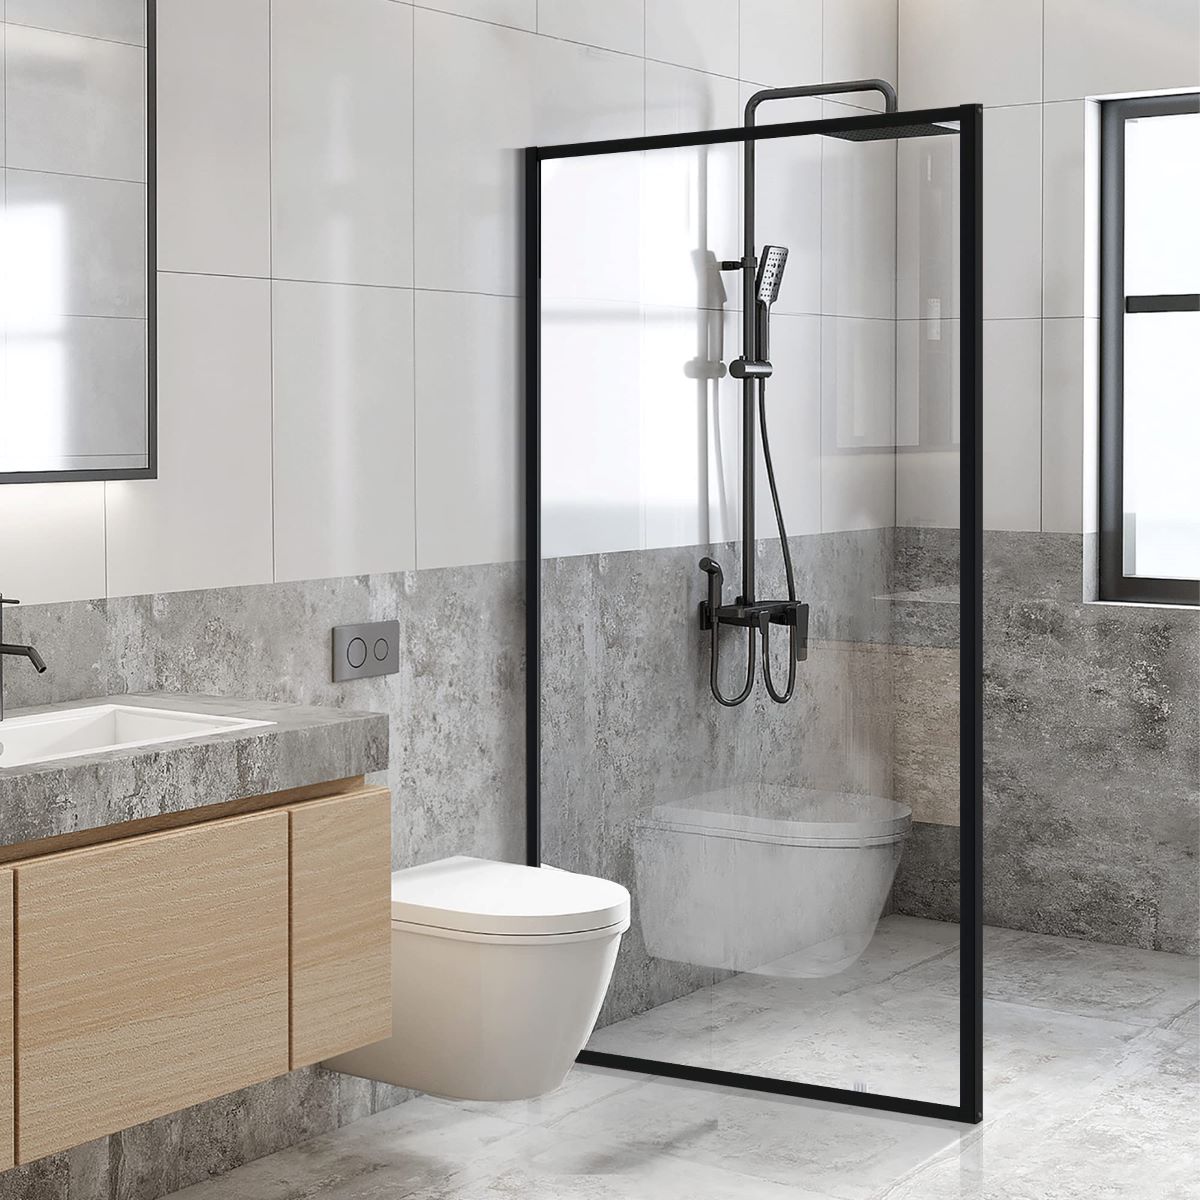
Installing a glass shower panel can instantly elevate the aesthetic appeal of your bathroom, creating a modern and luxurious ambiance. The sleek and transparent nature of glass panels allows for an open and airy feel, making the bathroom appear more spacious and inviting. Whether you are embarking on a bathroom renovation project or simply seeking to upgrade your shower enclosure, the installation process can be a rewarding and transformative endeavor.
In this comprehensive guide, we will walk you through the step-by-step process of installing a glass shower panel. From gathering the necessary tools and materials to securing the glass panels in place, each stage is crucial in ensuring a seamless and durable installation. By following these instructions, you can achieve a professional-looking result while adding a touch of sophistication to your bathroom space.
The installation of a glass shower panel requires careful attention to detail and precision, as it involves working with delicate materials. However, with the right guidance and a methodical approach, you can successfully complete the installation process, turning your vision of a modern and elegant shower enclosure into a reality.
Whether you are a seasoned DIY enthusiast or a homeowner eager to take on a new home improvement project, this guide will equip you with the knowledge and confidence to tackle the installation of a glass shower panel. By understanding each step and its significance, you can embark on this endeavor with a sense of empowerment and enthusiasm, knowing that you are enhancing both the functionality and visual appeal of your bathroom.
Now, let's delve into the essential tools and materials needed for the installation process, setting the foundation for a successful and gratifying project.
Key Takeaways:
- Elevate your bathroom with a modern and luxurious glass shower panel, creating an open and airy feel while adding sophistication to the space. Follow the step-by-step guide for a professional-looking result.
- Ensure a seamless and durable installation of your glass shower panel by meticulously measuring, preparing, and securing the panels. Seal the edges with high-quality silicone for long-term durability and water-tightness.
Read more: How To Install Shower Glass Doors
Step 1: Gather Necessary Tools and Materials
Before embarking on the installation of a glass shower panel, it is essential to gather all the necessary tools and materials to ensure a smooth and efficient process. Having the right equipment at your disposal will not only streamline the installation but also contribute to the overall quality and durability of the finished product. Here's a comprehensive list of the tools and materials you will need:
Tools:
- Measuring Tape: Accurate measurements are crucial for ensuring that the glass panels fit perfectly within the shower space.
- Level: A level will help you ensure that the panels and tracks are installed perfectly straight, avoiding any uneven or crooked placements.
- Drill and Drill Bits: You will need a drill to create holes for the installation of the bottom track and side U-channels.
- Screwdriver: A screwdriver, both flathead and Phillips, will be necessary for securing the hardware in place.
- Glass Suction Cups: These specialized tools will assist in handling and maneuvering the heavy glass panels safely during installation.
- Caulking Gun: To apply silicone sealant for securing the glass panels and sealing the edges.
Materials:
- Glass Panels: Select tempered glass panels designed specifically for shower enclosures, ensuring both safety and durability.
- Bottom Track: The bottom track provides stability and support for the glass panels, typically made of aluminum or stainless steel.
- Side U-Channels: These channels are used to secure the vertical edges of the glass panels, offering additional stability and a clean, finished look.
- Screws and Anchors: Depending on the type of wall material, you will need appropriate screws and anchors to secure the bottom track and side U-channels.
- Silicone Sealant: High-quality, waterproof silicone sealant is essential for securing the glass panels in place and sealing the edges to prevent water leakage.
By ensuring that you have all the necessary tools and materials on hand, you can proceed with confidence, knowing that you are well-equipped to begin the installation process. With these foundational elements in place, you are ready to move on to the next crucial step: measuring and preparing the shower area for the installation of the glass panels.
Step 2: Measure and Prepare the Shower Area
Accurate measurements and thorough preparation are fundamental to the successful installation of a glass shower panel. Before proceeding with the physical installation, it is crucial to meticulously measure the shower area and make the necessary preparations to ensure a precise and secure fit for the glass panels.
Measuring the Shower Area
Begin by using a measuring tape to determine the exact dimensions of the shower space where the glass panels will be installed. Measure the width and height of the area, taking into account any irregularities or uneven surfaces. It is essential to measure at multiple points to accommodate any variations in the walls or floor.
Once the measurements are recorded, double-check for accuracy to avoid any discrepancies that could lead to ill-fitting glass panels. Precision at this stage is paramount, as it sets the foundation for a seamless and visually appealing installation.
Preparing the Shower Area
After obtaining precise measurements, thoroughly clean the shower area to ensure that the surfaces are free from dust, debris, and any obstructions that could hinder the installation process. Smooth and clean surfaces will facilitate the proper placement and adherence of the bottom track and side U-channels.
Additionally, inspect the walls and floor for any structural issues or irregularities that may need to be addressed before proceeding with the installation. It is essential to address any discrepancies at this stage to prevent complications during the installation of the glass panels.
Furthermore, if the shower area features tiles or other wall coverings, ensure that they are securely attached and in good condition. Any loose or damaged tiles should be repaired or replaced to provide a stable and even surface for the installation of the glass panels.
By meticulously measuring the shower area and preparing the surfaces for the installation, you are laying the groundwork for a precise and successful placement of the glass shower panels. These initial steps are critical in ensuring that the subsequent installation stages proceed smoothly and result in a visually stunning and functional shower enclosure.
Step 3: Install the Bottom Track
The installation of the bottom track is a pivotal stage in the process of installing a glass shower panel, as it provides essential support and stability for the glass panels. Properly securing the bottom track is crucial for ensuring the structural integrity and longevity of the entire shower enclosure. Here's a detailed guide on how to effectively install the bottom track:
1. Positioning the Bottom Track
Begin by positioning the bottom track at the base of the shower area, aligning it with the measurements and layout previously determined. Ensure that the track is level and sits flush with the shower floor, as any unevenness at this stage can lead to complications during the installation of the glass panels.
2. Marking Hole Locations
Using a pencil or marker, carefully mark the hole locations on the shower floor through the pre-drilled holes in the bottom track. These marks will serve as guides for drilling holes to secure the track in place.
3. Drilling Holes
With the marked hole locations as references, use a drill equipped with the appropriate drill bit to create holes in the shower floor. The drill bit size should correspond to the type of anchors or fasteners being used to secure the bottom track.
4. Securing the Bottom Track
Once the holes are drilled, place the bottom track back into position and align it with the drilled holes. Secure the track in place by inserting the appropriate anchors or fasteners through the holes and into the shower floor. Use a screwdriver to tighten the fasteners, ensuring that the bottom track is firmly and securely attached.
5. Verifying Stability
After securing the bottom track, verify its stability and alignment. Use a level to confirm that the track is perfectly horizontal and free from any tilting or misalignment. A stable and level bottom track is essential for providing a solid foundation for the subsequent installation steps.
By meticulously following these steps to install the bottom track, you are laying the groundwork for the successful placement of the glass panels. The secure and level positioning of the bottom track is integral to the overall stability and functionality of the glass shower enclosure, setting the stage for the next phase of the installation process.
Read more: DIY Guide To Installing A Glass Shower Door
Step 4: Install the Side U-Channels
The installation of side U-channels is a critical step in the process of installing a glass shower panel, as these channels play a pivotal role in providing structural support and stability to the vertical edges of the glass panels. Properly securing the side U-channels is essential for ensuring the overall integrity and durability of the shower enclosure. Here's a detailed guide on how to effectively install the side U-channels:
-
Positioning the Side U-Channels
Begin by positioning the side U-channels vertically along the edges of the shower area where the glass panels will be installed. Carefully align the channels with the measurements previously determined, ensuring that they are level and plumb. The precise positioning of the side U-channels is crucial for accommodating the glass panels securely and maintaining a uniform and aesthetically pleasing appearance.
-
Marking Hole Locations
Using a pencil or marker, mark the hole locations on the walls through the pre-drilled holes in the side U-channels. These marks will serve as guides for drilling holes to secure the channels in place. It is important to ensure that the hole locations align accurately with the channels to facilitate a seamless installation.
-
Drilling Holes
With the marked hole locations as references, use a drill equipped with the appropriate drill bit to create holes in the walls. The drill bit size should correspond to the type of anchors or fasteners being used to secure the side U-channels. Exercise caution and precision during the drilling process to avoid damage to the walls and ensure that the holes are aligned with the markings.
-
Securing the Side U-Channels
Once the holes are drilled, position the side U-channels back in place and align them with the drilled holes. Secure the channels by inserting the appropriate anchors or fasteners through the holes and into the walls. Use a screwdriver to tighten the fasteners, ensuring that the side U-channels are firmly and securely attached. It is crucial to verify that the channels are level and plumb during the securing process to maintain the integrity of the installation.
-
Verifying Alignment and Stability
After securing the side U-channels, verify their alignment and stability. Use a level to confirm that the channels are perfectly vertical and free from any tilting or misalignment. Additionally, ensure that the channels are uniformly positioned on both sides of the shower area to facilitate the seamless installation of the glass panels.
By meticulously following these steps to install the side U-channels, you are laying the groundwork for the successful placement of the glass panels. The secure and precisely positioned side U-channels are integral to the overall stability and functionality of the glass shower enclosure, setting the stage for the next phase of the installation process.
Step 5: Install the Glass Panels
The installation of the glass panels marks a significant stage in the process of creating a stunning and functional shower enclosure. As the focal point of the entire installation, the glass panels not only contribute to the aesthetic appeal of the bathroom but also serve as essential barriers, enclosing the shower space and preventing water from splashing onto the surrounding area. Here's a detailed guide on how to effectively install the glass panels:
1. Handling the Glass Panels
Before proceeding with the installation, it is crucial to handle the glass panels with care and precision. Utilize glass suction cups to safely maneuver the heavy panels, minimizing the risk of damage or injury during the installation process. Ensure that the panels are clean and free from any debris or contaminants that could affect their appearance and structural integrity.
2. Placing the Glass Panels
Carefully position the glass panels within the bottom track and side U-channels, ensuring a snug and secure fit. Align the panels according to the predetermined measurements, taking into account any necessary adjustments to accommodate variations in the shower area. It is essential to verify that the panels are level and plumb, maintaining a uniform and visually appealing alignment.
Read more: 12 Amazing Shower Panels Of 2022
3. Securing the Glass Panels
Once the glass panels are correctly positioned, proceed to secure them in place using the designated hardware, such as screws and brackets. Follow the manufacturer's guidelines for the specific installation requirements, ensuring that the panels are firmly anchored within the bottom track and side U-channels. Exercise caution and precision during this stage to prevent any damage to the glass panels and maintain their structural integrity.
4. Verifying Stability and Alignment
After securing the glass panels, carefully verify their stability and alignment. Utilize a level to confirm that the panels are perfectly positioned and free from any tilting or misalignment. Additionally, ensure that the panels create a seamless and uniform enclosure, providing a visually striking and functional barrier for the shower space.
By meticulously following these steps to install the glass panels, you are bringing the vision of a modern and elegant shower enclosure to fruition. The precise and secure placement of the glass panels is integral to the overall functionality and visual appeal of the shower enclosure, setting the stage for the subsequent steps in the installation process.
Step 6: Secure the Glass Panels
Securing the glass panels is a crucial step in the installation process, as it ensures the stability, safety, and longevity of the entire shower enclosure. Properly anchoring the glass panels within the bottom track and side U-channels is essential for creating a secure and functional barrier that enhances the overall shower experience. Here's a detailed guide on how to effectively secure the glass panels:
1. Fastening the Panels
Using the designated hardware provided by the manufacturer, such as screws and brackets, proceed to fasten the glass panels securely within the bottom track and side U-channels. Carefully follow the specific installation guidelines to ensure that the panels are firmly anchored without compromising their structural integrity. It is essential to use the appropriate tools and techniques to prevent any damage to the glass panels during the fastening process.
Read more: How To Install Siding Panels
2. Ensuring Even Distribution
When securing the glass panels, pay close attention to ensuring an even distribution of support along the bottom track and side U-channels. This uniform distribution of support helps minimize stress on the glass panels and promotes their long-term durability. By evenly securing the panels, you contribute to the overall stability and resilience of the entire shower enclosure.
3. Verifying Tightness and Alignment
After fastening the glass panels, carefully verify the tightness of the hardware to ensure that the panels are securely held in place. Utilize a level to confirm that the panels are perfectly aligned and free from any tilting or misalignment. This meticulous attention to detail during the securing process is essential for achieving a visually appealing and structurally sound installation.
4. Checking for Stability
Once the glass panels are securely fastened and aligned, perform a comprehensive check to verify their stability. Gently apply pressure to the panels to ensure that they remain firmly anchored and free from any wobbling or movement. This step is crucial for confirming that the glass panels are securely in place, ready to fulfill their role as an elegant and functional enclosure for the shower space.
By meticulously following these steps to secure the glass panels, you are contributing to the overall integrity and functionality of the shower enclosure. The precise and secure anchoring of the glass panels within the bottom track and side U-channels is fundamental to creating a safe, durable, and visually stunning shower enclosure, elevating the aesthetic and functional appeal of the entire bathroom space.
Step 7: Seal the Edges
Sealing the edges of the glass shower panels is a critical and final step in the installation process, essential for ensuring the integrity, durability, and water-tightness of the entire enclosure. Properly sealing the edges not only enhances the aesthetic appeal of the installation but also serves as a protective measure against water leakage and moisture-related issues. Here's a detailed guide on how to effectively seal the edges of the glass panels:
Read more: How To Install A Steam Shower
1. Selecting High-Quality Silicone Sealant
Begin by selecting a high-quality silicone sealant specifically designed for use in wet environments, such as bathrooms and shower enclosures. Opt for a clear or translucent sealant that complements the appearance of the glass panels, creating a seamless and visually appealing finish. Ensure that the sealant is formulated to provide waterproof and mold-resistant properties, contributing to the long-term maintenance and functionality of the installation.
2. Preparing the Edges
Thoroughly clean and dry the edges of the glass panels to remove any dust, debris, or residues that could compromise the adhesion of the sealant. Use a gentle glass cleaner or a mild detergent solution to ensure that the edges are free from contaminants, promoting optimal adhesion and a clean, professional finish. Additionally, inspect the edges for any imperfections or irregularities that may need to be addressed before applying the sealant.
3. Applying the Silicone Sealant
Carefully apply a continuous and even bead of silicone sealant along the edges of the glass panels, ensuring complete coverage and a uniform seal. Use a caulking gun to facilitate precise application, maintaining a steady and controlled flow of sealant. Pay close attention to achieving a consistent and aesthetically pleasing finish, taking care to avoid excess buildup or uneven application. Work methodically and patiently to ensure that the sealant adheres securely to the edges, forming a robust barrier against water infiltration.
4. Smoothing and Finishing
After applying the sealant, utilize a silicone tool or a moistened finger to smooth and shape the sealant bead, creating a neat and streamlined appearance. This step helps eliminate any excess sealant and ensures a clean, professional finish along the edges of the glass panels. Take the time to refine the sealant's appearance, achieving a visually appealing and cohesive integration with the overall installation.
Read more: How To Install An Outdoor Shower
5. Allowing for Proper Curing
Allow the silicone sealant to cure and set according to the manufacturer's recommendations, ensuring that it achieves its full waterproofing and bonding capabilities. Exercise caution to prevent any contact or disturbance of the sealant during the curing process, as this could compromise its effectiveness. Once the sealant has fully cured, verify its integrity and water-tightness, confirming that the edges of the glass panels are securely and durably sealed.
By meticulously following these steps to seal the edges of the glass panels, you are fortifying the entire installation against water infiltration and moisture-related issues. The precise and thorough application of silicone sealant not only enhances the visual appeal of the glass shower enclosure but also contributes to its long-term durability and functionality, ensuring a reliable and aesthetically pleasing addition to the bathroom space.
Conclusion
In conclusion, the installation of a glass shower panel is a transformative and rewarding endeavor that elevates the aesthetic appeal and functionality of the bathroom space. Throughout this comprehensive guide, we have explored the step-by-step process of installing a glass shower panel, from gathering the necessary tools and materials to sealing the edges for optimal durability and water-tightness.
By meticulously measuring and preparing the shower area, installing the bottom track and side U-channels, and securing the glass panels, homeowners and DIY enthusiasts can achieve a professional-looking result while adding a touch of sophistication to their bathroom space. The careful attention to detail and precision required in each stage of the installation process ensures a seamless and durable outcome, creating a modern and luxurious ambiance within the shower enclosure.
The final step of sealing the edges with high-quality silicone sealant not only enhances the visual appeal of the glass panels but also serves as a protective measure against water leakage and moisture-related issues. The thorough application and finishing of the sealant contribute to the long-term maintenance and functionality of the installation, ensuring a reliable and aesthetically pleasing addition to the bathroom space.
Ultimately, the installation of a glass shower panel represents a significant enhancement to the overall bathroom environment, creating a sense of openness and sophistication while providing a functional and visually striking enclosure for the shower space. The sleek and transparent nature of glass panels allows for an open and airy feel, making the bathroom appear more spacious and inviting.
Whether undertaking a bathroom renovation project or seeking to upgrade the shower enclosure, the installation of a glass shower panel offers a gratifying opportunity to enhance both the visual appeal and functionality of the bathroom. By following the detailed steps outlined in this guide, homeowners and DIY enthusiasts can embark on this endeavor with confidence, knowing that they are equipped with the knowledge and guidance to achieve a professional and visually stunning result.
In essence, the installation of a glass shower panel represents a significant investment in the overall aesthetic and functionality of the bathroom, creating a modern and luxurious space that embodies both style and practicality.
Frequently Asked Questions about How To Install Glass Shower Panel
Was this page helpful?
At Storables.com, we guarantee accurate and reliable information. Our content, validated by Expert Board Contributors, is crafted following stringent Editorial Policies. We're committed to providing you with well-researched, expert-backed insights for all your informational needs.


0 thoughts on “How To Install Glass Shower Panel”