Home>Furniture & Design>Interior Design Trends>How To Put Glass Back Together
Interior Design Trends
How To Put Glass Back Together
Modified: October 19, 2024
Discover the latest interior design trends and learn how to put glass back together with our expert tips and techniques. Create a stylish and functional space with our innovative ideas.
(Many of the links in this article redirect to a specific reviewed product. Your purchase of these products through affiliate links helps to generate commission for Storables.com, at no extra cost. Learn more)
Introduction
Glass is a versatile and elegant material that adds a touch of sophistication to our surroundings. Whether it's a cherished antique vase, a beloved picture frame, or a valuable window pane, glass items hold sentimental and practical value in our lives. However, accidents happen, and glass can become chipped, cracked, or shattered. The good news is that with the right tools, materials, and techniques, it's possible to restore broken glass items to their former glory.
Repairing glass requires a delicate touch and a keen eye for detail. It's a craft that demands patience and precision, but the satisfaction of bringing a fractured piece of glass back to its original state is immeasurable. In this comprehensive guide, we will delve into the art of repairing glass, exploring the different types of glass, the essential tools and materials needed, and a step-by-step walkthrough of the repair process. Whether you're a seasoned DIY enthusiast or a novice looking to salvage a treasured glass item, this guide will equip you with the knowledge and confidence to tackle glass repairs with finesse.
Understanding the properties and characteristics of different types of glass is crucial to executing a successful repair. From tempered glass to laminated glass, each type presents unique challenges and considerations. By familiarizing ourselves with these distinctions, we can tailor our approach to suit the specific requirements of the glass at hand. With the right insights and techniques, even the most intricate glass repairs can be accomplished with skill and precision.
So, roll up your sleeves, gather your tools, and prepare to embark on a journey of restoration and rejuvenation. Let's dive into the world of glass repair and discover the gratifying art of putting glass back together.
Key Takeaways:
- Embrace the art of glass repair by understanding different glass types, using precise tools, and following a step-by-step process. It’s a gratifying endeavor that rewards patience and skill.
- Achieve successful glass repairs with precision, patience, and attention to detail. From aligning glass pieces to applying adhesive and polishing, each step contributes to restoring the beauty and functionality of glass items.
Read more: How To Put An Extension Ladder Back Together
Understanding the Types of Glass
Glass is a remarkably diverse material, with various types that serve different purposes and possess distinct properties. Understanding these differences is essential when it comes to repairing glass, as each type requires a specific approach to achieve successful restoration. Here are some common types of glass and their unique characteristics:
-
Float Glass: Also known as soda-lime glass, float glass is the most widely used type in windows, doors, and other architectural applications. It is manufactured by floating molten glass on a bed of molten tin, resulting in a smooth and uniform surface. Float glass is relatively easy to work with and is prone to shattering into sharp, jagged pieces when broken.
-
Tempered Glass: Tempered glass is designed to be stronger and safer than regular glass. It undergoes a special heat treatment process that increases its strength and causes it to shatter into small, granular pieces when broken, reducing the risk of serious injury. Due to its unique properties, repairing tempered glass requires specific techniques to ensure its structural integrity.
-
Laminated Glass: Laminated glass consists of two or more layers of glass bonded together with an interlayer, typically made of polyvinyl butyral (PVB). This type of glass is known for its strength and safety features, as the interlayer holds the glass together when shattered, preventing it from breaking into sharp pieces. Repairing laminated glass involves addressing both the glass layers and the interlayer to maintain its protective qualities.
-
Acrylic Glass (Plexiglass): Acrylic glass, often referred to as plexiglass, is a transparent thermoplastic that is lightweight and shatter-resistant. It is commonly used as a substitute for traditional glass in applications where safety and durability are paramount. When damaged, acrylic glass can be repaired using specialized adhesives and polishing techniques to restore its clarity and structural integrity.
-
Frosted Glass: Frosted glass undergoes a process to create a translucent appearance, making it ideal for privacy screens and decorative purposes. Repairing frosted glass requires careful consideration of its texture and finish to ensure that the repair seamlessly blends with the surrounding surface.
Each type of glass presents its own set of challenges and considerations when it comes to repair. By understanding the unique properties of each type, we can tailor our repair techniques to address specific characteristics and achieve optimal results. Whether it's a delicate window pane or a cherished glass ornament, knowing the nuances of different glass types is fundamental to mastering the art of putting glass back together.
Tools and Materials Needed
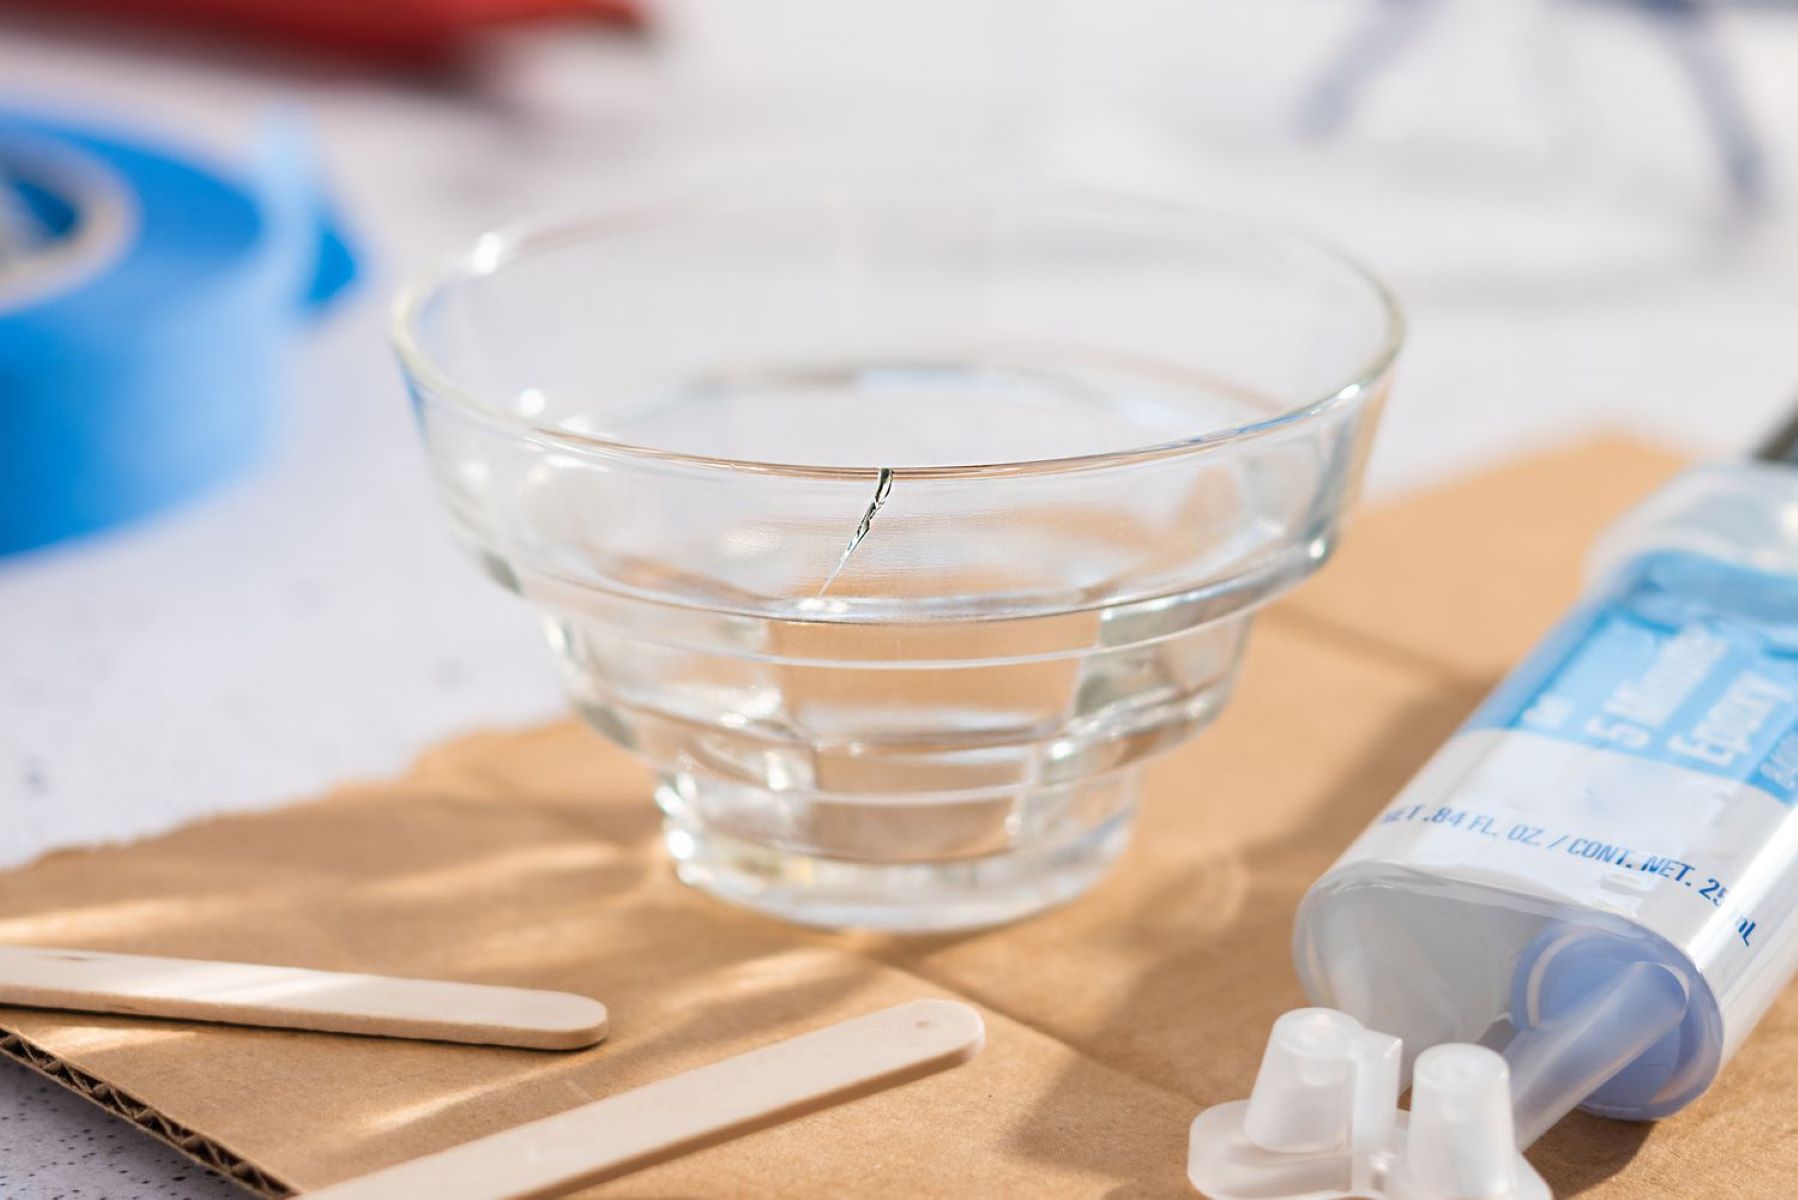
Repairing glass requires a precise selection of tools and materials to ensure a successful restoration. From specialized adhesives to safety equipment, having the right supplies at hand is essential for executing a meticulous repair. Here's a comprehensive list of the tools and materials needed to embark on the journey of putting glass back together:
Tools:
-
Safety Glasses and Gloves: Prioritize safety by wearing protective glasses and gloves to shield your eyes and hands from glass shards and adhesives during the repair process.
-
Glass Cutter: A high-quality glass cutter is indispensable for scoring and cutting glass to the desired shape and size. Look for a cutter with a durable carbide wheel for precise and clean cuts.
-
Glass Grinder: A glass grinder equipped with diamond bits is essential for smoothing rough edges and refining the shape of the glass pieces, ensuring a seamless fit during the repair.
-
UV Light or UV Lamp: For repairs involving UV-curing adhesives, a UV light source is necessary to cure the adhesive and bond the glass pieces effectively.
-
Clamps or Support Stands: Stabilize the glass pieces during the repair process by using clamps or support stands to hold them in place securely.
-
Precision Tweezers or Forceps: These fine-tipped tools are invaluable for handling small glass fragments and intricate assembly tasks with precision.
-
Glass Polishing Kit: A glass polishing kit containing abrasive discs and polishing compounds is essential for restoring the clarity and smoothness of the repaired glass surface.
-
Paintbrushes and Applicators: Use soft-bristled paintbrushes and applicators to apply adhesives, primers, and polishing compounds with precision and control.
Materials:
-
Glass Adhesive: Select a high-quality, transparent glass adhesive designed for bonding glass surfaces with strength and clarity. UV-curing adhesives are ideal for achieving rapid and durable bonds.
-
Glass Cleaner and Solvent: Prepare the glass surfaces for repair by using a glass cleaner to remove dirt, debris, and residues. Additionally, a solvent such as isopropyl alcohol aids in degreasing and priming the glass for adhesive application.
-
Glass Reinforcement Tape: For reinforcing cracked or weakened areas of the glass, opt for specialized glass reinforcement tape to enhance the structural integrity of the repair.
-
Replacement Glass Pieces: If the glass item has irreparable damage, ensure you have replacement glass pieces that match the size, thickness, and type of the original glass for a seamless restoration.
-
Protective Film or Tape: Use protective film or tape to mask off areas of the glass that require protection during the repair, such as decorative patterns or delicate surfaces.
-
Polishing Compounds and Cerium Oxide: These compounds are essential for polishing and refining the repaired glass surface, restoring its luster and smoothness.
By assembling these essential tools and materials, you'll be well-equipped to tackle a wide range of glass repair projects with confidence and precision. Whether it's mending a cherished heirloom or restoring a functional glass fixture, having the right supplies at your disposal is the first step towards mastering the art of putting glass back together.
Read more: How To Put A Blender Together
Step-by-Step Guide to Putting Glass Back Together
Repairing glass demands a meticulous approach and a keen eye for detail. By following a systematic process, you can effectively restore broken or damaged glass items to their former glory. Here's a comprehensive step-by-step guide to putting glass back together:
1. Prepare the Work Area
Begin by setting up a clean and well-lit work area with ample space to maneuver the glass pieces. Lay down a soft, padded surface to protect the glass and provide a cushioned workspace. Ensure that all necessary tools and materials are within reach, and consider using protective barriers to prevent dust and debris from contaminating the repair environment.
2. Assess the Damage
Carefully examine the broken glass item to assess the extent of the damage. Identify any missing or fragmented pieces, and take note of any structural weaknesses or stress points. Understanding the scope of the damage will guide your approach to the repair process and help determine the best course of action.
3. Clean and Prepare the Glass Surfaces
Thoroughly clean the glass surfaces using a glass cleaner and a lint-free cloth to remove any dirt, oils, or residues that may hinder the adhesion of the repair materials. If necessary, use a solvent such as isopropyl alcohol to degrease and prime the glass for adhesive application, ensuring a clean and receptive surface for the repair.
4. Align and Fit the Glass Pieces
Carefully align the broken glass pieces to ensure a precise fit and seamless assembly. Use clamps or support stands to hold the pieces in place, allowing for accurate positioning and stability during the repair process. If any pieces are missing or irreparably damaged, consider using replacement glass pieces that match the size, thickness, and type of the original glass.
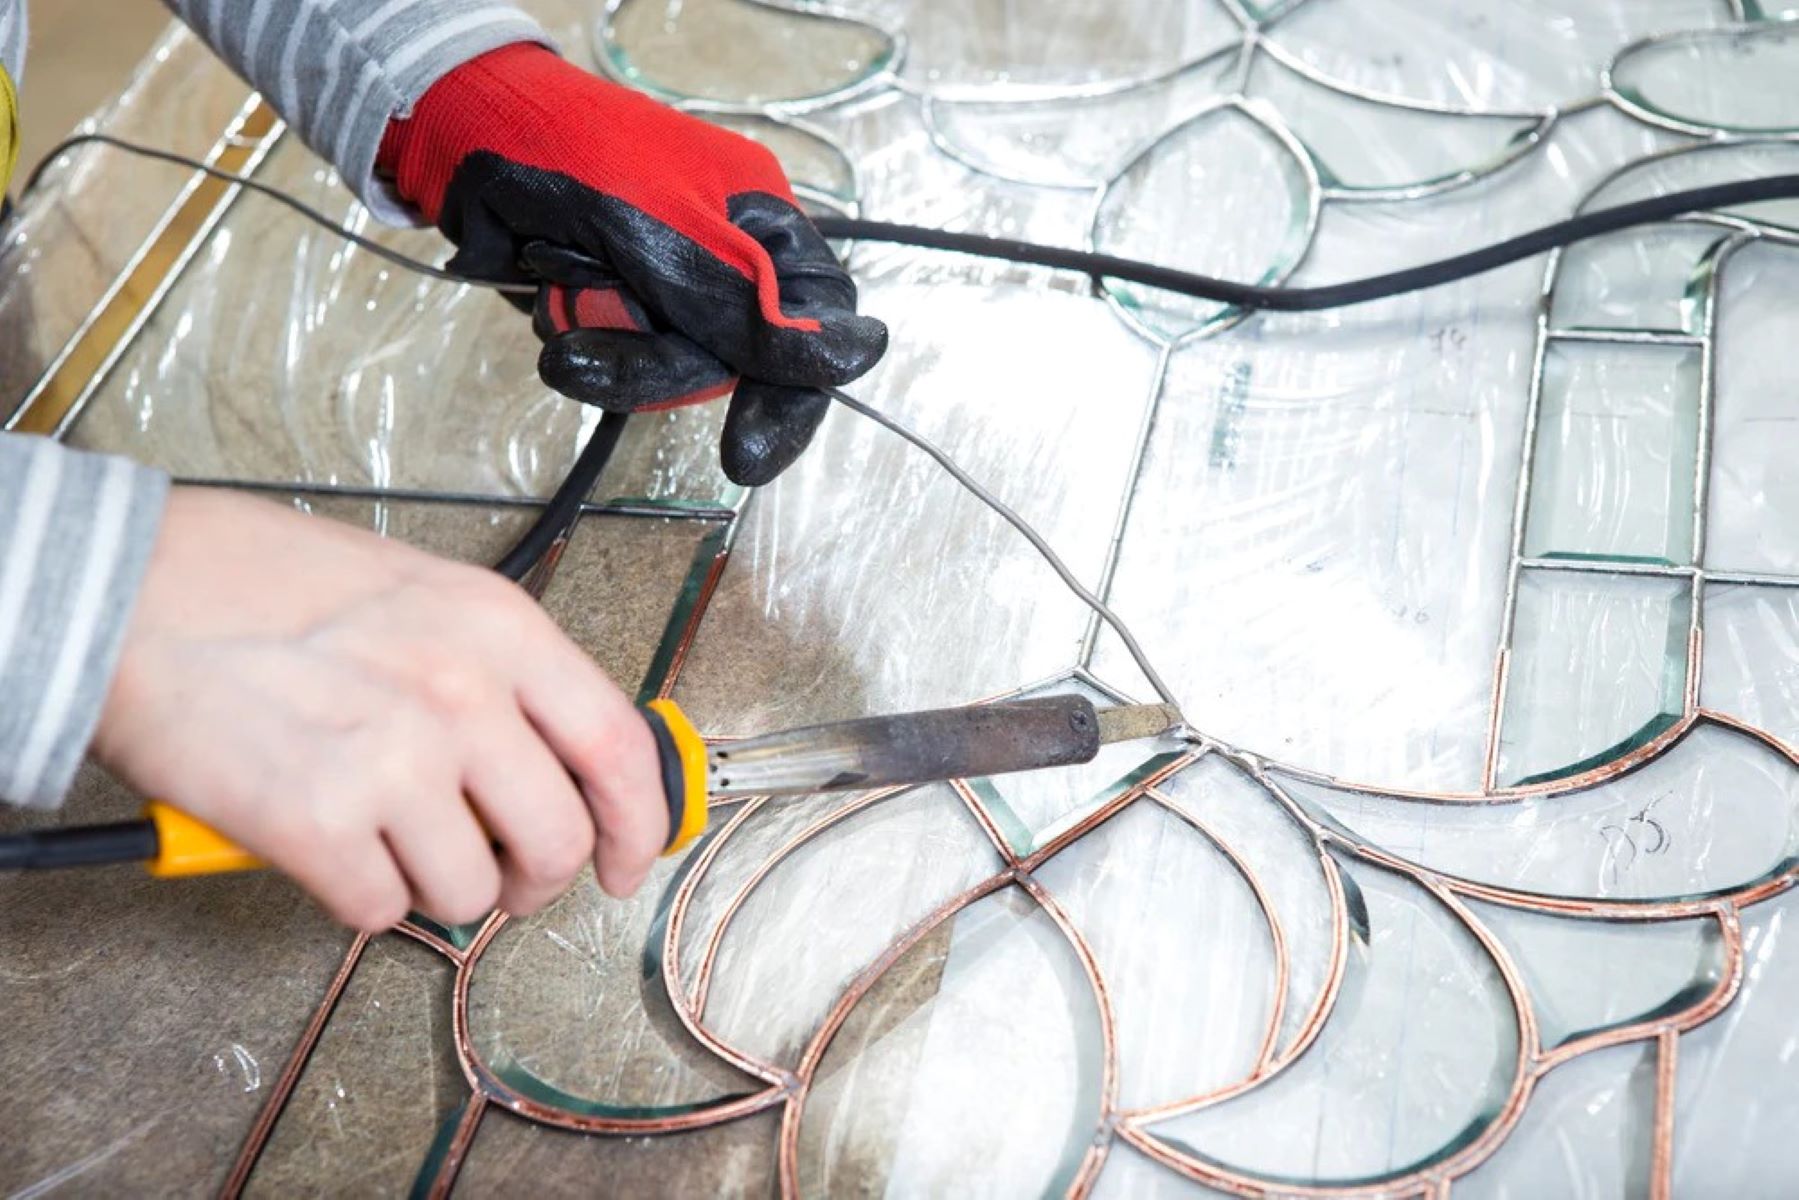
5. Apply Glass Adhesive
Select a high-quality, transparent glass adhesive suited for the specific type of glass and the nature of the repair. Apply the adhesive to the mating surfaces of the glass pieces, ensuring even coverage and a secure bond. If using a UV-curing adhesive, expose the bonded areas to a UV light source to initiate the curing process and achieve a durable, transparent bond.
6. Reinforce and Support the Repair
For cracked or weakened areas of the glass, reinforce the repair using specialized glass reinforcement tape to enhance the structural integrity and stability of the bonded sections. This additional reinforcement provides crucial support and helps prevent further damage or separation.
7. Polish and Refine the Repaired Surface
Once the adhesive has fully cured, use a glass polishing kit with abrasive discs and polishing compounds to refine the repaired surface. Gently smooth any rough edges, remove excess adhesive, and restore the clarity and luster of the glass, ensuring a seamless finish that blends harmoniously with the surrounding surface.
Read more: How To Put Plumbing Pipes Together
8. Final Inspection and Finishing Touches
Conduct a thorough inspection of the repaired glass item, checking for any imperfections, irregularities, or areas that require further attention. Make any necessary adjustments or refinements, and consider applying a protective film or tape to safeguard delicate areas or decorative elements. With the repair complete, admire your handiwork and revel in the satisfaction of putting glass back together with precision and care.
By following these meticulous steps, you can effectively restore broken or damaged glass items, breathing new life into cherished possessions and functional fixtures. The art of putting glass back together is a gratifying endeavor that rewards patience, skill, and a dedication to preserving the beauty and utility of glass in all its forms.
Tips for a Successful Repair
Achieving a successful glass repair requires a combination of precision, patience, and attention to detail. To enhance your proficiency in putting glass back together, consider the following tips and insights that can elevate your repair endeavors to new heights:
-
Precision in Alignment: When aligning and fitting the glass pieces, prioritize precision to ensure a seamless assembly. Take the time to carefully position the fragments, ensuring that they align perfectly to restore the original form of the glass item. This meticulous approach sets the foundation for a cohesive and visually appealing repair.
-
Adhesive Application: Pay close attention to the application of the glass adhesive, ensuring that it is evenly distributed and covers the mating surfaces thoroughly. Avoid excess adhesive that could mar the appearance of the repair, and strive for a transparent and uniform bond that seamlessly integrates with the surrounding glass.
-
UV-Curing Adhesive Considerations: If utilizing UV-curing adhesive, be mindful of the exposure time and intensity required for effective curing. Follow the manufacturer's guidelines and recommendations to achieve optimal bonding strength and transparency. Additionally, ensure that the bonded areas receive adequate exposure to the UV light source for consistent and durable results.
-
Reinforcement for Structural Integrity: In cases where the glass has experienced structural compromise, such as cracks or weakened areas, consider reinforcing the repair with specialized glass reinforcement tape. This additional support enhances the overall stability and resilience of the repaired glass, mitigating the risk of future damage or separation.
-
Careful Polishing and Finishing: Exercise caution and precision when polishing and refining the repaired glass surface. Use gentle, controlled movements to smooth rough edges and remove excess adhesive, taking care not to inadvertently scratch or damage the surrounding glass. The goal is to achieve a flawlessly polished finish that seamlessly integrates with the original glass surface.
-
Thorough Inspection and Touch-Ups: After completing the repair process, conduct a thorough inspection of the glass item to identify any imperfections or areas that may require additional attention. Address any irregularities or blemishes with meticulous touch-ups, ensuring that the repaired glass exhibits a consistent and refined appearance.
-
Protective Measures: Consider applying a protective film or tape to safeguard delicate areas or decorative elements of the repaired glass. This proactive measure helps preserve the integrity of the repair and shields vulnerable sections from potential damage or abrasions.
By incorporating these tips into your glass repair endeavors, you can elevate the quality and precision of your work, achieving consistently successful outcomes that honor the beauty and functionality of glass items. Embrace the art of putting glass back together with a commitment to excellence and a keen eye for detail, and revel in the satisfaction of breathing new life into cherished glass possessions.
Conclusion
In the realm of glass repair, the art of putting glass back together transcends mere restoration; it embodies a profound reverence for craftsmanship and a dedication to preserving the beauty and functionality of glass items. As we conclude this comprehensive guide, it's evident that the process of repairing glass demands a harmonious blend of technical expertise, precision, and a deep appreciation for the intrinsic allure of glass.
Throughout this journey, we've explored the diverse landscape of glass types, delving into the unique properties and characteristics that define each variation. From the resilience of tempered glass to the elegance of frosted glass, understanding the nuances of different glass types is fundamental to executing successful repairs with finesse and insight.
Equipped with a meticulous selection of tools and materials, we've ventured into the essential elements that form the backbone of glass repair. From safety gear to specialized adhesives and precision instruments, assembling the right resources is the cornerstone of embarking on a journey to put glass back together with confidence and proficiency.
The step-by-step guide presented a systematic approach to glass repair, emphasizing the importance of meticulous alignment, precise adhesive application, and thoughtful reinforcement. By following these detailed steps, one can navigate the intricate process of glass repair with a sense of purpose and a commitment to achieving seamless, enduring results.
Furthermore, the invaluable tips and insights shared in this guide serve as guiding beacons, illuminating the path to excellence in glass repair. From precision in alignment to careful polishing and finishing, these considerations elevate the quality and precision of glass repairs, ensuring that each restoration is a testament to skill, dedication, and reverence for the art of putting glass back together.
As we reflect on this journey, it's clear that the art of putting glass back together is a testament to the enduring allure of glass and the timeless significance of preserving its beauty and functionality. Whether it's a cherished heirloom, a decorative masterpiece, or an essential fixture, the ability to restore broken or damaged glass items is a testament to human ingenuity and a celebration of the enduring legacy of glass craftsmanship.
In closing, may this guide inspire a newfound appreciation for the art of glass repair, empowering individuals to embark on their own journeys of restoration with confidence and reverence. Let us continue to honor the elegance and resilience of glass, embracing the gratifying art of putting glass back together with unwavering dedication and a profound respect for the enduring allure of this remarkable material.
Frequently Asked Questions about How To Put Glass Back Together
Was this page helpful?
At Storables.com, we guarantee accurate and reliable information. Our content, validated by Expert Board Contributors, is crafted following stringent Editorial Policies. We're committed to providing you with well-researched, expert-backed insights for all your informational needs.


0 thoughts on “How To Put Glass Back Together”