Home>Furniture & Design>Interior Design Trends>How To Replace Oven Door Glass
Interior Design Trends
How To Replace Oven Door Glass
Modified: October 19, 2024
Learn how to replace oven door glass and stay updated with the latest interior design trends. Get expert tips and ideas for a modern and stylish kitchen.
(Many of the links in this article redirect to a specific reviewed product. Your purchase of these products through affiliate links helps to generate commission for Storables.com, at no extra cost. Learn more)
Introduction
Replacing the glass on an oven door may seem like a daunting task, but with the right tools, materials, and a step-by-step guide, it can be a manageable and rewarding DIY project. A shattered or cracked oven door glass not only affects the aesthetic appeal of the appliance but also poses safety concerns. By taking the initiative to replace the damaged glass, you can restore the functionality and visual appeal of your oven while ensuring a safe cooking environment for you and your family.
Whether the glass was damaged due to accidental impact or simply succumbed to wear and tear over time, the process of replacing it involves several key steps. From gathering the necessary tools and materials to carefully disassembling the door, removing the broken glass, and installing the new one, each stage requires attention to detail and a methodical approach. While the thought of dismantling an oven door may seem intimidating, following a systematic guide can simplify the process and empower you to tackle this repair with confidence.
In this comprehensive guide, we will walk you through each step of replacing the oven door glass, providing clear instructions and valuable tips to ensure a successful outcome. By following these instructions, you can save on costly professional repairs and take pride in restoring your oven to its optimal condition. So, roll up your sleeves, gather your tools, and let's embark on this DIY journey to rejuvenate your oven and elevate your culinary space.
Key Takeaways:
- Replacing oven door glass is a manageable DIY project that restores safety and visual appeal. By following the steps, you can save money and feel accomplished in rejuvenating your kitchen space.
- Through patience and attention to detail, you can safely disassemble, remove, and install new oven door glass. This DIY endeavor fosters independence and enhances your home maintenance skills.
Read more: How To Replace Glass In A Door
Step 1: Gather Necessary Tools and Materials
Before embarking on the task of replacing the oven door glass, it's essential to gather all the required tools and materials. Having the right equipment at your disposal will streamline the process and ensure a smooth transition from one step to the next. Here's a comprehensive list of the tools and materials you'll need:
Tools:
- Screwdriver Set: A set of screwdrivers, including Phillips and flat-head varieties, will be essential for removing screws and disassembling the door components.
- Pliers: Both needle-nose and standard pliers will come in handy for manipulating small components and wires.
- Putty Knife: This tool will aid in prying apart the door panels and releasing the old glass.
- Protective Gloves: Heat-resistant gloves will protect your hands when handling the oven door and glass components.
- Safety Goggles: It's crucial to safeguard your eyes from any glass particles or debris during the removal process.
Materials:
- Replacement Glass: Ensure that you have the correct replacement glass for your specific oven model. Measure the dimensions of the existing glass to ensure a precise fit.
- Screw and Bolt Container: Use a small container to store the screws and bolts removed during the disassembly process. This will prevent loss and confusion when reassembling the door.
- Cleaning Solution: Have a mild cleaning solution and a soft cloth on hand to clean the door panels and components before reassembly.
- Protective Padding: Lay down a soft, clean cloth or padding to place the oven door on during the disassembly and glass replacement process. This will prevent scratches and damage to the door surface.
By ensuring that you have all the necessary tools and materials ready, you can approach the task of replacing the oven door glass with confidence and efficiency. This proactive approach minimizes interruptions during the process and sets the stage for a successful repair. With the tools and materials in place, you're now prepared to move on to the next step of removing the oven door and commencing the glass replacement process.
Step 2: Remove the Oven Door
Removing the oven door is a crucial initial step in the process of replacing the glass. This task requires careful handling and attention to detail to ensure the door is detached safely and efficiently. Follow these steps to remove the oven door:
-
Open the Door to the Broil Position: Before removing the door, ensure that the oven is turned off and cool. Open the door to the broil position, which is typically halfway open, to access the hinges.
-
Locate the Hinge Latches: On each hinge, there are latches that secure the door to the hinge. These latches need to be unlocked before the door can be removed. Depending on the oven model, the latches may be in the form of small levers or clips.
-
Engage the Hinge Locks: Once the latches are located, use a flat-head screwdriver or a similar tool to flip them open. This action disengages the hinge locks, allowing the door to be lifted off the hinges.
-
Lift the Door Off the Hinges: With the latches disengaged, carefully lift the oven door upwards to release it from the hinges. It's advisable to have a second person assist with this step to ensure the door is lifted evenly and securely.
-
Place the Door in a Safe Location: Once the door is removed, place it on a soft, padded surface to prevent scratches or damage. This will also provide a stable and safe working area for the subsequent steps in the glass replacement process.
By following these steps, you can safely remove the oven door, setting the stage for the subsequent disassembly and glass replacement procedures. It's important to handle the door with care and attention to avoid any accidental damage or injury during this process. With the door successfully removed, you are now ready to proceed to the next phase of disassembling the door components in preparation for glass replacement.
Read more: How To Replace Glass In Storm Door
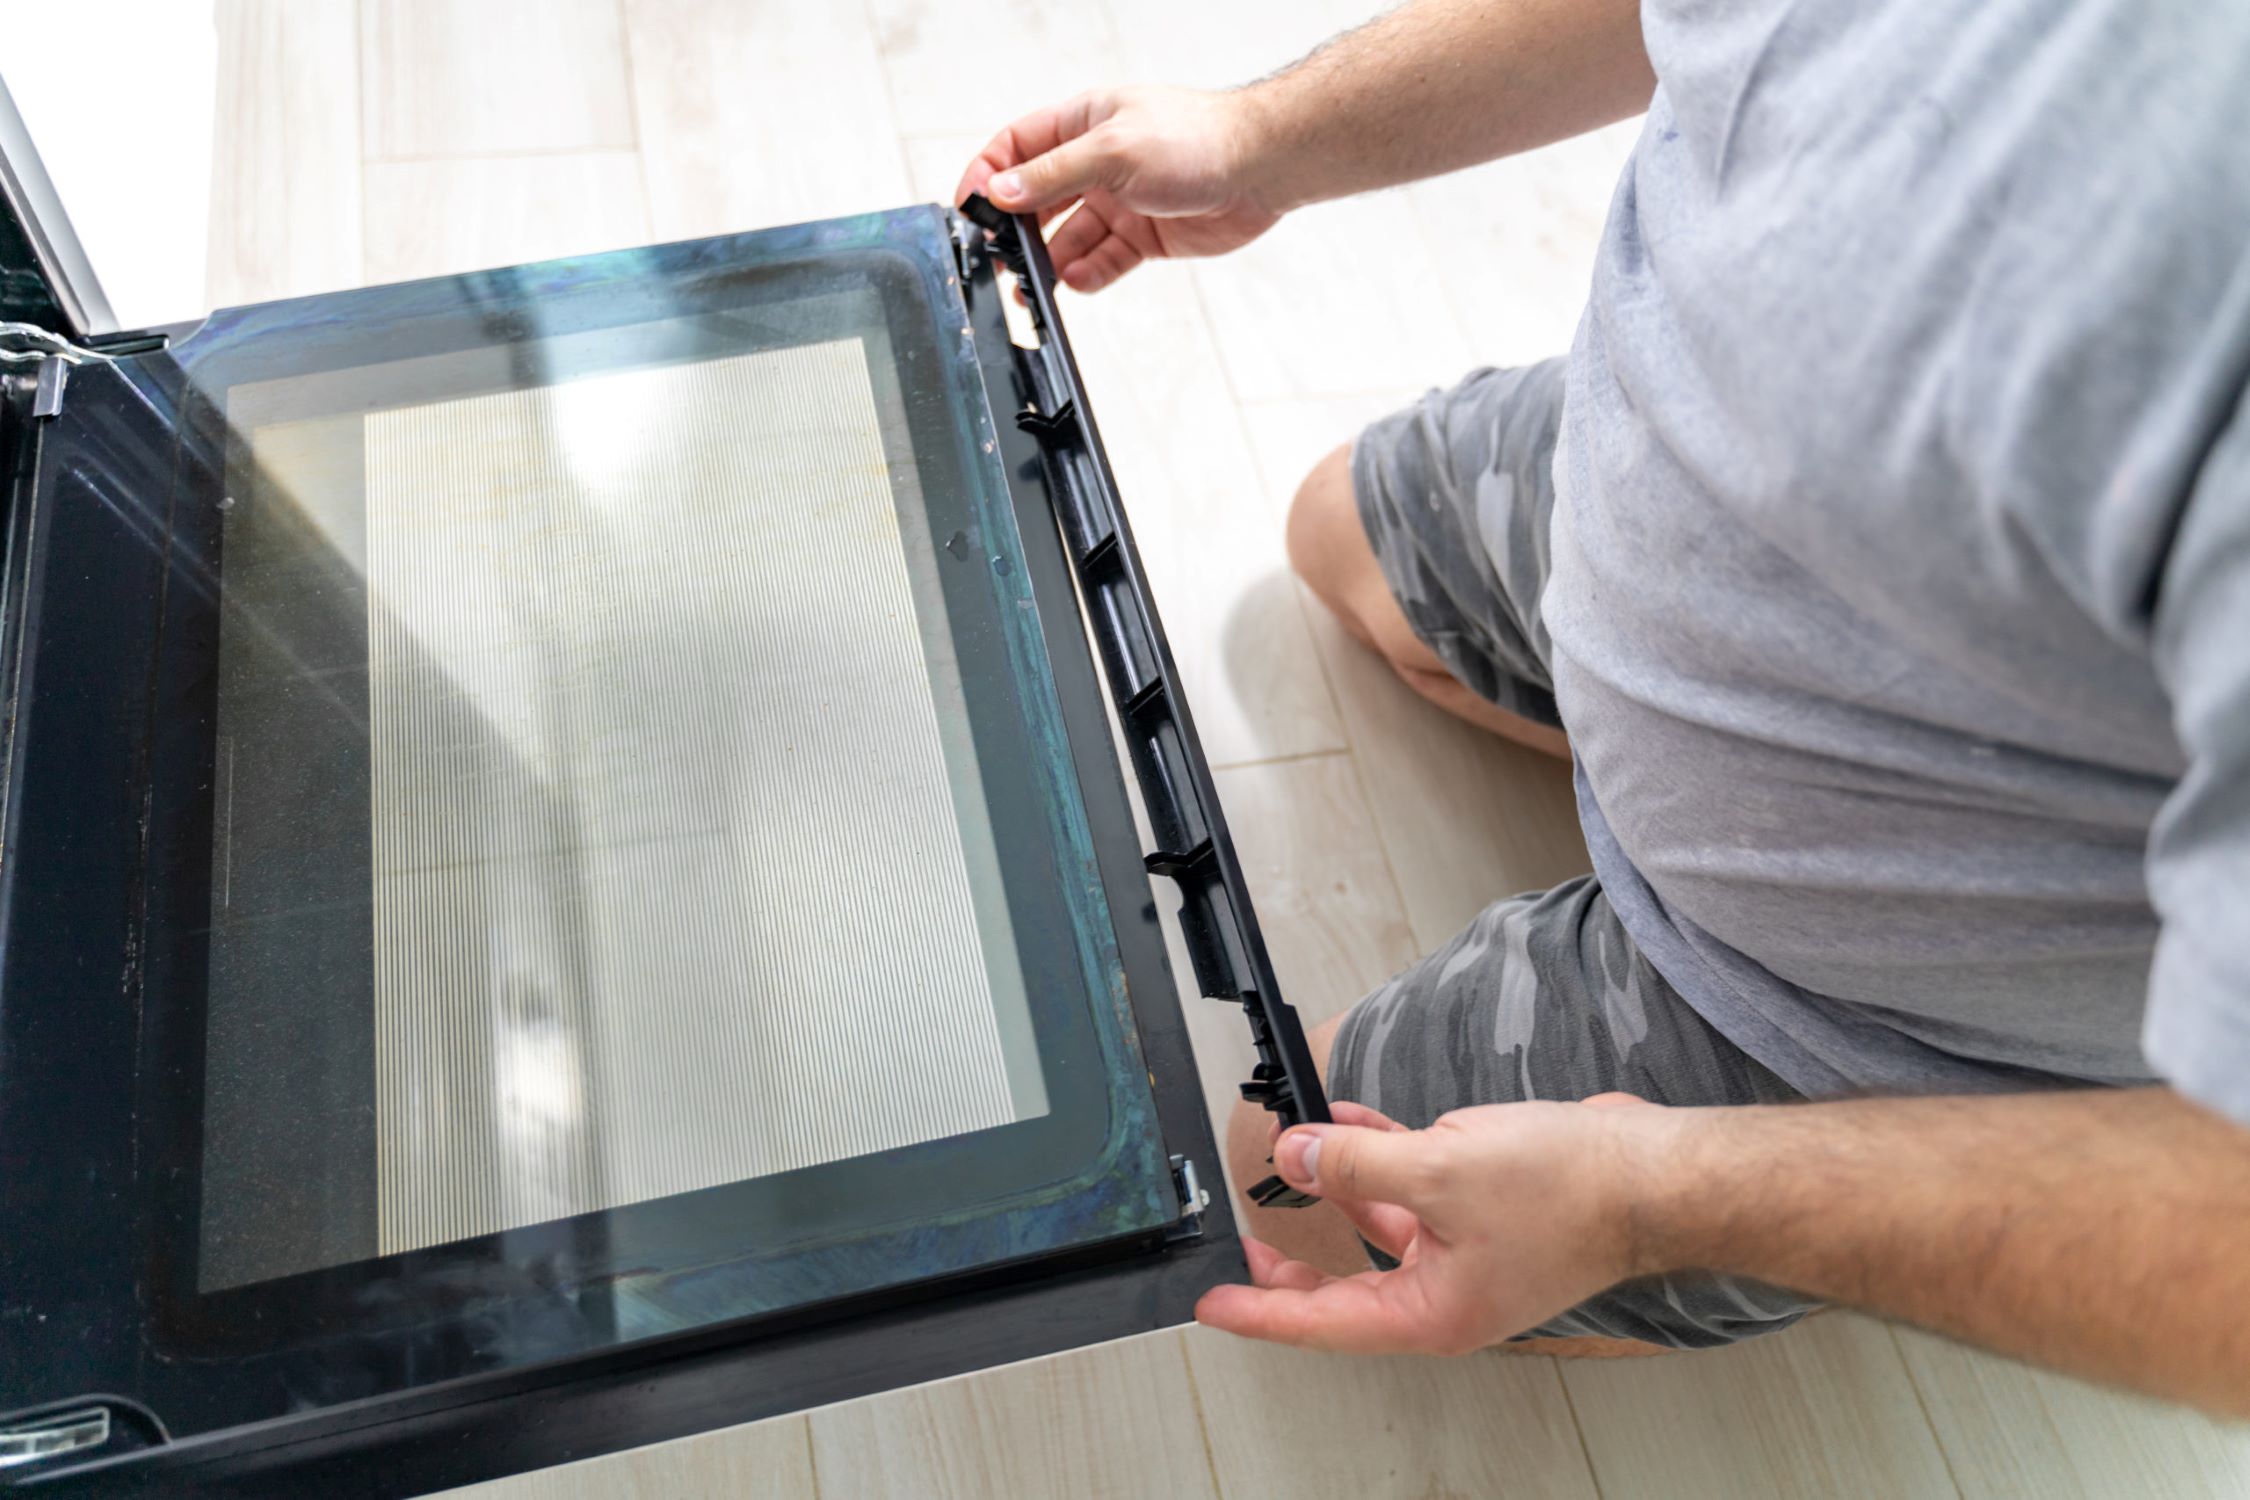
Step 3: Disassemble the Door
Disassembling the oven door is a critical phase in the process of replacing the glass. This step requires precision and attention to detail to ensure that the door components are carefully separated, allowing access to the broken glass for safe removal. Follow these detailed steps to disassemble the oven door:
-
Identify the Door Latches and Hinge Pins: Before proceeding with disassembly, it's essential to identify the specific latches and hinge pins that hold the door components together. These latches and pins are typically located on the sides of the door and play a crucial role in securing the panels.
-
Release the Latches and Remove the Hinge Pins: Using a flat-head screwdriver or a similar tool, carefully release the latches securing the door panels. Once the latches are disengaged, proceed to remove the hinge pins by gently tapping them out with a hammer and a small punch. It's important to exercise caution during this step to prevent damage to the pins and surrounding components.
-
Separate the Inner and Outer Panels: With the latches and hinge pins removed, carefully separate the inner and outer panels of the door. Take note of the orientation and arrangement of the panels to ensure proper reassembly later. It's advisable to have a clean and spacious work area to lay out the panels systematically.
-
Remove the Insulation and Glass Retainer: Upon separating the panels, you will likely encounter insulation material and a glass retainer securing the broken glass. Carefully remove the insulation, taking note of its placement for reinstallation. Then, proceed to extract the glass retainer, ensuring that it is detached without causing damage to the surrounding components.
-
Extract the Broken Glass: With the insulation and glass retainer removed, carefully extract the broken glass from the door. Exercise caution to avoid any contact with sharp edges or fragments. It's advisable to wear protective gloves and safety goggles during this step to minimize the risk of injury.
-
Clean and Inspect the Door Components: Once the broken glass is removed, take the opportunity to clean and inspect the door components thoroughly. Remove any residual glass particles and debris, and assess the condition of the panels and other elements. This inspection will help identify any additional maintenance or replacement needs before reassembly.
By meticulously following these steps, you can effectively disassemble the oven door, paving the way for the safe removal of the broken glass and the subsequent installation of the new glass. It's essential to approach this phase with patience and precision to ensure that the door components are handled with care and attention to detail. With the door disassembled, you are now prepared to proceed to the pivotal stage of installing the new glass and reassembling the door for seamless functionality.
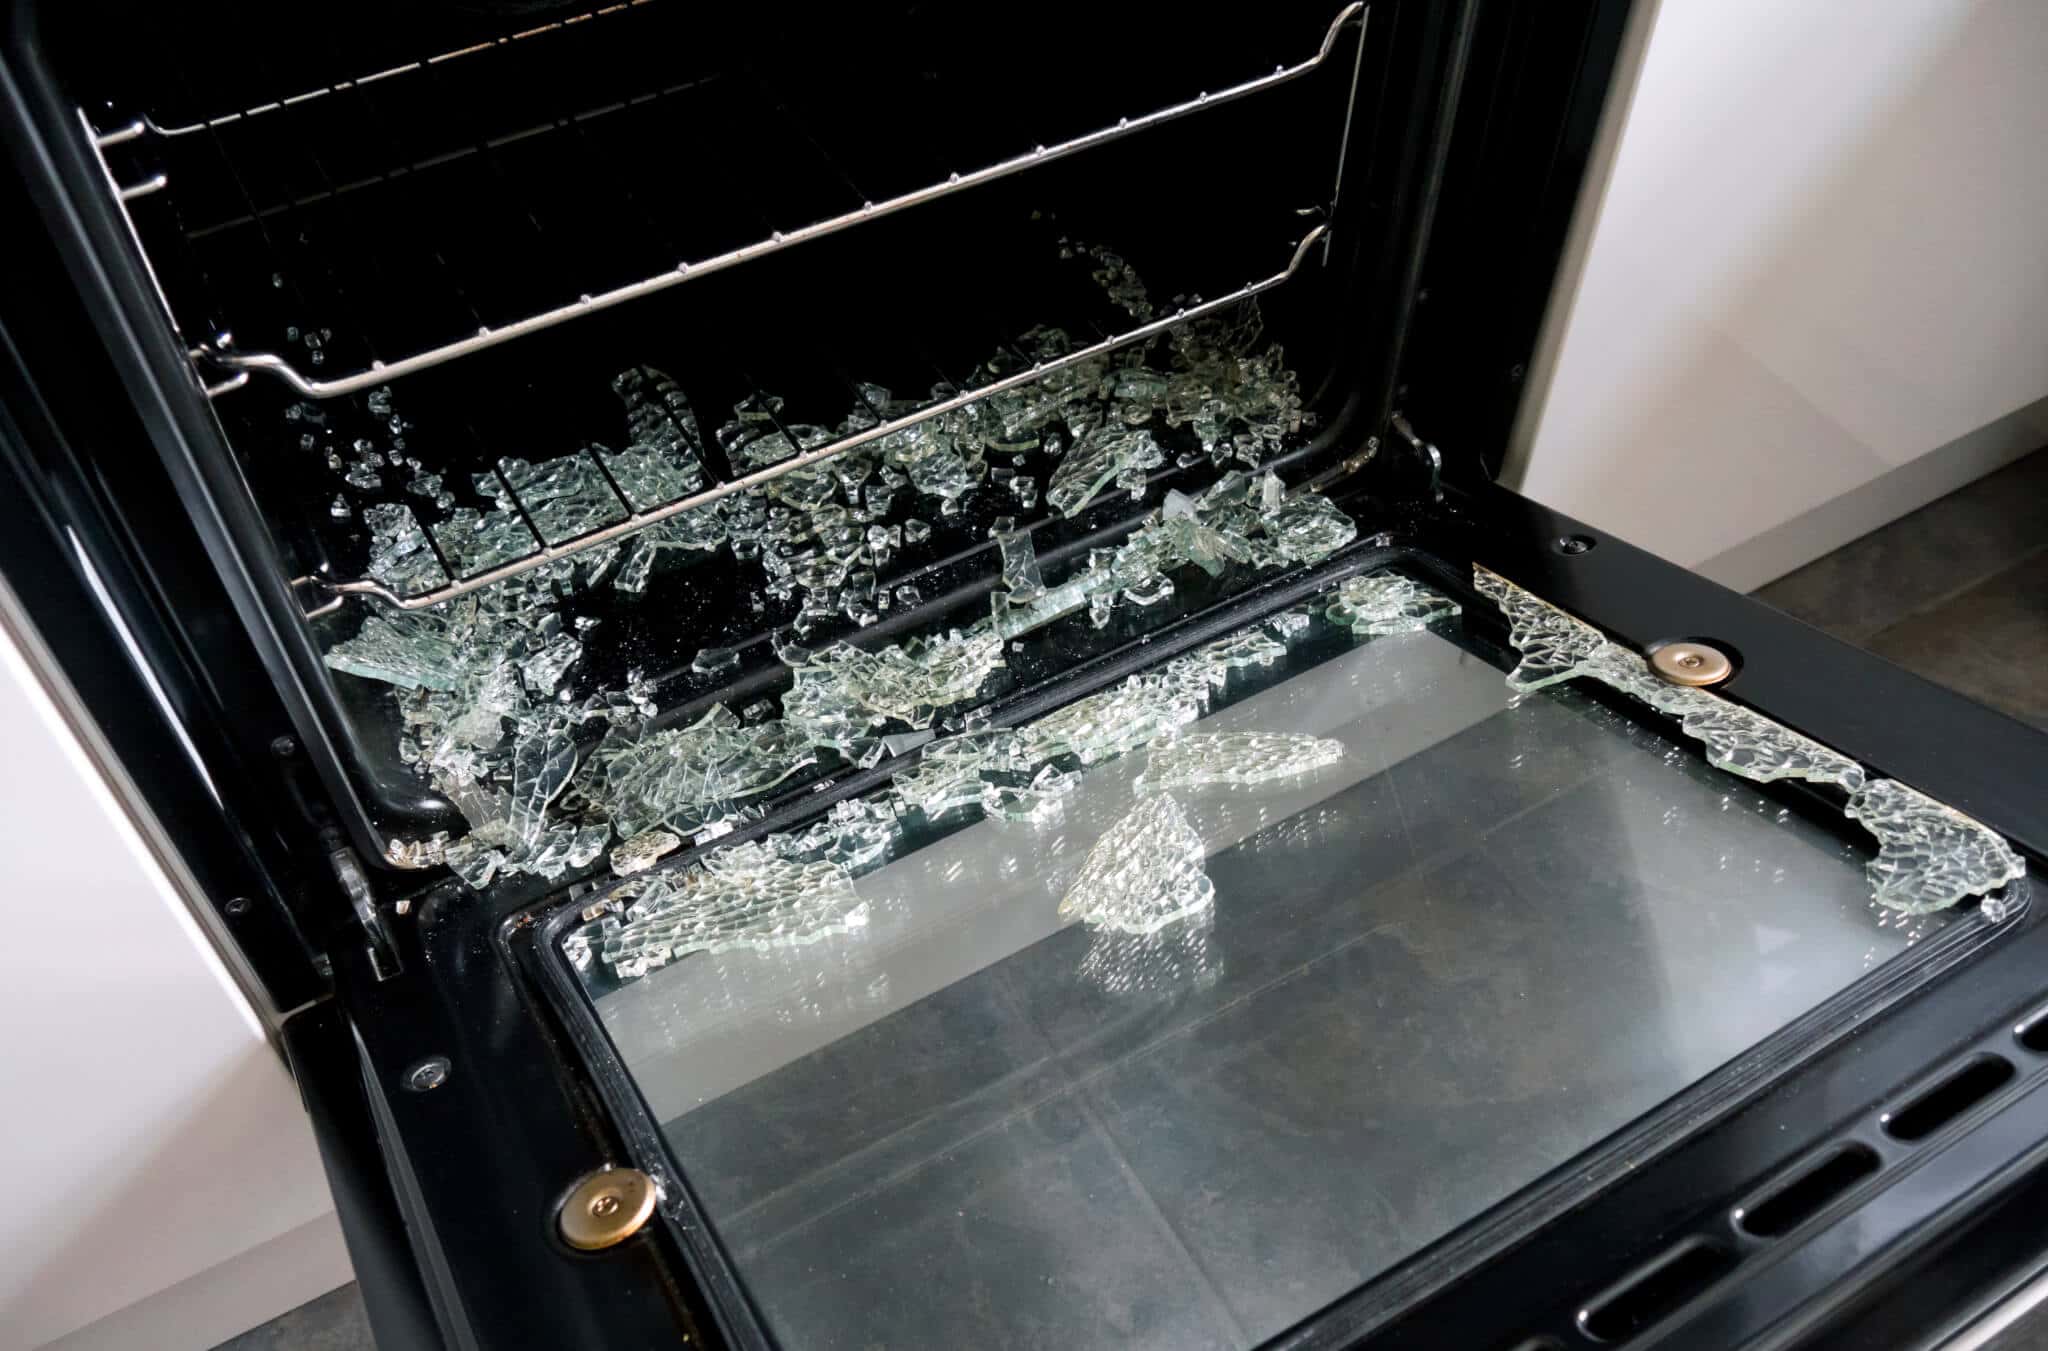
Step 4: Remove the Broken Glass
With the oven door disassembled, the next critical step is to safely remove the broken glass from the door. This process requires careful handling and attention to detail to minimize the risk of injury and ensure that all glass fragments are extracted without causing damage to the surrounding components.
-
Wear Protective Gear: Before proceeding, it's essential to prioritize safety by wearing protective gloves and safety goggles. These precautions will safeguard your hands and eyes from any sharp edges or glass particles during the removal process.
-
Inspect the Glass Retainer: Take a moment to inspect the glass retainer and its attachment points within the door. Depending on the oven model, the retainer may be secured by clips, screws, or other fastening mechanisms. Identify the specific method of attachment to facilitate the safe removal of the retainer.
-
Carefully Remove the Glass Retainer: Using the appropriate tools, such as a screwdriver or pliers, carefully remove the fasteners securing the glass retainer. Exercise caution to prevent any damage to the retainer or surrounding components. Once the fasteners are detached, gently lift out the glass retainer, ensuring that it is maneuvered out of the door without causing any unnecessary strain on the remaining glass fragments.
-
Extract the Broken Glass: With the glass retainer removed, the broken glass should be accessible within the door assembly. Carefully lift out the broken glass, taking note of any sharp edges or protruding fragments. It's crucial to handle the glass with extreme care to avoid any accidental cuts or injuries.
-
Dispose of the Broken Glass: Once the broken glass is safely removed from the door, it should be disposed of responsibly. Place the broken glass in a sturdy container, ensuring that it is securely sealed to prevent any accidental contact. Depending on local regulations, the broken glass may need to be disposed of at a designated facility to ensure proper handling and recycling.
-
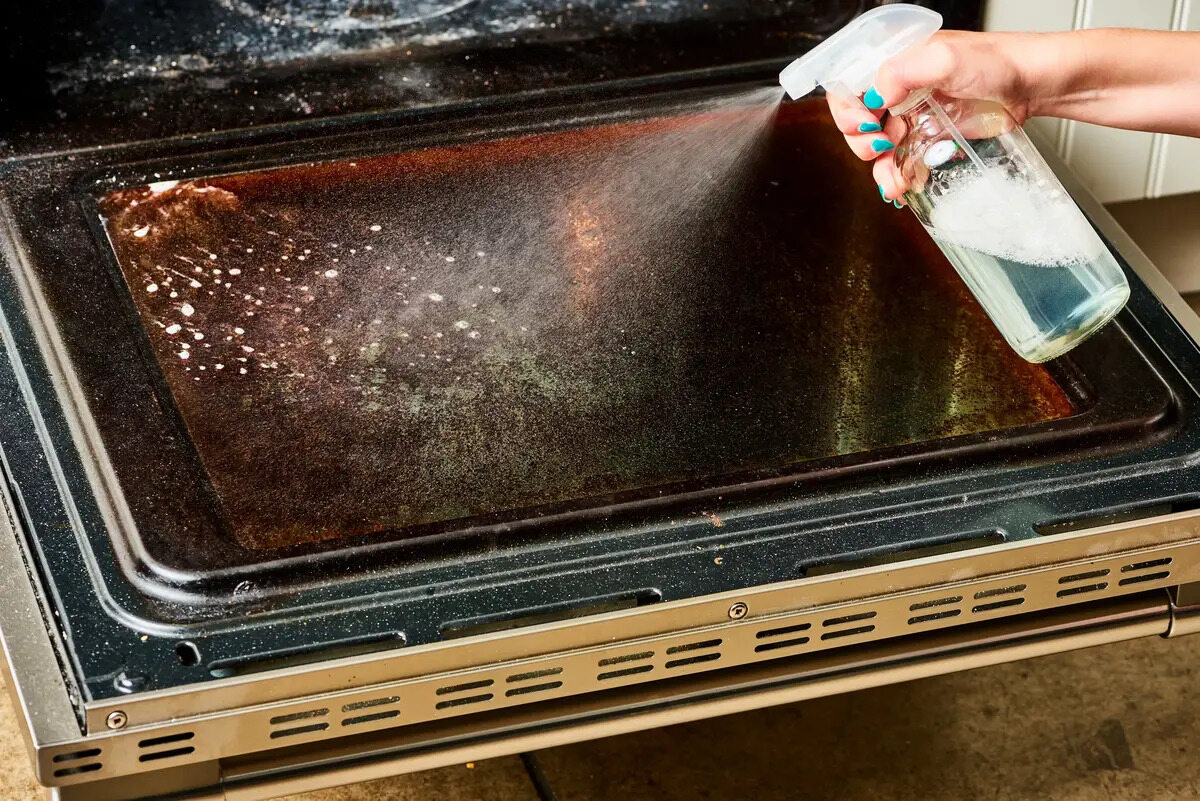
Clean the Door Interior: After the broken glass is extracted, take the opportunity to clean the interior of the door thoroughly. Remove any residual glass particles, debris, or dust to prepare the door for the installation of the new glass. A soft cloth and a mild cleaning solution can be used to ensure that the door interior is free from any remnants of the broken glass.
By meticulously following these steps, you can safely remove the broken glass from the oven door, setting the stage for the pivotal phase of installing the new glass. It's essential to approach this process with patience and attention to detail to ensure a smooth transition to the subsequent installation and reassembly steps.
Step 5: Install the New Glass
With the broken glass safely removed and the door components meticulously cleaned and inspected, the installation of the new glass marks a pivotal phase in the process of rejuvenating the oven door. This step requires precision and attention to detail to ensure that the new glass is securely and accurately positioned within the door assembly. Follow these detailed steps to install the new glass:
-
Prepare the New Glass: Before proceeding with the installation, carefully inspect the new glass to ensure that it is free from any defects or damage. Verify that the dimensions of the replacement glass match the specifications of the original glass to guarantee a precise fit. Additionally, clean the new glass with a mild glass cleaner to remove any fingerprints or residues, ensuring a pristine surface for installation.
-
Position the Glass Retainer: Place the glass retainer, which was removed during the disassembly process, in the designated position within the door assembly. Ensure that the retainer aligns with the edges of the door and that any fastening mechanisms, such as clips or screws, are ready for securing the new glass.
-
Carefully Place the New Glass: With the assistance of another person, if available, carefully position the new glass within the door assembly. Align the edges of the glass with the corresponding grooves or channels in the door panels, ensuring a snug and secure fit. Exercise caution to prevent any unnecessary pressure or impact on the glass during this process.
-
Secure the Glass Retainer: Once the new glass is positioned correctly, proceed to secure the glass retainer in place. Depending on the specific design of the door, use the appropriate fasteners, such as screws or clips, to firmly hold the glass in position. Ensure that the retainer is evenly and securely attached to prevent any movement or instability of the new glass.
-
Inspect and Clean the Glass: After the new glass is installed and secured, take a moment to inspect it for any smudges, residues, or imperfections. Use a clean, lint-free cloth and a mild glass cleaner to gently wipe the surface of the glass, ensuring that it is free from any blemishes or marks. This final cleaning step will enhance the visual appeal of the oven door and provide a clear view of the oven interior.
By meticulously following these steps, you can successfully install the new glass, bringing the oven door one step closer to complete restoration. It's essential to approach this phase with care and precision to ensure that the new glass is seamlessly integrated into the door assembly, setting the stage for the subsequent reassembly and reinstallation of the door.
When replacing oven door glass, make sure to wear gloves to protect your hands from any sharp edges. Carefully remove the screws and old glass, then place the new glass in and secure it with the screws.
Step 6: Reassemble the Door
With the new glass securely installed, the reassembly of the oven door is a pivotal phase that brings together the meticulously disassembled components into a cohesive and functional unit. This step requires patience, attention to detail, and a methodical approach to ensure that the door is reassembled accurately and securely. Follow these detailed steps to reassemble the oven door:
-
Position the Inner and Outer Panels: Begin by aligning the inner and outer panels of the door, taking care to match the orientation and arrangement observed during the disassembly process. Ensure that any insulation material is correctly positioned between the panels to provide thermal insulation and structural support.
-
Reattach the Hinge Pins: With the panels aligned, proceed to reattach the hinge pins to secure the inner and outer panels together. Gently tap the hinge pins into place using a hammer and a small punch, ensuring that they are firmly seated and provide stability to the door structure.
-
Engage the Door Latches: Once the hinge pins are in place, engage the door latches to secure the panels together. Depending on the specific design of the door, this may involve flipping levers or clips to lock the panels in position. Verify that the latches are securely fastened to prevent any movement or separation of the panels.
-
Install the Handle and Hardware: If the door features a handle or additional hardware components, carefully reinstall these elements according to the manufacturer's specifications. Use the appropriate tools, such as screwdrivers or pliers, to secure the handle and hardware, ensuring that they are firmly attached and functional.
-
Inspect and Test the Reassembled Door: Once the door components are reassembled, take a moment to inspect the door for any misalignments or irregularities. Test the functionality of the door by gently opening and closing it to ensure smooth operation and proper alignment. Address any issues or adjustments as needed to guarantee optimal performance.
By meticulously following these steps, you can effectively reassemble the oven door, bringing together the components in a cohesive and secure manner. It's essential to approach this phase with precision and attention to detail to ensure that the door functions seamlessly and provides a safe and reliable enclosure for the oven interior. With the door successfully reassembled, you are now prepared to proceed to the final step of reattaching the door to the oven, completing the comprehensive process of replacing the oven door glass.
Read more: How To Replace Glass In French Door
Step 7: Reattach the Door to the Oven
Reattaching the oven door is the final and crucial step in completing the replacement of the glass. This process requires careful handling and attention to detail to ensure that the door is securely and accurately reinstalled, restoring the functionality and aesthetic appeal of the oven. Follow these detailed steps to reattach the door to the oven:
-
Align the Hinges: Position the oven door in front of the oven opening, aligning the hinges on the door with the hinge slots on the oven. Ensure that the door is oriented correctly and that the hinges are poised to engage with the slots securely.
-
Engage the Hinges: With the assistance of another person, if available, carefully lift the door and align the hinges with the slots on the oven. Once aligned, lower the door to engage the hinges with the slots, ensuring a snug and secure fit. It's essential to handle the door with care to prevent any damage to the hinges or the oven structure.
-
Secure the Hinge Latches: Once the door is in position, engage the hinge latches to lock the hinges in place. Depending on the oven model, this may involve flipping levers or clips to secure the hinges. Verify that the latches are firmly engaged to prevent any movement or dislodging of the door.
-
Test the Door Operation: After reattaching the door, test its operation by gently opening and closing it to ensure smooth movement and proper alignment. Verify that the door closes securely and forms a tight seal with the oven, promoting efficient heat retention and optimal cooking conditions.
-
Verify the Seal: Inspect the perimeter of the door to ensure that it forms a consistent and tight seal with the oven when closed. A proper seal is essential for maintaining the internal temperature of the oven and ensuring energy-efficient operation.
By meticulously following these steps, you can successfully reattach the oven door, completing the comprehensive process of replacing the oven door glass. It's essential to approach this phase with patience and attention to detail to ensure that the door is securely installed and functions seamlessly within the oven structure. With the door reattached, you have rejuvenated your oven and created a safe and visually appealing cooking environment for your culinary endeavors.
Conclusion
Congratulations on successfully replacing the glass on your oven door! By following this comprehensive guide, you have not only restored the functionality and aesthetic appeal of your oven but also demonstrated the ability to tackle a challenging DIY project with confidence and precision. The process of replacing the oven door glass may have initially seemed daunting, but your proactive approach and attention to detail have resulted in a rewarding outcome.
As you reflect on the journey of disassembling the door, safely removing the broken glass, and meticulously installing the new glass, you have gained valuable insights into the inner workings of your oven. This hands-on experience has not only empowered you to address a specific repair but has also deepened your understanding of the appliance, fostering a sense of ownership and connection.
Beyond the tangible results of a rejuvenated oven, this DIY endeavor has instilled a sense of accomplishment and self-reliance. By embracing the challenge and navigating each step with determination, you have expanded your skill set and proven your ability to overcome obstacles in the realm of home maintenance and repair.
Furthermore, the cost-saving aspect of this DIY approach cannot be overlooked. By taking the initiative to replace the oven door glass yourself, you have avoided the expenses associated with professional repairs or replacements. This proactive approach not only saves money but also fosters a sense of resourcefulness and independence in managing household maintenance tasks.
As you admire the newly installed glass on your oven door, take pride in the knowledge that you have enhanced the safety and functionality of a vital kitchen appliance. Your commitment to maintaining and improving your living space has not gone unnoticed, and the skills you have honed through this project will continue to serve you well in future DIY endeavors.
In closing, the successful replacement of the oven door glass stands as a testament to your determination, attention to detail, and willingness to embrace new challenges. As you enjoy the fruits of your labor in a revitalized kitchen environment, may this experience inspire and embolden you to embark on future DIY projects with the same enthusiasm and confidence. Cheers to your newfound expertise and the transformative power of a well-executed DIY repair!
Frequently Asked Questions about How To Replace Oven Door Glass
Was this page helpful?
At Storables.com, we guarantee accurate and reliable information. Our content, validated by Expert Board Contributors, is crafted following stringent Editorial Policies. We're committed to providing you with well-researched, expert-backed insights for all your informational needs.


0 thoughts on “How To Replace Oven Door Glass”