Home>Furniture & Design>Interior Design Trends>How To Replace Glass In Storm Door

Interior Design Trends
How To Replace Glass In Storm Door
Modified: August 27, 2024
Learn how to replace glass in a storm door and stay updated with the latest interior design trends. Find expert tips and advice for a stylish home.
(Many of the links in this article redirect to a specific reviewed product. Your purchase of these products through affiliate links helps to generate commission for Storables.com, at no extra cost. Learn more)
Introduction
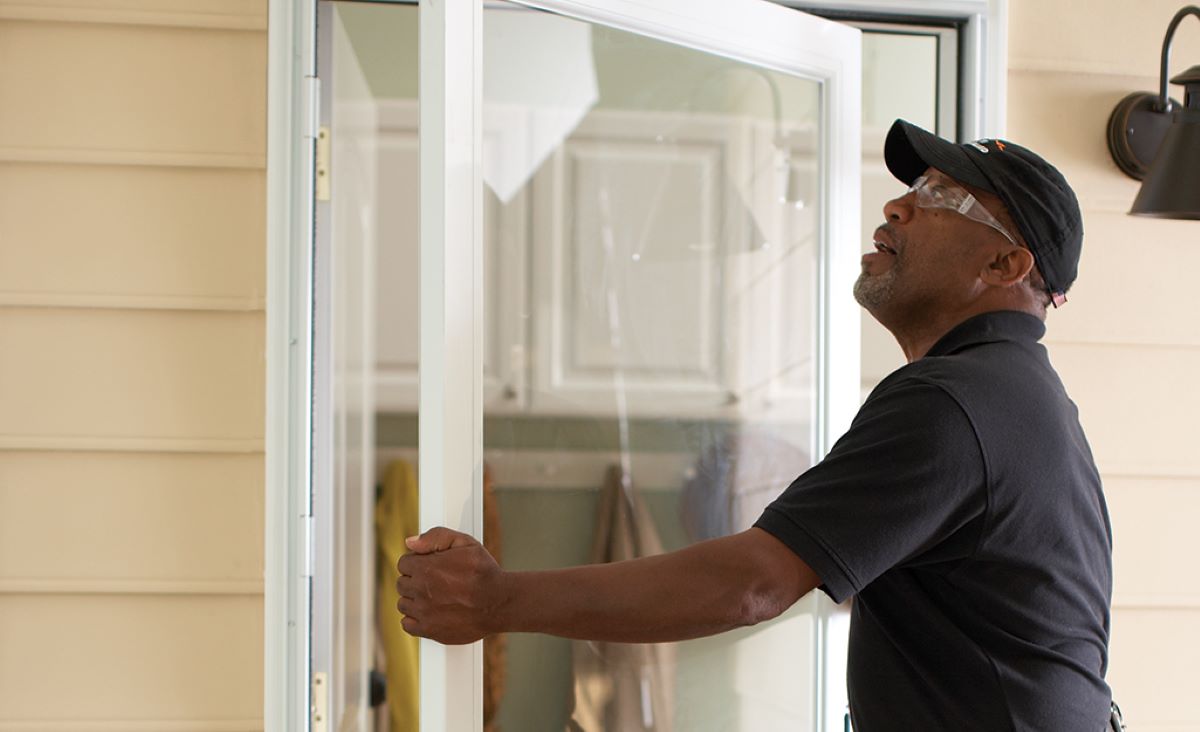
Replacing the glass in a storm door can breathe new life into your home's exterior, enhancing its aesthetic appeal and functionality. Whether the glass has been damaged, is outdated, or no longer meets your needs, this simple yet impactful upgrade can make a significant difference. By following a few straightforward steps and using the right tools and materials, you can successfully replace the glass in your storm door, giving it a fresh, polished look.
A storm door serves as a protective barrier against the elements, providing an additional layer of insulation and security for your home. The glass in a storm door plays a crucial role in maintaining a comfortable indoor environment while allowing natural light to filter through. Over time, wear and tear, inclement weather, or accidental damage can compromise the integrity of the glass, necessitating its replacement.
By taking on the task of replacing the glass in your storm door, you not only save on the cost of hiring a professional but also gain a sense of accomplishment and ownership in maintaining your home. This DIY project allows you to tailor the replacement glass to your specific preferences, whether it's choosing a different type of glass for improved energy efficiency or updating the design to complement your home's exterior.
As you embark on this project, it's essential to approach it with a methodical mindset and attention to detail. By understanding the necessary steps and acquiring the right tools and materials, you can ensure a smooth and successful glass replacement process. Additionally, prioritizing safety measures throughout the project is paramount to protect yourself from potential hazards associated with handling glass and using tools.
In the following sections, we will guide you through the step-by-step process of replacing the glass in your storm door, from removing the old glass to installing the new one. By the end of this comprehensive guide, you will have the knowledge and confidence to transform your storm door with a fresh, new glass panel, elevating both its functionality and visual appeal.
Key Takeaways:
- Replacing the glass in a storm door is a DIY project that can save money and add a personal touch to your home. With the right tools and careful steps, you can upgrade your door’s appearance and functionality.
- When choosing replacement glass, consider factors like energy efficiency, safety, and aesthetic appeal. Taking precise measurements and following safety precautions during installation will ensure a successful and long-lasting upgrade.
Read more: How To Replace A Storm Door Handle
Tools and Materials Needed
Before embarking on the task of replacing the glass in your storm door, it's essential to gather the necessary tools and materials to ensure a smooth and efficient process. Here's a comprehensive list of what you'll need:
Tools:
- Safety Glasses and Gloves: Protect your eyes and hands from glass shards and sharp edges.
- Screwdriver Set: To remove screws and hardware securing the old glass.
- Putty Knife: Useful for prying off trim and old sealant.
- Measuring Tape: For accurately measuring the dimensions of the existing glass panel.
- Caulk Gun: To apply new sealant during the installation of the replacement glass.
- Utility Knife: For cutting and trimming sealant and insulation.
- Glazier Points: Small metal pieces used to secure the glass in the door frame.
- Hammer: For gently tapping in glazier points and removing old glass.
Materials:
- Replacement Glass: Ensure it matches the dimensions and thickness of the original glass.
- Glazing Compound or Silicone Caulk: To seal the new glass into the door frame.
- Glazier Points: If not included with the replacement glass, purchase these to secure the new glass.
- Painter's Tape: For protecting the door frame and surrounding areas during the glass replacement process.
- Mineral Spirits: To clean the door frame and remove any residual adhesive or sealant.
- Safety Glasses and Gloves: Protect your eyes and hands from glass shards and sharp edges.
- Screwdriver Set: To remove screws and hardware securing the old glass.
- Putty Knife: Useful for prying off trim and old sealant.
- Measuring Tape: For accurately measuring the dimensions of the existing glass panel.
- Caulk Gun: To apply new sealant during the installation of the replacement glass.
- Utility Knife: For cutting and trimming sealant and insulation.
- Glazier Points: Small metal pieces used to secure the glass in the door frame.
- Hammer: For gently tapping in glazier points and removing old glass.
Gathering these tools and materials before starting the glass replacement process will ensure that you have everything you need to complete the project efficiently and safely. With the right equipment at your disposal, you can proceed with confidence, knowing that you are well-prepared to tackle each step of the replacement process.
Removing the Old Glass
Removing the old glass from your storm door is a critical initial step in the glass replacement process. It requires careful attention to detail and a methodical approach to ensure the safe removal of the existing glass panel without causing damage to the door frame or surrounding areas. Here's a detailed guide on how to effectively remove the old glass from your storm door:
-
Prepare the Work Area: Before starting, ensure that the work area is clear of any obstructions and that you have ample space to maneuver around the door. Lay down a protective covering, such as a drop cloth, to catch any glass shards or debris that may fall during the removal process.
-
Remove the Door from the Hinges: If possible, take the storm door off its hinges and lay it flat on a stable surface. This will make the glass removal process more manageable and reduce the risk of accidental breakage.
-
Unscrew the Retaining Strips or Trim: Using a screwdriver, carefully remove any retaining strips or trim that secure the glass in place. These may be located on the interior or exterior side of the door frame. Take note of the placement and orientation of each piece for easy reassembly later.
-
Extract the Old Glass: Once the retaining strips or trim are removed, gently push the old glass panel from the frame. Exercise caution to avoid applying excessive force that could lead to breakage. If the glass is held in place by adhesive or sealant, carefully use a putty knife to loosen the bond and ease the glass out of the frame.
-
Dispose of the Old Glass Safely: After successfully removing the old glass, handle it with care to prevent injuries from sharp edges. Place the old glass in a sturdy container or wrap it in heavy-duty paper or cloth before disposing of it in accordance with local regulations.
-
Clean the Door Frame: With the old glass removed, take the opportunity to clean the door frame thoroughly. Remove any residual adhesive, sealant, or debris using a utility knife and mineral spirits. This will ensure a clean and smooth surface for installing the new glass.
By following these steps, you can safely and effectively remove the old glass from your storm door, setting the stage for the next phase of the glass replacement process. Taking the time to execute this step with care and precision will contribute to the overall success of the project, allowing you to proceed confidently to the next stage of the glass replacement process.
Read more: How To Replace Glass In A Door
Measuring for the New Glass
Accurate measurements are crucial when preparing to install a new glass panel in your storm door. Taking precise measurements ensures that the replacement glass will fit seamlessly into the door frame, providing a secure and weather-tight seal. Here's a detailed guide on how to measure for the new glass:
-
Assess the Door Frame: Begin by examining the door frame to determine the exact dimensions of the space where the glass panel will be installed. Use a measuring tape to record the width and height of the opening, taking measurements at multiple points to account for any variations in the frame.
-
Consider Glass Thickness: Take note of the thickness of the original glass or the depth of the channel where the glass sits. This information is essential when selecting the replacement glass to ensure a proper fit within the door frame.
-
Account for Clearances: Measure the clearances around the edges of the door frame to determine the amount of space available for the new glass. It's important to factor in any allowances for expansion and contraction due to temperature variations, as well as clearance for the glass to fit comfortably without rubbing against the frame.
-
Check for Squareness: Verify that the door frame is square by measuring the diagonals from corner to corner. If the measurements are equal, the frame is square. If not, take note of the variation to ensure that the replacement glass accommodates any non-square aspects of the frame.
-
Document the Measurements: Record the precise measurements of the width, height, and thickness of the space for the new glass panel. It's advisable to double-check the measurements to ensure accuracy before proceeding to acquire the replacement glass.
-
Consult a Professional: If you encounter challenges or uncertainties during the measuring process, consider seeking guidance from a professional glass supplier or installer. They can provide valuable insights and expertise to ensure that the replacement glass is tailored to the specific requirements of your storm door.
By meticulously measuring the space for the new glass panel, you lay the foundation for a successful installation process. Accurate measurements enable you to select the right replacement glass and proceed with confidence, knowing that it will seamlessly integrate into your storm door, restoring its functionality and visual appeal.
Choosing the Right Replacement Glass
Selecting the appropriate replacement glass for your storm door is a pivotal decision that directly impacts the door's functionality, energy efficiency, and overall aesthetic. When choosing the right replacement glass, several factors come into play, each influencing the door's performance and your satisfaction with the end result.
Consider Energy Efficiency
Opting for energy-efficient glass can contribute to maintaining a comfortable indoor environment while potentially reducing heating and cooling costs. Low-emissivity (Low-E) glass, for instance, features a microscopically thin coating that helps control the transfer of heat and UV rays, enhancing insulation and minimizing the fading of interior furnishings. Additionally, double or triple-pane glass with insulating gas fills can further improve energy efficiency by providing enhanced thermal insulation.
Evaluate Safety and Security
Prioritizing safety and security is paramount when selecting replacement glass for your storm door. Consider tempered or laminated glass options, both of which are designed to enhance safety by reducing the risk of breakage and minimizing the potential for injury in the event of impact. Tempered glass, in particular, is heat-treated to increase its strength and shatter into small, granular pieces upon breakage, reducing the likelihood of sharp edges and serious injuries.
Explore Decorative and Functional Options
Beyond practical considerations, replacement glass offers an opportunity to enhance the visual appeal and functionality of your storm door. Consider decorative glass options, such as frosted, patterned, or textured glass, to add a touch of elegance and privacy to your entryway. Additionally, if ventilation is a priority, consider incorporating glass panels that can be opened or adjusted to allow airflow while maintaining security.
Match the Aesthetic of Your Home
Harmonizing the replacement glass with the architectural style and color scheme of your home is essential for achieving a cohesive and visually appealing exterior. Whether your home features a traditional, contemporary, or transitional design, selecting replacement glass that complements the existing aesthetic can elevate the overall curb appeal and create a unified look that enhances the home's exterior.
Seek Professional Guidance
If you're uncertain about which replacement glass option best suits your needs, consulting with a professional glass supplier or installer can provide valuable insights and recommendations. These experts can assess your specific requirements, offer guidance on glass types and features, and ensure that the replacement glass aligns with your preferences and budget.
By carefully considering these factors and exploring the diverse range of replacement glass options available, you can make an informed decision that aligns with your priorities and enhances the functionality and visual appeal of your storm door. The right replacement glass has the potential to elevate your home's exterior, improve energy efficiency, and provide lasting value for years to come.
Installing the New Glass
With the old glass successfully removed and the precise measurements recorded, it's time to proceed with the installation of the new glass panel in your storm door. This phase of the glass replacement process requires attention to detail and a methodical approach to ensure a secure and weather-tight fit. Here's a comprehensive guide on how to effectively install the new glass:
-
Prepare the Replacement Glass: Before installing the new glass, thoroughly clean and inspect it to ensure that it is free from any defects or damage. Verify that the dimensions and thickness of the replacement glass align with the measurements taken from the door frame, providing a precise fit.
-
Apply Sealant or Glazing Compound: Using a caulking gun, apply a thin, continuous bead of glazing compound or silicone caulk along the inner edge of the door frame where the replacement glass will be positioned. This sealant will create a weather-resistant barrier and secure the glass in place.
-
Position the Replacement Glass: Carefully place the replacement glass into the prepared opening in the door frame, ensuring that it fits snugly and aligns with the edges of the frame. Exercise caution to avoid applying excessive pressure that could potentially crack or damage the glass.
-
Secure the Glass with Glazier Points: To firmly secure the replacement glass in the door frame, gently press glazier points into the wood around the perimeter of the glass. These small metal pieces provide additional support and prevent the glass from shifting or rattling within the frame.
-
Trim Excess Sealant: Using a putty knife or a utility knife, carefully trim any excess sealant or glazing compound that may have squeezed out around the edges of the replacement glass. This step ensures a clean and professional finish while maintaining a secure seal.
-
Reinstall Retaining Strips or Trim: If the storm door features retaining strips or trim, carefully reattach them using the appropriate screws or fasteners. Ensure that the trim is securely in place, holding the replacement glass firmly within the frame.
-
Inspect and Clean: Once the replacement glass is installed and secured, inspect the door frame to ensure that the glass is properly positioned and that the sealant is evenly distributed. Clean any smudges or excess sealant from the glass surface using a glass cleaner and a lint-free cloth.
By following these steps, you can successfully install the new glass panel in your storm door, revitalizing its functionality and visual appeal. The meticulous execution of each step ensures a secure and weather-resistant fit, providing long-lasting benefits for your home's exterior. With the new glass in place, your storm door will not only regain its protective and aesthetic qualities but also contribute to the overall comfort and efficiency of your living space.
Read more: How To Paint A Storm Door
Finishing Touches and Safety Precautions
After successfully installing the new glass panel in your storm door, it's essential to attend to the finishing touches that will ensure the longevity and visual appeal of the replacement. Additionally, prioritizing safety precautions throughout the final stages of the glass replacement process is crucial to safeguard yourself and maintain a secure environment. Here's a detailed overview of the finishing touches and safety precautions to consider:
Apply a Protective Sealant
To enhance the durability and weather resistance of the newly installed glass, consider applying a protective sealant around the edges of the door frame. A high-quality exterior-grade sealant or caulk can provide an additional barrier against moisture infiltration and help prevent air leaks, contributing to the overall energy efficiency of the storm door.
Inspect and Adjust Hardware
Take the time to inspect and adjust the hardware components of the storm door, including hinges, handles, and latches. Ensure that all fasteners are securely tightened and that the door operates smoothly without any binding or misalignment. Properly functioning hardware not only enhances the door's performance but also contributes to its overall security.
Test for Proper Operation
After completing the glass replacement process, thoroughly test the storm door to ensure that it opens, closes, and latches securely. Verify that the new glass panel does not impede the door's operation and that it maintains a tight seal when closed. Address any issues related to fit or functionality promptly to prevent potential damage to the replacement glass or the door frame.
Read more: How To Replace Oven Door Glass
Clean and Maintain the Glass
Once the replacement glass is in place, take the opportunity to clean and maintain its pristine appearance. Use a mild glass cleaner and a lint-free cloth to remove any smudges or residue from the glass surface, restoring its clarity and transparency. Regular maintenance of the glass will preserve its visual appeal and contribute to the overall cleanliness of the storm door.
Prioritize Safety Precautions
Throughout the entire glass replacement process, prioritizing safety precautions is paramount to prevent accidents and injuries. Always wear protective gloves and safety glasses when handling glass and using tools to minimize the risk of cuts or eye injuries. Additionally, exercise caution when working with sealants and adhesives, ensuring adequate ventilation and following the manufacturer's guidelines for safe application.
By attending to these finishing touches and adhering to essential safety precautions, you can complete the glass replacement process with confidence, knowing that the storm door is not only visually enhanced but also optimized for long-term performance and safety. Taking the time to address these final details ensures that the replacement glass seamlessly integrates into the door's structure, providing lasting value and peace of mind for your home's exterior.
Frequently Asked Questions about How To Replace Glass In Storm Door
Was this page helpful?
At Storables.com, we guarantee accurate and reliable information. Our content, validated by Expert Board Contributors, is crafted following stringent Editorial Policies. We're committed to providing you with well-researched, expert-backed insights for all your informational needs.


0 thoughts on “How To Replace Glass In Storm Door”