
Articles
How To Stain A Concrete Floor
Modified: March 24, 2024
Learn how to stain a concrete floor with our informative articles. Achieve a flawless finish with our expert tips and step-by-step instructions.
(Many of the links in this article redirect to a specific reviewed product. Your purchase of these products through affiliate links helps to generate commission for Storables.com, at no extra cost. Learn more)
Introduction
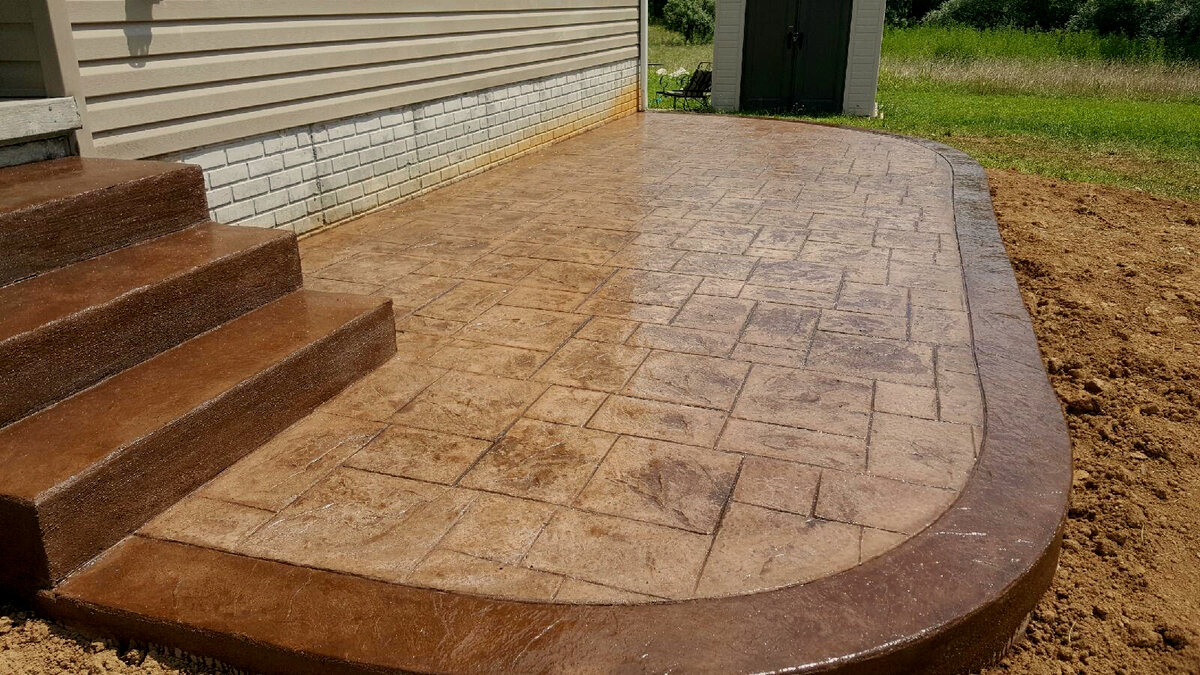
Staining a concrete floor is a fantastic way to transform its appearance and add a touch of elegance to any space. Whether it’s your home, office, or commercial establishment, a stained concrete floor can create a stunning visual impact that is both durable and easy to maintain.
Unlike traditional floor coverings like carpet or tile, stained concrete offers a unique and customizable solution that allows you to showcase the natural beauty of the concrete while adding color and character to your space. Whether you prefer a bold and vibrant design or a more subdued and earthy tone, stained concrete can be tailored to suit your personal style and décor.
Not only does stained concrete provide aesthetic benefits, but it also offers practical advantages. A properly stained and sealed concrete floor is resistant to stains, chemicals, and wear and tear, making it an ideal choice for high-traffic areas. Additionally, stained concrete is much easier to clean and maintain compared to other flooring options, saving you time and effort in the long run.
In this article, we will guide you through the process of staining a concrete floor, from the necessary materials and tools to the step-by-step process of achieving a beautiful and long-lasting finish. Whether you are a DIY enthusiast or a professional contractor, this comprehensive guide will provide you with the knowledge and techniques needed to successfully stain a concrete floor with ease.
So, let’s roll up our sleeves and embark on this exciting journey of transforming a dull concrete floor into a work of art!
Key Takeaways:
- Transform your space with a stunning stained concrete floor that adds beauty, character, and durability. Follow the step-by-step process to achieve a customized look that reflects your personal style.
- Proper maintenance and care will ensure your stained concrete floor retains its beauty, durability, and color vibrancy over time. Regular cleaning, protection from furniture, and reapplying sealer as needed are key to preserving its exquisite appearance.
Read more: How To Stain A Concrete Porch
Materials and Tools Needed
Before you begin the process of staining a concrete floor, it’s important to gather all the necessary materials and tools to ensure a smooth and successful project. Here is a list of what you will need:
- Concrete stain: Choose a stain based on your desired color and finish. There are two types of concrete stain: acid-based and water-based. Acid-based stains create a marbled effect and offer a wider range of color options, while water-based stains are more environmentally friendly and easier to apply.
- Cleaners: You will need a concrete cleaner specifically designed to remove dirt, grease, and stains from the surface. Make sure to choose a cleaner that is compatible with the type of stain you are using.
- Sealer: A sealer is essential to protect the stained concrete floor from damage caused by daily wear and tear, spills, and UV rays. There are different types of sealers available, including acrylic, epoxy, and polyurethane. Choose one that suits your needs and the specific requirements of the project.
- Protective gear: Safety should always be a priority when working with chemicals. Wear gloves, safety glasses, and a respirator to protect yourself from exposure to the stain and other potentially harmful substances.
- Applicators: Depending on the type of stain you choose, you will need either a brush, roller, or sprayer to apply the stain to the concrete floor. Consider the size of the project and the texture of the concrete when deciding on the applicator.
- Scrub brushes and sponges: These will be used for cleaning the concrete surface and applying the stain in hard-to-reach areas.
- Tape and plastic sheets: Use these to cover any areas you want to protect from the stain, such as walls, baseboards, and furniture.
- Concrete repair materials: If there are cracks or imperfections on the concrete floor, you will need a suitable repair material, such as a crack filler or patching compound, to fix them before staining.
- Pressure washer: This will come in handy for thoroughly cleaning the concrete surface before staining.
- Appropriate brushes and rollers: Choose brushes and rollers suitable for the type of stain and sealer you are using. Make sure they are designed for use on concrete to ensure smooth application.
- Dust mop and vacuum: These will help you keep the area clean and dust-free during the staining process.
Make sure to gather all the necessary materials and tools before you start the staining process. This will save you time and frustration and ensure that you have everything you need to achieve a professional-looking finish. Remember to follow the manufacturer’s instructions for each product and take all necessary safety precautions.
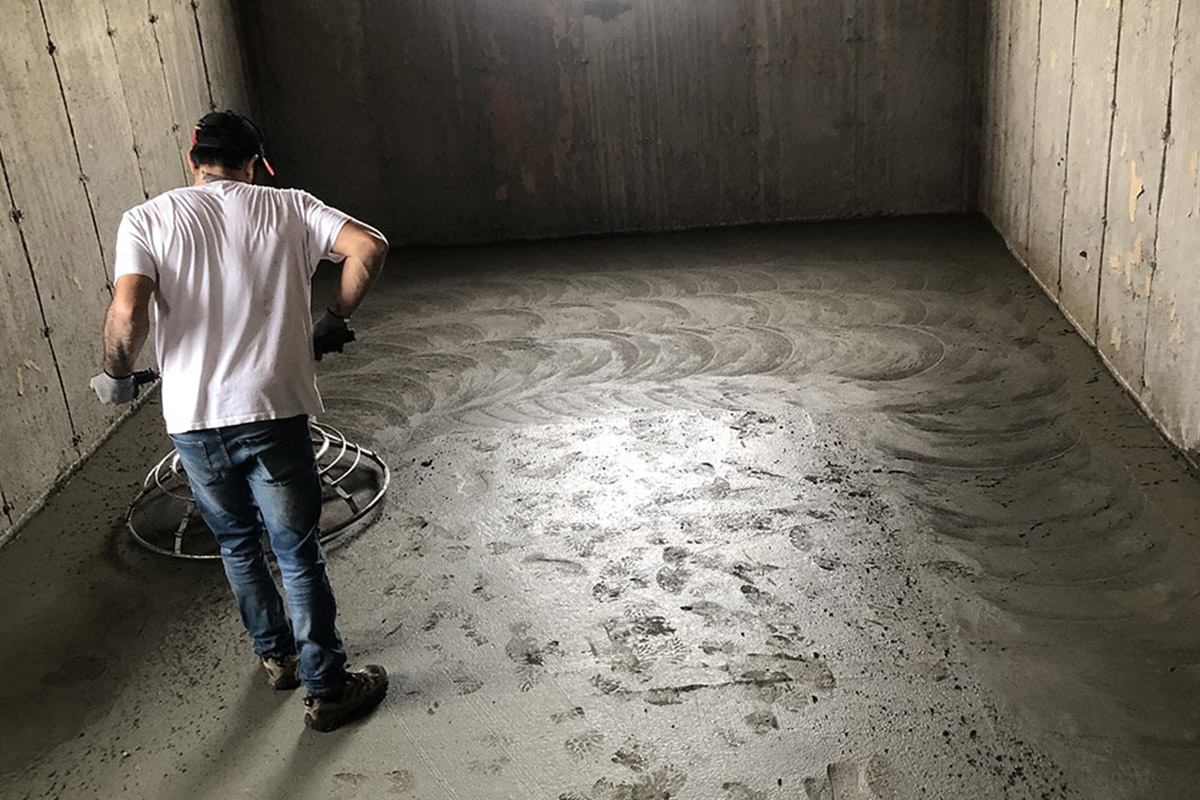
Preparing the Concrete Floor
Before you begin staining a concrete floor, it’s crucial to adequately prepare the surface to ensure the stain adheres properly and creates a smooth and even finish. Follow these steps to prepare the concrete floor:
- Clean the concrete surface: Start by removing any loose dirt, debris, and dust from the floor. Sweep thoroughly, and use a dust mop or vacuum cleaner to eliminate as much dust as possible. This will help the stain adhere better to the concrete.
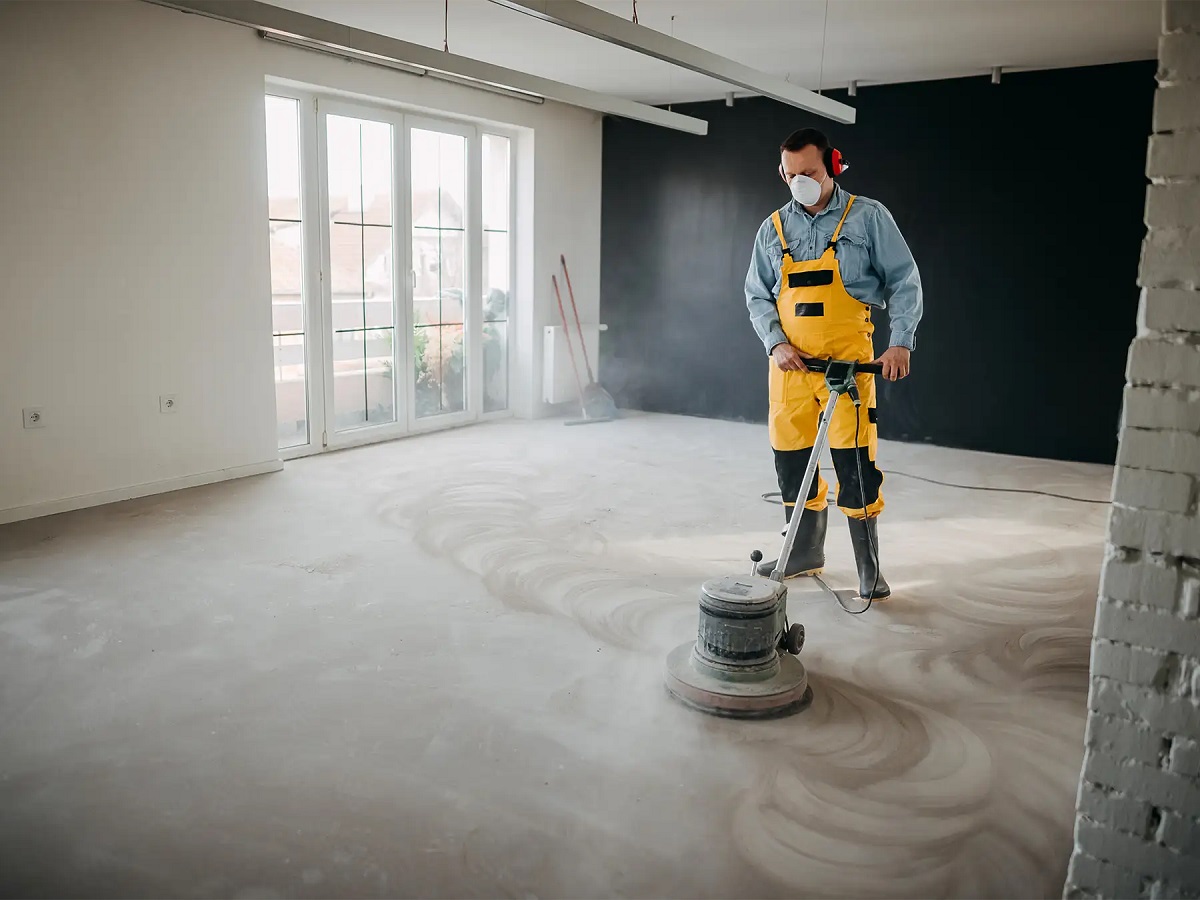
- Remove any existing coatings: If there are any existing coatings or sealers on the concrete floor, they need to be removed before staining. Use a concrete grinder or stripper to get rid of these coatings. This step is essential to ensure proper penetration and bonding of the stain to the concrete surface.
- Repair cracks and imperfections: Inspect the concrete floor for any cracks, chips, or imperfections. Use a suitable concrete repair material, such as a crack filler or patching compound, to fix these issues. Follow the manufacturer’s instructions for the repair product and allow it to dry completely before proceeding.
- Etch the surface (optional): If you’re working with a smooth or polished concrete surface, you may need to etch it to create a slightly rougher texture that allows the stain to penetrate better. Use an etching solution, following the manufacturer’s instructions, and rinse it off thoroughly with water. Allow the concrete to dry completely before moving on to the next step.
- Tape and cover any areas you want to protect: If there are areas adjacent to the concrete floor that you want to keep stain-free, such as walls, baseboards, or furniture, use tape and plastic sheets to cover and protect them. This will prevent accidental staining and make the cleanup process easier.
Properly preparing the concrete floor is crucial to achieving a beautiful and long-lasting stained finish. By taking the time to clean the surface, remove any existing coatings, repair imperfections, and protect adjacent areas, you ensure that the stain will adhere correctly and create the desired effect. Once the concrete floor is prepared, you’re ready to move on to the next steps of the staining process.
Cleaning the Concrete Surface
Before applying the stain, it’s essential to thoroughly clean the concrete surface. Cleaning removes dirt, grease, and other contaminants that can prevent the stain from adhering properly. Follow these steps to clean the concrete surface effectively:
- Sweep or vacuum the floor: Begin by removing loose dirt and debris from the concrete surface. Use a broom or vacuum cleaner with a brush attachment to sweep or vacuum the entire area. Pay close attention to corners, edges, and hard-to-reach areas.
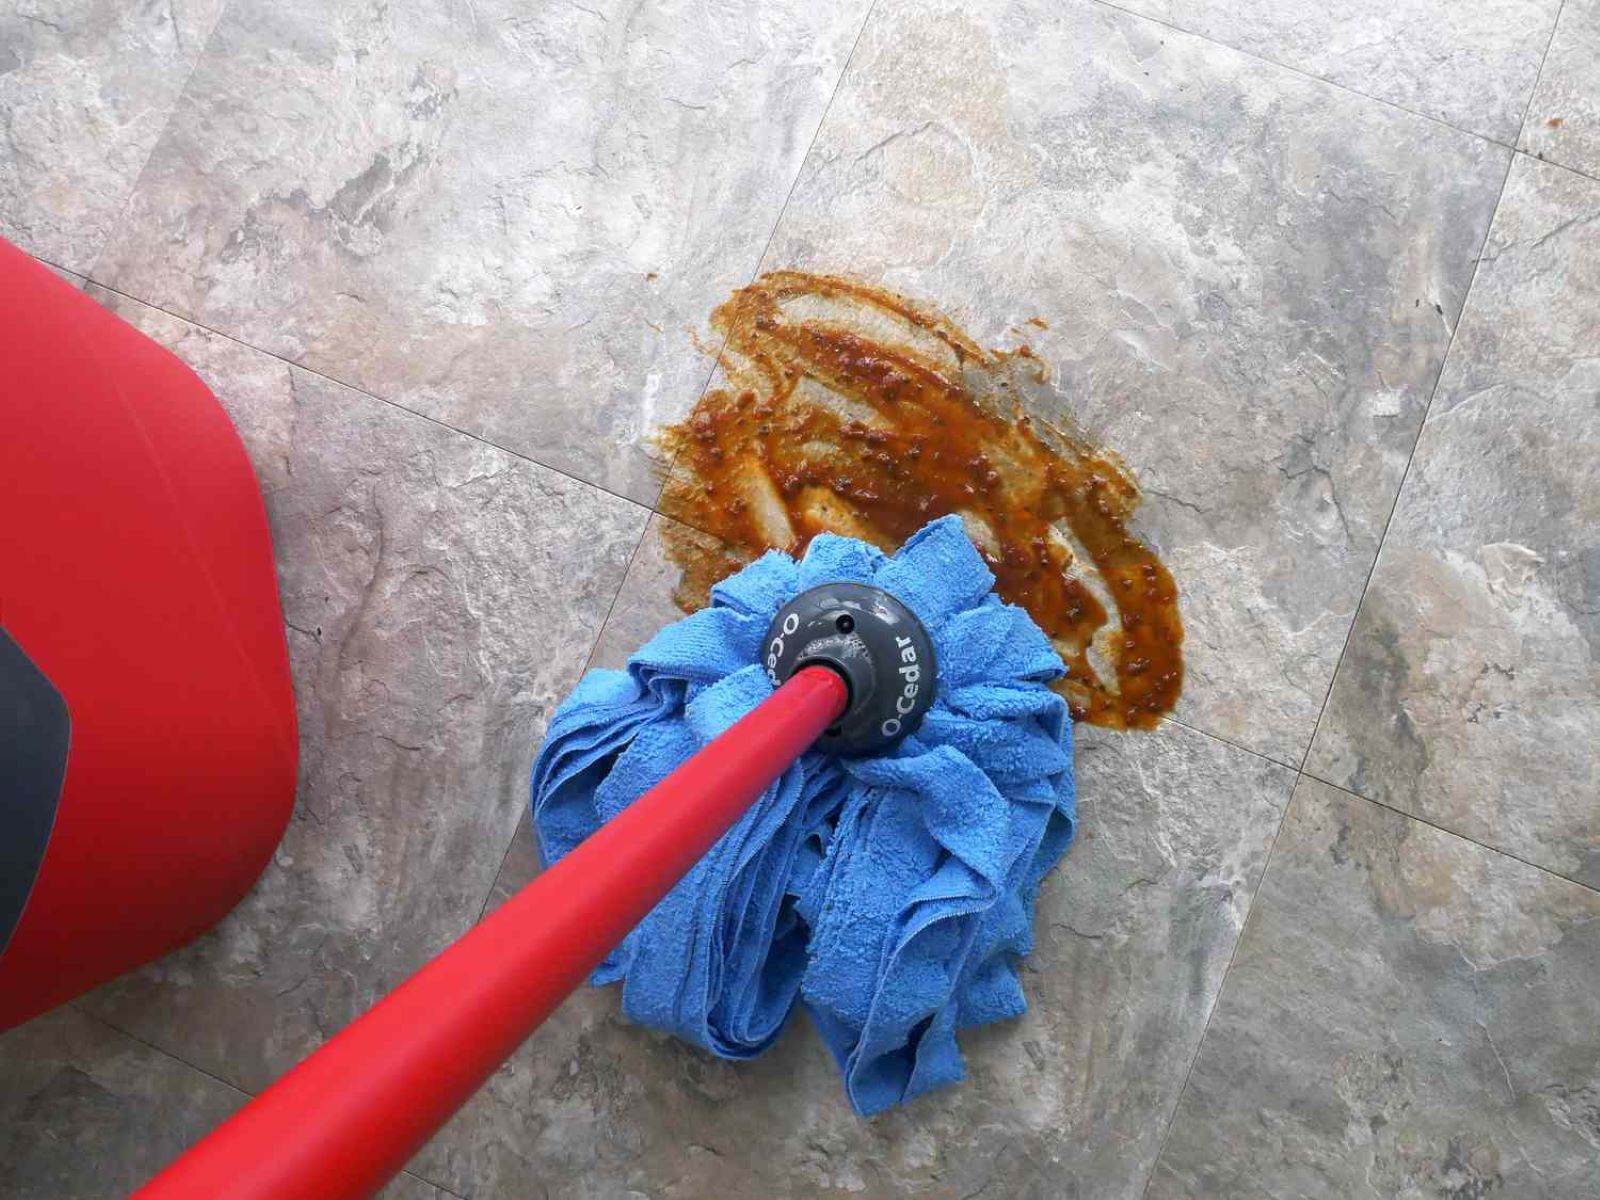
- Remove stubborn stains: If there are any stubborn stains, such as oil or grease, on the concrete, use a specialized concrete cleaner or degreaser to treat them. Apply the cleaner directly to the stains and scrub with a stiff brush or sponge. Rinse thoroughly with water and allow the surface to dry completely.
- Use a pressure washer: If the concrete floor is particularly dirty or has ingrained stains, consider using a pressure washer for a more thorough cleaning. Adjust the pressure according to the condition of the surface and take care not to damage the concrete. Allow the concrete to dry completely before proceeding to the next step.
- Inspect for mold or mildew: If there is any mold or mildew present on the concrete surface, treat it with a bleach solution or an appropriate anti-fungal cleaner. Follow the manufacturer’s instructions for the product and ensure adequate ventilation when working with chemicals. Rinse the area thoroughly with water after treatment.
- Allow the concrete to dry: After cleaning, it’s crucial to allow the concrete surface to dry completely before proceeding with the staining process. Moisture on the surface can interfere with the stain’s ability to penetrate and adhere properly. Depending on the weather conditions and ventilation, this may take anywhere from a few hours to a couple of days.
By thoroughly cleaning the concrete surface, you ensure that the stain will have maximum contact with the concrete, resulting in a more vibrant and uniform color. Additionally, a clean surface creates a strong foundation for the stain to adhere to, ensuring a long-lasting finish. Take your time and pay attention to detail during the cleaning process, as it will greatly impact the final result of your stained concrete floor.
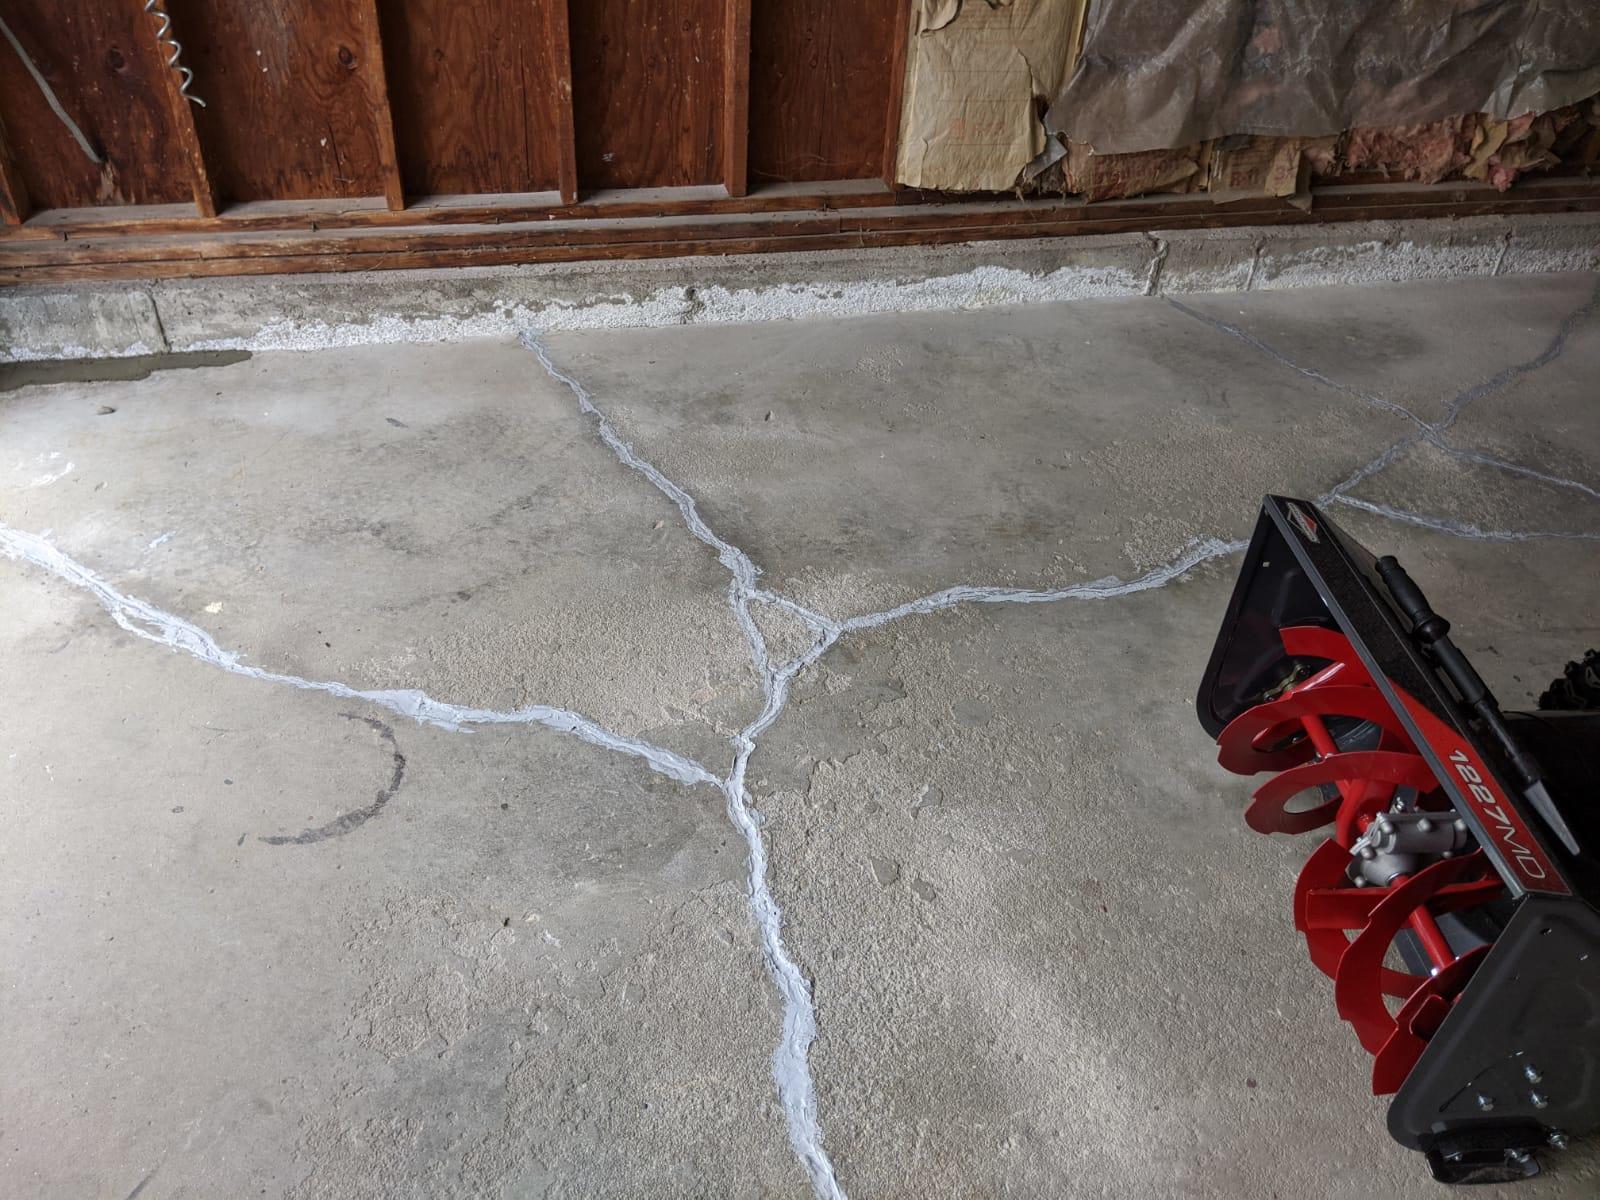
Repairing Cracks and Imperfections
Before applying the stain, it’s essential to repair any cracks or imperfections on the concrete surface. Repairing these issues not only improves the appearance of the floor but also ensures that the stain adheres properly and creates a smooth and even finish. Follow these steps to repair cracks and imperfections on your concrete floor:
- Inspect the concrete: Thoroughly examine the entire concrete surface for any cracks, chips, or other imperfections. Pay close attention to high-traffic areas and areas prone to damage or wear.
- Clean the area: Before repairing, make sure to clean the area around the crack or imperfection. Remove any debris, dust, or loose material using a broom or vacuum cleaner.
- Choose the right repair material: Depending on the size and severity of the crack or imperfection, choose an appropriate concrete repair material. There are various options available, such as crack fillers, patching compounds, or resurfacing products. Consult your local hardware store or a concrete specialist for guidance on selecting the right product for your specific needs.
- Prepare the repair material: Follow the manufacturer’s instructions to prepare the repair material. This may involve mixing different components or adding water to achieve the desired consistency.
- Apply the repair material: Use a trowel, putty knife, or other suitable tool to apply the repair material to the crack or imperfection. Fill the entire area, making sure to level it with the surrounding concrete surface. Smooth out the surface as much as possible.
- Allow the repair material to dry: The drying time will vary depending on the type of repair material used. Follow the manufacturer’s instructions for the recommended drying time. Avoid walking or applying any pressure on the repaired areas until they are completely dry.
- Sand and smooth the repaired areas: Once the repair material has dried, use sandpaper or a sanding block to smooth out the repaired areas. This will help create a seamless transition between the repaired sections and the rest of the concrete floor.
- Clean the surface again: After repairing and sanding, clean the entire surface once again to remove any dust or debris that may have accumulated during the repair process. This will ensure a clean and ready-to-stain surface.
Repairing cracks and imperfections on the concrete floor is essential to achieve a visually appealing and durable stained finish. By taking the time to properly repair and prepare the surface, you ensure that the stain will adhere correctly and create a smooth and seamless look. Remember, attention to detail during the repair process will greatly enhance the overall appearance of your stained concrete floor.
Read more: How To Waterproof A Concrete Floor
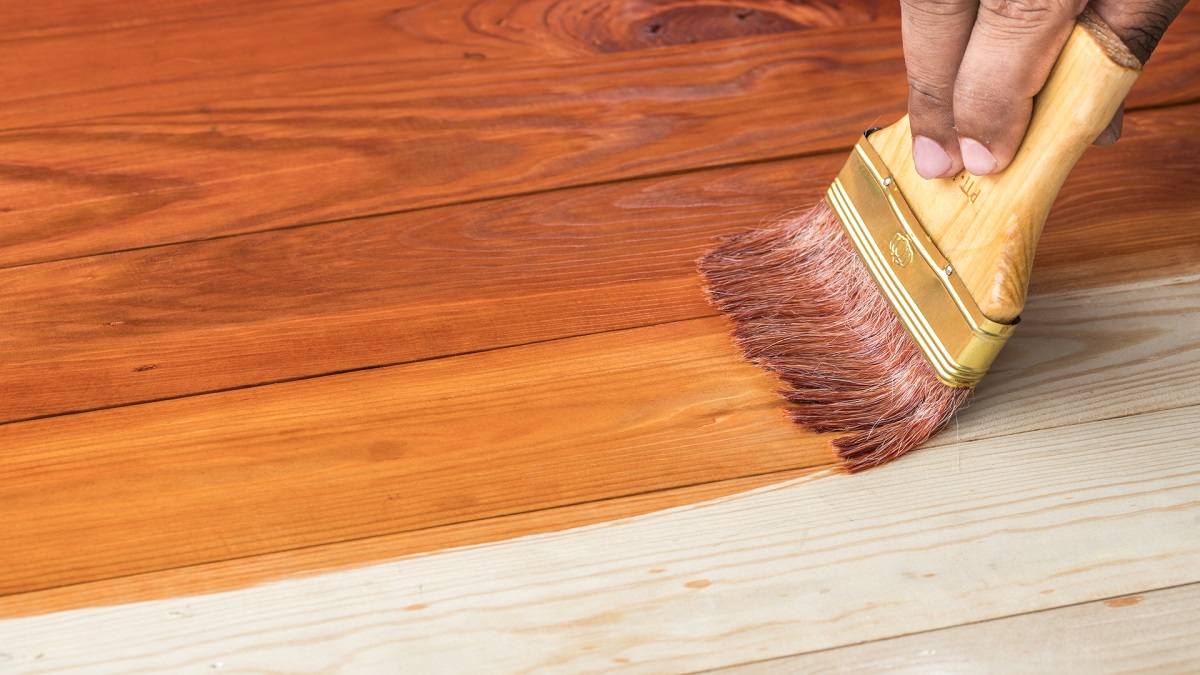
Applying the Concrete Stain
Now that you have prepared the concrete surface and repaired any cracks or imperfections, it’s time to apply the concrete stain. This step is where you can get creative and transform your concrete floor with color and character. Follow these steps to apply the concrete stain:
- Choose the right stain: Based on your desired color and finish, select either an acid-based stain or a water-based stain. Consider factors such as the application method, drying time, and compatibility with the concrete surface.
- Test the stain on a small area: Before applying the stain to the entire floor, it’s important to conduct a test on a small, inconspicuous area. This will give you an idea of how the stain will react with your concrete surface and allow you to make any necessary adjustments.
- Prepare the stain: Follow the manufacturer’s instructions to prepare the stain. This may involve diluting the stain with water or another appropriate solvent. Make sure to mix the stain thoroughly to achieve a consistent color.
- Apply the stain: Using a brush, roller, or sprayer, apply the stain to the concrete floor in even and overlapping strokes. Work in manageable sections to ensure that the stain doesn’t dry before you can blend it properly.
- Blend the stain: Once you’ve applied the stain to a section, use a clean brush or a mop to blend and spread the color. This helps create a more natural and uniform look. Keep in mind that the stain will develop and become more vibrant as it dries.
- Control the intensity of the color: If you want a lighter or more subtle color, you can dilute the stain or apply additional coats. For a deeper and richer color, apply multiple coats of the stain. Be sure to let each coat dry completely before applying the next one.
- Allow the stain to dry: The drying time for concrete stain will depend on various factors such as the type of stain, ambient temperature, and humidity levels. Typically, it takes several hours for the stain to dry, but it may require more time in certain circumstances. Follow the manufacturer’s instructions for the recommended drying time.
While applying the concrete stain, remember to wear protective gear, such as gloves and safety glasses, to minimize any potential contact with the chemicals. Additionally, ensure proper ventilation in the area to disperse any fumes generated during the staining process.
Applying the concrete stain requires patience and attention to detail. Take your time, work in small sections, and pay close attention to blending and achieving the desired color intensity. The stain will add depth and character to your concrete floor, creating a visually stunning and unique space.
Choosing the Right Stain
Choosing the right stain for your concrete floor is crucial to achieving the desired color and finish. With a wide range of options available, it’s important to consider several factors when selecting the stain that best suits your needs. Here are some key aspects to consider before making your decision:
- Stain type: There are two main types of concrete stains: acid-based stains and water-based stains. Acid-based stains create a marbled effect and offer a wider range of color options, including earthy tones and vibrant hues. They chemically react with the concrete surface, resulting in unique patterns and variations. On the other hand, water-based stains are non-reactive and easier to apply. They offer a more consistent and predictable color and are generally more environmentally friendly.
- Color options: Consider the color palette that you want to achieve for your stained concrete floor. Acid-based stains typically offer a broader range of colors, from rich earth tones to bold, vibrant shades. Water-based stains tend to have a more limited color selection but still provide a variety of options to suit different design preferences.
- Transparency and coverage: Determine how transparent or opaque you want the stain to be. Some stains are highly transparent, allowing the natural texture and variations of the concrete to show through. Others provide more coverage, concealing imperfections and creating a more uniform appearance.
- Compatibility with the concrete: Check if the stain you are considering is suitable for the type of concrete surface you have. Different stains may have specific requirements or limitations, particularly in relation to the age, porosity, and texture of the concrete.
- Application method: Consider the application method that works best for your project. Some stains are designed for brush or roller application, while others are better suited for spraying. Factors such as the size and complexity of the area, as well as personal preference and expertise, should be taken into account.
- Maintenance and longevity: Evaluate the durability and longevity of the stain you choose. Look for stain formulations that provide resistance to UV rays, chemicals, and wear and tear. Additionally, consider the necessary maintenance requirements, such as resealing or touch-ups, to keep your stained concrete floor looking its best over time.
It’s always a good idea to consult with experts, such as professional contractors or specialty concrete stores, for personalized recommendations. They can provide valuable insights and help you choose the stain that best meets your specific requirements and design vision.
Remember, the right stain can transform your concrete floor and elevate the overall aesthetics of your space. By considering the factors mentioned above, you can make an informed decision and achieve a breathtaking stained concrete floor that reflects your style and personality.
Before staining a concrete floor, make sure to thoroughly clean and etch the surface to ensure proper adhesion of the stain. This will help to achieve a more even and long-lasting finish.
Testing the Stain on a Small Area
Before applying the stain to the entire concrete floor, it’s crucial to conduct a test on a small, inconspicuous area. This will allow you to assess how the stain interacts with your specific concrete surface and ensure that the desired color and finish are achieved. Follow these steps to test the stain on a small area:
- Select a test area: Choose a small, discreet section of the concrete floor to conduct the stain test. Ideally, select an area that is representative of the overall surface and will give you an accurate preview of the final result.
- Prepare the test area: Clean the test area thoroughly, removing any dirt, dust, or debris. Ensure that the surface is free from any existing coatings or sealers, as they can affect the stain’s penetration and adhesion.
- Apply the stain: Using the chosen applicator method, apply the stain to the test area following the instructions provided by the stain manufacturer. Take note of the application technique, coverage, and desired color intensity.
- Observe the color: Allow the stain to dry according to the manufacturer’s recommended drying time. Take note of how the color develops and if it matches your expectations. Keep in mind that the color may appear different when wet compared to when it is fully dried.
- Assess the compatibility: Evaluate how well the stain complements the texture and characteristics of your concrete surface. Look for any unexpected reactions or undesired effects, such as excessive color variation or mottling. These observations will help you gauge if the chosen stain is suitable for your floor.
- Make adjustments if necessary: If the tested area does not meet your expectations, you may need to make adjustments. This could involve trying a different stain color, adjusting the application technique, or considering additional coats to achieve the desired result.
- Review the test area in different lighting: Assess the test area under different lighting conditions, such as natural daylight and artificial lighting, to ensure that the chosen stain color looks consistent and appealing in various settings.
By testing the stain on a small area, you can avoid potential problems or disappointments when applying it to the entire floor. It allows you to make any necessary adjustments and ensures that the final result aligns with your vision. Remember, patience and attention to detail during the testing phase will pay off in achieving a beautiful and successful stained concrete floor throughout your space.
Applying the Stain to the Concrete Floor
Once you have tested the stain and are satisfied with the desired color and finish, it’s time to apply the stain to the entire concrete floor. Follow these step-by-step instructions to ensure a smooth and successful application:
- Prepare the concrete floor: Make sure the concrete surface is clean, repaired, and adequately prepped. Remove any dust, debris, or coatings that may hinder the staining process. Use tape and plastic sheets to protect areas you don’t want to stain, such as walls or furniture.
- Mix the stain: Follow the manufacturer’s instructions to prepare the stain, whether it needs to be diluted with water or other solvents. Thoroughly mix the stain to achieve a consistent color throughout the project.
- Choose your application method: Determine the most suitable application method for your project: a brush, roller, or sprayer. Consider the size and layout of the space, as well as your comfort and expertise with each technique.
- Begin the staining process: Start from the farthest corner of the room and work your way toward the exit, ensuring that you don’t walk on the freshly stained areas. Apply the stain in smooth, even strokes, covering the floor with a thin and uniform layer of color.
- Overlap each stroke: To achieve an even and consistent color, overlap each stroke as you apply the stain. This ensures that the entire floor receives the same amount of color coverage.
- Address any uneven or missed spots: During the application process, keep an eye out for any missed or unevenly stained spots. Use a brush or sponge to touch up these areas, ensuring they blend seamlessly with the rest of the floor.
- Allow the stain to dry: The drying time for concrete stain varies based on the type of stain, environmental conditions, and the porosity of the concrete. Typically, the stain will need several hours or even overnight to dry completely. Follow the manufacturer’s recommendations for precise drying times.
- Apply additional coats (if desired): If you want a deeper color or more coverage, apply additional coats of the stain once the previous layer has fully dried. Allow each coat to dry before applying the next one. Remember to blend each new layer with the existing stain for a consistent look.
Throughout the staining process, be mindful of maintaining a wet edge. This means working in sections and moving smoothly from one area to the next, ensuring that wet stain blends with wet stain without drying in between.
Lastly, when working in larger spaces, consider having a helper to ensure a consistent application and to help with time-sensitive tasks such as blending and touch-ups.
With patience and attention to detail, applying the stain to the concrete floor will result in a beautiful, customized finish that enhances the overall aesthetics of your space.
Read more: How To Stain An Outdoor Concrete Patio
Achieving Desired Color and Coverage
As you apply the concrete stain, your goal is to achieve the desired color and coverage that will enhance the beauty of your floor. There are a few key considerations to keep in mind to ensure you achieve the best result possible:
- Stain intensity: The number of coats and the application technique will impact the intensity of the stain color. If you desire a lighter shade, apply fewer coats or dilute the stain with water. For a deeper and more vibrant color, apply additional coats or use a stronger concentration of stain.
- Blending and overlap: To create a consistent appearance, blend each stroke of stain into the previous one and overlap them slightly. This technique helps ensure an even, seamless color transition without any noticeable lines or patches.
- Assessing coverage: After applying the initial coat(s) of stain, step back and evaluate the coverage. Some concrete surfaces may be more porous than others, leading to variations in how the stain is absorbed. Assess if the coverage is even and if any areas require additional attention or touch-ups.
- Addressing uneven color: If you notice any areas with uneven color intensity or mottling, you can try several approaches. One option is to apply another coat of stain to even out and intensify the color. Alternatively, you can use a soft brush or sponge to blend and adjust the color manually.
- Multiple applications: Depending on the desired results, you may need to apply multiple coats of stain. Allow each coat to dry fully before assessing the color and deciding if additional coats are necessary. Repeat the application process until you achieve the desired color depth and coverage.
- Sampling different areas: As you progress with the staining process, it’s a good idea to periodically stop and evaluate different areas of the floor to ensure color consistency. Lighting conditions, variations in the concrete surface, and different stages of drying can affect how the stain appears. Sampling different areas helps ensure a cohesive finish throughout the floor.
- Take your time and make adjustments: Achieving the desired color and coverage may require patience and adjustments along the way. It’s essential to take your time, step back frequently, and make any necessary alterations as you work through the staining process. This will help you attain the best possible outcome.
Remember that the color of the stain will continue to develop as it dries. So, allow the stain to dry completely before making any final judgments about the color and coverage.
By paying careful attention to color intensity, blending techniques, coverage assessment, and making necessary adjustments, you can ensure that the final result meets or exceeds your expectations. This will ultimately create a stunning, personalized look for your concrete floor.
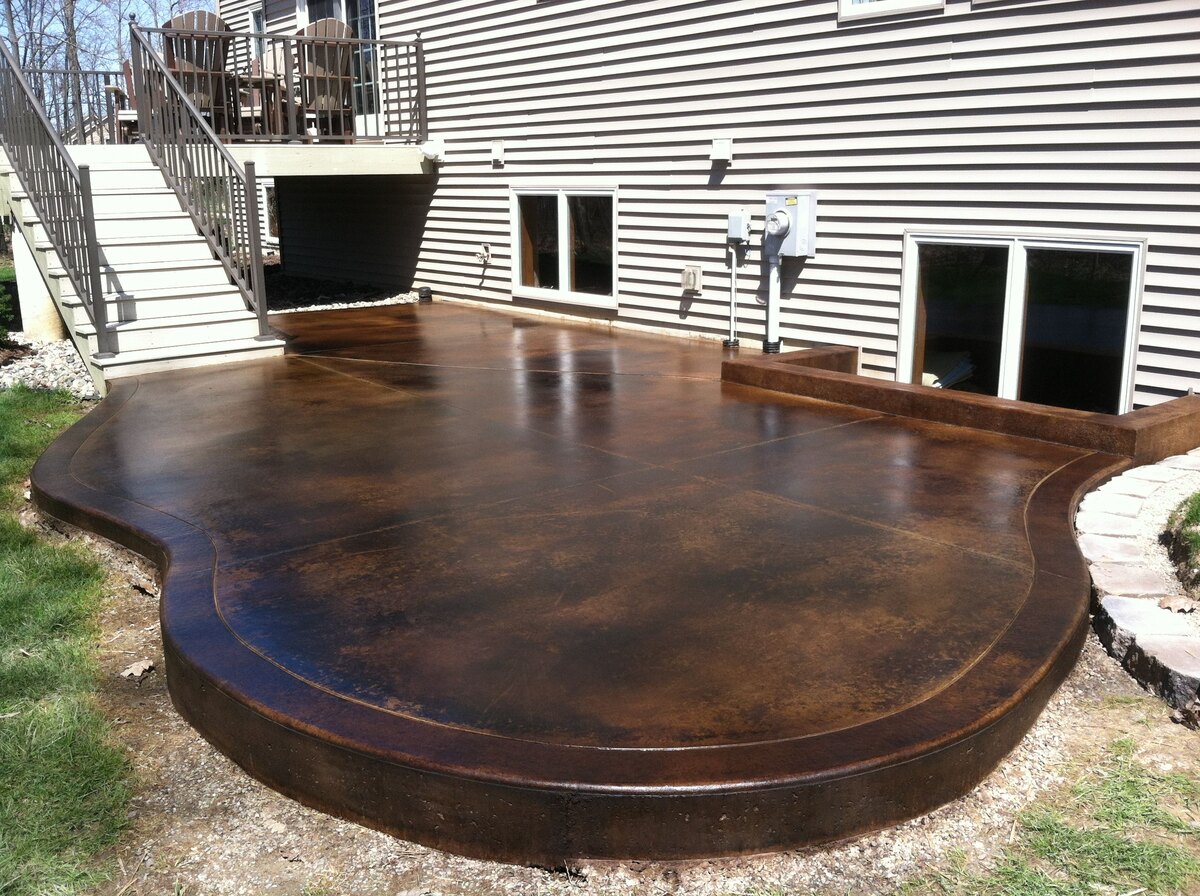
Sealing the Stained Concrete Floor
Once you have achieved the desired color and coverage on your stained concrete floor, the next crucial step is to seal the surface. Sealing not only enhances the appearance of the stained concrete but also provides protection against stains, chemicals, and general wear and tear. Follow these steps to seal your stained concrete floor:
- Clean the stained floor: Before applying the sealer, ensure that the surface is clean and free from any debris, dust, or residue. Use a broom, vacuum cleaner, or damp mop to remove any dirt or particles that may interfere with the adhesion of the sealer.
- Choose the appropriate sealer type: There are different types of sealers available, including acrylic, epoxy, and polyurethane. Consider factors such as the level of shine you desire, the traffic the floor will endure, and the level of protection needed. Consult the sealer manufacturer’s instructions and recommendations to select the most suitable sealer for your stained concrete floor.
- Prepare the sealer: Follow the manufacturer’s instructions to properly prepare the sealer. This may involve diluting the sealer with a specific solvent or mixing different components together. Ensure that you thoroughly mix the sealer to achieve a consistent solution.
- Apply the sealer: Using a clean brush, roller, or sprayer, apply the sealer to the stained concrete floor. Work in small sections and maintain a wet edge to ensure even application. Avoid using excessive amounts of sealer, as it can result in a thick and uneven finish.
- Smooth out the sealer: Once the sealer is applied, use a clean roller or brush to smooth out any lines or ridges. This helps create a uniform appearance and ensures an even coating of the sealer.
- Allow the sealer to dry: The drying time for the sealer varies depending on the type of sealer and environmental conditions. Follow the manufacturer’s instructions for the recommended drying time. Avoid walking on the freshly sealed surface until it is fully dry to prevent any marks or damage.
- Apply additional coats: Depending on the sealer and the desired level of protection, you may need to apply multiple coats. Follow the manufacturer’s instructions for recommended waiting time between coats, and ensure each coat is fully dry before applying the next one.
- Maintain the sealed floor: Once the sealer is dry and cured, follow the manufacturer’s instructions for maintenance and cleaning. Regularly sweep or vacuum the floor to remove dirt and debris, and clean any spills promptly to prevent stains. Avoid using harsh chemicals or abrasives that could damage the sealer.
Sealing your stained concrete floor plays an essential role in preserving its beauty and ensuring long-lasting durability. The sealer acts as a protective barrier, enhancing the vibrancy of the stain while safeguarding the floor against daily wear and tear.
By following the proper procedures for applying the sealer and maintaining the sealed floor, you can enjoy your beautifully stained concrete floor for years to come.
Maintaining and Caring for Stained Concrete
Proper maintenance and care are vital to preserving the beauty and longevity of your stained concrete floor. By following these maintenance tips, you can ensure that your floor remains in excellent condition for years to come:
- Regular cleaning: Sweep or vacuum the stained concrete floor regularly to remove dirt, dust, and debris. This prevents them from scratching or dulling the surface. Use a dry or slightly damp mop to clean the floor as needed, and promptly clean up any spills to avoid stains.
- Use the right cleaning products: When cleaning the stained concrete floor, use pH-neutral cleaners specifically formulated for use on sealed concrete. Avoid harsh chemicals, acidic or abrasive cleaners, as they can damage the sealer and stain. Follow the manufacturer’s recommendations for suitable cleaners.
- Protect the floor from furniture: Place protective pads or felt under furniture legs to prevent them from scratching or damaging the stained surface when moved or shifted. Regularly check and replace these pads as needed to ensure optimal protection.
- Avoid dragging heavy objects: When moving heavy objects, such as furniture or appliances, lift them instead of dragging them across the floor. Dragging can cause scratches and damage to the stained surface.
- Protect against UV rays: Exposure to direct sunlight can cause the stain to fade over time. Use curtains, blinds, or window films to limit the amount of sunlight that reaches the stained concrete floor. This helps prevent discoloration and maintains the vibrancy of the stain for longer.
- Regularly inspect for damage: Periodically inspect the stained concrete floor for any signs of damage, such as cracks, chips, or wear. Address any issues promptly by repairing or touching up the damaged areas to prevent further deterioration.
- Reapply sealer as needed: Over time, the sealer on your stained concrete floor may wear away or become less effective. Depending on the level of traffic and wear, it may be necessary to reapply a fresh coat of sealer every few years. Follow the manufacturer’s instructions for recommendations on when and how to reseal the floor.
- Consider area rugs or mats: Placing area rugs or mats in high-traffic areas can help protect the stained concrete floor from excessive wear and tear. It also helps capture dirt and debris before they reach the surface, reducing the need for frequent cleaning.
By following these maintenance practices, you can ensure that your stained concrete floor retains its beauty, durability, and color vibrancy over time. Regular care and attention will greatly extend the lifespan and enjoyment of your exquisite flooring.
Conclusion
Staining a concrete floor is a transformative process that adds beauty, character, and durability to any space. By following the proper steps and guidelines, you can achieve a stunning stained concrete floor that enhances the overall aesthetics of your environment.
From preparing the concrete surface to applying the stain and sealing the floor, each step requires careful attention to detail and patience. Through proper cleaning, repairing cracks, and choosing the right stain and sealer, you can create a customized look that reflects your personal style.
Remember, testing the stain on a small area is crucial to ensure the color and finish meet your expectations. It allows for adjustments and ensures a consistent and desired result throughout the entire floor.
Once the staining process is complete, maintaining and caring for your stained concrete floor is essential. Regular cleaning using the right products, protecting the floor from furniture, and avoiding dragging heavy objects will extend the lifespan and preserve the appearance of your beautiful floor.
Whether it’s a residential space, office, or commercial establishment, a stained concrete floor offers numerous advantages. Not only does it provide an aesthetically pleasing and unique look, but it also offers durability, ease of maintenance, and resistance to stains and wear.
By taking the time to understand the process, gather the necessary materials, and follow the guidelines provided, you can confidently embark on your stained concrete floor project. With attention to detail and careful execution, you can transform a plain concrete surface into a breathtaking work of art that will be admired for years to come.
Frequently Asked Questions about How To Stain A Concrete Floor
Was this page helpful?
At Storables.com, we guarantee accurate and reliable information. Our content, validated by Expert Board Contributors, is crafted following stringent Editorial Policies. We're committed to providing you with well-researched, expert-backed insights for all your informational needs.


0 thoughts on “How To Stain A Concrete Floor”