Articles
How To Stain A Concrete Porch
Modified: January 20, 2024
Learn how to stain a concrete porch with our informative articles. Transform your outdoor space with this easy and cost-effective DIY project.
(Many of the links in this article redirect to a specific reviewed product. Your purchase of these products through affiliate links helps to generate commission for Storables.com, at no extra cost. Learn more)
Introduction
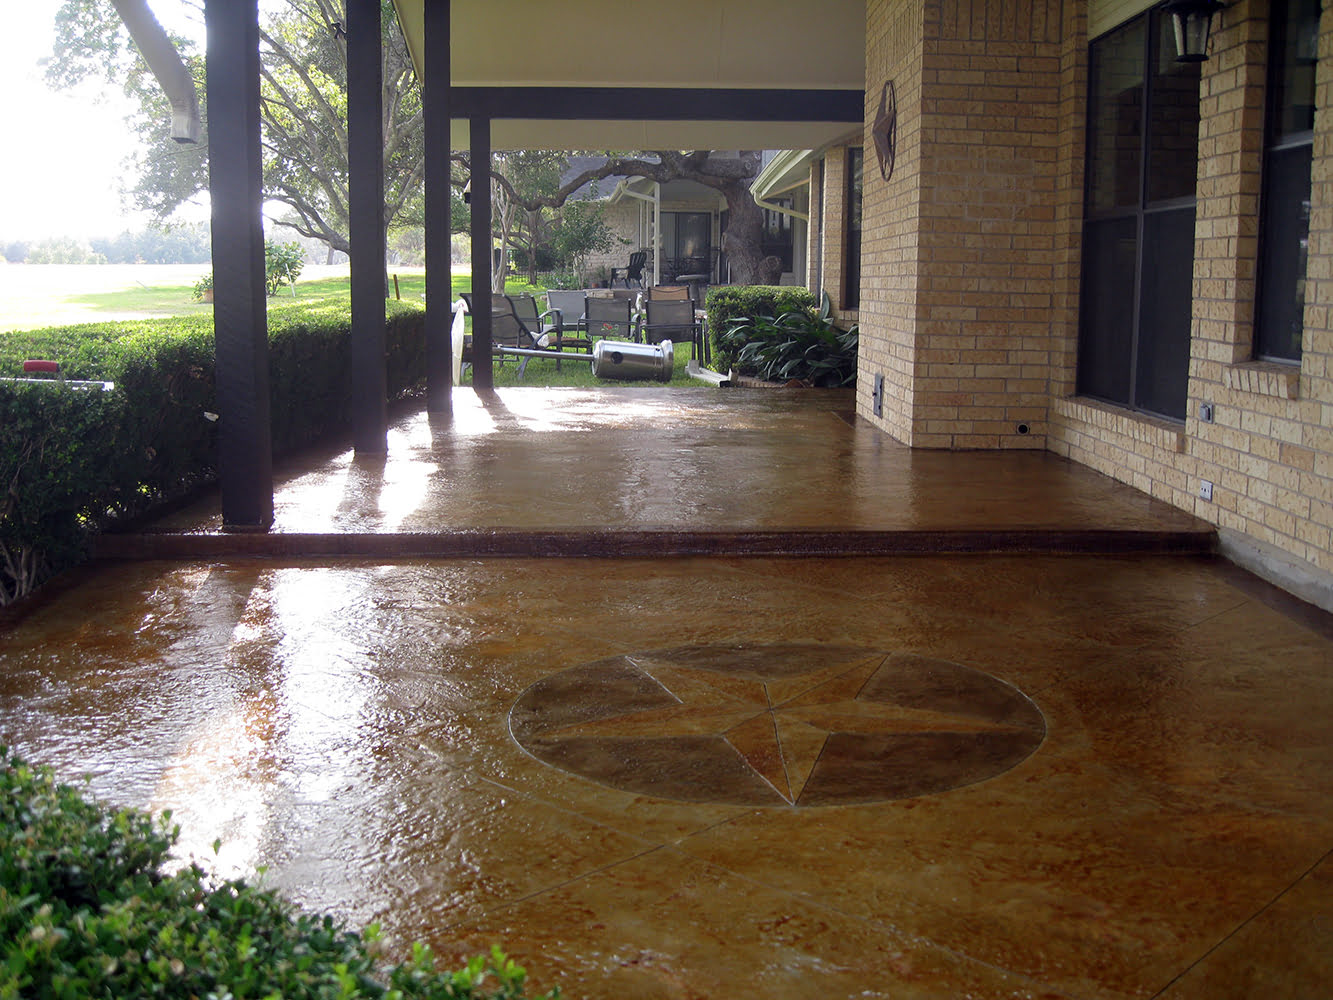
When it comes to enhancing the curb appeal of your home, don’t overlook the power of a well-maintained and visually appealing porch. A concrete porch can be transformed into a stunning focal point of your outdoor space by staining it. Not only does staining a concrete porch give it a fresh and modern look, but it also adds durability, protection, and longevity to the surface.
In this article, we will guide you through the step-by-step process of staining a concrete porch. Whether you’re a DIY enthusiast or a homeowner looking to revamp your porch, this comprehensive guide will equip you with all the necessary information and techniques to get the job done right.
Before diving into the staining process, let’s take a moment to gather the materials and tools needed for this project.
Key Takeaways:
- Transform your concrete porch into a stunning focal point by following our step-by-step guide to staining. Enhance curb appeal, add protection, and achieve a durable, long-lasting finish with the right materials and techniques.
- Achieve the perfect color and finish for your stained porch by choosing the right stain, applying it with care, and allowing for proper curing and drying time. Follow our tips for maintenance and enjoy your transformed outdoor space for years to come.
Read more: How To Clean A Concrete Porch
Materials and Tools Needed
Before you begin staining your concrete porch, it’s important to gather all the necessary materials and tools. Here’s a list of what you’ll need:
- Concrete stain: Choose a stain specifically formulated for exterior use.
- Concrete cleaner: Look for a cleaner that is safe for outdoor use and can effectively remove dirt, grime, and oil stains from the surface.
- Concrete patching compound: This is necessary for filling in any cracks or holes in the concrete surface before staining.
- Protective gear: Wear protective gloves, safety glasses, and a mask to protect yourself from chemicals and dust.
- Paintbrush or roller: Use a high-quality brush or roller to apply the stain evenly.
- Spray bottle: This will be useful for applying the cleaner onto the surface.
- Pressure washer: If you don’t have a pressure washer, you can rent one from a local home improvement store to thoroughly clean the porch.
- Tarps or plastic sheets: Use these to cover and protect surrounding areas from accidental spills or splatters.
- Paint tray: Pour the stain into a paint tray for easy access during the application process.
- Stir stick: Use a stir stick to thoroughly mix the stain before applying it.
- Concrete sealer: After staining, you’ll need a concrete sealer to protect the surface and enhance its longevity.
Make sure you have all these materials and tools ready before you begin the staining process. This will ensure a smooth and hassle-free project execution.
Preparing the Porch
Before you start staining your concrete porch, it’s important to properly prepare the surface. Preparing the porch ensures that the stain will adhere well and result in a beautiful and long-lasting finish. Here are the steps to prepare your porch:
- Clean the surface: Begin by thoroughly cleaning the porch to remove any dirt, debris, or loose particles. Start by sweeping the surface to remove loose dirt, and then use a pressure washer to rinse away any stubborn stains or grime. Ensure that the surface is completely dry before moving on to the next step.
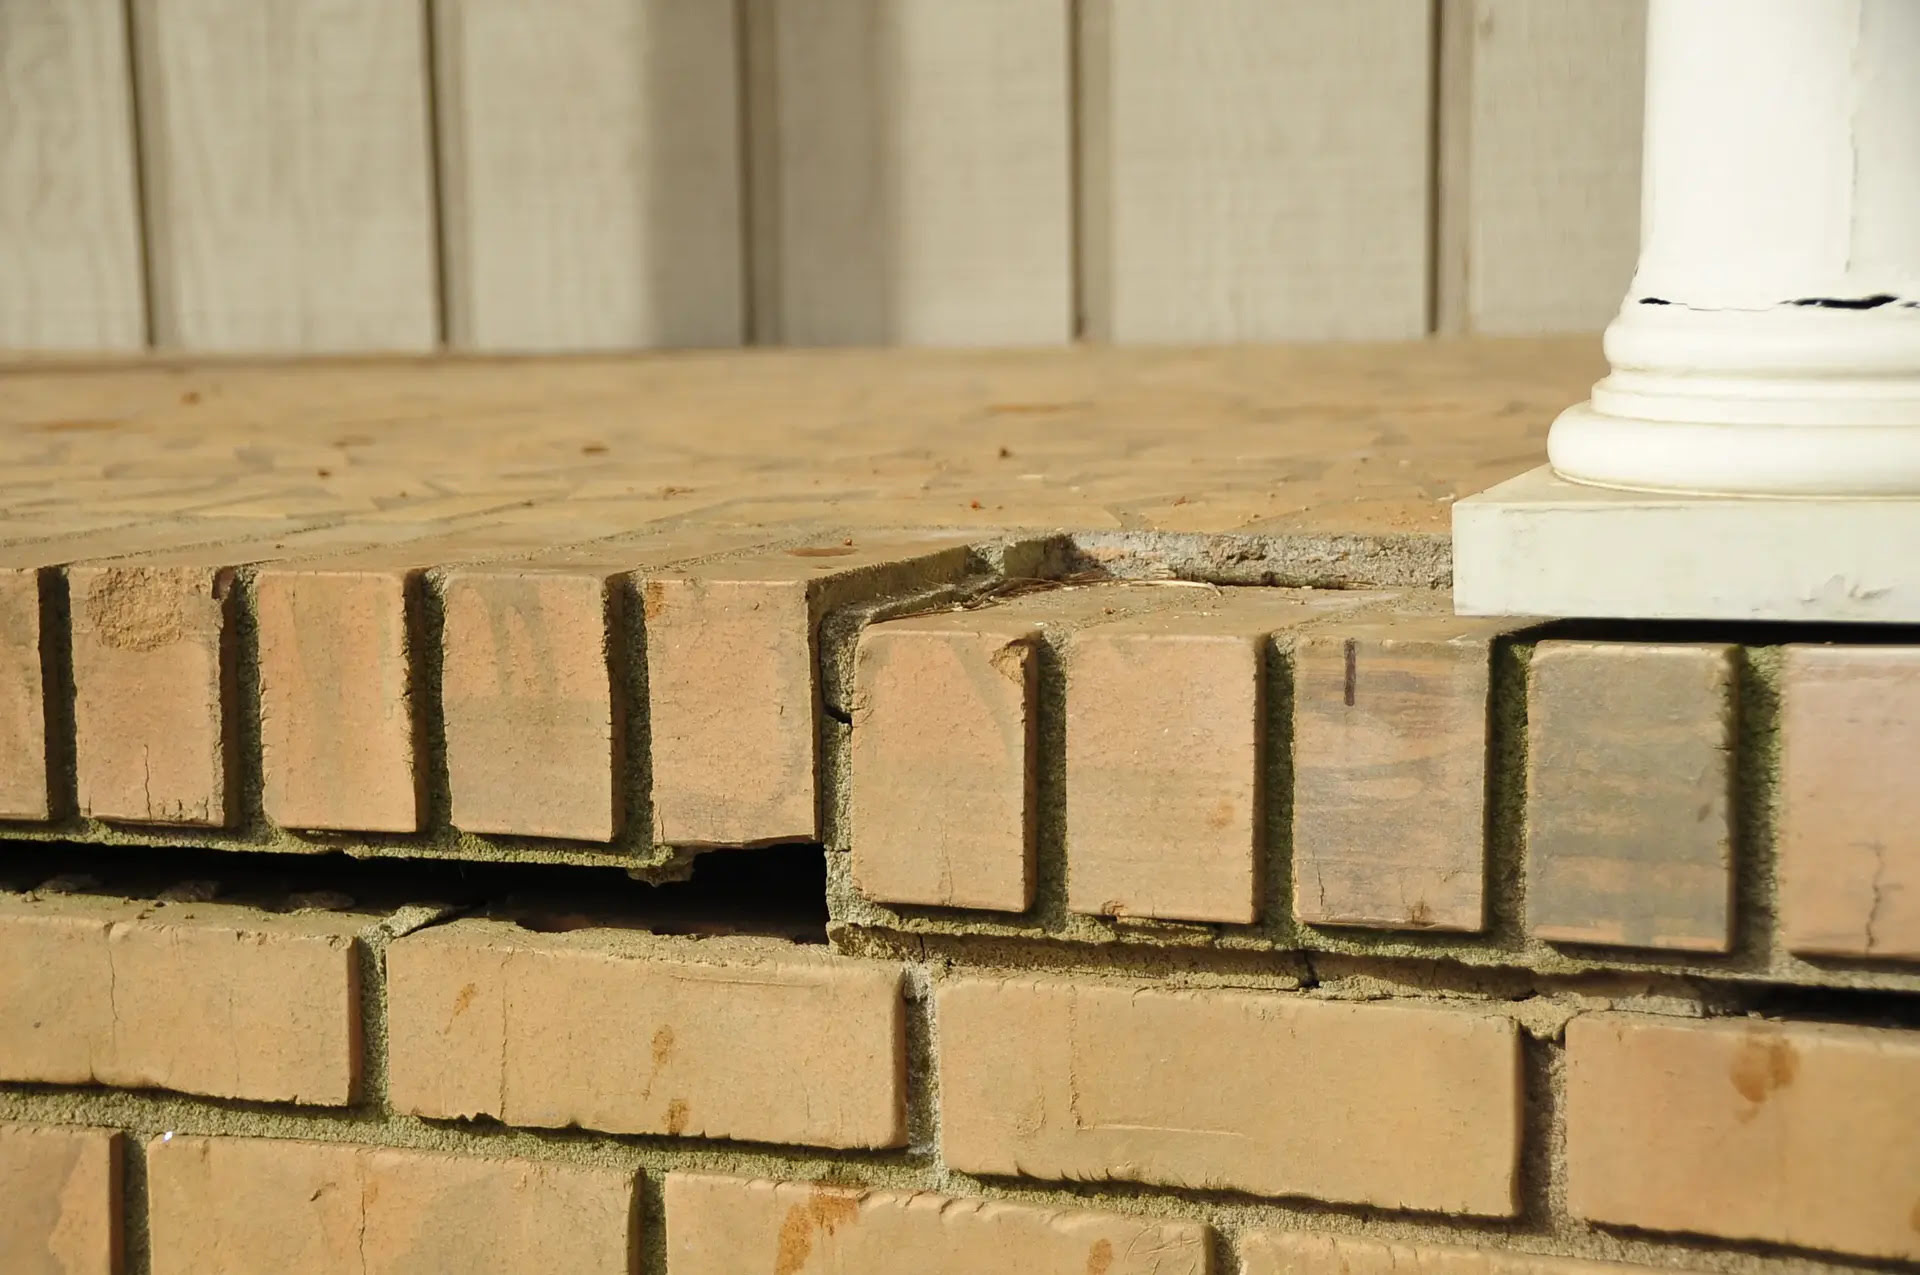
- Inspect for cracks and holes: Carefully inspect the porch for any cracks or holes. Use a concrete patching compound to fill in any imperfections and ensure a smooth surface. Follow the manufacturer’s instructions for mixing and applying the compound. Allow sufficient drying time before proceeding.
- Remove any existing sealers or coatings: If your porch has previously been sealed or coated, it’s essential to remove these before applying the stain. Use a chemical stripper or a power grinder to remove any existing sealers or coatings. Follow the instructions provided by the manufacturer, and take necessary safety precautions.
- Test for moisture: Before applying the stain, it’s crucial to test the moisture content of the concrete. Excessive moisture can prevent the stain from properly adhering and can lead to an uneven finish. Conduct a moisture test using a moisture meter or by taping plastic sheeting to the surface and checking for condensation after 24 hours.
By properly preparing the porch, you lay the foundation for a successful staining project. Take your time during this step, as it will greatly impact the final results. Once the porch is clean, cracks are filled, previous coatings are removed, and moisture levels are checked, you’re ready to move on to the next phase: cleaning the surface.
Cleaning the Surface
One of the most crucial steps in staining a concrete porch is thoroughly cleaning the surface. Proper cleaning ensures that the stain adheres well and results in a clean and vibrant finish. Follow these steps to effectively clean your porch:
- Sweep the porch: Start by sweeping the porch to remove loose debris, dirt, and dust. Use a broom with stiff bristles to effectively sweep the entire surface.
- Apply a concrete cleaner: Dilute the concrete cleaner according to the manufacturer’s instructions and apply it to the porch using a spray bottle. Make sure to cover the entire surface evenly. Allow the cleaner to sit for the recommended time specified on the product label. This will help break down dirt, grime, and oil stains.
- Scrub the surface: Use a stiff-bristled brush or a scrub brush to scrub the surface. Pay extra attention to any particularly stubborn stains or high traffic areas. Using a circular motion, work the cleaner into the concrete, ensuring that it penetrates the pores for a thorough clean. This will help remove any embedded dirt and stains.
- Rinse the porch: After scrubbing the surface, thoroughly rinse the porch using a pressure washer or a garden hose with a high-pressure nozzle. Start from the highest point and work your way down, ensuring that all cleaner residue is removed. This step is crucial as any leftover cleaner can interfere with the staining process.
- Allow the surface to dry: Give the porch ample time to dry completely before moving on to the next step. Ideally, allow it to dry for at least 24 to 48 hours, depending on the weather conditions. Ensure that there is no moisture present on the surface, as it can hinder the adhesion of the stain.
By thoroughly cleaning the porch before staining, you remove any dirt, grime, and oil stains, ensuring that the stain is applied to a clean and smooth surface. This step sets the foundation for a successful staining process and helps in achieving a beautiful and long-lasting finish. Once the porch is clean and completely dry, you’re ready to move on to the next step: patching cracks and holes, if any are present.
Patching Cracks and Holes
Before proceeding with the staining process, it’s important to address any cracks or holes in the concrete porch. Patching these imperfections will ensure a smooth and even surface for the stain to adhere to. Follow these steps to effectively patch cracks and holes in your porch:
- Clean out the cracks: Use a wire brush or a chisel to clean out any loose debris, dirt, or old filler from the cracks. This will ensure better adhesion of the patching compound.
- Prepare the patching compound: Follow the manufacturer’s instructions to prepare the concrete patching compound. Mix it to the recommended consistency, ensuring that there are no lumps or dry patches.
- Apply the patching compound: Use a putty knife or a trowel to apply the patching compound into the cracks and holes. Press it firmly into the voids, ensuring that it completely fills the space. Smooth out the surface and level it with the surrounding area. If needed, apply multiple layers, allowing each layer to dry before adding the next.
- Smooth out the surface: After applying the patching compound, use a damp cloth or sponge to smooth out the surface. This will help blend the patch with the existing concrete, creating a seamless finish.
- Allow the patch to dry: Give the patching compound sufficient time to dry and cure. The drying time can vary depending on the product used, so follow the manufacturer’s instructions. Typically, it takes around 24 to 48 hours for the compound to fully cure.
- Check for any uneven areas: Once the patching compound is dry, inspect the patched areas for any unevenness. Sand down any high spots or rough edges with sandpaper to create a smooth and even surface.
Patching the cracks and holes in your concrete porch is essential for achieving a flawless and professional-looking finish. Taking the time to properly address these imperfections will not only enhance the appearance of the porch but also ensure the longevity of the stained surface. Once the patches are dry and the surface is smooth, you can move on to the next step: protecting the surrounding areas.
Read more: How To Level Concrete Porch
Protecting Surrounding Areas
Before you begin staining your concrete porch, it’s important to take precautions to protect the surrounding areas. Stain can be difficult to remove once it splatters or spills onto unintended surfaces, so it’s essential to properly cover and shield any nearby items or landscaping. Follow these steps to effectively protect the surrounding areas:
- Cover furniture and objects: If there are any furniture pieces or objects near the porch, such as outdoor tables, chairs, or planters, cover them with plastic sheets or tarps to prevent any accidental splatters or drips.
- Secure nearby plants and vegetation: If you have plants or vegetation close to the porch, carefully lift and secure them away from the staining area. Cover them with plastic or move them to a safe location temporarily.
- Create a barrier: Use painter’s tape or masking tape to create a protective barrier around the porch. Apply the tape to any vertical surfaces, such as nearby walls or posts, to ensure that no stain reaches them accidentally.
- Use drop cloths: Lay down drop cloths or plastic sheets on any nearby walkways or adjacent surfaces to catch any potential drips or spills. This will protect the ground from staining and make cleanup easier.
- Cover nearby windows and doors: If there are windows or doors in close proximity to the porch, protect them by covering them with plastic or using painter’s tape. This will prevent any accidental stain splatters from reaching these surfaces.
By taking the time to properly protect the surrounding areas, you minimize the risk of unwanted staining and avoid the hassle of cleaning up afterwards. These simple precautions will ensure that your staining project goes smoothly and that only the intended surface is stained. Once you have taken the necessary protective measures, you’re ready to move on to the next step: choosing the right stain.
Choosing the Right Stain
Choosing the right stain for your concrete porch is crucial for achieving the desired color and finish. There are various types of concrete stains available, each offering different advantages and effects. Consider the following factors when selecting the right stain:
- Water-based vs. acid-based stain: Water-based stains are generally easier to apply and have a wider range of color options. They are also more environmentally friendly and have a shorter drying time. Acid-based stains, on the other hand, create unique and dramatic effects by reacting with the minerals in the concrete. They offer a natural, variegated look.
- Color options: Concrete stains come in a wide range of colors, from earth tones to vibrant hues. Consider the overall aesthetic of your outdoor space and choose a color that complements the surrounding elements. It’s recommended to test the stain on a small, inconspicuous area of the porch to ensure it achieves the desired color.
- Opacity: Stains have different levels of opacity, ranging from translucent to opaque. Translucent stains allow the natural variations of the concrete to show through, while opaque stains provide more solid coverage. Consider the level of transparency you want when selecting the stain.
- UV resistance and durability: Look for a stain that offers UV resistance to prevent fading and discoloration over time. Also, consider the durability of the stain, especially if your porch is subjected to heavy foot traffic or outdoor elements.
- Finish: Stains can provide a matte, semi-gloss, or glossy finish. Consider the level of shine you desire for your porch and select a stain with the appropriate finish.
Take your time to research different stain options and consider the specific requirements and preferences for your concrete porch. Consult with professionals or visit a local home improvement store to get expert advice and recommendations. Once you’ve chosen the right stain, you’re ready to move on to the exciting part: applying the stain to your porch.
Before staining a concrete porch, make sure to thoroughly clean and etch the surface to ensure proper adhesion of the stain. Use a concrete cleaner and follow the manufacturer’s instructions for best results.
Applying the Stain
Now that you’ve chosen the right stain for your concrete porch, it’s time to apply it and bring your vision to life. Follow these steps to ensure a successful application process:
- Prepare the stain: Start by thoroughly stirring the stain to ensure a consistent color throughout. If you’re using an acid-based stain, be sure to follow the manufacturer’s instructions for mixing and preparation.
- Apply the first coat: Using a high-quality brush or roller, apply the stain evenly to the porch surface. Work in small sections, starting from one corner and working your way across. Apply the stain in a smooth and consistent manner, ensuring complete coverage.
- Blend overlapping areas: If you’re working in sections, make sure to blend the overlapping areas to create a seamless transition. This will prevent noticeable lines and achieve a uniform finish.
- Consider additional coats: Depending on the desired color intensity and opaqueness, you may need to apply multiple coats of the stain. Follow the manufacturer’s instructions for drying time before applying additional coats. Allow each coat to dry completely before proceeding.
- Work in a controlled environment: It’s important to work in a well-ventilated area, avoiding direct sunlight if possible. This will prevent the stain from drying too quickly and ensure proper absorption into the concrete surface.
- Cleanup: After applying the stain, clean your brushes or rollers immediately using water or the appropriate cleaning agent. Dispose of any staining materials and debris responsibly.
Remember, the application process is a crucial step in achieving a beautiful and even finish. Take your time, be patient, and apply the stain with care. It’s recommended to practice on a small, inconspicuous area of the porch before proceeding to the entire surface.
Once you’ve applied the stain, you can move on to the next step: achieving the desired color.
Achieving the Desired Color
After applying the stain to your concrete porch, it’s important to assess the color and make any necessary adjustments to achieve your desired result. Keep in mind that the final color may differ from your initial expectations due to the unique characteristics of the concrete and the stain. Here are some tips to help you achieve the desired color:
- Allow for curing time: Concrete stains often require some time to fully develop and settle into their final color. This process, known as curing, can take anywhere from a few hours to a few days. Be patient and allow the stain to cure before assessing the color.
- Consider additional coats: If the initial color is lighter than expected, you can apply additional coats of stain to achieve a deeper hue. Keep in mind that each application will darken the color, so proceed with caution and test on a small area first.
- Use a top coat: Applying a clear top coat or sealer can enhance and deepen the color of the stain. A top coat also provides added protection for your porch against weathering, UV rays, and foot traffic. Follow the manufacturer’s instructions for proper application of the top coat.
- Embrace natural variations: Concrete is a natural material, and variations in color and texture are to be expected. These variations can contribute to the unique beauty of a stained concrete porch. Embrace these variations and appreciate the organic feel they bring to your outdoor space.
- Consider professional assistance: If you’re unsure about achieving your desired color or want to ensure a flawless finish, consider seeking the help of a professional concrete stain contractor. They have the expertise and experience to guide you and deliver the results you envision.
Remember, achieving the desired color may require some experimentation and adjustments. Take your time to assess the color and make any necessary tweaks to achieve your desired outcome. Once you’re satisfied with the color, you can proceed to the next step: sealing the stained porch.
Read more: How To Extend A Concrete Porch
Sealing the Stained Porch
After staining your concrete porch, it’s essential to apply a sealer to protect the surface and enhance the longevity of the stain. Sealing helps to prevent stains, moisture penetration, and UV damage. Follow these steps to effectively seal your stained porch:
- Choose the right sealer: Select a sealer specifically designed for exterior concrete surfaces. Consider factors such as durability, UV resistance, and the desired finish (matte, semi-gloss, or glossy).
- Clean the surface: Ensure that the stained porch is clean and free from any debris, dust, or stains before applying the sealer. Sweep the surface and remove any loose particles.
- Apply the sealer: Use a long-handled roller or brush to apply a thin and even coat of sealer to the porch surface. Work in small sections, starting from one corner and moving across. Ensure complete coverage, making sure not to miss any areas.
- Allow for drying time: Follow the manufacturer’s instructions for drying time. Typically, it takes about 24 hours for the sealer to dry, but this can vary depending on the product and environmental conditions. Avoid foot traffic, water exposure, and other activities that could disrupt the drying process.
- Apply additional coats: Depending on the type of sealer you’re using, you may need to apply multiple coats to achieve optimal protection. Allow each coat to dry completely before applying the next one.
- Maintain the sealed porch: To prolong the life of the sealer and maintain the beauty of your stained porch, follow proper maintenance practices. Regularly clean the surface with a mild detergent and water, and avoid using abrasive cleaners or chemicals that could damage the sealer.
Applying a sealer to your stained porch not only protects the surface but also enhances the color and sheen of the stain. The sealer creates a protective barrier that helps your porch withstand the outdoor elements and adds durability to the stained finish. Once the sealer is dry and cured, your stained porch is ready to be enjoyed for years to come.
Curing and Drying Time
After staining and sealing your concrete porch, it’s important to allow sufficient time for the stain and sealer to cure and fully dry. Proper curing and drying time ensure that the stain and sealer adhere well to the surface, resulting in a long-lasting and beautiful finish. Here’s what you need to know about the curing and drying process:
Curing Time:
Curing refers to the process in which the stain chemically reacts with the concrete surface, creating a permanent bond. The curing time can vary depending on factors such as humidity, temperature, and the type of stain used. It’s generally recommended to allow the stain to cure for a minimum of 24-48 hours before subjecting the porch to heavy traffic or exposing it to moisture. During this time, it’s crucial to keep the porch dry and avoid any activities that could disrupt the curing process.
Drying Time:
Drying time refers to the time it takes for the sealer to fully dry and be ready for use. The drying time can vary depending on the type of sealer used, environmental conditions, and the number of coats applied. Typically, it takes around 24-72 hours for the sealer to dry completely. However, it’s important to check the manufacturer’s instructions for the specific drying time of the sealer you’re using. During this period, it’s essential to avoid any foot traffic, water exposure, or heavy objects on the porch that could damage the drying sealer.
Factors to Consider:
Several factors can affect the curing and drying time of the stain and sealer:
- Temperature and humidity: Higher temperatures and lower humidity levels tend to speed up the drying and curing process, while colder temperatures and higher humidity can slow it down.
- Air circulation: Adequate air circulation can help facilitate the drying process. Ensure there is proper ventilation in the area where the porch is located.
- Number of coats: If multiple coats of stain or sealer are applied, it may increase the overall drying time. Each layer needs to dry completely before applying the next one.
- Product recommendations: Always refer to the manufacturer’s instructions for the specific stain and sealer you are using. They will provide the most accurate information and guidelines for the recommended curing and drying time.
Remember to exercise patience and allow the necessary time for the stain and sealer to cure and dry properly. Rushing the process can compromise the quality and longevity of the finish. Once the stain and sealer have fully cured and dried, your porch is ready to be enjoyed and admired.
Final Tips and Recommendations
As you complete the process of staining your concrete porch, here are some final tips and recommendations to ensure a successful and long-lasting finish:
- Read and follow product instructions: Always carefully read and follow the manufacturer’s instructions for the stain, sealer, and any other products used for the project. This will help you achieve the best results and ensure the longevity of the finished porch.
- Do a small test area: Before applying the stain to the entire porch, it’s wise to do a small test area first. This allows you to evaluate the color, opacity, and compatibility of the stain with your concrete surface.
- Protect yourself: During the staining process, wear appropriate personal protective equipment, such as gloves, safety glasses, and a mask, to protect yourself from chemicals, dust, and fumes.
- Regular maintenance: To extend the life of your stained porch, perform regular maintenance. This includes keeping the surface clean by sweeping away debris and regularly washing it with a mild detergent and water. Avoid using abrasive cleaners that can damage the stain or sealer.
- Avoid harsh chemicals: Avoid using harsh chemicals or acidic cleaning solutions on your stained porch, as they can potentially damage the finish. Stick to gentle and non-abrasive cleaning methods.
- Reapply sealer periodically: Over time, the sealer on your porch may wear off due to weathering and foot traffic. To maintain its protective qualities and appearance, periodically reapply a fresh coat of sealer as recommended by the manufacturer.
- Consider professional assistance: If you’re unsure about any step of the staining process or want to achieve a flawless finish, consider hiring a professional concrete staining contractor. They have the skills and expertise to ensure a professional and beautiful result.
By following these tips and recommendations, you can enjoy a stunning and durable stained concrete porch for years to come. Remember, patience, attention to detail, and proper maintenance are key to a successful staining project. Now, step back, admire your work, and get ready to enjoy your transformed porch.
Conclusion
Congratulations on successfully staining your concrete porch! By following the step-by-step guide and implementing the tips and recommendations provided, you have transformed your porch into a visually appealing and durable space. Staining your concrete porch not only enhances its curb appeal but also adds protection and longevity to the surface.
We started by gathering the necessary materials and tools and then prepared the porch by cleaning the surface and patching any cracks or holes. We also took the time to protect the surrounding areas to prevent any unwanted stains or spills.
Choosing the right stain played a crucial role in achieving the desired color and finish. By carefully considering factors such as water-based vs. acid-based stains, color options, opacity, UV resistance, and finish, you were able to select the perfect stain for your porch.
The application process required patience and diligence, ensuring even coverage and blending overlapping areas. You also had the option to apply multiple coats to achieve the desired intensity of color. Once the stain was applied, sealing the stained porch provided added protection and enhanced the overall appearance.
Remember, proper curing and drying time is essential to allow the stain and sealer to fully bond and dry. By allowing sufficient time for these processes, you ensured a long-lasting and beautiful finish.
Finally, we provided some final tips and recommendations, including reading product instructions, doing a test area, protecting yourself, regular maintenance, and considering the assistance of a professional if needed.
Now, step back and admire your beautifully stained concrete porch. Enjoy the enhanced curb appeal and the sense of pride that comes from completing a successful DIY project. With proper care and maintenance, your stained porch will continue to be a stunning centerpiece of your outdoor space for years to come.
Frequently Asked Questions about How To Stain A Concrete Porch
Was this page helpful?
At Storables.com, we guarantee accurate and reliable information. Our content, validated by Expert Board Contributors, is crafted following stringent Editorial Policies. We're committed to providing you with well-researched, expert-backed insights for all your informational needs.


0 thoughts on “How To Stain A Concrete Porch”