Home>Furniture & Design>Outdoor Furniture>How To Build Handrails For Outdoor Steps
Outdoor Furniture
How To Build Handrails For Outdoor Steps
Modified: August 28, 2024
Learn how to build sturdy handrails for your outdoor steps with our expert tips and step-by-step guide. Enhance your outdoor furniture and design with custom-built handrails.
(Many of the links in this article redirect to a specific reviewed product. Your purchase of these products through affiliate links helps to generate commission for Storables.com, at no extra cost. Learn more)
Introduction
Welcome to the world of outdoor design and furniture! Whether you're a seasoned DIY enthusiast or a newcomer to the world of home improvement, building handrails for outdoor steps can be a rewarding and practical project. Not only do handrails enhance the safety of your outdoor space, but they also contribute to its aesthetic appeal. In this comprehensive guide, we'll walk you through the process of constructing sturdy and visually appealing handrails for your outdoor steps.
When it comes to outdoor furniture and design, the details matter. Handrails are an essential component of any outdoor staircase, providing stability and support for those navigating the steps. Beyond their functional significance, handrails can also add a touch of elegance and charm to your outdoor space, elevating its overall ambiance. By taking on the task of building handrails for your outdoor steps, you have the opportunity to customize and personalize this crucial feature, ensuring that it seamlessly complements your outdoor decor and architecture.
Moreover, the satisfaction of completing a project that enhances both the safety and beauty of your outdoor area is immeasurable. With the right tools, materials, and a bit of guidance, you can embark on this endeavor with confidence, knowing that you are investing in the long-term value and appeal of your home.
Throughout this guide, we will provide detailed instructions, tips, and insights to help you navigate each step of the handrail-building process. From planning and measuring to the final touches, we will cover everything you need to know to create handrails that are not only structurally sound but also visually appealing. So, roll up your sleeves, gather your tools, and let's embark on this fulfilling journey of creating handrails that will enhance the safety and elegance of your outdoor space.
Key Takeaways:
- Building handrails for outdoor steps is a rewarding DIY project that enhances safety and adds elegance to your outdoor space. With the right tools and materials, you can create a personalized and durable addition to your home.
- Precise measurements, thorough planning, and attention to detail are essential for constructing and attaching handrails. By adding finishing touches, such as protective finishes and decorative elements, you can elevate the overall appearance and functionality of the handrails.
Read more: How To Build An Outdoor Step
Tools and Materials Needed
Before diving into the construction of handrails for your outdoor steps, it’s essential to gather the necessary tools and materials to ensure a smooth and efficient building process. Here’s a comprehensive list of what you’ll need:
Tools:
- Measuring tape
- Pencil
- Level
- Power drill
- Screwdriver
- Saw (depending on the material you choose for the handrails)
- Ratchet set
- Adjustable wrench
- Hammer
- Paintbrushes (if painting or staining the handrails)
Materials:
- Pressure-treated or weather-resistant wood for the handrails
- Wood screws or bolts
- Metal brackets or balusters (if desired for added support and aesthetics)
- Wood stain or paint (optional, for finishing the handrails)
- Wood sealer or weatherproofing treatment
- Concrete or masonry anchors (if attaching handrails to concrete steps)
It’s important to select high-quality materials that are suitable for outdoor use, as they will be exposed to the elements and must withstand varying weather conditions. Additionally, having the right tools at your disposal will make the construction process more efficient and ensure that the handrails are installed with precision and stability.
By gathering these tools and materials, you’ll be well-equipped to proceed with the next steps of measuring, planning, and ultimately building the handrails for your outdoor steps.
Measuring and Planning
Before you start constructing the handrails for your outdoor steps, precise measurements and thorough planning are crucial for a successful and visually appealing outcome. Here’s a step-by-step guide to help you through the measuring and planning phase:
Read more: How To Build Outdoor Steps On A Slope
1. Assess the Staircase
Begin by evaluating the layout and dimensions of the outdoor steps where the handrails will be installed. Take note of the total length of the staircase and the number of steps, as well as any unique features or obstacles that may impact the handrail design.
2. Determine the Height and Length
Measure the height of each step as well as the distance from the top of the top step to the ground and from the bottom of the bottom step to the ground. These measurements will help you determine the appropriate height and length for the handrails to provide optimal support and safety.
3. Consider Building Codes and Regulations
Check local building codes and regulations to ensure compliance with safety standards and requirements for handrail height, spacing, and other relevant specifications. Adhering to these guidelines is essential to guarantee the safety and legality of your handrail installation.
4. Sketch the Design
With the measurements in hand, sketch out a design for the handrails, considering the material you’ll be using and any decorative elements you wish to incorporate. This will serve as a visual reference and guide as you move forward with the construction process.
5. Plan for Attachment Points
Determine the locations where the handrails will be attached to the steps and any additional support structures, such as posts or brackets. Ensure that these attachment points are secure and capable of bearing the weight and pressure that the handrails will experience.
By diligently measuring and planning the handrail installation, you’ll lay a solid foundation for the construction phase, setting the stage for a well-executed and visually appealing addition to your outdoor space.
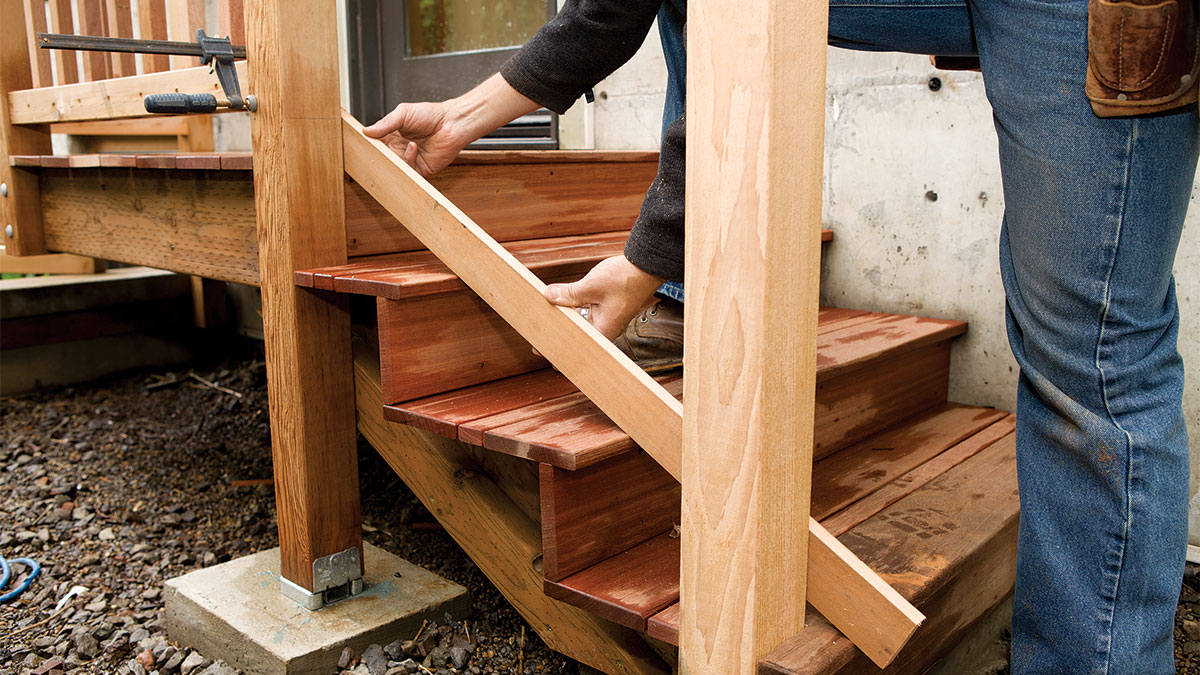
Building the Handrails
With precise measurements and a clear plan in place, it’s time to embark on the construction of the handrails for your outdoor steps. Whether you opt for a classic wooden design or a more contemporary metal style, the following steps will guide you through the building process:
1. Cut the Handrail Material
If you’re using wood for the handrails, carefully measure and cut the material to the appropriate lengths based on your earlier measurements and design plan. Use a saw with the appropriate blade for clean and precise cuts.
2. Shape and Smooth the Edges
After cutting the handrail sections, use a sander or sandpaper to round off any sharp edges and create a smooth, comfortable surface. This step is especially important for wooden handrails to ensure safety and comfort for users.
Read more: How To Build Brick Steps
3. Add Decorative Elements (Optional)
If you’re looking to add decorative elements such as carved details or metal balusters to your handrails, now is the time to incorporate these features. Carefully attach them to the handrail sections according to your design plan, ensuring that they are securely fastened.
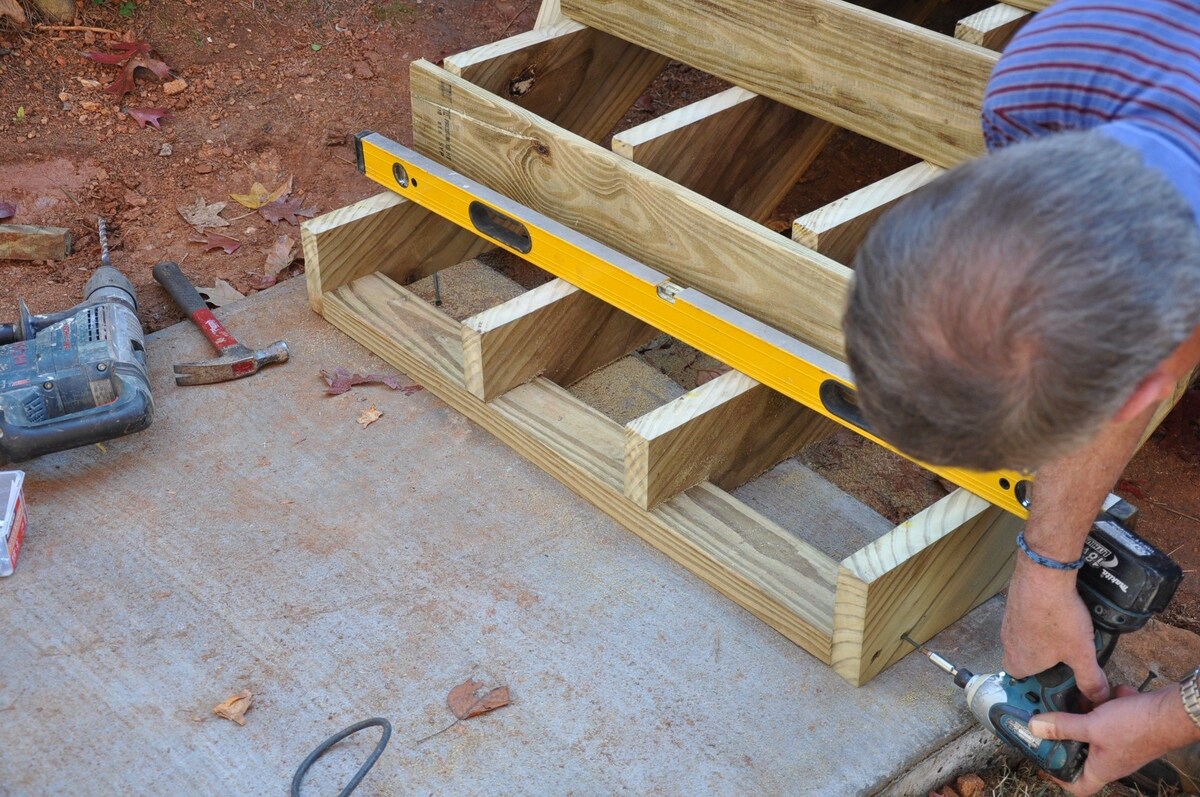
4. Pre-Drill Attachment Holes
For wooden handrails, pre-drill pilot holes at the designated attachment points to prevent splitting and ensure precise alignment during installation. Use a drill bit that matches the size of the screws or bolts you’ll be using to secure the handrails.
5. Apply Finish (If Desired)
If you plan to stain or paint the handrails, this is the ideal stage to apply the finish. Choose a high-quality outdoor wood stain or paint that complements your outdoor decor and provides protection against the elements.
6. Seal and Protect the Handrails
Regardless of the material you’ve chosen for the handrails, it’s essential to apply a weatherproofing treatment or sealant to safeguard the handrails from moisture, UV exposure, and other environmental factors. This step will prolong the lifespan of the handrails and maintain their appearance over time.
By following these steps, you’ll be well on your way to constructing durable, visually appealing handrails that enhance the safety and aesthetic appeal of your outdoor steps.
Read more: How To Build An Angled Deck Step-by-Step
Attaching the Handrails to the Steps
Once the handrails are constructed and prepared, the next crucial step is to securely attach them to the outdoor steps. Proper installation is essential to ensure the stability and longevity of the handrails. Here’s a detailed guide to help you through the attachment process:
1. Position the Handrails
Place the handrails in their designated positions along the outdoor steps, ensuring that they are aligned according to your initial measurements and design plan. Use a level to confirm that the handrails are perfectly horizontal and make any necessary adjustments.
2. Mark the Attachment Points
Using a pencil or marker, carefully mark the locations where the handrails will be attached to the steps. Ensure that the markings are clear and visible, as they will serve as guides for drilling or anchoring.
3. Drill Pilot Holes
If you’re attaching the handrails to wooden steps, use a power drill to create pilot holes at the marked attachment points. For concrete or masonry steps, use a masonry drill bit to bore holes for the anchors or fasteners.
Read more: How To Build Landscaping Steps
4. Secure the Handrails
With the pilot holes in place, use wood screws, bolts, or masonry anchors to secure the handrails to the steps. Ensure that the fasteners are tightened securely, providing a firm and stable connection between the handrails and the steps.
5. Add Additional Support (If Needed)
Depending on the length and design of the handrails, you may need to install additional support structures such as posts or brackets to reinforce the attachment points and enhance the overall stability of the handrails.
6. Test for Stability
Once the handrails are attached, carefully test their stability by applying pressure and ensuring that they can support the intended weight. Make any final adjustments to the attachment points or fasteners as needed to guarantee a secure and reliable installation.
By following these steps, you’ll effectively attach the handrails to the outdoor steps, creating a safe and durable support system for anyone navigating the staircase.
Finishing Touches
As you near the completion of the handrail installation, attention to detail and thoughtful finishing touches can elevate the overall appearance and functionality of the project. Consider the following steps to add those final flourishes to your newly installed handrails:
Read more: How To Build A Step On A Patio
1. Clean and Inspect
Before adding the finishing touches, take a moment to clean the handrails and the surrounding area. Remove any dust, debris, or markings that may have accumulated during the installation process. Inspect the handrails for any imperfections or areas that may require touch-ups.
2. Apply a Protective Finish
If you haven’t already applied a protective finish to the handrails, now is the time to do so. Choose a weather-resistant sealant or topcoat that provides added protection against moisture, UV rays, and general wear and tear. This step will help preserve the appearance and integrity of the handrails over time.
3. Add Decorative Elements
Consider incorporating decorative elements such as post caps, finials, or ornamental brackets to enhance the visual appeal of the handrails. These subtle additions can impart a touch of elegance and personality to the overall design, contributing to the aesthetic charm of your outdoor space.
4. Touch Up Paint or Stain
If you’ve opted for painted or stained handrails, inspect the finish for any areas that may require touch-ups. Address any blemishes or inconsistencies to ensure a uniform and polished appearance. A fresh coat of paint or stain can rejuvenate the handrails and enhance their visual allure.
Read more: What Are The Steps In Building A House
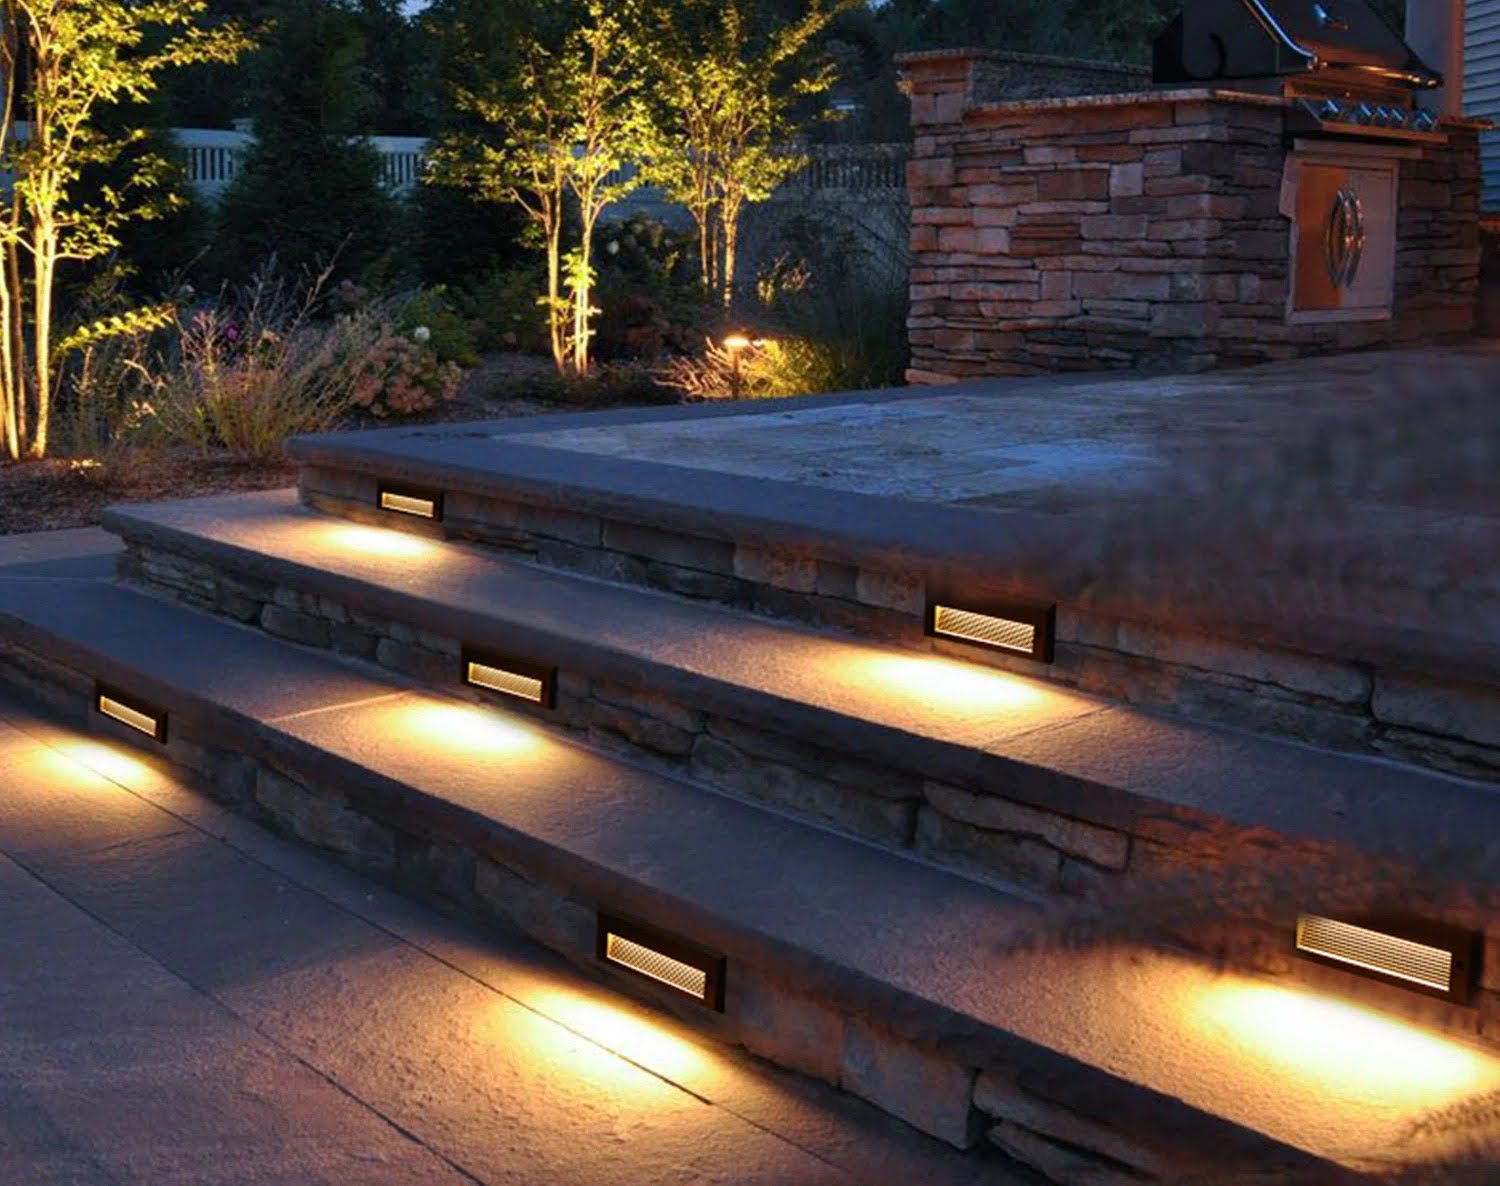
5. Install Lighting (Optional)
For added safety and ambiance, consider installing low-voltage LED lights along the handrails. This not only illuminates the staircase for nighttime use but also contributes to the overall atmosphere of your outdoor space. Ensure that the lighting fixtures are weatherproof and securely installed.
6. Perform a Final Inspection
Once the finishing touches are in place, conduct a thorough final inspection of the handrails. Test their stability, check for any loose components, and ensure that all decorative elements are securely fastened. This meticulous review will provide peace of mind and ensure that the handrails are ready for use.
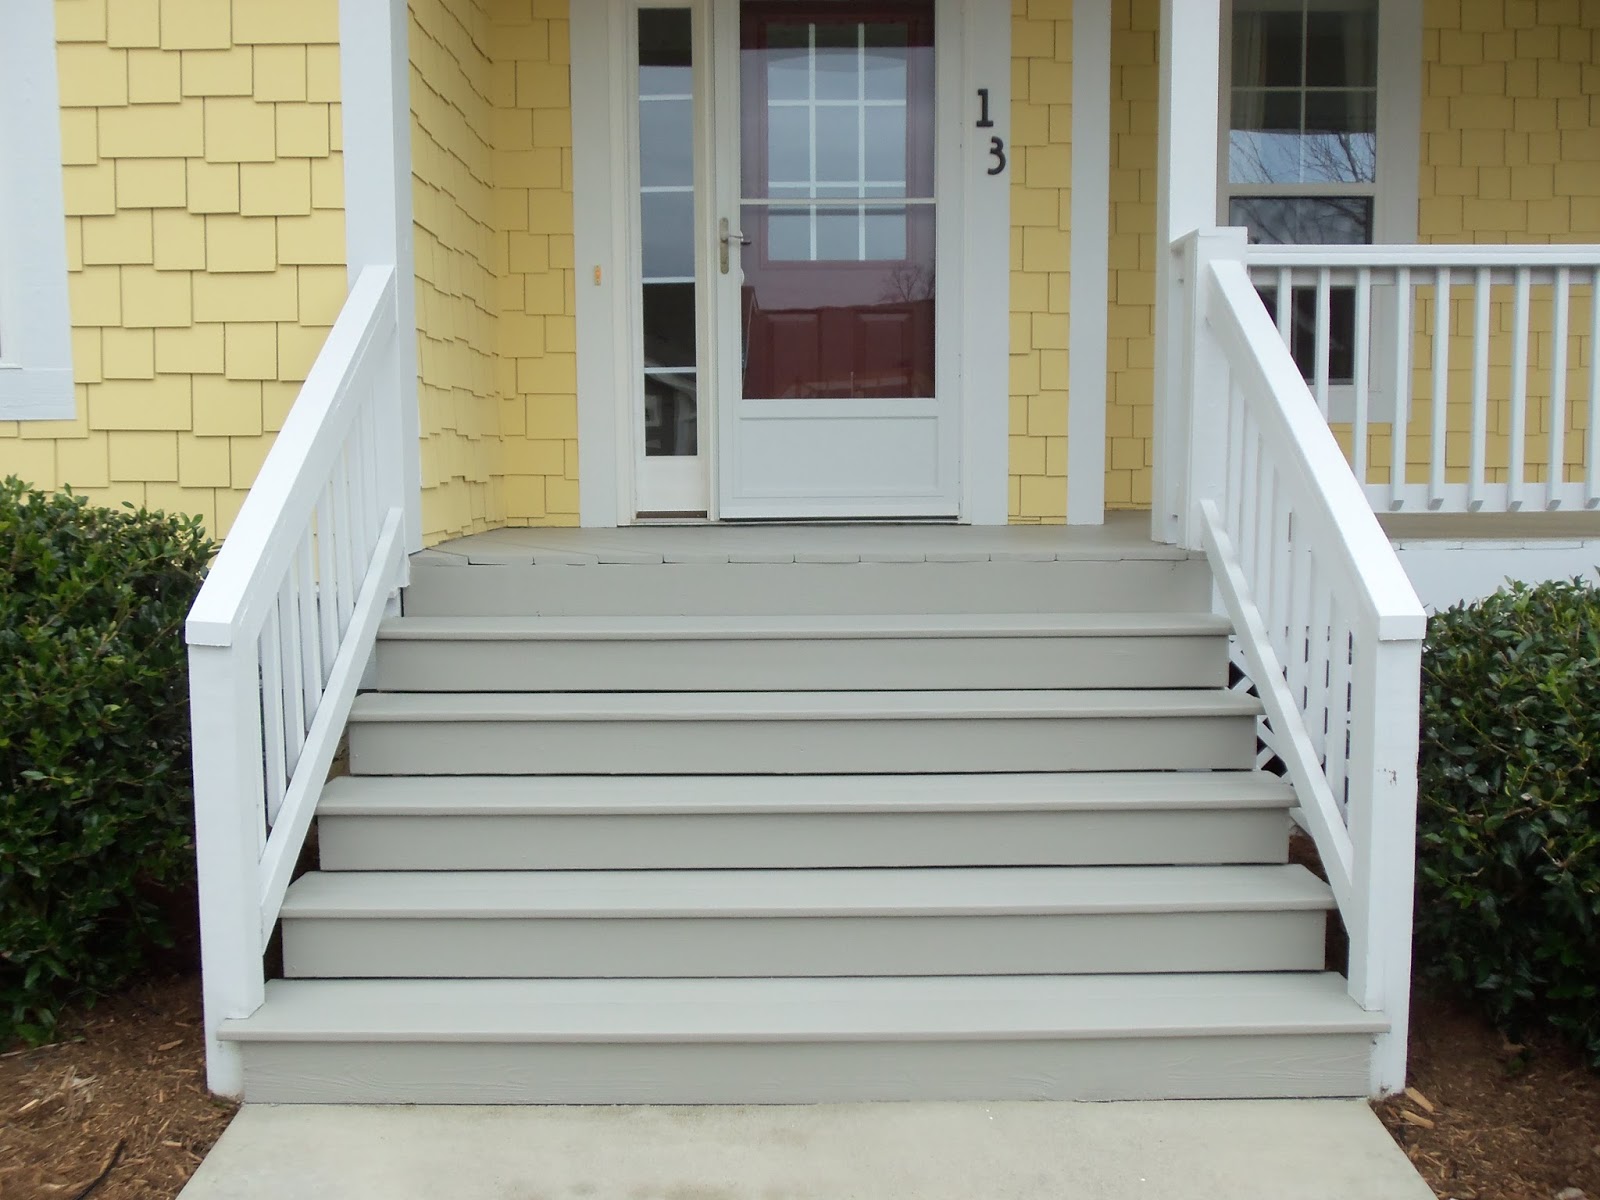
By attending to these finishing touches, you’ll bring a sense of completion and refinement to the handrail installation, creating a polished and inviting entryway for your outdoor space.
Conclusion
Congratulations on successfully completing the construction and installation of handrails for your outdoor steps! By undertaking this project, you’ve not only enhanced the safety and functionality of your outdoor space but also added a touch of personalized style and elegance. As you reflect on the journey from planning and measuring to the finishing touches, it’s evident that the effort invested in this endeavor has yielded a valuable and rewarding outcome.
Building handrails for outdoor steps is a testament to your commitment to creating a welcoming and secure environment for yourself, your family, and your guests. The attention to detail, precision in measurements, and thoughtful consideration of design elements have culminated in a feature that seamlessly integrates with the aesthetics of your outdoor area while prioritizing safety and convenience.
Furthermore, the skills and knowledge acquired throughout this project are invaluable, equipping you with a deeper understanding of outdoor design and construction. The satisfaction of witnessing the transformation of your outdoor steps, from a functional necessity to an aesthetically pleasing focal point, is a testament to your dedication and craftsmanship.
As you admire the newly installed handrails, take pride in the fact that you’ve not only improved the functionality of your outdoor space but also contributed to its overall charm and allure. Your efforts have resulted in a feature that harmoniously blends with the natural beauty of your surroundings, enhancing the visual appeal and cohesiveness of your outdoor environment.
Remember, the completion of this project marks a significant achievement, reflecting your ability to undertake and execute a hands-on task that significantly impacts the form and function of your home. Your commitment to creating a safe, inviting, and aesthetically pleasing outdoor space is a testament to your dedication to the art of home improvement and design.
As you enjoy the fruits of your labor, may the handrails stand as a symbol of your craftsmanship and attention to detail, enriching the experience of traversing your outdoor steps and leaving a lasting impression on all who encounter your meticulously crafted outdoor space.
Frequently Asked Questions about How To Build Handrails For Outdoor Steps
Was this page helpful?
At Storables.com, we guarantee accurate and reliable information. Our content, validated by Expert Board Contributors, is crafted following stringent Editorial Policies. We're committed to providing you with well-researched, expert-backed insights for all your informational needs.

0 thoughts on “How To Build Handrails For Outdoor Steps”