Articles
How To Stain A Concrete Basement Floor
Modified: January 18, 2024
Learn how to stain your concrete basement floor with our informative articles. Transform your space with these easy-to-follow steps and expert tips.
(Many of the links in this article redirect to a specific reviewed product. Your purchase of these products through affiliate links helps to generate commission for Storables.com, at no extra cost. Learn more)
Introduction:
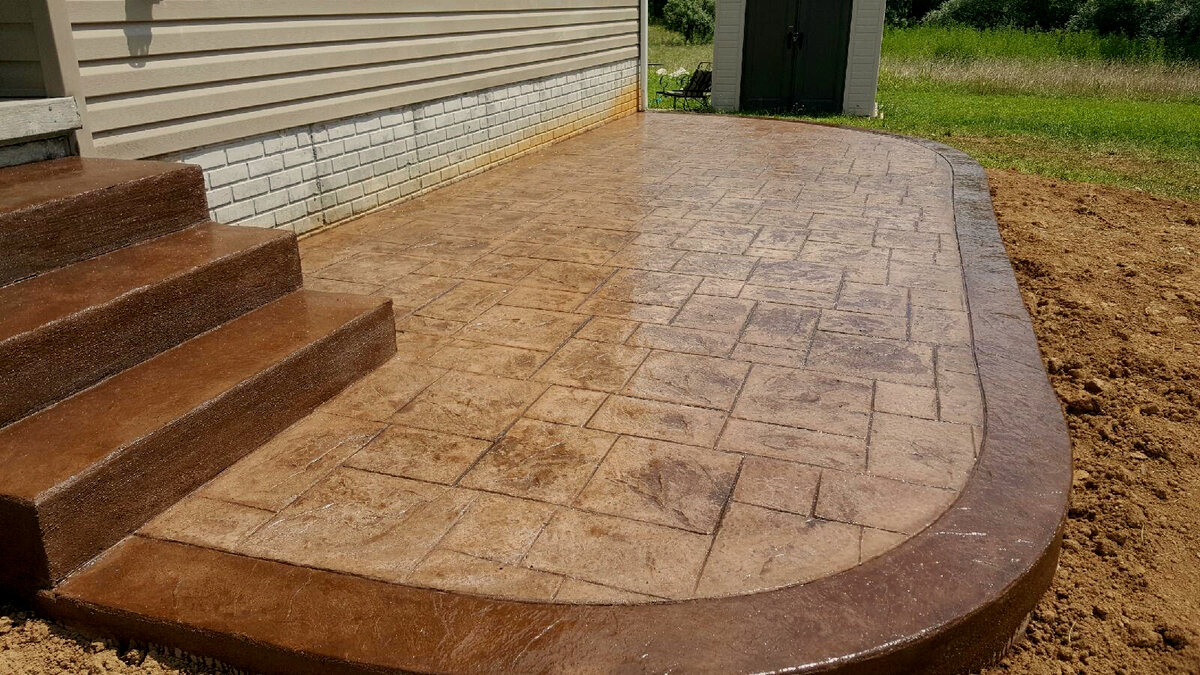
Having a basement in your home provides an additional space that can be transformed into a functional and visually appealing area. If you’re looking to give your basement floor a makeover, staining it can be a great solution. Staining not only adds a beautiful finish to the concrete floor but also helps to protect it from wear and tear.
In this article, we will guide you through the step-by-step process of staining a concrete basement floor. By following these steps, you can achieve a stunning result that will enhance the overall look of your basement.
Before we dive into the process, it’s important to note that staining a concrete floor requires some preparation and attention to detail. It’s essential to follow the recommended guidelines and safety precautions to ensure a successful and long-lasting outcome.
So, let’s get started and transform your dull basement floor into a gorgeous space!
Key Takeaways:
- Transform your dull basement into a stunning space by following the 6-step process of staining a concrete floor. From preparation to sealing, achieve a professional-looking finish that enhances your home’s aesthetics.
- Carefully choose the right stain, clean and prepare the floor, and follow the curing process to achieve a vibrant and durable stained basement floor. Enjoy the renewed charm and functionality it brings to your home!
Read more: How To Stain A Concrete Floor
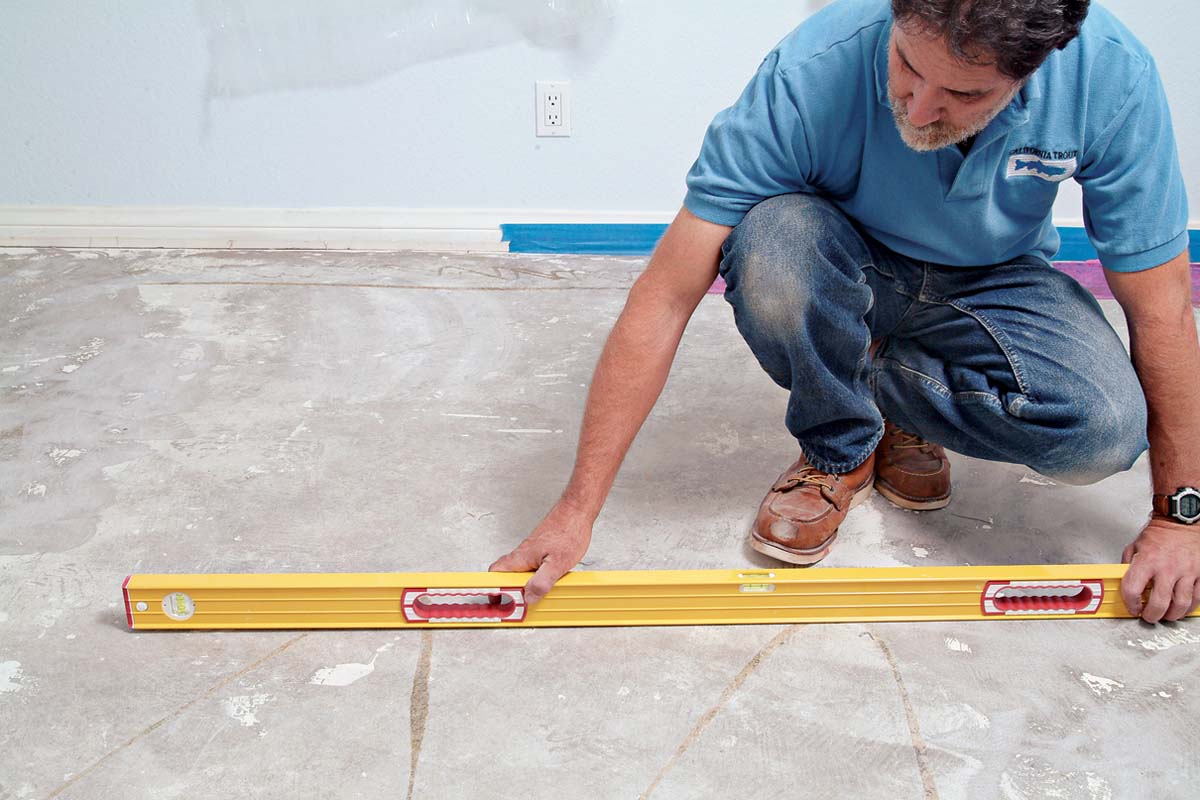
Step 1: Preparing the Basement Floor
The first step in staining a concrete basement floor is to thoroughly prepare the surface. This ensures proper adhesion of the stain and helps to achieve a smooth and even finish. Follow these steps to prepare your basement floor:
- Clean the floor: Begin by removing any furniture, debris, or loose materials from the floor. Sweep the entire area to remove dust and dirt. Use a shop vacuum to eliminate any remaining particles or dirt from the surface.
- Repair any damage: Inspect the floor for cracks, chips, or other damage. Fill any gaps or cracks with a concrete patching compound, following the manufacturer’s instructions. Smooth the surface of the patch with a trowel and allow it to dry completely before proceeding.
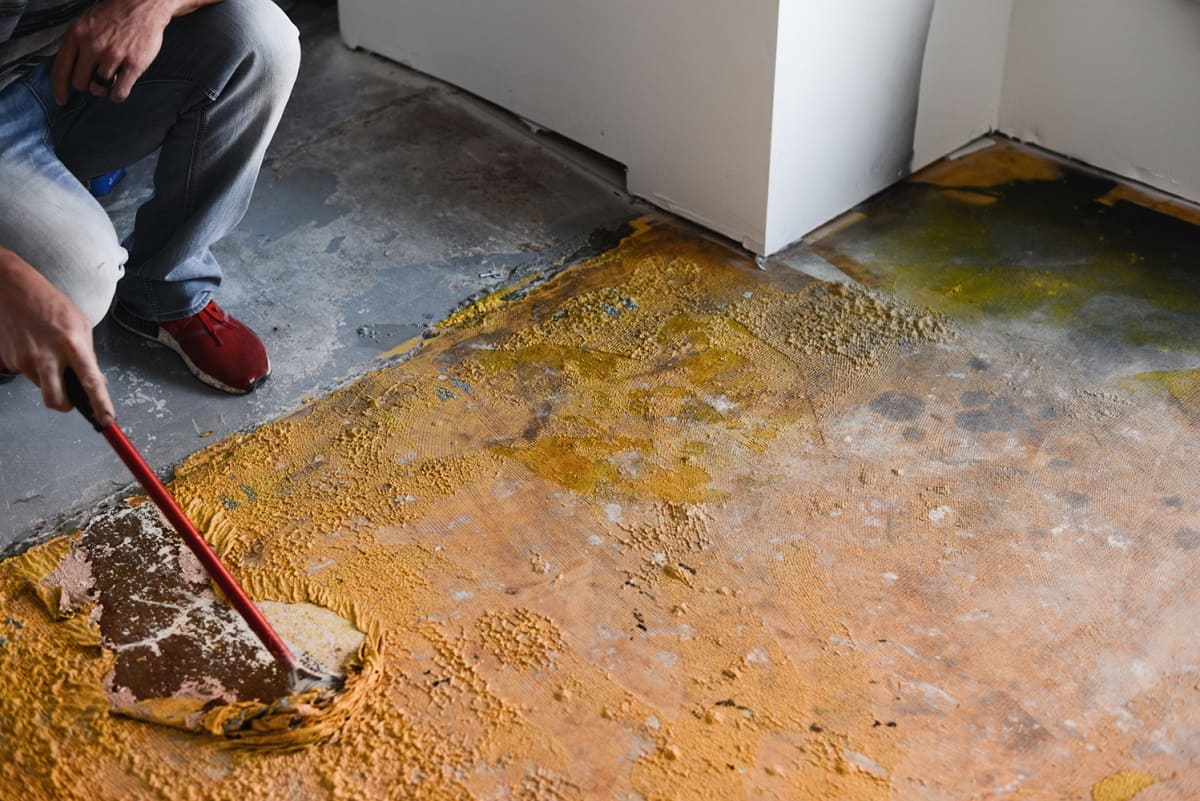
- Remove existing coatings: If your basement floor has any existing coatings, such as paint or sealant, they need to be removed. Use a chemical paint stripper or a concrete grinder to effectively strip off the old coating. Follow the instructions provided and ensure proper ventilation during this process.
- Evaluate moisture levels: It’s crucial to check the moisture levels in your basement before staining the floor. Excessive moisture can affect the adhesion and longevity of the stain. Conduct a moisture test by taping a plastic sheet to the floor and leaving it overnight. If you notice condensation or moisture on the underside of the plastic, you may need to address any underlying moisture issues before proceeding.
Once you’ve completed these steps, you’re ready to move on to the next phase of the staining process: choosing the right stain for your basement floor.
Step 2: Choosing the Right Stain
When it comes to staining your concrete basement floor, it’s important to choose the right stain that suits your desired look and requirements. There are two main types of concrete stains: acid-based stains and water-based stains. Consider the following factors when selecting the stain for your basement floor:
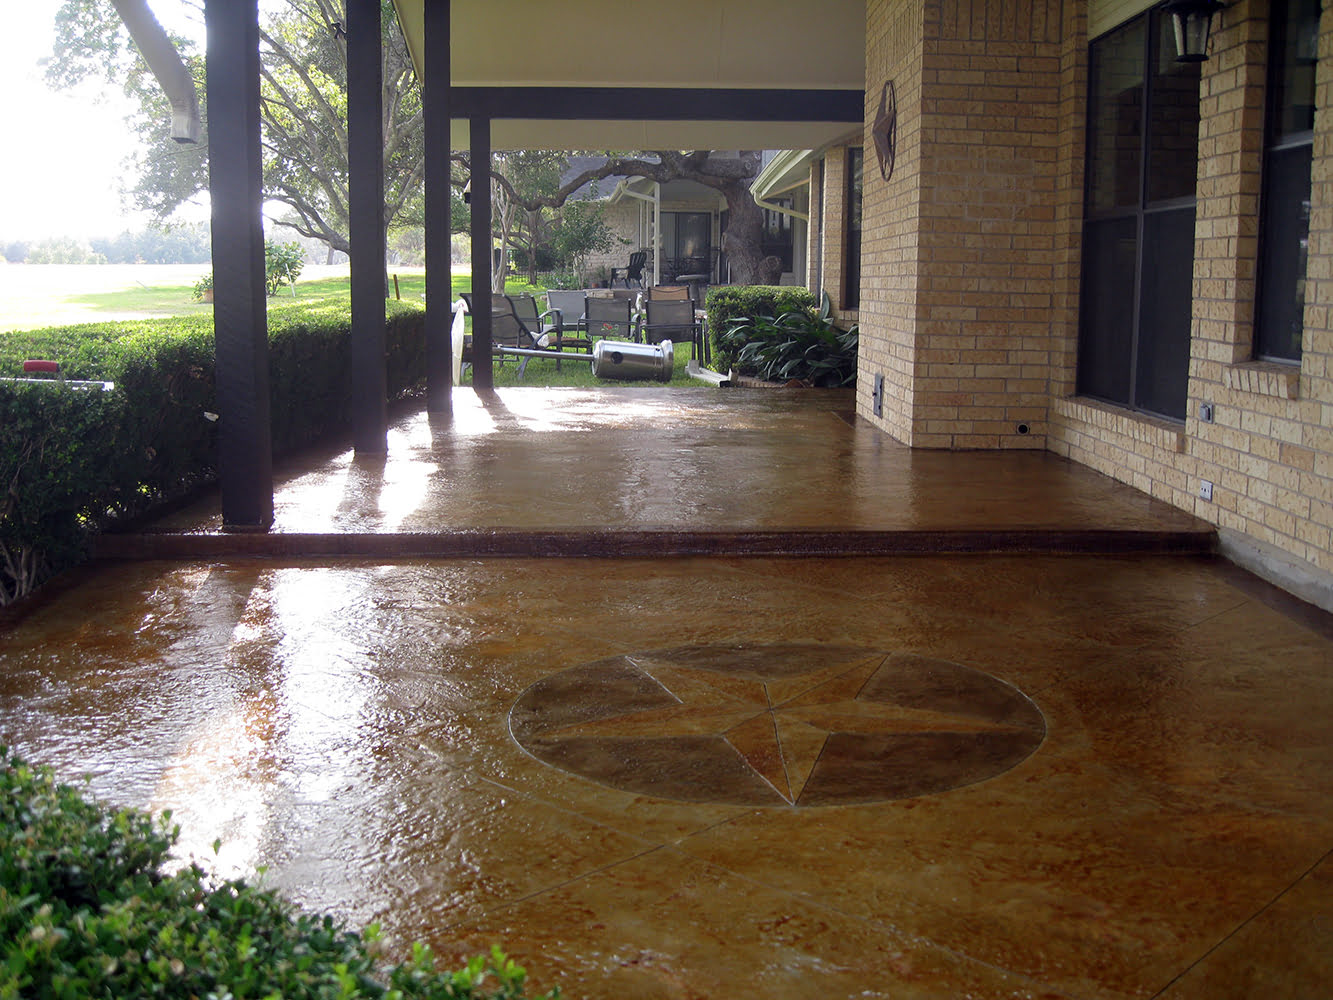
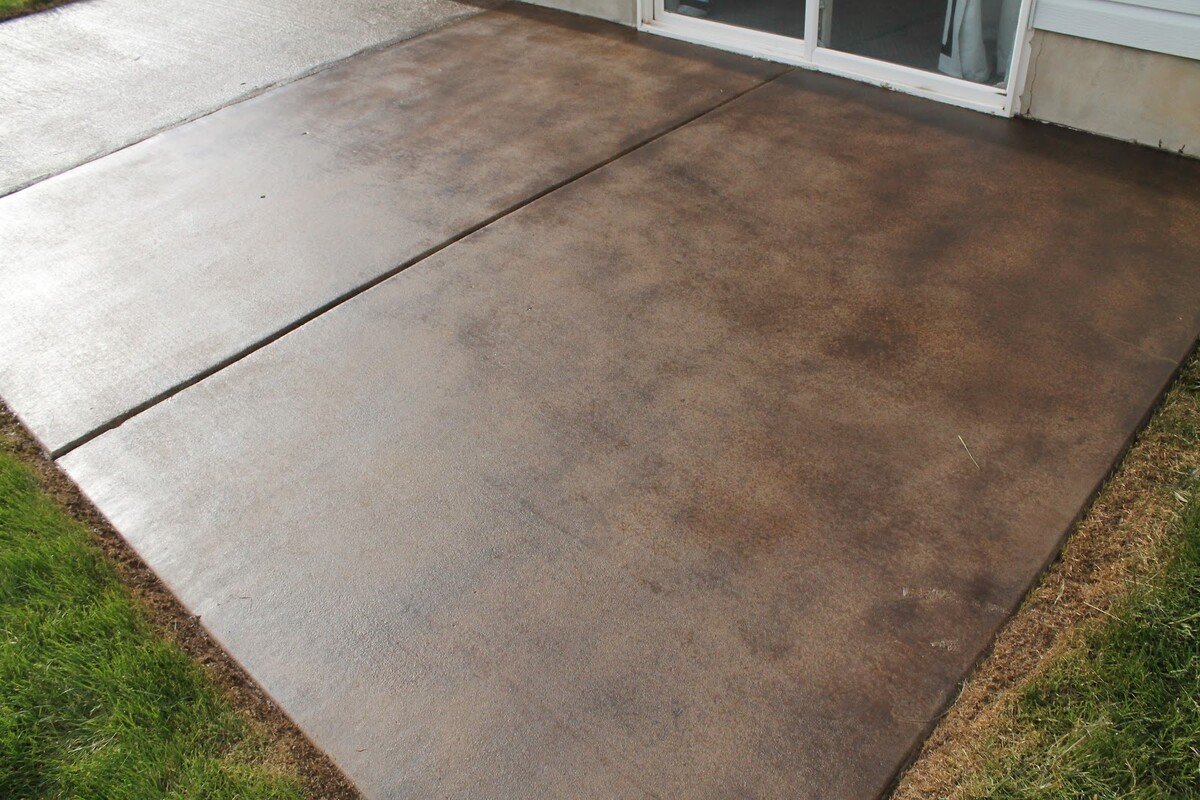
- Desired color: Determine the color you want for your basement floor. Acid-based stains offer a wider range of earthy tones and produce a marbled, variegated effect. Water-based stains provide a more consistent color appearance and are available in a wide variety of shades.
- Transparency: Consider how opaque you want the stain to be. Acid-based stains are translucent and allow the natural variations in the concrete to show through. Water-based stains offer more opacity and can provide a solid color appearance.
- Longevity: Evaluate the durability and longevity of the stain. Acid-based stains penetrate deep into the concrete, providing long-lasting results. Water-based stains create a surface coating that may wear over time but can be easily refreshed with additional coats.
- Maintenance: Consider the maintenance requirements of the stain. Acid-based stains generally require more frequent resealing to maintain their color and protection. Water-based stains may require periodic touch-ups or reapplication depending on the level of wear.
- Environmental impact: Take into account the environmental impact of the stain. Water-based stains are generally more eco-friendly and contain fewer harmful fumes compared to acid-based stains.
Once you’ve considered these factors, research and consult with professionals to find the stain that best meets your preferences and needs. Remember to take into account the existing conditions of your basement floor and your desired aesthetic before making your final decision.
Now that you have chosen the stain for your basement floor, it’s time to move on to the next step: cleaning the floor.
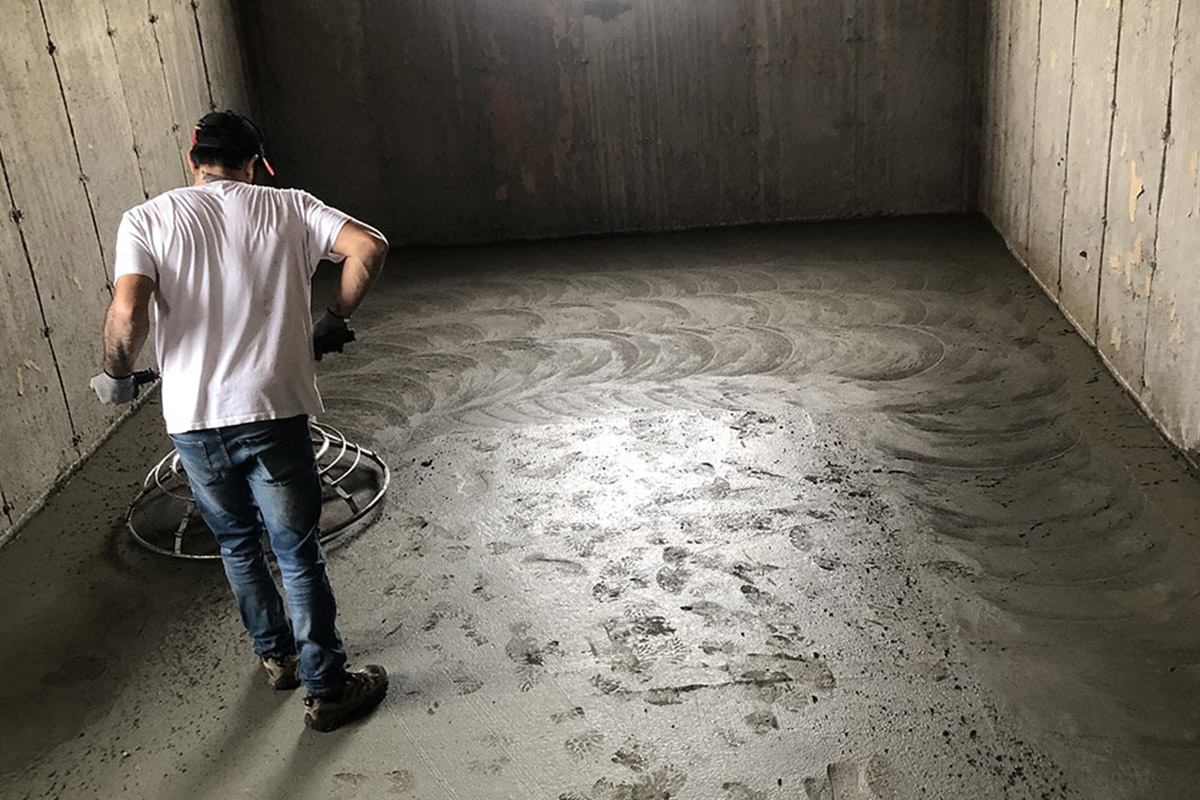
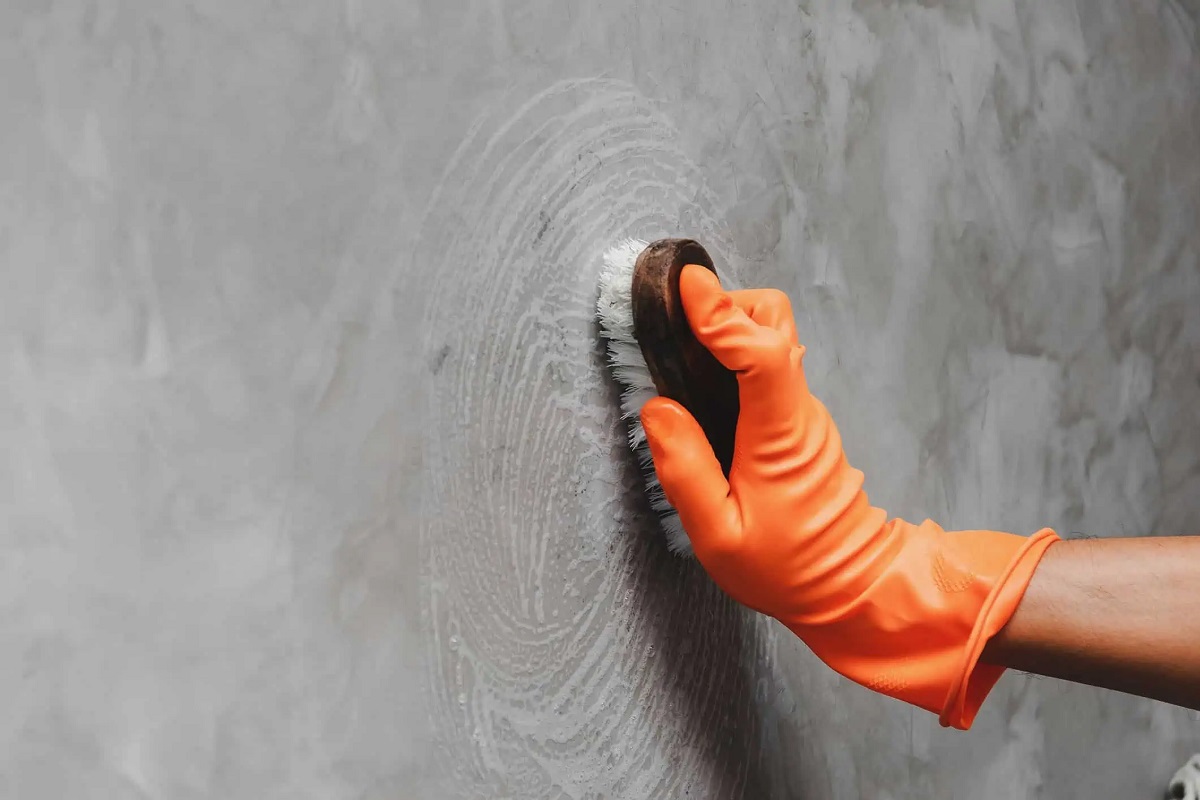
Step 3: Cleaning the Floor
Before applying the stain to your concrete basement floor, it’s crucial to thoroughly clean the surface to ensure proper adhesion and a flawless finish. Follow these steps to clean your basement floor:
- Sweep and vacuum: Start by sweeping the floor to remove any loose dirt, dust, and debris. Use a shop vacuum to thoroughly clean the entire area, focusing on corners and edges.
- Scrub the floor: Use a concrete cleaner or degreaser and a stiff brush to scrub the floor. Pay attention to any stains, oil spots, or grease marks. Work in small sections and rinse the brush periodically to avoid spreading dirt.
- Rinse the floor: After scrubbing, rinse the floor with clean water to remove the cleaner and any residue. Use a mop or a floor squeegee to ensure a thorough rinse. Repeat this step if necessary until the water runs clear.
- Dry the floor: Allow the floor to dry completely before proceeding with the staining process. It’s crucial to ensure that all moisture has evaporated from the surface. Use fans or open windows and doors to speed up the drying process.
By cleaning the floor thoroughly, you remove any contaminants that could interfere with the staining process. This ensures that the stain adheres properly and results in a beautiful and long-lasting finish.
Now that the floor is clean and dry, you’re ready to move on to the next step: applying the stain to the basement floor.
Before staining a concrete basement floor, make sure to thoroughly clean and etch the surface to ensure the stain adheres properly and produces a consistent finish.
Step 4: Applying the Stain
Now that you have prepared and cleaned your concrete basement floor, it’s time to apply the stain. Follow these steps to achieve a professional-looking finish:
- Protect surrounding areas: To avoid staining unintended surfaces, cover any surrounding walls, furniture, or fixtures with plastic sheets or drop cloths. Use painter’s tape to secure the coverings in place.
- Mix the stain: If you are using an acid-based stain, carefully follow the manufacturer’s instructions to mix the stain solution. Water-based stains usually come pre-mixed, so no additional mixing is required.
- Apply the stain: Start by pouring the stain into a pump sprayer or a paint tray, depending on your preference. Begin applying the stain in small sections, working your way from one side of the basement floor to the other. Use a brush or a roller to ensure even coverage and a smooth finish.
- Create variations: If desired, you can create variations in the color and texture of the stained floor. Use a sponge or a rag to blot or dab the stain in certain areas to achieve a mottled or marbled effect.
- Allow for penetration: After applying the stain, let it penetrate the concrete for the recommended amount of time specified by the manufacturer. Typically, this can range from a few hours to overnight.
- Check color intensity: Once the desired penetration time has elapsed, check the color intensity of the stain by lifting a small portion of the protective covering or testing an inconspicuous area. If you are satisfied with the color, move on to the next step.
Remember to work carefully and methodically, ensuring that you apply the stain evenly and avoid pooling or overlapping. Take breaks as needed to prevent fatigue and maintain a consistent application.
With the stain applied and color intensity checked, it’s now time to move on to the next step: sealing the stained basement floor.
Read more: How To Clean Basement Concrete Floor
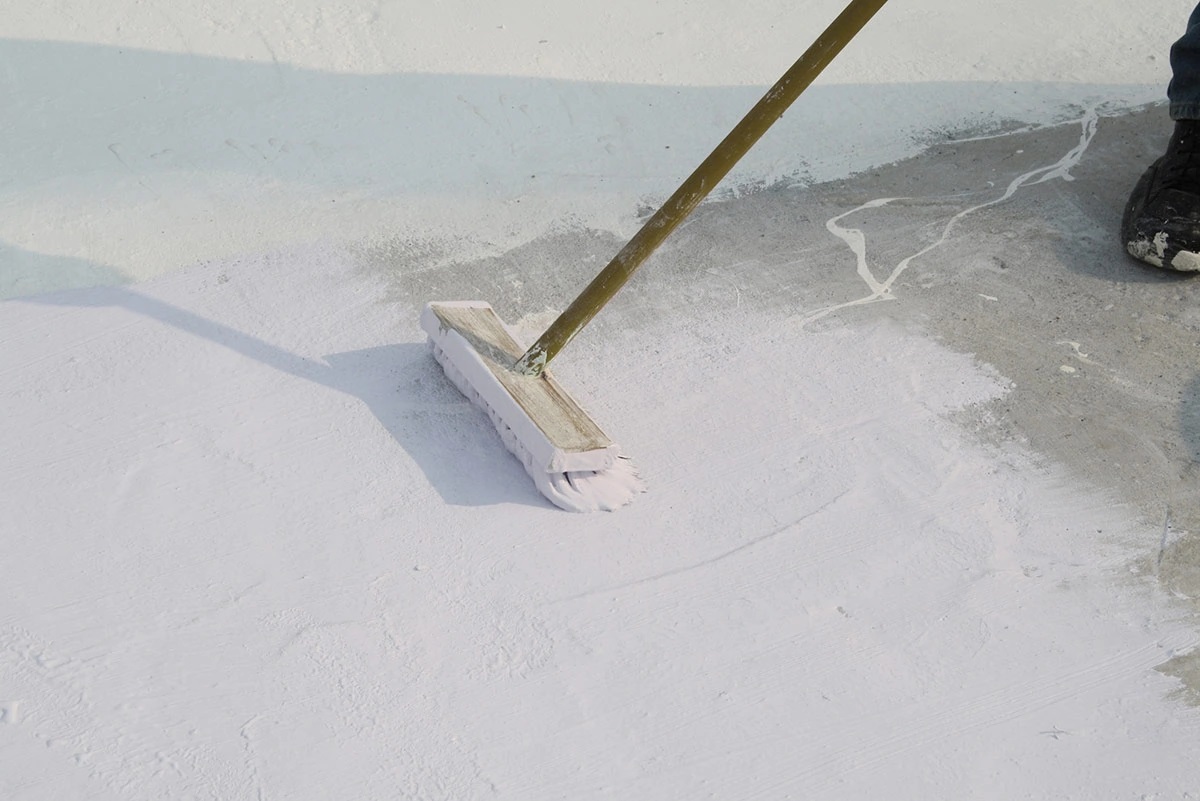
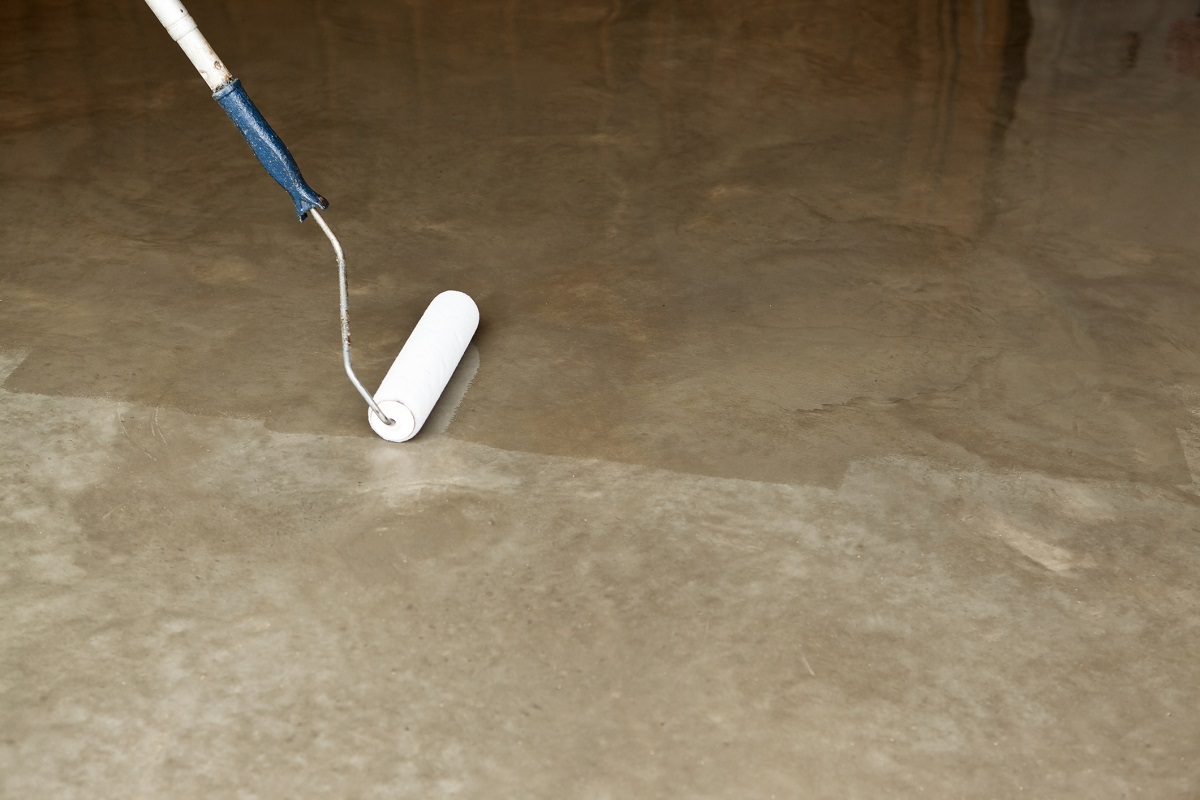
Step 5: Sealing the Stained Floor
After applying the stain to your concrete basement floor, it’s crucial to seal it to protect the color and enhance its durability. Follow these steps to seal the stained floor:
- Wait for the recommended curing time: Before sealing the stained floor, it’s essential to allow it to fully cure. The curing time can vary depending on the type of stain and manufacturer’s instructions. Typically, you should allow the stain to cure for at least 24 to 48 hours.
- Choose the appropriate sealer: There are two main types of sealers for stained concrete floors – water-based sealers and solvent-based sealers. Water-based sealers are environmentally friendly, low in odor, and provide a matte or satin finish. Solvent-based sealers offer a higher level of durability and protection but may have higher levels of VOCs (volatile organic compounds).
- Apply the sealer: Use a paint roller or a pump sprayer to apply an even coat of sealer to the stained basement floor. Work in small sections and use long, overlapping strokes to ensure full coverage. Avoid excessive application to prevent any pooling or uneven drying.
- Allow for proper drying and curing: After applying the sealer, allow it to dry according to the manufacturer’s instructions. This can take anywhere from a few hours to a full day, depending on the sealer type and environmental conditions. Additionally, allow the sealed floor to cure for the recommended time before placing any furniture or heavy objects on it.
- Consider additional coats: Depending on the desired level of sheen and protection, you may choose to apply multiple coats of sealer. Allow each coat to dry and cure before applying the next one. Follow the manufacturer’s guidelines for the number of recommended coats.
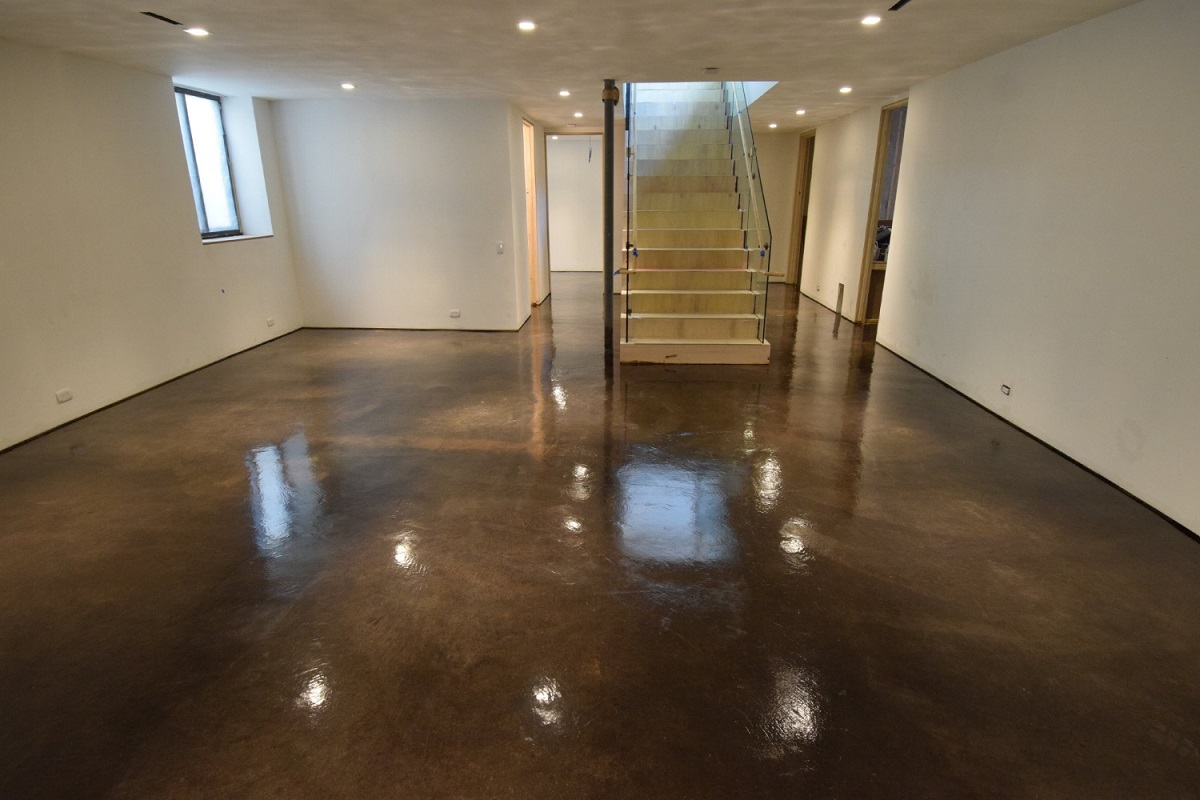
Sealing the stained floor not only enhances its aesthetics but also provides a protective barrier against stains, spills, and daily wear and tear. It helps to maintain the vibrant color and ensures the longevity of your newly stained basement floor.
With the stained floor properly sealed, you’re almost there! The final step is to allow for the curing and drying process.
Step 6: Curing and Drying Process
After sealing the stained basement floor, it’s important to allow for the proper curing and drying process. This ensures that the sealant fully sets and the floor becomes ready for regular use. Follow these steps to complete the curing and drying process:
- Avoid foot traffic: Immediately after applying the sealer, avoid walking on the stained floor for the recommended initial drying time. This can typically range from 2 to 4 hours, but refer to the specific instructions provided by the sealer manufacturer.
- Limit moisture exposure: To allow the sealant to fully cure, it’s important to avoid any exposure to moisture during the initial drying period. Keep the basement area well-ventilated and avoid any water spills or cleaning until the recommended curing time has passed.
- Follow the curing timeline: The curing time for the sealed stained floor can vary depending on factors such as humidity, temperature, and the specific sealer used. It’s important to follow the manufacturer’s guidelines for the recommended curing time, which can typically range from 24 to 48 hours.
- Gradually reintroduce furniture and use: Once the recommended curing time has passed, you can start gradually reintroducing furniture and items to the basement floor. Avoid dragging heavy furniture, as it can potentially scratch the surface. Allow an additional 48 to 72 hours for the sealant to fully cure before subjecting it to heavy use and foot traffic.
- Regular maintenance: To ensure the longevity and beauty of your stained basement floor, it’s important to follow a regular maintenance routine. Keep the floor clean by sweeping or vacuuming regularly to remove dirt and debris. Use a neutral pH cleaner specifically formulated for sealed concrete floors to mop the surface periodically.
By allowing for the proper curing and drying process, you ensure the durability and longevity of your newly stained basement floor. Following these steps will help you achieve a beautiful, well-protected floor that will enhance the overall aesthetics of your basement space.
That concludes the six steps to staining your concrete basement floor. With a little bit of time and effort, you can transform your basement into a visually stunning and functional area that you’ll enjoy for years to come.
Remember, each step in the staining process requires careful attention to detail and adherence to safety guidelines. If you feel unsure or uncomfortable handling any specific step, it’s always recommended to consult with professionals experienced in concrete staining to ensure the best results.
Enjoy your newly stained basement floor and the renewed charm it brings to your home!
Conclusion
Staining a concrete basement floor is a fantastic way to transform a dull and uninspiring space into a vibrant and visually appealing area. By following the six steps outlined in this article – preparing the floor, choosing the right stain, cleaning the floor, applying the stain, sealing the stained floor, and allowing for the curing and drying process – you can achieve a professional-looking result that will enhance your basement’s overall aesthetics.
From preparing the floor by cleaning and repairing any damage to selecting the perfect stain that suits your desired color and transparency, each step plays a crucial role in the staining process. Cleaning the floor thoroughly before applying the stain ensures proper adhesion, while choosing the right sealer provides protection and longevity to your stained floor.
It’s important to follow the specific instructions provided by the stain and sealer manufacturers and to take into account any recommended drying and curing times. Allowing for the proper curing and drying process ensures that the stain and sealer fully set, providing a durable and long-lasting finish.
Remember, staining a concrete basement floor requires careful attention to detail and safety precautions. If you’re unsure or feel uncomfortable handling any part of the process, don’t hesitate to seek assistance from professionals who specialize in concrete staining.
With a little patience and effort, you can transform your basement into a beautiful and functional space that adds value to your home. So, roll up your sleeves, gather your materials, and get ready to enjoy the stunning results of your newly stained basement floor!
Frequently Asked Questions about How To Stain A Concrete Basement Floor
Was this page helpful?
At Storables.com, we guarantee accurate and reliable information. Our content, validated by Expert Board Contributors, is crafted following stringent Editorial Policies. We're committed to providing you with well-researched, expert-backed insights for all your informational needs.


0 thoughts on “How To Stain A Concrete Basement Floor”