Home>Furniture & Design>Outdoor Furniture>How To Fix Anti-Siphon Valve On Outdoor Faucet
Outdoor Furniture
How To Fix Anti-Siphon Valve On Outdoor Faucet
Modified: February 18, 2024
Learn how to fix the anti-siphon valve on your outdoor faucet with our step-by-step guide. Keep your outdoor furniture and design in top shape.
(Many of the links in this article redirect to a specific reviewed product. Your purchase of these products through affiliate links helps to generate commission for Storables.com, at no extra cost. Learn more)
Introduction
Welcome to this comprehensive guide on fixing an anti-siphon valve on an outdoor faucet. If you've noticed water leaking from the top of your outdoor faucet when you turn it on, it's likely that the anti-siphon valve needs attention. The anti-siphon valve is a crucial component of outdoor faucets, preventing water from flowing backward and contaminating the potable water supply.
In this guide, we will walk you through the step-by-step process of fixing the anti-siphon valve on your outdoor faucet. You'll learn about the tools and materials you'll need, as well as the essential steps to take to ensure your outdoor faucet functions properly. By following this guide, you can save time and money by fixing the issue yourself, without the need to hire a professional.
So, let's dive in and explore the world of outdoor faucet maintenance, starting with an understanding of the anti-siphon valve and its significance in your outdoor water system.
Key Takeaways:
- Regularly inspect and clean the anti-siphon valve to prevent leaks and maintain safe, clean water for outdoor use. Use the right tools and materials for effective maintenance.
- Replace worn or damaged valve components with new ones to ensure a reliable seal and prevent potential leaks. Test the faucet after reassembly to verify proper functionality.
Read more: What Is An Anti-Siphon Outdoor Faucet
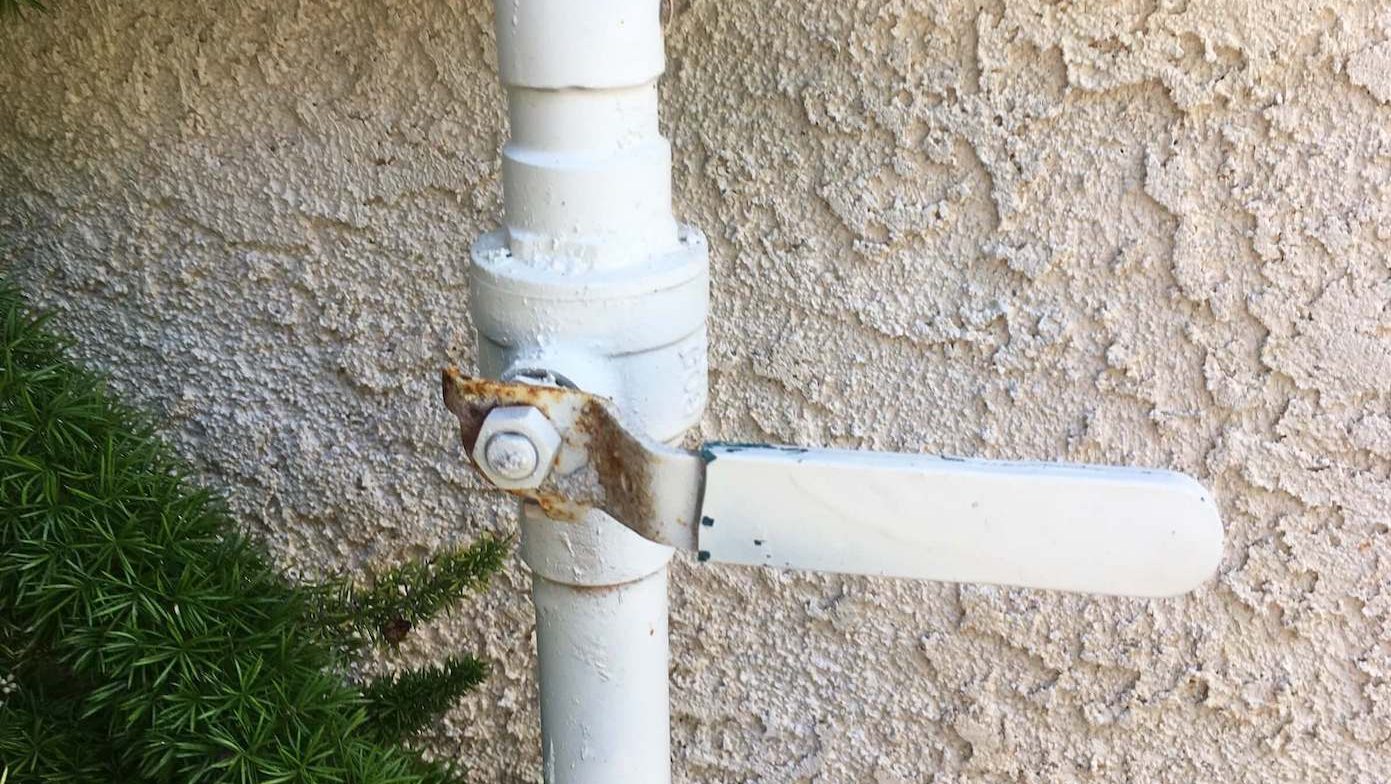
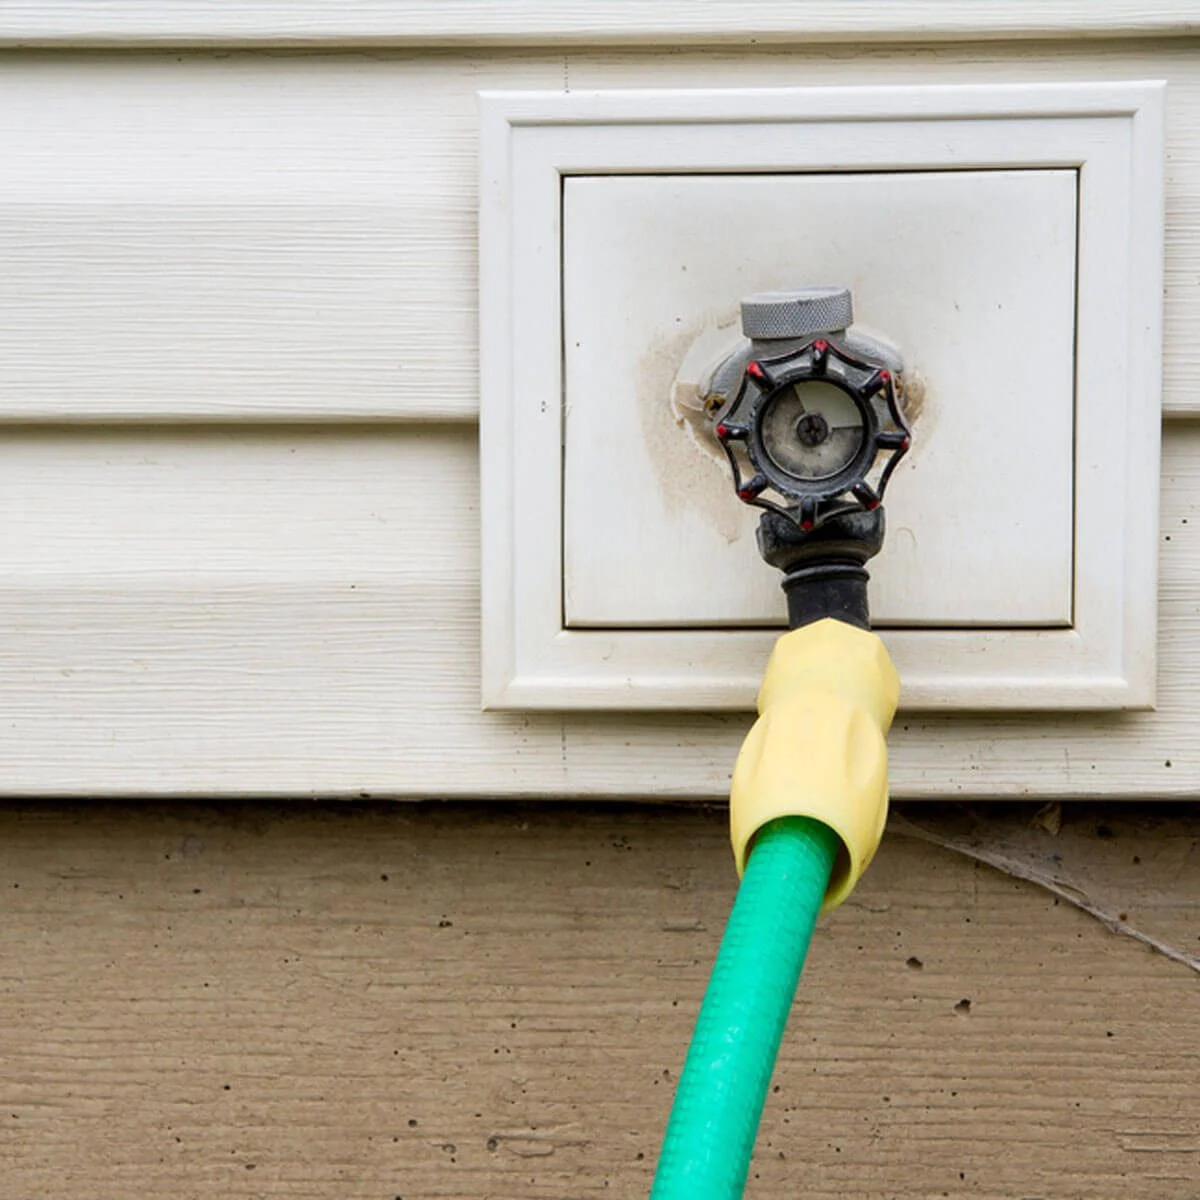
Understanding the Anti-Siphon Valve
The anti-siphon valve is a critical component of outdoor faucets, designed to prevent water from flowing backward and contaminating the potable water supply. It accomplishes this by creating a barrier that prevents water from siphoning back into the water system. This is crucial for maintaining the safety and integrity of the water supply, especially in outdoor settings where the risk of contaminants, such as fertilizers and pesticides, coming into contact with the water is higher.
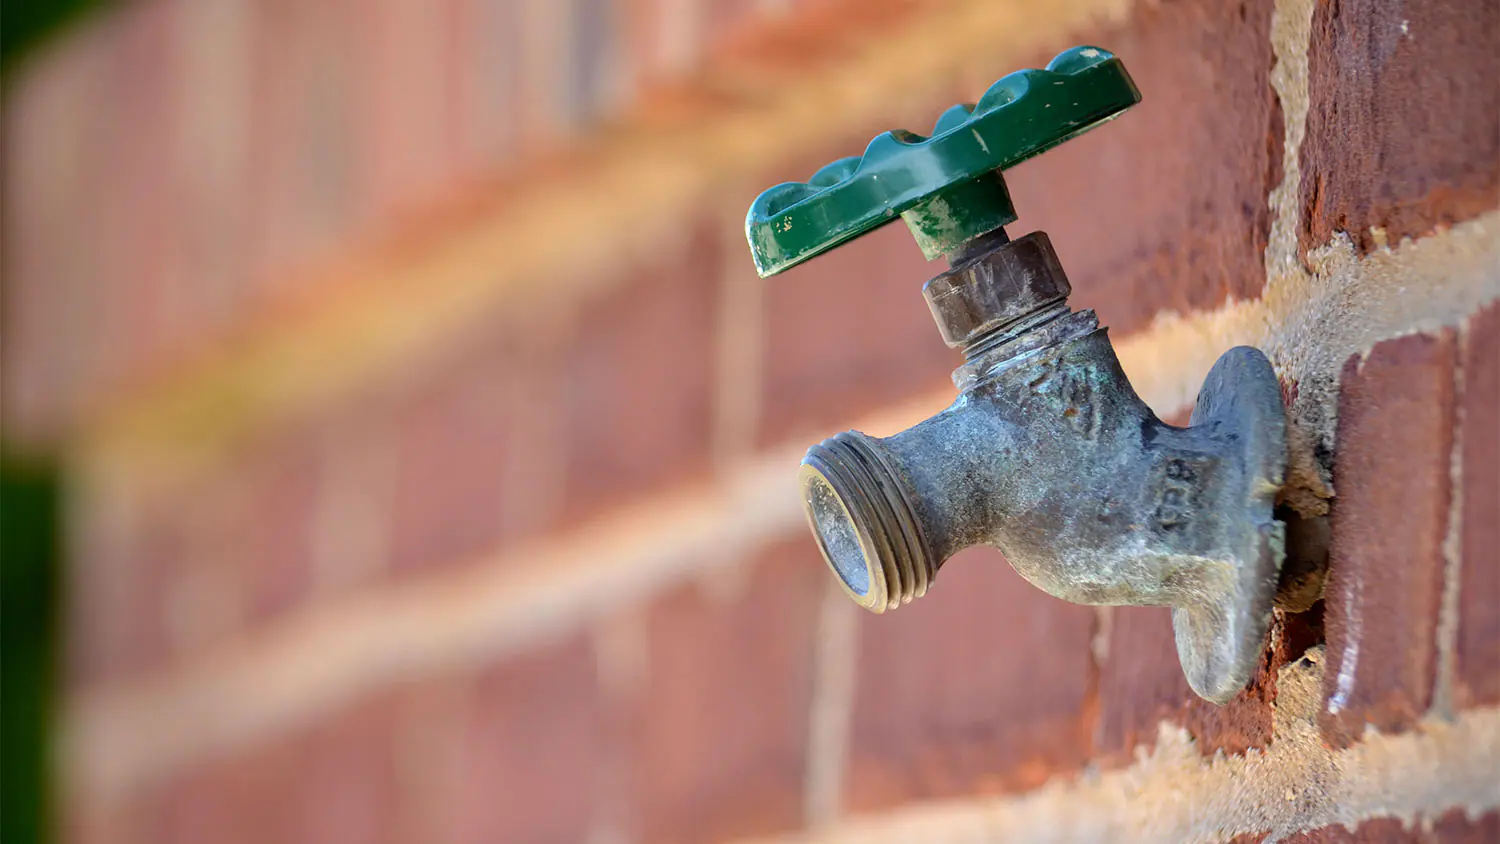
Typically, the anti-siphon valve is located on the exterior of the faucet, just below the handle. It is often housed within a cap that can be removed for inspection and maintenance. When the valve malfunctions, it can lead to leaks or a reduction in water pressure, indicating the need for immediate attention.
Understanding the function of the anti-siphon valve is essential for maintaining the overall efficiency and safety of your outdoor water system. By familiarizing yourself with its role, you can better appreciate the importance of regular maintenance and troubleshooting. Now that you have a grasp of the significance of the anti-siphon valve, let’s move on to the tools and materials you’ll need to fix it.
Tools and Materials Needed
Before you begin fixing the anti-siphon valve on your outdoor faucet, it’s essential to gather the necessary tools and materials. Having the right equipment at hand will streamline the repair process and ensure that you can address the issue effectively.
Here’s a list of the tools and materials you’ll need:
- Adjustable wrench
- Phillips head screwdriver
- Flathead screwdriver
- Replacement O-rings and washers
- Plumber’s tape
- Clean cloth or rag
- Bucket or container
- Vinegar or lime scale remover (if dealing with mineral buildup)
These tools and materials are essential for disassembling the faucet, inspecting the anti-siphon valve, and replacing any worn or damaged components. The adjustable wrench will help you loosen and tighten connections, while the screwdrivers are necessary for removing screws and accessing internal parts.
Replacement O-rings and washers are crucial for addressing any leaks, and plumber’s tape will help create a watertight seal when reassembling the faucet. Additionally, having a clean cloth or rag on hand will allow you to wipe down components and remove any debris or buildup.
If you’re dealing with mineral buildup within the valve, vinegar or a lime scale remover can be used to dissolve the deposits and restore the valve’s functionality. Finally, having a bucket or container nearby will help contain any water that may drain from the faucet during the repair process.
With these tools and materials at your disposal, you’ll be well-prepared to tackle the task of fixing the anti-siphon valve on your outdoor faucet. Now that you’re equipped with the necessary items, let’s proceed to the first step: shutting off the water supply.
Step 1: Shut Off the Water
Before you begin working on your outdoor faucet, it’s crucial to shut off the water supply to prevent any leaks or water damage. Locate the shutoff valve connected to the outdoor faucet and turn it clockwise to close it. If there isn’t a dedicated shutoff valve for the outdoor faucet, you may need to shut off the main water supply to your home.
Once the water supply is turned off, open the outdoor faucet to release any remaining water and relieve any pressure in the system. This will minimize the risk of water spraying when you disassemble the faucet for repairs. Keep in mind that residual water may still be present in the pipes, so having a bucket or container to catch any drips is advisable.
By shutting off the water supply and draining the faucet, you create a safe and controlled environment for inspecting and repairing the anti-siphon valve. This precautionary measure ensures that you can work on the faucet without the risk of water flow interfering with the repair process.
With the water supply turned off and the faucet drained, you’re ready to move on to the next step: removing the valve cap to access the anti-siphon valve. This will allow you to inspect and clean the valve, addressing any issues that may be affecting its performance. Let’s proceed to the next step in the repair process, where we’ll delve into the details of accessing the anti-siphon valve.
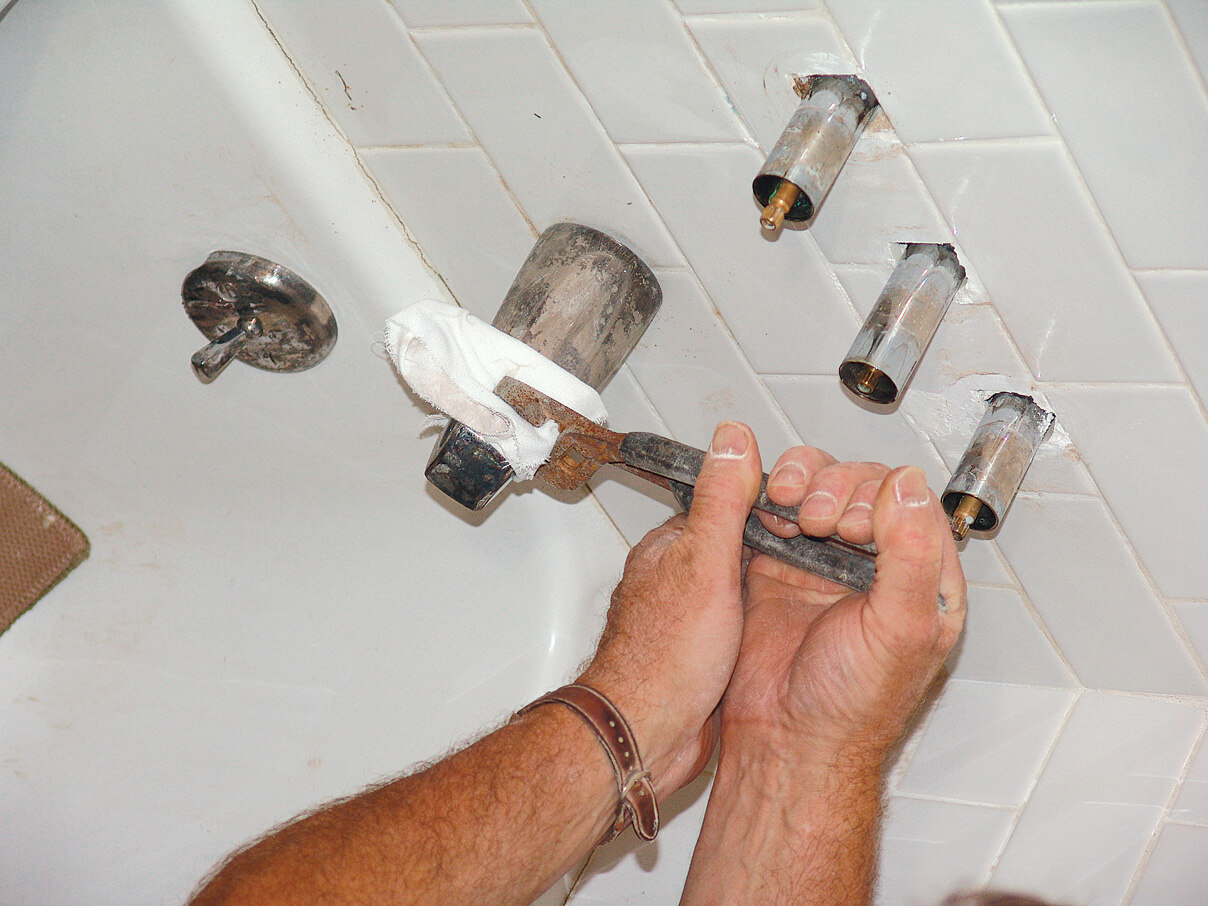
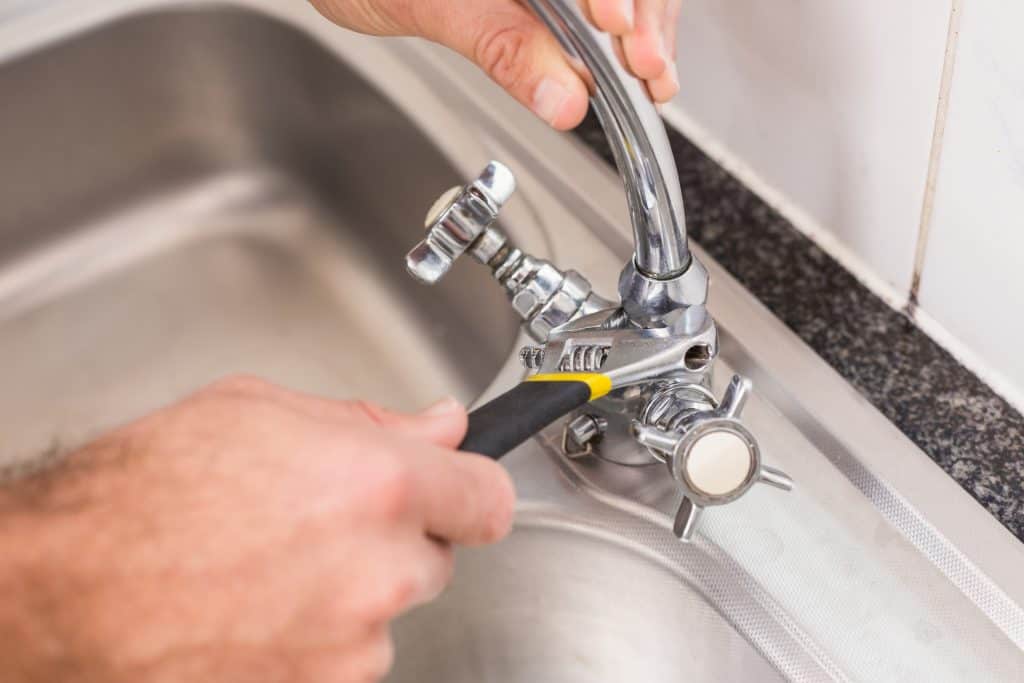
Step 2: Remove the Valve Cap
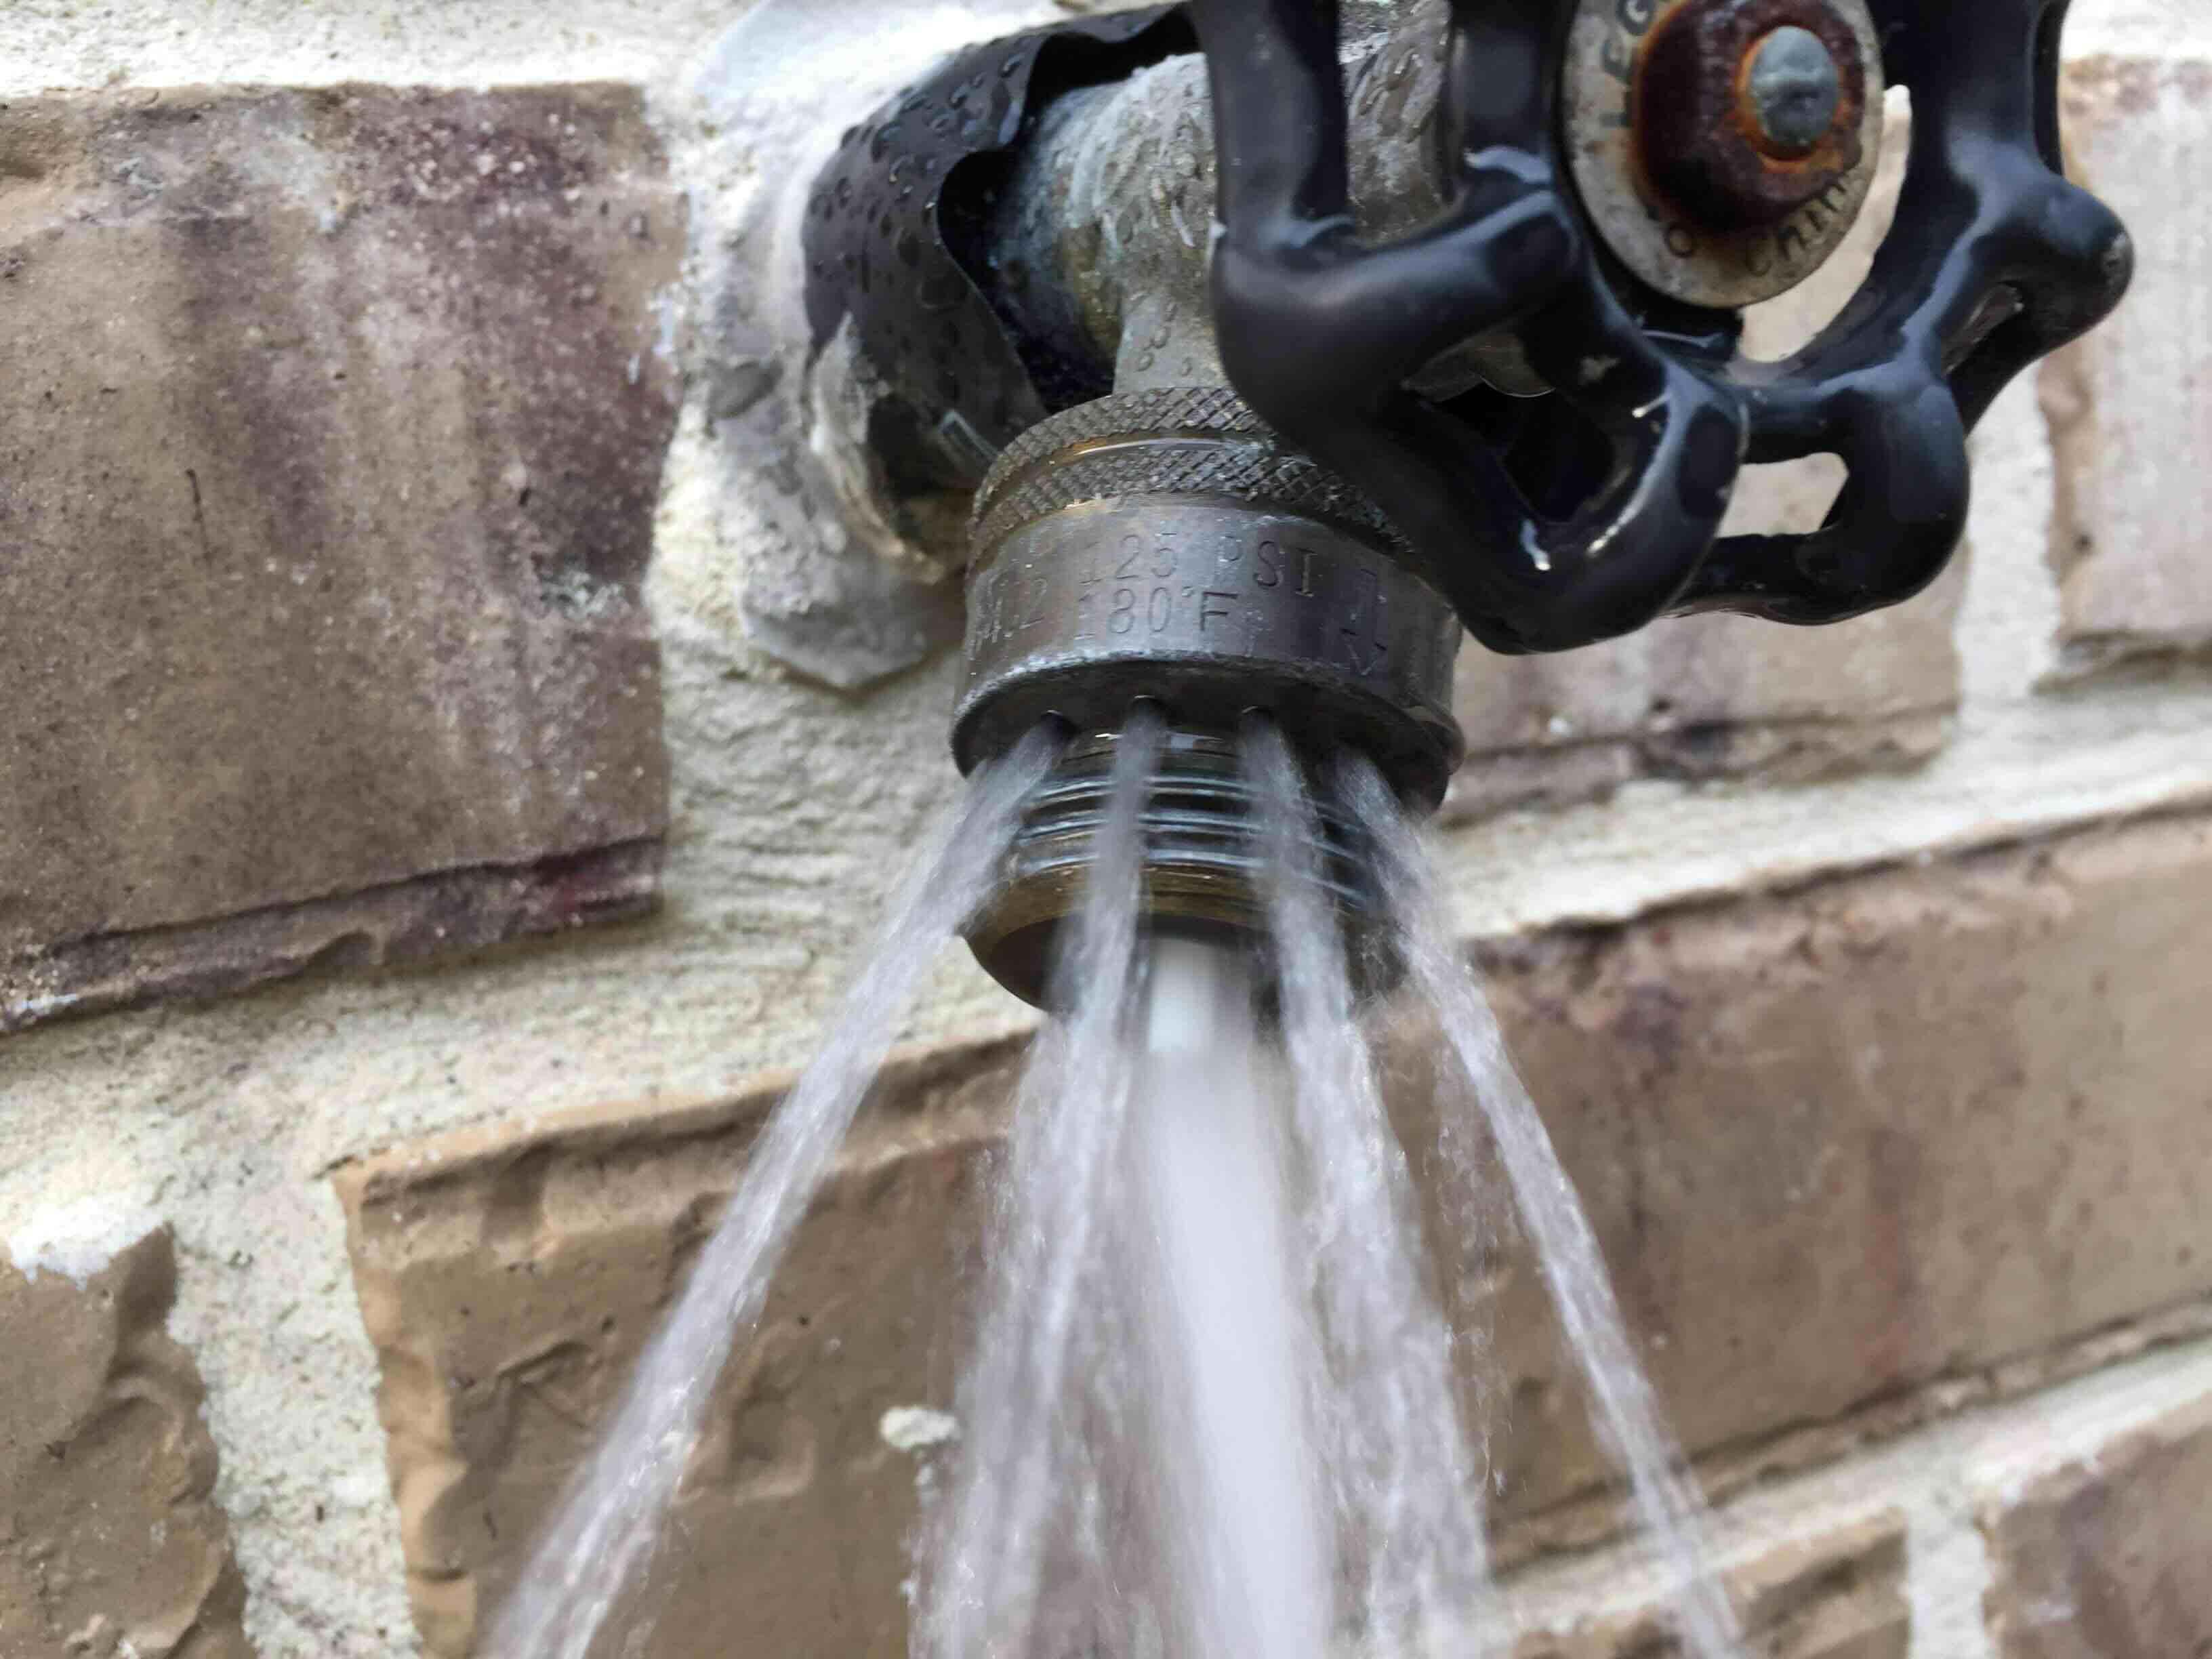
With the water supply shut off and the faucet drained, it’s time to remove the valve cap to access the anti-siphon valve. The valve cap is typically located just below the handle of the outdoor faucet and can be unscrewed to reveal the internal components, including the anti-siphon valve.
Using an adjustable wrench or the appropriate tool, carefully loosen and remove the valve cap. Be mindful of any screws or retaining clips that may be securing the cap in place. Once the cap is removed, set it aside in a secure location, ensuring that any small components, such as screws or washers, are kept safely together.
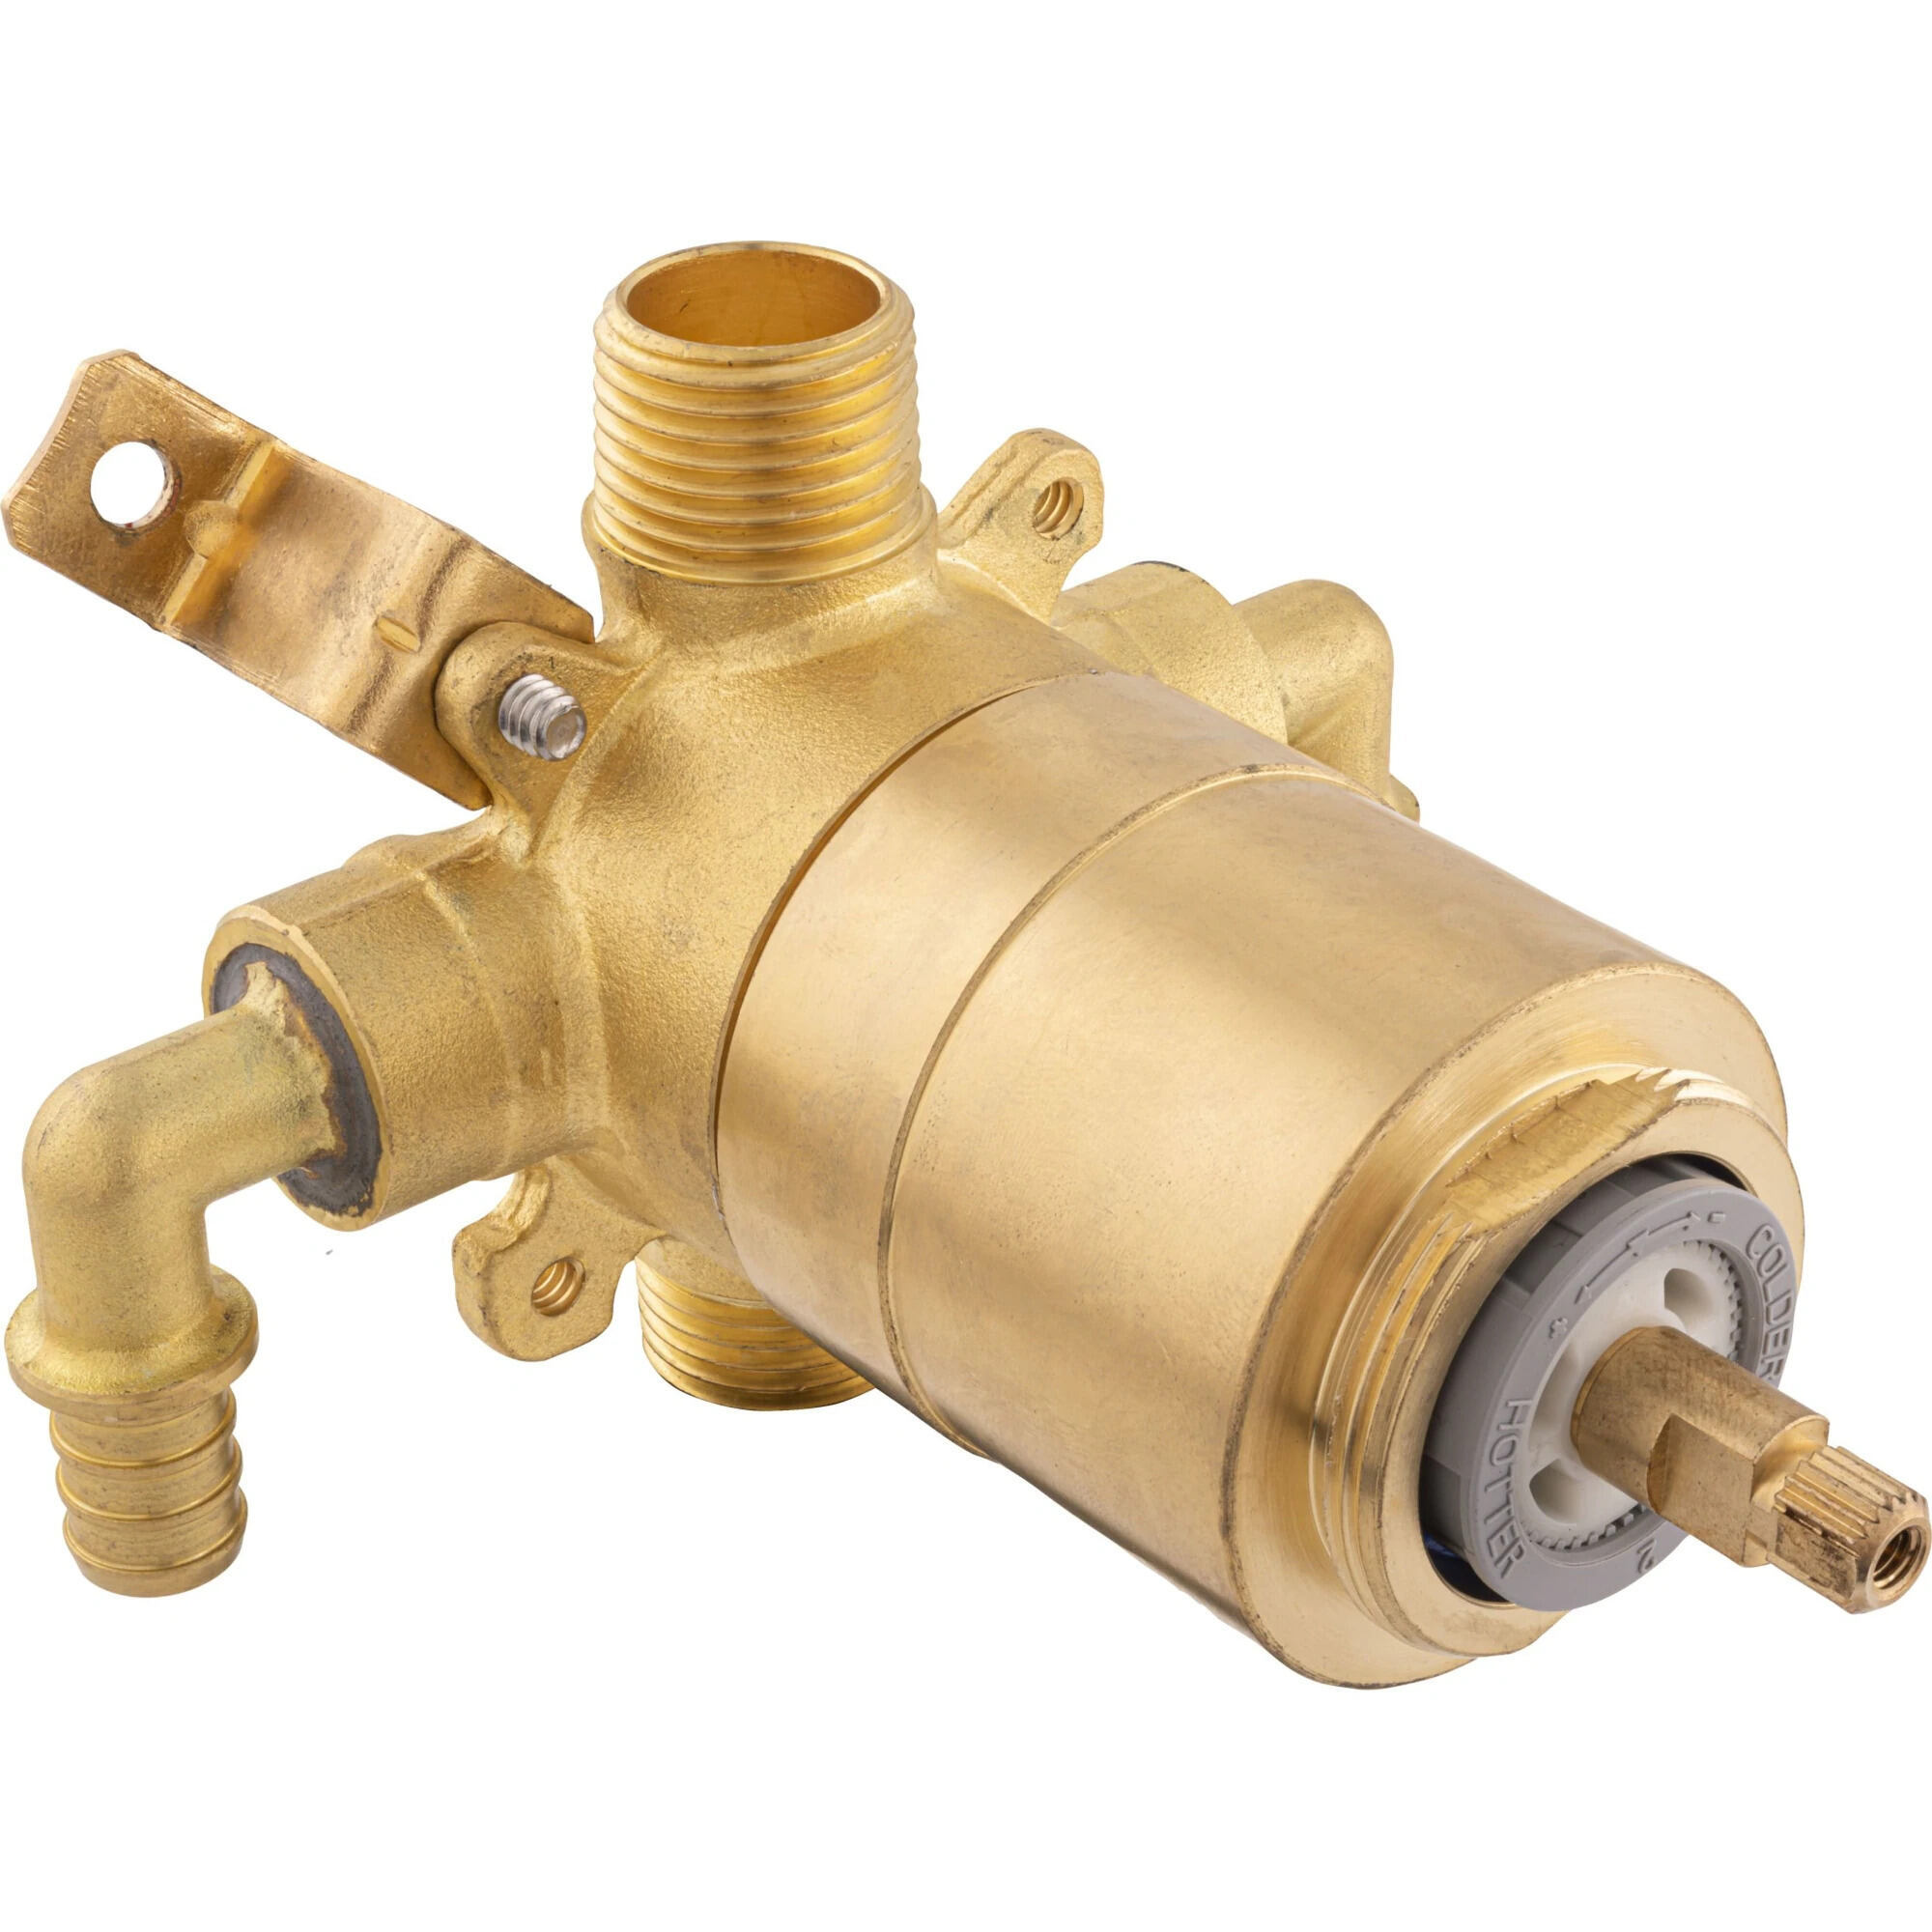
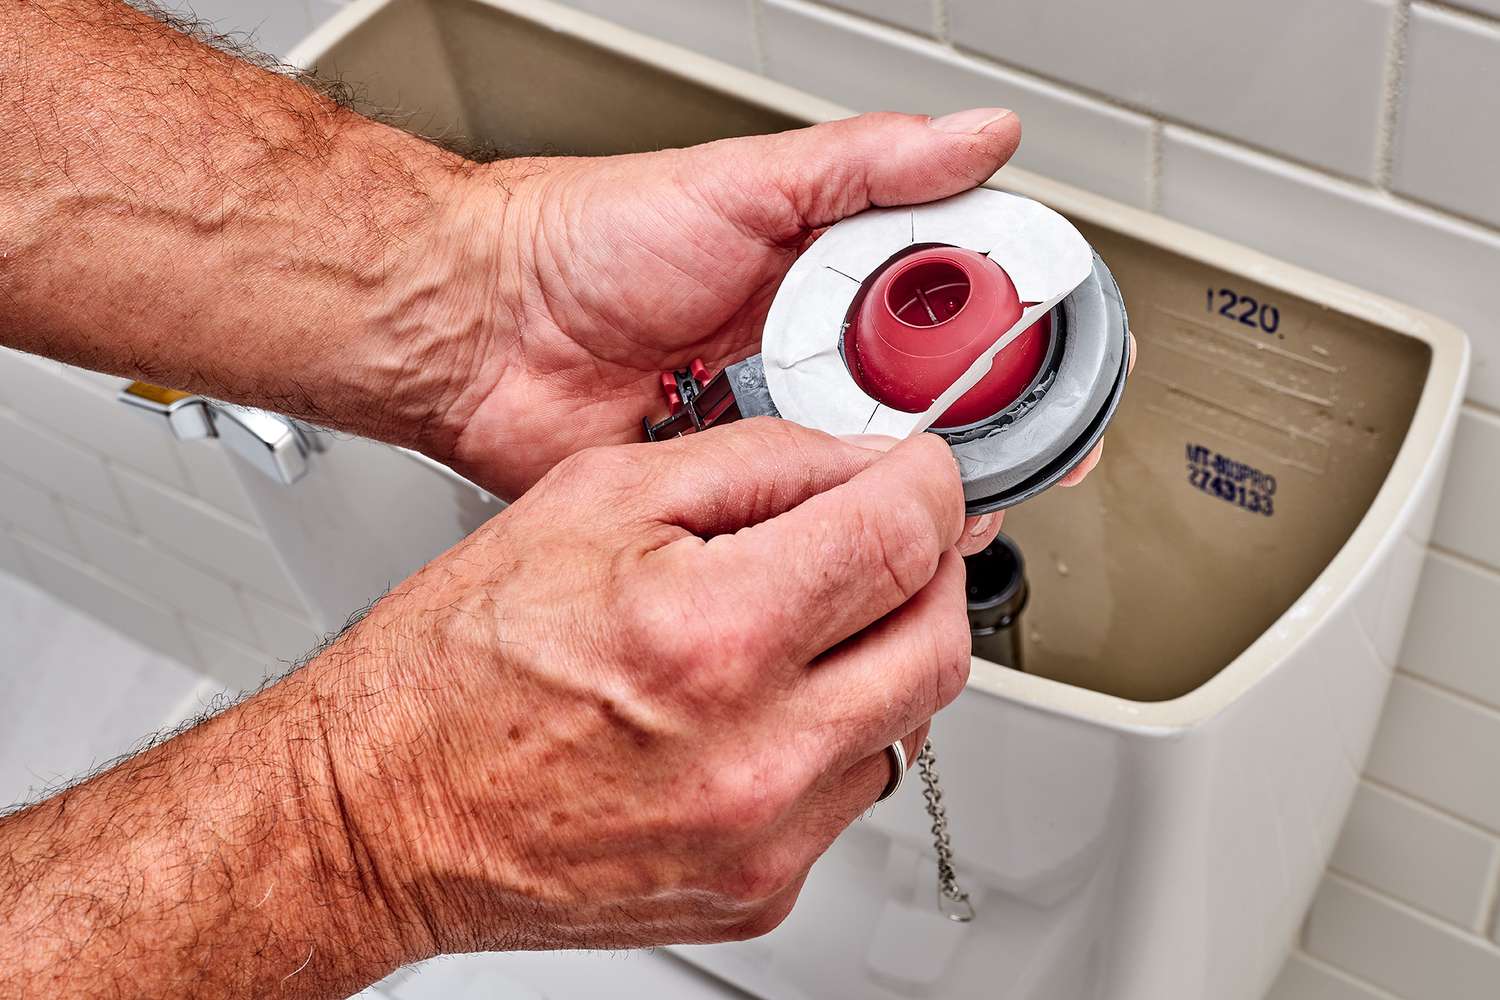
Upon removing the valve cap, you’ll gain access to the anti-siphon valve, which is vital for preventing water from flowing backward and contaminating the potable water supply. Take this opportunity to inspect the valve for any signs of damage, wear, or debris buildup. Mineral deposits or debris can impede the valve’s functionality, leading to leaks or reduced water pressure.
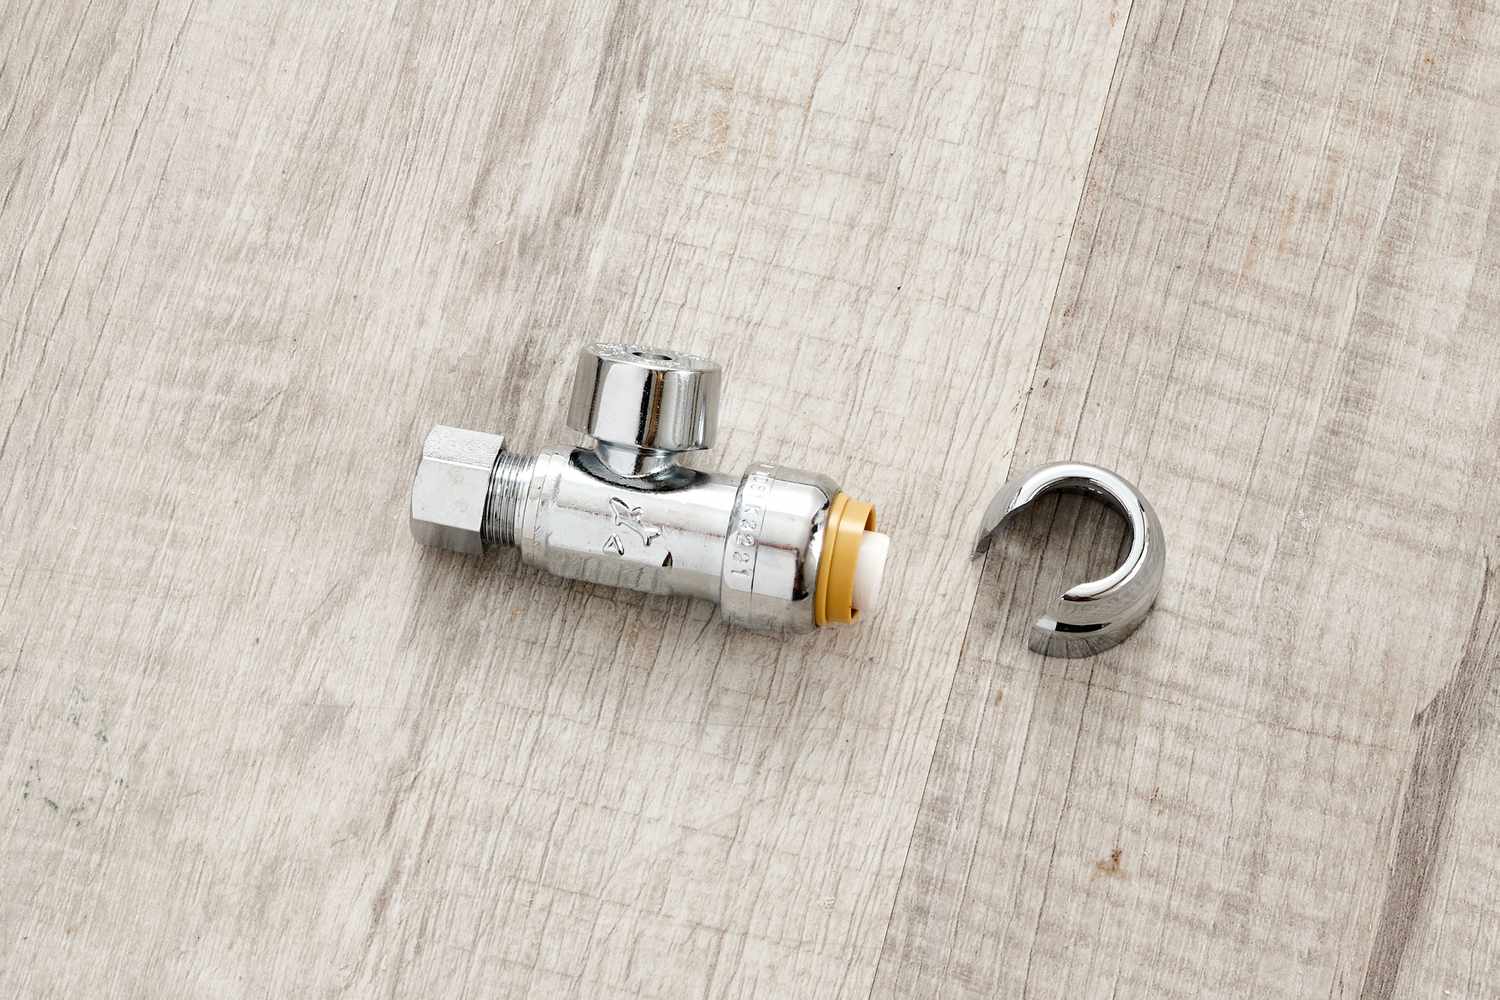
As you examine the valve, pay attention to the condition of the O-rings and washers, which form a seal to prevent leaks. If these components appear worn or damaged, they may need to be replaced to restore the valve’s effectiveness. Additionally, check for any visible debris or mineral buildup that could be affecting the valve’s operation.
By carefully removing the valve cap and inspecting the anti-siphon valve, you’re taking the necessary steps to diagnose and address any issues that may be impacting the faucet’s performance. In the next step, we’ll delve into the process of cleaning and maintaining the valve to ensure optimal functionality. Let’s proceed to step three and explore the essential tasks involved in inspecting and cleaning the valve.
To fix an anti-siphon valve on an outdoor faucet, first, turn off the water supply. Then, remove the valve cap and clean any debris. If the valve is still leaking, it may need to be replaced.
Read more: How To Remove Anti Scald Valve Bathtub
Step 3: Inspect and Clean the Valve
With the valve cap removed and the anti-siphon valve exposed, it’s time to conduct a thorough inspection and cleaning to ensure the valve’s optimal functionality. Carefully examine the valve and its components for any signs of wear, damage, or obstruction that may be affecting its performance.
Start by inspecting the O-rings and washers for any wear or deterioration. These components are essential for creating a watertight seal and preventing leaks. If they appear worn, cracked, or flattened, it’s advisable to replace them with new O-rings and washers to restore the valve’s effectiveness.
Next, check for any debris or mineral buildup within the valve. Mineral deposits can impede the valve’s operation, leading to leaks or reduced water pressure. If you notice mineral buildup, you can use a solution of vinegar or a lime scale remover to dissolve the deposits. Soak the affected components in the solution and use a brush or cloth to gently remove the buildup.
After cleaning the valve components, thoroughly rinse them with water to ensure that all traces of the cleaning solution and debris are removed. Inspect the valve housing for any remaining debris or buildup, and use a clean cloth or brush to remove it, ensuring that the valve is free from obstructions that could affect its performance.
Once the valve and its components are clean and free from debris, carefully reassemble the valve, ensuring that the O-rings and washers are properly seated and in good condition. This meticulous cleaning and inspection process will help restore the anti-siphon valve’s functionality and ensure that it operates effectively, preventing water from siphoning back into the potable water supply.
Having completed the inspection and cleaning of the anti-siphon valve, you’re now ready to address any worn or damaged components by replacing them with new parts. In the next step, we’ll explore the process of replacing the valve parts to ensure the optimal performance of your outdoor faucet. Let’s move on to step four and delve into the essential task of replacing the valve parts.
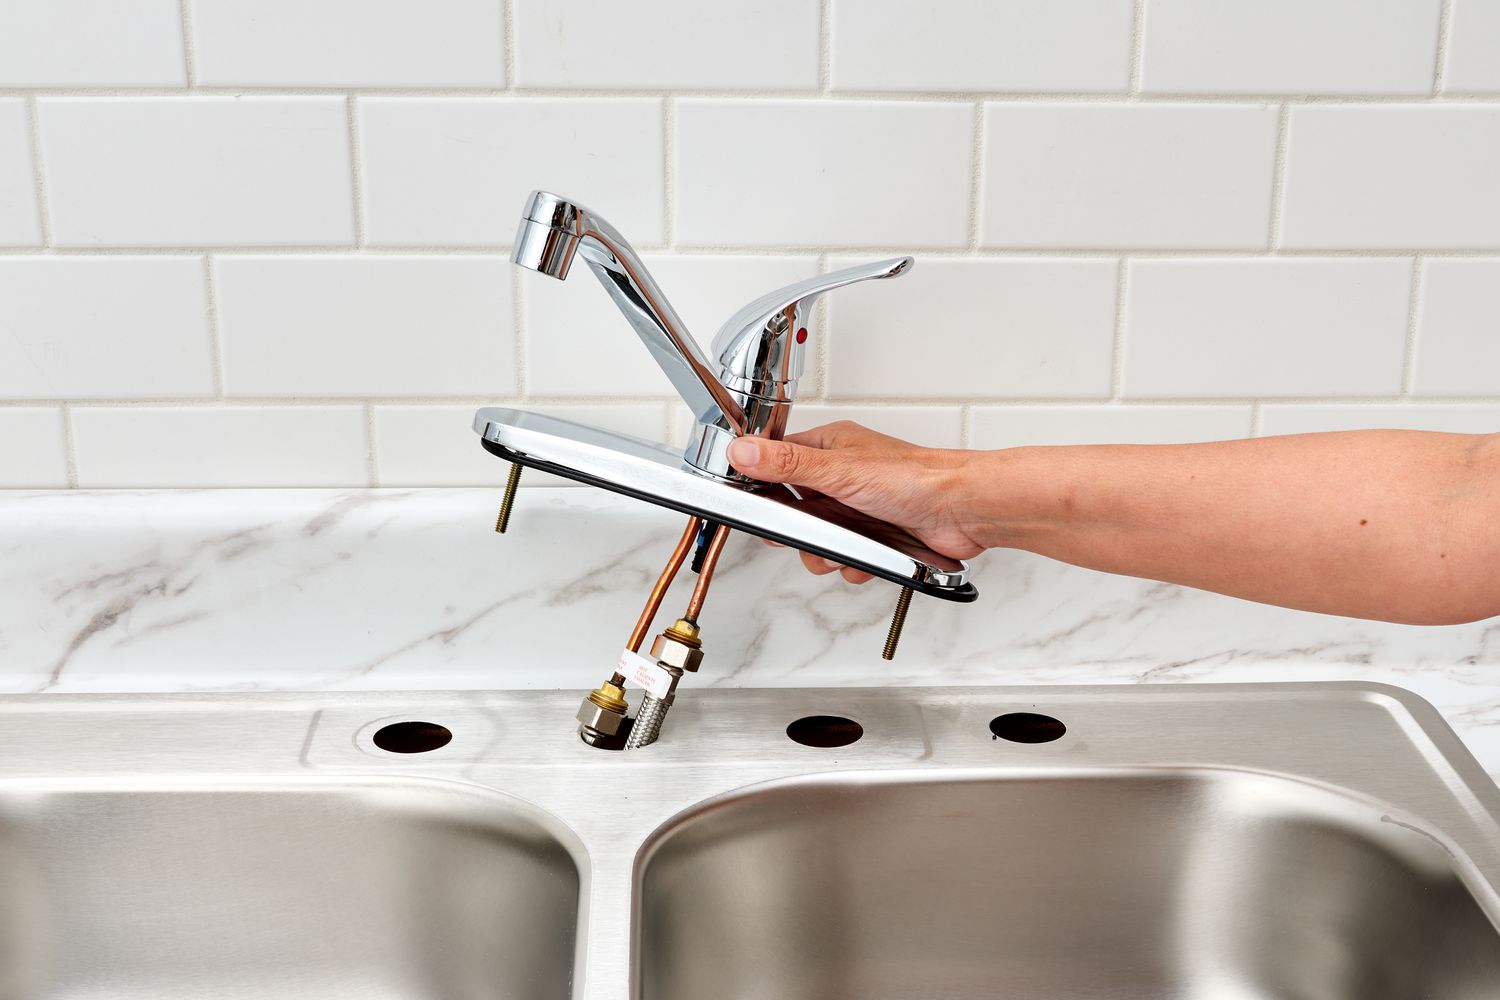
Step 4: Replace the Valve Parts
After inspecting and cleaning the anti-siphon valve, it’s essential to address any worn or damaged components by replacing them with new parts. This step is crucial for ensuring the optimal functionality of the valve and preventing potential leaks or water contamination.
Start by identifying any O-rings, washers, or other components that show signs of wear, deterioration, or damage. These components are integral to creating a watertight seal and maintaining the proper operation of the anti-siphon valve. If the O-rings or washers appear worn, cracked, or flattened, it’s important to replace them with new, compatible parts.
When selecting replacement parts, ensure that they are suitable for your specific outdoor faucet model and the anti-siphon valve assembly. It’s advisable to consult the faucet’s manual or contact the manufacturer to obtain the correct replacement components, guaranteeing a proper fit and optimal performance.
Carefully install the new O-rings and washers in their designated positions, ensuring a snug and secure fit. Properly seating the new components will help create an effective seal, preventing leaks and maintaining the integrity of the anti-siphon valve.
Additionally, if any other valve parts show signs of damage or wear, such as the valve stem or housing, consider replacing them as needed. Ensuring that all components are in good condition is essential for the reliable operation of the anti-siphon valve and the overall functionality of the outdoor faucet.
By replacing worn or damaged valve parts with new, high-quality components, you’re taking proactive steps to maintain the integrity of the anti-siphon valve and prevent potential water leaks or contamination. With the new parts in place, you’re ready to proceed to the next step: reassembling the faucet and testing its functionality. Let’s move on to step five and explore the process of reassembling and testing the outdoor faucet.
Step 5: Reassemble and Test the Faucet
With the anti-siphon valve inspected, cleaned, and any worn components replaced, it’s time to reassemble the faucet and test its functionality. Proper reassembly is crucial for ensuring that the valve operates effectively and that the outdoor faucet functions as intended.
Start by carefully placing the cleaned and replaced components back into the valve housing, ensuring that they are properly seated and secured. Pay close attention to the placement of O-rings, washers, and any other valve parts, guaranteeing a tight and reliable seal to prevent leaks.
Once the valve components are in place, carefully reattach the valve cap, securing it snugly to the faucet body. Use the appropriate tool, such as an adjustable wrench, to tighten the cap, ensuring that it is firmly in position. Be mindful of any screws or retaining clips that may need to be reinstalled to secure the valve cap.
After reassembling the faucet, it’s essential to test its functionality to ensure that the anti-siphon valve operates as intended. Turn on the water supply to the outdoor faucet and observe its performance. Check for any leaks around the valve cap or handle, and verify that the water flows smoothly without any irregularities.
If you notice any leaks or issues with water flow, carefully inspect the valve cap and components to identify and address the source of the problem. It may be necessary to re-tighten connections, adjust components, or replace any parts that are not functioning correctly. Thoroughly testing the faucet’s functionality will help identify and resolve any remaining issues.
By reassembling and testing the outdoor faucet, you’re ensuring that the anti-siphon valve operates effectively and that the faucet functions optimally. This step is crucial for verifying the success of the repair process and confirming that the valve prevents water from siphoning back into the potable water supply.
With the faucet reassembled and tested, you’ve completed the essential steps to fix the anti-siphon valve on your outdoor faucet. Now, let’s summarize the key points and conclude this comprehensive guide to outdoor faucet maintenance and repair.
Conclusion
Congratulations on successfully fixing the anti-siphon valve on your outdoor faucet! By following the comprehensive steps outlined in this guide, you’ve taken proactive measures to ensure the optimal functionality and safety of your outdoor water system. Let’s recap the key takeaways from this repair process and highlight the importance of maintaining the anti-siphon valve.
- Preventative Maintenance: Regular inspection and cleaning of the anti-siphon valve are essential for preventing water contamination and maintaining the integrity of the potable water supply. By addressing any issues promptly, you can avoid potential leaks and ensure the reliable operation of your outdoor faucet.
- Proper Tools and Materials: Equipping yourself with the necessary tools and materials, including replacement O-rings, washers, and cleaning solutions, streamlines the repair process and ensures that you can address the valve’s maintenance effectively.
- Thorough Inspection: Carefully examining the valve components for wear, damage, or mineral buildup allows you to diagnose and address any issues that may impact the valve’s functionality. This attention to detail is crucial for maintaining the anti-siphon valve’s effectiveness.
- Replacement of Worn Components: Replacing worn or damaged O-rings, washers, and other valve parts with new, high-quality components is essential for creating a reliable seal and preventing potential leaks. Ensuring that all components are in good condition is key to the valve’s optimal performance.
- Testing and Verification: Thoroughly testing the faucet’s functionality after reassembly allows you to verify the success of the repair process and confirm that the anti-siphon valve operates effectively. This step ensures that the outdoor faucet functions as intended, with no leaks or irregularities.
By addressing the maintenance and repair of the anti-siphon valve, you’ve taken an important step in safeguarding the quality of your outdoor water supply and ensuring the reliable operation of your faucet. Regular maintenance and proactive troubleshooting will help you stay ahead of potential issues and maintain a functional and safe outdoor water system.
Remember, if you encounter complex issues or are unsure about any aspect of the repair process, don’t hesitate to seek professional assistance. Your diligence in maintaining the anti-siphon valve contributes to the overall safety and efficiency of your outdoor water system, providing peace of mind and reliable access to clean water for various outdoor activities.
Thank you for engaging with this guide, and we hope it has empowered you to confidently address the maintenance and repair of the anti-siphon valve on your outdoor faucet. Here’s to a smoothly functioning outdoor water system and the peace of mind that comes with it!
Frequently Asked Questions about How To Fix Anti-Siphon Valve On Outdoor Faucet
Was this page helpful?
At Storables.com, we guarantee accurate and reliable information. Our content, validated by Expert Board Contributors, is crafted following stringent Editorial Policies. We're committed to providing you with well-researched, expert-backed insights for all your informational needs.


0 thoughts on “How To Fix Anti-Siphon Valve On Outdoor Faucet”