Articles
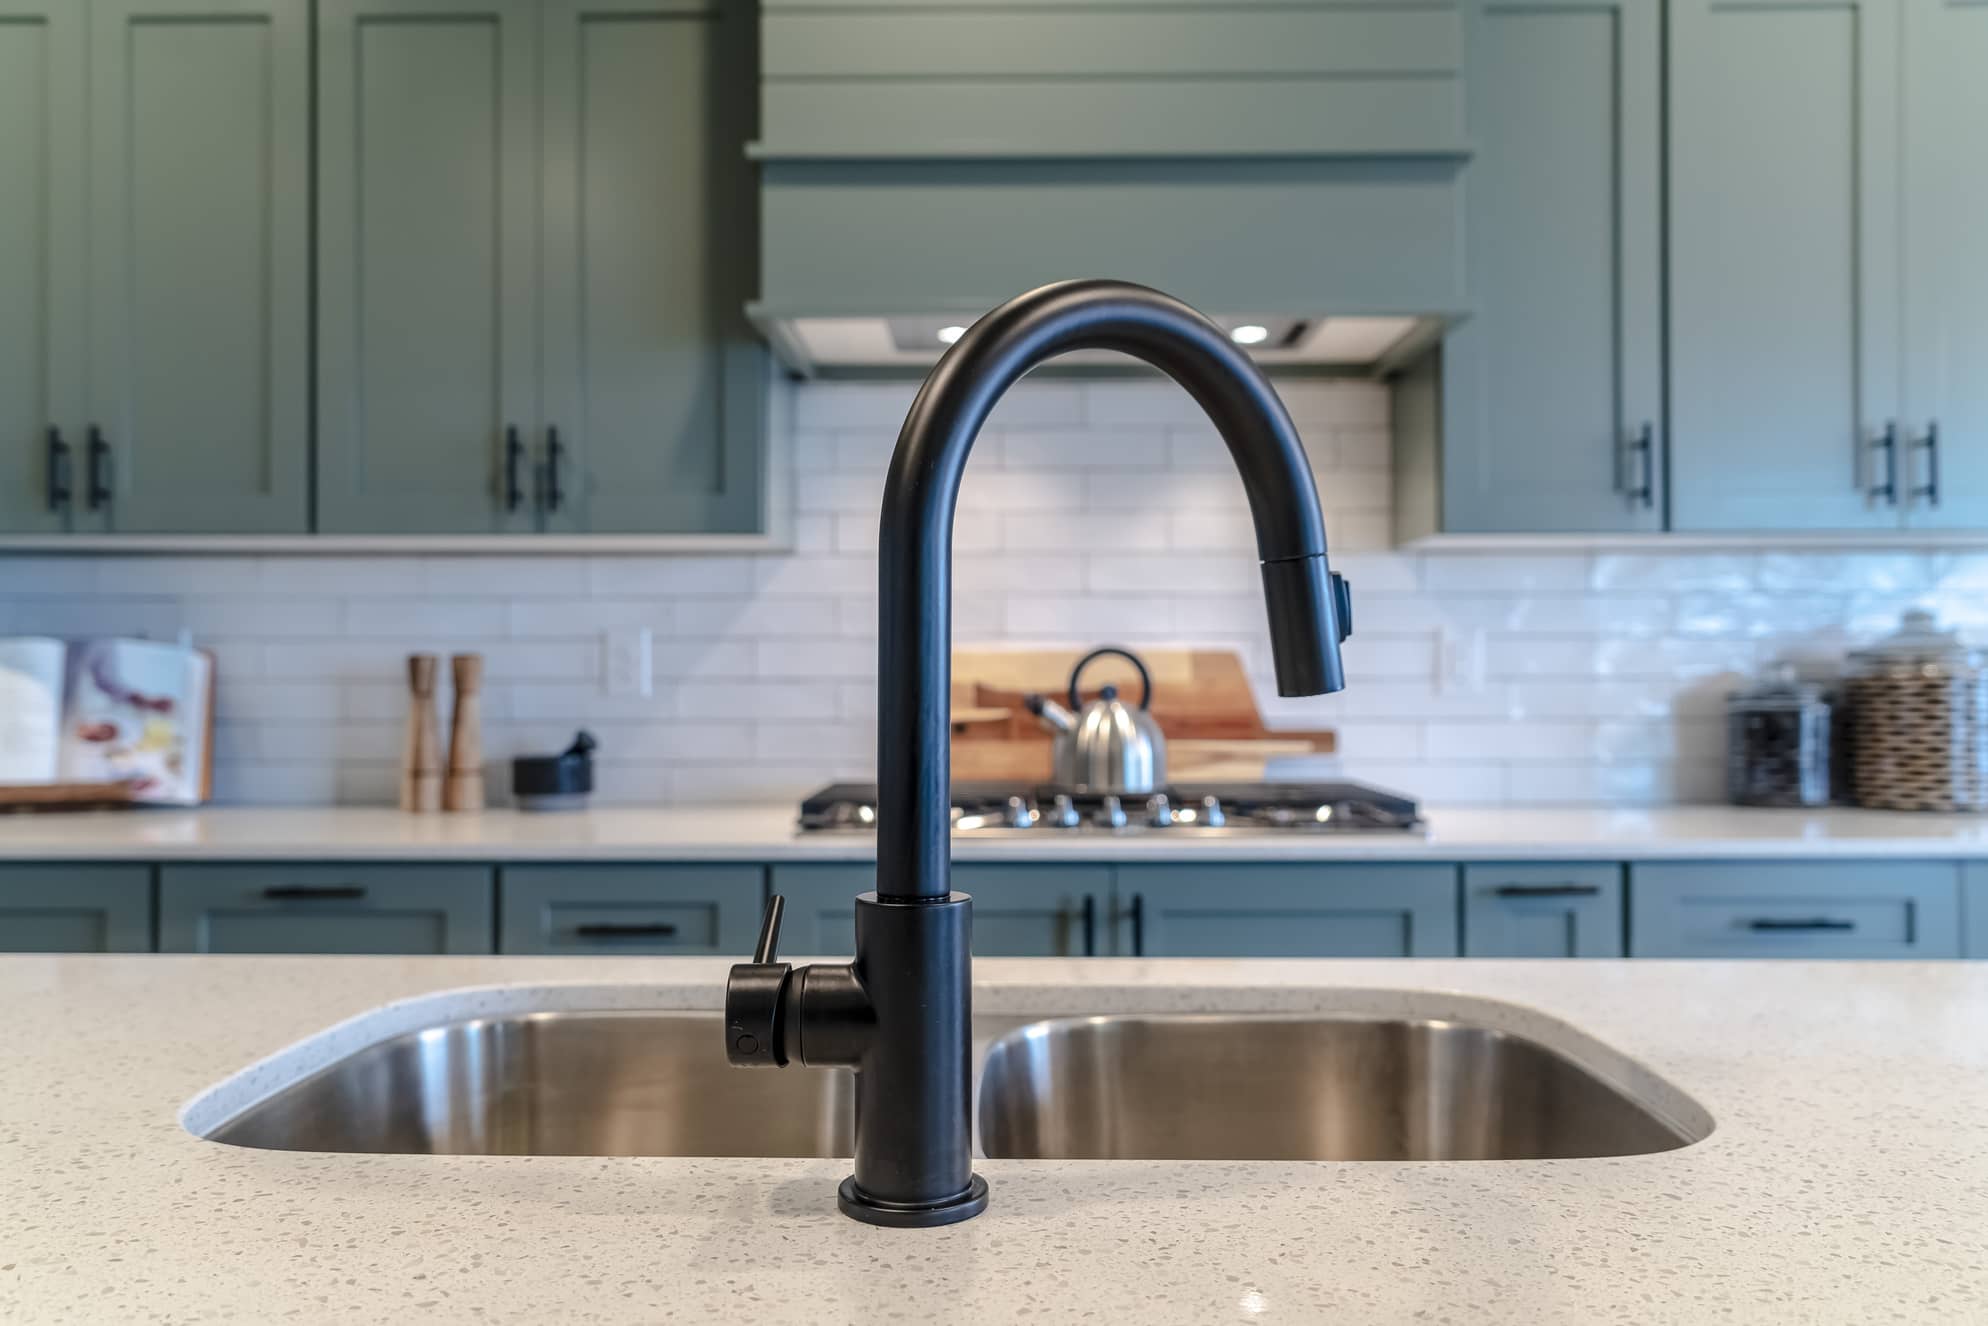
How To Fix A Loose Faucet
Modified: October 20, 2024
Learn how to fix a loose faucet with these helpful articles. Follow step-by-step instructions and troubleshooting tips. Improve your plumbing skills today!
(Many of the links in this article redirect to a specific reviewed product. Your purchase of these products through affiliate links helps to generate commission for Storables.com, at no extra cost. Learn more)
Introduction
A loose faucet can be a frustrating issue to deal with. Not only does it affect the overall functionality of the faucet, but it can also lead to annoying drips and leaks. Fortunately, fixing a loose faucet is a relatively simple task that you can do on your own with just a few basic tools and materials. In this article, we will guide you through the step-by-step process of fixing a loose faucet, so you can enjoy a fully functional and leak-free fixture in no time.
Before we begin, it’s important to note that the following instructions are intended for a standard single-handle faucet. If you have a different type of faucet or if you encounter any complications during the repair process, it may be best to consult a professional plumber.
Now, let’s gather the necessary tools and materials before we dive into the steps of fixing a loose faucet.
Key Takeaways:
- Easily fix a loose faucet at home with basic tools and materials. Follow step-by-step instructions to tighten the retaining nut, replace worn-out components, and test for leaks to restore functionality.
- Regular maintenance and occasional checks can prevent future faucet issues. Remember to shut off the water supply before starting any repair work and seek professional assistance if needed.
Read more: How To Tighten Loose Faucet Handle
Tools and Materials Needed
Before you start fixing a loose faucet, make sure you have the following tools and materials on hand:
- Adjustable wrench
- Phillips screwdriver
- Flathead screwdriver
- Plumber’s tape
- New O-rings or washers (if necessary)
- Silicone grease (optional)
Having these tools and materials ready will ensure a smoother and more efficient repair process. Now let’s move on to the step-by-step instructions for fixing a loose faucet.
Step 1: Shut off the water supply
The first step in fixing a loose faucet is to shut off the water supply. This is an important safety precaution that will prevent any water from flowing while you work on the faucet. Follow these steps to shut off the water supply:
- Locate the shut-off valves under the sink or near the water meter.
- Turn the valve clockwise until it is fully closed. This will stop the flow of water to the faucet.
- Test the faucet to ensure that the water supply has been successfully shut off.
Once you have successfully shut off the water supply, you can move on to the next step of fixing your loose faucet.
Step 2: Remove the handle
Now that you have shut off the water supply, it’s time to remove the handle of the loose faucet. Follow these steps:
- Look for the decorative cap on the handle. This can usually be found at the top of the handle and may be labeled with the manufacturer’s logo or a hot/cold indicator.
- Use a flathead screwdriver to carefully pry off the cap. If the cap is stuck, try wiggling the screwdriver gently until it comes off.
- Underneath the cap, you will find the handle screw. Use a Phillips screwdriver to loosen and remove the screw.
- Once the screw is removed, you should be able to lift the handle straight up and off the faucet.
With the handle removed, you will have better access to the inner workings of the faucet, allowing you to tighten the loose parts and fix the issue. Let’s move on to the next step.
Check the faucet handle and tighten the screw underneath. If the handle is still loose, you may need to replace the handle or the cartridge inside the faucet.
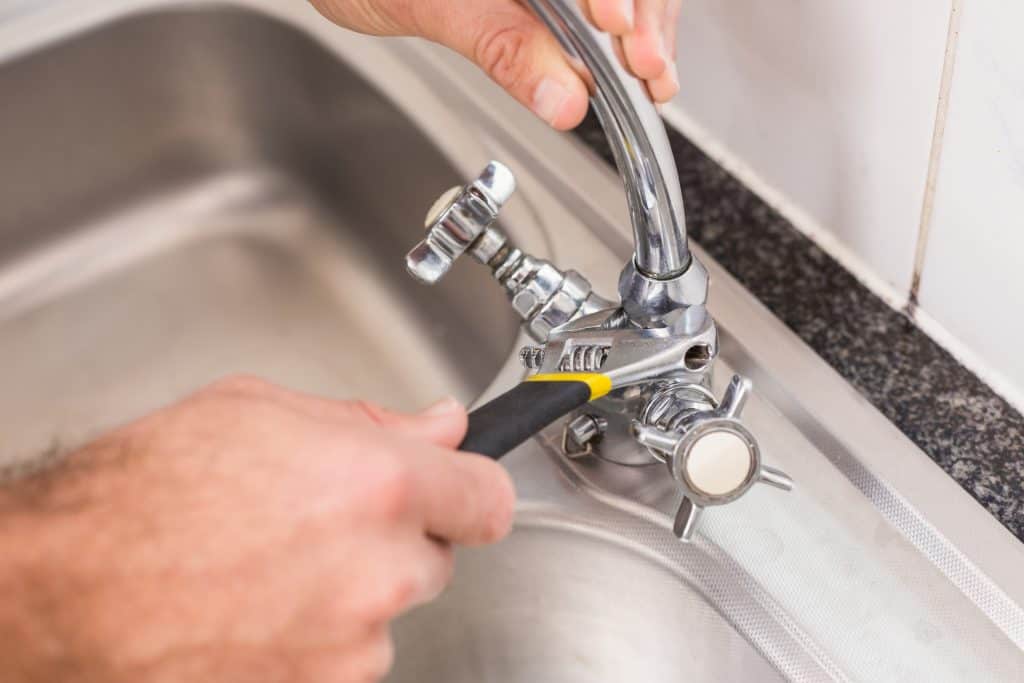
Step 3: Tighten the retaining nut
With the handle removed, you can now focus on tightening the retaining nut to fix the loose faucet. Follow these steps:
- Locate the retaining nut, which is typically situated directly below the handle.
- Using an adjustable wrench, grip the retaining nut and turn it clockwise to tighten it.
- Make sure to tighten it firmly, but be careful not to overtighten and risk damaging the fixture.
- Check the faucet to see if the looseness has been resolved. If not, continue to the next step.
If tightening the retaining nut does not fully resolve the loose faucet problem, it may indicate that other components, such as O-rings or washers, need to be replaced. Let’s move on to the next step to address this issue.
Read more: How To Fix Siding That Is Loose
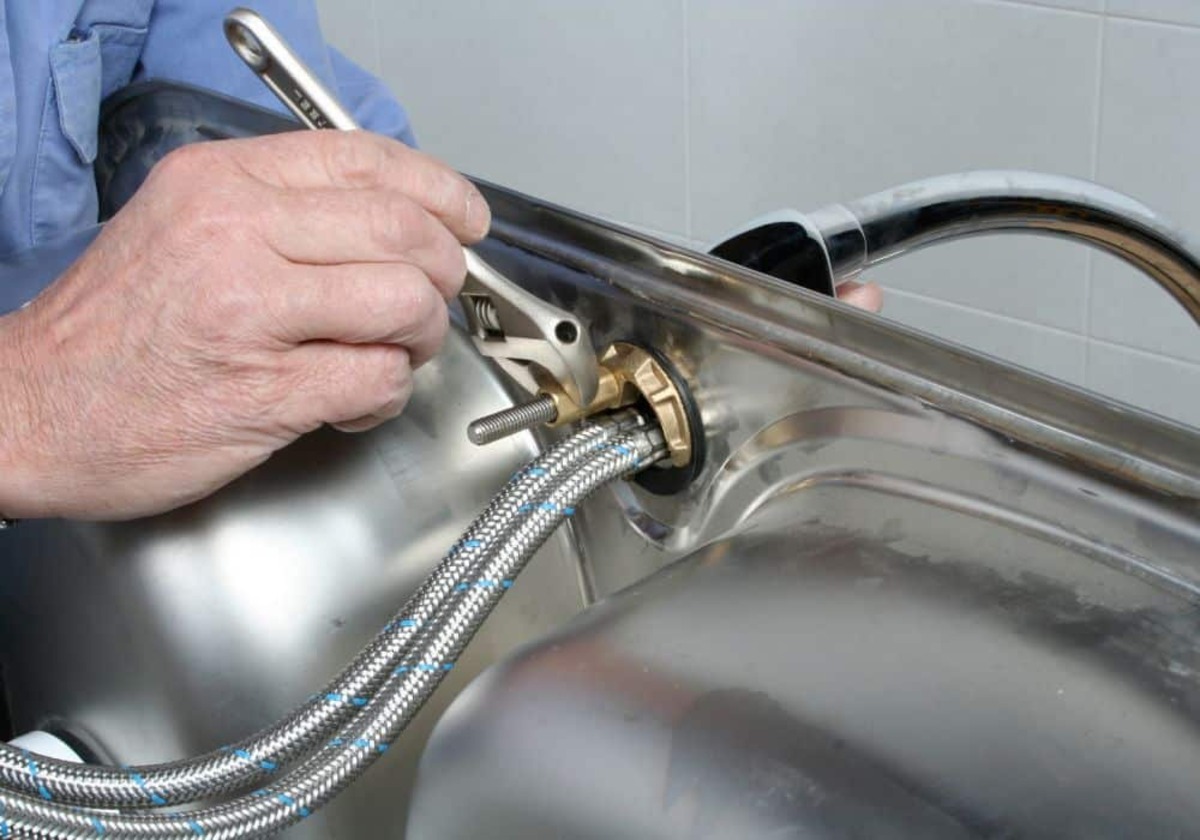
Step 4: Reassemble the faucet
If tightening the retaining nut did not resolve the loose faucet issue, it may be necessary to replace worn-out components such as O-rings or washers. Follow these steps to reassemble the faucet:
- Remove the retaining nut and lift off the spout assembly from the faucet base.
- Inspect the O-rings or washers for any signs of wear or damage. If they appear worn or brittle, it’s best to replace them.
- Apply a thin layer of plumber’s tape around the new O-rings or washers. This will create a tight seal and prevent leaks.
- Carefully place the new O-rings or washers onto the spout assembly, ensuring they fit snugly.
- Reattach the spout assembly to the faucet base and secure it with the retaining nut. Use the adjustable wrench to tighten the nut, but be cautious not to over-tighten.
Once you have reassembled the faucet with the new components, it’s time to test it for leaks.
Step 5: Test for leaks
After reassembling the faucet, it’s crucial to test it for leaks to ensure that your repair efforts were successful. Here’s how you can test for leaks:
- Turn on the water supply by opening the shut-off valve(s) that you closed earlier. Gradually open the valves to avoid sudden pressure surges.
- Once the water is flowing, observe the faucet closely for any signs of leaks or dripping water.
- If you notice any leaks, try tightening the retaining nut a bit more or check if the O-rings or washers are properly installed.
- If the leaks persist, you may need to consult a professional plumber for further assistance.
- If no leaks are detected, operate the faucet by turning the handle on and off to ensure it is working smoothly.
Congratulations! Your loose faucet should now be fixed, and you can enjoy a fully functional and leak-free fixture once again.
Remember, regular maintenance and occasional tightening of the retaining nut can help prevent future issues with your faucet. It is recommended to perform routine checks and repairs to ensure the longevity and reliability of your plumbing fixtures.
As a final optional step, you can apply a small amount of silicone grease to the handle stem before reattaching the handle. This will provide lubrication and make it easier to turn the handle.
We hope this guide has been helpful in fixing your loose faucet. If you have any further questions or encounter any difficulties, it is always best to consult a professional plumber for assistance.
Happy plumbing!
Conclusion
Fixing a loose faucet is a common household repair that can be easily done with a few basic tools and materials. Whether it’s a loose handle or a wobbly spout, addressing the issue promptly can prevent further damages and annoying leaks.
By following the step-by-step instructions outlined in this article, you can successfully tighten the retaining nut, replace worn-out components, and reassemble the faucet to restore its functionality and eliminate any looseness.
Remember to always shut off the water supply before starting any faucet repair work to ensure your safety and to avoid potential water damage. Regular maintenance of your fixtures, including occasional checks and tightening of the retaining nut, can help prevent future issues and prolong the lifespan of your faucet.
If you encounter any difficulties during the repair process or if the loose faucet problem persists, it’s recommended to seek the assistance of a professional plumber. They have the expertise and experience to tackle more complex faucet issues and ensure a long-lasting and effective solution.
With the knowledge and guidance provided in this article, you now have the confidence to tackle a loose faucet repair on your own. Enjoy the satisfaction of a fully functional and leak-free faucet as you put your newfound plumbing skills to use!
Frequently Asked Questions about How To Fix A Loose Faucet
Was this page helpful?
At Storables.com, we guarantee accurate and reliable information. Our content, validated by Expert Board Contributors, is crafted following stringent Editorial Policies. We're committed to providing you with well-researched, expert-backed insights for all your informational needs.


0 thoughts on “How To Fix A Loose Faucet”