
Articles
How To Fix A Faucet Handle
Modified: March 1, 2024
Learn how to fix a faucet handle with these informative articles. Find step-by-step guides and expert tips to troubleshoot and repair your faucet.
(Many of the links in this article redirect to a specific reviewed product. Your purchase of these products through affiliate links helps to generate commission for Storables.com, at no extra cost. Learn more)
Introduction
When it comes to household plumbing issues, a loose or broken faucet handle is a common inconvenience that many homeowners encounter. A faulty faucet handle not only affects the aesthetics of your sink or shower but can also lead to leaks and wasted water. The good news is that fixing a faucet handle is a relatively simple task that you can tackle on your own, even if you have limited plumbing experience.
In this guide, we will walk you through the step-by-step process of fixing a faucet handle. Whether you have a single-handle or a double-handle faucet, the general principles remain the same. By following these instructions and gathering the necessary tools, you can restore your faucet handle’s functionality and avoid the need for a costly plumber’s visit.
So let’s get started with gathering the tools you’ll need for the job.
Key Takeaways:
- Fixing a loose or broken faucet handle is a simple DIY task that can save time and money. Regular maintenance and prompt repairs can prevent more significant plumbing issues in the future.
- By following the step-by-step process, gathering the necessary tools, and inspecting for damage, you can easily restore the functionality of your faucet handle. Remember to turn off the water supply and seek professional assistance if needed.
Read more: How To Fix A Stripped Faucet Handle
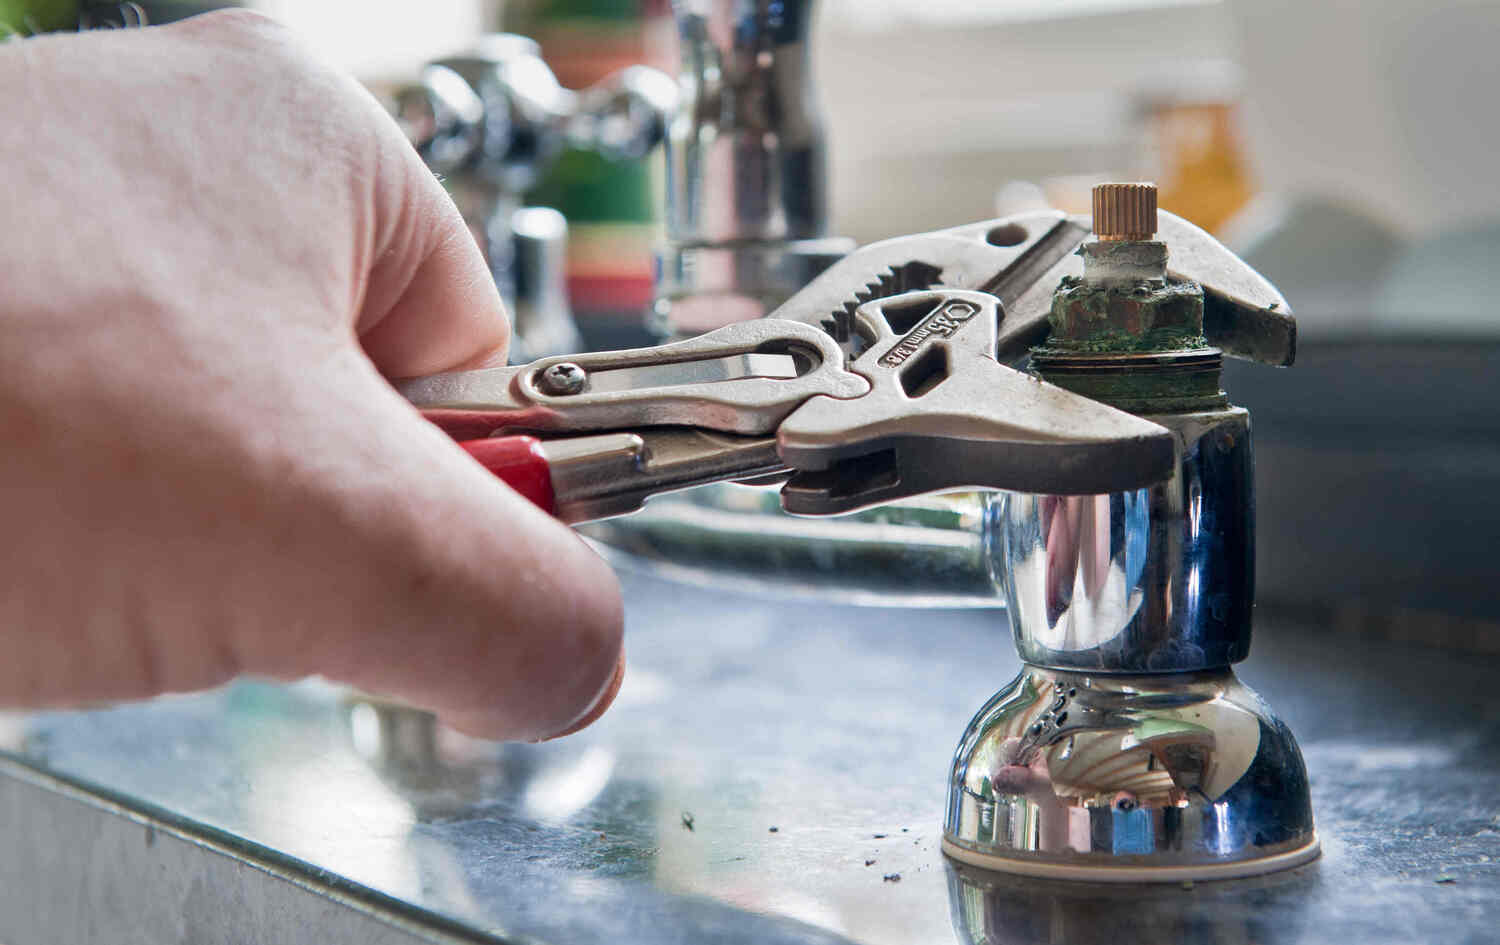
Step 1: Gather the necessary tools
Before you begin fixing your faucet handle, it’s important to gather the necessary tools to ensure a smooth and efficient repair process. Here is a list of tools you will need:
- Adjustable wrench
- Screwdriver (flathead or Phillips, depending on your faucet)
- Pliers
- Replacement parts (if needed)
- Teflon tape
- Clean cloth
Having these tools readily available will save you time and prevent frustration during the repair process. Once you have gathered all the tools, you can move on to the next step: turning off the water supply.
Step 2: Turn off the water supply
Before you begin working on your faucet handle, it’s important to turn off the water supply to prevent any water leakage or accidents. Here’s how you can do it:
- Locate the shut-off valves under the sink or near the main water line.
- Turn the valve handles clockwise until they are fully closed.
- To ensure the water is completely off, turn on the faucet and wait for the water to stop flowing. If no water comes out, you have successfully turned off the water supply.
Turning off the water supply will prevent any accidental water damage and make it safe to work on your faucet handle. Now that the water supply is shut off, you can proceed to the next step: removing the faucet handle.
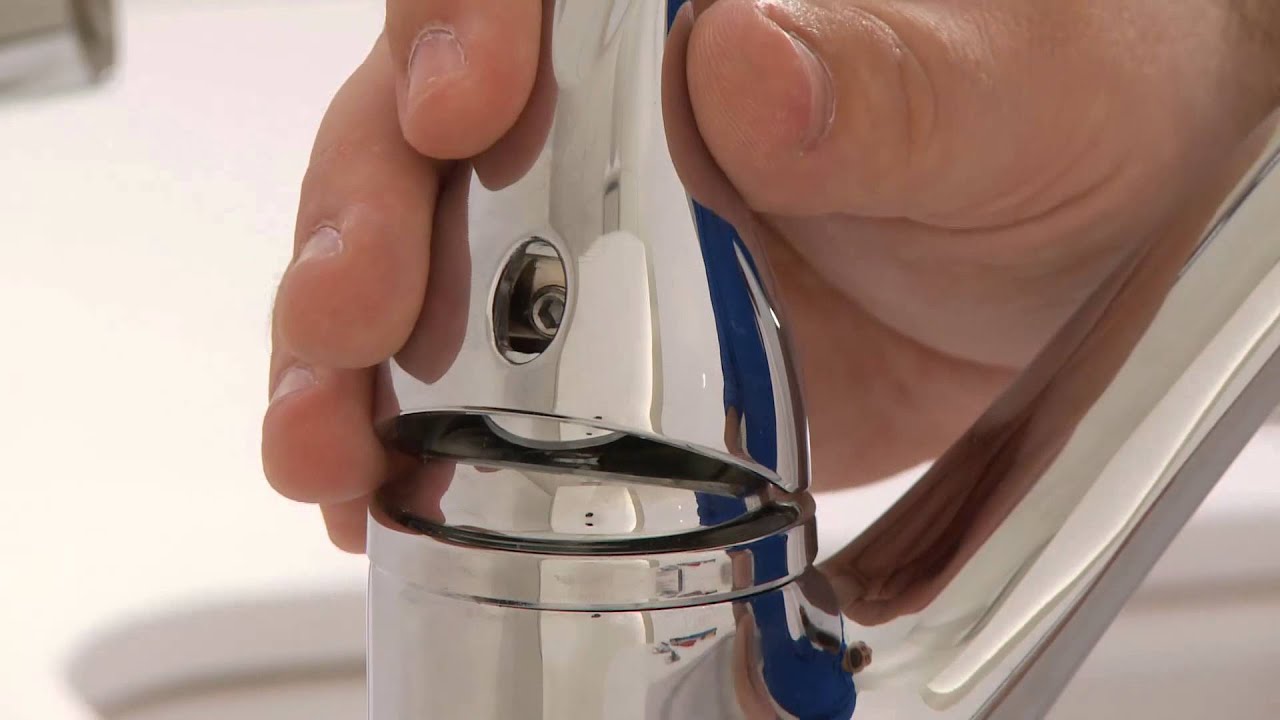
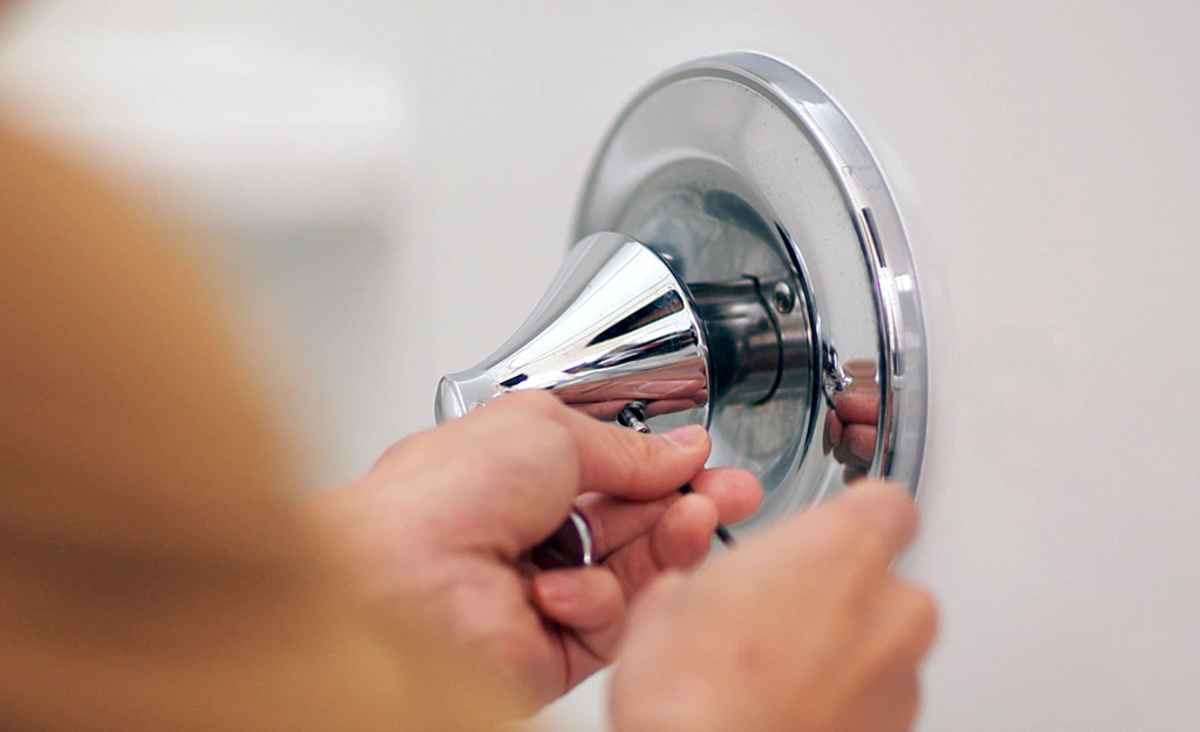
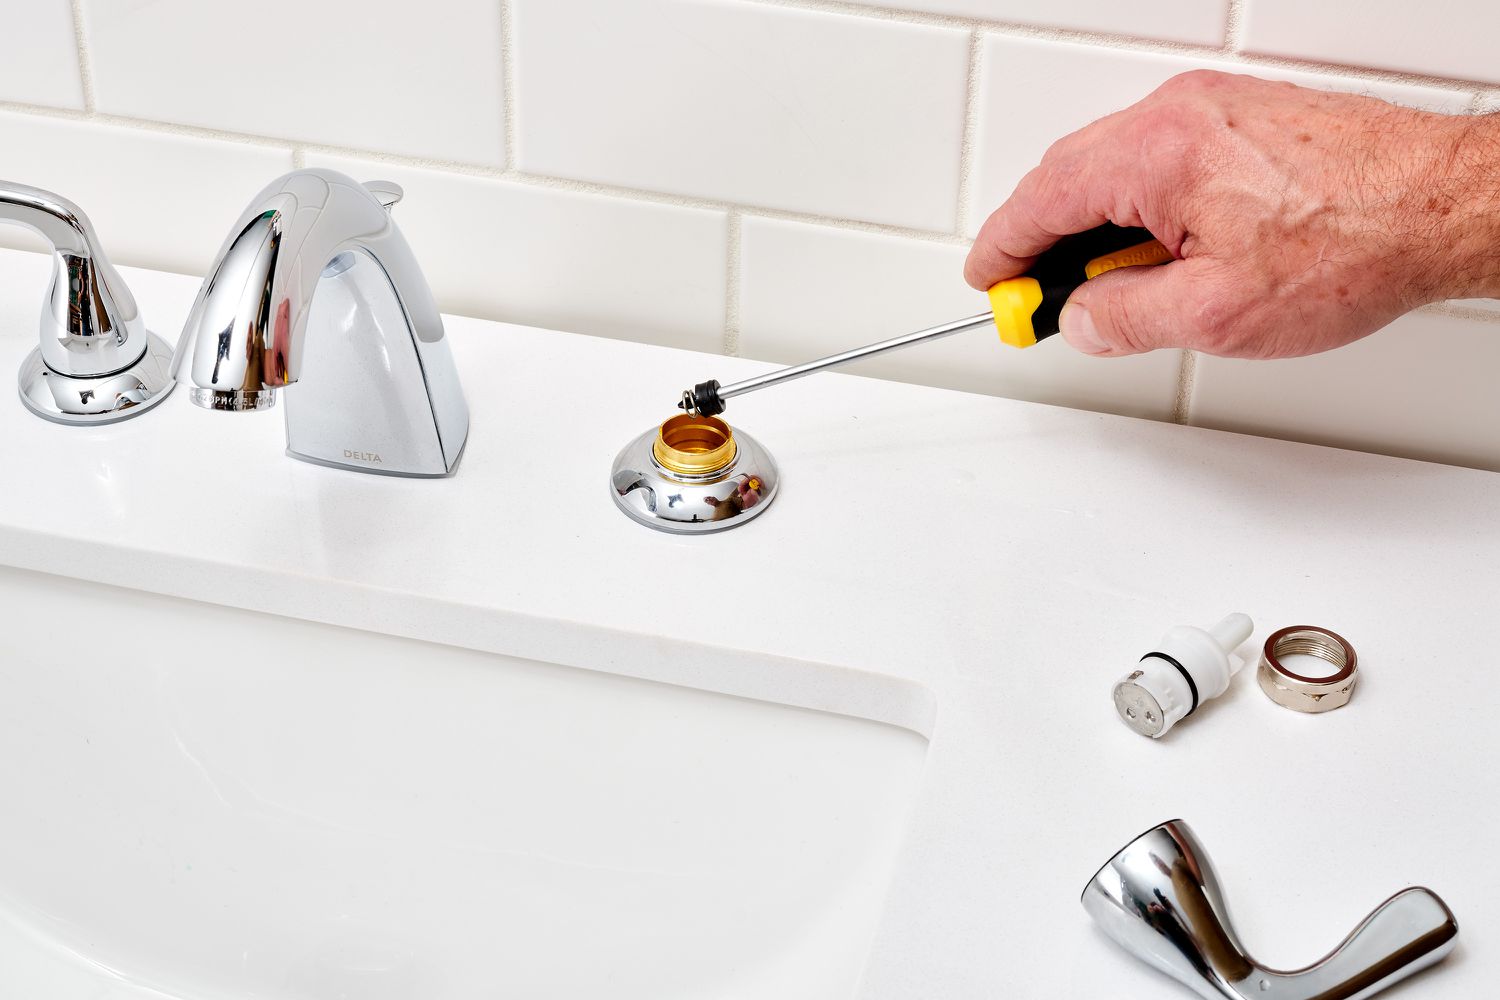
Step 3: Remove the faucet handle
Removing the faucet handle is a crucial step in fixing a loose or broken handle. Follow these steps to remove the faucet handle:
- Find the decorative cap or screw cover on the handle. This cap is usually located on the top or front of the handle.
- Using a small flathead screwdriver, gently pry off the cap to reveal the screw beneath it. In some cases, the cap may be threaded and can be unscrewed by hand.
- Using a screwdriver or an Allen wrench, depending on the type of screw, loosen and remove the screw holding the handle in place.
- Gently lift off the handle, taking care not to damage any surrounding components or pipes.
Once the faucet handle is removed, you can proceed to the next step: inspecting for any damage or wear.
Step 4: Inspect for damage
With the faucet handle removed, it’s time to inspect for any damage or wear that may be causing the issue. Carefully examine the handle, stem, cartridge, and any other components for the following signs:
- Cracks or fractures in the handle
- Worn-out or broken stem or cartridge
- Corrosion or mineral deposits
- Loose or damaged screws
If you notice any of these issues, it’s likely that the damaged component is the cause of the loose or broken handle. In such cases, it may be necessary to replace the damaged parts. However, if everything appears to be in good condition, you can proceed to reassemble the faucet handle.
Before moving on to the next step, take this opportunity to clean any accumulated dirt or debris from the components. Use a clean cloth or a small brush to remove any buildup. This will help maintain the longevity and efficiency of your faucet handle.
When fixing a faucet handle, start by turning off the water supply. Use a screwdriver to remove the handle and inspect for any damage. Replace any worn out parts and reassemble the handle carefully.
Read more: How To Fix Squeaky Faucet Handle
Step 5: Replace damaged components
If you have identified any damaged or worn-out components during the inspection, it’s time to replace them. Here’s how you can replace the damaged components in your faucet handle:
- Identify the specific component that needs to be replaced, such as the handle, stem, cartridge, or screws.
- Visit your local hardware store or contact the faucet manufacturer to purchase the necessary replacement parts.
- Follow the manufacturer’s instructions or consult a plumbing professional if you need assistance with identifying and purchasing the correct components.
- Once you have the replacement parts, carefully remove the old components from the faucet handle.
- Install the new components according to the manufacturer’s instructions. Make sure they fit securely and snugly into place.
Replacing the damaged components will not only fix the loose or broken handle but also enhance the overall functionality and longevity of your faucet. Once you have successfully replaced the components, you can proceed to reassemble the faucet handle.
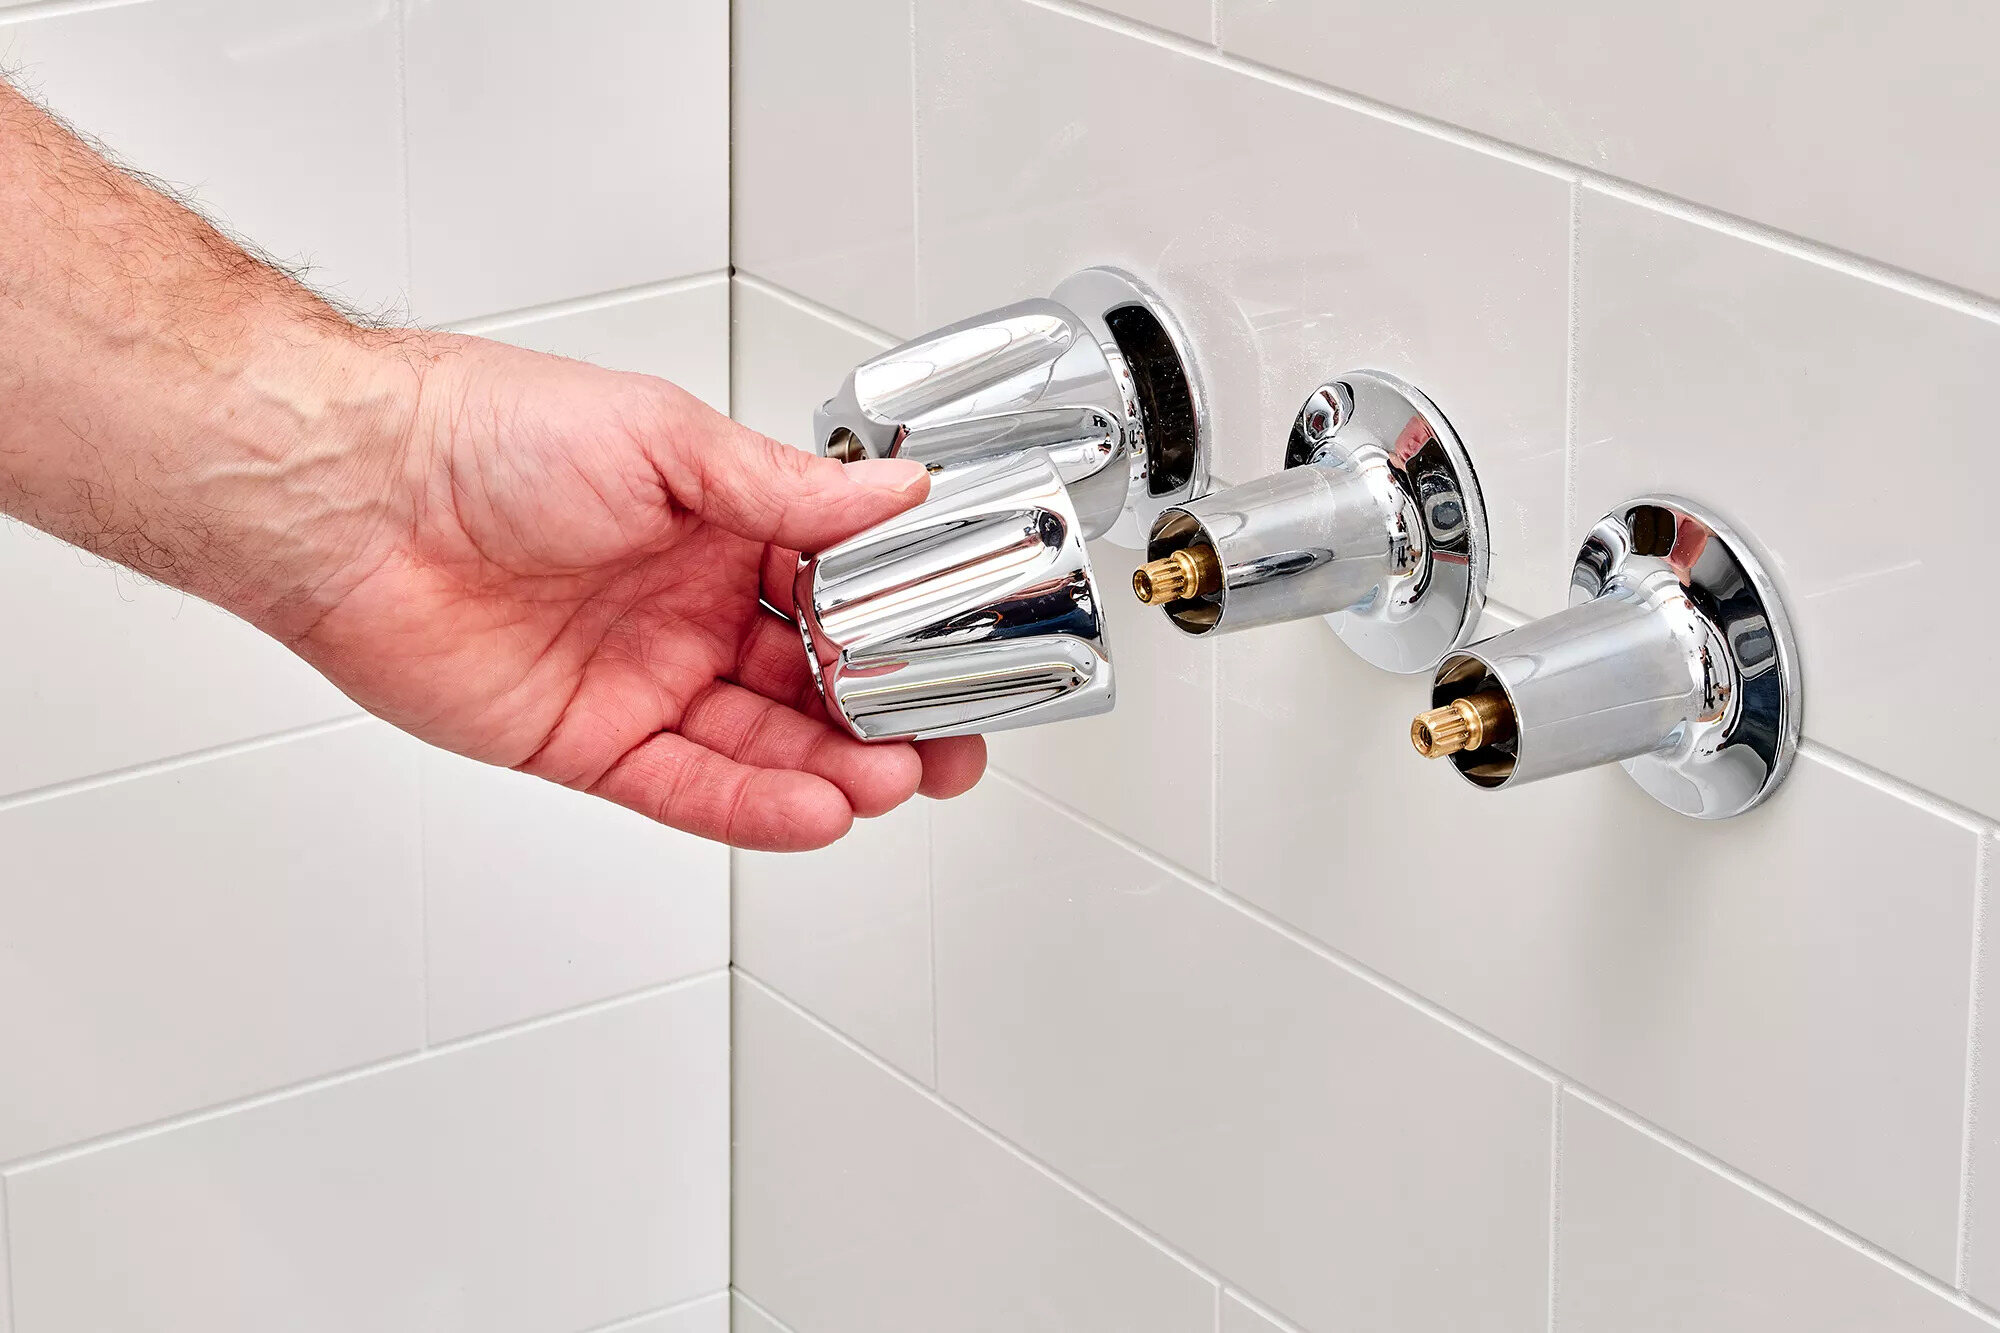
Step 6: Reassemble the faucet handle
After replacing any damaged components, it’s time to reassemble the faucet handle. Follow these steps to ensure proper reassembly:
- Take the handle and align it with the stem or cartridge, ensuring that any screw holes or openings line up correctly.
- Insert the screws and tighten them securely using a screwdriver or an Allen wrench, depending on the type of screws used.
- If your faucet handle had a decorative cap or screw cover, place it back in its original position and press it firmly until it snaps into place. If it is threaded, screw it in.
Ensure that the handle is secure and doesn’t wobble, as this will ensure optimal functionality and prevent future issues.
Next, turn on the water supply and test the faucet handle to ensure that it is working properly. If there are no leaks and the handle operates smoothly, you have successfully reassembled the faucet handle.
If you encounter any difficulties during the reassembly process or the handle still doesn’t function properly, it may be best to consult a professional plumber to address the issue.
Step 7: Turn on the water supply
With the faucet handle successfully reassembled, it’s time to turn on the water supply and ensure everything is functioning as it should. Here’s how you can do it:
- Locate the shut-off valves that you turned off earlier in Step 2.
- Slowly and gradually turn the valve handles counterclockwise to open the water supply.
- Observe the faucet handle closely as the water flows. Check for any leaks, drips, or unusual sounds.
- If everything appears to be in order and there are no signs of leakage or malfunction, congratulations! You have successfully fixed the faucet handle.
It’s important to note that if you notice any leaks or issues with the handle, it may indicate that further adjustments or repairs are needed. In such cases, it is recommended to consult a professional plumber to address the underlying problem.
By following these seven steps, you can fix a loose or broken faucet handle and restore the functionality of your sink or shower. Regular maintenance and prompt repair of faucet handles can help prevent bigger plumbing issues down the line.
Remember, if you’re unsure about any step or encounter difficulties during the process, don’t hesitate to seek professional assistance. Taking the time to fix your faucet handle properly will save you time, money, and the inconvenience of dealing with plumbing problems in the future.
We hope this guide has been helpful in assisting you with fixing your faucet handle. Enjoy your fully functional and leak-free plumbing!
Conclusion
Fixing a loose or broken faucet handle is a task that you can easily tackle on your own with a few simple steps. By gathering the necessary tools, turning off the water supply, and removing the faucet handle, you can inspect for damage and replace any damaged components. After reassembling the handle and turning on the water supply, you can enjoy a fully functional and leak-free faucet.
Regular maintenance and prompt repair of faucet handles is essential to prevent more significant plumbing issues in the future. By addressing a loose or broken handle promptly, you can save time, money, and the inconvenience of dealing with a faulty fixture.
If you’re unsure about any step in the process or encounter difficulties, it’s always a good idea to seek professional assistance from a plumber. They can provide expert guidance and ensure that the repair is carried out correctly.
Remember, safety is paramount when working with plumbing fixtures, so always turn off the water supply before starting any repairs. Additionally, take the time to inspect the handle, stems, cartridges, and other components for signs of wear or damage, as this will help you determine if replacement parts are needed.
With the information and steps provided in this guide, you should feel confident in fixing a loose or broken faucet handle. Enjoy the satisfaction of a functional and aesthetically pleasing fixture, all accomplished with a little DIY effort!
Frequently Asked Questions about How To Fix A Faucet Handle
Was this page helpful?
At Storables.com, we guarantee accurate and reliable information. Our content, validated by Expert Board Contributors, is crafted following stringent Editorial Policies. We're committed to providing you with well-researched, expert-backed insights for all your informational needs.


0 thoughts on “How To Fix A Faucet Handle”