Home>Furniture & Design>Outdoor Furniture>How To Turn On Outdoor Gas Heater
Outdoor Furniture
How To Turn On Outdoor Gas Heater
Published: January 12, 2024
Learn how to properly turn on your outdoor gas heater and enjoy the warmth in your outdoor space. Follow these simple steps for a cozy and comfortable outdoor experience.
(Many of the links in this article redirect to a specific reviewed product. Your purchase of these products through affiliate links helps to generate commission for Storables.com, at no extra cost. Learn more)
Introduction
Read more: How To Turn Off Gas Water Heater
Introduction
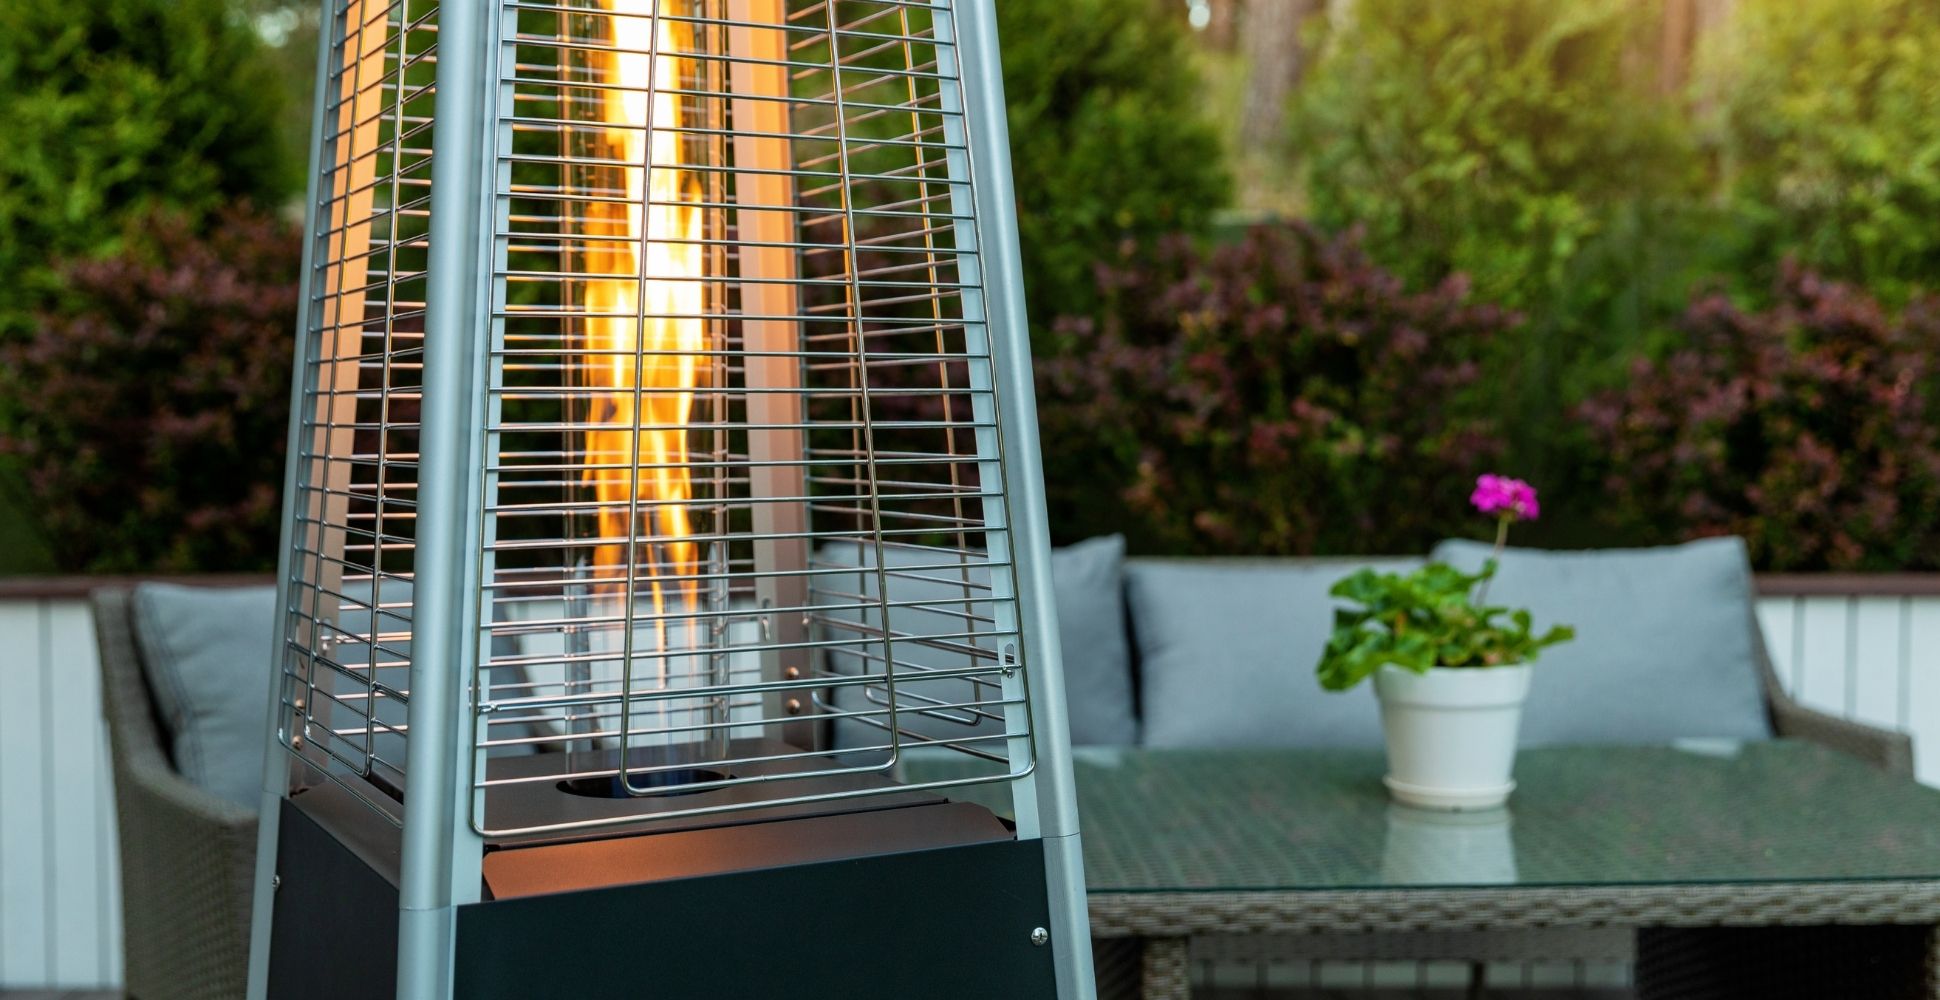
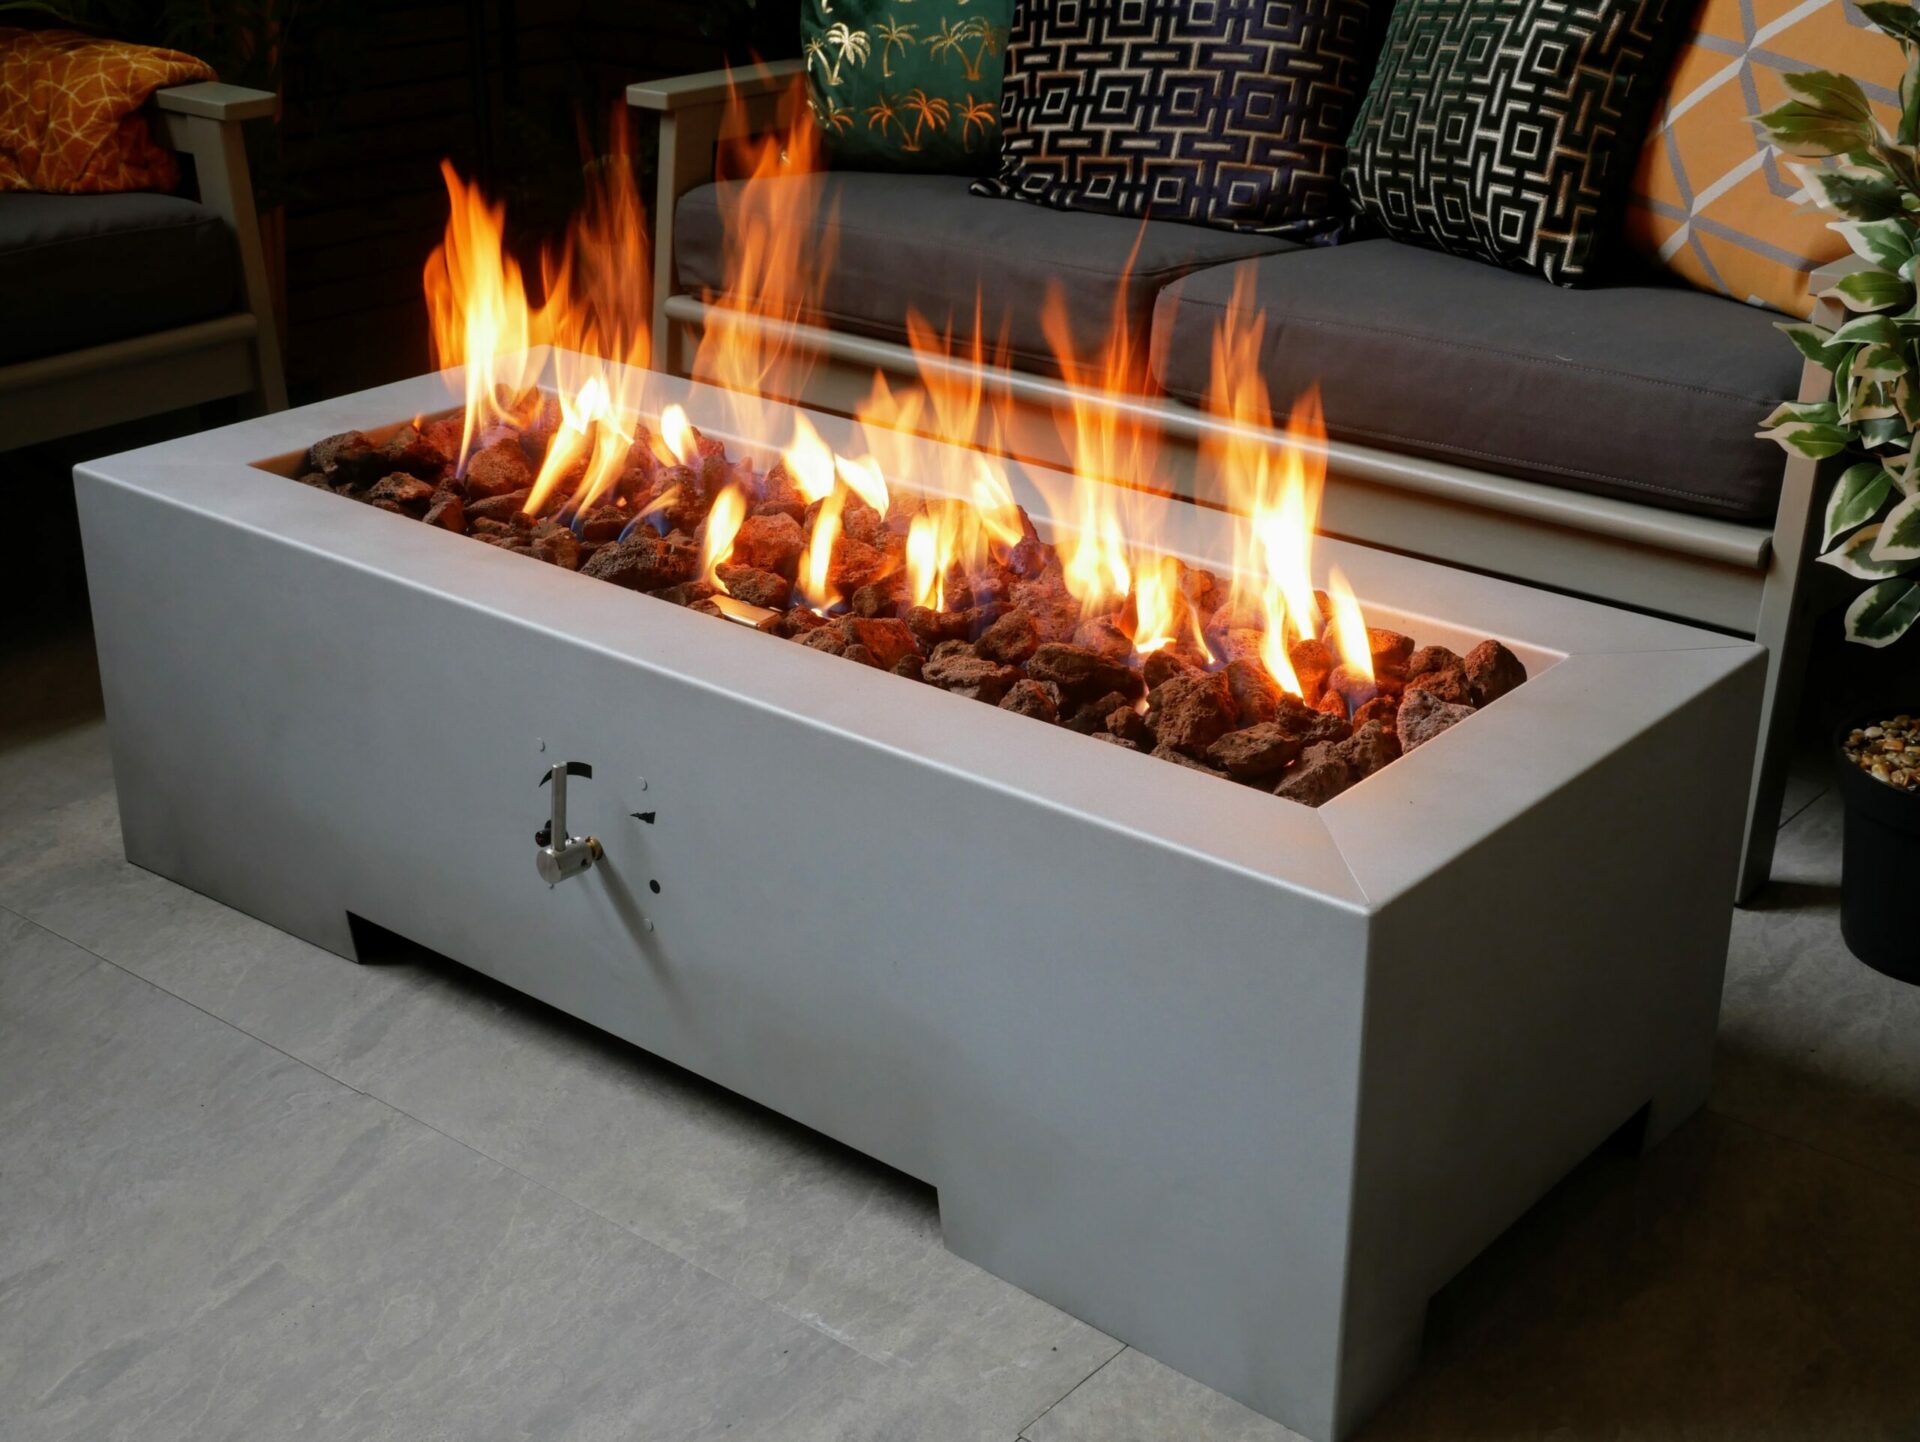
Welcome to the wonderful world of outdoor gas heaters! As the temperatures drop and the desire to spend more time in the great outdoors persists, these heaters become invaluable additions to any outdoor space. Whether you have a patio, deck, or outdoor dining area, an outdoor gas heater can extend your outdoor enjoyment well into the cooler months.
In this comprehensive guide, we will walk you through the step-by-step process of turning on an outdoor gas heater. From ensuring safety to igniting the pilot light and adjusting the heat settings, we've got you covered. By the end of this article, you'll feel confident in operating your outdoor gas heater and creating a warm and inviting atmosphere for yourself and your guests.
So, grab a cup of your favorite warm beverage, and let's dive into the world of outdoor gas heaters. But first, let's talk about safety precautions to ensure that you can enjoy the warmth and comfort of your outdoor space without any worries.
Key Takeaways:
- Stay Safe: Prioritize safety when using outdoor gas heaters by following the manufacturer’s manual, checking for leaks, maintaining ventilation, and keeping children and pets at a safe distance.
- Create Cozy Outdoor Space: Master the art of operating your outdoor gas heater to extend outdoor enjoyment, from lighting the pilot light to adjusting heat settings and safely shutting off the heater.
Safety Precautions
Before embarking on the process of turning on your outdoor gas heater, it is crucial to prioritize safety. Gas heaters, like any other gas-powered appliance, require careful handling to prevent accidents and ensure optimal functionality. Here are some essential safety precautions to keep in mind:
- Read the Manual: Always start by thoroughly reading the manufacturer’s manual for your specific outdoor gas heater. This will provide you with detailed instructions and safety guidelines tailored to your unit.
- Check for Leaks: Before each use, inspect the gas connections and hoses for any signs of wear, damage, or leaks. A simple solution of soapy water applied to the connections can help identify any gas leaks through the formation of bubbles.
- Clear the Area: Ensure that the area around the heater is clear of any flammable materials, such as furniture, curtains, or overhanging branches. Maintaining a safe distance from combustible items is essential to prevent fire hazards.
- Ventilation: Only operate the outdoor gas heater in a well-ventilated area. Adequate ventilation prevents the accumulation of carbon monoxide, a colorless and odorless gas that can be harmful if inhaled in high concentrations.
- Keep Children and Pets Away: Establish a safety perimeter around the heater and ensure that children and pets are kept at a safe distance to avoid accidental contact with the hot surfaces.
- Use Stable Ground: Place the heater on a stable and level surface to prevent tipping or instability during operation. This is especially important for freestanding gas heaters.
By adhering to these safety precautions, you can create a secure environment for using your outdoor gas heater. Now that we’ve covered the essential safety measures, let’s move on to the next step: checking the gas supply.
Checking the Gas Supply
Before attempting to turn on your outdoor gas heater, it’s important to verify that the gas supply is connected and functioning properly. This step ensures that the heater receives the necessary fuel to operate efficiently. Here’s how you can check the gas supply:
- Inspect the Gas Tank: If your outdoor gas heater is connected to a propane tank, visually inspect the tank to ensure that it is not empty or showing signs of damage. For natural gas heaters, ensure that the gas line is securely connected and free from leaks.
- Turn the Gas Valve On: If the gas tank or line is in good condition, locate the gas valve on the tank or gas line. Slowly turn the valve counterclockwise to open it. Take care not to force the valve, and stop turning it once it’s fully open.
- Listen for Hissing Sounds: As you open the gas valve, listen for any hissing sounds near the connections. Hissing noises may indicate a gas leak, in which case you should immediately close the valve and address the issue before proceeding.
- Perform a Bubble Test: For propane connections, you can perform a bubble test using a solution of soapy water to check for gas leaks. Apply the soapy water to the connections and observe for the formation of bubbles, which would indicate a leak.
Once you have confirmed that the gas supply is intact and free from leaks, you can proceed to the next crucial step: lighting the pilot light. This step is essential for initiating the heating process and ensuring that the heater functions as intended. Let’s delve into the process of lighting the pilot light and igniting your outdoor gas heater.
Lighting the Pilot Light
Before you can fully ignite your outdoor gas heater, you’ll need to light the pilot light, which serves as the initial flame that ignites the main burner. This process may vary slightly depending on the specific model of your gas heater, so always refer to the manufacturer’s instructions for detailed guidance. Here are the general steps for lighting the pilot light:
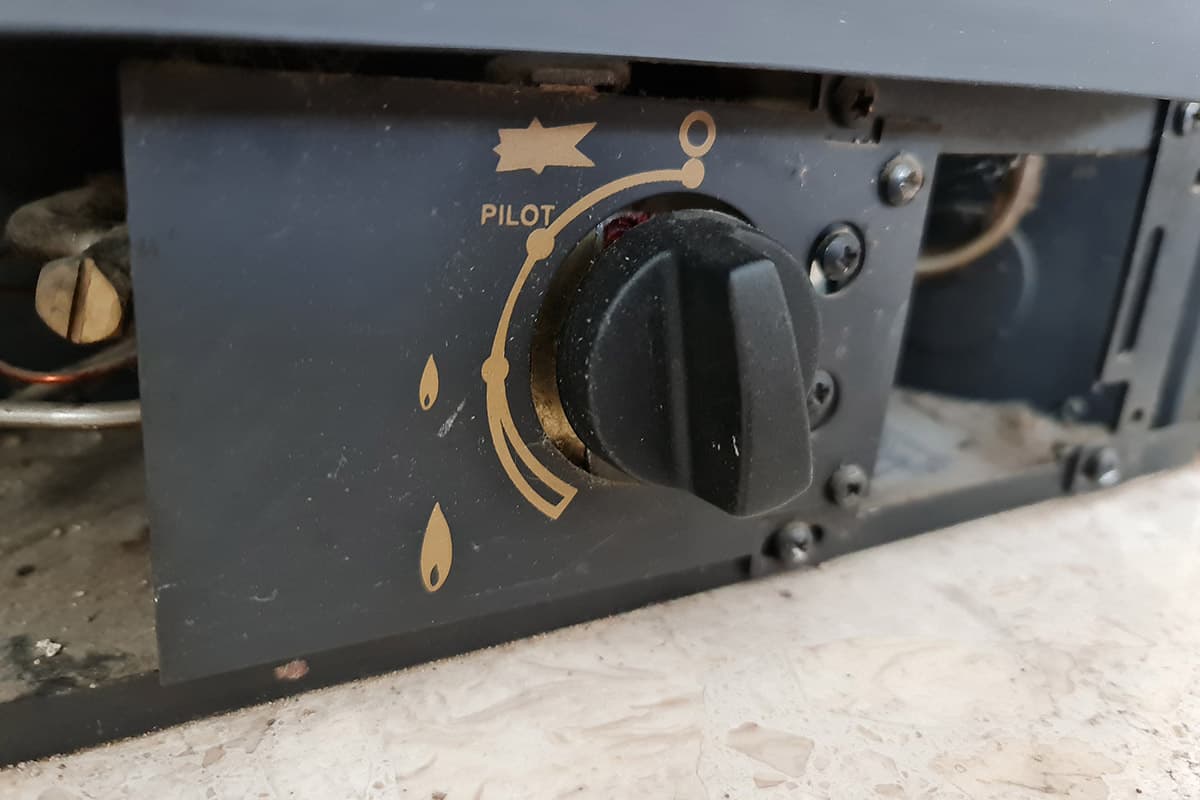
- Locate the Pilot Assembly: The pilot assembly is typically located near the bottom of the heater, and it is often concealed behind a removable panel. Consult your manual to identify the exact location of the pilot assembly for your specific heater.
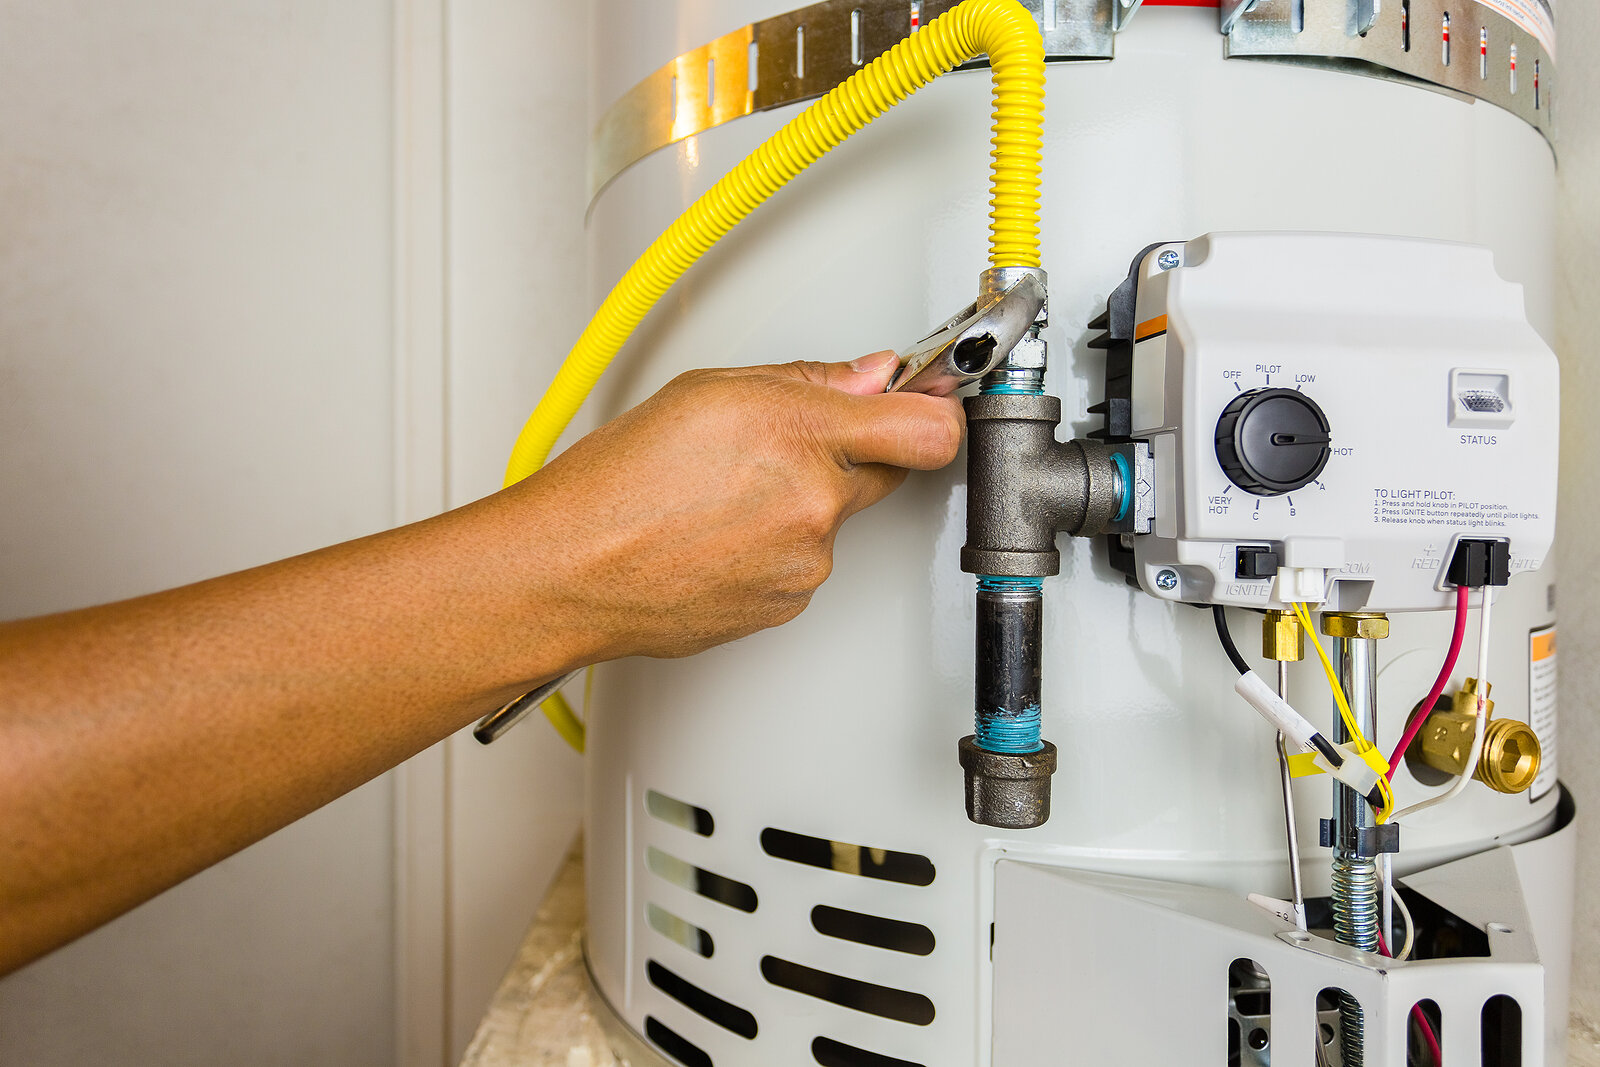
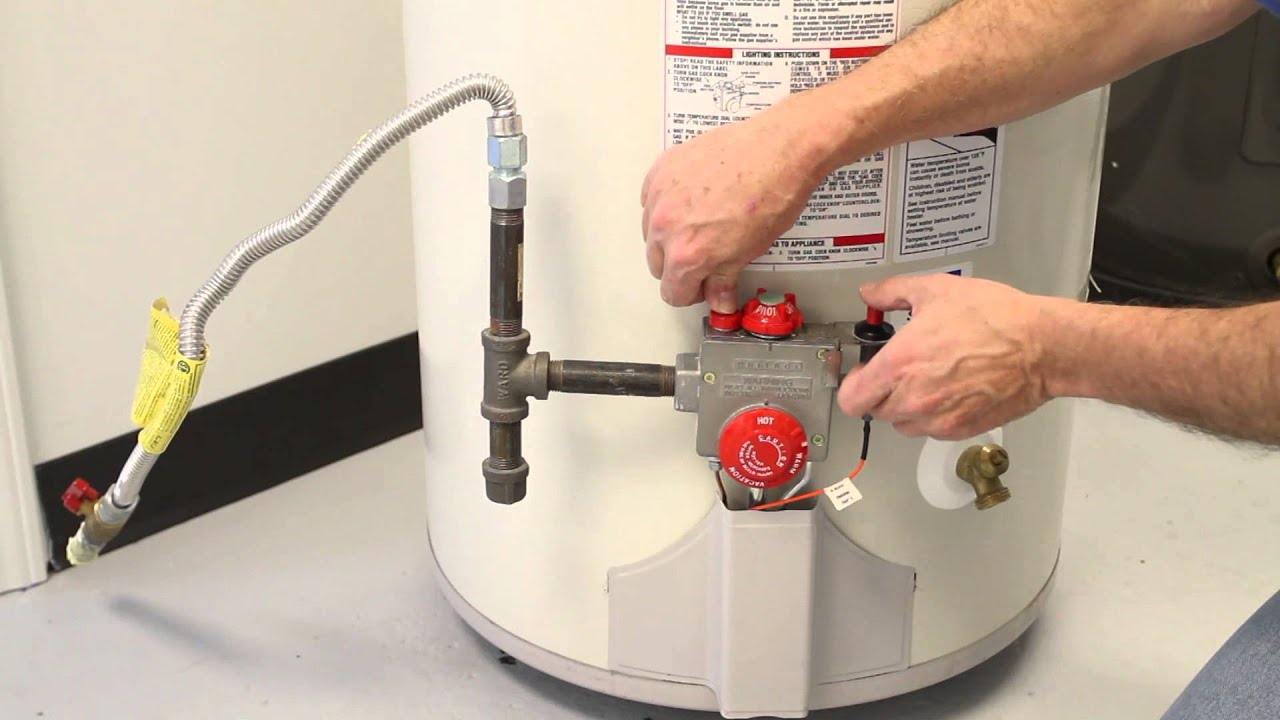
- Set the Control Knob: Turn the control knob to the “Pilot” position. This allows gas to flow to the pilot assembly and prepares it for ignition.
- Depress the Control Knob: While holding down the control knob in the “Pilot” position, press the ignition button or, if applicable, use a long-reach lighter to ignite the pilot. Continue to hold the control knob for about 30 seconds to allow the thermocouple to heat up.
- Release the Control Knob: After the thermocouple has had sufficient time to heat up, release the control knob. The pilot light should remain lit. If it goes out, wait a few minutes and repeat the process, ensuring that the thermocouple is positioned correctly in the flame.
- Replace the Panel: Once the pilot light is burning steadily, replace any panels or covers that were removed to access the pilot assembly. This helps protect the pilot light from being extinguished by wind or drafts.
Successfully lighting the pilot light sets the stage for activating the main burner and generating heat. Now that the pilot light is illuminated, let’s proceed to the next step: turning on the heater to enjoy the warmth it provides.
Read more: How To Turn On An Outdoor Propane Heater
Turning on the Heater
With the pilot light successfully lit, you are now ready to turn on your outdoor gas heater and bask in its comforting warmth. The process of activating the main burner may vary based on the design of your heater, so it’s essential to consult the manufacturer’s instructions for precise guidance. Here are the general steps for turning on the heater:
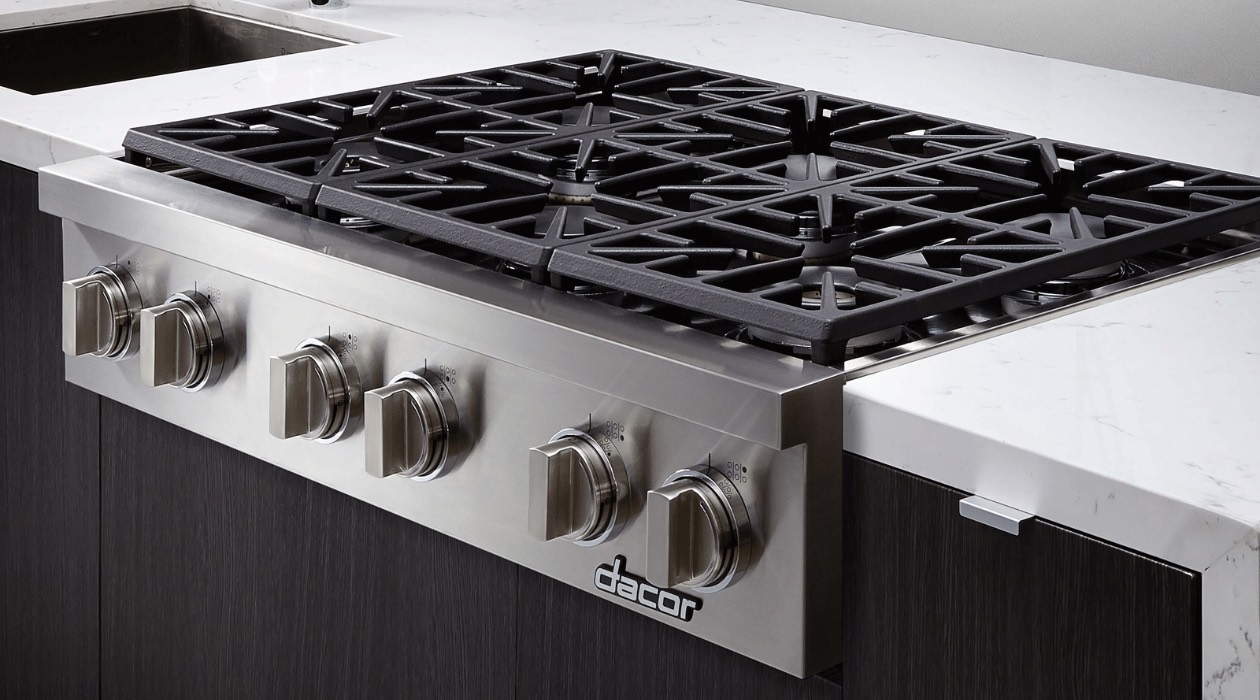
- Set the Heat Output: Locate the heat control knob or switch, which is typically positioned near the top of the heater. Adjust the knob or switch to your desired heat output level, whether it offers multiple settings or a continuous range of control.
- Ignite the Main Burner: Depending on your heater’s design, you may need to turn the control knob to the “On” position or press an ignition button to activate the main burner. Some models feature electronic ignition systems, while others require manual lighting using a long-reach lighter.
- Observe the Flame: Once the main burner is ignited, observe the flame to ensure that it is burning steadily and producing an even, blue flame. A consistent flame indicates proper combustion and efficient operation of the heater.
- Adjust the Settings: Take a moment to assess the heat output and adjust the settings as needed to achieve your desired level of warmth. Many gas heaters offer the flexibility to fine-tune the heat output to accommodate changing outdoor conditions.
By following these steps, you can easily turn on your outdoor gas heater and revel in the cozy ambiance it creates. As the heater begins to radiate warmth, you and your guests can comfortably linger in your outdoor space, even on chilly evenings. However, it’s important to be mindful of the heat settings and make any necessary adjustments to maintain a comfortable and safe environment.
Now that your heater is up and running, let’s explore the next step: adjusting the heat settings to optimize your outdoor heating experience.
Make sure the gas valve is open and the pilot light is lit. If the pilot light is out, follow the manufacturer’s instructions to relight it. Always make sure the area around the heater is clear of any obstructions.
Adjusting the Heat Settings
Once your outdoor gas heater is in operation, you have the flexibility to adjust the heat settings to create the ideal ambiance and maintain a comfortable temperature in your outdoor space. Whether you’re hosting a gathering, enjoying a quiet evening, or simply unwinding outdoors, optimizing the heat settings can enhance your overall experience. Here’s how you can adjust the heat settings:
- Consider Ambient Conditions: Take into account the prevailing weather conditions, including temperature, wind speed, and humidity, as they can influence the effectiveness of your heater. Adjust the heat output to compensate for these factors and ensure a pleasant outdoor environment.
- Utilize Variable Controls: If your gas heater offers variable heat controls, take advantage of this feature to fine-tune the warmth according to your preferences. You can increase the heat output on cooler nights and dial it down during milder evenings.
- Observe Heat Distribution: Pay attention to how the heat is distributed throughout the outdoor space. Adjust the settings to achieve optimal coverage and ensure that the warmth reaches areas where you and your guests are seated or gathered.
- Monitor Comfort Levels: Regularly gauge the comfort levels of those in the vicinity of the heater. Adjust the heat settings as needed to maintain a cozy and inviting atmosphere without generating excessive heat that could cause discomfort.
- Be Mindful of Fuel Consumption: While adjusting the heat settings, be mindful of the fuel consumption of your outdoor gas heater. Finding a balance between warmth and efficiency can help prolong the duration of use before refilling or replacing the fuel source.
By conscientiously adjusting the heat settings based on the factors mentioned above, you can optimize the performance of your outdoor gas heater and ensure a delightful outdoor experience for you and your guests. Whether you’re engaging in lively conversations, savoring a meal, or simply unwinding under the starlit sky, the carefully adjusted heat settings can contribute to a memorable and comfortable outdoor setting.
As the evening unfolds and the warmth of the heater envelops your outdoor space, it’s essential to be familiar with the process of shutting off the heater when it’s no longer needed. Let’s explore the next step: shutting off the heater to conclude a wonderful evening outdoors.
Shutting Off the Heater
As the evening draws to a close and the outdoor festivities wind down, it’s essential to know how to properly shut off your outdoor gas heater. This not only ensures the safe and efficient operation of the heater but also contributes to the longevity of its components. Follow these steps to safely and effectively shut off your gas heater:
- Turn the Heat Control to Low: Before shutting off the heater, reduce the heat output by adjusting the control knob to a lower setting. Allowing the heater to gradually cool down can help prevent abrupt temperature changes and minimize wear on the components.
- Turn Off the Main Burner: Locate the control knob or switch that activates the main burner. Turn the knob to the “Off” position or follow the manufacturer’s instructions for shutting off the burner, ensuring that the flame is completely extinguished.
- Wait for Cooling: After turning off the main burner, allow the heater to cool down for a few minutes. This helps dissipate any remaining heat and ensures that the heater is safe to handle and store, if necessary.
- Close the Gas Valve: If your outdoor gas heater is connected to a propane tank, gently turn the gas valve clockwise to close it. For natural gas heaters, follow the appropriate procedure to safely shut off the gas supply.
- Secure the Heater: If you anticipate inclement weather or prolonged periods of non-use, consider securing the heater with a protective cover or storing it in a sheltered area to shield it from the elements.
By conscientiously following these steps, you can effectively shut off your outdoor gas heater, promoting its longevity and ensuring that it’s ready for future use. Additionally, adhering to proper shutdown procedures enhances safety and minimizes the risk of accidents or malfunctions.
As you conclude your outdoor gathering or quiet evening under the stars, take a moment to appreciate the warmth and comfort that your gas heater has provided. Whether it’s a lively social event or a tranquil night of stargazing, your outdoor space has been transformed into a welcoming and inviting environment, thanks to the reliable warmth of your gas heater.
With the heater safely shut off, you can look forward to many more delightful moments in your outdoor oasis. Now that you’re well-versed in the process of turning on, adjusting, and shutting off your outdoor gas heater, you can confidently create a cozy and inviting atmosphere for all your outdoor pursuits.
Remember to refer to your specific heater’s manual for detailed instructions tailored to your unit, and always prioritize safety when operating gas-powered appliances. With these insights, you’re well-equipped to make the most of your outdoor space, even as the temperatures dip. Here’s to many more enjoyable moments in the great outdoors!
Conclusion
Congratulations! You’ve embarked on a journey to master the art of operating your outdoor gas heater, and now you’re equipped with the knowledge and confidence to create a warm and inviting outdoor environment. By following the comprehensive steps outlined in this guide, you’ve gained a deeper understanding of the process of turning on, adjusting, and safely shutting off your gas heater.
As you’ve discovered, the warmth and comfort provided by an outdoor gas heater can transform your outdoor space into a year-round haven for relaxation, socializing, and unwinding. Whether you’re hosting gatherings, enjoying quiet evenings, or simply savoring the beauty of nature, your gas heater has become an indispensable ally in extending the enjoyment of your outdoor oasis.
Throughout this guide, safety has been a paramount consideration, and you’ve learned the essential precautions to ensure the secure and efficient operation of your gas heater. From inspecting the gas supply to lighting the pilot light and adjusting the heat settings, you’ve embraced a holistic approach to operating your heater with confidence and peace of mind.
As you navigate the process of using your outdoor gas heater, remember to consult your specific heater’s manual for detailed instructions tailored to your unit. Prioritizing safety and adhering to the manufacturer’s guidelines will enhance your overall experience and prolong the lifespan of your heater.
With each successful operation of your outdoor gas heater, you’re poised to create unforgettable moments in your outdoor space, regardless of the season. The allure of alfresco dining, engaging conversations, and tranquil evenings can now be enjoyed in the comforting warmth provided by your gas heater.
As you savor the delightful experiences that your outdoor space offers, from festive gatherings to serene moments of solitude, your gas heater stands ready to envelop you and your guests in a cocoon of welcoming heat. With your newfound expertise, you’re well-prepared to elevate every outdoor occasion, infusing it with the cozy ambiance that only a well-operated gas heater can provide.
So, as you venture into the great outdoors, whether it’s a crisp autumn evening or a chilly winter night, your outdoor gas heater stands as a beacon of warmth, inviting you to savor the beauty of nature and the company of loved ones. Here’s to many more cherished moments in your outdoor sanctuary, where the allure of the outdoors and the comfort of your gas heater converge to create unforgettable experiences.
Frequently Asked Questions about How To Turn On Outdoor Gas Heater
Was this page helpful?
At Storables.com, we guarantee accurate and reliable information. Our content, validated by Expert Board Contributors, is crafted following stringent Editorial Policies. We're committed to providing you with well-researched, expert-backed insights for all your informational needs.


0 thoughts on “How To Turn On Outdoor Gas Heater”