
Articles
How To Turn Down Water Heater
Modified: October 31, 2024
Learn the best techniques for turning down your water heater in our informative articles. Save energy and money with these simple steps.
(Many of the links in this article redirect to a specific reviewed product. Your purchase of these products through affiliate links helps to generate commission for Storables.com, at no extra cost. Learn more)
Introduction
Welcome to this guide on how to turn down your water heater. If you’ve noticed that the water in your home is consistently too hot, or if you’re simply looking to lower your energy bills, adjusting the temperature setting on your water heater is a practical solution. By following a few simple steps, you’ll be able to regulate the temperature and enjoy hot water that is both safe and efficient.
Before we dive into the steps, it’s important to understand why you might want to lower your water heater’s temperature. While hot showers and baths can be relaxing, excessively hot water can be dangerous, risking burns and scalds. By reducing the temperature, you can ensure the safety of everyone in your household, especially children and the elderly.
In addition to safety concerns, there are also financial benefits to turning down your water heater. Heating water accounts for a significant portion of your energy bills, and a higher temperature setting means more energy consumption. By lowering the temperature, you can save money and reduce your carbon footprint.
It’s worth noting that the recommended temperature for most homes is around 120 degrees Fahrenheit (49 degrees Celsius). This temperature is hot enough to perform everyday tasks like washing dishes and clothes, taking showers, and even providing warm water for household appliances, while still maintaining safety and energy efficiency.
Now that you understand the importance of adjusting your water heater’s temperature let’s move on to the step-by-step process to turn down your water heater and enjoy the benefits of optimized temperature settings.
Key Takeaways:
- Lowering your water heater’s temperature to around 120 degrees Fahrenheit not only ensures safety but also reduces energy consumption and utility bills, contributing to a greener and more energy-efficient future.
- Prioritize safety by turning off the power supply before adjusting the temperature. Regularly check the water temperature to ensure a comfortable and safe hot water experience throughout your home.
Read more: How To Turn On A Water Heater
Step 1: Gather the necessary materials
Before you can begin adjusting the temperature on your water heater, it’s important to gather all the necessary materials. This will ensure that you have everything you need to safely and effectively complete the task. Here are the materials you’ll need:
- A screwdriver: This will be used to access the temperature adjustment controls on your water heater. Make sure you have a screwdriver that is the appropriate size for the screws on your particular model.
- A thermometer: This will allow you to measure the temperature of the water coming out of your faucets. You can use a simple handheld thermometer or a digital one for more accurate readings.
- A notepad and pen: It is recommended to take note of the current temperature setting before making any adjustments. This way, you can easily reference the previous setting if needed.
Once you have gathered these materials, you can move on to the next step in the process. It’s always a good idea to ensure that you have everything you need before starting any home maintenance task, as it saves time and avoids any unnecessary interruptions during the process.
Step 2: Determine the current temperature settings
Before you start adjusting the temperature on your water heater, it’s important to know the current temperature setting. This will give you a reference point and help you decide how much you need to lower the temperature. Follow these steps to determine the current temperature settings:
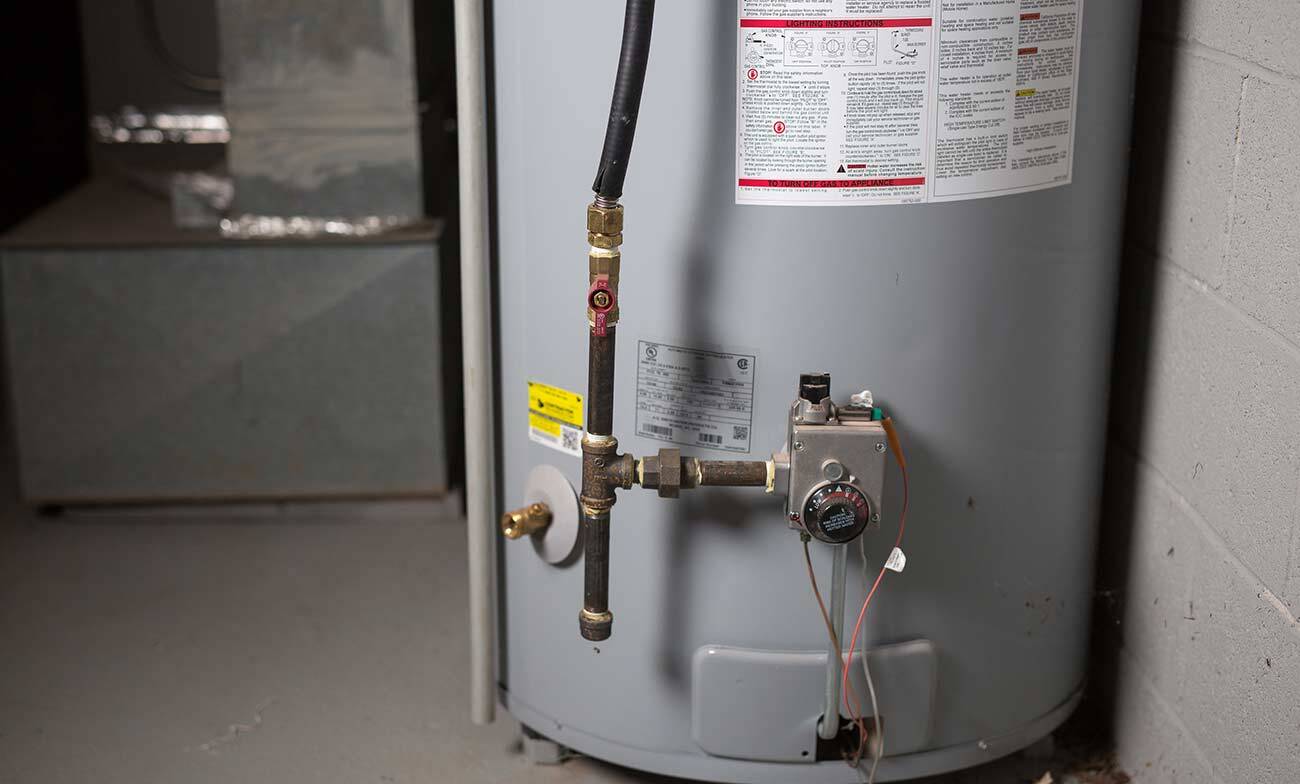
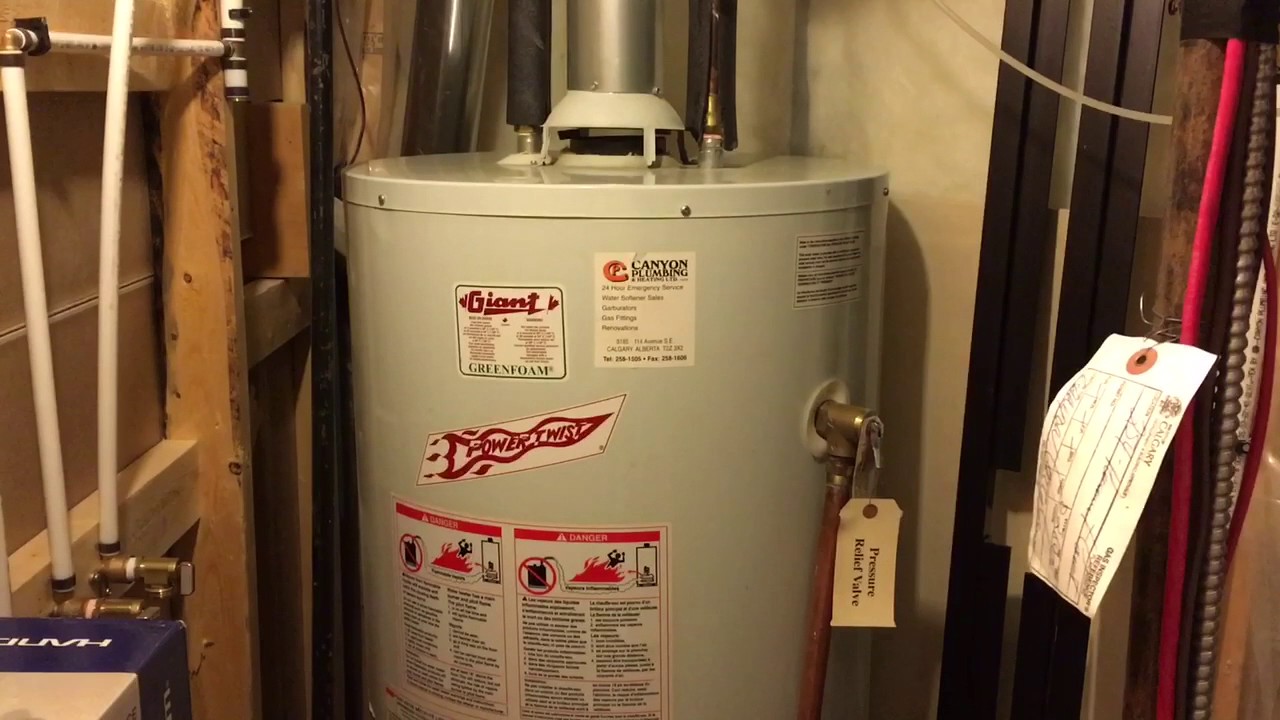
- Locate the water heater: The water heater is typically found in the basement, utility room, or garage. Look for a large cylindrical tank connected to plumbing pipes.
- Check the temperature dial: On the front of the water heater, you’ll find a temperature dial or control panel. It is usually labeled with temperature increments or settings.
- Use a thermometer to measure the hot water: Run hot water from a faucet for a few minutes and place the thermometer directly under the stream. Take note of the temperature reading.
- Repeat the process at different faucets: Check the temperature at different faucets in your home, including those closest to the water heater and those farthest away. This will give you an idea of how well the hot water is being distributed.
By measuring the temperature at various locations, you can identify any inconsistencies or variations in the hot water output. It’s important to note that the temperature may differ slightly from faucet to faucet depending on the distance from the water heater and the efficiency of the plumbing system.
Once you have determined the current temperature settings and have a clear understanding of the hot water distribution in your home, you can move on to the next step of adjusting the temperature on your water heater.
Step 3: Locate the water heater controls
In order to adjust the temperature on your water heater, you’ll need to locate the controls. The location of the controls can vary depending on the type and model of your water heater. Here are some common places to find the controls:
- Gas water heater: For a gas water heater, you’ll typically find the controls on the front of the unit near the bottom. Look for a dial or a knob with temperature markings.
- Electric water heater: If you have an electric water heater, the controls are usually found behind an access panel on the side of the unit. You may need to unscrew or remove the panel to access the temperature controls.
- Tankless water heater: Tankless water heaters usually have temperature controls on the unit itself or on a remote control device that comes with the system. Consult the manufacturer’s instructions to locate the controls.
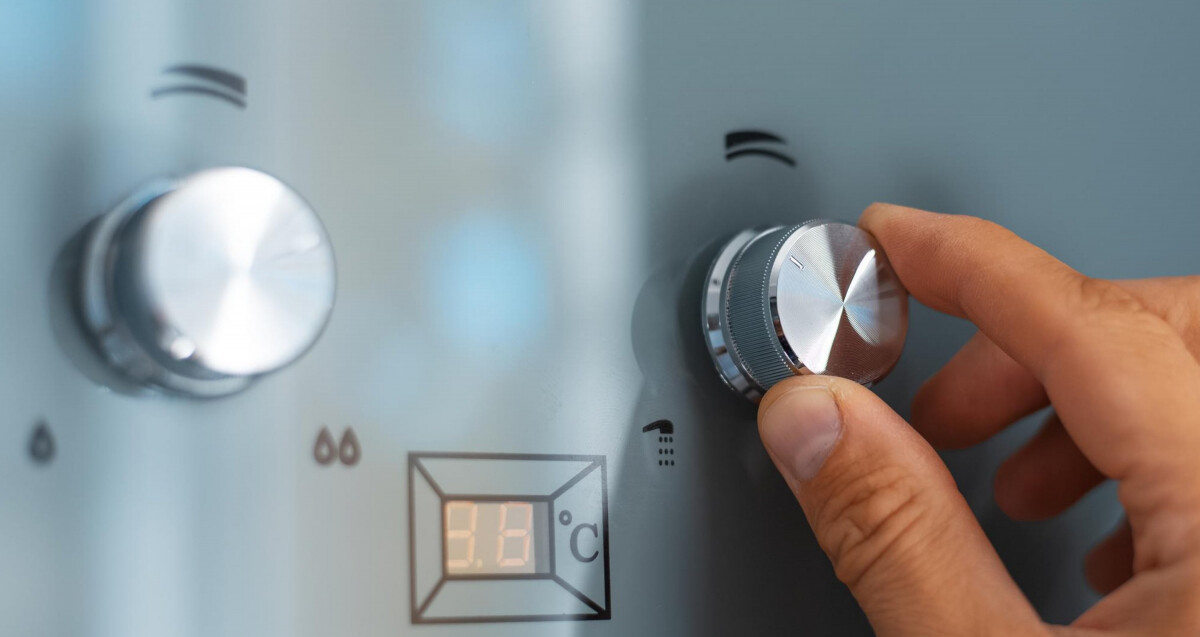
Once you have located the controls, take a moment to familiarize yourself with how they work and how to make adjustments. Some water heaters may require you to use a screwdriver to turn a dial, while others may have digital controls that allow you to adjust the temperature using buttons or touch screens.
It’s important to note that when accessing the controls, you should exercise caution and ensure the power supply to the water heater is turned off. This will prevent any accidental electric shock or gas leakage, if applicable. Safety should always be a top priority when working with any home appliance.
Now that you have located the controls and understand how they work, you are ready to proceed to the next step of turning down your water heater’s temperature.
Step 4: Turn off the power supply to the water heater
Before making any adjustments to your water heater, it’s crucial to ensure that the power supply is turned off. This step is essential for your safety and to prevent any damage to the water heater itself. Follow these steps to turn off the power supply:
- Electric water heater: Locate the circuit breaker panel in your home. Look for the breaker labeled “Water Heater” or something similar. Flip the switch to the “Off” position to cut off the power supply.
- Gas water heater: Look for the gas supply valve located near the water heater. Turn the valve to the “Off” position to shut off the gas supply. If you’re unsure how to do this, consult the manufacturer’s instructions or contact a professional plumber.
- Tankless water heater: Depending on the model, you may need to turn off both the electrical circuit breaker and the gas valve to completely cut off the power supply. Again, refer to the manufacturer’s instructions for specific details.
After turning off the power supply, wait a few minutes to allow the water heater to cool down before proceeding with the temperature adjustment. This will prevent any accidental burns from hot surfaces and ensure a safer working environment.
Remember, if you’re not confident in turning off the power supply yourself or if you’re unsure about any aspect of the process, it’s always best to seek assistance from a professional plumber or electrician. Your safety should be the top priority when working with any home appliance.
Now that you have successfully turned off the power supply to your water heater, you can move on to the next step of adjusting the temperature setting.
Before turning down your water heater, make sure to turn off the power or gas supply. Then, locate the thermostat and adjust it to a lower temperature to reduce energy consumption.
Read more: How To Turn Off Hot Water Heater
Step 5: Adjust the temperature setting
Now that you’ve turned off the power supply to your water heater, you can safely adjust the temperature setting. Follow these steps to make the necessary adjustments:
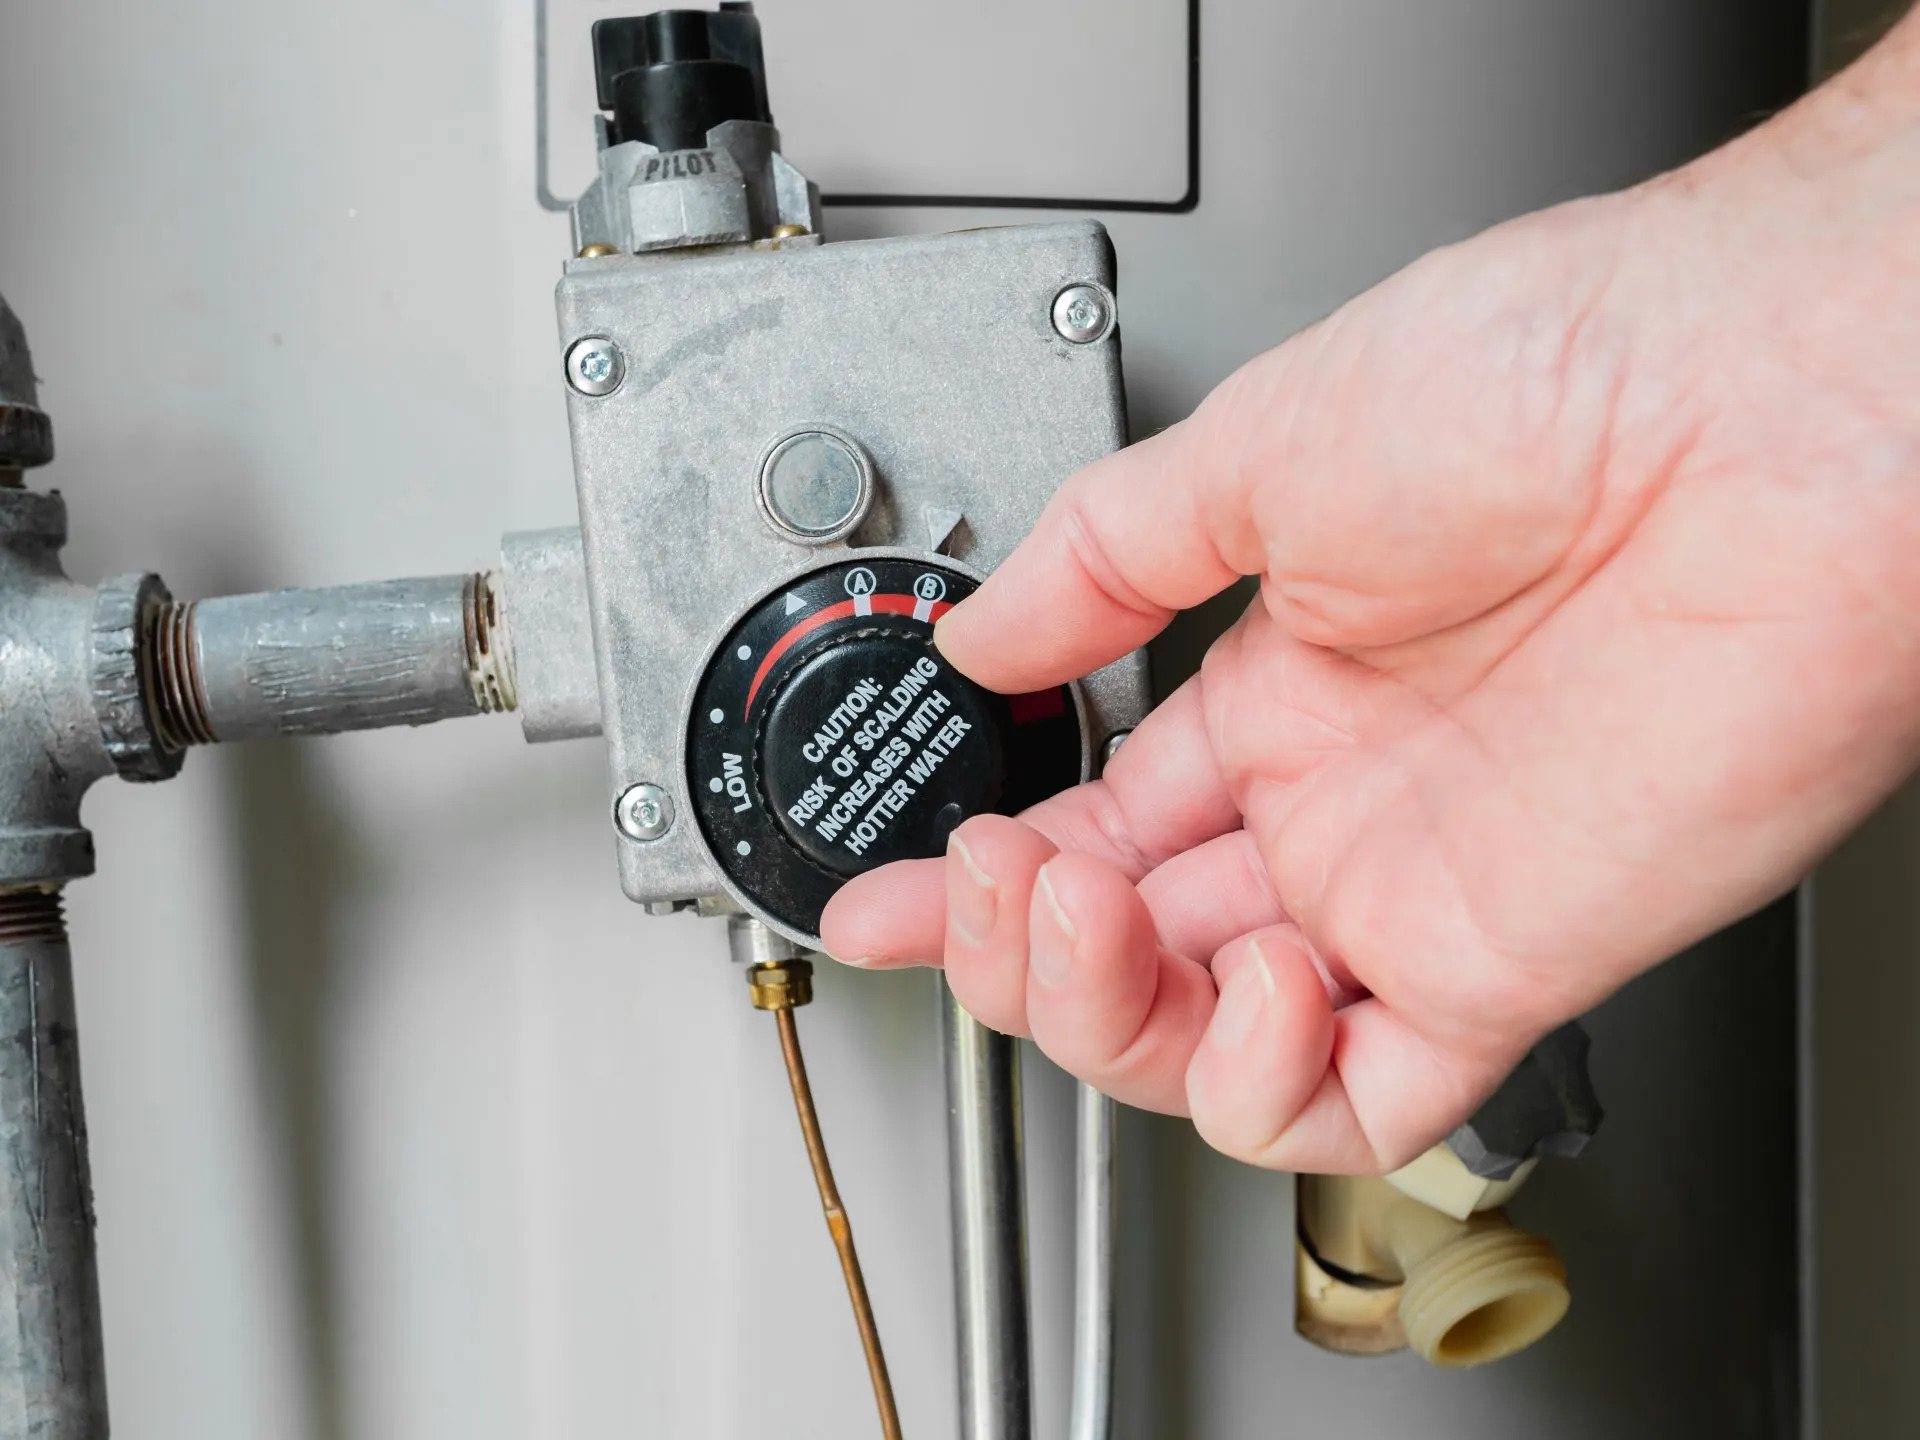
- Locate the temperature control dial or panel on your water heater. Use a screwdriver, if necessary, to access and turn the dial. Alternatively, use the buttons or touch screen to adjust the temperature on models with digital controls.
- Refer to the notepad where you have previously noted the current temperature setting. Decide how much you want to lower the temperature based on your needs. Remember that the recommended temperature for most homes is around 120 degrees Fahrenheit (49 degrees Celsius) for both safety and energy efficiency.
- Carefully turn the dial or use the controls to lower the temperature setting. Make small adjustments at a time and wait for the water heater to reach the new temperature before making further adjustments if needed. This will allow you to fine-tune the temperature and prevent sudden changes.
- Take note of the new temperature setting for future reference.
It’s important to note that the process may vary depending on the specific model of your water heater. Consult the manufacturer’s instructions if you encounter any difficulties or if there are specific steps outlined for your particular water heater.
Remember to be mindful of the temperature setting you choose. While it’s tempting to go hotter, it’s crucial to prioritize safety and energy efficiency. By selecting a lower temperature, you can prevent scalding accidents and save money on your energy bills at the same time.
Once you have made the necessary adjustments, you’re ready to move on to the next step of turning the power supply back on.
Step 6: Turn the power supply back on
Now that you have successfully adjusted the temperature setting on your water heater, it’s time to turn the power supply back on. Follow these steps to restore the power:
- Electric water heater: Return to the circuit breaker panel in your home. Locate the breaker labeled “Water Heater” or a similar designation. Flip the switch to the “On” position to restore power to the water heater.
- Gas water heater: Find the gas supply valve near the water heater. Turn the valve to the “On” position to allow gas flow back to the water heater. If you’re unsure about this step, it is advisable to consult the manufacturer’s instructions or seek professional help.
- Tankless water heater: Turn on both the electrical circuit breaker and gas supply valve, if they were turned off during Step 4, to fully restore power to the tankless water heater.
Once the power supply is restored, you may hear the water heater kick back into operation. It may take some time for the water heater to heat up and reach the newly adjusted temperature setting, so be patient during this process.
If you notice any unusual sounds or if you experience any issues with the water heater after turning the power supply back on, it’s important to check for any potential problems or consult a professional plumber. Safety should always be a priority, so it’s better to err on the side of caution.
Congratulations! You have successfully adjusted the temperature on your water heater and restored the power supply. Now it’s time to move on to the next step and wait for the water heater to reach the new temperature.
Step 7: Wait for the water heater to reach the new temperature
After adjusting the temperature setting on your water heater and turning the power supply back on, it’s important to allow sufficient time for the water heater to reach the new temperature. Follow these steps to ensure that the water heater has reached the desired setting:
- Give it time: Depending on the size of your water heater and the temperature adjustment you made, it may take some time for the water heater to heat up and reach the new temperature. On average, it can take anywhere from 1 to 3 hours for the water to fully reach the desired temperature.
- Be patient: Avoid using hot water during this waiting period to allow the water heater to operate without interruptions. This will enable it to heat the water more efficiently and reach the desired temperature more quickly.
- Check the user manual: If you’re uncertain about the specific time required for your water heater model to heat up, refer to the user manual provided by the manufacturer. It will usually provide guidelines on the expected waiting time after adjusting the temperature.
During this waiting period, it’s important to keep in mind that the water heater will be using energy to heat the water. If you’re concerned about energy consumption, you may consider adjusting the temperature settings during a time when you anticipate lower hot water usage, such as during the day when most family members are away from home.
Once you feel that enough time has passed and the water heater should have reached the new temperature setting, you can move on to the final step and test the water temperature.
Step 8: Test the water temperature
After waiting for the water heater to reach the new temperature setting, it’s time to test the water to ensure it is at the desired temperature. Follow these steps to accurately check the water temperature:
- Select a faucet: Choose a faucet in your home, preferably one that is commonly used for tasks such as washing hands or taking showers.
- Allow the water to run: Turn on the faucet and let the water run for a few minutes to ensure that any stagnant water in the pipes is flushed out.
- Place a thermometer: Using a thermometer, place it under the running water and allow it to stabilize. Make sure the thermometer is submerged in the water to get an accurate reading.
- Check the temperature: Take note of the temperature reading on the thermometer. Ensure that it is within the desired range, typically around 120 degrees Fahrenheit (49 degrees Celsius).
- Repeat the process: Test the water temperature at other faucets throughout your home to ensure consistency. Check the temperature at faucets located both near and far from the water heater to verify that the hot water is distributed evenly.
If the temperature is not at the desired level, you may need to make further adjustments to the water heater’s temperature setting and repeat the process. Remember to make minor adjustments and allow sufficient time for the water heater to heat up before retesting.
It’s important to note that if you are experiencing difficulties adjusting the temperature, or if you notice any issues with the water heater or hot water distribution, it is best to consult a professional plumber. They can provide expert guidance and assistance to ensure the safe and efficient operation of your water heater.
By testing the water temperature, you can ensure that your water heater is set to the desired level, providing you with hot water that is safe and comfortable for everyday use.
Read more: How To Turn Off Gas Water Heater
Conclusion
Congratulations! You have successfully learned how to turn down your water heater’s temperature. By following these step-by-step instructions, you can ensure the safety and energy efficiency of your water heater while enjoying comfortable access to hot water in your home.
Lowering the temperature on your water heater not only helps prevent burns and scalds, especially for children and the elderly, but it also reduces your energy consumption and lowers your utility bills. By setting your water heater to the recommended temperature of around 120 degrees Fahrenheit (49 degrees Celsius), you strike a balance between safety and energy efficiency.
Remember, while adjusting the temperature is a simple task, it is crucial to prioritize safety. Always turn off the power supply to your water heater before making any adjustments, and if you encounter any difficulties or issues, do not hesitate to seek professional help.
Regularly checking the water temperature and ensuring it remains within the desired range will provide you with peace of mind and ensure a comfortable hot water experience throughout your home. Additionally, monitoring the water temperature can help you identify any potential issues with your water heater that may require repair or maintenance.
Thank you for taking the time to learn how to turn down your water heater’s temperature. By implementing these steps, you are not only ensuring the safety of your household but also contributing to a greener and more energy-efficient future.
Happy adjusting and enjoy your comfortably warm water!
Frequently Asked Questions about How To Turn Down Water Heater
Was this page helpful?
At Storables.com, we guarantee accurate and reliable information. Our content, validated by Expert Board Contributors, is crafted following stringent Editorial Policies. We're committed to providing you with well-researched, expert-backed insights for all your informational needs.


0 thoughts on “How To Turn Down Water Heater”