Home>Furniture>Living Room Furniture>How To Make Floor Cushions
Living Room Furniture
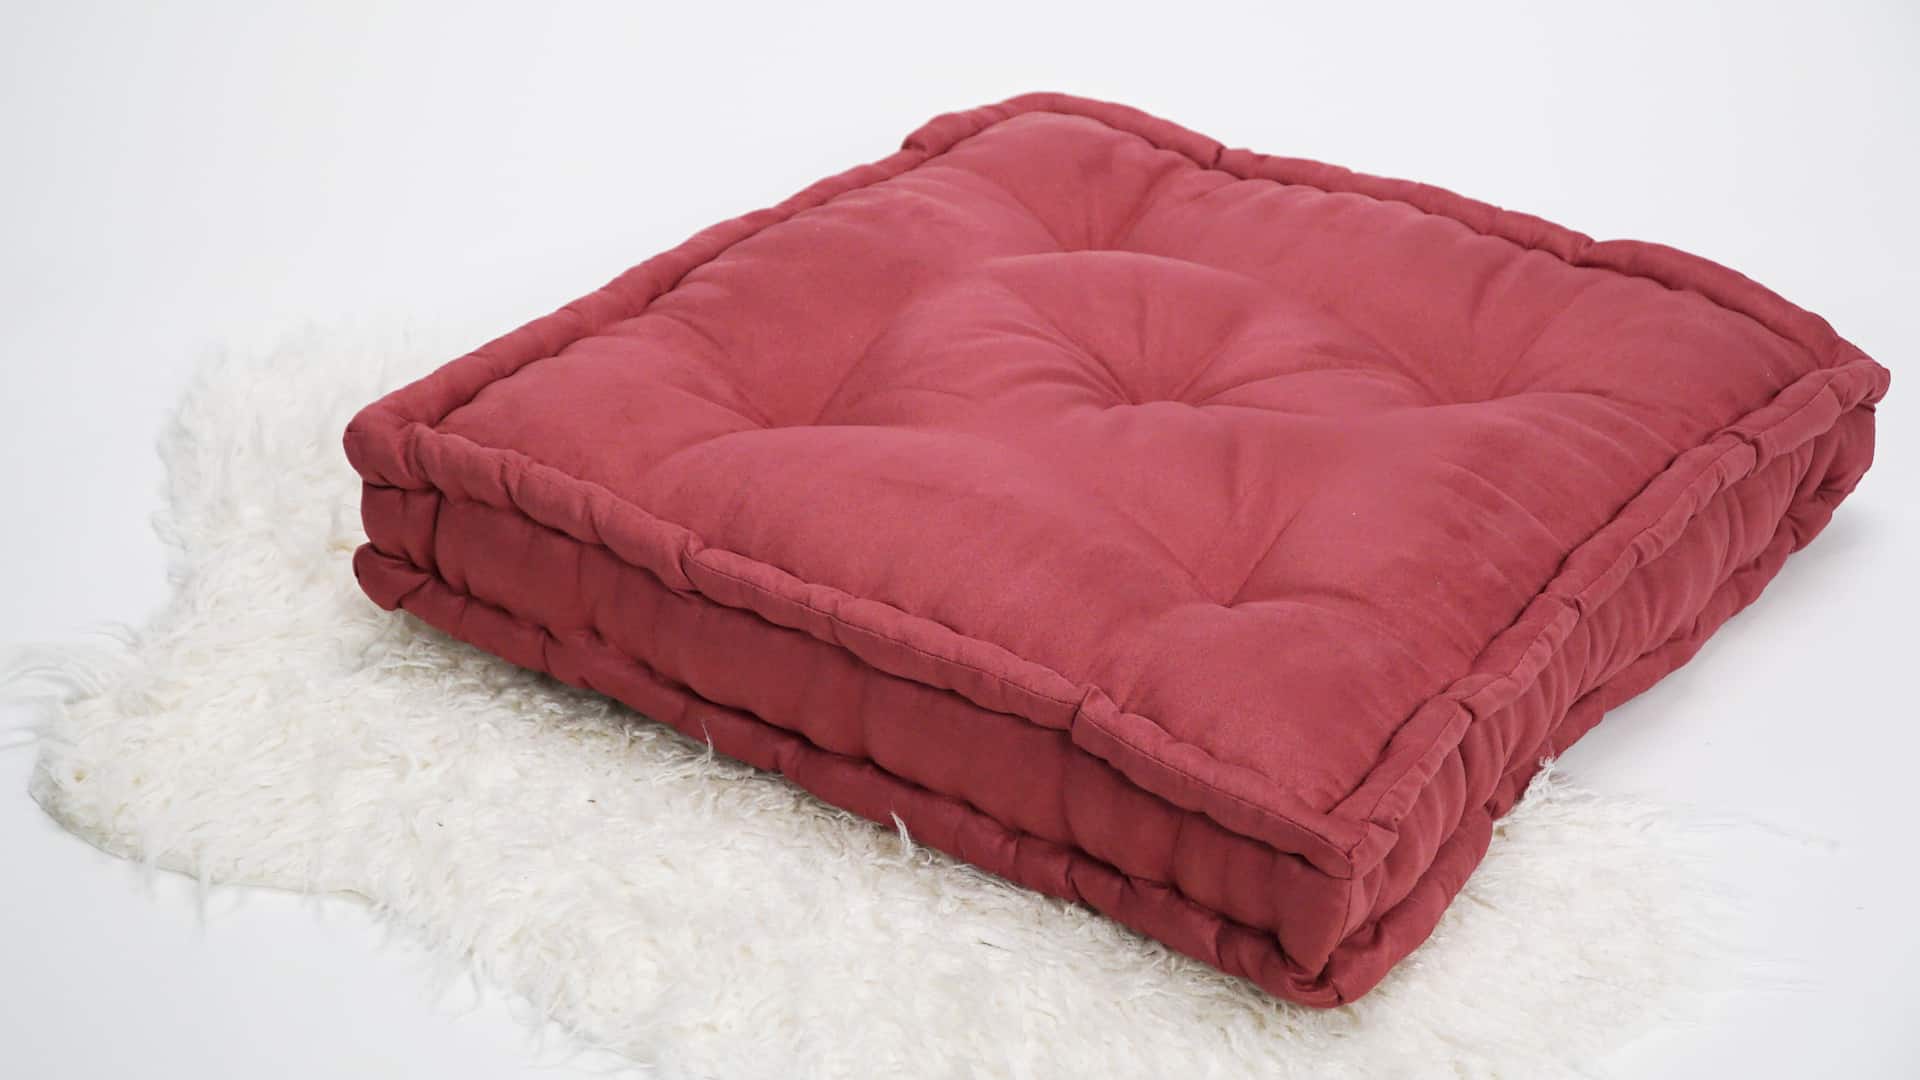
How To Make Floor Cushions
Modified: August 25, 2024
Learn how to make comfortable floor cushions for your living room furniture. Enhance your seating options and add style to your space with these DIY floor cushions.
(Many of the links in this article redirect to a specific reviewed product. Your purchase of these products through affiliate links helps to generate commission for Storables.com, at no extra cost. Learn more)
Introduction
Welcome to the world of cozy and comfortable living room furniture! If you’re looking to create a relaxed and inviting atmosphere in your living space, one way to do so is by adding floor cushions. Floor cushions are versatile pieces of furniture that not only provide extra seating options but also offer a cozy spot to relax, read a book, or simply unwind after a long day’s work.
In this article, we will guide you through the process of making your own floor cushions. Don’t worry if you’re not an expert seamstress – we will provide simple step-by-step instructions that anyone can follow. So, whether you’re looking to save some money or want a custom-designed cushion to match your existing décor, this DIY project is perfect for you.
Before we dive into the details, let’s take a look at the materials you’ll need for this project.
Key Takeaways:
- Create custom floor cushions using durable fabric, precise measurements, and filling of choice. Add personal touches for a cozy and stylish living room addition.
- Enjoy the satisfaction of crafting your own floor cushions, perfect for relaxation and gatherings. Share this DIY project with others to spread the comfort!
Read more: How To Make A Floor Cushion
Materials Needed
- Fabric: Choose a durable and comfortable fabric that suits your style and preferences. Consider using upholstery fabric or a thick cotton material to ensure the cushions can withstand frequent use.
- Measuring tape: This will come in handy when determining the dimensions of your floor cushions.
- Scissors: A good pair of sharp fabric scissors is essential for cutting the fabric accurately.
- Thread: Select a thread color that matches or complements the fabric you’ve chosen.
- Sewing machine: While not mandatory, a sewing machine will make the sewing process faster and more efficient. However, you can also hand-sew the fabric pieces together if you prefer.
- Needles: If you’re hand-sewing, make sure to have a supply of sewing needles on hand.
- Pins: Use pins to hold the fabric in place while sewing.
- Marker or fabric chalk: These tools will help you mark the fabric before cutting and sewing.
- Filling: You can choose from a variety of fillings such as polyester fiberfill, foam, or even repurpose old pillows or cushion inserts.
- Zipper or Velcro (optional): If you want the option to remove the cover for washing or switching out the filling, consider adding a zipper or Velcro closure to your cushion.
Now that you have all the necessary materials, let’s move on to the next step – choosing the fabric.
Step 1: Choosing the Fabric
When choosing the fabric for your floor cushions, it’s important to consider both style and durability. Since floor cushions are prone to rough use and occasional spills, it’s best to opt for a fabric that is sturdy and easy to clean.
Here are a few fabric options to consider:
- Upholstery fabric: This is a popular choice for floor cushions due to its durability and resistance to wear and tear. Look for fabrics that have a high rub count, indicating a longer lifespan. Additionally, consider factors like stain resistance and ease of cleaning when selecting upholstery fabric.
- Outdoor fabric: Another excellent choice is outdoor fabric, which is designed to withstand the elements and resist fading. This type of fabric is typically water-resistant and easy to clean, making it ideal for floor cushions that may be exposed to spills or used in outdoor settings.
- Cotton canvas: Cotton canvas is a versatile and durable fabric that works well for floor cushions. It provides a natural and comfortable feel while being relatively easy to maintain. Look for a heavier weight cotton canvas for added durability.
- Denim: If you prefer a more casual and rugged look, denim fabric is a great option. Denim is known for its durability and can withstand frequent use. It’s also easy to clean and maintains its appearance well.
- Velvet: For a touch of luxury and elegance, consider velvet fabric for your floor cushions. Velvet offers a plush and cozy feel, making it a perfect choice for creating a comfortable seating area in your living room. Keep in mind that velvet may require more maintenance, as it can be prone to snagging or crushing.
Once you have chosen the fabric that suits your style and needs, it’s time to move on to the next step – measuring and cutting the fabric.
Step 2: Measuring and Cutting the Fabric
Accurate measurements are crucial when making floor cushions to ensure a proper fit and comfortable seating experience. Follow these steps to measure and cut the fabric:
- Measure the desired size: Determine the dimensions of your floor cushion based on your intended use and available space. Consider the height, width, and depth of the cushion. Keep in mind that larger cushions will require more fabric.
- Add seam allowances: To account for seam allowances, add an additional 1 inch to each side of the measurements. This extra allowance will ensure that you have enough fabric to sew the pieces together. For example, if the cushion dimensions are 20 inches by 20 inches, cut the fabric to 22 inches by 22 inches.
- Mark the fabric: Using a marker or fabric chalk, mark the measurements on the wrong side of the fabric. Make sure the marking is clear and visible.
- Cut the fabric: Use sharp fabric scissors to cut the fabric along the marked lines. Take your time and cut carefully to ensure smooth and precise edges. If you’re making multiple cushions, repeat this step for each piece.
Once you have cut the fabric to the desired size, you’re ready to move on to the next step – sewing the fabric pieces together.
When making floor cushions, use durable and easy-to-clean fabric to ensure longevity and practicality. Consider using materials like canvas or outdoor fabric for a sturdy and low-maintenance option.
Step 3: Sewing the Fabric Pieces Together
Now that you have your fabric pieces cut to size, it’s time to sew them together to form the body of the floor cushion. Follow these steps to sew the fabric pieces:
- Place the fabric pieces together: Take two fabric pieces and place them together with the right sides facing each other. Align the edges and corners as accurately as possible.
- Pin the fabric pieces: Use straight pins to secure the fabric pieces together. Insert the pins along the edges, leaving about a ½-inch seam allowance. Make sure the pins are placed close enough to keep the fabric in place during the sewing process.
- Sew the fabric pieces: Using a sewing machine or a needle and thread, sew along the edges of the fabric, following the seam allowance. Start sewing at one corner and continue along all sides, leaving a small opening for adding the filling later. If using a sewing machine, backstitch at the beginning and end to secure the stitches.
- Trim the edges: Once you’ve sewn all sides together, trim the excess seam allowance to reduce bulk and achieve cleaner edges. Be careful not to cut too close to the stitches.
- Turn the fabric right side out: Carefully turn the fabric right side out through the opening you left. Use a blunt tool like a knitting needle or chopstick to push out the corners, ensuring they are fully formed.
- Iron the fabric: Gently iron the fabric to smooth out any wrinkles and creases. This will give your floor cushion a polished and professional look.
- Top stitch the edges (optional): For added durability and a finished look, you can opt to top stitch around the edges of the cushion. This will help keep the fabric layers together and reinforce the seams.
Now that your fabric pieces are sewn together, it’s time to move on to the next step – adding the filling.
Read more: How To Make Cushions With Piping
Step 4: Adding the Filling
The filling is what gives your floor cushion its comfortable and plush feel. There are several options for filling, so choose one that suits your preference and provides the desired level of support. Here’s how to add the filling to your floor cushion:
- Prepare the filling: If you’re using polyester fiberfill or foam, fluff it up to ensure it’s evenly distributed. If you’re repurposing old pillows or cushion inserts, make sure they are clean and in good condition.
- Open the cushion: Locate the small opening you left while sewing the fabric pieces together. Carefully enlarge the opening if needed to allow for easier filling.
- Add the filling: Begin by adding a small amount of filling at a time through the opening. Use your hands to push the filling into all corners and edges, ensuring even distribution. Continue adding filling until you achieve the desired level of comfort and support.
- Shape and adjust: Once the cushion is filled, shape it with your hands to achieve a uniform and well-rounded appearance. Make adjustments as necessary to ensure the filling is evenly distributed and there are no lumps or uneven areas.
- Close the cushion: Once you are satisfied with the filling, it’s time to close the cushion. You can do this by hand-sewing the opening closed using a needle and thread, or if you prefer a removable cover, you can add a zipper or Velcro closure at this stage.
- Fluff and test: Give your cushion a final fluff and test it out by sitting or lying on it. Make any additional adjustments to the filling if needed to achieve the desired level of comfort.
With the filling added, your floor cushion is nearly complete. The final step is to close the cushion, and we’ll cover that in the next step.
Step 5: Closing the Cushion
Now that your floor cushion is filled and shaped to perfection, it’s time to close it up to give it a finished look. Follow these steps to securely close your cushion:
- If hand-sewing: Thread a needle with a length of thread that matches the fabric. Begin by knotting the end of the thread. Position the opening where you added the filling in such a way that the edges align neatly. Use a hidden stitch or ladder stitch to sew the opening closed. Make small, discreet stitches along the edges, ensuring that you catch both sides of the fabric without being visible from the outside. Secure your stitches with a knot and trim any excess thread.
- If using a zipper or Velcro: If you have opted for a removable cover, follow the instructions provided with the zipper or Velcro. Typically, you will need to attach one side of the closure mechanism to one fabric edge and the other side to the corresponding opposite edge. Ensure that the closure is centered and aligned properly to facilitate easy removal and insertion of the cushion’s filling.
- Optional: Add decorative elements: If you wish to add some extra flair to your floor cushion, consider adding decorative elements such as buttons, ribbons, or trims. These can be attached securely after closing the cushion, making it uniquely yours and enhancing its visual appeal.
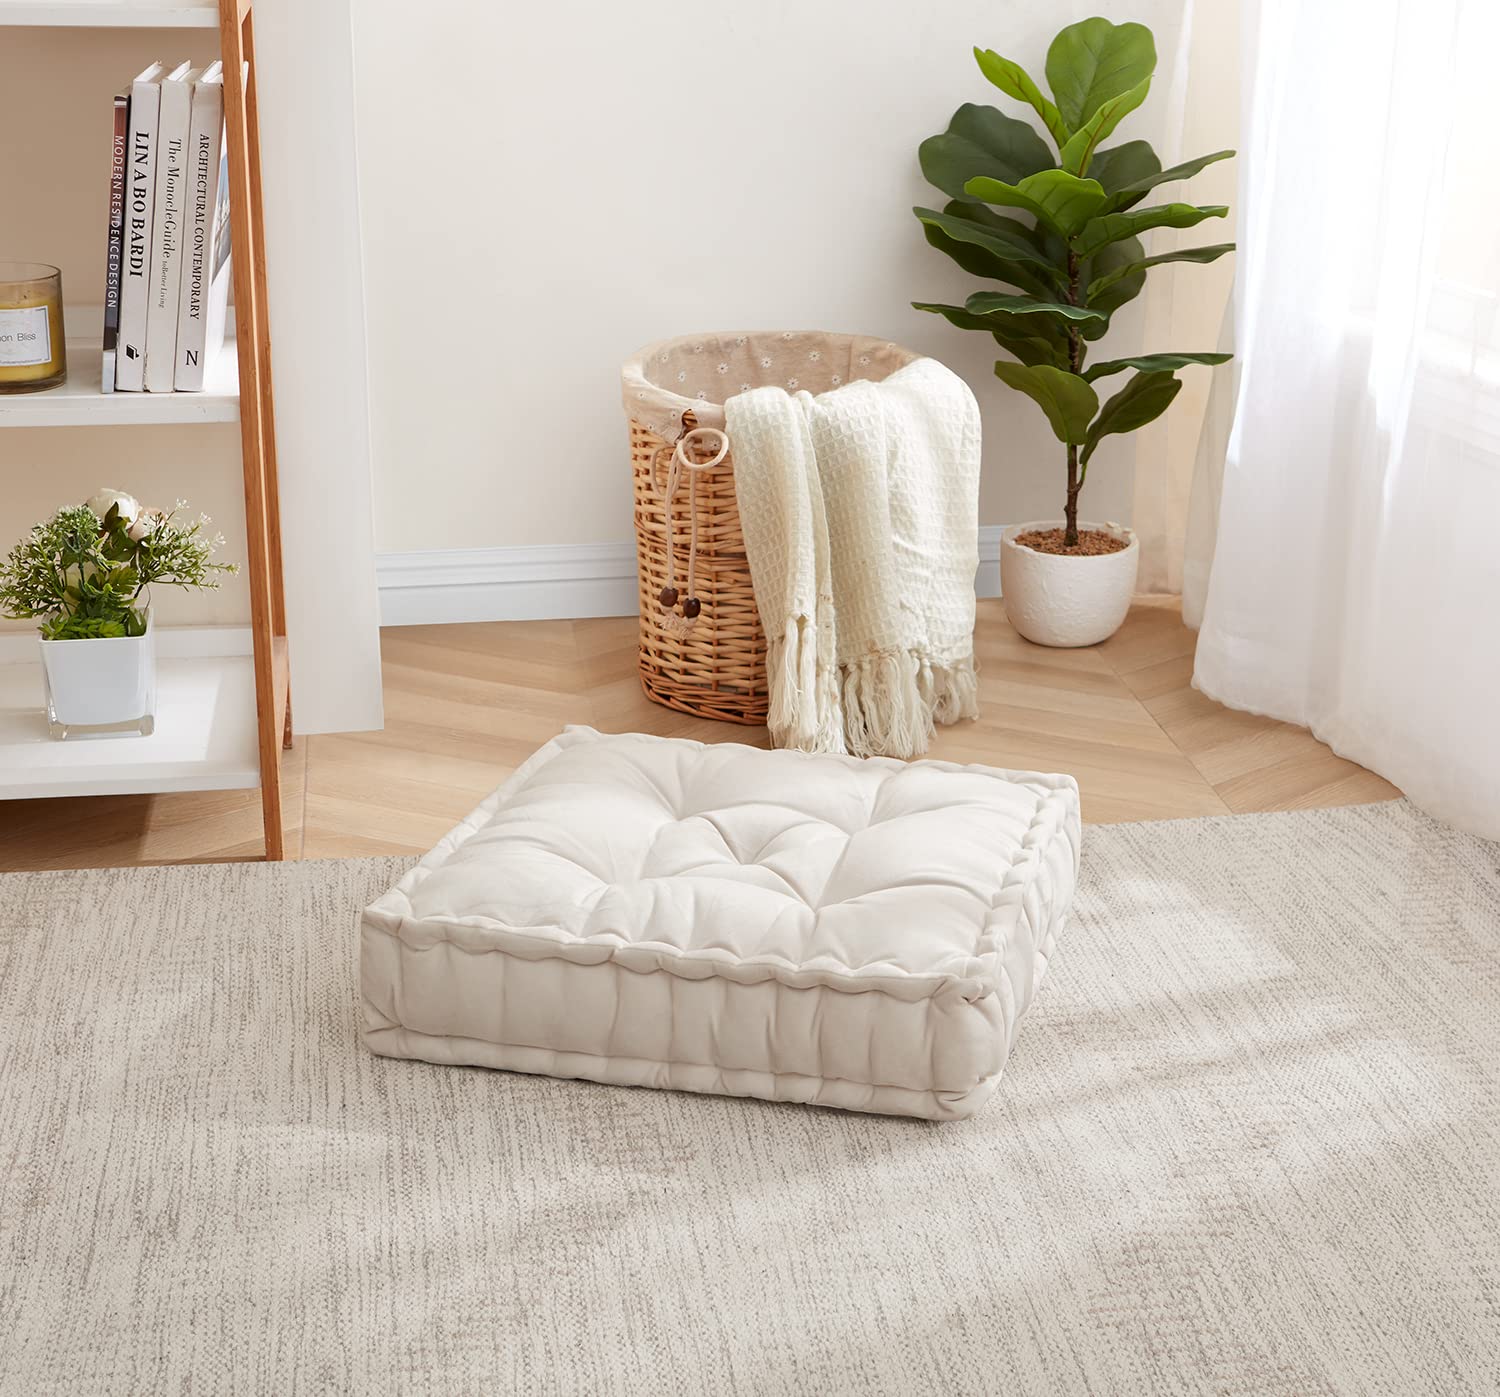
Once the cushion is closed, give it a final fluff and adjust the filling as necessary. Admire your handmade creation and take pride in your cozy and inviting living room addition.
Congratulations! You have successfully created your own floor cushions. Now it’s time to sit back, relax, and enjoy the comfort and style they bring to your living space.
Remember, you can customize your floor cushions to match your existing decor by choosing fabrics and adding personal touches. Get creative and have fun with this DIY project!
If you found this tutorial helpful, feel free to share it with others who might be interested in creating their own floor cushions. Happy crafting!
Conclusion
Creating your own floor cushions is a rewarding and enjoyable DIY project that allows you to enhance the comfort and style of your living room. By following the step-by-step instructions outlined in this article, you can make custom floor cushions that perfectly fit your space and reflect your personal taste.
From choosing the right fabric to measuring and cutting with precision, sewing the fabric pieces together, adding the filling, and closing the cushion, each step is essential to create a high-quality and durable floor cushion. Remember to personalize your cushions by adding decorative elements or opting for a removable cover for added convenience.
Not only do floor cushions provide extra seating options, but they also create a cozy and inviting atmosphere in your living room. They are versatile pieces of furniture that can be used for relaxation, reading, or simply lounging with family and friends.
Whether you’re a beginner or experienced in sewing, this DIY project is accessible to all skill levels. It allows you to showcase your creativity and imagination while saving money compared to purchasing store-bought floor cushions.
Now that you have the knowledge and guidance to create your own floor cushions, why not start exploring different fabrics, colors, and patterns to match your living room decor? With a few simple steps, you can transform your space into a comfortable and stylish area where you and your loved ones can gather and enjoy quality time together.
So, gather your materials, unleash your creativity, and have fun making your own floor cushions. Get ready to experience the joy of lounging on a cozy and personalized piece of furniture that you created with your own hands!
Frequently Asked Questions about How To Make Floor Cushions
Was this page helpful?
At Storables.com, we guarantee accurate and reliable information. Our content, validated by Expert Board Contributors, is crafted following stringent Editorial Policies. We're committed to providing you with well-researched, expert-backed insights for all your informational needs.


0 thoughts on “How To Make Floor Cushions”