Articles
How To Lay Out A Deck Properly
Modified: August 25, 2024
Learn how to properly lay out a deck with our informative articles. Find expert tips and advice to ensure a successful deck construction project.
(Many of the links in this article redirect to a specific reviewed product. Your purchase of these products through affiliate links helps to generate commission for Storables.com, at no extra cost. Learn more)
Introduction
When it comes to creating an outdoor space that is both functional and aesthetically pleasing, a well-laid out deck can be the perfect solution. Whether you envision a place to relax and enjoy the sunshine, entertain guests, or simply extend your living space, proper deck layout is crucial to achieve your desired outcome.
Laying out a deck may seem like a daunting task, especially if you have little to no experience in construction or design. However, with a step-by-step approach and careful planning, you can tackle this project with confidence and create a deck that fits your needs and compliments your home.
In this article, we will guide you through the process of laying out a deck properly. From assessing the space and gathering materials to installing the decking boards and adding finishing touches, we will cover all the essential steps to help you successfully complete your deck project.
Before diving into the nitty-gritty details, it’s essential to understand that deck layout involves more than just placing some boards together. It requires careful consideration of factors such as space availability, structural integrity, and design aesthetics. By following these steps and taking the time to plan your deck layout, you’ll be well on your way to creating an outdoor space that you can enjoy for years to come.
So, let’s begin the journey towards a beautifully laid out deck that will become the envy of your neighbors and the go-to spot for relaxation and entertainment.
Key Takeaways:
- Properly laying out a deck involves careful planning, from assessing the space and gathering materials to installing the decking boards and adding finishing touches. Attention to detail and safety ensures a functional and visually appealing outdoor space.
- Building a deck requires a step-by-step approach, including clearing and leveling the site, creating a detailed deck design, and adding stairs or railing for safety. The finishing touches, such as protective finishes and decorative elements, personalize the outdoor space for enjoyment.
Read more: How To Paint Decking Properly
Step 1: Assessing the Space
Before you start planning the layout of your deck, it’s important to assess the space you have available. Walk around your outdoor area and consider factors such as the size and shape of your yard, any existing structures or obstacles, and the terrain of your land.
Take measurements of the area where you want to build your deck. These measurements will help you determine the dimensions of your deck and ensure that it fits seamlessly into your outdoor space.
Consider the purpose of your deck. Will you use it for outdoor dining, lounging, or a combination of both? Think about how many people will typically be using the deck at once, as this will help you determine its size.
If you have a view you want to maximize or if you’re looking for privacy, take note of the orientation of your deck in relation to the surrounding landscape. You may want to position your deck in a way that offers the best views or strategically places it to provide some privacy from neighbors.
Additionally, investigate any city or homeowner’s association regulations or permitting requirements that might affect the layout of your deck. It’s crucial to understand any restrictions or guidelines before you start building to avoid any potential issues later on.
Keep in mind any existing structures, such as trees or buildings, that you want to work around or incorporate into your deck design. Remember that decks can be built at different heights, so take the time to assess the best elevation for your deck based on the surrounding environment.
By thoroughly assessing the space, you will gain a better understanding of how to design and layout your deck to ensure that it harmonizes with your property and meets your functional and aesthetic goals.
Step 2: Gathering Materials
Once you have assessed the space and have a clear vision for your deck, it’s time to gather the necessary materials. The materials you’ll need will depend on the type of deck you plan to build, the size, and your personal preferences.
One of the key components of a deck is the decking material. There are various options to choose from, such as pressure-treated lumber, composite decking, or hardwood. Each material has its own advantages and considerations, so research and select the one that best suits your needs in terms of durability, maintenance, and appearance.
In addition to the decking material, you will need support posts, deck screws or nails, joists, and beams. If you plan to incorporate railing, you will need posts, balusters, and a handrail. Don’t forget about accessories like lighting, benches, and planter boxes if you want to add those to your deck as well.
Consider the durability and longevity of the materials you choose. Since a deck is an outdoor structure exposed to the elements, it’s important to select materials that can withstand moisture, UV rays, and other weather conditions. Opting for high-quality, weather-resistant materials will help ensure the longevity and durability of your deck.
Take accurate measurements of your deck space and create a materials list based on those measurements. This will help you purchase the correct quantity of materials and minimize waste.
When gathering materials, be sure to also consider safety equipment. Depending on the complexity of your deck project, you may need tools such as a circular saw, drill, level, tape measure, and safety glasses. Having the right tools on hand will make the construction process smoother and safer.
Lastly, don’t forget about the finishing touches. Think about how you want to finish the edges of your deck and whether you want to include any decorative elements or features. These small details can make a significant difference in the overall look and feel of your deck.
By gathering all the necessary materials before starting the construction, you will have everything you need on hand, ensuring a smooth and efficient process as you bring your deck layout to life.
Step 3: Clearing and Leveling the Site
With your materials gathered, it’s time to prepare the site for construction by clearing and leveling the area where your deck will be located. This step is crucial to ensure a stable and secure foundation for your deck.
Start by removing any existing vegetation, such as grass, weeds, or shrubs, from the site. This can be done by manually digging them out or using a sod cutter for larger areas. Clear away any debris, rocks, or other obstructions that may hinder the construction process.
Next, assess the soil and make sure it is level. A level surface is necessary to ensure that your deck will be sturdy and prevent any unevenness or sinking in the future.
If the site is not already level, you may need to do some additional work. Begin by marking the highest point of the site and using a shovel or a rake to remove excess soil from that area. Gradually work your way towards the lowest point, redistributing the soil and ensuring a smooth, level surface. You can use a level or a laser level to check for evenness as you go.
It’s important to note that if you encounter any major grading issues or have a particularly uneven site, you may need to consult with a professional or consider hiring a contractor to properly level the area.
Once the site is cleared and leveled, it’s a good idea to lay down a weed barrier or landscape fabric to prevent weed growth underneath your deck. This will help minimize maintenance and ensure that your deck remains weed-free.
Take the time to thoroughly inspect the site for any potential drainage issues. Poor drainage can lead to water pooling under your deck, causing damage over time. Address any drainage concerns by creating a slope away from the house or installing a drainage system, if necessary.
By clearing and leveling the site before construction, you establish a solid foundation for your deck. This step is essential to ensure stability, prevent future issues, and lay the groundwork for a successful deck layout.
Step 4: Creating the Deck Design
With the site prepared, it’s time to unleash your creativity and design your deck layout. The design process involves considering factors such as the size and shape of your deck, the desired functionality, and the aesthetic appeal you want to achieve.
Start by taking the measurements you gathered earlier and translating them into a detailed plan. This can be done using graph paper or a design software program that allows you to create a scaled drawing of your deck. Be sure to account for any existing structures, like trees or walls, that you want to incorporate or work around.
Consider the layout of your deck in relation to your home and the surrounding landscape. Think about how you want to access the deck from inside your house and how it will flow with your indoor living space. Additionally, take into account the sun’s path throughout the day and whether you want to maximize or minimize exposure to sunlight.
When designing your deck, think about the specific functional areas you want to include. Do you want separate spaces for dining, lounging, and grilling? Or are you looking for an open, cohesive layout? Consider how these areas will be arranged and how they will serve your needs and lifestyle.
Think about the shape of your deck. While rectangular or square decks are common, don’t be afraid to explore other shapes, such as L-shaped or curved designs, to add visual interest and make the most of your available space.
Remember to consider safety measures in your deck design. If your deck is elevated, you will likely need to incorporate a railing system for safety purposes. Ensure that the railing is designed to meet local building codes and provides proper support and protection.
Lastly, consider the materials you gathered in the previous step and how they will contribute to the overall look and feel of your deck. Choose materials that complement your home’s style and your personal taste.
By taking the time to create a well-thought-out deck design, you will have a clear plan to follow during the construction phase. This step ensures that your deck not only meets your functional needs but also becomes a visually appealing and welcoming addition to your outdoor space.
Read more: How To Lay Decking Tiles
Step 5: Marking Out the Layout
With your deck design in hand, the next step is to mark out the layout on the ground to guide the construction process. This step is essential to ensure accurate placement and alignment of your deck structure.
Start by gathering your measuring tape, stakes, and string. Begin at one corner of your deck and measure out the dimensions according to your design. Place a stake at each corner to mark the outline of your deck.
Use a level string between the stakes to create a straight line for the edges of your deck. This will ensure that your deck remains square and aligned during construction.
If you have angled or curved areas in your deck design, use a flexible string or hose to mark out these portions. This will help you visualize and follow the curves or angles accurately.
Once you have marked out the perimeter of your deck, use additional stakes and strings to mark the locations of support posts, stair openings, or any other structural elements specified in your design.
Double-check your measurements and layout to ensure accuracy. It’s vital to catch any potential errors or miscalculations at this stage to avoid problems during construction.
Once you are satisfied with the layout, take a step back and visually assess how the deck will sit within your outdoor space. Consider its relationship to existing structures, landscape features, and the flow of your yard.
It’s also a good idea to walk around the marked-out area to get a sense of the scale and size of your deck. This can help you identify any potential obstacles or adjustments you may need to make before proceeding to the next steps.
By taking the time to accurately mark out your deck layout, you establish the foundation for a well-aligned and properly constructed deck. This step ensures that your deck will be in the right location and shape, meeting your design intentions and functional needs.
Step 6: Installing the Ledger Board
Now that you have marked out the layout of your deck, it’s time to begin the construction process by installing the ledger board. The ledger board is a horizontal board attached to the exterior wall of your house that provides support for the deck’s framing.
Start by locating the ledger board’s position on the wall. It is typically installed below the door threshold, but exact placement may vary depending on your design. Ensure that the ledger board is level by using a level and make sure it is attached securely to the wall studs with lag screws or through-bolts. The ledger board must be structurally sound as it will bear a significant load.
Before securing the ledger board, it’s crucial to create a flashing system to prevent water damage. The flashing should extend up behind the siding and over the top of the ledger board to direct water away from the house. This prevents water from seeping behind the ledger board and causing rot or other damage to the house’s structure.
Once the flashing is in place, attach the ledger board to the wall using the appropriate fasteners. Make sure to space the fasteners correctly, following local building codes and manufacturer guidelines.
To ensure a secure attachment, consider installing joist hangers along the ledger board. Joist hangers are metal brackets that hold the joists in place and provide additional support. They should be spaced according to your design and local building codes.
Double-check the levelness of the ledger board and make any necessary adjustments before proceeding with the next steps. An accurate and secure installation of the ledger board is crucial for the stability and longevity of your deck.
With the ledger board properly installed, you have laid the foundation for your deck’s framing. This step provides a solid connection between the deck and your house, ensuring stability and structural integrity.
When laying out a deck, be sure to measure and mark the location of any obstacles such as trees, posts, or utilities to ensure they are accounted for in your design and don’t interfere with the construction process.
Step 7: Building the Foundation
With the ledger board securely in place, it’s time to move on to building the foundation of your deck. The foundation serves as the support system for your deck and ensures its stability and durability.
The foundation of a deck typically consists of support posts, beams, and footings. The number of support posts and the size and spacing of the beams will depend on the size and design of your deck, as well as local building codes.
Start by digging holes at each support post location, following the specifications provided by your design. The size and depth of the holes will depend on the type of soil and the frost depth in your area.
Place the support posts in the holes and ensure they are plumb and level. Use temporary braces to hold them in place during the construction process.
Next, pour concrete footings around the base of each support post. The footings provide stability and help distribute the weight of the deck evenly. Follow the recommended concrete mix and curing times specified by your local building codes.
Attach the beams to the support posts using appropriate hardware and ensure they are level. The beams should run perpendicular to the support posts and provide a sturdy base for the deck’s framing.
Double-check the alignment and levelness of the beams to ensure a solid foundation for your deck.
Once the support posts and beams are securely in place, you are on your way to building a structurally sound deck. The foundation serves as the backbone of your deck, supporting the weight and load of the entire structure.
Remember to consult the building codes and regulations in your area to ensure compliance and safety during the foundation construction process.
With the foundation complete, you are ready to move on to the next steps of framing and constructing your deck.
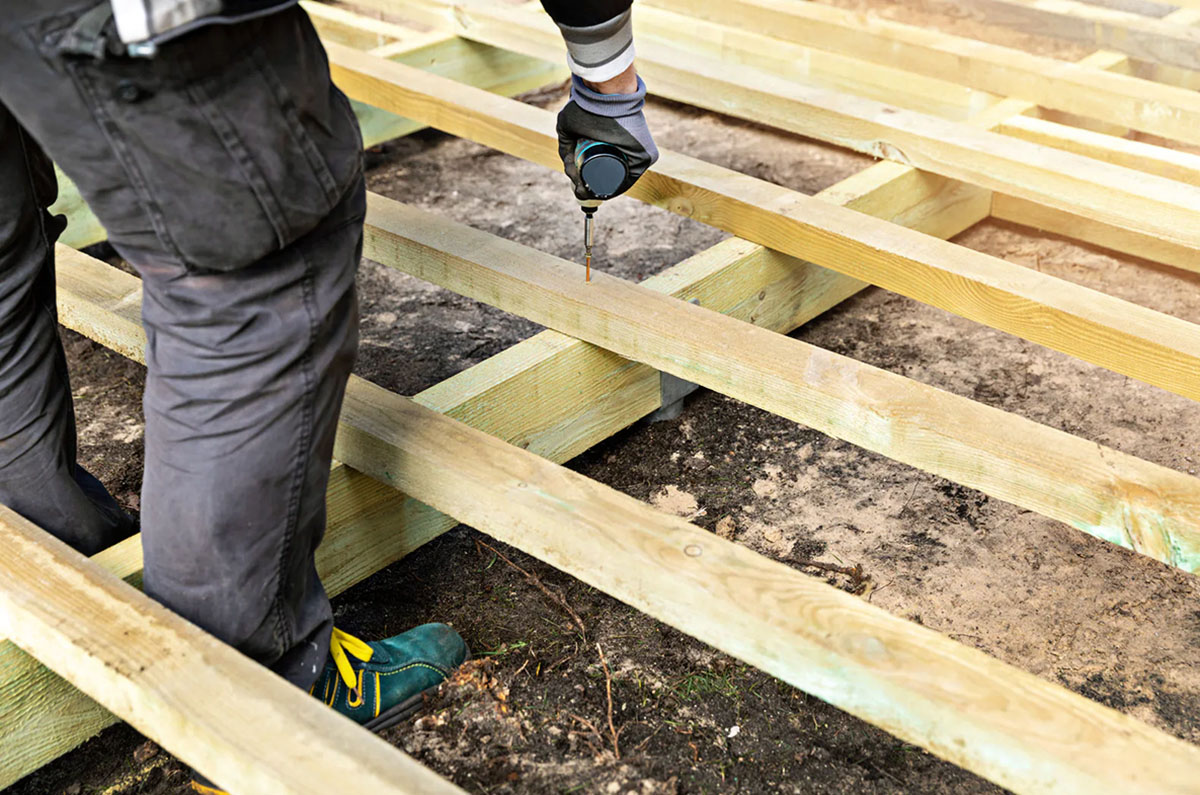
Step 8: Framing the Deck
After completing the foundation, it’s time to move on to framing your deck. The deck framing provides the structure and support for the decking boards and other components of your deck.
Start by laying out the perimeter of the deck using the previously installed ledger board and support posts as references. Measure and mark the locations for the deck joists along the beams, following your design and local building codes.
Cut the deck joists to the appropriate length and attach them to the ledger board and support beams using joist hangers or framing brackets. Ensure that the joists are evenly spaced and aligned with your design specifications.
Use a level to ensure that the joists are level and adjust as necessary. A level deck will provide a sturdy and even surface for your decking boards.
Next, install additional support beams or rim joists around the perimeter of the deck to provide additional structural support. These beams will help distribute the weight evenly and add stability to your deck.
Be sure to secure all joints and connections using appropriate screws or nails, and follow the manufacturer’s specifications for the specific hardware you are using.
Consider adding blocking between the joists to provide additional rigidity and prevent sagging over time. Blocking is typically installed at regular intervals along the length of the joists.
Double-check the levelness and alignment of the deck framing, making any necessary adjustments before proceeding to the next steps of the construction process.
Framing is a critical step in building a sturdy and long-lasting deck. It ensures that your deck has the structural integrity to support the weight and load it will be subjected to over time. Taking the time to properly frame your deck will provide a solid and reliable foundation for the rest of the construction process.
Read more: How To Lay Decking On Grass
Step 9: Installing the Joists
Once the deck framing is complete, the next step is to install the joists. Joists are horizontal structural components that run perpendicular to the support beams and provide support for the decking boards. Properly installed joists are essential for ensuring the strength and stability of your deck.
Start by measuring and cutting the joists to the appropriate length, considering any necessary notches for obstacles such as support posts or angles in your deck design.
Space the joists according to your design specifications, typically 16 inches on center. This spacing ensures adequate support for the decking and prevents any excessive bending or sagging.
Place the first joist against the ledger board, flush with the top of the support beam. Secure it in place using joist hangers or framing brackets, ensuring that it is level.
Continue installing the remaining joists, evenly spacing them along the length of the deck, and securing them to the ledger board and support beams with appropriate hardware.
Take care to align each joist with the layout marks you made during the framing stage, ensuring that they are flush with the ledger board and support beams.
Use a level to check the levelness of each joist and adjust as necessary. A level deck is essential for proper water drainage and the overall stability of the structure.
Consider adding blocking between the joists to reinforce their strength and prevent excessive movement. Blocking can be installed between the joists at regular intervals, providing additional stability and reducing the risk of sagging over time.
Double-check the alignment, levelness, and spacing of the joists to ensure a solid foundation for your decking boards.
By properly installing the joists, you are establishing the framework for your deck’s decking surface. This step is crucial for ensuring the strength and stability of your deck, creating a solid base for all future steps of the construction process.
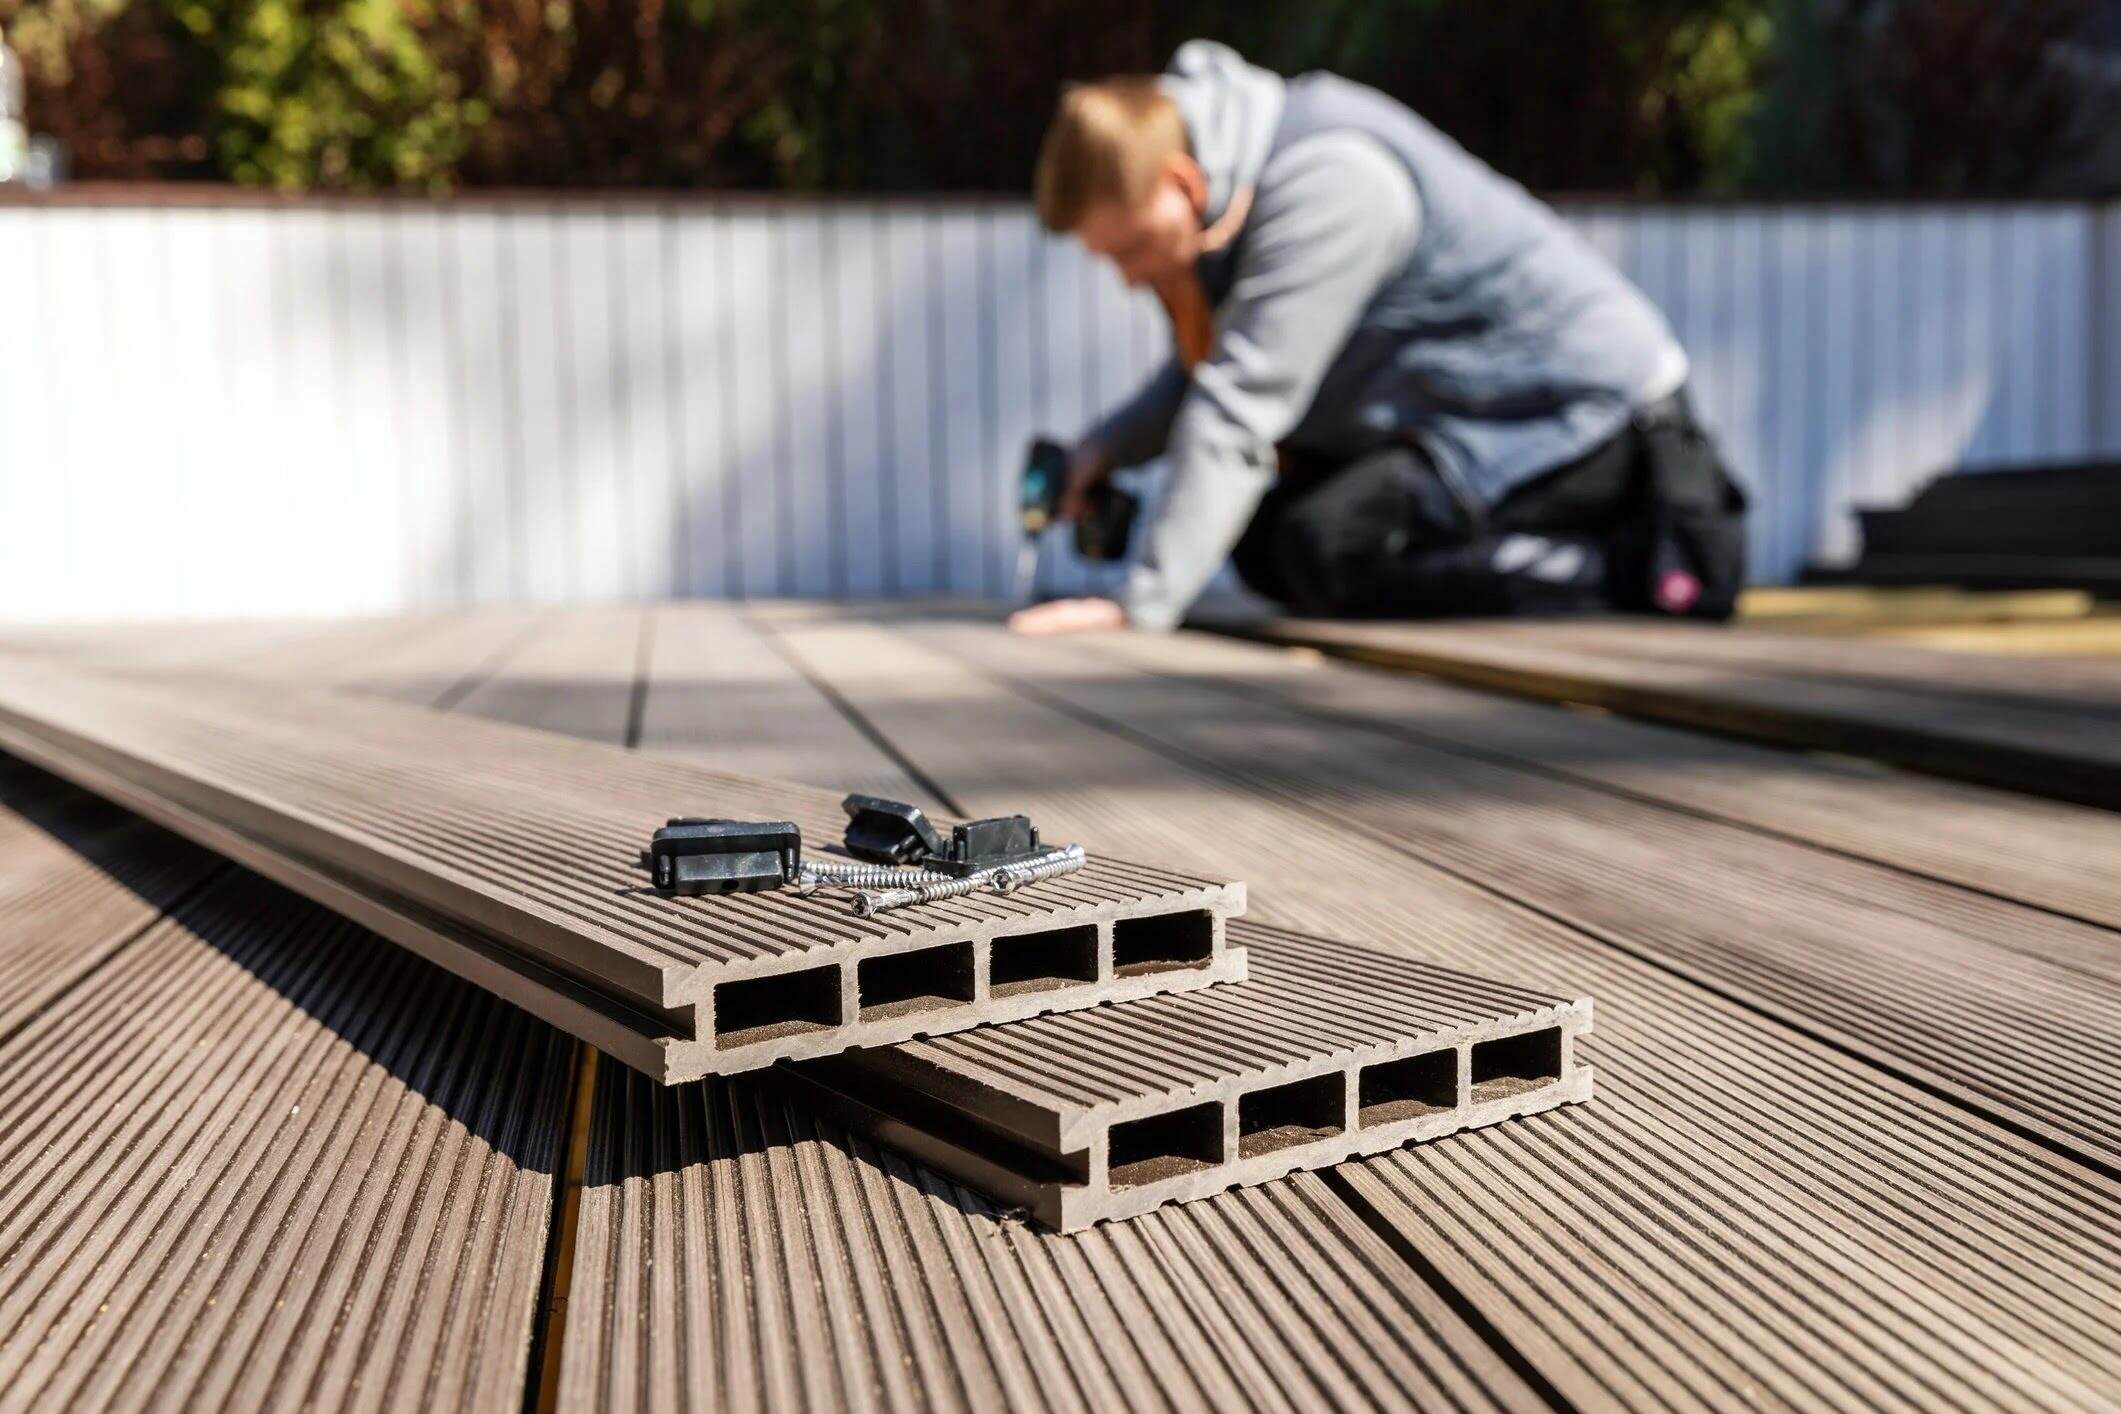
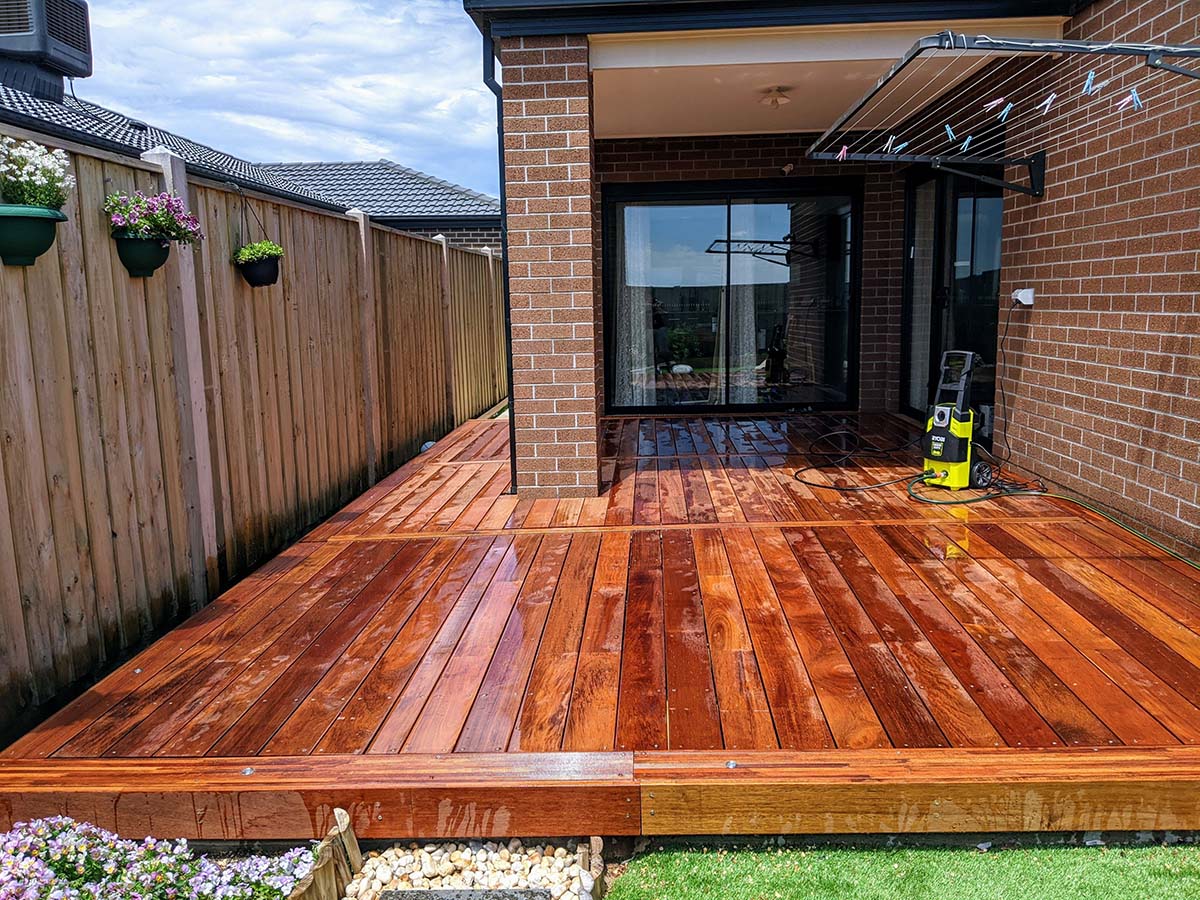
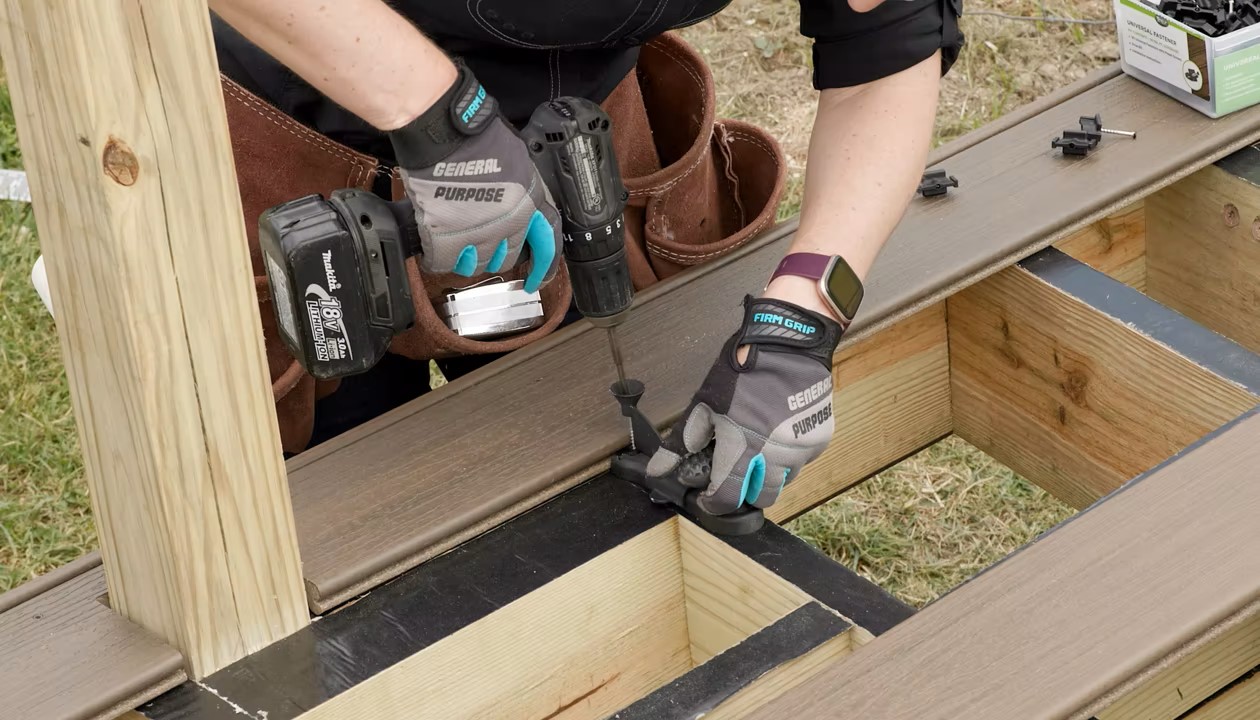
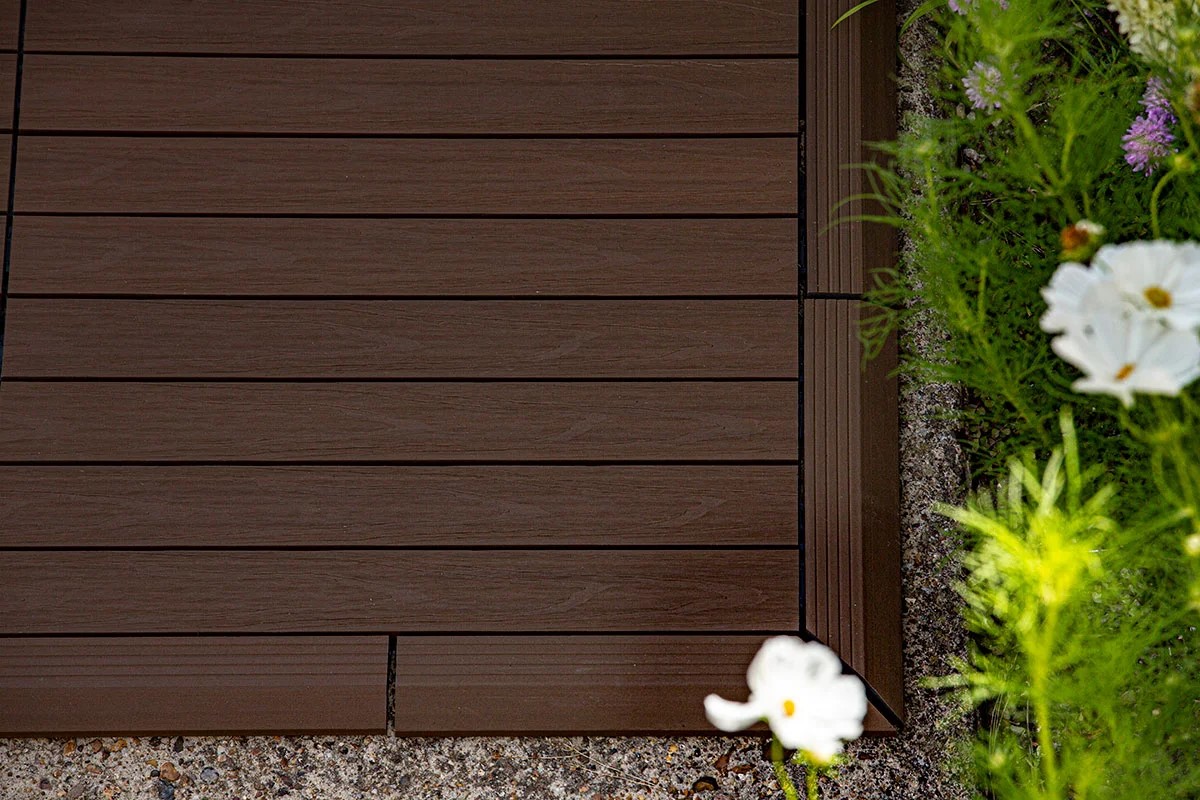
Step 10: Attaching the Decking Boards
With the joists in place, it’s time to move on to the exciting step of attaching the decking boards. The decking boards are the visible surface of your deck, providing the aesthetic appeal and the functional platform for your outdoor space.
Start by selecting the type of decking material you want to use, such as pressure-treated lumber, composite, or hardwood. Consider factors like durability, maintenance requirements, and aesthetics when making your choice.
Before installing the decking boards, allow them to acclimate to the outdoor environment for a couple of days to prevent significant expansion or contraction after installation.
Place the first decking board against the outer edge of the deck, ensuring it is flush with the perimeter. Use deck screws or nails to attach it to each joist, securing it firmly in place. Check for levelness as you go and make any necessary adjustments.
Continue installing the remaining decking boards, working your way towards the center of the deck. Ensure that each board is spaced evenly, typically with a small gap between them to allow for expansion and drainage.
Depending on your design and personal preference, you can choose to install the decking boards parallel to the support beams or at a diagonal angle for added visual interest.
When installing the decking boards, pay attention to the direction of the wood grain or pattern, if applicable. Consistency in the direction of the boards can contribute to a cohesive and visually appealing look.
Use a jigsaw or a circular saw to cut the decking boards to fit around any obstacles, such as support posts or railing posts. Ensure clean and precise cuts for a professional finish.
Double-check the alignment and levelness of each decking board as you progress, making any necessary adjustments to maintain a uniform and visually pleasing deck surface.
Once all the decking boards are installed, give your deck a thorough inspection, checking for any loose boards or uneven areas. Make any necessary fixes before moving on to the final steps of the construction process.
By attaching the decking boards, you are bringing your deck to life, creating a functional and beautiful space for outdoor enjoyment. Take pride in the craftsmanship and attention to detail as you complete this step of the deck construction process.
Step 11: Adding Stairs or Railing
Once the main structure of your deck is complete, it’s time to consider safety and accessibility by adding stairs or railing. Stairs and railing are essential components of any elevated deck, providing a secure means of access and preventing accidents.
If your deck has multiple levels or if it is elevated, installing stairs is necessary for safe and convenient access. The number of stairs and their dimensions will depend on the height of your deck and local building codes.
Start by determining the location of the stairs based on your deck design and functionality. Measure and mark the position where the bottom step will be, considering factors such as the flow of foot traffic and safety requirements.
Next, prepare the stringers, which are the angled supports that will hold the steps in place. Cut the stringers to the appropriate size and angle, following local building codes and the design of your stairs.
Install each stringer securely, attaching them to the deck’s framing with structural screws or bolts. Ensure that the stringers are level and evenly spaced, allowing for consistent and safe steps.
With the stringers in place, it’s time to install the stair treads. Use weather-resistant and durable materials, such as pressure-treated lumber or composite decking boards, to create the steps.
Attach the treads securely to the stringers, making sure they are level and evenly spaced. Use appropriate fasteners, such as deck screws or nails, for a secure and long-lasting connection.
After completing the stairs, turn your attention to the railing. Railing provides safety and helps define the boundaries of your deck. The style and material of the railing can complement your deck design and personal taste.
Measure and mark the positions for the railing posts, ensuring they are evenly spaced and meet local building codes. Install the railing posts securely, either by attaching them to the deck’s framing or by using post anchors.
Attach the railing brackets or hardware to the posts, then install the railing sections. Ensure that the railing is level and securely fastened to the posts, providing a sturdy and safe barrier.
Some building codes may require a handrail in addition to the railing. If necessary, install a handrail along the stairs or at a suitable height on the railing for added support.
Double-check the stability and safety of the stairs and railing, ensuring that they meet the necessary building codes and provide a secure means of access and protection on your deck.
By adding stairs or railing, you are prioritizing safety while enhancing the functionality and appearance of your deck. Pay attention to detail and craftsmanship as you complete this step, creating a safe and inviting outdoor space for everyone to enjoy.
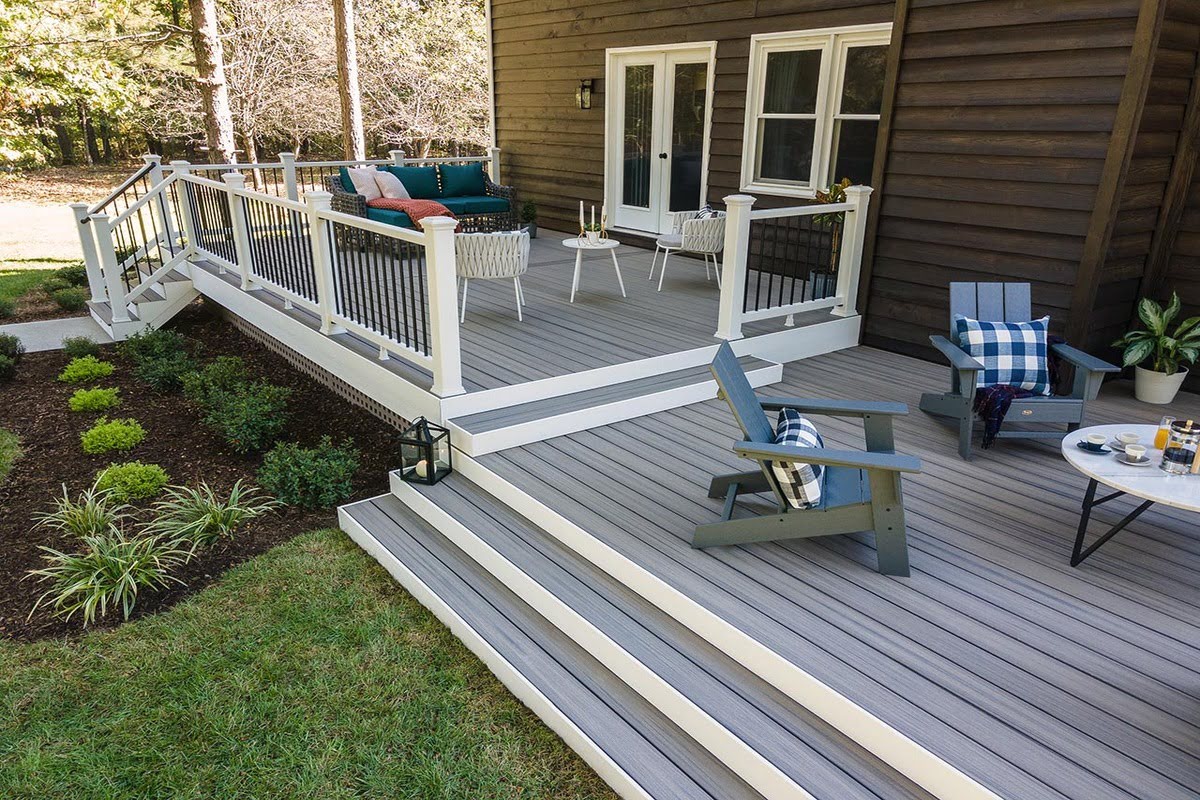
Step 12: Finishing Touches
As you near the completion of your deck construction project, it’s time to focus on the finishing touches. These final details will add charm, functionality, and personalization to your outdoor space, making it truly feel like an extension of your home.
One of the essential finishing touches is to apply a protective finish to your decking boards. This helps to seal the wood and protect against moisture, UV rays, and general wear and tear. Choose a finish that suits your desired look and offers the level of protection needed for your specific decking material.
Consider adding features such as rail caps or post caps to enhance the visual appeal of your deck and provide extra protection against weathering.
If desired, install decorative elements such as post lights or pathway lights to provide ambiance and enhance the usability of your deck during the evening hours.
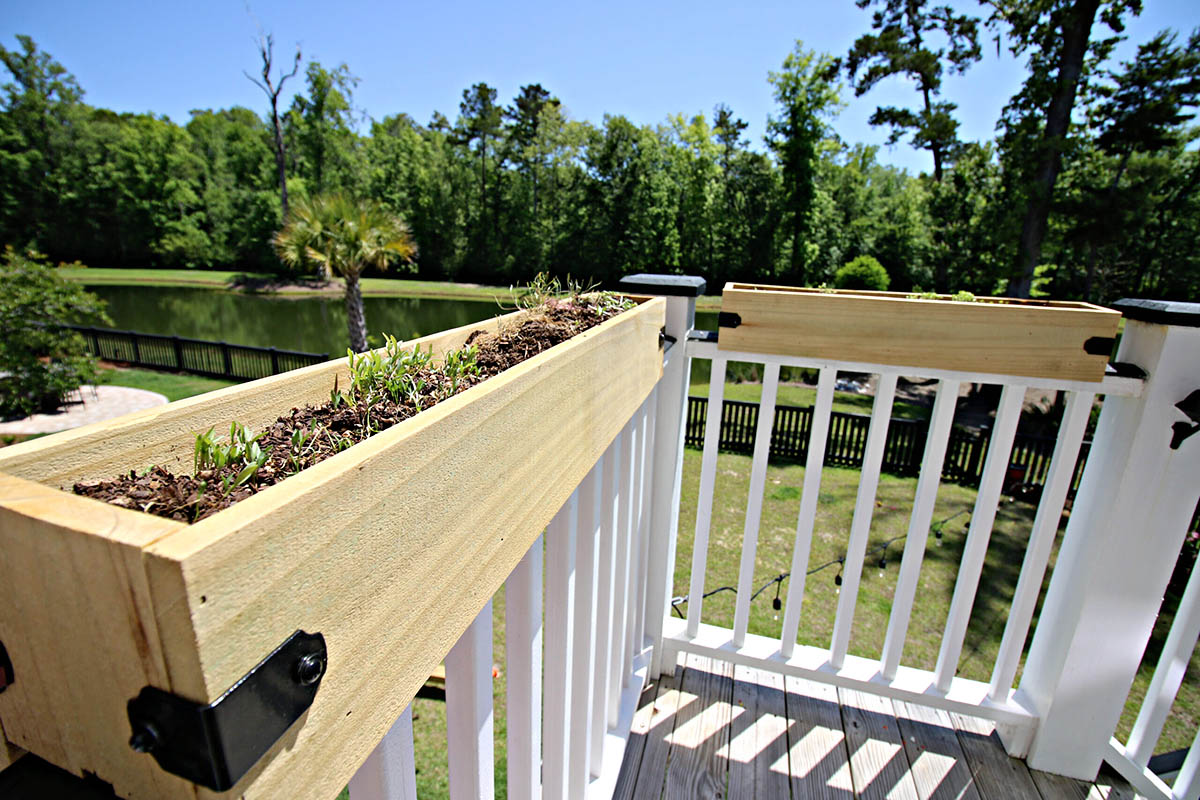
Consider incorporating seating options by adding benches or built-in seating around the perimeter of your deck. This not only provides additional seating but also adds a touch of comfort and style.
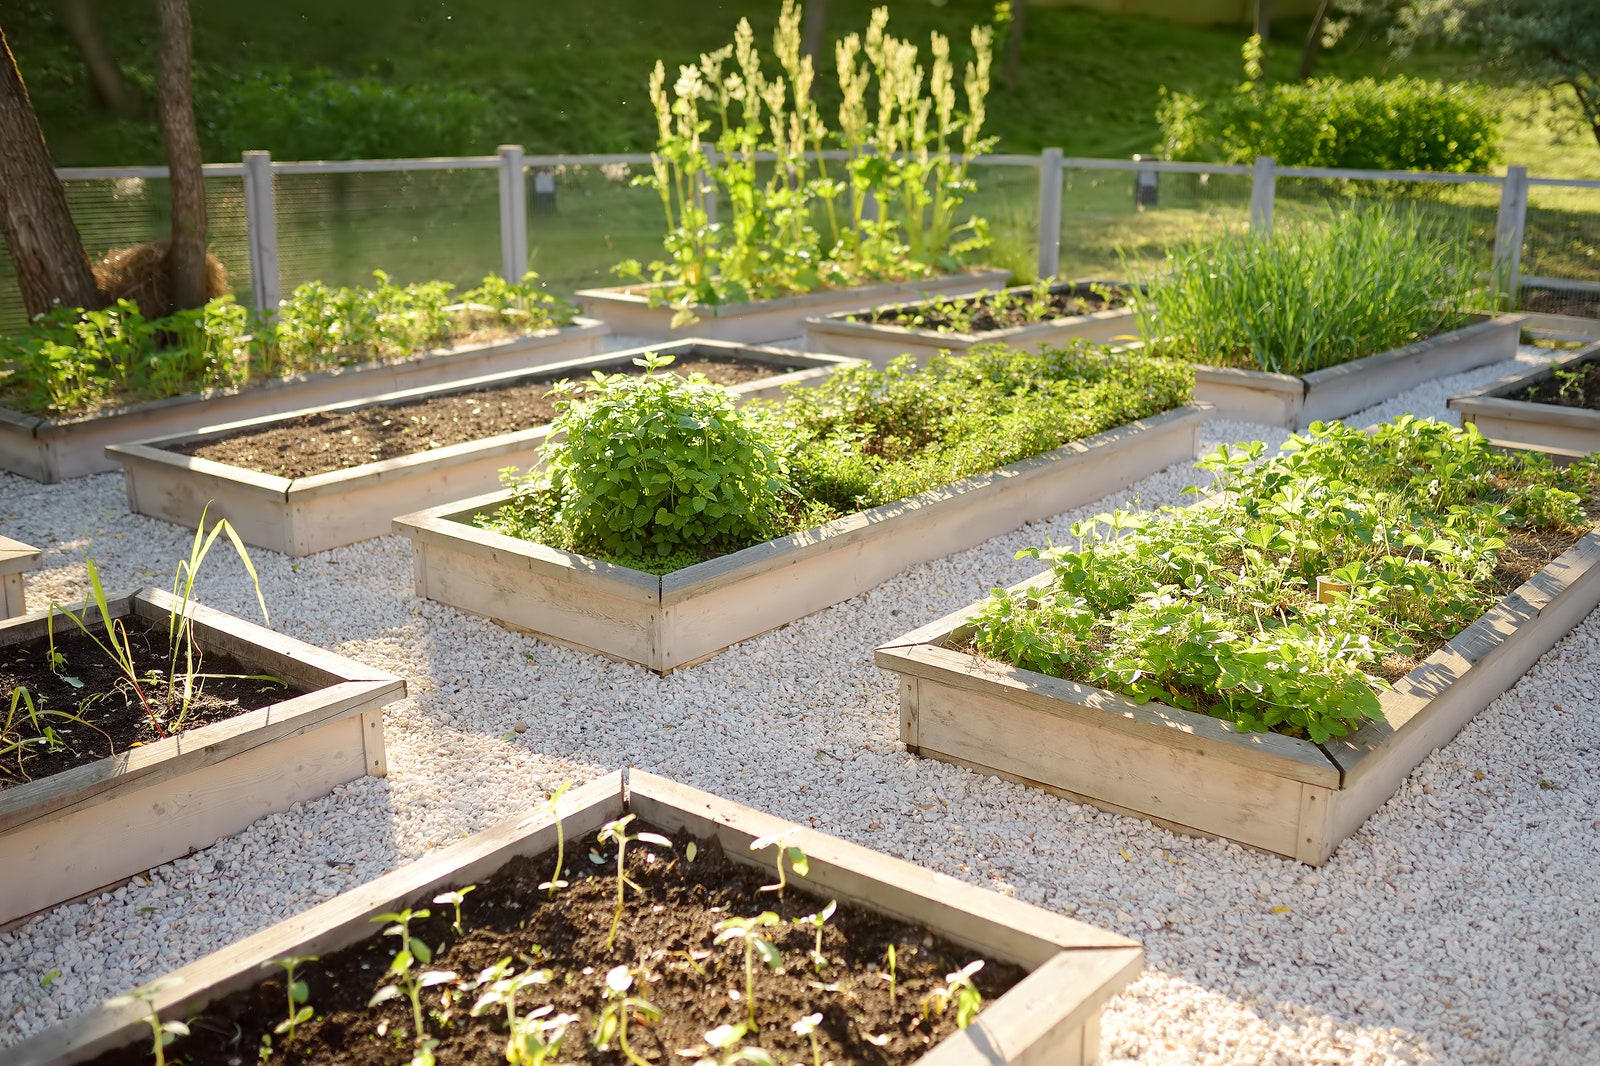
Lastly, consider adding some greenery or landscaping elements to soften the deck’s surroundings. This can be accomplished by incorporating planter boxes, raised garden beds, or even installing a pergola or trellis for climbing plants.
Take some time to tidy up the construction site, cleaning up any debris or leftover materials. This will ensure that your deck is ready for immediate use once the project is complete.
Lastly, take a step back and admire your hard work and craftsmanship. Celebrate the completion of your deck construction project and envision the countless hours of enjoyment and memories that will be created in this beautiful outdoor space.
Remember to consult with local building codes and regulations throughout the entire construction process to ensure compliance and safety.
With the finishing touches in place, your deck is ready to be enjoyed. Add your personal style and creativity to make your outdoor space uniquely yours!
Read more: How To Lay Roof Decking
Conclusion
Congratulations! You have successfully completed the process of laying out and constructing your deck. Through careful planning, diligent work, and attention to detail, you have created an outdoor space that is both functional and visually appealing.
Laying out a deck properly involves assessing the space, gathering materials, clearing and leveling the site, creating the deck design, marking out the layout, installing the ledger board, building the foundation, framing the deck, installing the joists, attaching the decking boards, adding stairs or railing, and finally, adding the finishing touches.
By following each step carefully and considering safety, functionality, and aesthetics, you have built a deck that adds value and enjoyment to your home. Your deck provides an inviting space to spend time with family and friends, relax, and take in the beauty of the outdoors.
Remember to maintain your deck regularly by inspecting for any signs of damage, cleaning the surface, and reapplying protective finishes as needed. Proper maintenance will help prolong the lifespan and beauty of your deck.
Whether you’re hosting outdoor gatherings, enjoying a peaceful morning coffee, or simply unwinding after a long day, your deck will serve as a space of comfort and relaxation.
Thank you for joining us on this journey of laying out a deck properly. We hope that this guide has provided you with valuable insights and inspiration to bring your deck vision to life.
Now, go out and enjoy your beautiful deck – your personal oasis in the great outdoors!
Frequently Asked Questions about How To Lay Out A Deck Properly
Was this page helpful?
At Storables.com, we guarantee accurate and reliable information. Our content, validated by Expert Board Contributors, is crafted following stringent Editorial Policies. We're committed to providing you with well-researched, expert-backed insights for all your informational needs.


0 thoughts on “How To Lay Out A Deck Properly”