Home>Furniture>Outdoor Furniture>How To Apply Polymeric Sand To Patio Pavers
Outdoor Furniture
How To Apply Polymeric Sand To Patio Pavers
Modified: March 7, 2024
Learn how to properly apply polymeric sand to your patio pavers and enhance the durability and stability of your outdoor furniture.
(Many of the links in this article redirect to a specific reviewed product. Your purchase of these products through affiliate links helps to generate commission for Storables.com, at no extra cost. Learn more)
Introduction
Welcome to our comprehensive guide on how to apply polymeric sand to patio pavers. If you’re looking to create a beautiful and durable outdoor space, polymeric sand is a vital component in ensuring the stability and longevity of your patio project. In this article, we will dive deep into the world of polymeric sand, exploring what it is, its benefits, and providing you with a step-by-step guide on how to properly apply it.
Polymeric sand is a type of jointing sand that is commonly used to fill the gaps between patio pavers. Unlike traditional sand, polymeric sand contains additives that, when activated with water, create a strong bond between the paver joints, locking them in place. This not only prevents weed growth and insect infestation but also helps to stabilize the pavers, reducing the likelihood of shifting or movement.
One of the main benefits of using polymeric sand is its ability to resist erosion and withstand harsh weather conditions. The sand hardens when it dries, forming a solid and flexible barrier that allows for natural expansion and contraction of the patio surface. This makes it an ideal choice for areas with extreme temperature changes or heavy rainfall.
Now that you understand the importance and benefits of using polymeric sand, let’s look at the step-by-step process of how to apply it to your patio pavers. By following these guidelines, you’ll ensure a seamless and professional result that will stand the test of time.
Key Takeaways:
- Polymeric sand stabilizes patio pavers, prevents weed growth, and repels insects, creating a durable and visually appealing outdoor space for relaxation and entertainment.
- Proper preparation, application, and maintenance of polymeric sand ensure a seamless and long-lasting patio, enhancing the beauty and functionality of your outdoor living area.
Read more: How To Sand Patio Pavers
What is Polymeric Sand?
Polymeric sand is a specially formulated type of jointing sand that is designed to fill the gaps between patio pavers. It is made up of a mixture of fine sands and polymers, which are activated by water to create a hardened and durable bond. This unique composition sets it apart from regular sand and makes it an essential component in patio construction.
Unlike traditional sand, which can easily wash away or erode over time, polymeric sand offers numerous advantages. Its main purpose is to stabilize the pavers, preventing them from shifting or becoming loose. This not only enhances the appearance of the patio but also improves its functionality and safety.
One of the key benefits of polymeric sand is its ability to resist weed growth. The polymer additives in the sand create a barrier that inhibits weed seeds from germinating and growing between the paver joints. This saves you from the hassle of constantly pulling out weeds and keeps your patio looking clean and well-maintained.
Another advantage of using polymeric sand is its ability to repel insects. The hardened surface of the sand makes it difficult for ants, wasps, and other pests to burrow or nest in between the pavers. This not only protects your patio but also reduces the risk of any insect-related damage or inconvenience.
Furthermore, polymeric sand provides superior stability and durability to your patio surface. Its strong bond helps to distribute the weight and load evenly, reducing the chances of paver cracking or sinking. It also allows for natural expansion and contraction of the pavers due to temperature changes, ensuring that your patio remains intact and free from unsightly gaps or uneven surfaces.
In summary, polymeric sand is a revolutionary product that offers multiple benefits for patio construction. Its ability to stabilize the pavers, resist weed growth, repel insects, and provide long-lasting durability makes it an indispensable choice for any outdoor living space. In the following sections, we will delve deeper into the process of preparing your patio pavers and applying polymeric sand correctly, ensuring optimal results.
Benefits of Using Polymeric Sand
Applying polymeric sand to your patio pavers comes with a plethora of benefits that go beyond just aesthetics. From enhancing stability to preventing weed growth, here are the key advantages of using polymeric sand.
- Stabilizes Pavers: Polymeric sand forms a strong bond between the paver joints, effectively stabilizing the entire patio surface. This prevents shifting, movement, and uneven settling, ensuring a level and durable outdoor space for years to come.
- Resists Weed Growth: The polymer additives in polymeric sand create a barrier that inhibits weed seeds from germinating and growing between the paver joints. This eliminates the constant need for weeding, saving you time and effort in maintaining a weed-free patio.
- Repels Insects: The hardened surface of polymeric sand makes it difficult for insects, such as ants and wasps, to establish nests or burrow between the pavers. This minimizes the risk of insect-related damage and ensures a pest-free outdoor environment for relaxation and entertainment.
- Durability and Longevity: Polymeric sand is designed to withstand harsh weather conditions, including heavy rain and temperature fluctuations. Its ability to expand and contract naturally with the pavers allows for greater durability, reducing the likelihood of cracking or breaking over time.
- Enhances Aesthetics: By filling the gaps between patio pavers, polymeric sand creates a seamless and uniform appearance. This enhances the overall aesthetics of the outdoor space, giving it a professional and finished look.
- Easy to Install and Maintain: Applying polymeric sand is a straightforward process that can be done by DIY enthusiasts. Once installed, the maintenance is minimal, with occasional sweeping and reapplying the sand as needed.
- Prevents Sand Erosion: Traditional sand can easily wash away or erode due to rain or foot traffic. Polymeric sand, on the other hand, forms a hardened barrier that stays in place, preventing erosion and the need for frequent sand replacement.
By harnessing the power of polymeric sand, you can transform your patio into a stable, low-maintenance, and visually appealing outdoor living space. In the following sections, we will guide you through the step-by-step process of preparing your patio pavers and applying polymeric sand correctly to maximize these benefits.
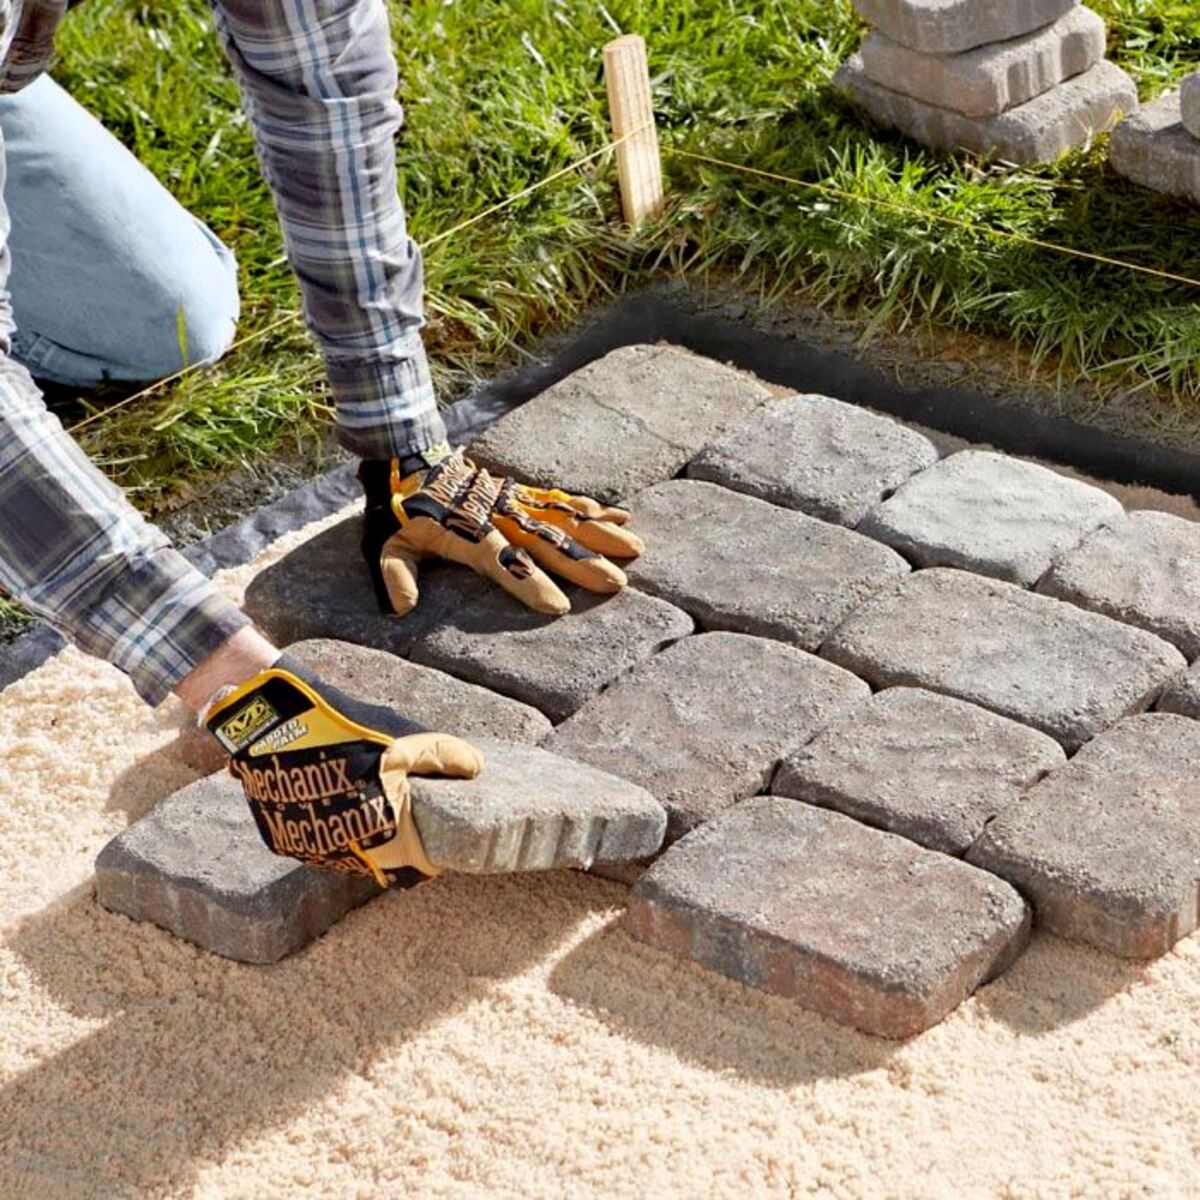
Preparing the Patio Pavers
Before you begin applying polymeric sand to your patio pavers, proper preparation is crucial to ensure a successful and long-lasting result. Follow these steps to prepare your patio pavers effectively:
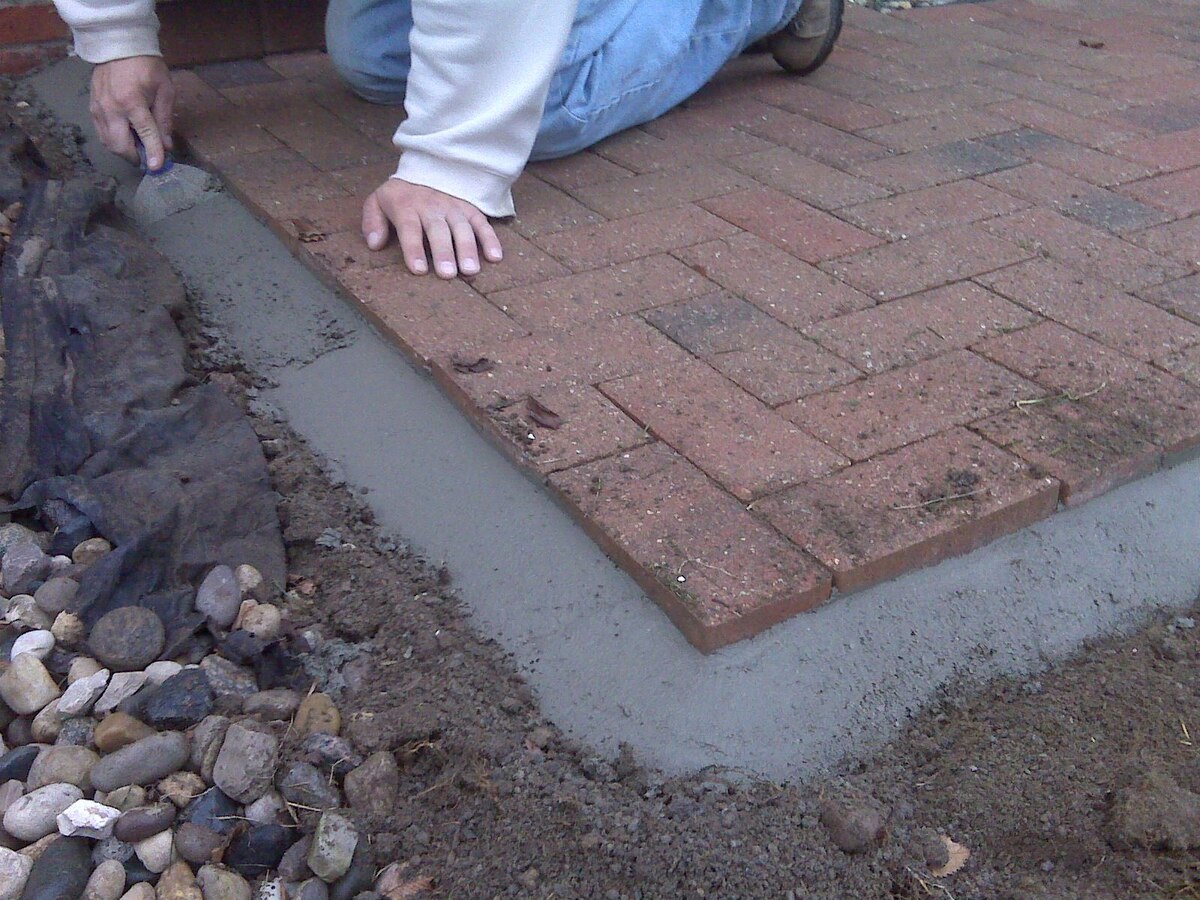
- Clean the Surface: Start by thoroughly cleaning the surface of the patio. Remove any debris, dirt, or weeds from between the paver joints using a broom or a leaf blower. You can also use a pressure washer if needed to achieve a clean and debris-free surface.
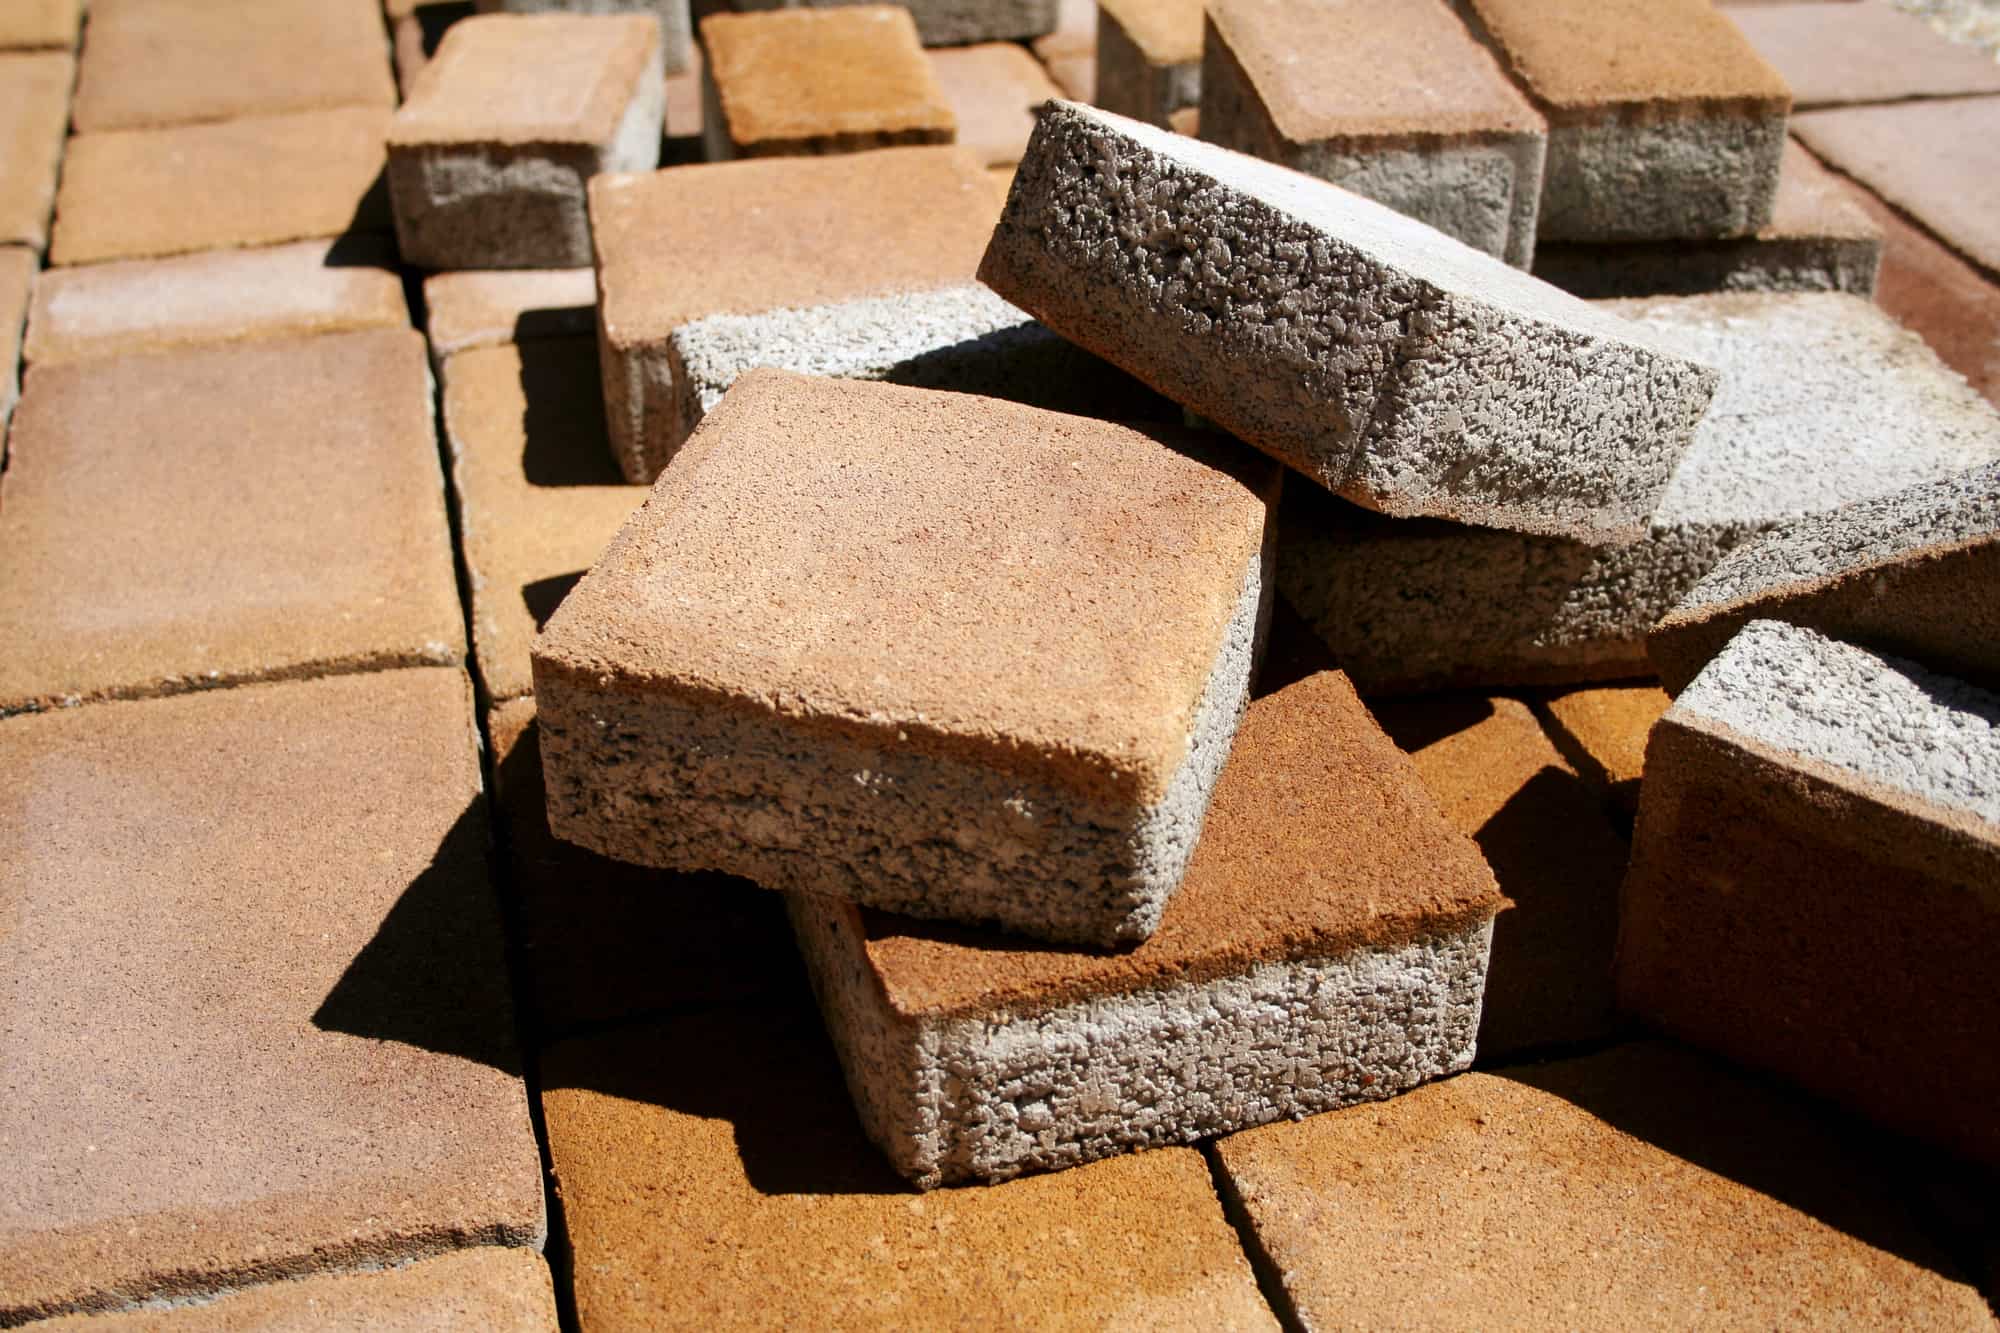
- Repair Damaged Pavers: Inspect the pavers for any damage or cracks. Replace any broken or damaged pavers before proceeding with the application of polymeric sand. This ensures a stable and even surface for the sand to adhere to.
- Check for Proper Drainage: Ensure that your patio has proper drainage to avoid water pooling on the surface. If necessary, make necessary adjustments to the slope or add drainage channels to prevent water retention.
- Allow Time for Drying: If you have recently pressure washed your patio, allow sufficient time for the pavers to dry completely before applying the polymeric sand. The surface needs to be dry to ensure proper adhesion and activation of the sand.
By properly preparing your patio pavers, you create a clean and stable foundation for the polymeric sand. This not only enhances the effectiveness of the sand but also ensures the longevity of your patio project. Now that your pavers are ready, let’s move on to the next step – cleaning the patio surface – before applying the polymeric sand.
Cleaning the Patio Surface
Before applying polymeric sand to your patio pavers, it is important to thoroughly clean the surface to ensure optimal adhesion and to remove any contaminants that may hinder the sand’s effectiveness. Follow these steps to clean the patio surface effectively:
- Sweep or Power Wash: Begin by sweeping the entire patio surface to remove loose debris, dirt, and leaves. Use a broom or a leaf blower to cover all areas, including the gaps between the pavers. If the surface is particularly dirty or stained, you can also use a power washer to give it a more thorough clean.
- Remove Stains: Inspect the patio surface for any stubborn stains, such as oil spills or rust marks. Use an appropriate cleaner or stain remover specifically designed for your patio material to treat and remove these stains. Follow the manufacturer’s instructions and use a scrub brush or a pressure washer for tougher stains.
- Use a Weed Killer: If there are any existing weeds or plant growth between the paver joints, it is recommended to apply a weed killer or herbicide. Make sure to choose a product that is safe for your patio material and follow the instructions on the packaging.
- Rinse the Surface: After cleaning and removing any stains or weeds, thoroughly rinse the patio surface with clean water. This will remove any cleaning solution residue and ensure a clean and neutral surface for the application of polymeric sand.
- Allow Drying Time: It is important to allow the patio surface to dry completely before applying the polymeric sand. Depending on the weather conditions, this may take a few hours or even a full day. Avoid applying the sand to a damp or wet surface, as it may compromise the effectiveness of the sand’s bonding properties.
By taking the time to clean the patio surface properly, you ensure that the polymeric sand bonds effectively and provides optimal stability and protection. Now that the surface is clean and dry, we can move on to the next step – the application process of polymeric sand.
Read more: How To Lay Patio Pavers On Sand
Application Process
Now that you’ve prepared the patio pavers and cleaned the surface, it’s time to delve into the step-by-step application process of polymeric sand. Follow these guidelines to ensure a successful and professional result:
Step 1: Applying the Polymeric Sand
- Choose the Right Sand: Select a high-quality polymeric sand that is suitable for your specific project and patio material. Consider factors such as color, grain size, and compatibility with your pavers. Read the manufacturer’s instructions carefully to ensure you have the correct amount of sand for your project.
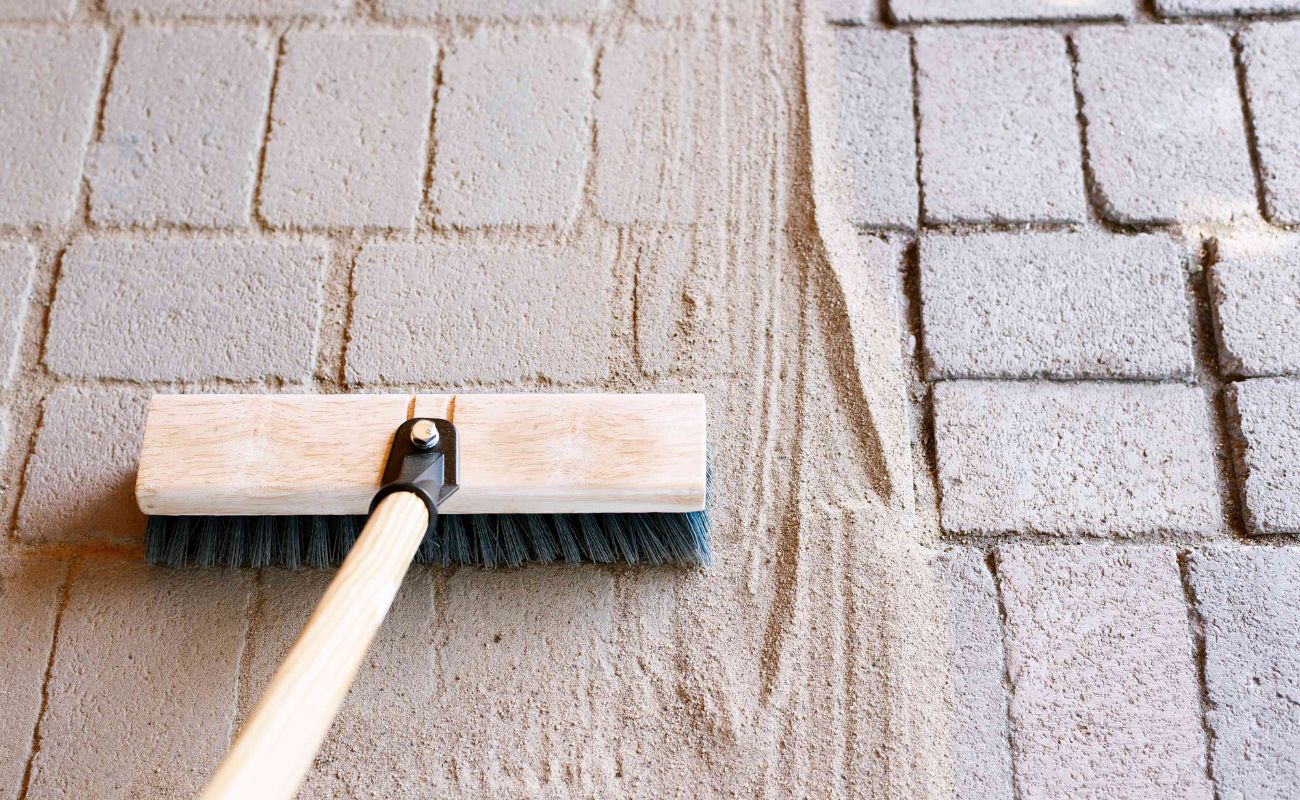
- Pour the Sand: Carefully pour the polymeric sand onto the patio surface, focusing on one section at a time. Use a shovel or a small trowel to distribute the sand evenly into the gaps between the pavers. Aim to fill the joints completely without overfilling to prevent excess sand spilling onto the surface.
- Work in Small Sections: It’s best to work in small sections to ensure you can sweep and compact the sand before it dries. This will help you achieve a more seamless and level finish. Continue pouring and spreading the sand across the entire patio until all the joints are filled.
Step 2: Sweeping and Compacting
- Sweep the Excess: Once the polymeric sand is applied to a section, use a broom to sweep the excess sand off the surface of the pavers. This will prevent any sand particles from settling on the paver surface, which can create a hazy or cloudy appearance.
- Compact the Sand: Use a vibratory plate compactor or a rubber mallet to gently tap the pavers and compact the sand further. This step helps to ensure that the sand settles tightly within the joints, providing a more stable and secure bond.
- Fill Remaining Gaps: If there are any areas where the sand settles or sinks below the surface, add more polymeric sand and repeat the sweeping and compacting process until all the gaps between the pavers are properly filled.
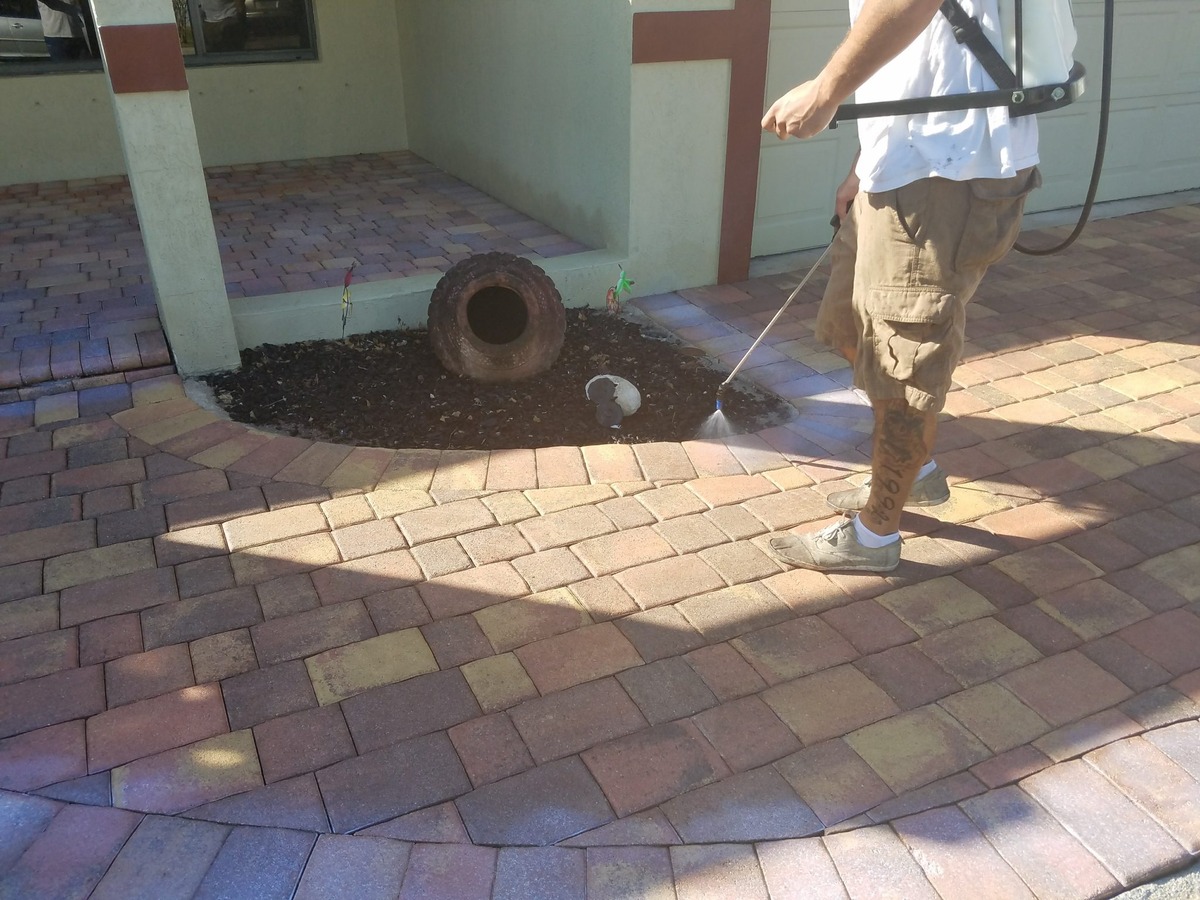
Step 3: Watering the Sand
- Activate the Polymeric Sand: Once all the joints are properly filled, lightly mist the patio surface with water using a garden hose or a spray nozzle attachment. The water will activate the polymer in the sand, allowing it to bond and harden. Avoid using excessive water pressure, as this can dislodge the sand or cause it to wash away.
- Continue Watering: As you activate the sand, make sure to cover the entire patio surface, ensuring that all the sand-filled joints are adequately watered. Pay extra attention to any areas that appear dry or have absorbed the initial water quickly.
Read more: What Kind Of Sand For Patio Pavers
Step 4: Final Sweeping and Compacting
- Sweep Away Residue: After watering, use a broom to gently sweep away any residue or excess sand that may have settled on the surface of the pavers. Be careful not to disturb the sand-filled joints.
- Compact the Sand: Give the sand one final round of compaction using a vibratory plate compactor or a rubber mallet. This ensures that the sand is tightly bonded within the joints and creates a solid and secure patio surface.
With the application process complete, the polymeric sand will begin to harden and form a strong bond with the pavers. In the next sections, we will discuss the curing time and the final steps to complete your patio project.
Step 1: Applying the Polymeric Sand
In this step, we will guide you through the process of applying the polymeric sand to the gaps between your patio pavers. Following these steps will help ensure a smooth and successful application:
- Choose the Right Sand: Select a high-quality polymeric sand that is specifically designed for your type of patio pavers. Consider factors such as color, grain size, and compatibility with your pavers. Read the manufacturer’s instructions carefully to determine the correct amount of sand needed for your project.
- Pour the Sand: Begin by pouring the polymeric sand onto the patio surface, focusing on one section at a time. Use a shovel or a small trowel to distribute the sand evenly into the gaps between the pavers. Be sure to fill the joints completely without overfilling, as excess sand can spill onto the surface and create a messy appearance.
- Work in Small Sections: It’s best to work in small sections to ensure you can sweep and compact the sand before it dries. This will help you achieve a more seamless and level finish. Continue pouring and spreading the sand across the entire patio until all the joints are filled.
When pouring the sand, it’s important to take your time and be thorough. Pay attention to each gap between the pavers to ensure they are all filled completely. Use a gentle tapping motion with a small trowel to help the sand settle and distribute evenly within the joints.
Remember, the goal is to create a solid and stable bond between the pavers, so be meticulous in your application process. Take care not to trap air bubbles or leave gaps in the sand-filled joints. This will help prevent any potential issues down the road, such as shifting or weed growth.
By following these steps to properly apply the polymeric sand, you’ll set the stage for a successful patio project. With the sand applied, the next step is to move on to the sweeping and compacting process to ensure a secure and durable installation.
Step 2: Sweeping and Compacting
After applying the polymeric sand to the gaps between your patio pavers, the next step is to sweep and compact the sand. This process helps ensure proper distribution and bonding of the sand, providing stability and durability to your patio. Follow these steps to effectively sweep and compact the sand:
- Sweep the Excess: Begin by sweeping the entire patio surface with a broom to remove any excess sand that may have accumulated on top of the pavers. Pay special attention to the gaps between the pavers, ensuring that no sand particles remain on the surface. This step helps create a clean and polished appearance.
- Compact the Sand: Next, use a vibratory plate compactor or a rubber mallet to gently tap and compact the sand within the paver joints. Start at one end of the patio and work your way across, applying even pressure to ensure the sand settles tightly. This compacting process helps eliminate any air pockets and ensures a stable and secure bond.
- Fill Remaining Gaps: As you compact the sand, you may notice that some areas require additional filling. If any gaps or depressions appear, add more polymeric sand to fill them. Use the same pouring and sweeping technique as in Step 1 to achieve consistent and even coverage. Repeat the compacting process to ensure proper settling.
By sweeping the excess sand and compacting it, you are creating a firm and solid foundation for your patio. This extra step enhances the stability of the pavers, reducing the potential for shifting or movement over time. It also helps to reinforce the bond between the sand and the paver joints, ensuring a more durable and long-lasting installation.
Take your time during this step to thoroughly sweep and compact the sand. Be diligent in filling any remaining gaps to achieve a seamless and level surface. Remember, the quality of your sweeping and compacting efforts directly affects the overall appearance and performance of your patio.
Once you’ve completed the sweeping and compacting process, your patio is well on its way to becoming a beautiful and resilient outdoor space. The next step in the application process is to water the sand, allowing it to activate and further strengthen the bond with the pavers.
Step 3: Watering the Sand
After applying and sweeping the polymeric sand into the gaps between your patio pavers, it’s time to activate the sand by watering it. This step is crucial as it allows the sand to bond and harden, creating a strong and durable surface. Follow these steps to effectively water the polymeric sand:
- Activate the Polymeric Sand: Using a garden hose or a spray nozzle attachment, lightly mist the entire patio surface, focusing on the sand-filled joints. The water will activate the polymers in the sand, causing it to bond and harden. It’s important to wet the sand evenly, ensuring that all the joints are adequately covered.
- Continue Watering: As you water the polymeric sand, be observant and continue to add water as needed. Some areas may absorb the initial water quickly, so give extra attention to those spots. Aim for a thorough and even watering, as this will ensure a complete activation of the sand throughout the entire patio.
When watering the sand, be cautious not to use excessive water pressure, as it can dislodge the sand or cause it to wash away. A gentle and consistent spray is all that is needed. The goal is to activate the sand, not flood the patio surface. Take your time and pay attention to detail to ensure proper activation and bonding.
As the water saturates the sand, you will notice a visible transformation. The sand will begin to harden, creating a solid and robust structure within the gaps of the pavers. This hardened sand acts as a strong barrier, enhancing the stability and longevity of your patio.
It’s important to note that the drying and hardening process may take several hours or even days, depending on the ambient temperature and humidity. Be patient and allow the polymeric sand sufficient time to fully cure and strengthen before proceeding to the final step of the application process.
After watering the sand, there may be some residue or excess sand on the surface. In the next step, we will discuss how to sweep away any remaining debris and ensure a clean and polished finish for your patio.
Read more: What Is A Paver Patio
Step 4: Final Sweeping and Compacting
After watering the polymeric sand and allowing it to activate and bond, the final step in the application process is to perform a final sweeping and compacting to ensure a polished and professional finish. Follow these steps to effectively complete this last stage of the process:
- Sweep Away Residue: With a broom, carefully sweep the entire patio surface to remove any residue or excess sand that may have settled on the pavers. Pay close attention to the gaps between the pavers, ensuring that the surface looks clean and free of any loose debris. This step helps enhance the visual appeal of your patio and gives it a finished look.
- Compact the Sand: Once the surface is swept, go over the polymeric sand again with a vibratory plate compactor or a rubber mallet. Apply gentle pressure as you compact the sand to ensure a tight and secure bond within the paver joints. This final compaction gives your patio additional stability and longevity.
By sweeping away the residue and compacting the sand, you are further enhancing the bond and stability of your patio. This extra step ensures that the sand is firmly packed and eliminates any potential air pockets or loose areas, which can compromise the integrity and longevity of the installation.
During the final compaction, pay attention to any areas that may have settled or appear uneven. Add more polymeric sand and repeat the compaction process if needed to achieve a level surface. Take your time and be meticulous to ensure a secure and uniform finish across the entire patio.
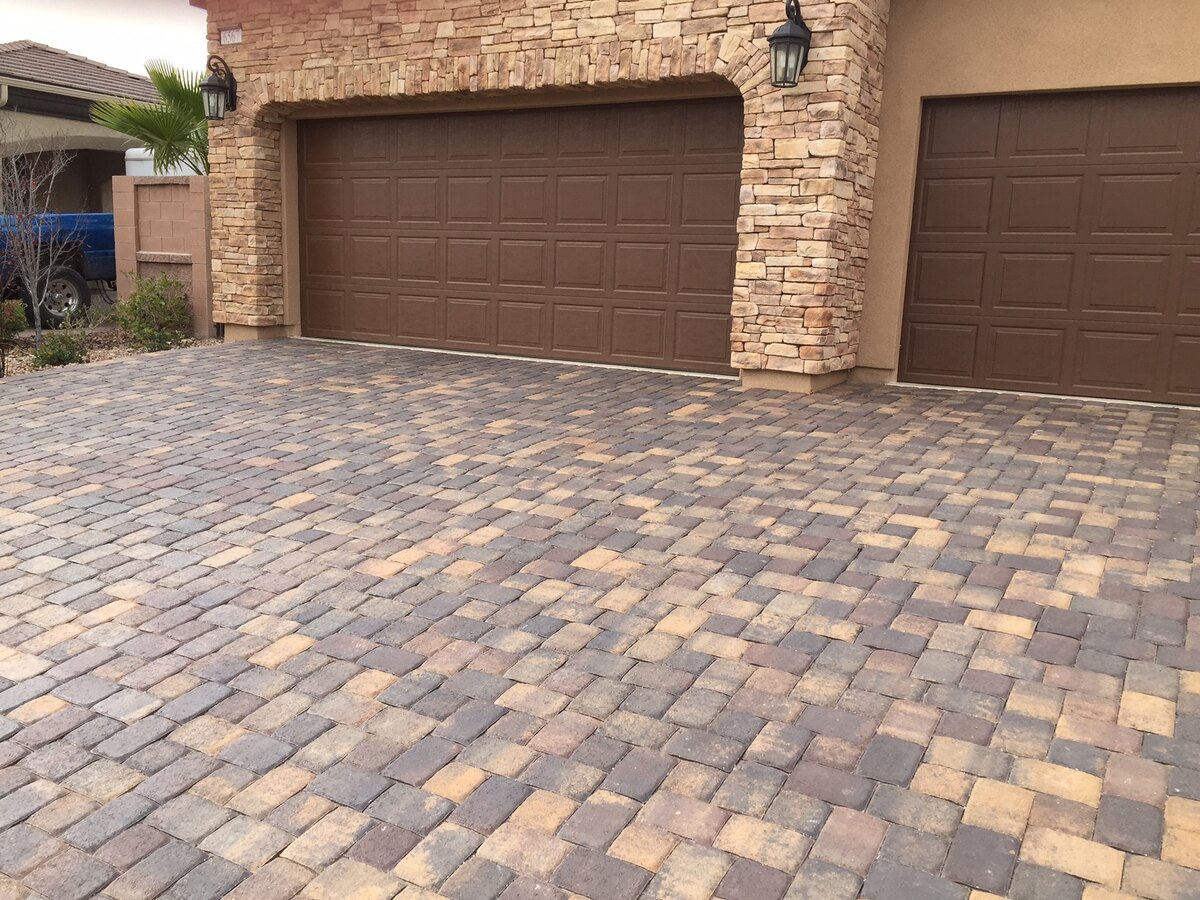
With the final sweeping and compaction complete, stand back and admire your beautifully finished patio. The polymeric sand is now fully activated and hardened, providing stability, weed resistance, and durability for your outdoor space.
Now that the application process is finished, it’s important to allow the polymeric sand sufficient time to fully cure. Refer to the manufacturer’s instructions for the recommended curing time, as it can vary depending on ambient conditions. During this cure period, avoid any heavy foot traffic or placing heavy objects on the patio to allow the sand to set and harden completely.
Congratulations! You have successfully applied polymeric sand to your patio pavers, ensuring a secure and long-lasting outdoor living space. With proper maintenance and care, your patio will provide years of enjoyment and beauty.
Before applying polymeric sand to patio pavers, make sure the pavers are clean and dry. Use a broom to sweep the sand into the joints, then use a compactor to settle the sand. Finally, mist the area with water to activate the sand and let it dry.
Curing Time and Final Steps
After completing the application process of polymeric sand to your patio pavers, it is essential to allow for a proper curing time to ensure optimal results. Curing time refers to the duration during which the sand fully sets and hardens, providing maximum stability and durability for your patio. Additionally, there are a few final steps you can take to complete your project. Let’s dive into these details:
Curing Time:
The exact curing time for polymeric sand can vary depending on several factors, including climate conditions and the specific brand of sand used. It is crucial to reference the manufacturer’s instructions for the recommended curing time for your chosen sand. In general, the process can take anywhere from 24 hours to a few days.
During the curing period, it is important to avoid any heavy foot traffic or placing heavy objects on the patio. This will allow the sand to fully set and harden, ensuring maximum stability and longevity for your outdoor space. Be patient and give the sand sufficient time to cure before resuming normal use of the patio.
Final Steps:
Once the polymeric sand has cured, there are a few final steps you can take to complete your patio project:
- Inspect the Patio: Take a close look at your patio to ensure that all paver joints are properly filled and that the sand has fully cured. Check for any areas that may require touch-up or additional sand to fill any gaps.
- Sweep and Clean: Give your patio a thorough sweeping to remove any loose sand or debris that may have settled on the surface. This final cleaning step will reveal the polished look of your patio and help maintain its pristine appearance.
- Apply a Sealant (Optional): Depending on your preference and the type of pavers used, you may choose to apply a sealant to protect the patio surface and further enhance its longevity. Consult with a professional or refer to the manufacturer’s recommendations for proper sealant application.
- Maintenance and Care: Once your patio is complete, regular maintenance and care will help preserve its beauty and ensure its longevity. This includes periodic sweeping to remove debris, using a mild detergent for cleaning, and avoiding harsh chemicals that may damage the pavers or the polymeric sand.
By following these final steps and maintaining your patio properly, you can enjoy a beautiful and durable outdoor space for years to come. Regular inspections, cleaning, and maintenance will help prevent issues and ensure that your patio remains in top condition.
With the curing time complete and the final steps taken, you can now sit back, relax, and enjoy your transformed patio. Whether you’re hosting gatherings, basking in the sun, or simply savoring a moment of peace, your polymeric sand-filled pavers will provide a stable and visually appealing foundation for all your outdoor activities.
Congratulations on completing your patio project with polymeric sand!
Read more: How To Put Sand Between Brick Pavers
Tips and Tricks for Applying Polymeric Sand
When it comes to applying polymeric sand to your patio pavers, following a few tips and tricks can help ensure a smooth and successful installation. These insights will help you achieve optimal results and make the process more efficient. Consider the following tips when applying polymeric sand:
- Read the Instructions: Before starting the application process, carefully read and understand the manufacturer’s instructions provided with the polymeric sand. Each brand may have specific guidelines or recommendations, so it’s important to follow them for the best outcome.
- Choose the Right Sand Color: Selecting a polymeric sand color that complements your patio pavers can enhance the visual appeal of your outdoor space. Choose a color that matches or complements the shade of your pavers, creating a cohesive and aesthetically pleasing look.
- Avoid Overfilling: While it’s crucial to fill the gaps between the pavers completely, avoid overfilling them. Overfilling can lead to excess sand spilling onto the surface, which can be challenging to remove and may spoil the appearance of your patio. Use a trowel or your fingers to level the sand and ensure a proper fit.
- Use a Joint Stabilizing Sealer: To further enhance the stability and longevity of your patio, consider applying a joint stabilizing sealer after the polymeric sand has cured. This sealer helps to lock in the sand and prevent weed growth, ensuring a long-lasting and low-maintenance outdoor space.
- Wet the Surface Before Application: If you notice that the patio surface is extremely dry, consider lightly misting it with water before applying the polymeric sand. This helps prevent the sand from drying out too quickly, allowing it to bond more effectively with the paver joints.
- Plan for Proper Drainage: Ensure that your patio has proper drainage to prevent water pooling. When filling the gaps with polymeric sand, avoid creating a slope that allows water to collect in certain areas. Proper drainage helps maintain the stability and integrity of your patio over time.
- Work in Shade or Cooler Temperatures: If possible, schedule your polymeric sand application during cooler parts of the day or in shaded areas. This can help prevent the sand from drying out too quickly, allowing you more time to properly sweep, compact, and water the sand.
- Maintain a Clean Work Area: Keep a broom or a leaf blower handy to regularly clean the work area and remove any debris or excess sand. This will help you maintain a clear view of the progress and ensure a more accurate application of the sand.
- Apply Sand in Multiple Passes: For larger patio areas, consider applying the polymeric sand in multiple passes rather than pouring it all at once. This allows you more control over the distribution and ensures a more consistent application throughout the project.
- Refer to Professional Expertise: If you are unsure about any aspect of the polymeric sand application process, or if you have a large or complex project, it may be beneficial to consult with a professional contractor to ensure proper installation and maximize the longevity of your patio.
By keeping these tips and tricks in mind, you’ll be well-prepared to apply polymeric sand to your patio pavers successfully. The process will be smoother, and the end result will be a beautifully finished, stable, and functional outdoor space.
Remember, attention to detail and proper installation techniques are key to achieving the best outcome. Take your time, follow the instructions, and enjoy the process of transforming your patio into a stunning outdoor oasis.
Good luck with your polymeric sand application, and may you enjoy years of outdoor enjoyment on your beautifully enhanced patio!
Conclusion
Congratulations! You have reached the end of our comprehensive guide on how to apply polymeric sand to patio pavers. By following the step-by-step process and incorporating the tips and tricks provided, you now have the knowledge and confidence to create a stable, durable, and visually appealing outdoor space.
Polymeric sand offers numerous benefits, including stabilizing the pavers, preventing weed growth, repelling insects, and enhancing the longevity of your patio. By filling the gaps between the pavers with this specially formulated sand, you not only improve the functionality and safety of your outdoor space, but also elevate its overall aesthetic appeal.
Remember to properly prepare the patio pavers by cleaning the surface, repairing any damaged areas, and ensuring proper drainage. Applying the polymeric sand in small sections, sweeping and compacting as you go, and allowing sufficient curing time are essential steps in achieving a professional and durable result.
Additionally, the tips and tricks provided throughout the guide will further aid you in the application process, from choosing the right sand color to maintaining a clean work area and considering the use of a joint stabilizing sealer.
With your patio project complete, all that’s left is to enjoy your transformed outdoor space. Whether you’re relaxing with family and friends, hosting gatherings, or simply enjoying the tranquility of your own backyard, your polymeric sand-filled patio pavers will provide a stable and visually appealing foundation for all your outdoor activities for years to come.
Remember to regularly inspect, clean, and maintain your patio to preserve its beauty and longevity. By doing so, you’ll ensure that your investment continues to bring you joy and relaxation for many seasons ahead.
Thank you for choosing our guide as your resource for applying polymeric sand to your patio pavers. We hope it has been informative, helpful, and inspiring. Best of luck with your patio project, and may your outdoor space become a haven for unforgettable moments and cherished memories!
Frequently Asked Questions about How To Apply Polymeric Sand To Patio Pavers
Was this page helpful?
At Storables.com, we guarantee accurate and reliable information. Our content, validated by Expert Board Contributors, is crafted following stringent Editorial Policies. We're committed to providing you with well-researched, expert-backed insights for all your informational needs.


0 thoughts on “How To Apply Polymeric Sand To Patio Pavers”