Home>Furniture>Outdoor Furniture>How To Lay Patio Pavers On Sand
Outdoor Furniture
How To Lay Patio Pavers On Sand
Modified: March 7, 2024
Learn how to lay patio pavers on sand and transform your outdoor space with beautiful outdoor furniture.
(Many of the links in this article redirect to a specific reviewed product. Your purchase of these products through affiliate links helps to generate commission for Storables.com, at no extra cost. Learn more)
Introduction
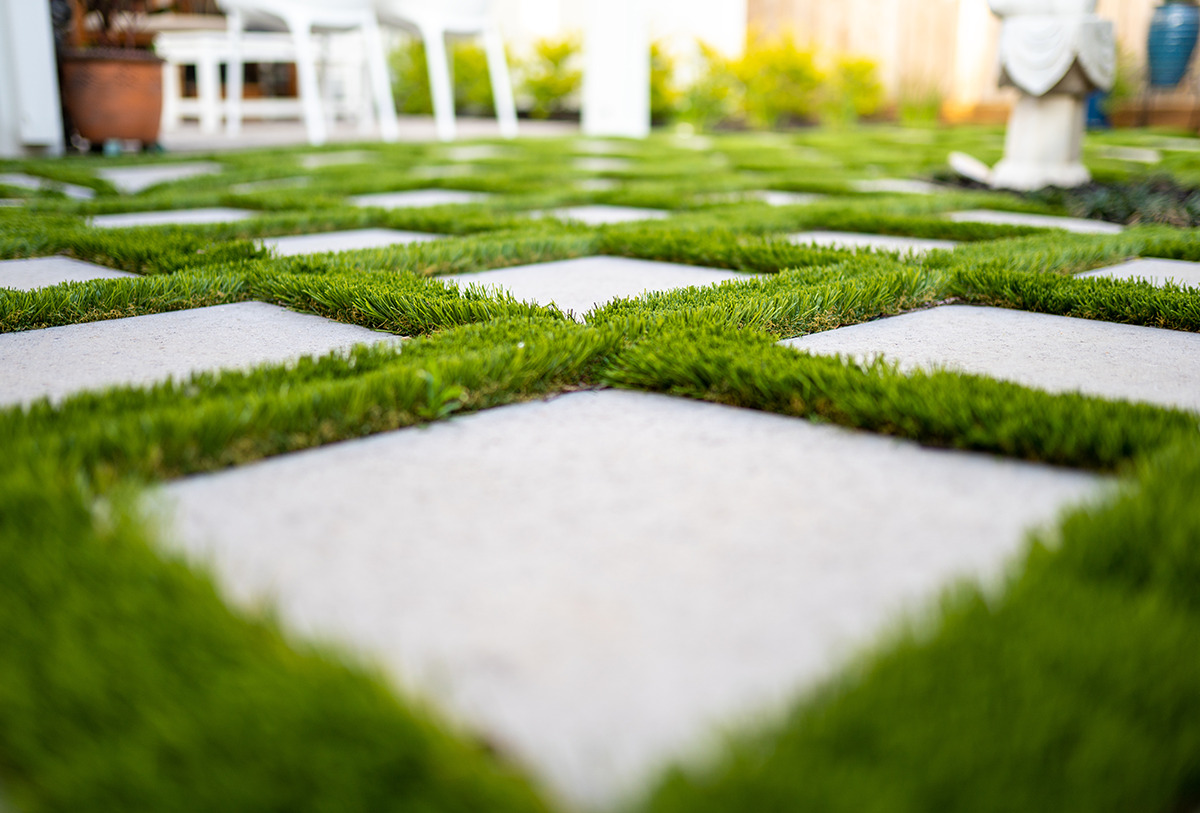
Welcome to this guide on how to lay patio pavers on sand. If you’re looking to enhance your outdoor space with a beautiful and functional patio, then laying pavers is a great option. Pavers not only provide a durable and attractive surface, but they also allow for easy customization and future expansion.
Before you begin the process of laying patio pavers, it’s important to understand the steps involved and gather all the necessary tools and materials. This article will walk you through the entire process, from preparing the ground to compacting and leveling the surface. By following these steps, you’ll be able to create a stunning patio that will be the envy of your neighbors.
But why choose sand as the base for your patio pavers? Sand offers several benefits, including excellent drainage, stability, and ease of installation. It provides a solid foundation for the pavers and helps prevent them from shifting or sinking over time. Additionally, sand allows for flexibility, making it easier to adjust the pavers if needed.
Now that you understand the importance of sand as a base material for your patio pavers, let’s dive into the step-by-step process of laying them. By the end of this guide, you’ll have all the knowledge and confidence to start your own patio project and transform your outdoor space into a haven for relaxation and entertainment.
Key Takeaways:
- Create a stable and beautiful patio by following these steps to lay pavers on sand. Proper preparation, layout, and filling gaps are key for a successful outdoor space.
- Transform your outdoor area into a haven for relaxation and entertainment with a durable and attractive patio. Use sand as a stable base for easy customization and future expansion.
Read more: How To Sand Patio Pavers
Step 1: Preparing the Ground
The first step in laying patio pavers on sand is to prepare the ground properly. This involves clearing the area of any vegetation, debris, or existing materials. Here’s how to do it:
- Mark the area: Start by marking the perimeter of your patio using stakes and string. This will give you a clear outline of the space and help you visualize the final result.
- Remove vegetation: Use a shovel or a garden hoe to remove any grass, weeds, or other vegetation within the marked area. It’s important to remove the roots as well to prevent regrowth in the future.
- Level the ground: Take a rake or a garden hoe and level the ground to ensure a flat surface. Remove any rocks or large debris that may hinder the installation process.
- Compact the soil: Use a hand tamper or a plate compactor to compact the soil. This will provide a stable base for the sand and prevent future settling or shifting of the pavers.
Properly preparing the ground is crucial for a successful patio installation. It ensures that the surface is even and stable, which will prevent any future issues with the pavers. Take your time with this step and make sure the ground is well-prepared before moving on to the next step.
Step 2: Marking the Layout
Once the ground is prepared, the next step in laying patio pavers on sand is to mark the layout of your patio. This step will help you visualize the size and shape of the patio and ensure accurate installation. Here’s how to do it:
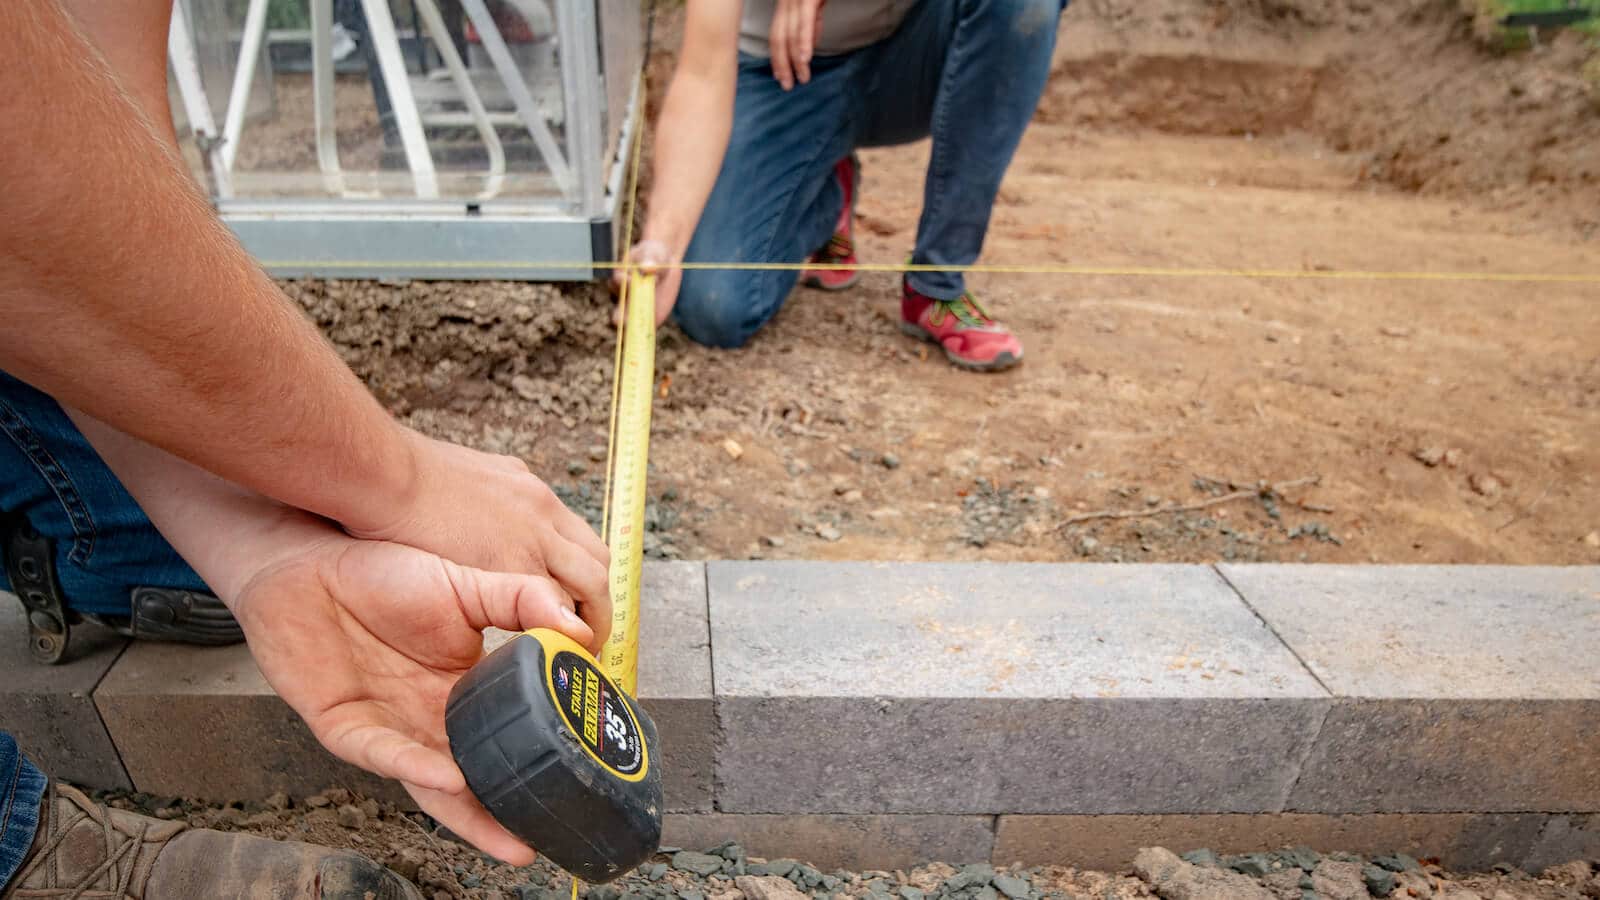
- Measure and plan: Determine the dimensions of your patio and decide on the desired shape. Measure the length and width of the area and mark the corners using stakes and string.
- Create a layout grid: To ensure that the pavers are laid evenly and in a straight line, create a layout grid using mason’s twine or string. This grid will serve as a guide during the installation process.
- Consider patterns: If you plan on using different paver patterns or designs, now is the time to decide on the layout. Experiment with different options and choose a pattern that suits your taste and complements the overall aesthetics of your outdoor space.
- Double-check the layout: Once you have marked the layout, take a step back and review the dimensions and placement. Make any necessary adjustments to ensure the patio will fit perfectly in your desired location.
By marking the layout of your patio, you’ll have a clear blueprint to follow during the installation process. It will provide guidance and aid in achieving a professional and visually appealing end result. Take your time with this step, as the accuracy of the layout will greatly impact the overall outcome of your patio project.
Step 3: Excavating the Area
Now that you have marked the layout of your patio, it’s time to start excavating the area. Excavation is an essential step in preparing the ground for the sand and pavers. Here’s how to properly excavate the area:
- Start digging: Use a shovel or a garden mattock to dig out the area within the marked boundaries. Start from one corner and work your way across, removing the topsoil and digging down to a depth of about 6 inches.
- Check for slope: While excavating, ensure that the ground has a slight slope away from any nearby structures. This slope will promote proper drainage and prevent water from pooling on your patio. Aim for a slope of about 1/8 inch per foot.
- Remove excess soil: As you excavate, pile the excess soil in a designated area. You can use it for other landscaping purposes or dispose of it properly if needed.
- Use a level and string: To ensure an even excavation, periodically check the depth and levelness of the area using a construction level and string. This will help you identify any high or low spots and make adjustments as necessary.
Excavating the area is a crucial step in creating a stable and long-lasting patio. By digging down to the proper depth, you’ll have enough space for the layers of sand and pavers. Take your time and double-check the slope and levelness of the excavation to ensure a successful installation.
Step 4: Adding a Weed Barrier
Once you have excavated the area for your patio, it’s important to add a weed barrier to prevent unwanted vegetation from growing between the pavers. This step will help maintain the aesthetics and longevity of your patio. Follow these steps to add a weed barrier:
- Clean the excavated area: Before adding the weed barrier, ensure that the area is free from any debris or loose soil. Use a broom or a garden rake to remove any leftover materials.
- Lay the weed barrier: Roll out the weed barrier material over the excavated area. Trim it to fit the shape and size of your patio, leaving a small overlap along the edges.
- Secure the weed barrier: Use landscape fabric pins or staples to secure the weed barrier into place. Space the pins or staples approximately every 3-4 feet along the edges and throughout the area.
- Trim excess weed barrier: Once the weed barrier is secured, trim any excess material using a utility knife or scissors. Make sure the edges are neatly aligned with the boundary of your patio.
Adding a weed barrier is crucial as it prevents the growth of weeds and grass between the pavers. It helps maintain a clean and manicured look, saving you time and effort on future maintenance. Make sure the weed barrier is properly installed and secured before proceeding to the next steps of your patio installation.
Read more: How To Lay A Paver Patio
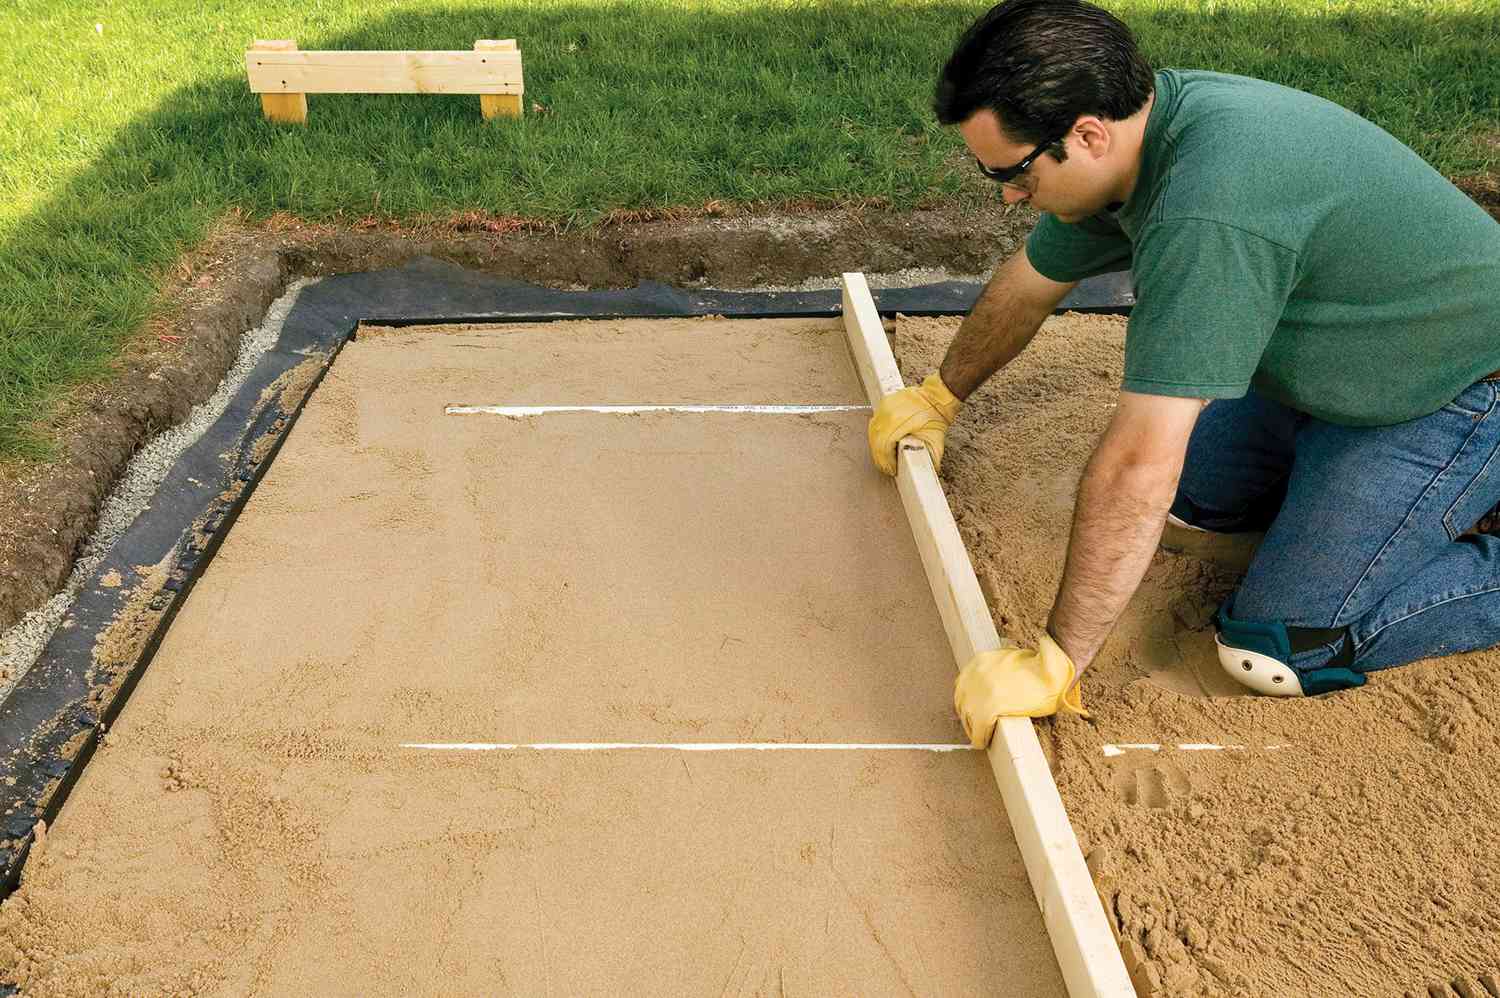
Step 5: Adding a Layer of Sand
With the weed barrier in place, it’s time to add a layer of sand to create a stable base for your patio pavers. The sand layer will provide a level surface and help with the interlocking of the pavers. Follow these steps to add the sand layer:
- Select the right type of sand: Choose a high-quality, coarse sand that is specifically meant for paving projects. Avoid using fine sand, as it can lead to uneven settling of the pavers.
- Distribute the sand: Spread a layer of sand evenly across the entire excavated area. Aim for a thickness of about 1 inch, ensuring that the sand is distributed uniformly.
- Level the sand: Use a straight-edged board or a screed to level the sand. Move the board back and forth in a sawing motion, smoothing out any inconsistencies and creating a smooth, even surface.
- Check for levelness: Use a level to ensure that the sand layer is level throughout. Adjust as needed by adding or removing sand in areas that are too high or too low.
- Compact the sand: Use a plate compactor or a hand tamper to compact the sand layer. This will provide a solid and stable base for the patio pavers, helping to prevent shifting and settling over time.
Adding a layer of sand is a critical step in the patio installation process. It helps create a level surface and provides stability for the pavers. Take your time to ensure that the sand layer is even and properly compacted before moving on to the next steps of your patio project.
Before laying patio pavers on sand, make sure to properly prepare the area by leveling the ground, adding a layer of landscape fabric, and then spreading a 1-inch layer of sand evenly. This will provide a stable base for the pavers and help prevent shifting over time.
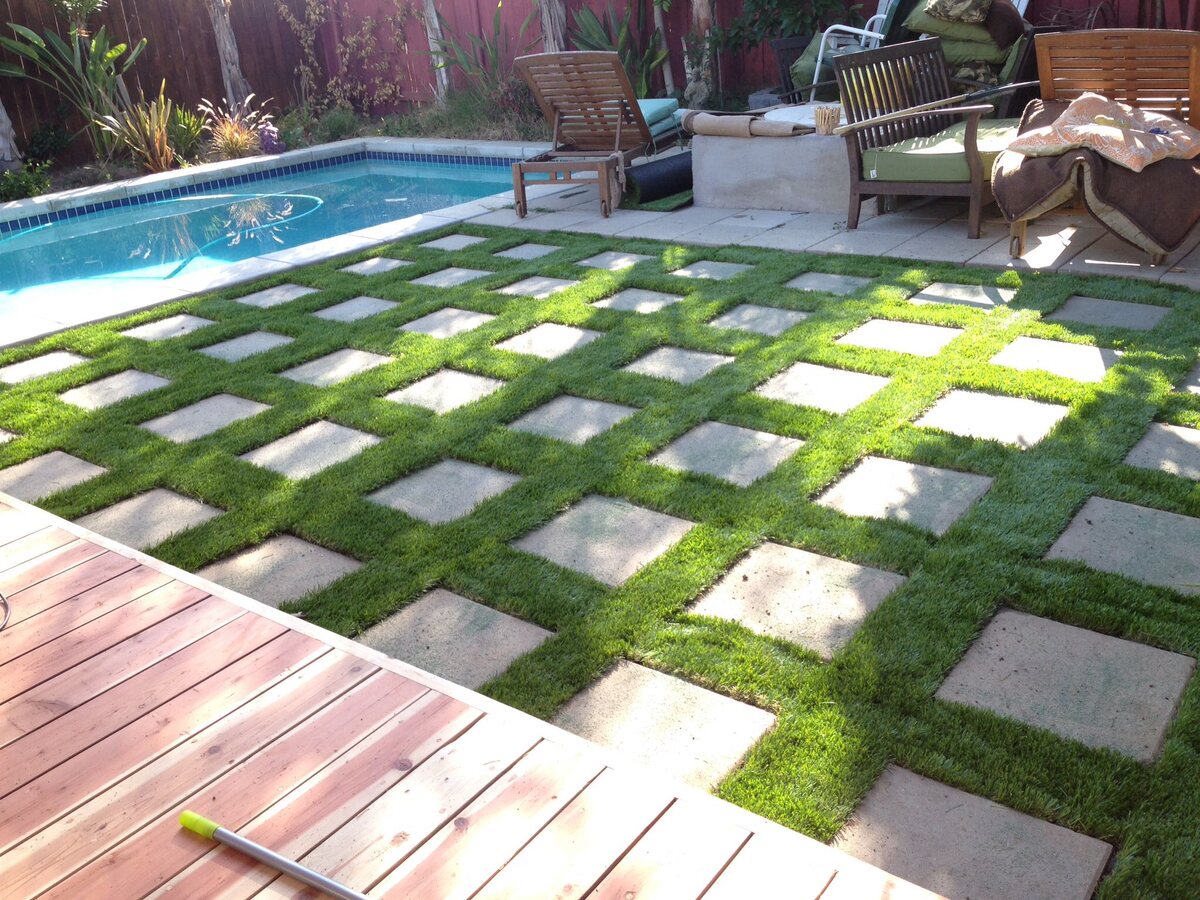
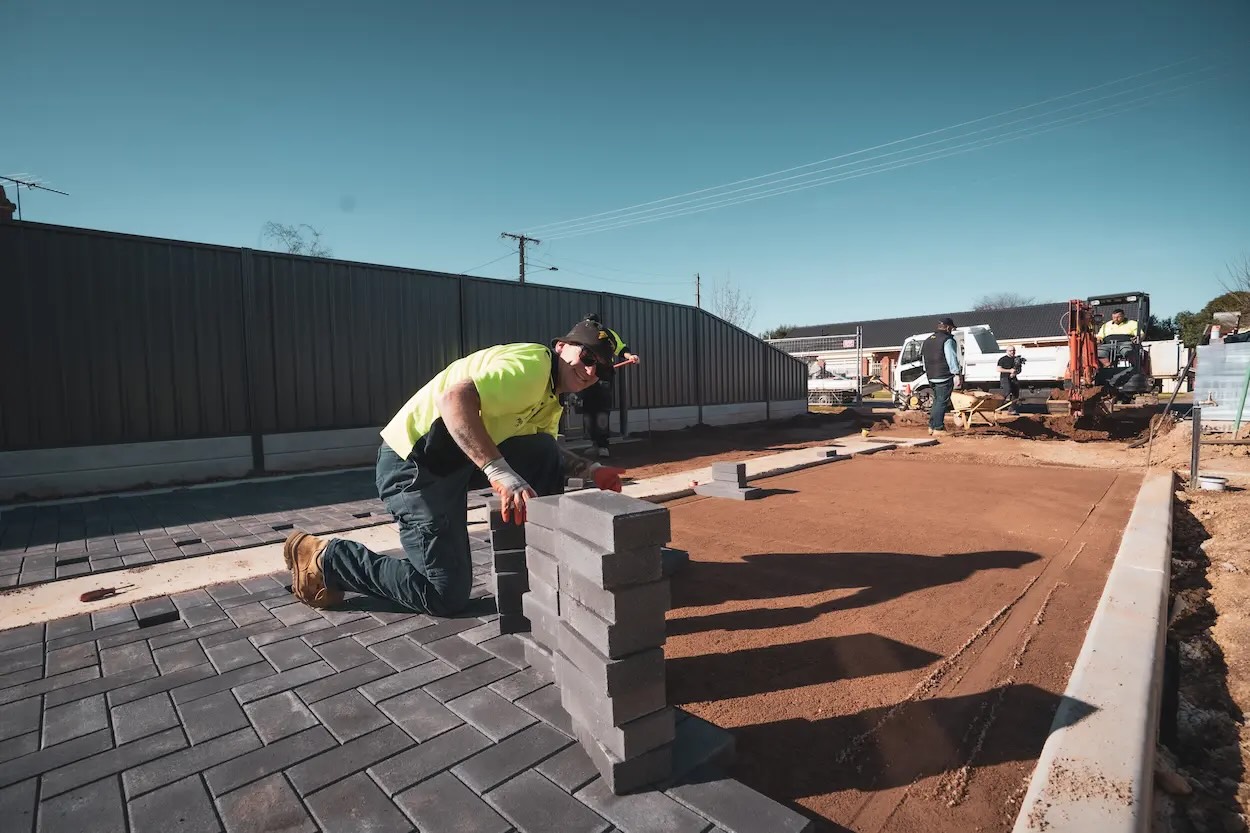
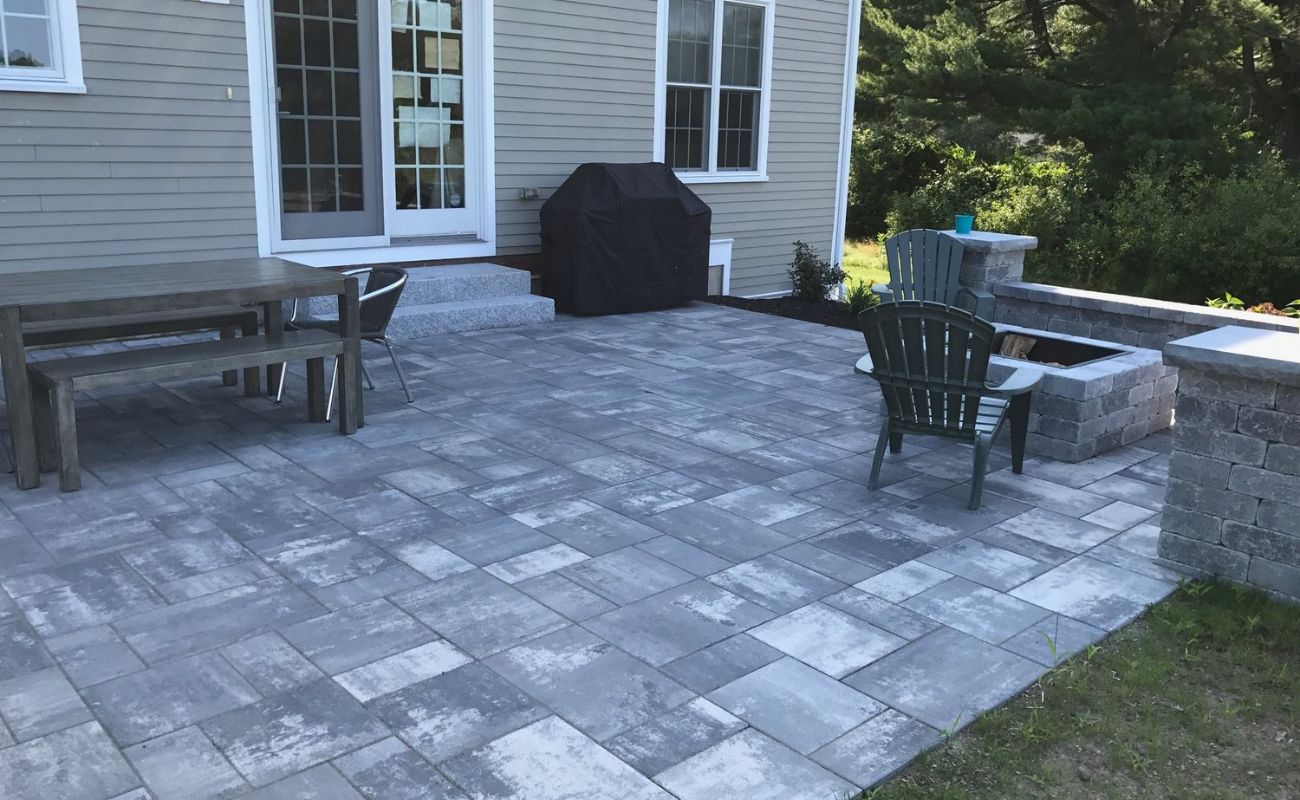
Step 6: Laying the Pavers
Now comes the exciting part of laying the pavers! This step will bring your patio to life and showcase your creativity and design skills. Follow these steps to properly lay the pavers:
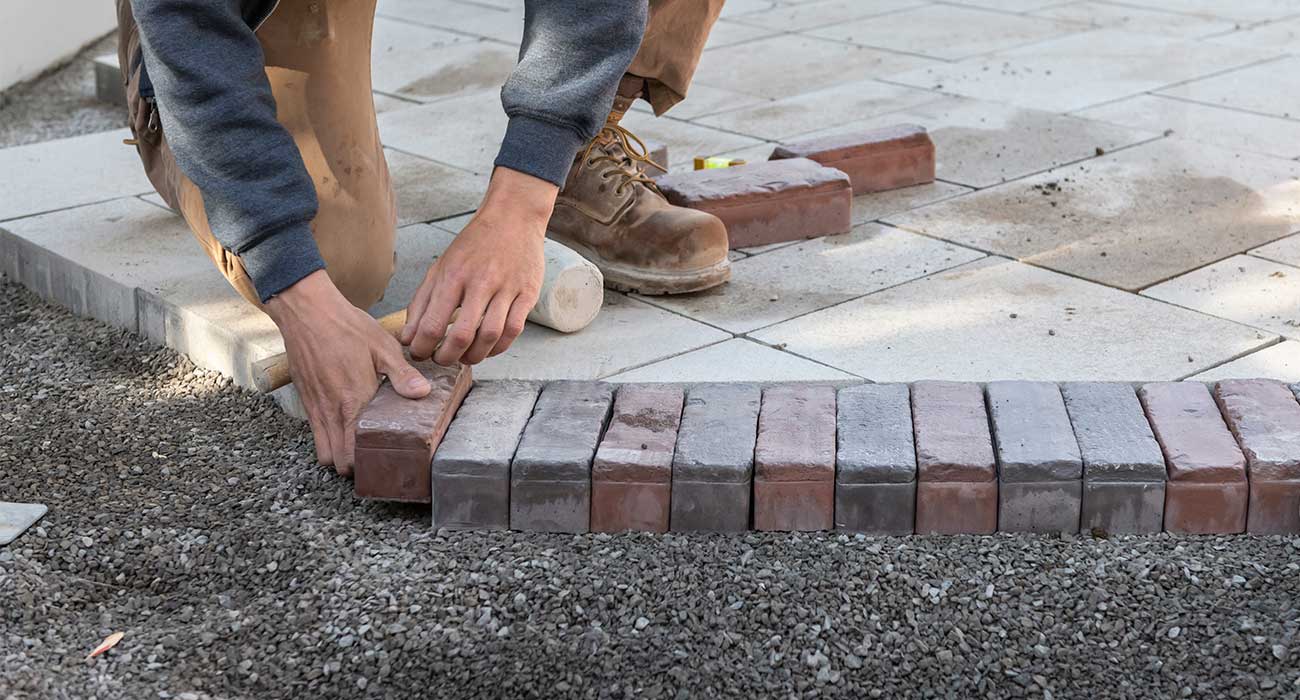
- Start from the edge: Begin laying the pavers from one corner or edge of the patio. This will provide a reference point and help maintain a straight and consistent pattern.
- Place the pavers: Carefully place each paver on the sand, ensuring that it fits snugly against the adjacent pavers. Use a slight twisting motion to embed the pavers into the sand and create a secure connection.
- Keep the gaps consistent: Maintain consistent gaps between the pavers by using spacers or a gap tool specifically designed for this purpose. This will ensure a uniform and professional look throughout the patio.
- Check for levelness and alignment: Use a level and a rubber mallet to check the levelness and alignment of the pavers. Tap lightly on any uneven pavers to adjust their position and make them flush with the surrounding ones.
- Continue laying the pavers: Work your way across the patio, laying the pavers in your desired pattern. Take your time and pay attention to detail, especially if you’re incorporating complex designs or curves into your patio.
Laying the pavers requires patience and precision to achieve a professional-looking result. Take breaks to step back and assess the overall layout as you progress. Adjust and make any necessary changes to ensure that the pavers are properly placed and aligned before moving on to the next steps of your patio project.
Step 7: Cutting the Pavers
Once you’ve laid the majority of the pavers, you may encounter areas where the standard-sized pavers don’t fit perfectly. In such cases, you’ll need to cut the pavers to fit the specific dimensions or shape required. Here’s how to cut the pavers:
- Measure and mark: Carefully measure the area where the paver needs to be cut. Use a pencil or chalk to mark the cutting line on the paver.
- Choose the right tool: Depending on the material of the pavers and the complexity of the cut, you can use a variety of tools such as a wet saw, angle grinder with a diamond blade, or a chisel and hammer.
- Wear safety gear: Safety is crucial when cutting pavers. Make sure to wear safety goggles, gloves, and a dust mask to protect yourself from flying debris and dust.
- Cut the paver: Follow the guidelines of the tool you’re using and carefully cut along the marked line. Take your time and make smooth, steady cuts to ensure clean and precise edges.
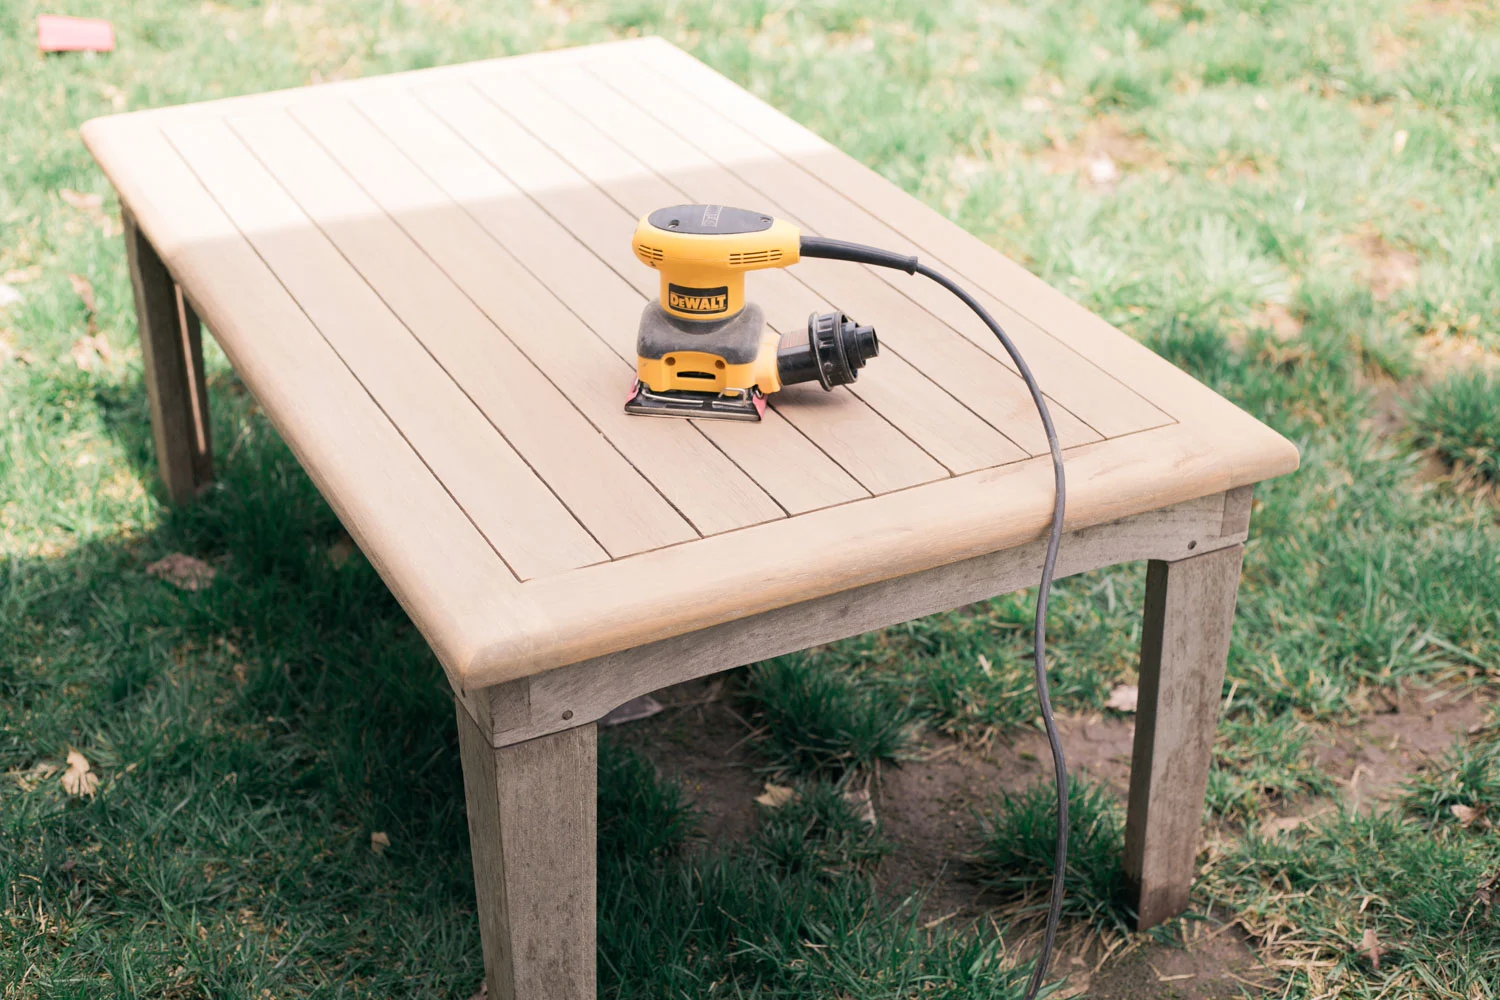
- Test the fit: After cutting the paver, check its fit in the designated area. Make any necessary adjustments by trimming or sanding the edges until it fits snugly against the surrounding pavers.
Remember, cutting pavers can be challenging, especially if you’re dealing with intricate shapes or angles. If you’re unsure or uncomfortable with the cutting process, it’s best to seek assistance from a professional or consider using pre-cut pavers to simplify the installation process.
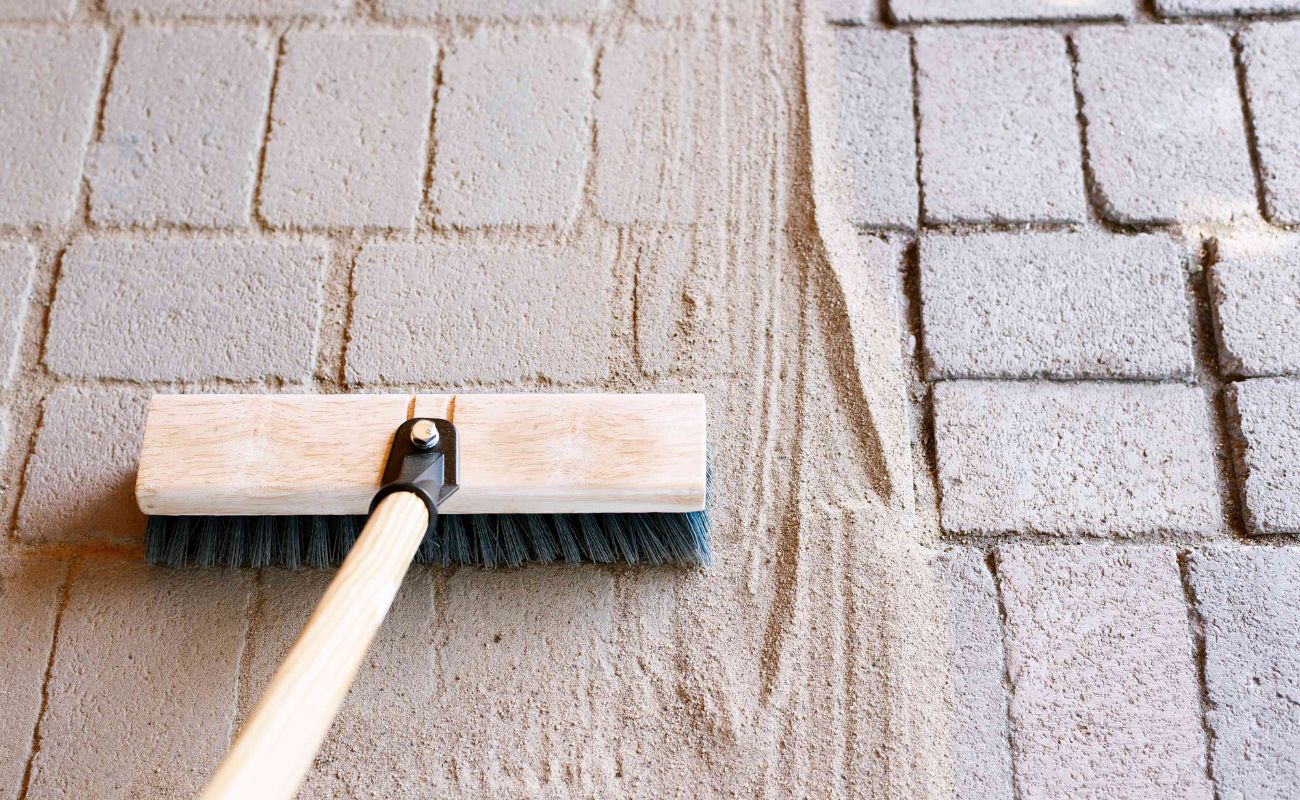
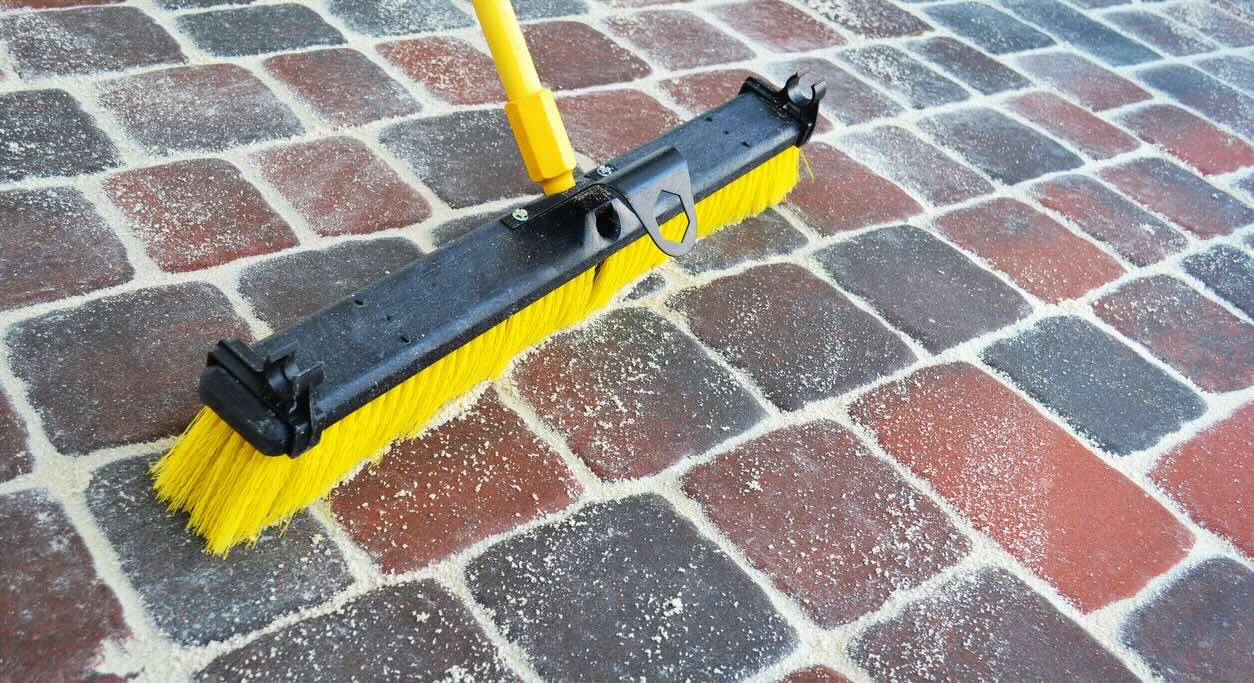
Step 8: Filling the Gaps
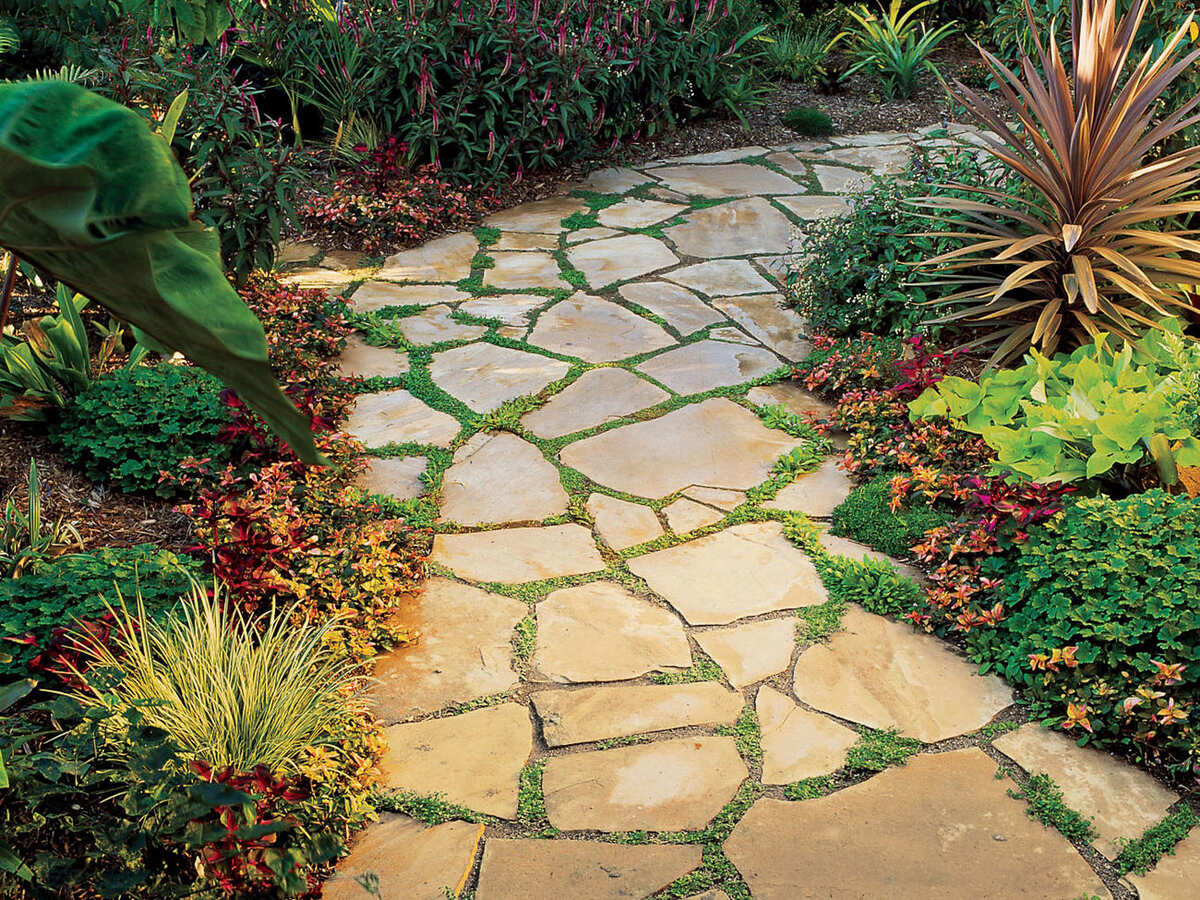
With the pavers in place, it’s time to fill the gaps between them to create a seamless and finished look for your patio. By filling the gaps, not only will you enhance the overall appearance, but you’ll also help stabilize the pavers and prevent the growth of weeds. Here’s how to fill the gaps:
- Select the right material: Choose a suitable filling material such as polymeric sand or fine gravel. Polymeric sand works well for most projects as it hardens when exposed to water, providing a more solid and long-lasting joint.
- Apply the filling material: Carefully pour the filling material onto the patio, ensuring that it fills the gaps between the pavers evenly. Use a broom or a brush to sweep the material into the gaps, making sure it reaches the bottom.
- Compact and level the filling material: Use a plate compactor or a tamper to gently compact the filling material into the gaps. This will help settle it and create a tight bond between the pavers.
- Remove excess material: After compacting, sweep away any excess filling material from the surface of the pavers. Use a leaf blower or a stiff broom to clear away any remaining debris.
- Moisten the filled gaps: If you’re using polymeric sand, lightly mist the filled gaps with water. This will activate the binding agents in the sand, allowing it to harden and create a solid joint.
Filling the gaps between the pavers is an important step to ensure a polished and cohesive appearance. It also helps prevent weed growth and minimizes the risk of pavers shifting or becoming loose. Take your time to properly fill and compact the gaps, ensuring a smooth and durable surface for your patio.
Read more: How To Lay Down Pavers For A Patio
Step 9: Compact and Level the Surface
The final step in laying patio pavers on sand is to compact and level the surface of your newly installed patio. This step is crucial in ensuring the stability, durability, and overall quality of your patio. Here’s how to properly compact and level the surface:
- Inspect the patio: Before compacting, carefully inspect the entire patio to ensure that all pavers are properly in place and the gaps are filled. Make any necessary adjustments or repairs as needed.
- Use a plate compactor: Rent or purchase a plate compactor from a local equipment rental store. Starting from one corner, run the plate compactor over the entire surface of the patio. Pay extra attention to any uneven areas or joints that may need additional compaction.
- Check for levelness: After compacting, use a level to check the overall levelness of the patio surface. The goal is to have a flat and even surface, with no noticeable dips or high spots. If any areas are uneven, adjust by adding or removing sand underneath the pavers.
- Re-sweep the surface: Once the patio is compacted and leveled, use a broom to sweep the surface, removing any loose debris or sand. This will give your patio a clean and polished appearance.
Compacting and leveling the surface of your patio is essential for its long-term stability and functionality. It helps prevent settling, shifting, and unevenness, ensuring that your patio will withstand the test of time. Take the time to properly compact and level the surface, as it will greatly contribute to the overall quality and enjoyment of your outdoor space.
Conclusion
Congratulations! You have successfully completed the process of laying patio pavers on sand. By following the steps outlined in this guide, you have transformed your outdoor space into a beautiful and functional patio that you can enjoy for years to come.
From preparing the ground to compacting and leveling the surface, each step was crucial in ensuring a smooth and durable foundation for your patio. By using sand as the base material, you have created a stable and flexible surface that can withstand the elements and withstand the test of time.
Remember, the key to a successful patio installation is careful planning, attention to detail, and taking your time throughout each step. From marking the layout and excavating the area to laying the pavers and filling the gaps, every action contributes to the overall quality and appearance of your patio.
Now that your patio is complete, it’s time to furnish and decorate it according to your personal style and taste. Whether you’re hosting outdoor gatherings, enjoying morning coffee, or simply basking in the beauty of nature, your new patio will provide a luxurious and inviting outdoor space for relaxation and entertainment.
As you enjoy your newly installed patio, remember to perform regular maintenance tasks such as sweeping, cleaning, and reapplying joint sand as needed. This will help keep your patio looking its best and prolong its lifespan.
Thank you for following this guide on how to lay patio pavers on sand. We hope this article has been informative and helpful. Now go out and enjoy your beautiful new patio!
Frequently Asked Questions about How To Lay Patio Pavers On Sand
Was this page helpful?
At Storables.com, we guarantee accurate and reliable information. Our content, validated by Expert Board Contributors, is crafted following stringent Editorial Policies. We're committed to providing you with well-researched, expert-backed insights for all your informational needs.


0 thoughts on “How To Lay Patio Pavers On Sand”