Home>Garden Essentials>How To Grow Clover From Seed
Garden Essentials
How To Grow Clover From Seed
Modified: August 16, 2024
Learn how to grow clover from seed in your garden and enjoy its beautiful blooms. Find step-by-step instructions and expert tips to bring your garden to life.
(Many of the links in this article redirect to a specific reviewed product. Your purchase of these products through affiliate links helps to generate commission for Storables.com, at no extra cost. Learn more)
Introduction
Welcome to the world of gardening! If you’re looking to add a touch of beauty to your garden and enhance its biodiversity, growing clover from seed is a great choice. Clover not only provides vibrant colors and lush foliage, but it also helps improve soil health and attracts beneficial insects. Whether you’re a seasoned gardener or a beginner, this article will guide you through the process of growing clover from seed, step by step.
Clover is a versatile plant that belongs to the legume family. It is known for its nitrogen-fixing capabilities, which means it can convert atmospheric nitrogen into a form that’s beneficial for plants. This natural process helps enrich the soil and reduce the need for nitrogen fertilizers, making clover an eco-friendly choice for your garden.
When choosing the right clover variety, consider the climate and soil conditions in your area. Some common clover varieties include white clover, red clover, and crimson clover. Each variety has unique characteristics and growth habits, so be sure to select one that suits your gardening goals.
To ensure successful growth and establishment of clover, there are several important factors to keep in mind. Proper soil preparation, suitable planting techniques, and regular maintenance all play a role in maximizing the potential of your clover plants. Paying attention to these factors will result in healthy, vibrant, and productive clover plants that will delight both you and your garden visitors.
Before diving into the details, it’s important to note that growing clover from seed requires patience and consistent care. It’s a rewarding process that allows you to witness the transformation of tiny seeds into lush, green plants. So grab your gardening tools and let’s learn how to grow clover from seed!
Key Takeaways:
- Clover is a versatile and eco-friendly plant that adds beauty and enriches soil health. Choose the right variety, prepare the soil, and provide proper care for vibrant and thriving clover plants in your garden.
- Proper watering, fertilizing, and weed control are essential for healthy clover growth. Harvest at the right time and care for your plants post-harvest to ensure continued success in your clover garden.
Read more: How To Grow Okra From Seed
Choosing the Right Clover Variety
When it comes to choosing the right clover variety for your garden, there are a few factors to consider. Each clover variety has unique characteristics, growth habits, and environmental preferences, so it’s important to select one that aligns with your gardening goals and the specific conditions of your area. Here are some popular clover varieties to consider:
- White Clover (Trifolium repens): White clover is a common choice for lawns and works well in a variety of soil types. It produces small white flowers that attract bees and other pollinators. White clover is also known for its ability to spread and create a dense ground cover, making it a great option for filling in bare spots.
- Red Clover (Trifolium pratense): Red clover is a perennial clover variety that thrives in cool-season climates. It features vibrant pink to purple flowers and can reach a height of up to two feet. Red clover performs best in well-draining soil and is often used as a green manure cover crop to improve soil fertility.
- Crimson Clover (Trifolium incarnatum): Crimson clover is an annual clover variety that is known for its eye-catching crimson-red flowers. It is commonly used as a cover crop as it fixes nitrogen in the soil and helps suppress weeds. Crimson clover prefers slightly acidic soil and performs well in both cool-season and warm-season climates.
- Dutch White Clover (Trifolium repens var. sativum): Dutch white clover is a low-growing clover variety that is often used in pasture mixes. It has a creeping growth habit, forming a dense mat of foliage that can tolerate moderate foot traffic. Dutch white clover is an excellent choice for areas with regular grazing or those looking to attract pollinators.
- Alsike Clover (Trifolium hybridum): Alsike clover is a perennial clover variety that is known for its ability to thrive in damp or poorly drained soils. It produces white or pink flowers and is often used in wetland restoration projects. Alsike clover can also withstand colder temperatures compared to other clover varieties.
Before making a selection, consider the specific growing conditions in your garden, such as soil type, sunlight availability, and climate. Some clover varieties perform better in certain conditions, so it’s important to choose one that will thrive in your garden. Additionally, consider your gardening goals. Are you looking for a ground cover that attracts pollinators or a cover crop that improves soil fertility? Understanding your objectives will help you make an informed decision.
Remember, no matter which clover variety you choose, they all offer numerous environmental benefits. They improve soil health, attract beneficial insects, and add a pop of color to your garden. So take some time to research and select the perfect clover variety, and get ready to enjoy the beauty and benefits it brings to your garden!
Important Factors for Growing Clover
When it comes to growing clover successfully, there are several important factors to consider. By paying attention to these factors, you can ensure that your clover plants thrive and provide you with the desired results. Here are some key aspects to keep in mind:
- Soil Preparation: Clover prefers well-draining soil with a pH ranging from 6.0 to 7.0. Before planting, it’s crucial to prepare the soil by removing any existing weeds or grass and loosening it with a garden fork or tiller. Incorporate organic matter like compost or well-rotted manure to improve soil structure and fertility.
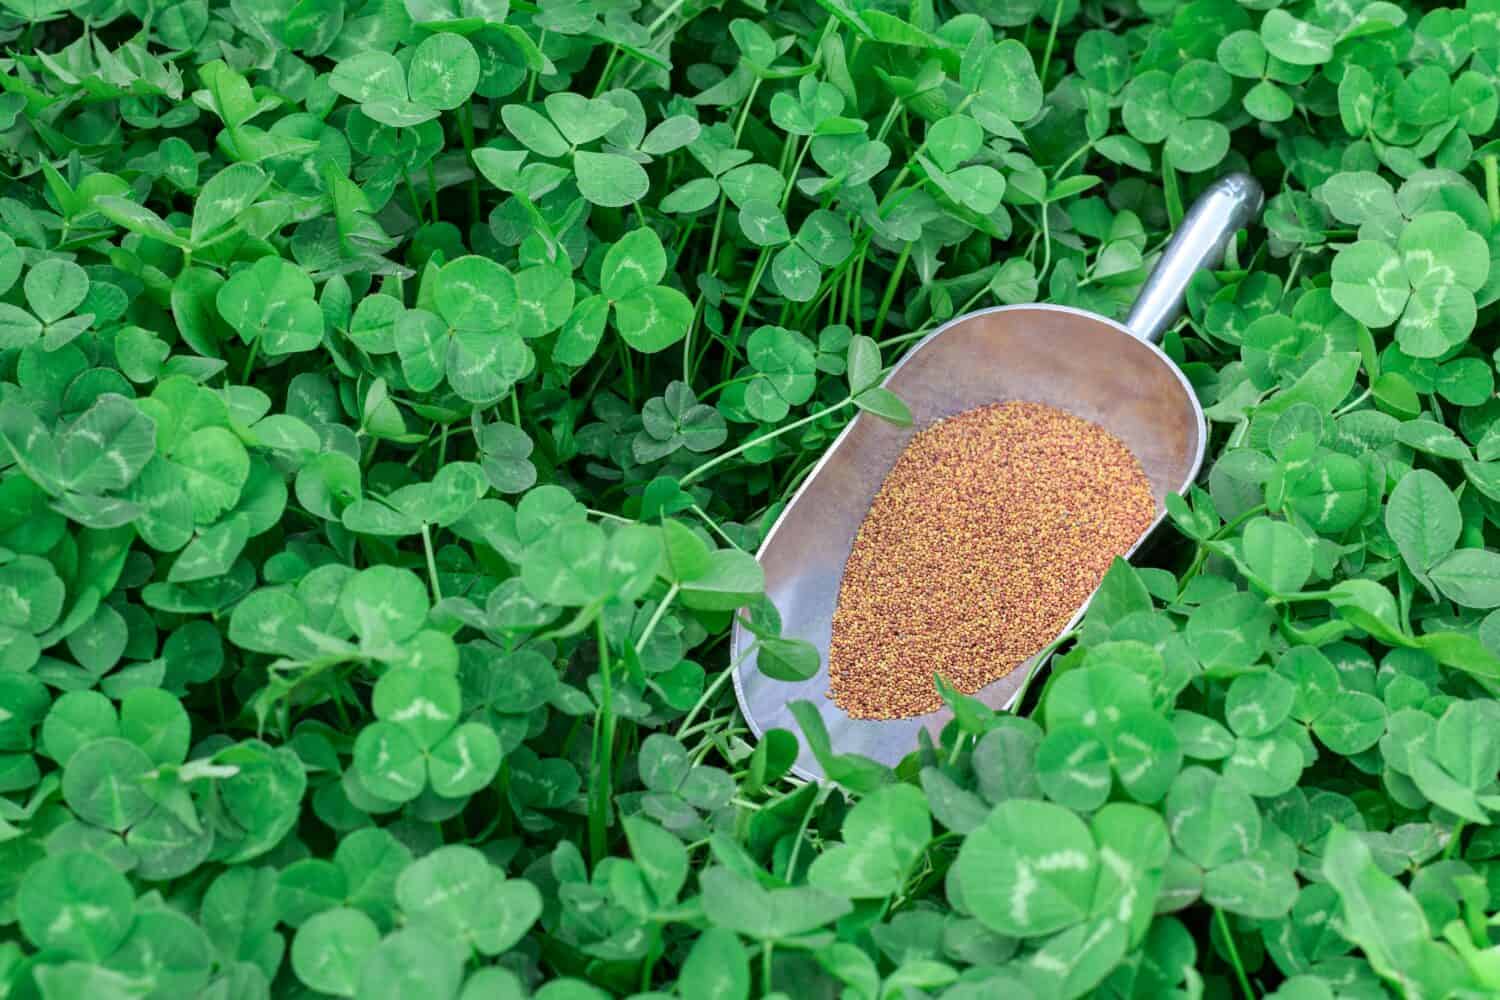
- Seed Quality: Choosing high-quality clover seeds is essential for successful germination and healthy plant growth. Look for certified organic or reputable seed suppliers to ensure that you’re getting viable seeds that are free from contaminants or diseases.
- Planting Time: The optimal time to plant clover seeds depends on your climate and the specific clover variety you’re growing. In general, it’s recommended to plant clover in spring or early fall to take advantage of favorable soil temperatures and moisture conditions for germination.
- Seed Depth and Spacing: Follow the recommended seeding depth and spacing for the specific clover variety you’re planting. As a general guideline, sow the seeds at a depth of ¼ to ½ inch and leave about 6 to 12 inches of space between each seed, depending on the desired density of the plants.
- Watering: Adequate moisture is crucial for seed germination and establishment of young clover plants. After planting, water the seeds gently to keep the soil consistently moist until the plants are well-established. Once the clover is established, it generally requires less water, but be sure to monitor soil moisture levels and provide supplemental irrigation during dry periods.
- Fertilizing: Clover is a nitrogen-fixing plant, meaning it has the ability to convert atmospheric nitrogen into a usable form for itself and surrounding plants. However, if your soil is nutrient deficient, you may consider incorporating organic fertilizers or compost to provide additional nutrients during initial establishment. Avoid using high nitrogen fertilizers, as they can hinder the nitrogen-fixing process.
- Maintenance: Regular maintenance is vital to ensure the health and vitality of your clover plants. This includes monitoring for weeds and promptly removing them to avoid competition for resources. Additionally, regular mowing or trimming can help maintain an even height and prevent the clover from becoming invasive.
By taking these factors into consideration and providing the appropriate care, you will set the stage for successful clover growth and a thriving garden. Remember to adjust your practices based on the specific clover variety and the unique conditions of your garden. With patience and diligence, you’ll soon enjoy the beauty and benefits that clover brings to your outdoor space.
Preparing the Soil
One of the crucial steps in growing healthy clover plants is preparing the soil properly. Soil preparation sets the foundation for optimal root development, nutrient absorption, and overall plant growth. Here are some steps to follow when preparing the soil for planting clover:
- Clear the Area: Start by clearing the area of any weeds, grass, or debris. Remove any large rocks, roots, or other obstacles that may interfere with root growth.
- Loosen the Soil: Use a garden fork or tiller to loosen the soil to a depth of at least 6 inches. This will help break up compacted soil and improve drainage. Avoid over-tilling, as it can disrupt the soil structure and lead to erosion.
- Test the Soil: Conduct a soil test to determine its pH level and nutrient content. Although clover is adaptable to a range of soil conditions, it prefers a slightly acidic to neutral pH of 6.0 to 7.0. The soil test will also indicate any deficiencies in major nutrients like nitrogen, phosphorus, or potassium. Based on the test results, you can make informed decisions on soil amendments.
- Add Organic Matter: Incorporate organic matter into the soil to improve its structure and fertility. Compost, well-rotted manure, or leaf mold are excellent choices. Spread a layer of organic matter over the soil surface and use a garden fork or tiller to mix it thoroughly into the top few inches of soil.
- Adjust Soil pH: If the soil pH is too acidic or alkaline, you can adjust it by adding soil amendments. Lime is commonly used to raise pH, while sulfur or peat moss can be added to lower pH. Follow the recommendations of the soil test or consult a gardening expert for specific guidance on the amount of amendment needed.
- Level and Rake: After incorporating organic matter and adjusting the soil pH if necessary, use a rake to level the soil surface. Smooth out any uneven areas and remove large clumps or stones. This will provide an even planting bed for your clover seeds.
Remember, proper soil preparation is essential for creating favorable growing conditions for your clover plants. By clearing the area, loosening the soil, incorporating organic matter, and adjusting the pH if needed, you will provide the ideal foundation for your clover seeds to germinate and establish roots. Don’t rush this step, as it will significantly impact the success of your clover garden. Take the time to properly prepare the soil, and you’ll be rewarded with healthy, vibrant clover plants that will thrive in your garden.
Planting Clover Seeds
Now that you’ve prepared the soil, it’s time to move on to the exciting step of planting your clover seeds. Proper planting techniques are crucial for the successful germination and establishment of your clover plants. Here’s a step-by-step guide to planting clover seeds:
- Timing: Choose the appropriate time to plant clover seeds based on your climate and the specific variety you’re growing. In general, spring and early fall are the best seasons for planting clover. Aim for a time when the soil is moist and the temperature is moderate, providing optimal conditions for seed germination.
- Seed Distribution: Decide how you want to distribute the seeds. You can either broadcast the seeds by hand or use a spreader for larger areas. Broadcasting involves scattering the seeds evenly across the planting area by hand. If using a spreader, adjust it to the appropriate setting to ensure even seed distribution.
- Seeding Rate: Follow the recommended seeding rate for the specific clover variety you’re planting. This information can usually be found on the seed packaging or obtained from your seed supplier. The seeding rate varies depending on the desired density of plants and the specific growing conditions.
- Seed Depth: Sow the clover seeds at the appropriate depth for optimal germination. As a general guideline, cover the seeds with about ¼ to ½ inch of soil. Too much depth can inhibit germination, while too little depth may expose the seeds to unfavorable conditions.
- Raking and Gentle Pressing: After seeding, use a rake to gently rake the soil surface. This will lightly cover the seeds with a thin layer of soil, helping to protect them and maintain moisture. You can also use the back of the rake or your hands to lightly press the soil, ensuring good seed-to-soil contact.
- Watering: After planting, water the area gently to ensure that the soil is moist. This initial watering will help kick-start the germination process. Be careful not to overwater, as excessive moisture can lead to seed rot or other issues. Monitor the soil moisture throughout the germination period and provide supplemental irrigation as needed.
- Germination and Establishment: Germination typically takes around 7 to 14 days, depending on the clover variety and growing conditions. During this period, it’s important to keep the soil consistently moist. Once the seedlings emerge, gradually reduce watering frequency while ensuring the soil doesn’t dry out completely. This will encourage the roots to grow deeper into the soil for better establishment.
Remember to follow the specific guidelines for the clover variety you’re planting, as some varieties may have unique requirements. Additionally, monitor the planting area regularly for weed growth and remove any weeds promptly to prevent them from competing with your clover plants for resources.
With proper planting techniques and a little care, your clover seeds will soon transform into healthy, thriving plants. Enjoy the process of watching your clover garden take shape and prepare for the beautiful blooms and beneficial insects that will grace your outdoor space.
Tip: Before planting clover seeds, prepare the soil by removing any weeds and loosening the top layer. Then, scatter the seeds evenly and lightly cover them with soil. Water the area regularly to keep the soil moist for germination.
Read more: How To Grow A Tree From A Seed
Watering and Fertilizing
Proper watering and fertilizing are essential for the growth and overall health of your clover plants. By providing adequate moisture and nutrients, you can ensure that your clover plants thrive and produce lush foliage and vibrant blooms. Here are some tips for watering and fertilizing your clover:
Watering:
Watering plays a crucial role in the germination process and the establishment of young clover plants. Here are some guidelines for watering your clover:
- After planting the clover seeds, water the area gently to keep the soil consistently moist until the seeds germinate. This will help the seeds to sprout and establish roots.
- During the early growth stage, it’s important to monitor soil moisture regularly and provide supplemental irrigation as needed. Aim to keep the soil moist but not waterlogged, as excessive moisture can lead to seed rot or fungal diseases.
- Once the clover plants are well established, they generally require less water. However, it’s essential to monitor soil moisture and provide supplementary irrigation during dry periods to prevent dehydration.
- Consider using a drip irrigation system or a soaker hose to deliver water directly to the base of the plants. This helps minimize water waste and ensures that the moisture reaches the root zone efficiently.
Fertilizing:
Clover is a nitrogen-fixing plant, meaning it has the ability to convert atmospheric nitrogen into a usable form for itself and surrounding plants. However, if your soil is nutrient-deficient, you may consider fertilizing to provide additional nutrients during the initial establishment phase. Here are some considerations for fertilizing clover:
- Avoid using high nitrogen fertilizers on clover plants, as excessive nitrogen can inhibit the natural nitrogen-fixing process. Instead, opt for organic fertilizers like compost, well-rotted manure, or a balanced slow-release fertilizer.
- Incorporate organic matter into the soil during the soil preparation stage, as this can provide a slow release of nutrients for the clover plants over time.
- If you notice signs of nutrient deficiencies, such as yellowing leaves or stunted growth, a side dressing of compost or a light application of a balanced fertilizer may be beneficial. Always follow the recommended application rates and instructions provided on the fertilizer packaging.
- Regularly monitor the health of your clover plants and observe any changes in growth or foliage color. This will help you identify if additional nutrient supplementation is necessary.
Remember, clover plants are relatively low-maintenance and often do not require heavy fertilization. Monitoring soil moisture and providing adequate hydration, along with incorporating organic matter, should support healthy growth and nitrogen fixation. By following these watering and fertilizing guidelines, you’ll provide the optimal conditions for your clover plants to flourish and create a vibrant and attractive garden area.
Weed Control
Weeds can compete with your clover plants for nutrients, water, and space, hindering their growth and overall health. Implementing effective weed control measures is crucial for ensuring the success of your clover garden. Here are some strategies for effectively managing weeds:
Mulching:
Applying a layer of organic mulch around your clover plants helps suppress weed growth by blocking sunlight and preventing weed seeds from germinating. Organic materials such as straw, wood chips, or shredded leaves make excellent mulch options. Apply a layer of mulch around your clover plants, keeping it a few inches away from the stems to prevent moisture buildup and pest issues.
Hand Pulling:
Regularly inspect your clover patch and pull out any visible weeds by hand. Be sure to remove the entire weed, including the roots, to prevent regrowth. This method is best suited for small infestations or areas where mechanical or chemical intervention is not feasible. It’s important to be thorough and diligent to prevent weeds from spreading and competing with your clover plants.
Mowing or Trimming:
Regularly mowing or trimming your clover patch can help keep weed populations in check. Set your mower to a height that allows the clover plants to thrive while keeping the grass and weed species low. This helps prevent weed seed production and maintains an even height across the area. Mulching or composting the clippings can also return nutrients to the soil.
Preventive Measures:
Take preventive measures to minimize weed growth in your clover garden. These include:
- Ensuring proper soil preparation and planting dense clover stands can help reduce available space for weeds to establish.
- Regularly monitoring the area for weed seedlings and promptly removing them before they can mature and produce seeds.
- Avoiding disturbances to the soil, as this can bring buried weed seeds to the surface and promote germination.
- Using weed-free mulch, compost, or planting materials to minimize introducing new weed seeds into the garden.
Chemical Control:
If weed infestations become severe or other control methods are unsuccessful, you may consider using herbicides as a last resort. Choose a selective herbicide specifically formulated for broadleaf weed control in clover. Follow the manufacturer’s instructions carefully, ensuring that the herbicide is safe to use on clover and won’t harm desirable plants or pollinators in the garden. Keep in mind that chemical control should be used sparingly and only when necessary.
Remember, maintaining a healthy and vigorous clover stand is one of the best defenses against weeds. By implementing a combination of preventive measures, regular maintenance, and proper cultural practices, you can effectively control weeds and create an inviting environment for your clover to thrive.
Disease and Pest Management
Like any other plants, clover is susceptible to certain diseases and pests that can impact its growth and overall health. Implementing proper disease and pest management practices is essential for maintaining a thriving clover garden. Here are some strategies to help you effectively manage common diseases and pests that can affect clover plants:
Disease Management:
Preventing and managing diseases in your clover garden is essential to ensure the health and longevity of your plants. Here are some practices to consider:
- Plant Disease-Resistant Varieties: Selecting disease-resistant clover varieties can greatly reduce the risk of infection. Look for varieties that are known for their resistance to common clover diseases in your area.
- Proper Spacing: Allow adequate spacing between clover plants to promote good air circulation. Dense and overcrowded plantings can create a favorable environment for disease development.
- Clean Gardening Practices: Practice good garden hygiene by removing fallen debris and decaying plant material, as they can harbor disease-causing organisms. Regularly clean and disinfect your gardening tools to prevent the spread of diseases.
- Timely Watering: Avoid overhead watering, as wet leaves can promote fungal diseases. Water at the base of the plants early in the day to allow foliage to dry before evening.
- Fungicides: If you observe signs of fungal diseases, such as leaf spots or powdery mildew, consider using organic fungicides to help manage the spread. Follow the manufacturer’s instructions and avoid excessive use.
Pest Management:
Pests can pose a threat to the health and well-being of your clover plants. Here are some strategies to keep pests at bay:
- Inspect Regularly: Regularly check your clover plants for signs of pest infestation. Look for chewed leaves, holes, or wilting, and take appropriate action if necessary.
- Handpicking: For small pest populations, manually remove pests from your plants, such as aphids or caterpillars, by handpicking or using a jet of water to dislodge them.
- Beneficial Insects: Encourage the presence of beneficial insects in your garden, such as ladybugs or lacewings, which feed on pests that attack clover plants. Planting companion flowers and creating habitat for beneficial insects can help attract them to your garden.
- Organic Pest Control: Utilize organic pest control methods like neem oil or insecticidal soaps if pest populations become a significant problem. Be sure to follow the instructions on the product label for effective and safe use.
- Row Covers: Consider using row covers to physically protect your clover plants from pests like beetles or caterpillars. This can be particularly useful during vulnerable stages of plant growth.
Remember, maintaining a healthy and balanced garden ecosystem is key to preventing and managing diseases and pests in your clover plants. By implementing these strategies and regularly monitoring your garden, you can address issues promptly and ensure the robust growth and longevity of your clover plants.
Harvesting CloverHarvesting clover is a rewarding and enjoyable process that not only provides you with a bountiful yield but also encourages the growth of new foliage and blooms. The timing and method of harvesting clover can vary depending on your intended use, whether it be for forage, hay, or simply as a cover crop. Here are some guidelines to help you harvest your clover effectively:
Timing:
The ideal time to harvest clover depends on your specific goals and the variety of clover you’re growing. Here are some general considerations:
- For Hay: If you’re harvesting clover to make hay, it’s crucial to time your harvest when the plants are at their peak of bloom. This ensures maximum nutrient content and quality. Harvesting at the early flowering stage promotes high protein levels, while waiting until the late flowering stage increases fiber content.
- For Forage: For grazing or animal forage, you can harvest clover when it reaches a height of around 6 to 8 inches. This allows the plants to recover quickly and maintain healthy growth.
- For Cover Crop: If using clover as a cover crop, you may choose to terminate the plants by mowing or tilling them into the soil before flowering. This provides green manure and adds organic matter to the soil.
Harvesting Methods:
The specific method of harvesting clover depends on your preferred use and the scale of your operation. Here are a few common methods:
- Hand Harvesting: For smaller areas or home gardens, you can hand-harvest clover by cutting the stems at the appropriate height with a pair of gardening shears or a sharp knife. This method allows for selective harvesting and ensures that the remaining plants continue to grow and flower.
- Mechanical Harvesting: On larger scales, mechanical harvesters, such as sickle bar mowers or hay balers, can be used to cut and collect the clover plants. This method is efficient and suitable for hay production or larger farming operations, but it may result in the removal of the entire plant.
- Strip Grazing: If using clover as a forage, strip grazing can be employed. Divide your clover patch into smaller sections and gradually move livestock across the different sections, allowing them to graze the clover at the desired height. This method ensures continuous regrowth and extends the grazing period.
Post-Harvest Care:
After harvesting, consider the following steps to promote regrowth and overall plant health:
- Leave Residual Vegetation: When harvesting, try to leave a residual height of at least 4 to 6 inches. This allows the clover plants to quickly recover and continue growing.
- Implement Good Grazing Practices: If using clover for grazing, practice rotational grazing and provide adequate rest periods to allow the plants to replenish nutrients and recover.
- Monitor and Fertilize: Regularly monitor your clover stand for signs of nutrient deficiency. If necessary, apply organic fertilizers or compost to provide additional nutrients for optimal regrowth.
Remember, proper timing and harvesting techniques are crucial for maximizing the yield and longevity of your clover plants. By following these guidelines and providing post-harvest care, you can ensure healthy regrowth and continued success in your clover garden.
Read more: How To Grow Zinnias From Seed
Conclusion
Growing clover from seed is a rewarding and worthwhile endeavor that can add beauty, biodiversity, and numerous benefits to your garden. Whether you’re attracted to clover for its vibrant colors, nitrogen-fixing abilities, or its value as forage or hay, following the proper steps for cultivation can help you achieve success.
From choosing the right clover variety to preparing the soil, planting the seeds, and providing adequate care, each step plays a crucial role in the growth and development of your clover plants. By paying attention to factors such as soil fertility, watering, weed control, disease and pest management, and proper harvesting techniques, you can create an environment that promotes healthy, robust clover growth.
Remember that growing clover requires patience and consistent care. It’s a journey that allows you to witness the transformation of tiny seeds into lush, green plants, all while contributing to the sustainability and beauty of your garden.
So roll up your sleeves, grab your gardening tools, and embark on the adventure of growing clover from seed. Embrace the joys and challenges along the way, and enjoy the vibrant blooms, the visits from beneficial insects, and the positive impact on your garden’s ecosystem.
With the knowledge gained from this guide and your own curious and nurturing spirit, you’ll soon be cultivating a garden filled with the wonders of clover. Happy gardening!
Frequently Asked Questions about How To Grow Clover From Seed
Was this page helpful?
At Storables.com, we guarantee accurate and reliable information. Our content, validated by Expert Board Contributors, is crafted following stringent Editorial Policies. We're committed to providing you with well-researched, expert-backed insights for all your informational needs.


0 thoughts on “How To Grow Clover From Seed”