Home>Garden Essentials>How To Install Turf On Concrete
Garden Essentials
How To Install Turf On Concrete
Modified: March 7, 2024
Learn how to install garden turf on concrete with our step-by-step guide. Create a lush green space on your concrete surface effortlessly.
(Many of the links in this article redirect to a specific reviewed product. Your purchase of these products through affiliate links helps to generate commission for Storables.com, at no extra cost. Learn more)
Introduction
Are you tired of looking at a dull and lifeless concrete surface in your garden or backyard? Do you dream of having a lush, green lawn but don’t want to deal with the hassle of soil preparation and maintenance? Installing turf on concrete might be the perfect solution for you!
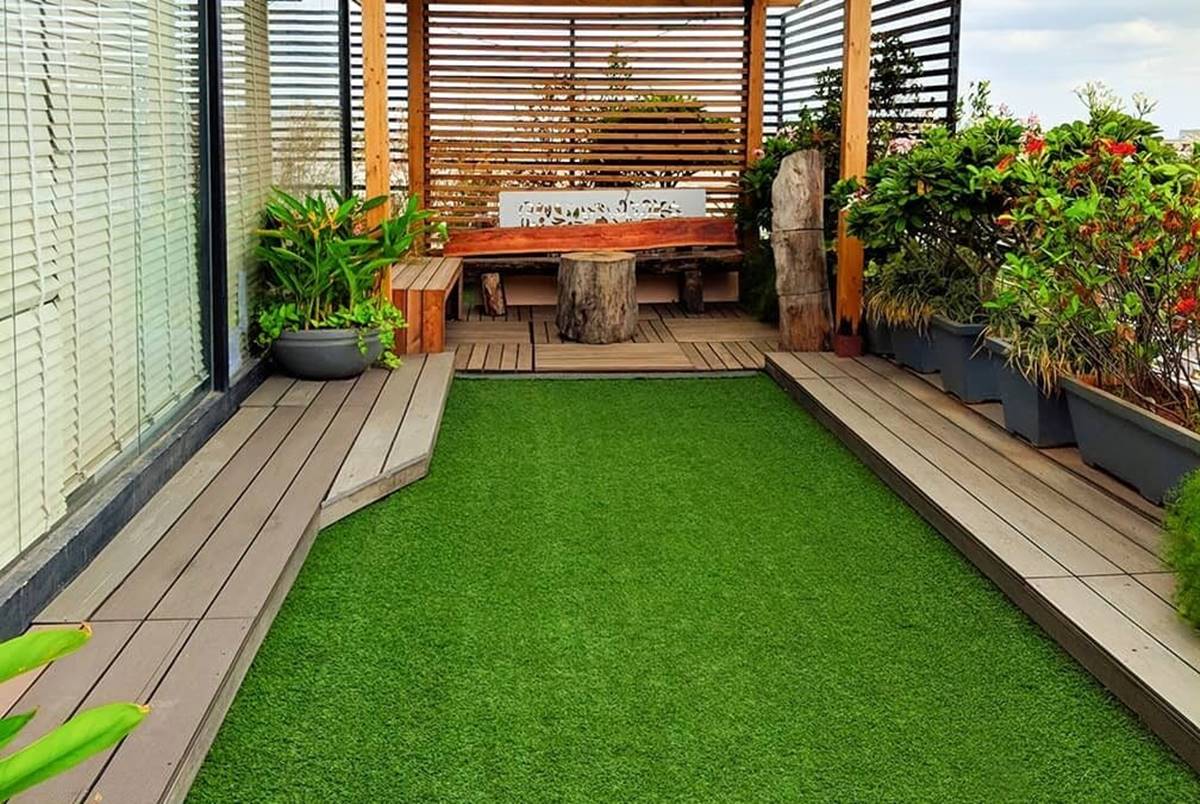
When it comes to creating a vibrant outdoor space, turf provides numerous benefits. It adds beauty and softness to any concrete surface, transforming it into an inviting area for relaxation and enjoyment. Whether you have a small patio, a rooftop terrace, or a larger concrete area, installing turf can completely change the look and feel of your space.
In this article, we will guide you through the process of installing turf on concrete, step by step. You don’t need to be an expert gardener or have extensive landscaping experience to accomplish this project. With a bit of preparation and the right materials, you can have a stunning artificial grass area that will enhance your outdoor living space.
So, let’s get started and give your concrete surface a makeover with a lush and green turf!
Key Takeaways:
- Transform your concrete space into a lush oasis by following simple steps to install turf. Enjoy a vibrant and inviting outdoor area without the hassle of soil preparation and extensive maintenance.
- Enhance the appearance and longevity of your turf by applying infill, using a power broom, and regular maintenance. Keep your turf clean, address stains promptly, and replenish infill as needed for a beautiful and resilient outdoor space.
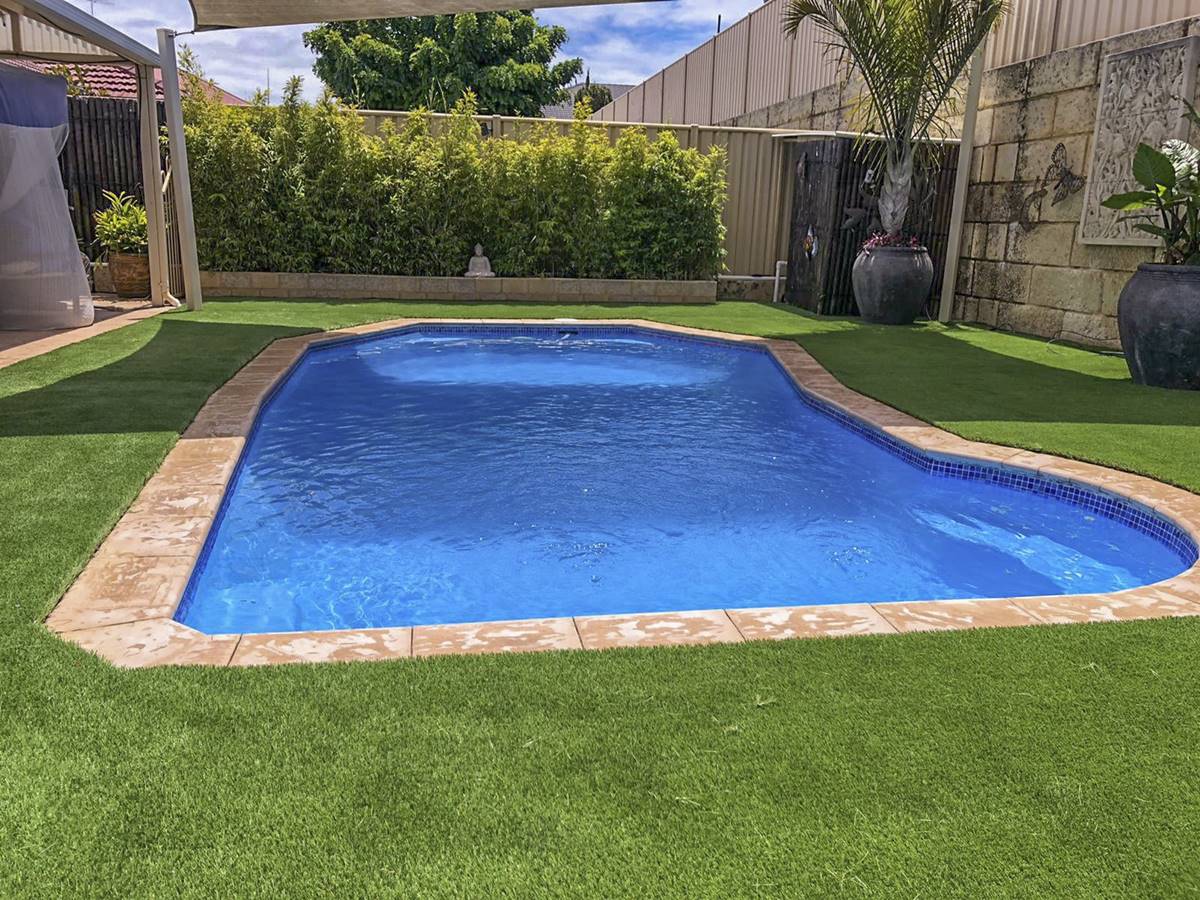
Read more: How To Install Lawn Turf On A Concrete Pool
Step 1: Preparing the Concrete Surface
Before installing the turf, it is essential to properly prepare the concrete surface. This step ensures a clean and smooth base, allowing for optimal installation and longevity of the turf.
The first task is to thoroughly clean the concrete. Use a broom or vacuum to remove any loose dirt, leaves, or debris. Pay close attention to corners, edges, and cracks, as these areas tend to accumulate more dirt. If there are stubborn stains or grease spots, use a mild detergent or a concrete cleaner to remove them. Rinse the surface with water and allow it to dry completely.
Next, inspect the concrete for any existing obstacles that may interfere with the installation of the turf. Look for cracks, uneven areas, or raised edges. If there are cracks wider than a quarter inch, it is recommended to fill them with a concrete patching compound. For uneven areas, use a level to determine the extent of the problem. If necessary, consider grinding down any high spots or using a self-leveling compound to create a smooth surface.
By thoroughly cleaning the concrete and addressing any existing obstacles, you will create a solid foundation for the turf installation. This step ensures a more seamless and durable end result.
Step 2: Applying a Weed Barrier
Installing a weed barrier is an important step to prevent unwanted weeds from growing through the turf and compromising its appearance. It acts as a barrier between the concrete surface and the turf, preventing weed seeds from taking hold and thriving.
When choosing a weed barrier, opt for a durable and permeable material that allows water to drain effectively. Non-woven geotextile fabric or landscape fabric are commonly used for this purpose. These materials are available in various thicknesses and can be found at most garden or landscaping supply stores.
Before applying the weed barrier, measure the dimensions of the concrete area and cut the fabric accordingly. Leave a few extra inches on each side to ensure full coverage. Lay the cut pieces on the concrete surface, overlapping the edges by a few inches to create a seamless barrier.
Secure the weed barrier in place using landscape staples or nails. Space them evenly along the edges and throughout the surface, ensuring a secure and taut fit. Take care not to damage the barrier or the concrete while installing the staples or nails.
In areas where there are drainage holes or openings on the concrete, cut corresponding holes in the weed barrier. This allows for proper water drainage and prevents any accumulation of water beneath the turf.
By applying a weed barrier, you create an additional layer of protection for your turf, ensuring a weed-free and low-maintenance surface.
Step 3: Installing a Drainage System (optional)
While not always necessary, installing a drainage system can benefit the longevity and performance of your turf on a concrete surface. Assessing the need for a drainage system depends on the location of the concrete area and its surrounding environment.
If the concrete surface is entirely exposed to rainwater or irrigation, a drainage system is highly recommended. It helps prevent water from pooling on the turf, which can lead to issues such as mold, mildew, and long-term damage. Additionally, a drainage system ensures that water flows away from the concrete, preventing saturation and potential structural issues.
Before installing the drainage system, evaluate the slope of the concrete surface. If it is already inclined or has a downward slope, water will naturally flow away. In such cases, a drainage system may not be necessary.
If you determine that a drainage system is needed, there are a few methods you can utilize. One common approach is to drill small drainage holes in the concrete at regular intervals. These holes should be angled to ensure proper water flow. Alternatively, you can install a French drain system by digging a trench along the perimeter of the concrete and filling it with drainage gravel or pipe.
Consult with a professional landscaper or drainage specialist to determine the most suitable drainage system for your specific situation. They can assess the site, soil conditions, and other factors to provide expert advice on the best approach.
Installing a drainage system, when necessary, helps maintain the health and durability of your turf, ensuring it remains lush and green for years to come.
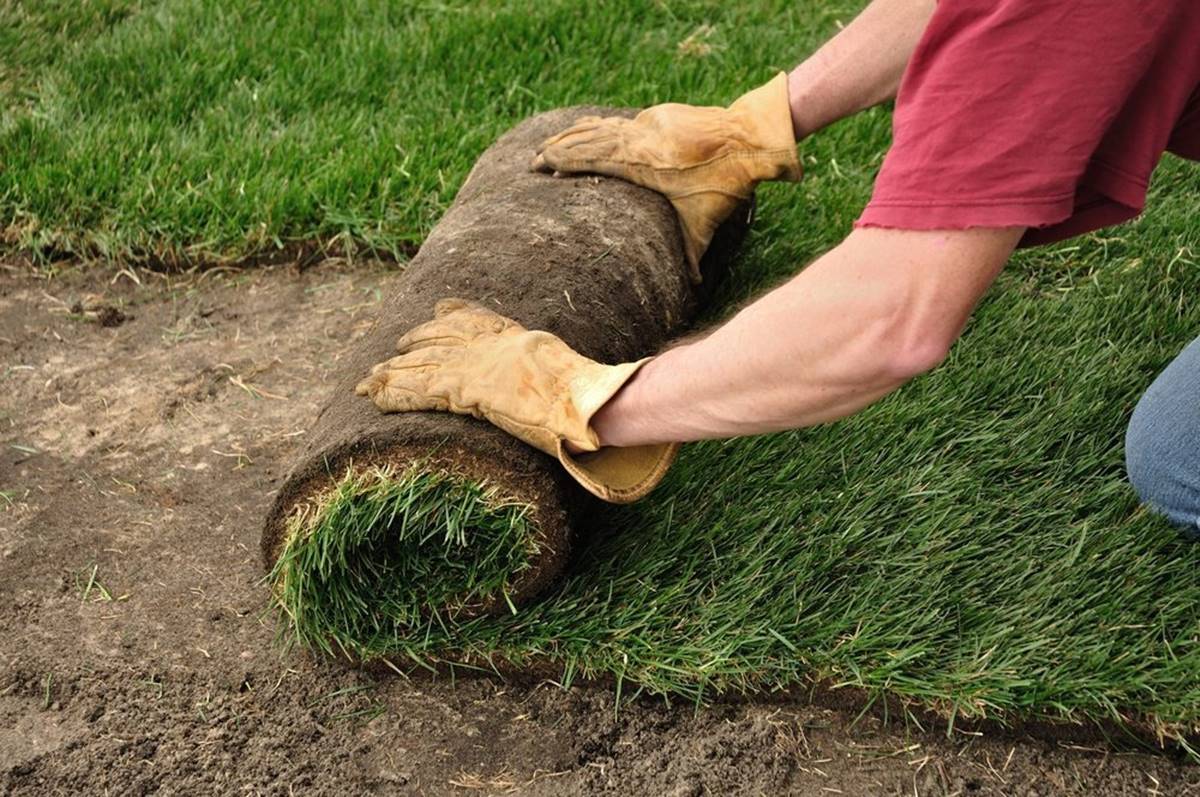
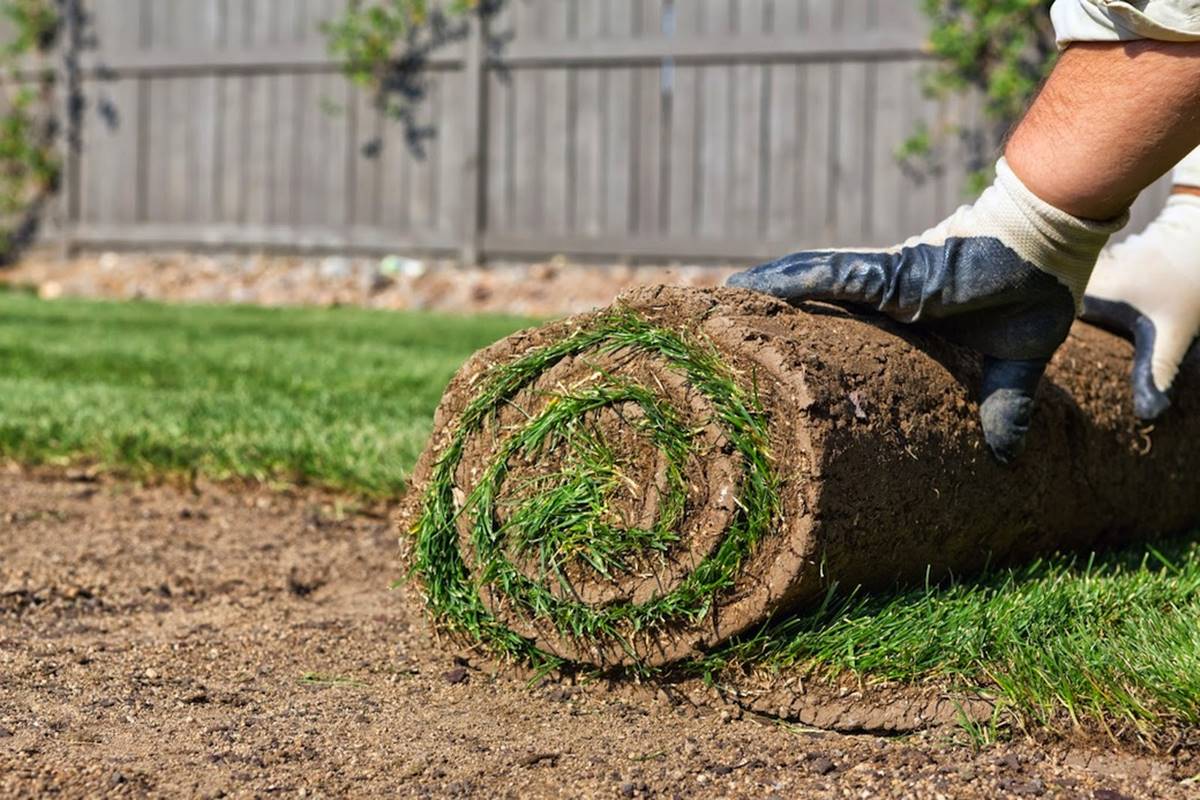
Step 4: Preparing the Turf
Before you can install the turf on the concrete surface, it is important to properly prepare the turf itself. This involves measuring and cutting the turf to fit the dimensions of the concrete area, as well as allowing the turf to acclimate to its new environment.
Start by measuring the length and width of the concrete area. Note these measurements and transfer them onto the back of the turf using a marker or chalk. It is recommended to add a few extra inches to each side to ensure a snug fit and allow for any necessary adjustments during installation.
Once the dimensions are marked, use a sharp utility knife or turf cutter to cut the turf along the marked lines. Take care to cut cleanly and smoothly, ensuring straight edges. It is essential to use a sharp blade to prevent fraying or tearing of the turf fibers. Repeat this process for all sides of the turf until you have the desired shape and size.
After cutting, allow the turf to acclimate to its new surroundings. Lay the pieces of turf flat in a shaded area or on a smooth surface, allowing them to relax and adjust to the temperature and humidity for at least an hour. This step helps the turf fibers regain their resilience and shape before installation.
During the acclimation process, inspect the turf for any defects or imperfections. Look for any uneven seams, loose threads, or damaged areas. If you notice any issues, contact the supplier or manufacturer for assistance. It is important to address any concerns before installing the turf to ensure a quality end result.
By properly measuring, cutting, and acclimating the turf, you set the stage for a seamless and well-fitted installation on the concrete surface. This step ensures a professional-looking outcome that enhances the overall aesthetic of your outdoor space.
Read more: How To Lay Astro Turf On Concrete
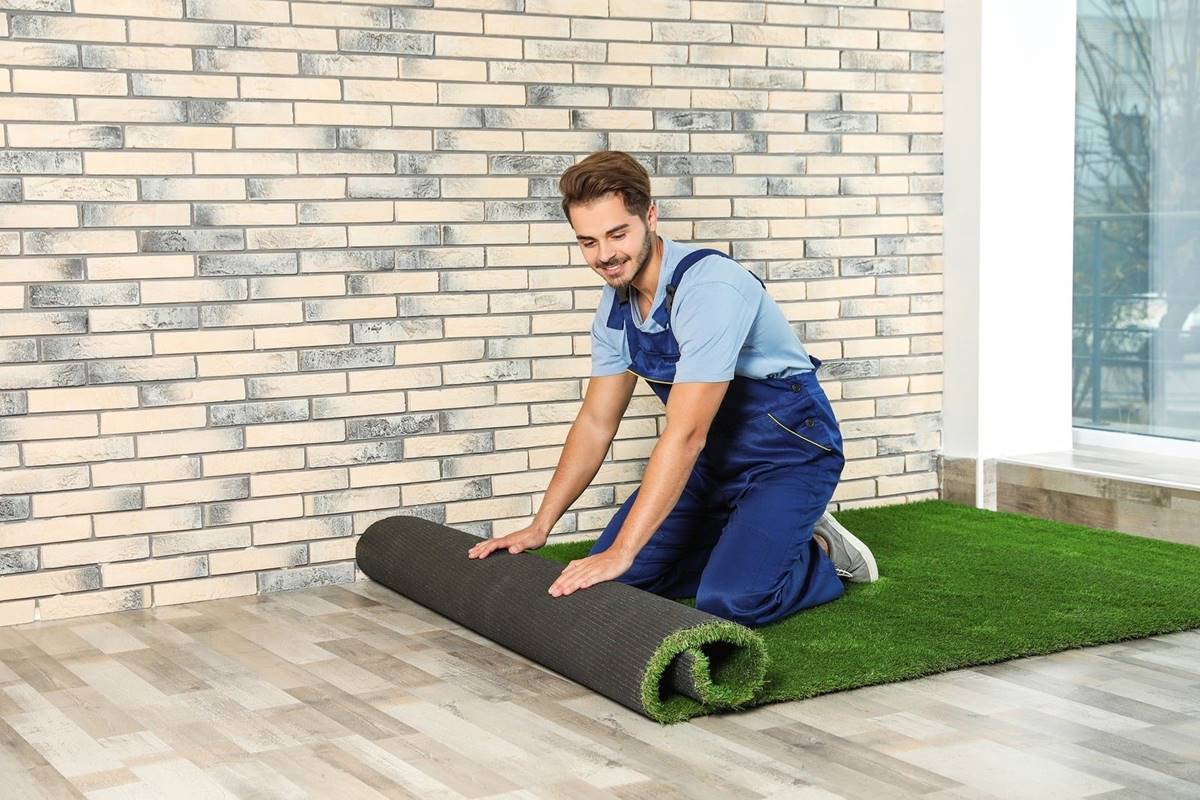
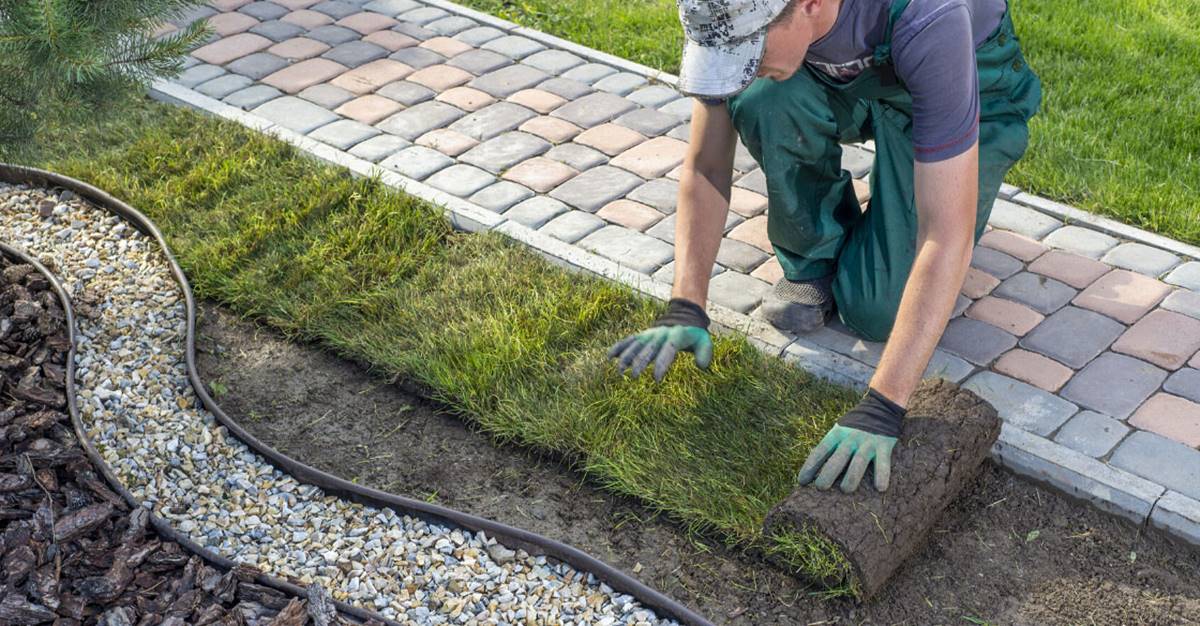
Step 5: Installing the Turf
Now that you have prepared the turf and the concrete surface, it’s time to install the turf onto the concrete. Follow these steps to ensure a smooth and secure installation.
Begin by rolling out the turf onto the concrete surface. Start at one end and work your way across, ensuring that the turf is aligned with the edges of the concrete area. Gently unfold the turf, being careful not to drag or stretch it excessively. Take your time to ensure that the turf is flat and even as you lay it down.
Once the turf is in place, secure the edges by using landscape spikes or nails. Place the spikes or nails approximately 6 to 8 inches apart along the perimeter of the turf, making sure they penetrate through the turf and into the concrete. This helps to anchor the turf and keep it in place, especially during periods of heavy foot traffic or strong winds.
As you secure the edges, make sure to pull the turf slightly taut, but avoid stretching it too much, as this can cause the turf to buckle or warp over time. Carefully smooth out any wrinkles or folds in the turf as you go along, ensuring a clean and seamless appearance.
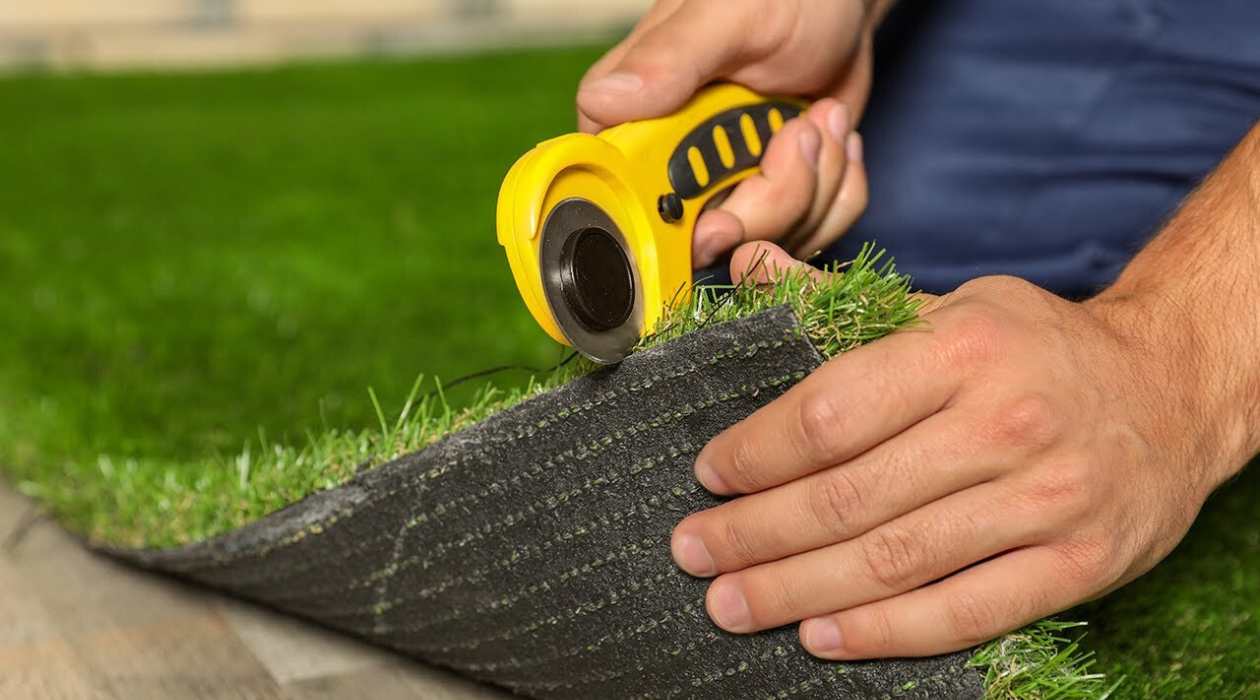
If you are installing multiple sections of turf, overlap the edges by a few inches to create a seamless transition. Use a sharp utility knife or turf cutter to trim any excess turf and create smooth edges where the sections meet. Make sure that the seams are as tight as possible to maintain a natural and uniform look.
Throughout the installation process, periodically step back and assess the overall appearance of the turf. Adjust and make any necessary corrections to ensure that the turf is well-positioned and visually appealing.
By rolling out the turf and securing the edges, you create a solid foundation for a professional-looking installation on the concrete surface. This step sets the stage for the final stages of the process, making your outdoor space more inviting and enjoyable.
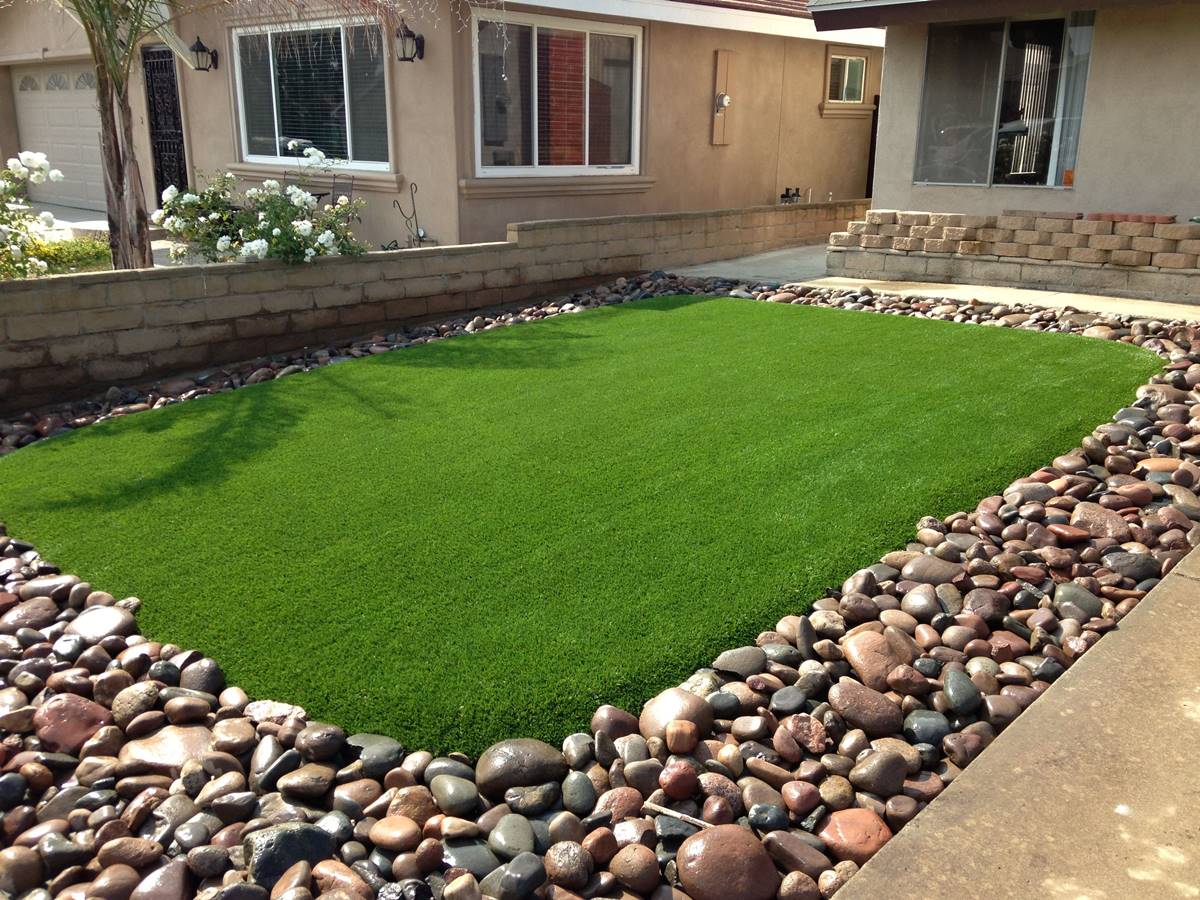
Before installing turf on concrete, make sure the surface is clean and level. Use a turf adhesive to secure the turf in place, and use a power broom to brush the turf fibers upright for a natural look.
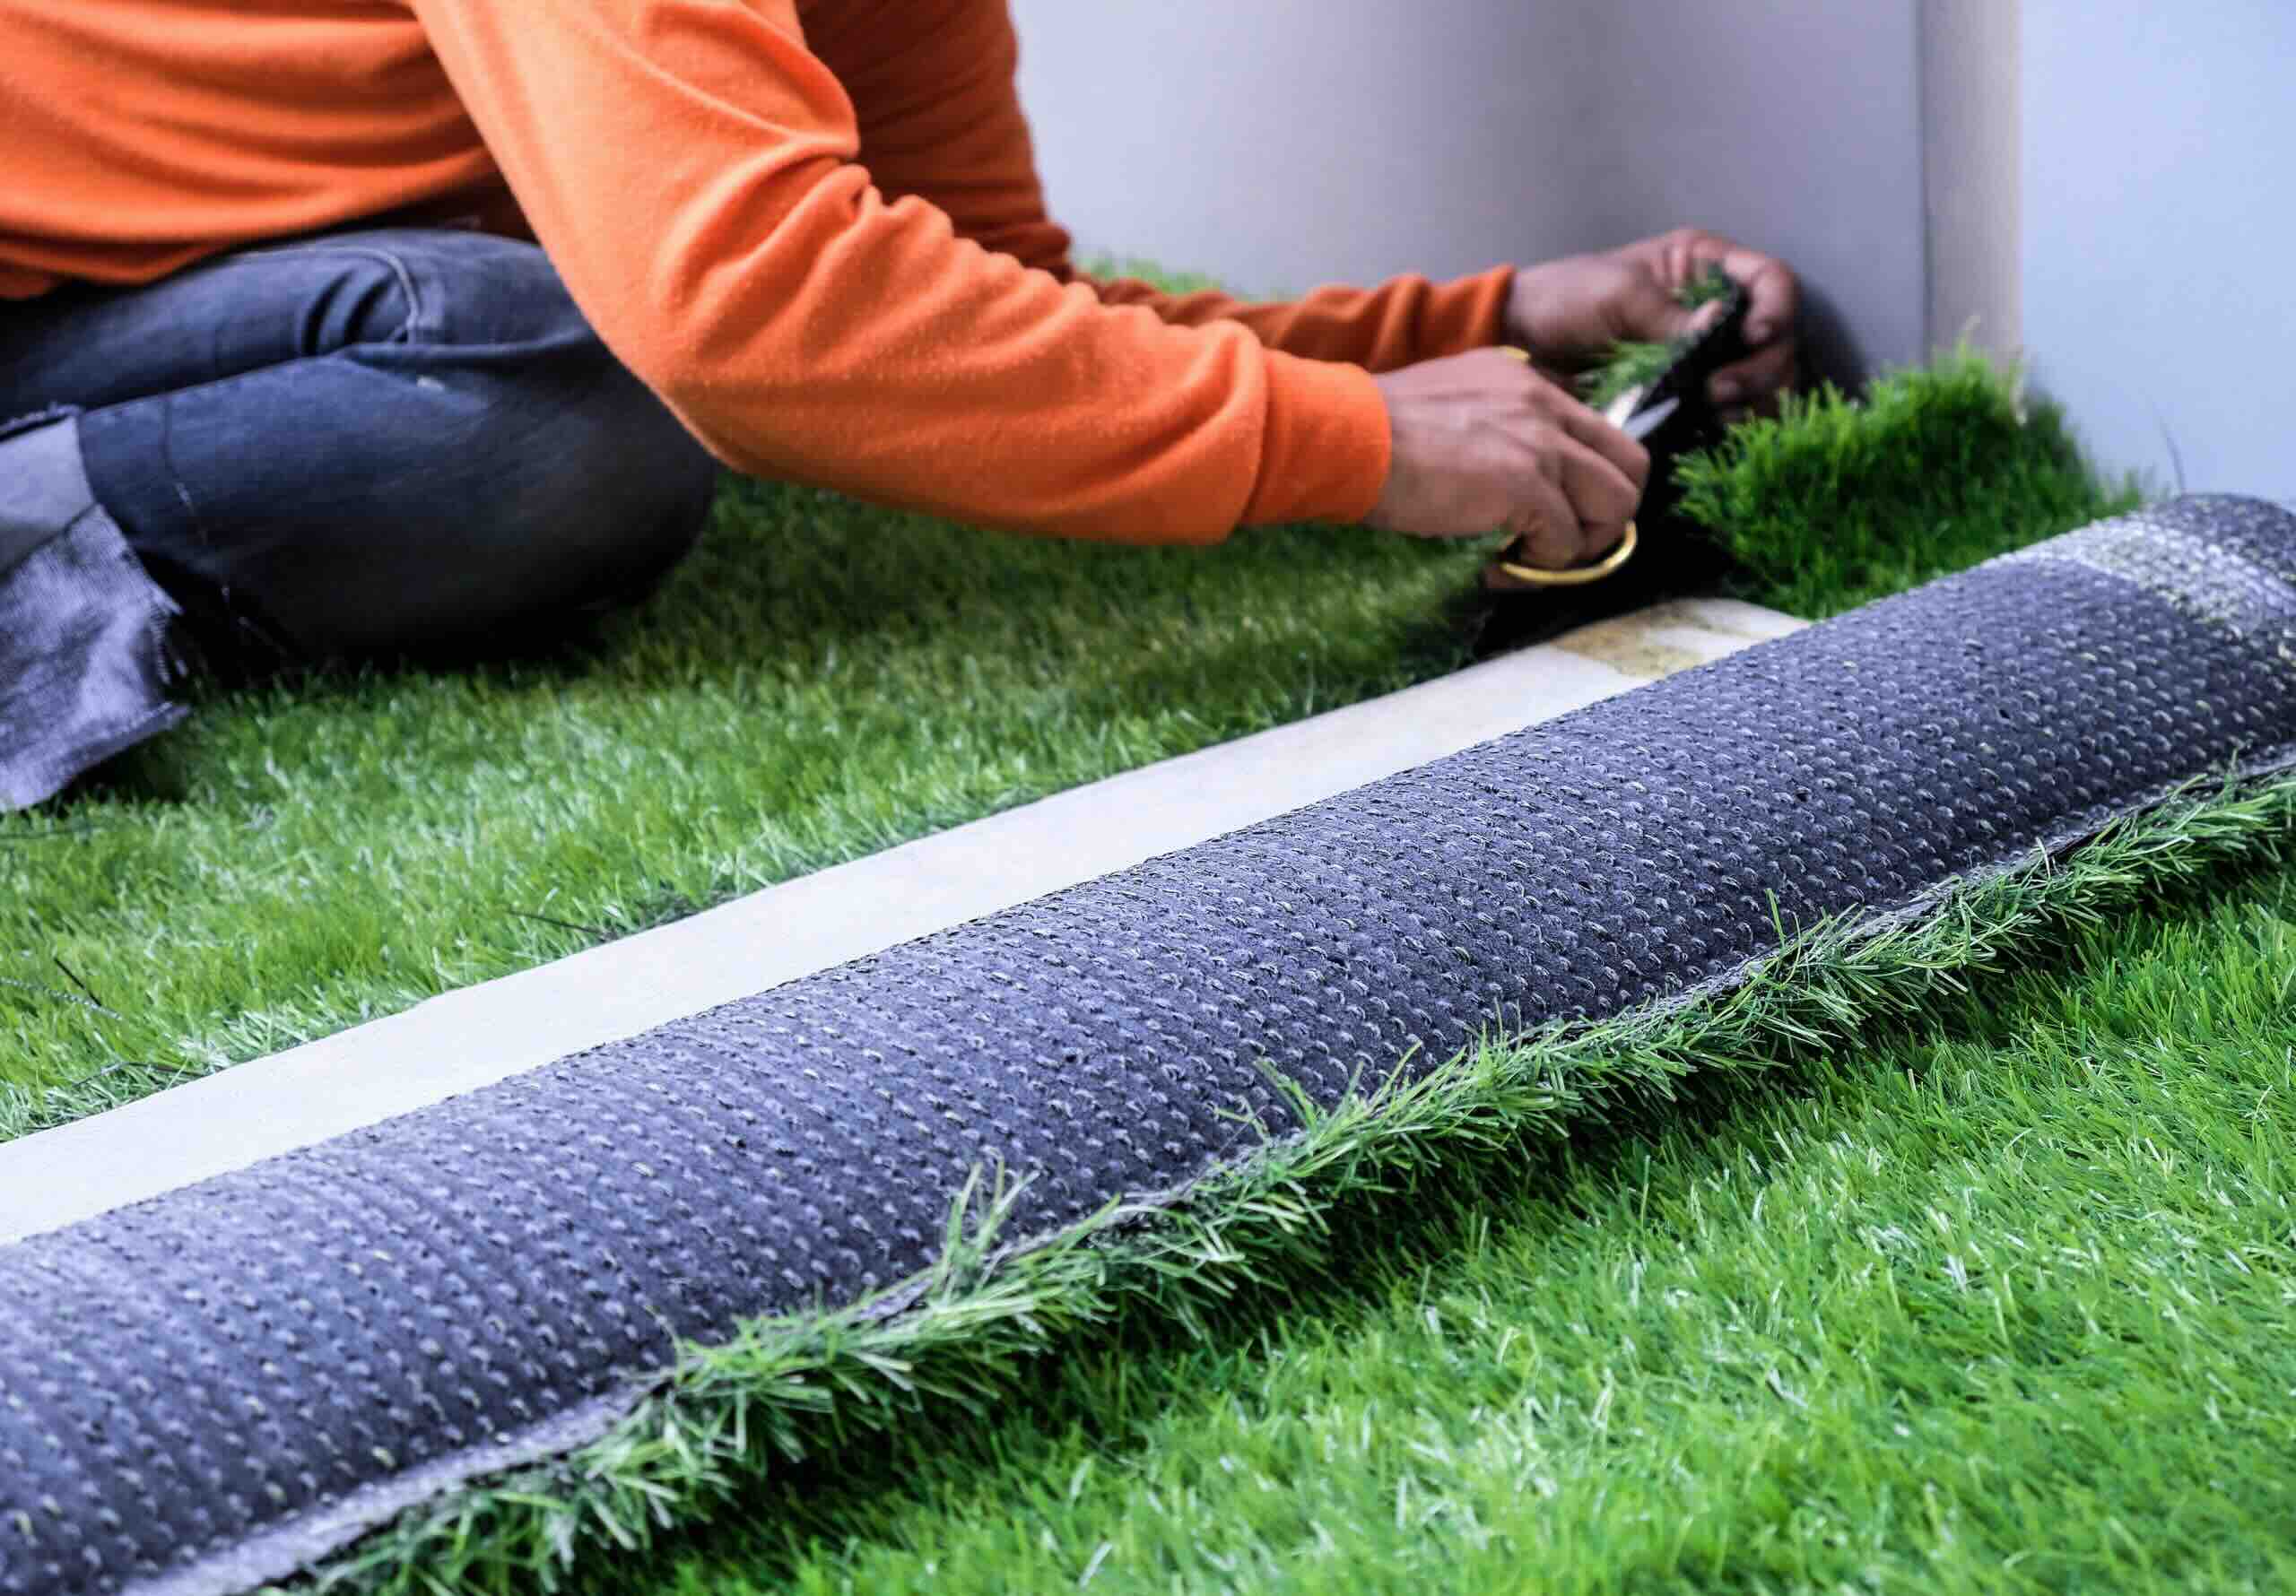
Step 6: Properly Seaming the Turf
To achieve a seamless and polished look, properly seaming the turf is crucial. This step involves joining individual sections of turf together to create a cohesive surface. There are a couple of methods you can use to accomplish this: adhesive or seam tape.
If you choose to use adhesive, start by carefully folding back the edges of the turf where the sections will be joined. Apply a thin and even layer of turf adhesive along the seaming area and use a notched trowel to spread it evenly. Make sure to follow the manufacturer’s instructions regarding the amount and application of the adhesive.
Next, gently press down the edges of the turf onto the adhesive, ensuring a secure bond. Take care not to trap any air bubbles or wrinkles under the turf during this process. For added reinforcement, you can place weights or heavy objects along the seam to help the adhesive set properly. Allow the adhesive to dry and cure according to the recommended time frame before resuming normal activity on the turf.
Alternatively, you can use seam tape to join the sections of turf. First, fold back the edges of the turf and place the seam tape along the seaming area. Ensure that the tape is centered and covers the entire seaming area. Using a turf seaming machine or a hot iron, apply heat to the seam tape, allowing it to melt and bond the turf together. Apply consistent pressure and follow the manufacturer’s instructions for temperature and timing. Once the tape has cooled down, gently release the folded edges of the turf and check the seam to ensure a secure and smooth connection.
Whichever method you choose, it is essential to work carefully and methodically to achieve a seamless appearance. Take your time to align the edges of the turf precisely and ensure that there are no visible gaps or inconsistencies along the seam. A well-executed seaming process will result in a natural and uniform look, enhancing the overall aesthetic of your turf installation.
Step 7: Applying Infill (optional)
Applying infill to your turf is an optional step that can enhance its stability, durability, and overall performance. Infill is a material that is spread onto the turf surface to add weight, support the turf fibers, and give it a more natural feel. Let’s explore how you can properly apply infill to your turf on a concrete surface.
The first step is to select the right type of infill material. There are various options available, including silica sand, rubber granules, or a combination of both. Consider factors such as foot traffic, desired softness, and the specific requirements of your turf type when choosing the appropriate infill. Consult with the manufacturer or a turf professional to determine the best material for your specific needs.
Once you have chosen the infill material, it’s time to spread it evenly over the turf surface. Start by pouring small amounts of infill onto the turf, focusing on one section at a time. Use a rake or a stiff-bristled broom to move the infill across the fibers and distribute it evenly. Work the infill into the turf, making sure to reach the base and providing support to the fibers. Continue spreading and working the infill until the entire turf surface is covered.
While applying infill, be mindful not to overdo it. Use just enough to provide stability and support without weighing down the turf excessively. Overfilling can lead to a stiff and unnatural feel, so it’s important to find the right balance. Take breaks and step back occasionally to assess the coverage and make adjustments as needed.
After the infill has been applied, use a broom or a power brush to brush the turf fibers. This helps to evenly distribute the infill throughout the turf and ensures a more natural and uniform appearance. Brushing the turf also helps to lift the fibers and prevent matting, maintaining the aesthetic appeal of your turf over time.
Applying infill to your turf is an optional step that can contribute to its overall performance and longevity. By choosing the right infill material and properly spreading it, you enhance the stability, support, and natural feel of your turf on the concrete surface.
Step 8: Using a Power Broom (optional)
Using a power broom is an optional step that can help maintain the appearance and vitality of your turf on a concrete surface. A power broom is a motorized brush designed specifically for artificial turf. It can be used to brush the turf fibers upright, creating a more natural and visually pleasing look. Let’s explore how to use a power broom effectively.
Start by ensuring that the power broom is set to the appropriate height. Adjust the brush height based on the length of the turf fibers and the desired outcome. Lower settings are typically used for shorter turf fibers, while higher settings are used for longer fibers. Refer to the manufacturer’s instructions for specific guidance on adjusting the power broom height.
Begin brushing the turf by moving the power broom slowly across the surface. Use long and sweeping motions, working systematically to cover the entire area. The brush should move against the grain of the turf fibers, gently lifting them and encouraging them to stand upright. Take care not to exert excessive pressure, as this can damage the turf or cause the fibers to flatten.
Pay close attention to high-traffic areas, as these sections may require more frequent and thorough brushing. Regular use of a power broom helps prevent the turf fibers from matting and becoming compacted, maintaining the overall appearance and resilience of the turf.
It is recommended to use a power broom on a monthly or as-needed basis, depending on the level of foot traffic and use. Regular brushing will help keep the turf fibers in optimal condition and ensure a lush and vibrant appearance.
After using the power broom, take a moment to inspect the turf for any debris or foreign objects. Remove any leaves, twigs, or other materials that may have accumulated on the surface. Keeping the turf clean and free from debris helps maintain its aesthetic appeal and longevity.
Using a power broom is an optional step that can significantly enhance the appearance and longevity of your turf on a concrete surface. By brushing the fibers upright and maintaining a regular brushing schedule, you can enjoy a natural-looking and well-maintained turf area.
Read more: How To Install Turf Grass
Step 9: Regular Maintenance and Care
To keep your turf on a concrete surface in optimal condition, regular maintenance and care are essential. This will help to preserve its appearance, cleanliness, and overall longevity. Here are some key aspects to consider for maintaining and caring for your turf.
One important maintenance task is rinsing and cleaning the turf surface periodically. Use a garden hose or a pressure washer to rinse off any dust, dirt, or debris that may have accumulated on the turf. Start at one end and work your way across, making sure to cover the entire surface. Pay extra attention to high-traffic areas or spots that are more prone to dirt buildup. Regular rinsing will help to refresh the turf’s appearance and keep it looking vibrant.
In addition to rinsing, it is crucial to promptly address any stains or spills that may occur on the turf. Blot or clean up any spills as soon as possible to prevent them from setting into the fibers. For tougher stains, spot clean the affected area using a mild detergent or soap mixed with water. Gently scrub the stain with a soft bristle brush and then rinse the area thoroughly. Avoid using harsh chemicals or abrasive cleaners, as they can damage the turf fibers.
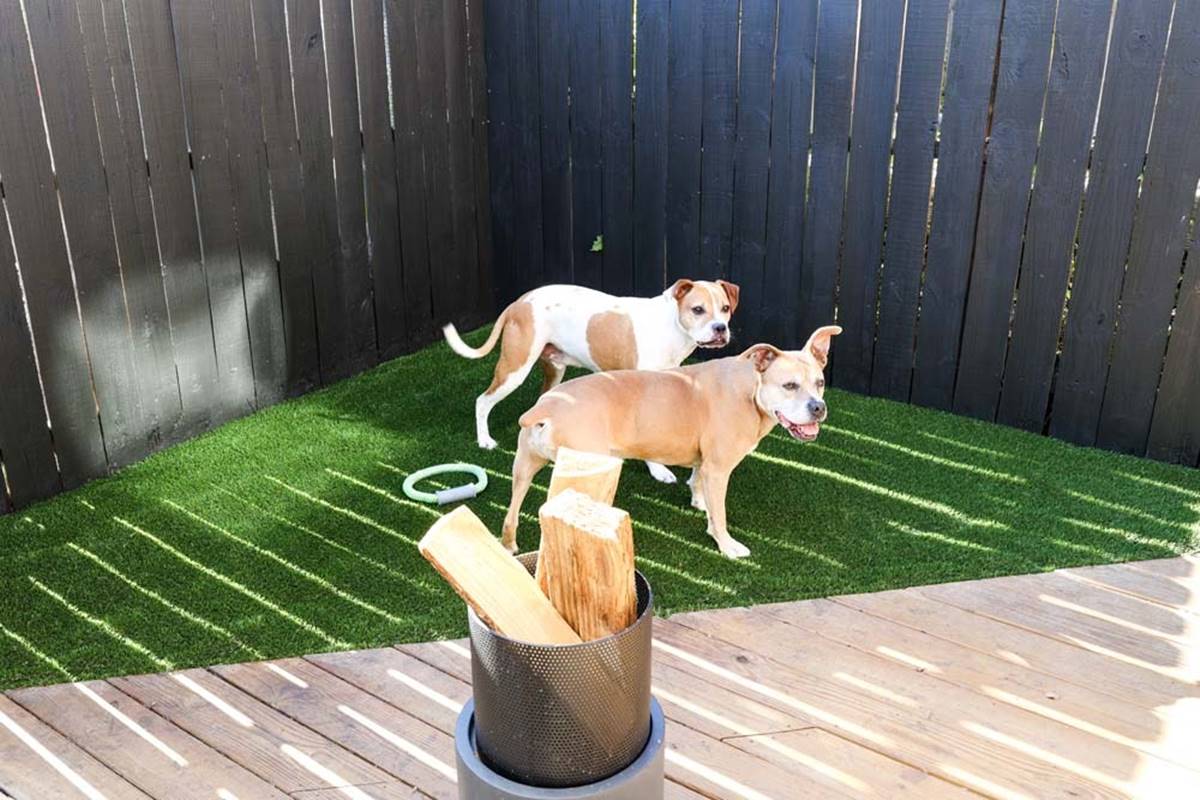
If you have pets, it is especially important to regularly remove any pet waste from the turf. Scoop up solid waste and dispose of it in the appropriate manner. Rinse the area with water afterward to ensure cleanliness. For urine, dilute it with water and rinse the area thoroughly. If odors persist, consider using a pet-friendly turf deodorizer to neutralize any lingering smells.
Periodically inspect the turf for any signs of damage, such as loose seams, tears, or matting. Address any issues promptly to prevent further damage or deterioration. If necessary, consult with a professional for repairs or replacement of damaged sections.
Finally, keep an eye on the level of infill on the turf and replenish it as needed. Over time, infill may settle or be displaced due to foot traffic or weather conditions. Adding infill ensures stability and keeps the turf fibers supported.
By incorporating regular maintenance and care into your routine, you can ensure that your turf on a concrete surface remains attractive, clean, and long-lasting. With proper attention and care, you can enjoy a beautiful and resilient outdoor space for years to come.
Conclusion
Installing turf on a concrete surface can transform a dull and lifeless area into a vibrant and inviting outdoor space. By following the steps outlined in this guide, you can successfully install turf on your concrete surface and enjoy the benefits of a lush and green lawn without the need for soil preparation and extensive maintenance.
From preparing the concrete surface to selecting the right materials and techniques, each step plays a crucial role in ensuring a seamless and durable turf installation. Cleaning the concrete, applying a weed barrier, and assessing the need for a drainage system are all important preparatory steps. Measuring, cutting, and acclimating the turf, as well as properly rolling it out and securing the edges, contribute to a professional-looking installation.
Optional steps such as applying infill, using a power broom, and regular maintenance further enhance the appearance and performance of your turf on the concrete surface. By choosing the right infill material, spreading it evenly, and brushing the turf fibers upright, you can achieve a more natural and well-maintained look.
Remember to regularly rinse and clean the turf, addressing any stains or pet waste promptly. Keep an eye on the condition of the turf, inspecting for any damage or matting that may require attention. Replenish the infill as needed to ensure stability and support for the turf fibers.
By investing time and effort into the installation and maintenance of your turf on a concrete surface, you can create a beautiful and functional outdoor space that enhances your enjoyment and the aesthetic appeal of your property. Whether it’s a small patio, a rooftop terrace, or a larger concrete area, installing turf can provide a refreshing and attractive green space for relaxation, entertainment, and outdoor activities.
So go ahead and bring new life to your concrete surface with the installation of turf. With the right techniques and a little bit of care, you can enjoy the beauty and benefits of a vibrant and low-maintenance lawn all year round.
Frequently Asked Questions about How To Install Turf On Concrete
Was this page helpful?
At Storables.com, we guarantee accurate and reliable information. Our content, validated by Expert Board Contributors, is crafted following stringent Editorial Policies. We're committed to providing you with well-researched, expert-backed insights for all your informational needs.

0 thoughts on “How To Install Turf On Concrete”