Home>Furniture>Outdoor Furniture>How Do You Lay Decking
Outdoor Furniture
How Do You Lay Decking
Modified: August 17, 2024
Learn the best techniques for laying decking and creating your dream outdoor space with our helpful guide. Find tips on choosing the perfect outdoor furniture for your deck.
(Many of the links in this article redirect to a specific reviewed product. Your purchase of these products through affiliate links helps to generate commission for Storables.com, at no extra cost. Learn more)
Introduction
Welcome to the world of outdoor living! If you’re looking to create a relaxing and inviting space in your backyard, one of the best ways to do so is by installing a deck. A well-designed and properly laid decking can transform any outdoor area into a stylish and functional extension of your home.
Whether you envision hosting barbecues, enjoying morning coffee, or simply lounging in the sun, a deck provides the perfect platform for outdoor activities. Building a deck may seem like a daunting task, but with the right tools, materials, and step-by-step guidance, anyone can successfully lay decking.
In this article, we will take you through the process of laying decking, from initial planning to the finishing touches. So, grab your tools and let’s get started with creating your dream outdoor space!
Key Takeaways:
- Building a deck requires careful planning, leveling the ground, and securing the decking boards. It’s a fun and rewarding project that can turn your outdoor space into a stylish and functional extension of your home.
- By following the steps in this guide, you can create a beautiful and inviting deck for outdoor relaxation and entertainment. Remember to prioritize safety, comply with regulations, and maintain your deck for long-lasting enjoyment.
Read more: How Do You Lay A Patio
Tools and Materials Needed
Before you begin laying decking, it’s important to gather all the necessary tools and materials. Having everything on hand will ensure a smooth and efficient installation process. Here’s a list of the essential items you’ll need:
Tools:
- Measuring tape
- Level
- Circular saw
- Drill
- Screwdriver
- Hammer
- Chalk line
- Decking spacer
- Jigsaw
- Miter saw (optional, for angled cuts)
Materials:
- Decking boards
- Joists
- Decking screws
- Concrete footing blocks (if necessary)
- Gravel or crushed stone
- Post anchors (if using posts)
- Post caps (if using posts)
- Decking treatment or stain (optional)
It’s worth investing in high-quality tools and materials to ensure the longevity and stability of your deck. Opt for pressure-treated or naturally rot-resistant wood for the decking boards and joists, as they will be exposed to the elements. Additionally, consider the aesthetic appeal and durability of the materials when making your selections.
Now that you’ve gathered your tools and materials, you’re ready to move on to the planning and preparation stage of laying decking. Take the time to carefully measure and plan your deck layout, accounting for any specific features or constraints in your yard. A well-thought-out design will ensure a successful and visually pleasing end result.
Planning and Preparation
Before you start laying decking, it’s essential to spend time on proper planning and preparation. This stage will help you determine the size and layout of your deck, and ensure that it integrates seamlessly with your outdoor space. Here are the key steps to take:
Read more: How To Lay Decking Tiles
1. Determine Deck Size:
Decide how large you want your deck to be. Consider factors such as the intended use, available space, and any existing features like trees or structures. Measure the area and mark it out with stakes and string to visualize the final dimensions.
2. Check Local Regulations:
Review any local building codes or regulations that may apply to deck construction. Familiarize yourself with any permit requirements, setbacks, or height restrictions. It’s important to comply with these guidelines to ensure a safe and legal deck.
3. Create a Design:
Consider the overall design aesthetic you want to achieve with your deck. Determine whether you want a single-level or multi-level deck, and decide on any additional features like stairs, railings, or built-in seating. Sketch out your design or use decking design software to visualize the final result.
4. Prepare the Ground:
Clear the area where the deck will be installed. Remove any vegetation, rocks, or debris. Level the ground using a shovel and rake. If the ground is uneven, you may need to use gravel or crushed stone to create a stable base.
Read more: How To Lay Decking On Grass
5. Mark the Layout:
Use stakes and string to mark the exact location and dimensions of the deck. Ensure it’s square by measuring diagonally from corner to corner. Adjust the layout as necessary to achieve the desired positioning.
By taking the time to carefully plan and prepare, you’ll set yourself up for a successful decking installation. With the size, layout, and design of your deck determined, you can now move on to the next steps of clearing and leveling the area.
Step 1: Clearing and Leveling the Area
Before you can start building your deck, it’s important to clear and level the area where it will be installed. This step will provide a solid foundation for your deck and ensure its stability. Here’s a guide on how to clear and level the area:
1. Remove vegetation:
Start by removing any grass, weeds, or plants in the area. Use a shovel or a garden rake to dig up the vegetation and dispose of it properly. It’s important to remove all organic matter to prevent weeds from growing through the deck later on.
2. Check for underground utilities:
Before digging, identify and mark the location of any underground utilities like gas lines, water pipes, or electrical cables. This will help avoid any potential damage or safety hazards. Consult with local utility companies if necessary.
Read more: How To Lay Roof Decking
3. Level the ground:
Use a level and a long straight board or a string to determine the high and low points of the area. Remove any high spots by digging or adding soil as needed. Use a tamper or a hand compactor to pack down the soil and ensure a firm surface.
4. Install landscape fabric:
To prevent weed growth and improve drainage, lay down landscape fabric over the cleared area. This will create a barrier between the soil and the deck’s foundation. Secure the fabric with landscape staples or pins.
5. Add a layer of gravel:
Spread a layer of gravel or crushed stone over the landscape fabric. This will help with drainage and create a stable base for the deck. Use a rake to level the gravel and ensure a uniform thickness of about 2-3 inches.
With the area cleared and leveled, you’re now ready to move on to the next step of installing the deck frame. This step is crucial in providing support and structure for your decking boards, so make sure to follow the proper techniques and measurements.
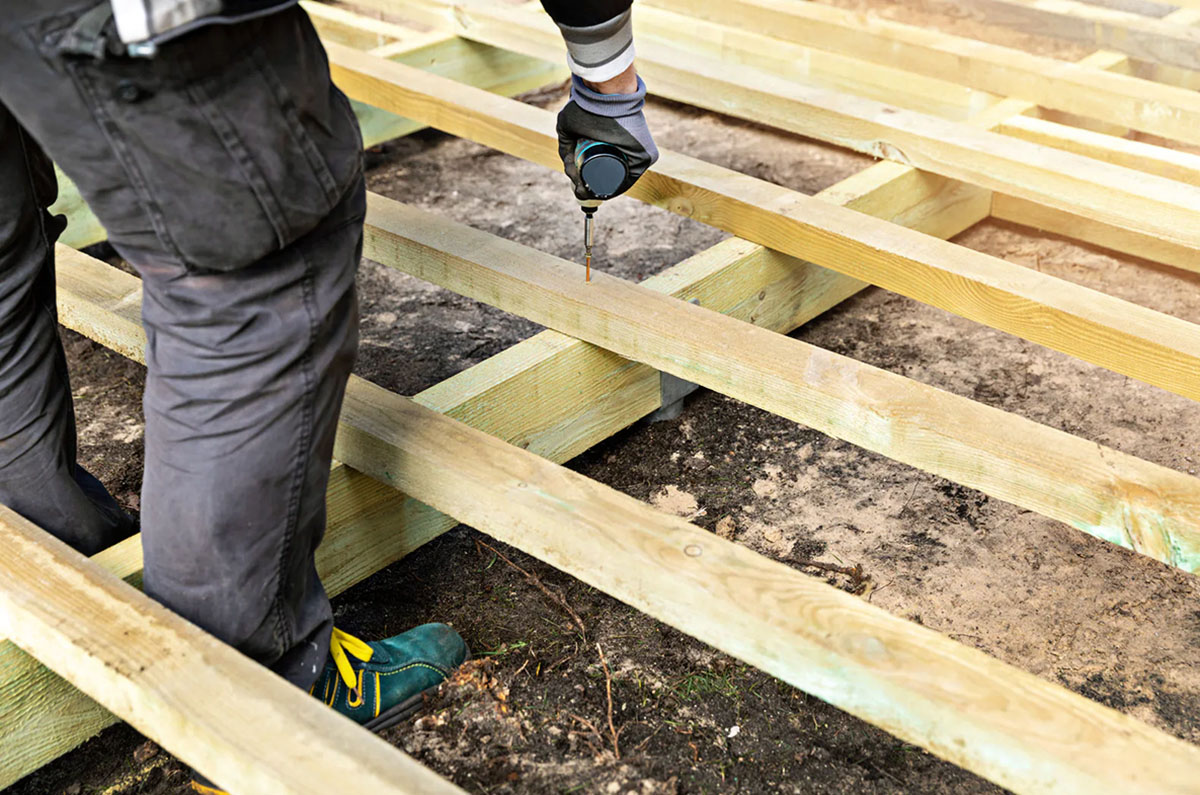
Step 2: Installing the Deck Frame
With the area cleared and leveled, it’s time to start building the frame for your deck. The frame serves as the structural support for the decking boards and determines the overall stability and longevity of your deck. Follow these steps to properly install the deck frame:
Read more: How Do You Restore Decking
1. Measure and mark the joists:
Start by measuring and marking the locations for the joists. Typically, joists are spaced between 16 to 24 inches apart, depending on the size of the decking boards. Use a measuring tape and a pencil to mark the positions on the ledger board (attached to the house) and the outer edge of the deck.
2. Attach the ledger board:
If you’re attaching your deck to the house, secure a ledger board to the exterior wall using lag bolts or structural screws. Make sure the ledger board is level and firmly attached to provide a strong connection.
3. Install the support posts (optional):
If your deck requires support posts, install them at the determined locations. Use post anchors or secure them in concrete footings for added stability. Make sure the posts are plumb and level before moving on to the next step.
4. Install the rim joists:
Attach the rim joists to the ends of the ledger board and the support posts (if applicable). Ensure they are flush with the outer edge of the deck and securely fastened using nails or screws.
Read more: How To Lay Astro Turf On Decking
5. Install the interior joists:
Place the interior joists between the rim joists, parallel to each other, and evenly spaced according to your measurements. Secure them in place using joist hangers or by toe-nailing them to the rim joists. Double-check that the joists are level and aligned before moving on.
6. Add blocking (if necessary):
If your deck design requires additional support, add blocking between the joists. This helps prevent sagging and adds strength to the overall structure. Install the blocking at equal intervals along the length of the joists.
With the deck frame installed, you’ve laid the groundwork for a solid and sturdy deck structure. The next step is to attach the decking boards and bring your vision of an outdoor oasis to life.
Step 3: Attaching the Decking Boards
Now that the deck frame is in place, it’s time to start attaching the decking boards. This step will bring your deck to life and create the surface on which you’ll walk and relax. Follow these steps to properly attach the decking boards:
1. Start with the first board:
Begin by placing the first decking board at one corner of the deck. Make sure it’s flush with the edge of the deck frame and positioned perpendicular to the joists. Leave a small gap between the boards for water drainage, usually about ⅛ inch.
Read more: How To Lay Composite Decking On Concrete
2. Secure the first board:
Pre-drill holes through the decking board and into the joists to prevent splitting. Then, use decking screws to securely fasten the board to the joists. Make sure to countersink the screws slightly below the surface of the wood for a smooth finish.
3. Install the remaining boards:
Continue placing and securing the remaining decking boards, working your way across the deck. Use a decking spacer or a small scrap piece of wood to create consistent spacing between the boards. Check periodically with a level to ensure the boards are level and aligned.
4. Cut and trim the boards:
If necessary, cut the last board to fit the remaining space at the end of the deck. Use a circular saw or a jigsaw for straight or angled cuts. Remember to wear safety goggles and follow proper cutting techniques. Trim any overhanging edges for a neat and clean look.
5. Stagger the joints:
When installing multiple decking boards, stagger the joints for added strength and visual appeal. Avoid aligning the joints in a straight line, as this could weaken the structure and create an unattractive pattern. Aim for a random and natural appearance.
Read more: How To Lay Decking Over Concrete
6. Treat or stain the decking:
If desired, apply a decking treatment or stain to protect the wood from the elements and enhance its appearance. Follow the manufacturer’s instructions for proper application and drying time.
With the decking boards securely attached, you’re one step closer to enjoying your new outdoor space. The next step is to secure the boards and add the finishing touches to complete your deck installation.
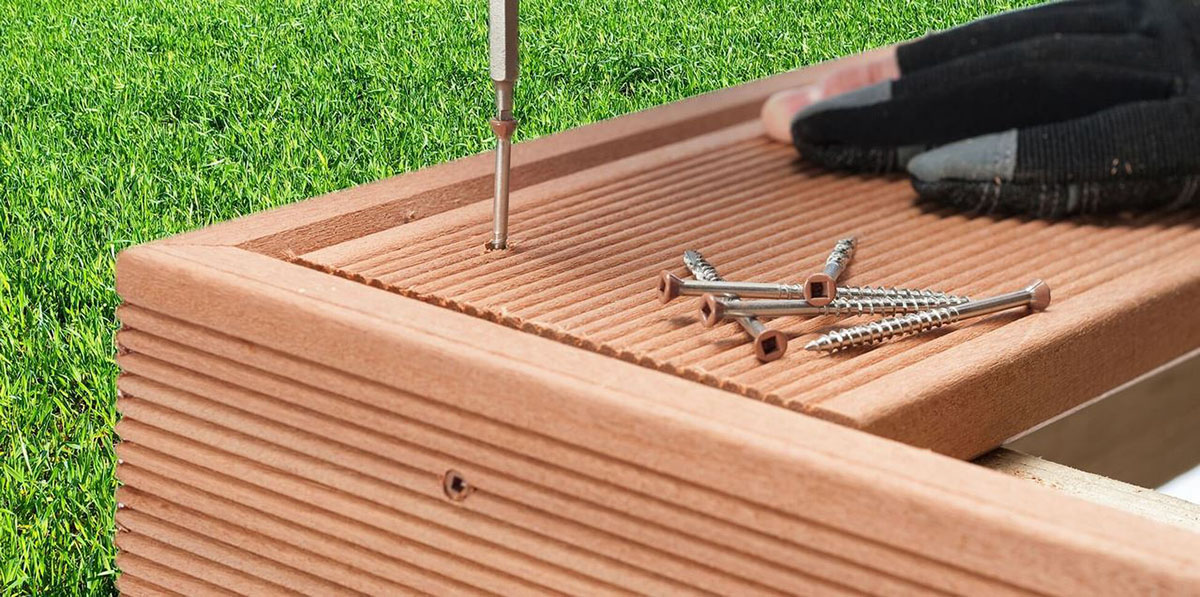
Step 4: Securing the Decking Boards
Now that the decking boards are in place, it’s important to properly secure them to ensure the longevity and stability of your deck. This step will ensure that the boards stay in place, even with heavy foot traffic and changing weather conditions. Follow these steps to securely fasten the decking boards:
1. Use the right screws:
Choose weather-resistant decking screws that are specifically designed for outdoor use. These screws are coated to withstand moisture and rust, providing a strong and reliable hold for your decking boards.
2. Predrill the screw holes:
Pre-drill holes through the decking boards before inserting the screws. This helps to prevent splitting or cracking of the wood. The holes should be slightly smaller than the diameter of the screws.
Read more: How To Lay Out A Deck Properly
3. Position the screws properly:
Place the screws in the center of the joists, about 1 inch from the edge of the decking boards. This ensures that the screws hit the solid wood and provide maximum support. Be careful not to overdrive the screws, as this could damage the boards.
4. Countersink the screw heads:
After inserting the screws, use a countersink bit or a drill bit slightly larger than the screw heads to create a recessed area. This will allow you to fill the holes with wood putty or a plug for a smoother and more polished finish.
5. Secure the boards at each joist:
Continue securing the decking boards to each joist using the pre-drilled holes and screws. Work your way across the deck, ensuring each board is evenly spaced and tightly secured. Check periodically with a level to ensure the boards are level and aligned.
6. Trim any excess:
If necessary, trim any excess length of the decking boards beyond the edge of the deck frame. Use a circular saw or a jigsaw to make clean and precise cuts. Remember to wear safety goggles and follow proper cutting techniques.
By properly securing the decking boards, you’ll have a sturdy and durable deck that can withstand the test of time. The final step is to add the finishing touches and make any necessary adjustments to complete the installation of your deck.
Read more: How To Lay Trex Composite Decking
Step 5: Trimming and Finishing Touches
With the decking boards securely fastened, it’s time to add the finishing touches to your deck. This step involves trimming any excess material, applying any final treatments or finishes, and making any necessary adjustments to ensure your deck is functional and visually appealing. Follow these steps to complete the trimming and finishing touches:
1. Trim the edges:
If there are any overhanging edges or uneven edges, use a circular saw or a jigsaw to trim them to the desired length. Take your time and ensure clean and precise cuts for a polished look. Wear safety goggles and follow proper cutting techniques.
2. Sand the surface:
Smooth out the surface of the decking boards by using a sander or sandpaper. This step helps to remove any rough spots or splinters and creates a comfortable and safe surface for walking barefoot. Sand in the direction of the wood grain for the best results.
3. Apply treatment or sealant:
If desired, apply a decking treatment or sealant to protect the wood from moisture, UV rays, and general wear and tear. Follow the manufacturer’s instructions for proper application and drying time. This step helps to preserve the natural beauty of the wood and extend the lifespan of your deck.
Read more: How Do You Calculate Stairs For A Deck?
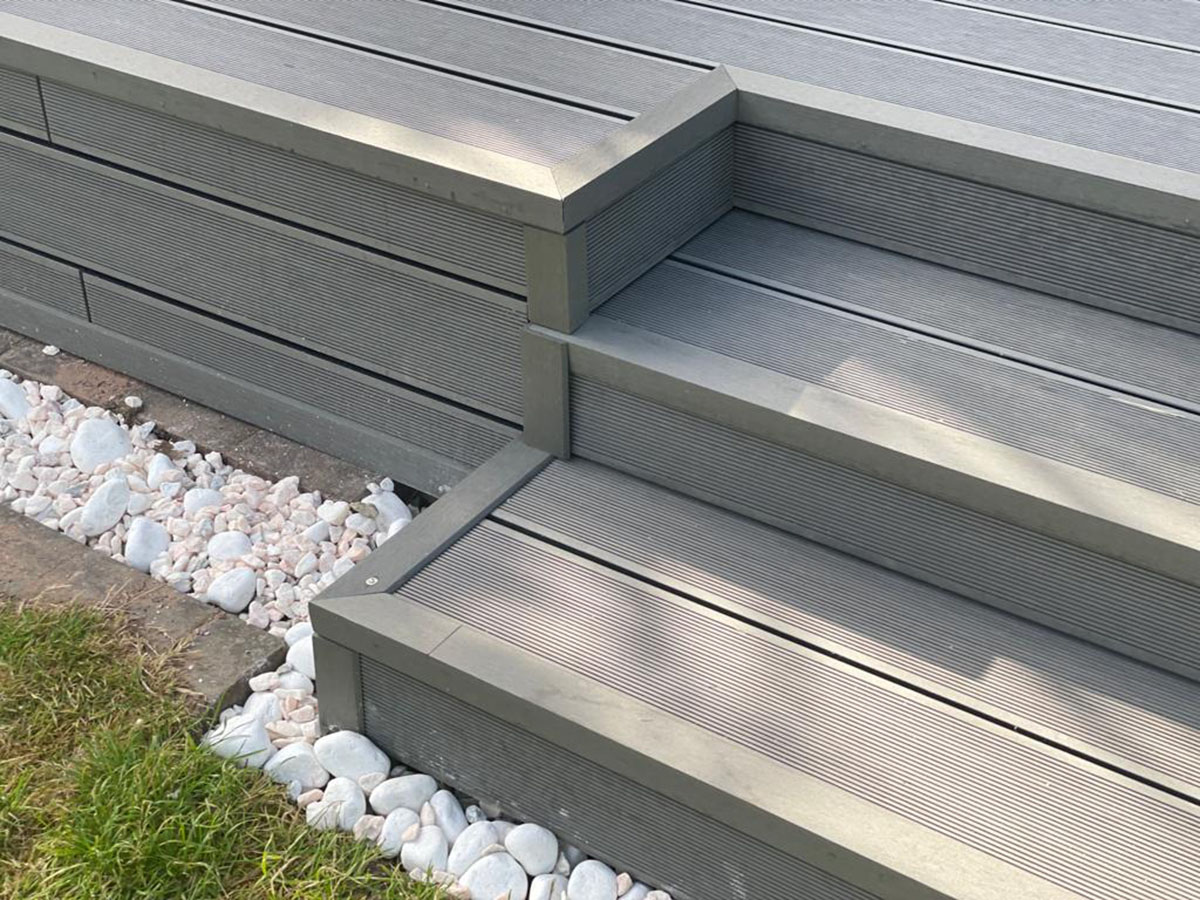
4. Install additional features (if desired):
If you have any additional features planned for your deck, such as railings, stairs, or lighting, now is the time to install them. Follow the manufacturer’s instructions and ensure they are properly secured and functional.
5. Check for any necessary adjustments:
Take a walk around your deck and check for any loose boards, unevenness, or any other issues that may require adjustments. Tighten any loose screws or replace any damaged boards as needed to maintain the integrity of your deck.
6. Clean up the work area:
Finally, clean up the work area by removing any leftover materials, tools, or debris. Dispose of them properly and give your newly finished deck a thorough cleaning to remove any dust or dirt.
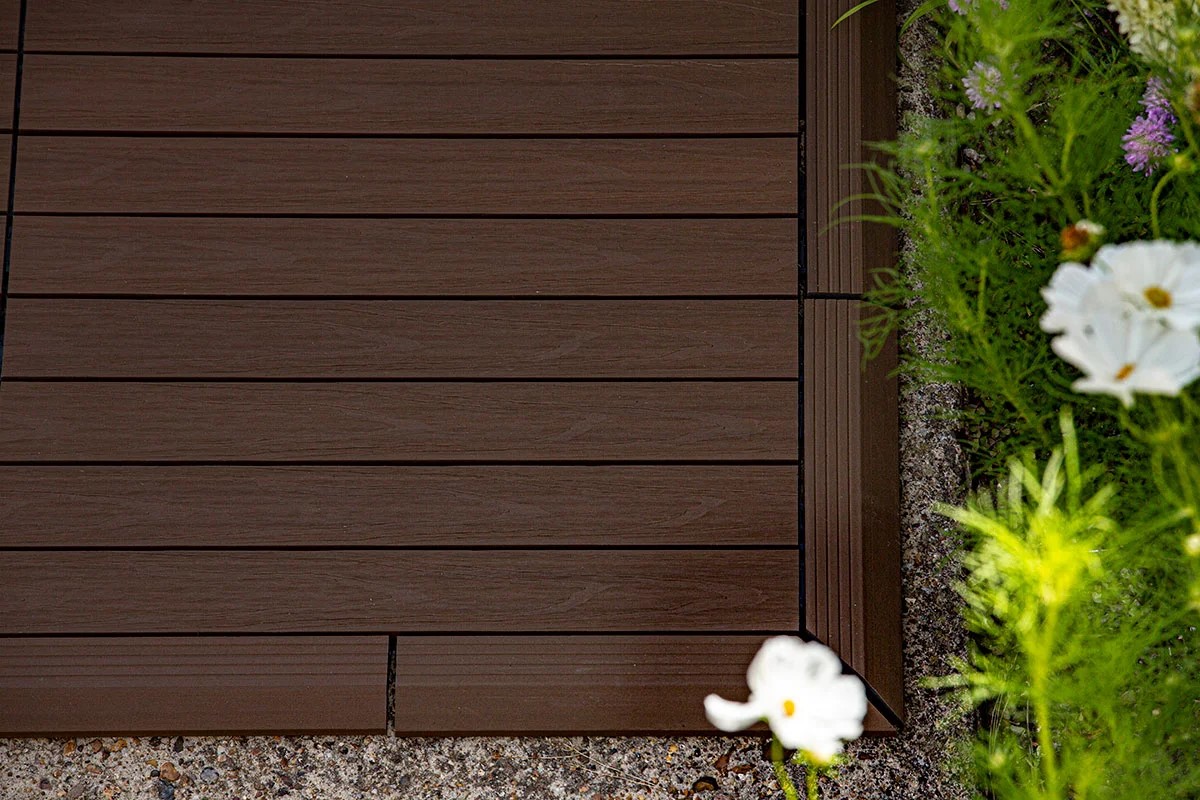
With these trimming and finishing touches complete, step back and admire your beautiful new deck. It’s now time to furnish and decorate your outdoor space, allowing you to fully enjoy the comfort and beauty of your newly laid decking.
Conclusion
Congratulations! You have successfully completed the process of laying decking and have transformed your outdoor space into a functional and inviting area. Through careful planning, preparation, and execution, you have created a beautiful deck that will provide countless hours of enjoyment for you, your family, and your friends.
By following the steps outlined in this guide, you have learned how to clear and level the area, install the deck frame, attach the decking boards, secure them in place, and add the finishing touches. Each step is crucial in ensuring the stability, durability, and visual appeal of your deck.
Remember to take proper safety precautions throughout the process, such as wearing protective gear and using the correct tools. Consult local building codes and regulations to ensure compliance and obtain any necessary permits before building your deck.
As you begin to use your new deck, make sure to perform regular maintenance to keep it in optimal condition. This includes inspecting for any loose boards or damaged areas, cleaning the deck surface, and reapplying sealant or treatment as needed.
Whether you plan to host summer barbecues, bask in the sun with a book, or simply enjoy the fresh air, your deck will serve as the perfect spot for outdoor relaxation and entertainment. Embrace the opportunity to personalize your deck with furniture, plants, lighting, and other decor to create a welcoming and personalized space.
Thank you for following this guide on how to lay decking. We hope it has provided you with the knowledge and inspiration to confidently embark on your deck-building journey. Enjoy your new outdoor escape!
Frequently Asked Questions about How Do You Lay Decking
Was this page helpful?
At Storables.com, we guarantee accurate and reliable information. Our content, validated by Expert Board Contributors, is crafted following stringent Editorial Policies. We're committed to providing you with well-researched, expert-backed insights for all your informational needs.


0 thoughts on “How Do You Lay Decking”