Home>Garden Essentials>How To Make A Cascading Greenery Bouquet

Garden Essentials
How To Make A Cascading Greenery Bouquet
Modified: March 7, 2024
Learn how to make a stunning cascading greenery bouquet using garden-inspired foliage for a natural and enchanting floral arrangement.
(Many of the links in this article redirect to a specific reviewed product. Your purchase of these products through affiliate links helps to generate commission for Storables.com, at no extra cost. Learn more)
Introduction
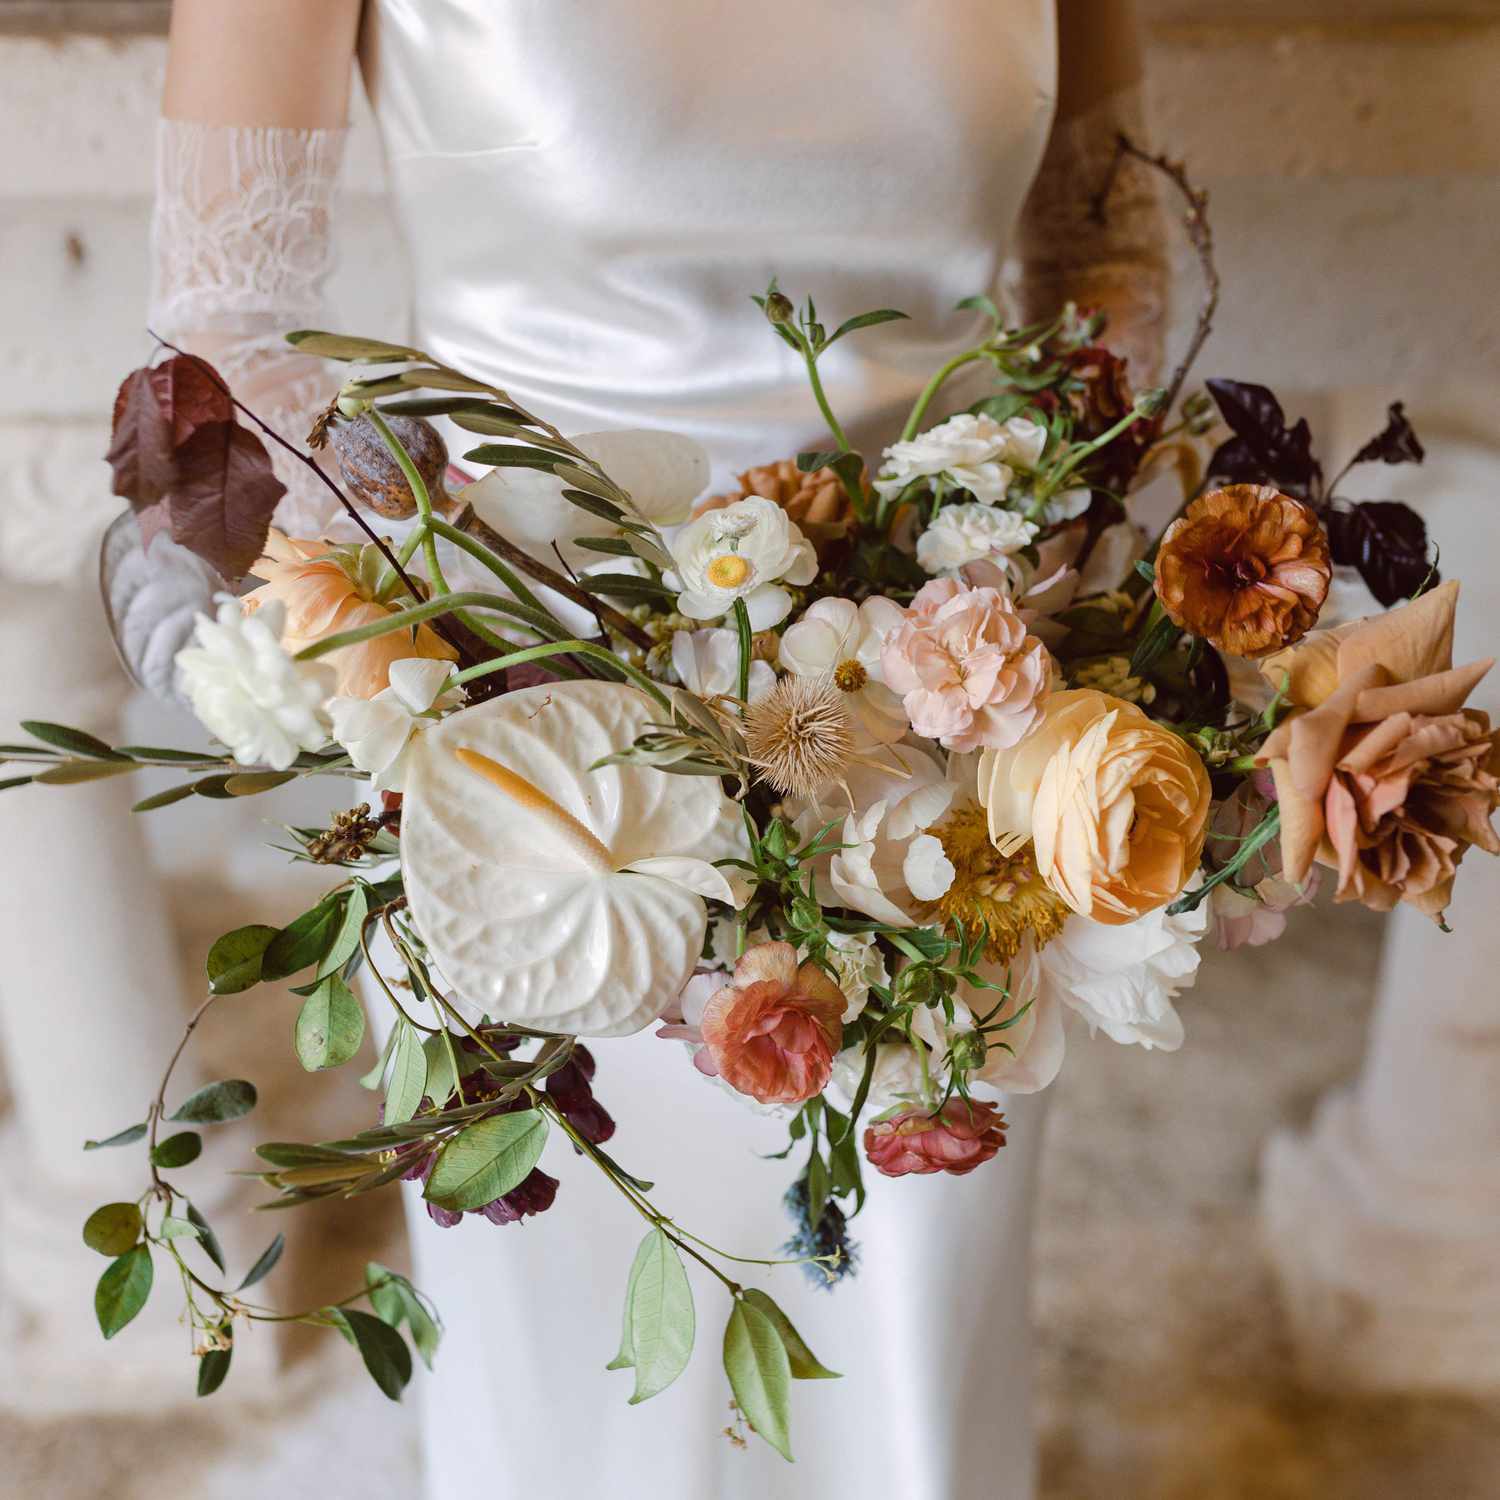
Welcome to the world of cascading greenery bouquets, where nature’s beauty takes center stage in a stunning floral arrangement. Whether you’re planning a wedding, a special event, or simply want to create a beautiful centerpiece for your home, a cascading greenery bouquet is a perfect choice. This style of bouquet is characterized by its trailing, flowing greenery, which adds an elegant and romantic touch to any arrangement.
But how do you create a cascading greenery bouquet that looks professionally done? Fear not – we’re here to guide you through the process! In this article, we’ll walk you through each step, from selecting the perfect greenery to adding the finishing touches. So grab your scissors, gather your supplies, and let’s get started!
Materials Needed:
- Greenery of your choice (eucalyptus, ivy, ferns, etc.)
- Focal flowers (roses, peonies, dahlias, etc.)
- Secondary flowers (baby’s breath, delphinium, snapdragons, etc.)
- Filler flowers (wax flower, statice, astilbe, etc.)
- Floral tape
- Wire cutters
- Floral wire
- Ribbon or twine
- Scissors
- Waterproof floral foam (optional)
Key Takeaways:
- Create a stunning cascading greenery bouquet by selecting the perfect greenery, adding focal and secondary flowers, and finishing with filler blooms. Enjoy the process and let your creativity shine!
- Prepare, arrange, and add finishing touches to your cascading greenery bouquet to create a breathtaking masterpiece. Balance creativity and technique to craft a unique and beautiful floral arrangement.
Read more: How To Make A Greenery Bridal Bouquet
Materials Needed
In order to create a stunning cascading greenery bouquet, there are a few key materials that you’ll need to gather. Here’s a list of what you’ll need:
- Greenery of your choice: The first step in creating a cascading greenery bouquet is selecting the perfect greenery. Eucalyptus, ivy, ferns, and trailing vines like jasmine or English ivy are popular choices. Consider the color, texture, and flexibility of the greenery to ensure it fits your desired aesthetic.
- Focal flowers: These are the standout flowers in your bouquet that will draw attention and serve as the focal point. Roses, peonies, dahlias, or any other large, eye-catching flowers work well as focal flowers. Choose colors that complement your greenery for a harmonious look.
- Secondary flowers: These flowers will play a supporting role in your bouquet, adding depth and volume. Baby’s breath, delphinium, snapdragons, or any other medium-sized flowers can work as secondary flowers. They should complement the colors of your focal flowers.
- Filler flowers: Fillers help to fill in any gaps in the bouquet and add texture and interest. Wax flower, statice, astilbe, or similar small blooms are perfect for this role. Choose fillers that complement the colors and style of your bouquet.
- Floral tape: Floral tape is essential for securing and maintaining the shape of your bouquet. It is easily stretched and adheres well to itself, making it ideal for wrapping stems together.
- Wire cutters: Wire cutters are necessary for trimming and cutting the stems of your greenery and flowers. They allow for clean cuts and make the arranging process easier.
- Floral wire: Floral wire can be used to reinforce and secure delicate stems or branches. It provides extra support and stability to your bouquet.
- Ribbon or twine: A beautiful ribbon or twine can be used to wrap the stems of your bouquet. Choose a color or style that complements the overall look of your arrangement.
- Scissors: Scissors are essential for various tasks, such as cutting ribbon or twine, trimming excess stems, or shaping the bouquet.
- Waterproof floral foam (optional): If you want to create a longer-lasting arrangement, you can use waterproof floral foam as a base for your bouquet. This foam helps to keep the stems hydrated and provides additional support.
Once you have gathered all of the necessary materials, you’re ready to embark on the journey of creating your own cascading greenery bouquet. Let’s dive into the step-by-step process!
Step 1: Selecting the Greenery
The first step in creating a stunning cascading greenery bouquet is selecting the perfect greenery. Greenery plays a vital role in adding depth, texture, and movement to your arrangement. Here’s how you can go about selecting the ideal greenery:
Consider the Style and Theme:
Think about the style and theme of the event or occasion for which you are creating the bouquet. Are you going for a rustic, bohemian look or a more elegant and classic vibe? The greenery you choose should align with the overall aesthetic.
Explore Different Types of Greenery:
There are various types of greenery that work well in cascading bouquets. Eucalyptus, with its silvery leaves and pleasant scent, is a popular choice. Ivy, with its trailing vines, adds a touch of whimsy and romance. Ferns, with their delicate and feathery fronds, can lend an ethereal feel.
Consider Color and Texture:
Take into account the color palette of your bouquet. Some greenery options come in different shades, from deep greens to silver or variegated tones. Choose greens that complement the colors of your focal and secondary flowers.
Flexibility and Drape:
When selecting greenery, pay attention to its flexibility and how it drapes. Cascading greenery should be flexible enough to create flowing lines and gracefully trail down from the bouquet. Avoid stiff or rigid greenery that may not lend itself well to a cascading style.
Experiment and Mix Different Varieties:
Don’t be afraid to experiment and mix different types of greenery together to create a visually interesting arrangement. For example, you can combine eucalyptus with ivy to add dimension and texture. Play with different combinations until you find the perfect balance.
Remember, the greenery you choose will set the foundation for your cascading bouquet. So take your time, explore different options, and select the greenery that best suits your vision. Once you have the perfect greenery, you’re ready to move on to the next step: preparing the greenery for assembly.
Step 2: Preparing the Greenery
Once you have selected the ideal greenery for your cascading bouquet, it’s time to prepare the greenery for assembly. Proper preparation ensures that your greenery is in the best condition and ready to be incorporated into the bouquet. Here’s what you need to do:
Trim the Stems:
Start by trimming the stems of your greenery. Use sharp scissors or wire cutters to make clean cuts at an angle. It’s important to remove any excess foliage or damaged parts of the stems to promote better water absorption.
Remove Lower Leaves:
Remove any lower leaves that will fall below the waterline in the vase or bouquet. This prevents the leaves from becoming submerged, which can lead to bacterial growth and shorten the lifespan of your arrangement.
Prune Excessive Branches:
If you find any long or excessive branches or stems, you may need to prune them to achieve the desired length and shape for your cascading bouquet. Pruning also helps to control the overall size of the bouquet.
Remove thorns (if applicable):
If you’re using greenery with thorns, such as roses or certain types of ivy, it’s best to remove the thorns carefully. This reduces the risk of injury during the bouquet assembly process and makes it more comfortable to handle.
Condition the Greenery:
Before arranging the greenery, it’s essential to condition it properly. Place the trimmed stems in a container filled with clean water for a few hours or overnight. This hydration period helps the greenery to absorb water and keeps it fresh for longer.
By preparing the greenery in these steps, you ensure that it is ready to shine in your cascading bouquet. Once you have prepared the greenery, it’s time to move on to the next step: creating the base for the bouquet.
Step 3: Creating the Base
With your greenery prepared and ready, it’s time to create the base for your cascading bouquet. The base serves as the foundation that holds the rest of the flowers and greenery together. Here’s how you can create the base:
Start with a Focal Point:
Select a few stems of your chosen greenery that will serve as the focal point of your bouquet. These will be the longest and most prominent pieces in the arrangement. Begin by holding these stems together and positioning them in a way that creates a natural, cascading shape.
Add Supporting Greenery:
To create a full and lush base, add more greenery to the focal point. Choose shorter stems of greenery that have a similar texture or color as the focal stems. Place them strategically, weaving them through the focal point and allowing some to drape down naturally.
Secure with Floral Tape:
Once you are satisfied with the arrangement of the base, use floral tape to secure the stems together. Wrap the floral tape tightly around the stems, starting from the top and working your way down. This will hold the base securely and ensure that it remains intact while you add more flowers and greenery.
Trim Excess Stems:
After securing the base, trim any excess stems that may be sticking out too far or disrupting the shape of the bouquet. Use your scissors or wire cutters to make clean cuts, ensuring that all stems are uniform in length and neatly aligned.
Optional: Use Waterproof Floral Foam:
If you want extra support and longevity for your bouquet, you can insert waterproof floral foam into a bouquet holder or container. Soak the foam in water until it is fully saturated, then place it at the base of the bouquet. This foam will help to keep the greenery and flowers hydrated throughout the event.
Creating a strong and well-structured base is crucial for the stability and overall look of your cascading bouquet. Once you have the base in place, you’re ready to move on to the next step: adding the focal flowers.
When making a cascading greenery bouquet, start with a base of sturdy greenery like eucalyptus or ivy. Then, add in softer, more delicate greenery like ferns or baby’s breath to create a cascading effect.
Step 4: Adding the Focal Flowers
Now that you have created a solid base for your cascading bouquet, it’s time to add the focal flowers. These are the standout blooms that will draw attention and serve as the focal point of your arrangement. Here’s how you can incorporate the focal flowers:
Prepare the Focal Flowers:
Trim the stems of your focal flowers to the desired length. Remove any excess foliage or thorns that may interfere with the arrangement. Make sure the stems are clean and free from any debris or damaged parts.
Identify Key Points:
Take a moment to identify key points or focal areas on the base of your bouquet. These are the areas where you want to place the focal flowers for maximum impact. Typically, these points are on the top and front of the base.
Insert the Focal Flowers:
Begin by inserting the stems of the focal flowers into the base of the bouquet. Position them at the identified key points, ensuring that they are secure and stable. Angle the stems slightly outward and downward to follow the natural cascading shape.
Create Balance and Symmetry:
As you add the focal flowers, make sure to create balance and symmetry throughout the bouquet. Distribute them evenly, placing them at different heights and angles. Step back occasionally to assess the overall look and make any necessary adjustments.
Secure with Floral Tape:
Once you are satisfied with the placement of the focal flowers, secure them in place using floral tape. Wrap the tape around the stems, making sure it is tight and secure. This will hold the flowers in position and provide additional stability to the bouquet.
Adding the focal flowers is a crucial step in creating a visually striking cascading bouquet. Once the focal flowers are securely in place, you can move on to the next step: incorporating the secondary flowers.
Step 5: Incorporating the Secondary Flowers
With the focal flowers securely in place, it’s time to add the secondary flowers to your cascading bouquet. These flowers will serve as a supporting element, adding depth, texture, and color to the arrangement. Here’s how you can incorporate the secondary flowers:
Prepare the Secondary Flowers:
Trim the stems of your secondary flowers to the desired length, keeping in mind the overall shape and size of the bouquet. Remove any excess foliage or thorns that may interfere with the arrangement. Ensure that the stems are clean and free from any debris.
Identify Placement Areas:
Take a moment to identify areas in the base where you want to incorporate the secondary flowers. These areas are typically between the focal flowers or in any gaps or open spaces in the arrangement. Visualize where the secondary flowers will add balance and enhance the overall look.
Insert the Secondary Flowers:
Starting from the identified placement areas, begin inserting the stems of the secondary flowers into the base of the bouquet. Place them strategically, filling in the gaps and creating a harmonious flow with the focal flowers. Vary the heights and angles for a natural and organic look.
Create Depth and Dimension:
As you incorporate the secondary flowers, focus on creating depth and dimension within the bouquet. Blend different colors, shapes, and textures to add visual interest. Allow some of the secondary flowers to cascade slightly below the focal flowers, creating a seamless transition.
Step Back and Assess:
Periodically step back and assess the overall arrangement as you add the secondary flowers. Ensure that the bouquet remains balanced, with a pleasing distribution of flowers throughout. Make any necessary adjustments to achieve the desired aesthetic.
Secure with Floral Tape:
Once you are satisfied with the placement of the secondary flowers, secure them in place using floral tape. Wrap the tape around the stems, ensuring a tight and secure hold. This will help maintain the structure and shape of the bouquet.
Incorporating the secondary flowers adds depth and dimension to your cascading bouquet, enhancing its overall beauty. With the secondary flowers arranged, you can move on to the next step: filling in the gaps with filler flowers.
Step 6: Filling in the Gaps with Filler Flowers
As you near the completion of your cascading bouquet, it’s time to fill in the remaining gaps and add the finishing touches with filler flowers. These delicate blooms serve to enhance the overall look of the bouquet and create a sense of fullness. Here’s how you can incorporate filler flowers:
Prepare the Filler Flowers:
Trim the stems of your filler flowers to the appropriate length, considering the size of the bouquet and the placement of the other flowers. Remove any excess foliage or thorns that may interfere with the arrangement. Ensure that the stems are clean and free from debris.
Identify Empty Spaces:
Take a close look at the bouquet and identify any remaining empty spaces or gaps that need to be filled. These spaces are usually small openings between the focal and secondary flowers or areas that may appear visually unbalanced.
Insert the Filler Flowers:
Starting from the identified empty spaces, gently insert the stems of the filler flowers into the base of the bouquet. Weave them into the arrangement, filling in the gaps and adding a soft, airy touch. Vary the heights and angles to create a natural and organic appearance.
Create Texture and Movement:
The filler flowers play a crucial role in adding texture and movement to the bouquet. Choose blooms that are smaller in size, with interesting shapes and textures. Allow some of the filler flowers to cascade slightly below the other flowers, contributing to the cascading effect.
Blend Colors and Shapes:
As you add the filler flowers, focus on blending different colors and shapes to create a harmonious composition. Consider the color palette of the bouquet and choose filler flowers that complement the overall aesthetic. This will help tie the arrangement together cohesively.
Step Back and Assess:
Periodically step back and assess the bouquet as you add the filler flowers. Ensure that the arrangement remains balanced and visually pleasing. Make any necessary adjustments to achieve the desired look and ensure that the filler flowers are evenly distributed.
Secure with Floral Tape:
Once you are satisfied with the placement of the filler flowers, secure them in place using floral tape. Wrap the tape around the stems, ensuring a firm hold. This will help maintain the structure and cohesion of the bouquet.
By filling in the gaps with filler flowers, you add the final touches to your cascading bouquet, creating a breathtaking arrangement. With the filler flowers incorporated, you can now move on to the final step: adding the finishing touches.
Step 7: Adding Finishing Touches
Congratulations! You’re at the final step of creating your captivating cascading greenery bouquet. Now it’s time to add the finishing touches, which will elevate your bouquet to its full potential. Here’s how you can add those final flourishes:
Assess the Overall Look:
Take a moment to step back and assess the overall look of your bouquet. Make any necessary adjustments to ensure that the arrangement is balanced, visually pleasing, and meets your desired aesthetic. Consider the shape, size, and placement of the flowers and greenery.
Trim Excess Stems:
Inspect the stems of your bouquet and trim any excess length. Use your scissors or wire cutters to make clean cuts, ensuring that all stems are uniform in length. This will give your bouquet a polished and professional appearance.
Wrap the Stems:
Once you are satisfied with the arrangement and stem lengths, it’s time to wrap the stems with a ribbon or twine. Choose a ribbon or twine that complements the colors and style of your bouquet. Start at the base and wrap it tightly around the stems, securing it with a knot or a decorative bow.
Add a Personalized Touch:
If desired, you can add a personalized touch to your bouquet. Consider adding a charm, a locket, or a sentimental trinket that holds special meaning for you or the occasion. It will make the bouquet even more unique and memorable.
Mist the Bouquet:
To keep your bouquet fresh and vibrant, mist it lightly with water using a spray bottle. This will help hydrate the flowers and greenery and keep them looking fresh throughout the day. Be mindful not to oversaturate the bouquet.
Store and Transport Carefully:
When storing or transporting your cascading greenery bouquet, ensure that it remains upright and secure. Use a vase or a bouquet holder to keep the stems hydrated and in place. Keep the bouquet away from direct sunlight, heat, and drafts to preserve its freshness.
Adding those finishing touches will bring your cascading greenery bouquet to life, turning it into a breathtaking masterpiece that will be admired by all. Once you have completed these final steps, your bouquet is ready to be showcased at weddings, events, or as a beautiful centerpiece in your home.
Enjoy the beauty and elegance of your stunning cascading greenery bouquet and bask in the admiration it receives. Remember, this step-by-step guide can be adapted and customized according to your preferences and creativity. So let your imagination run wild and create a bouquet that truly reflects your style and personality.
Happy arranging!
Read more: How To Make A Wildflower Bouquet
Conclusion
Creating a cascading greenery bouquet is a delightful and rewarding endeavor. It allows you to combine the natural beauty of greenery and flowers to craft a stunning floral arrangement that captivates the senses. By following the steps outlined in this guide, you can confidently create your own cascading greenery bouquet with professional flair.
From selecting the perfect greenery to adding the finishing touches, each step plays a crucial role in bringing your bouquet to life. The choice of greenery sets the tone and provides the cascading effect, while the focal flowers add a captivating focal point. The secondary flowers and filler blooms enhance the depth, texture, and color of the arrangement.
Throughout the process, it’s important to balance creativity and technique. Experiment with different combinations of flowers, greenery, and filler blooms to achieve the desired aesthetic. Don’t be afraid to trust your instincts and add your personal touch to make the bouquet uniquely yours.
Remember to consider the style and theme of the occasion, blend colors harmoniously, and create a balanced composition. The art of constructing a cascading greenery bouquet lies in harmonizing the elements into a cohesive and visually striking arrangement.
As you add the finishing touches and wrap the stems with ribbon or twine, cherish the moment knowing that you have created something extraordinary. Your cascading greenery bouquet is a testament to your creativity and dedication.
Whether it’s for a wedding, a special event, or simply to adorn your home, your cascading greenery bouquet will bring joy and beauty wherever it is displayed. It will be a cherished centerpiece, a symbol of love, and a testament to the beauty of nature.
So, take pride in your creation, showcase your cascading greenery bouquet with pride, and let its enchanting allure captivate all who behold it. Enjoy the process, unleash your creativity, and continue creating breathtaking floral arrangements for years to come.
Frequently Asked Questions about How To Make A Cascading Greenery Bouquet
Was this page helpful?
At Storables.com, we guarantee accurate and reliable information. Our content, validated by Expert Board Contributors, is crafted following stringent Editorial Policies. We're committed to providing you with well-researched, expert-backed insights for all your informational needs.


0 thoughts on “How To Make A Cascading Greenery Bouquet”