Home>Garden Essentials>How To Make A Greenery Cemetery Cross
Garden Essentials
How To Make A Greenery Cemetery Cross
Modified: March 7, 2024
Learn how to create a stunning garden-inspired cemetery cross with greenery. Honor your loved ones with this beautiful DIY project.
(Many of the links in this article redirect to a specific reviewed product. Your purchase of these products through affiliate links helps to generate commission for Storables.com, at no extra cost. Learn more)
Introduction
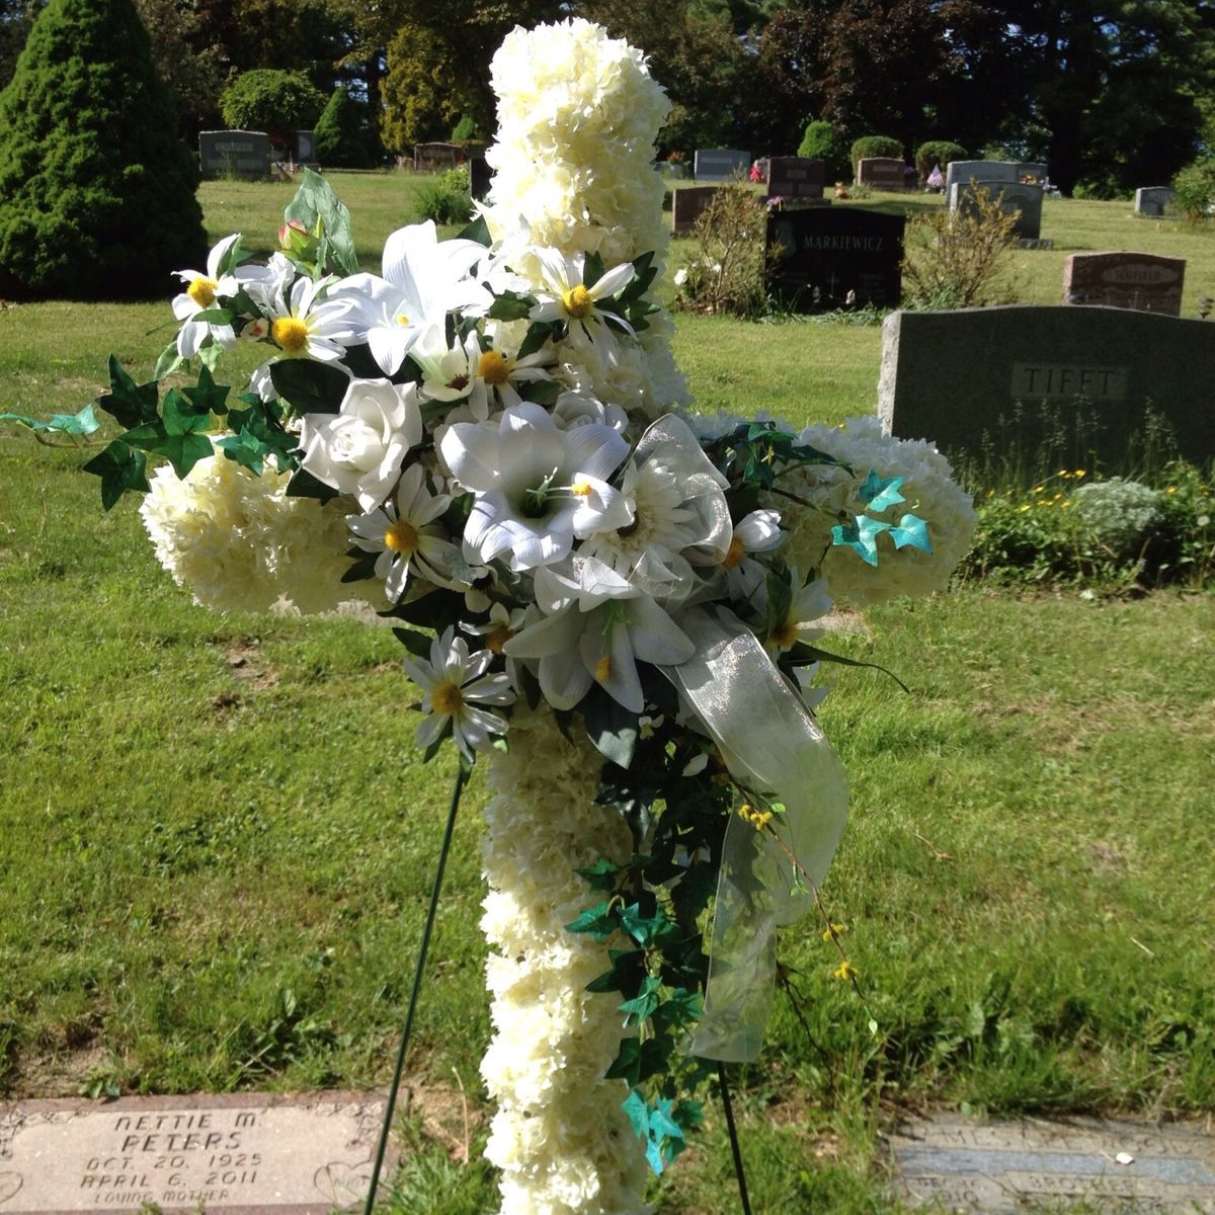
Welcome to our guide on how to make a stunning and eco-friendly greenery cemetery cross. With its natural beauty and symbolic significance, a greenery cemetery cross is a heartfelt and sustainable way to honor a loved one who has passed away. By incorporating elements from nature, you can create a touching tribute that brings comfort and serenity to the final resting place.
In this article, we will walk you through the step-by-step process of making a greenery cemetery cross. From gathering the greenery to adding decorative touches, we will provide you with detailed instructions and helpful tips along the way.
Creating a greenery cemetery cross not only serves as a meaningful memorial but also contributes to the preservation of the environment. By using natural materials and avoiding synthetic decorations, you can minimize the ecological impact and ensure that your tribute is in harmony with nature.
Keep in mind that the materials and techniques you choose can greatly influence the overall look and durability of the cross. You can personalize the design with your loved one’s favorite plants, flowers, or symbolic elements. By adding a personal touch, you can create a unique and heartfelt tribute that reflects their personality and spirit.
Let’s begin this journey of creating a beautiful greenery cemetery cross, providing solace and remembrance for years to come.
Key Takeaways:
- Create a heartfelt and eco-friendly greenery cemetery cross to honor a loved one. Use natural materials and personalized touches for a unique and sustainable tribute.
- Follow step-by-step instructions to gather greenery, construct the cross, and add personal elements. Place the cross in a meaningful spot at the cemetery for a lasting tribute.
Materials Needed
Before you start creating your greenery cemetery cross, it’s important to gather all the necessary materials. Here’s a list of items you’ll need:
- A wooden or metal cross – Choose a cross that is the appropriate size and material for your desired design. You can purchase pre-made crosses from craft stores or use a DIY approach by creating a cross from wooden boards or metal rods.
- Greenery – Select a variety of fresh or dried greenery to decorate your cross. Options include ivy, ferns, moss, eucalyptus, or any other greenery that holds up well in outdoor conditions.
- Floral wire or zip ties – These will be used to secure the greenery to the cross.
- Garden clippers or scissors – You’ll need them to trim the greenery and shape it to fit the cross.
- Decorative elements – Optional decorative elements such as flowers, ribbons, or symbolism-related accessories can be added to personalize the cross.
- Water source – If you plan to use fresh greenery, you’ll need access to water to keep it hydrated before and during the creation process.
It’s important to note that the materials needed may vary depending on your preferences and the availability of certain items. Feel free to get creative and adapt the materials list to suit your individual needs and vision for the greenery cemetery cross.
Once you have gathered all the materials, you are ready to move on to the next step: gathering the greenery.
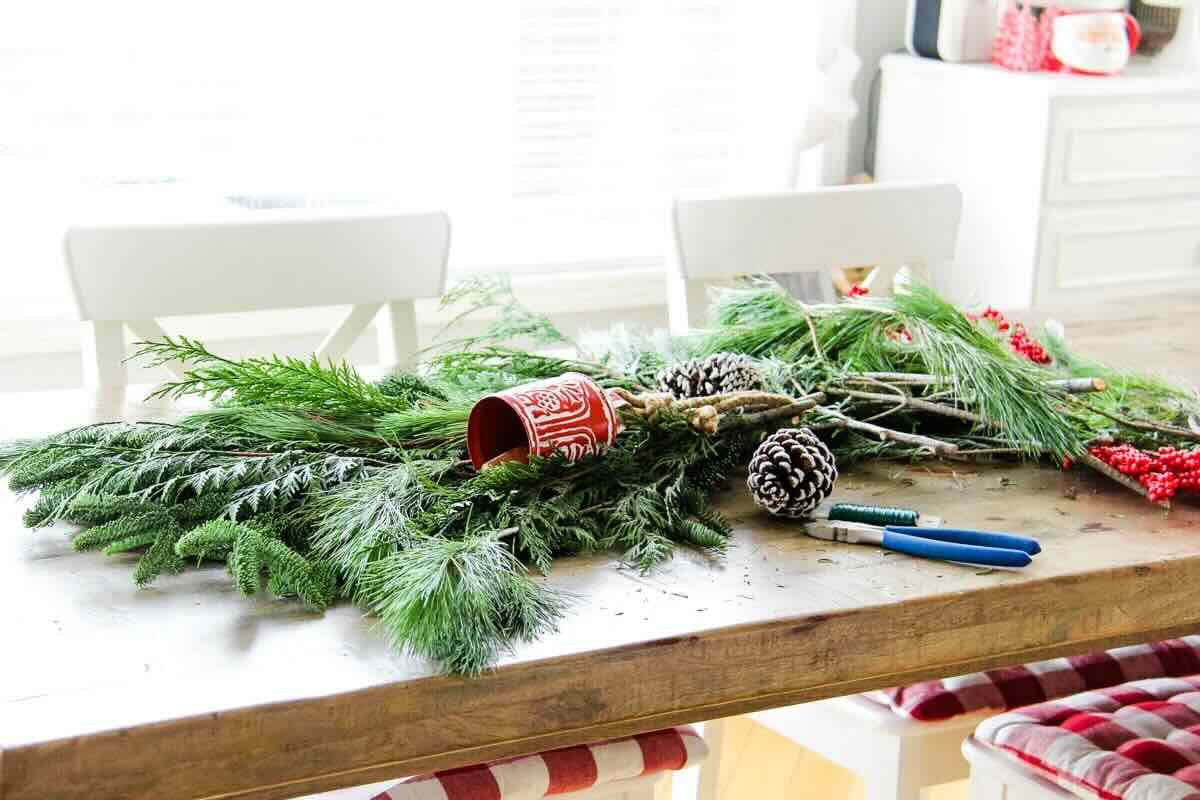
Step 1: Gathering the Greenery
The first step in creating a greenery cemetery cross is to gather the greenery that you will use to decorate the cross. This is an opportunity to incorporate elements from nature that hold symbolic meaning or were cherished by the person you are memorializing.
Here are some tips for gathering the greenery:
- Choose appropriate greenery: Select greenery that is suitable for outdoor conditions and can withstand the elements. Ivy, ferns, moss, eucalyptus, and other hardy greens are popular choices.
- Consider color and texture: Think about the color scheme and texture you want to achieve. Look for greenery with different shades of green and varying textures to add visual interest to the cross.
- Gather from your garden or local florist: If you have access to a garden, you can use plants and foliage from there. Alternatively, visit a local florist or garden center to purchase the greenery you need.
- Ask permission if gathering from public areas: If you plan to gather greenery from public places such as parks or forests, make sure to obtain the necessary permissions and follow any regulations or restrictions.
- Collect more than you think you’ll need: It’s better to have extra greenery than to run out during the construction process. Collect a bit more than you think you’ll require to ensure you have enough to cover the cross fully.
Once you have gathered the greenery, take a moment to appreciate the natural beauty and significance it holds. The next step is to prepare the base for the cross.
Step 2: Preparing the Base
Now that you have the greenery for your greenery cemetery cross, it’s time to prepare the base. The base provides stability for the cross and serves as a foundation for attaching the greenery.
Follow these steps to prepare the base:
- Clean the cross: If you purchased a pre-made cross, give it a thorough cleaning to remove any dirt, dust, or debris. If you are making a DIY cross, ensure its surface is smooth and free from rough edges.
- Assess the stability: Check if the base of the cross is sturdy enough to hold the weight of the greenery. If needed, reinforce the base by adding additional support or securing it to a solid surface.
- Paint or stain (optional): Depending on your preference, you can paint or stain the cross to add a personalized touch. Choose colors that complement the greenery and blend well with the surrounding environment.
- Prepare the attachment points: Determine where the greenery will be attached to the cross. Measure and mark these points to ensure even distribution and a balanced look. You can use a pencil or tape as reference markers.
By taking the time to properly prepare the base, you are setting the stage for a sturdy and visually pleasing greenery cemetery cross. Once the base is prepared, move on to the next step – constructing the cross.
Step 3: Constructing the Cross
Now that you have prepared the base, it’s time to construct the cross itself. This step is especially important if you are creating a DIY cross or if you want to personalize the design.
Follow these steps to construct the cross:
- Measure and cut the cross arms: If you are making a wooden cross, measure the desired length for the cross arms and cut the wooden boards accordingly. Ensure that the arms are symmetrical in length.
- Align and connect the cross arms: Position the cross arms in the shape of a cross, ensuring that they are aligned correctly. Secure the cross arms together using screws, nails, or other appropriate connectors.
- Sand and smooth the cross: If necessary, use sandpaper to smooth any rough edges or surfaces of the cross. This step helps to create a polished and professional-looking finish.
- Apply protective finish (optional): If you want to protect the wood from weathering and enhance its natural beauty, consider applying a protective finish such as varnish, paint, or a wood sealer. This step is optional but can extend the lifespan of the cross.
If you are using a pre-made cross, you may skip the construction step and proceed directly to the next step. Remember, the construction process allows you to customize the cross and make it uniquely yours.
Once the cross is constructed and any optional finishes have been applied, you are ready to move on to the next step – securing the greenery to the cross.
When making a greenery cemetery cross, use a sturdy base like wire or wood, and secure the greenery with floral wire or zip ties. Start with a focal point in the center and work your way out for a balanced look.
Read more: How To Make Greenery Tomte With Greenery
Step 4: Securing the Greenery
With the cross constructed, it’s time to attach the greenery and bring your greenery cemetery cross to life. Securing the greenery ensures that it remains in place and creates a lush and beautiful display.
Follow these steps to secure the greenery:
- Prepare the greenery: Trim the greenery to the desired length, removing any excess or damaged parts. Keep in mind that some greenery may need to be grouped together to create fuller clusters.
- Start at the bottom: Begin attaching the greenery at the bottom of the cross, near the base. Use floral wire or zip ties to secure the stems to the cross. Wrap the wire or tie tightly but gently to avoid damaging the greenery.
- Work your way up: Gradually work your way up the cross, attaching the greenery along the arms and towards the top. Ensure that the greenery is evenly distributed and covers the surface of the cross.
- Overlap and layer: As you attach the greenery, overlap the stems and layer different types of greenery for added depth and dimension. This will create a more natural and vibrant appearance.
- Secure loose ends: If any stems or branches are sticking out or appear loose, use additional floral wire or ties to secure them to the cross. This will ensure a cohesive and secure arrangement.
Take your time during this step to carefully arrange and secure the greenery. Consider the overall composition, balance, and aesthetic of the cross as you work. It’s perfectly fine to make adjustments as needed to achieve the desired look.
With the greenery securely attached to the cross, it’s time to add some decorative elements and personal touches in the next step.
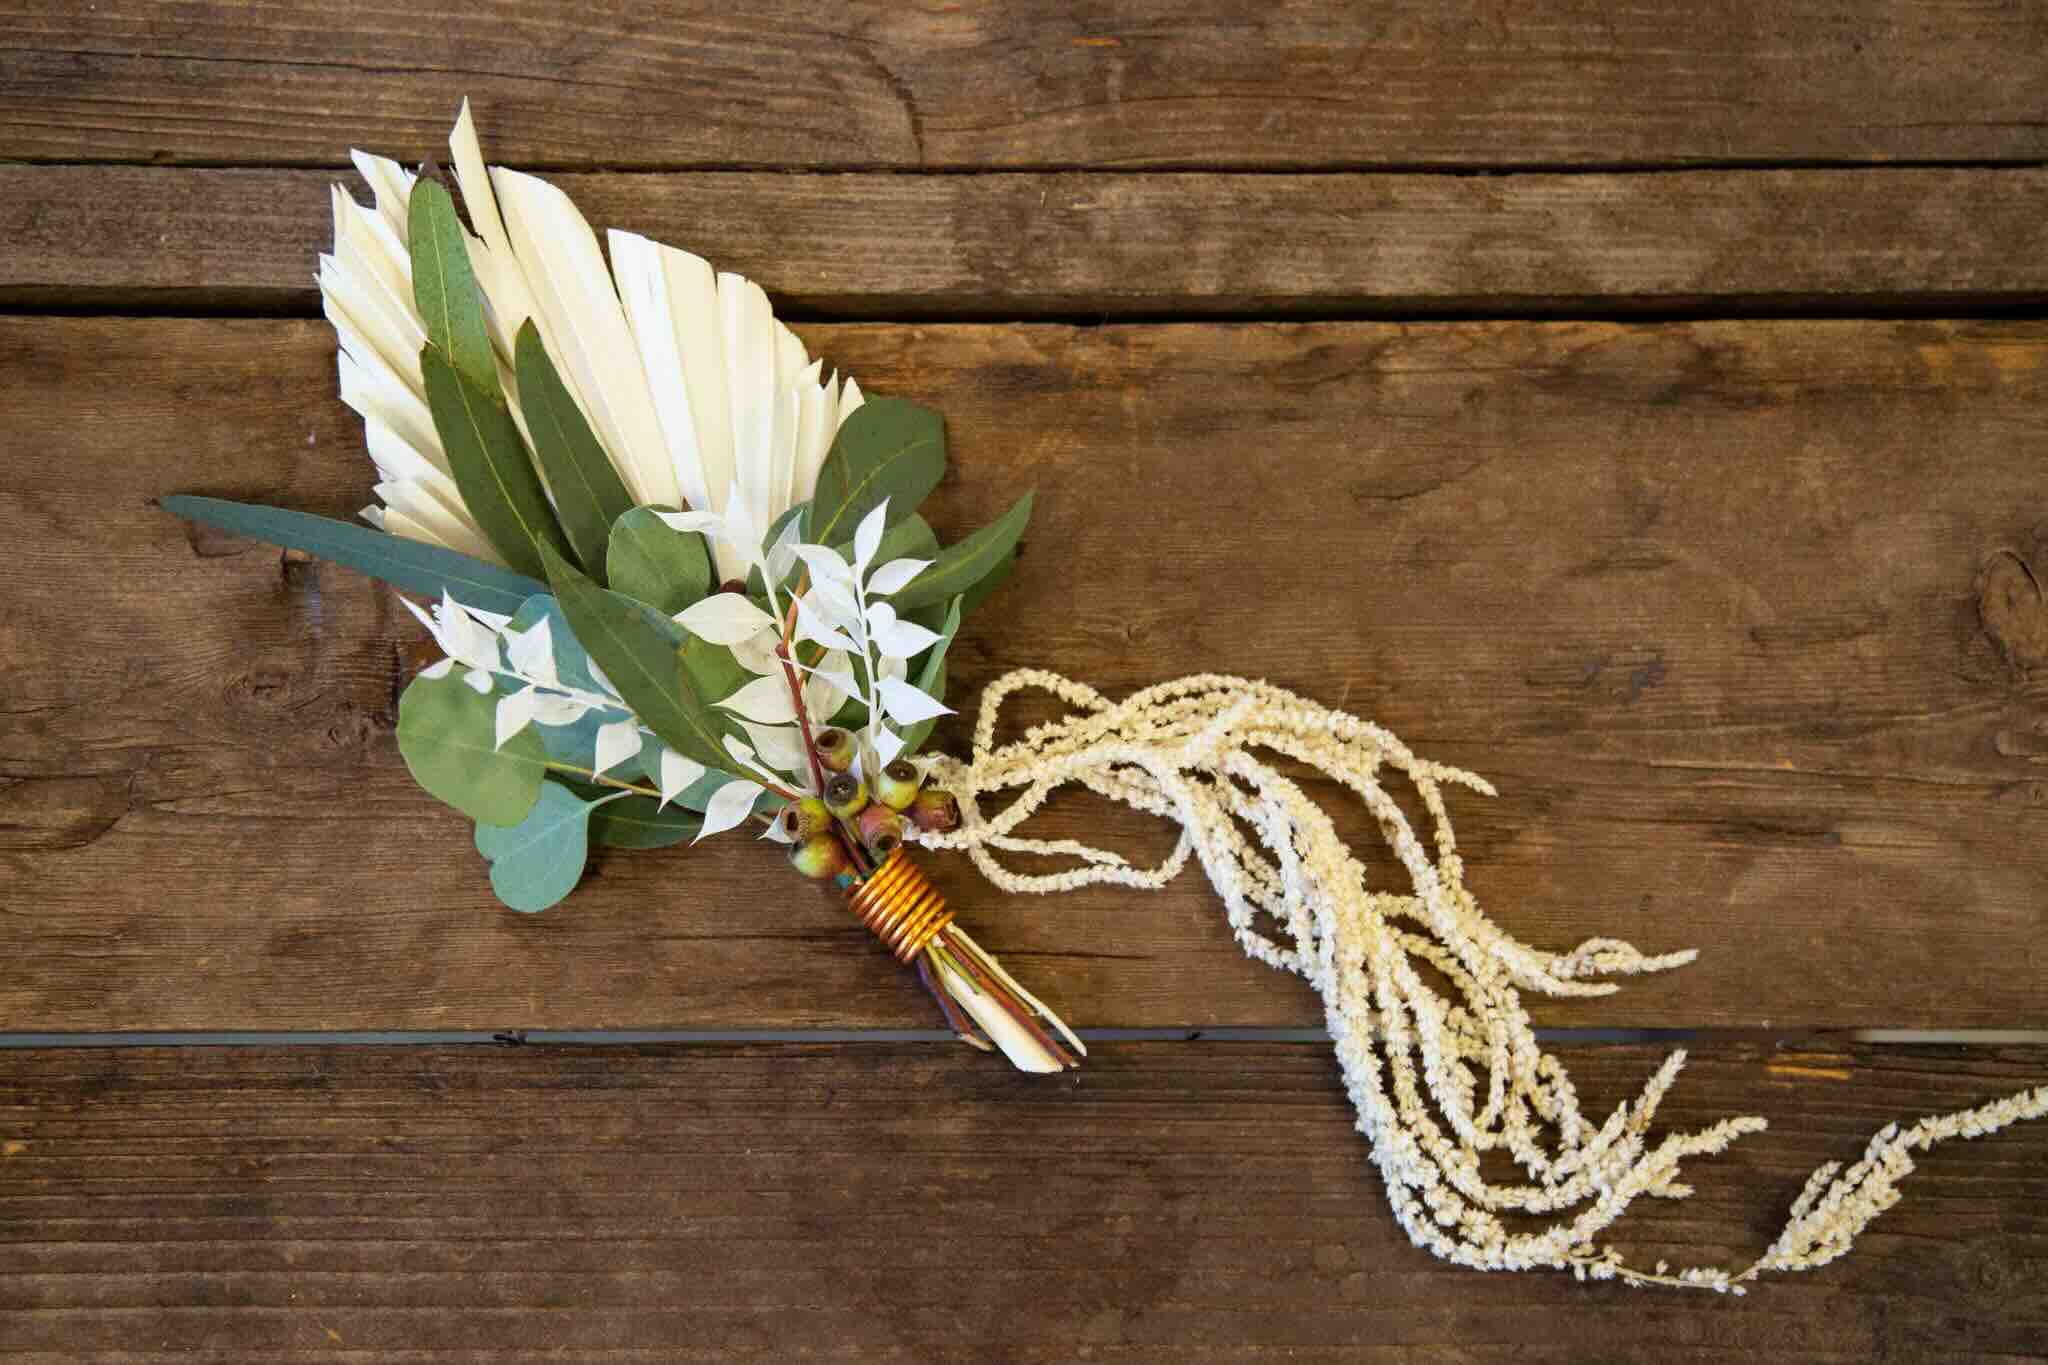
Step 5: Adding Decorative Elements
Now that you have the greenery in place on your greenery cemetery cross, it’s time to add some decorative elements to enhance its visual appeal and personal significance. These decorative touches can help customize the cross and pay tribute to your loved one.
Follow these steps to add decorative elements:
- Choose flowers or other adornments: Select flowers that hold special meaning or were favored by the person you’re memorializing. Consider their favorite colors, symbolic flowers, or blooms that reflect their personality. You can also incorporate other decorative elements such as ribbons, bows, or religious symbols.
- Attach the flowers and decorations: Use floral wire or zip ties to attach the flowers and decorations to the greenery and cross. Be gentle but secure in your attachment, making sure they are securely fastened and won’t easily come loose.
- Consider the weather: Keep in mind the climate and weather conditions of the cemetery when choosing decorations. Opt for sturdy flowers and materials that can withstand wind, rain, or sun exposure.
- Personalize the cross: Add personal touches to the cross by including meaningful items such as photographs, small mementos, or handwritten notes. These items can provide comfort and a sense of closeness with the person being remembered.
Remember, the goal is to create a thoughtful and personalized memorial. Don’t be afraid to get creative and think outside the box. The decorative elements should reflect the personality, interests, and cherished memories of the person you’re honoring.
With the decorative elements in place, your greenery cemetery cross is almost complete. The final step is to bring it to the cemetery and find the perfect spot to showcase your heartfelt tribute.
Step 6: Placing the Cross at the Cemetery
The final step in creating your greenery cemetery cross is to find the right spot in the cemetery to place it. Placing the cross in a meaningful location will ensure that it serves as a beautiful and lasting tribute to your loved one.
Consider the following tips when placing the cross at the cemetery:
- Check cemetery guidelines: Before you visit the cemetery, make sure to review any rules or guidelines regarding the placement of memorials. Some cemeteries may have specific regulations on the size, materials, and placement of crosses.
- Choose a prominent location: Look for a spot in the cemetery that is visible and easily accessible. Consider finding a location near the person’s burial site or in a meaningful area that holds significance to your loved one.
- Ensure stability: Once you have chosen the spot, make sure the cross is securely placed and won’t easily topple over. Depending on the design and cemetery regulations, you may need to use stakes or other methods to anchor the cross in place.
- Maintain the cross: Regularly visit the cemetery to maintain and care for the cross. Remove any wilted or damaged greenery, replace with fresh materials when needed, and tidy up the area around the cross.
Remember that the placement of the cross in the cemetery is a deeply personal decision. Take your time to find the perfect spot and ensure that it reflects the love and respect you have for your departed loved one.
By following all the steps in this guide, you have created a stunning and meaningful greenery cemetery cross. This eco-friendly tribute will honor your loved one’s memory while bringing a touch of natural beauty to the cemetery.
May this greenery cemetery cross serve as a lasting symbol of remembrance, love, and connection with your dearly departed.
Conclusion
Creating a greenery cemetery cross is a heartfelt and eco-friendly way to honor and remember a loved one who has passed away. By incorporating elements from nature, you can craft a beautiful and meaningful tribute that brings solace and serenity to their final resting place.
In this guide, we have walked you through the step-by-step process of making a greenery cemetery cross. From gathering the greenery to securing it onto the cross, and adding personalized decorative elements, each step has been carefully outlined to help you create a unique and heartfelt memorial.
By choosing eco-friendly materials, such as natural greenery and avoiding synthetic decorations, you not only create a visually stunning tribute but also help preserve the environment. The natural beauty of the greenery, paired with personalized touches, creates a memorial that is both sustainable and deeply meaningful.
Remember to consider the preferences and personality of the person you are memorializing, incorporating their favorite flowers and symbols. Adding personal touches like photographs or mementos can further personalize the cross and create a connection with the cherished memories of your loved one.
Once your greenery cemetery cross is complete, carefully place it in a prominent and meaningful location within the cemetery. Always follow any guidelines or regulations set by the cemetery authorities to ensure the respectful placement of your tribute.
Finally, remember to maintain and care for the cross over time. Regular visits to the cemetery to clean, replace wilted greenery, and tidy the surrounding area will honor the memory of your loved one and keep the tribute looking beautiful and well-tended.
Creating a greenery cemetery cross is a special way to express your love and remembrance for a departed loved one while embracing the beauty of nature. May your greenery cemetery cross be a lasting symbol of love, peace, and eternal connection.
Frequently Asked Questions about How To Make A Greenery Cemetery Cross
Was this page helpful?
At Storables.com, we guarantee accurate and reliable information. Our content, validated by Expert Board Contributors, is crafted following stringent Editorial Policies. We're committed to providing you with well-researched, expert-backed insights for all your informational needs.


0 thoughts on “How To Make A Greenery Cemetery Cross”