Home>Garden Essentials>How Early To Start Pepper Seeds Indoors
Garden Essentials
How Early To Start Pepper Seeds Indoors
Modified: March 15, 2024
Start your garden early by learning when to start pepper seeds indoors. Discover the best practices for successful indoor pepper seed germination.
(Many of the links in this article redirect to a specific reviewed product. Your purchase of these products through affiliate links helps to generate commission for Storables.com, at no extra cost. Learn more)
Introduction
Growing your own peppers can be a rewarding and fulfilling experience, whether you have a sprawling outdoor garden or just a small balcony space. While most people think of directly sowing seeds in the garden, starting pepper seeds indoors is a great way to get a head start on the growing season and ensure a higher success rate for your plants.
By starting pepper seeds indoors, you have greater control over environmental conditions such as temperature, light, and moisture. This allows you to provide the ideal conditions for germination and seedling development. Additionally, it extends the growing season, giving your peppers more time to mature and produce a bountiful harvest.
In this article, we will explore the benefits of starting pepper seeds indoors, provide guidance on choosing the right containers and soil, and discuss the best practices for sowing, lighting, watering, and fertilizing pepper seedlings. We will also touch upon the process of transplanting the seedlings outdoors and offer solutions to common problems that may arise throughout the process.
So, whether you’re a seasoned gardener looking to expand your pepper varieties or a beginner with limited gardening space, starting pepper seeds indoors is a valuable technique to learn. It allows you to have more control over the growing conditions and ensures healthier, more robust plants. So let’s dive in and discover how you can get started with growing peppers from seed indoors!
Key Takeaways:
- Get a head start on growing peppers by starting seeds indoors 8-10 weeks before the last frost. This helps develop stronger plants and extends the growing season for a bountiful harvest.
- Choose the right containers and soil for healthy pepper seedlings. Provide proper lighting, temperature, watering, and fertilization for successful indoor seed starting.
Read more: How To Start Pepper Seeds Indoors
Benefits of Starting Pepper Seeds Indoors
Starting pepper seeds indoors provides numerous benefits that contribute to successful pepper cultivation. Let’s explore some of the key advantages:
1. Early Start: By starting pepper seeds indoors, you can begin the germination process earlier than if you were to sow them directly in the garden. This gives your plants a head start and allows them to develop stronger root systems and sturdy stems, resulting in healthier plants overall.
2. Extended Growing Season: Pepper plants require warm temperatures to thrive. By starting seeds indoors, you can initiate the growing process well ahead of the last frost date, ensuring that your pepper plants have a longer growing season and a greater opportunity to produce a higher yield of peppers.
3. Greater Control: Indoor seed starting allows you to have full control over the growing environment. You can adjust factors such as temperature, light, and moisture to create ideal conditions for germination and seedling growth. This control minimizes the risk of pests, diseases, and other environmental challenges that can hinder plant development.
4. Increased Variety: Starting pepper seeds indoors opens up a world of variety choices. You have access to a wide range of pepper seed varieties, including mild, hot, sweet, and exotic peppers that may not be readily available as established plants at local nurseries or garden centers.
5. Cost Savings: Seed starting indoors can be more cost-effective compared to purchasing established pepper plants. A packet of pepper seeds can yield multiple plants, providing you with an abundance of peppers at a fraction of the cost.
6. Personal Satisfaction: Watching the germination and growth of pepper seedlings is a rewarding experience. It allows you to connect with the natural process of plant development, fostering a sense of accomplishment and satisfaction as you nurture and care for your pepper plants from the very beginning.
7. Improved Success Rate: Indoor seed starting significantly increases the success rate of growing peppers. You have control over the early stages of the plant’s growth, ensuring that the right conditions are met for optimal germination, resulting in healthier and stronger seedlings.
Starting pepper seeds indoors not only enhances your gardening experience but also provides you with healthier plants, an extended growing season, and an abundance of flavorful peppers. So, let’s move on to the next step and explore the process of choosing the right containers and soil for your pepper seedlings.
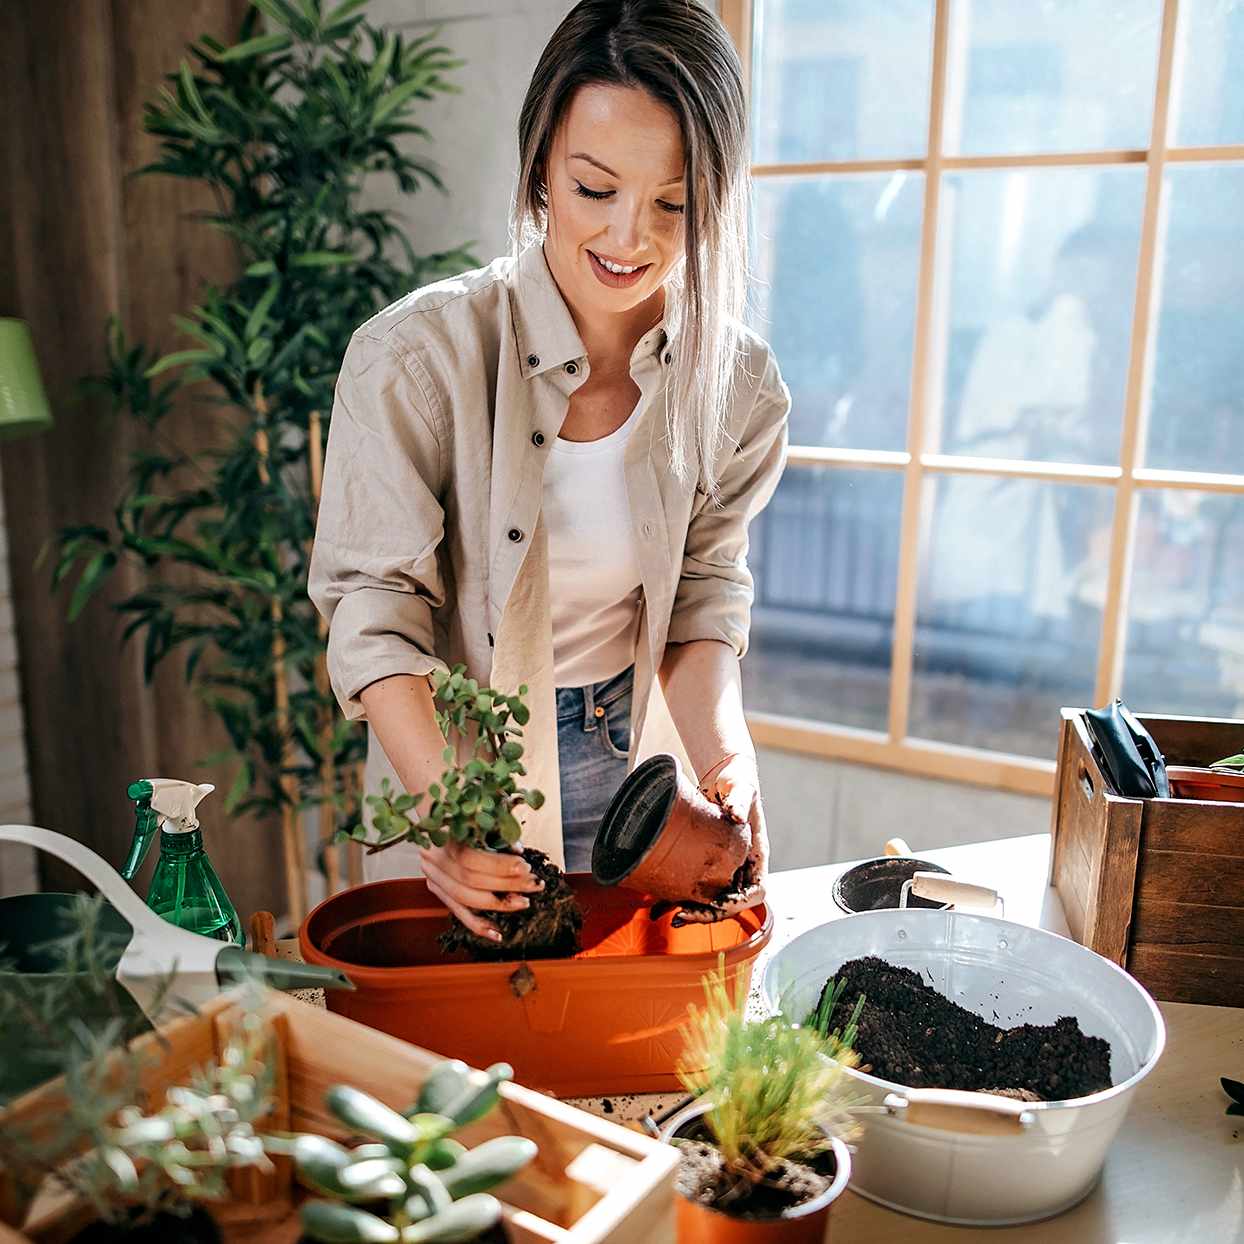
Choosing the Right Containers and Soil
When it comes to starting pepper seeds indoors, selecting the right containers and soil is crucial for the successful growth of your seedlings. Here are some key factors to consider:
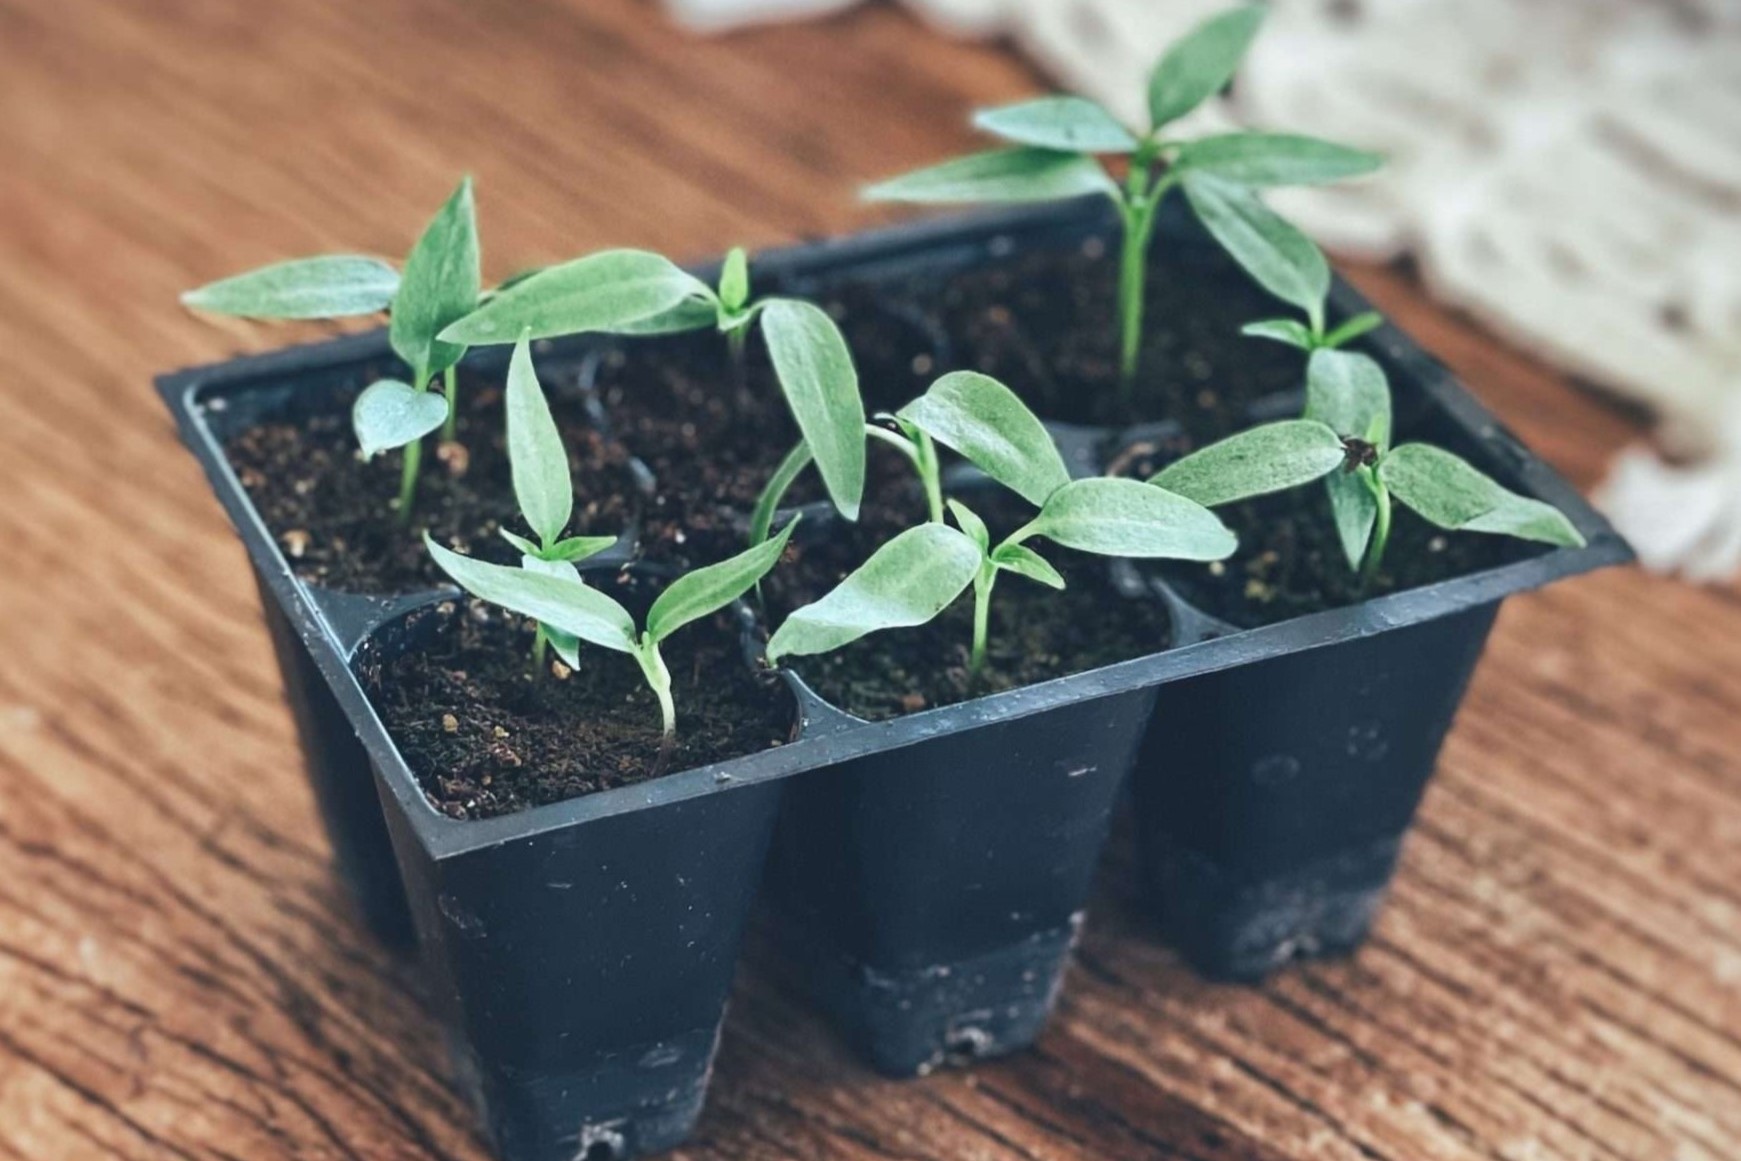
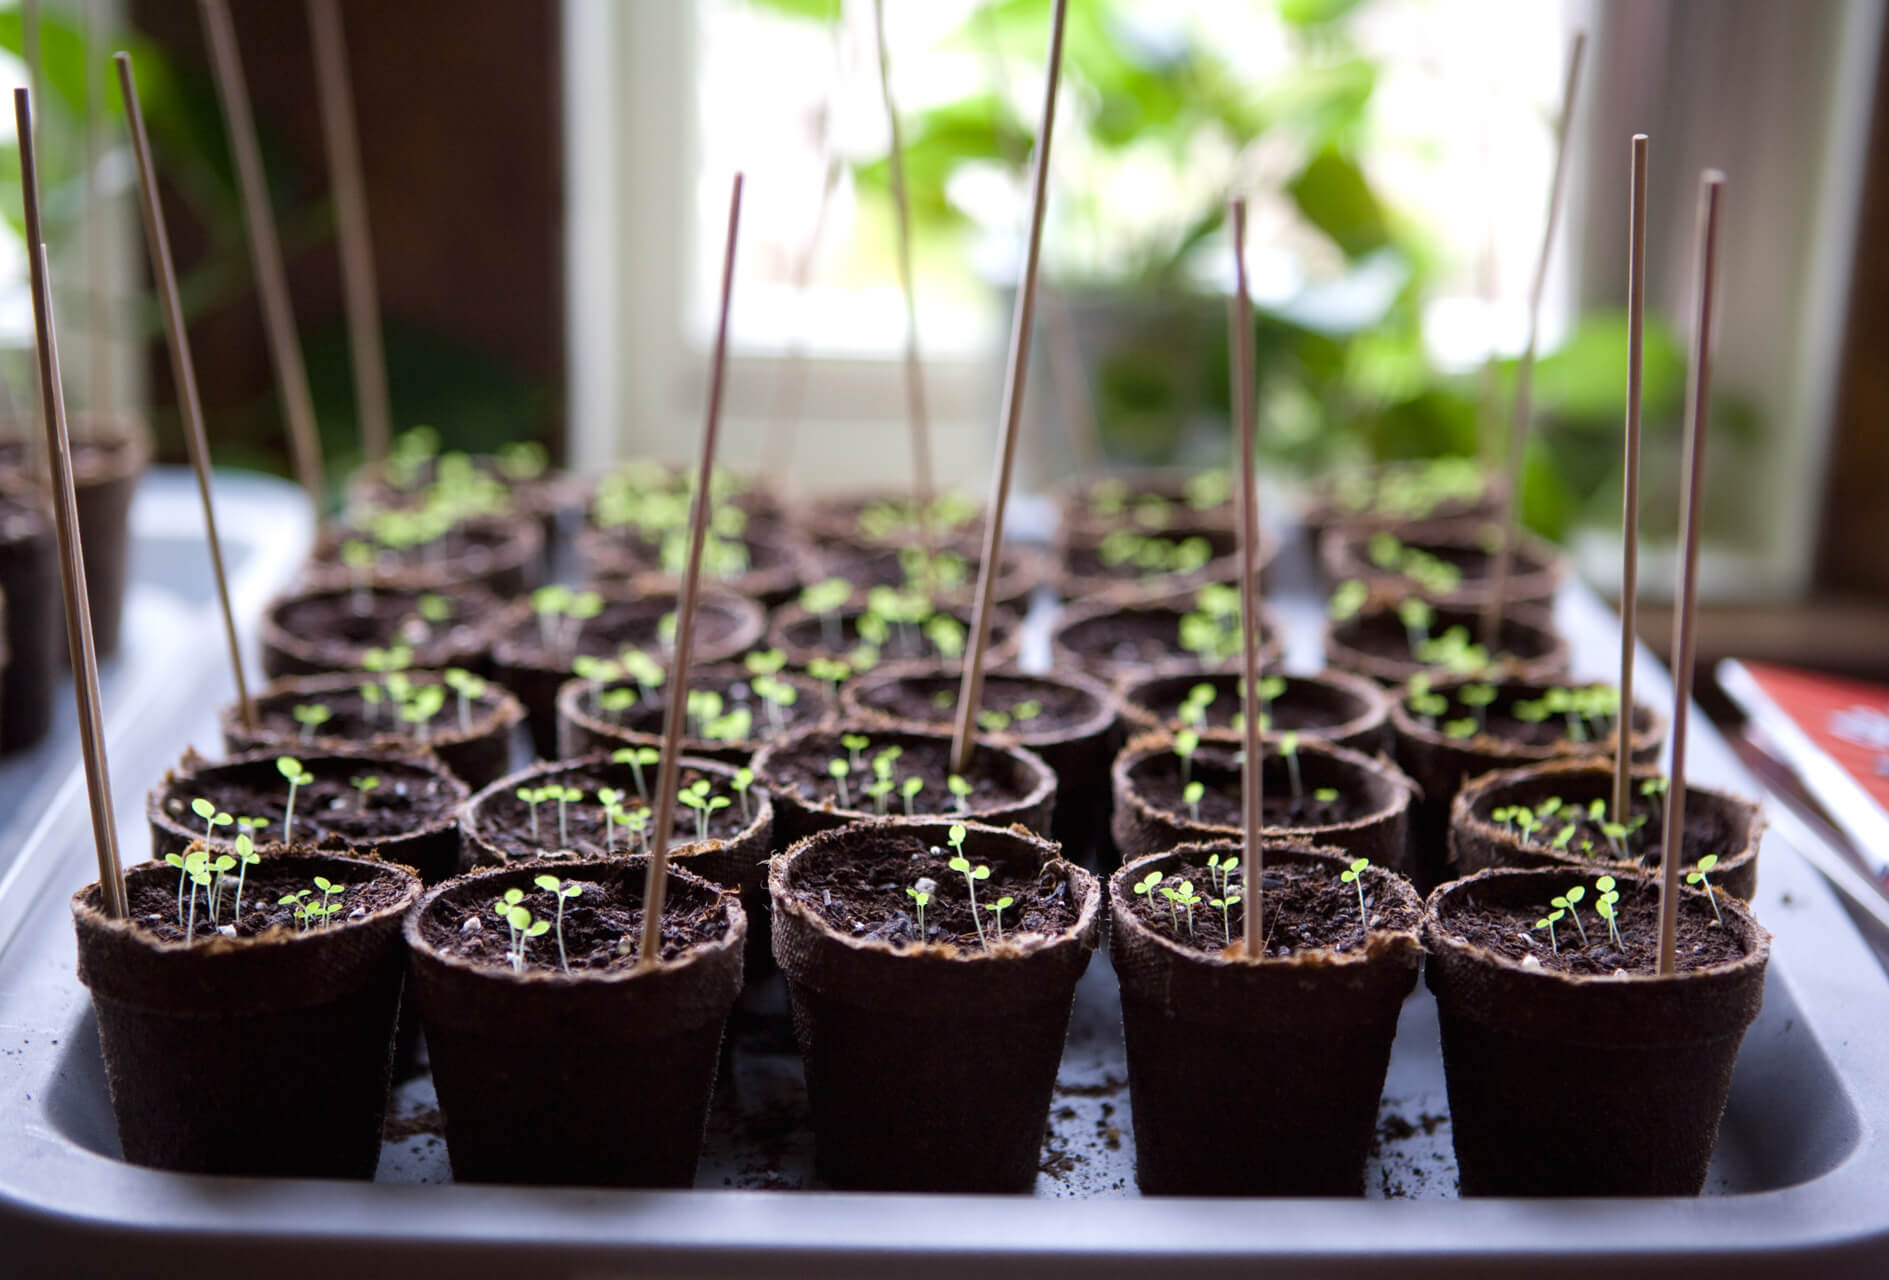
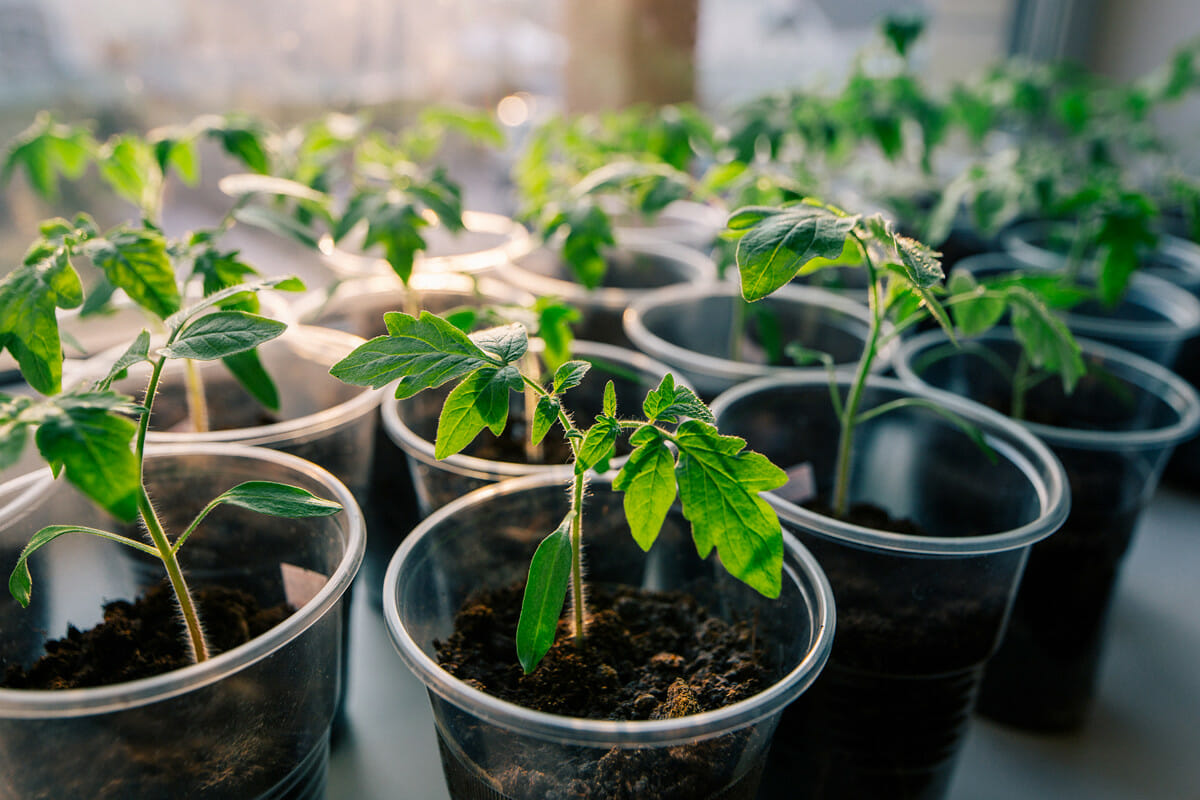
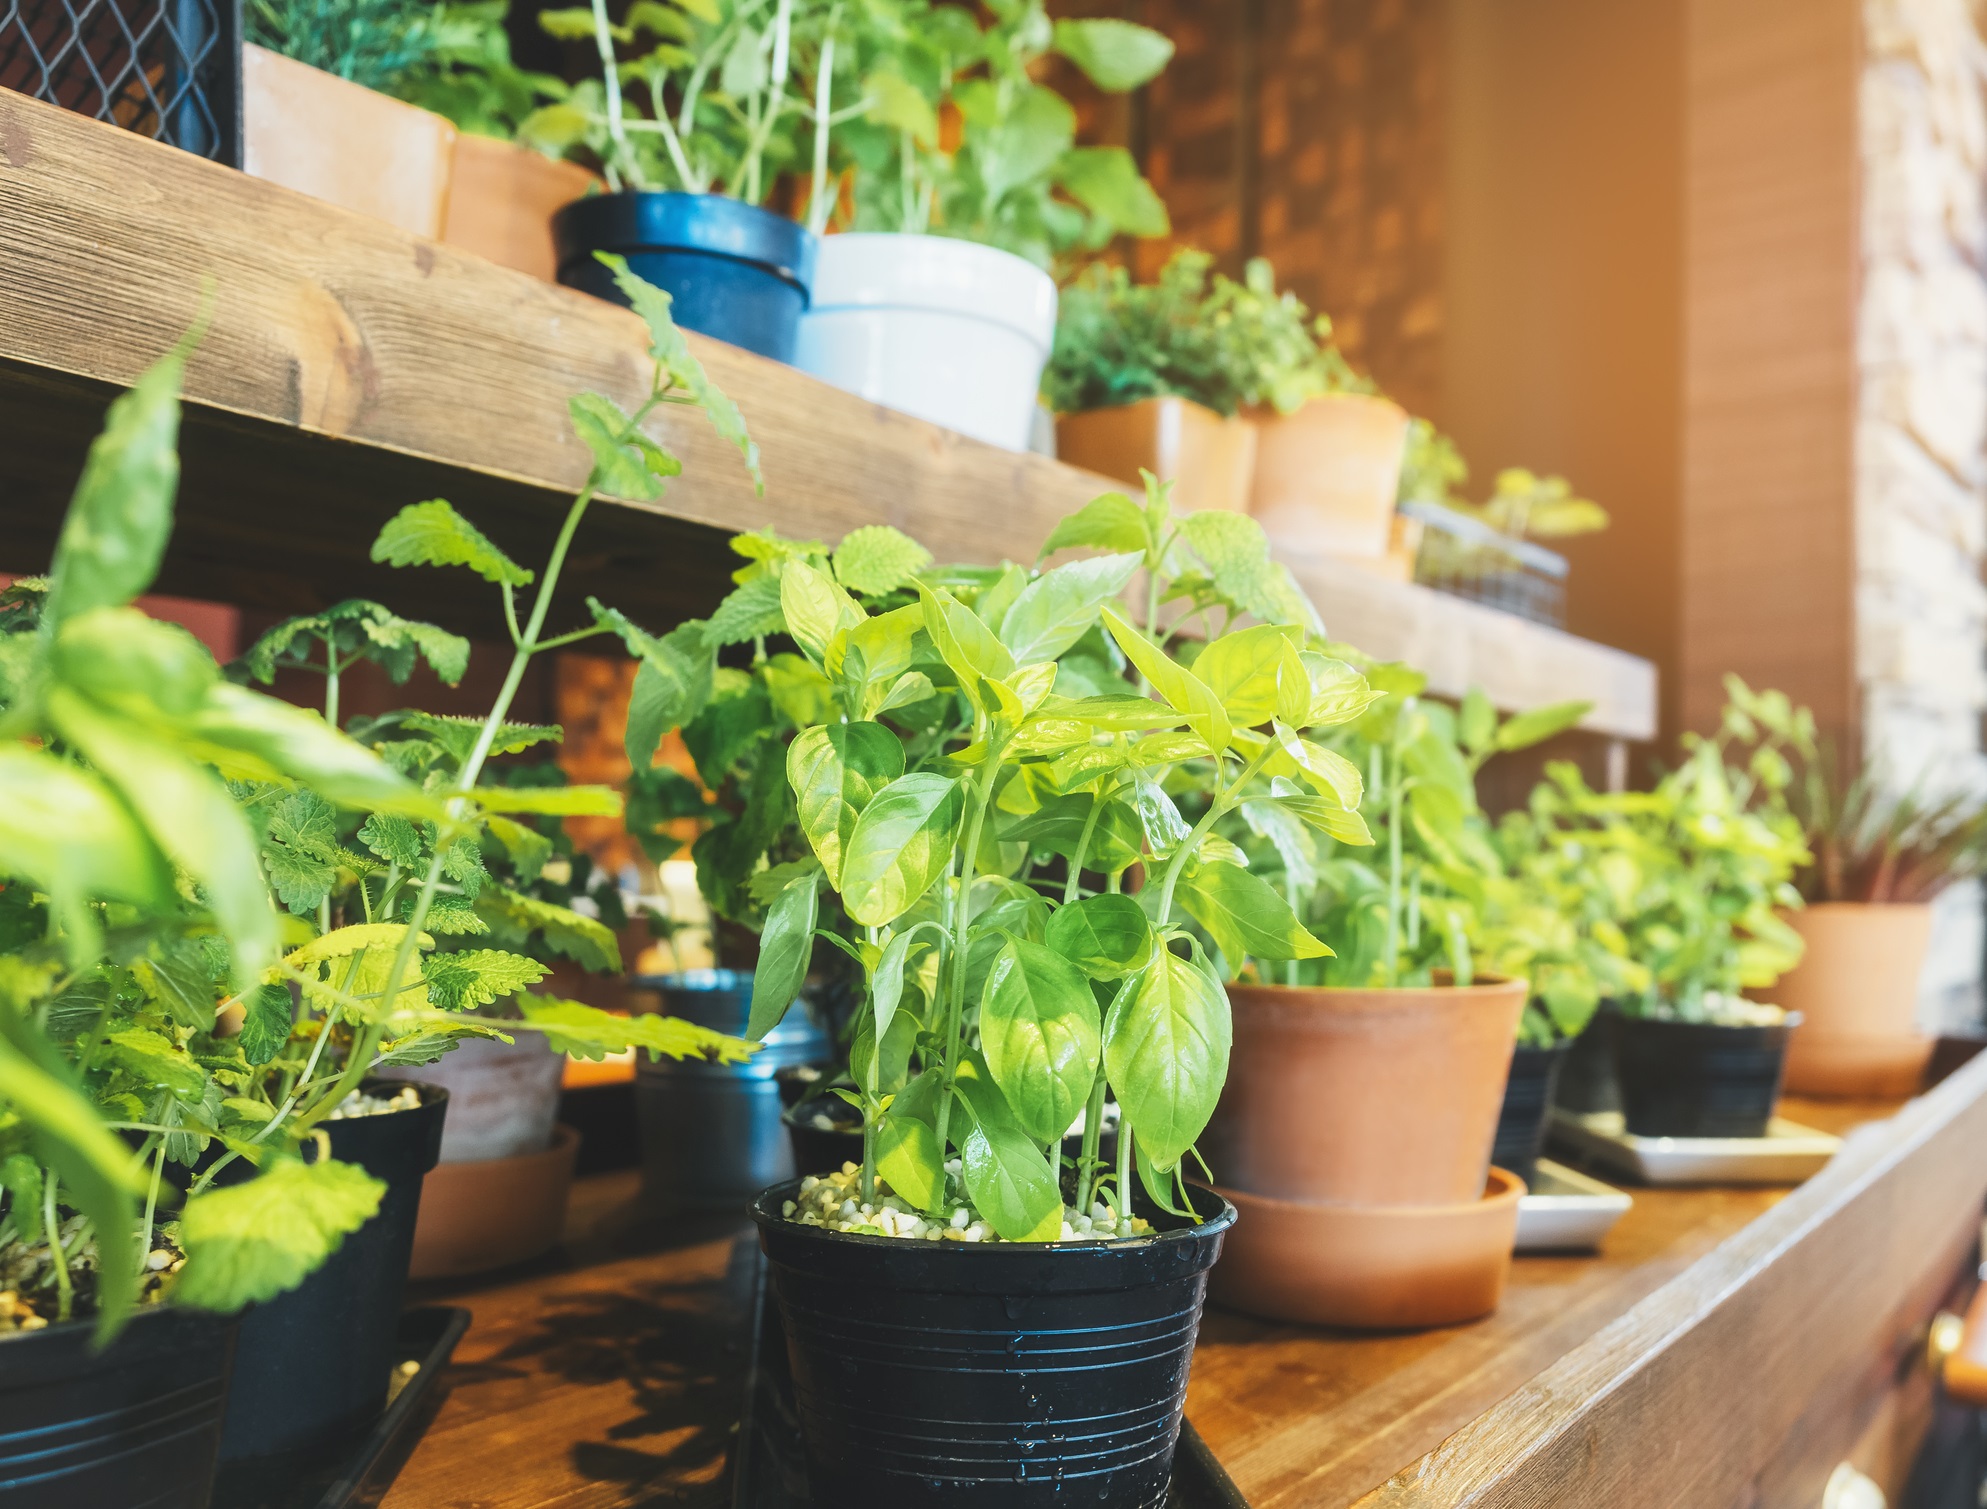
1. Container Size: Choose containers that are at least 2-3 inches deep and have good drainage holes. Peppers develop long root systems, so providing enough space for their roots to grow is essential. Transplanting seedlings into larger containers as they grow is also recommended to avoid root congestion.
2. Materials: There are various choices for container materials, including plastic, terracotta, or peat pots. Plastic containers are lightweight, durable, and easy to clean, while terracotta pots are porous and help with moisture regulation. Peat pots are biodegradable and can be planted directly into the ground, reducing transplant shock.
3. Seed Starting Mix: Using a good quality seed starting mix is crucial. Avoid using regular garden soil, as it tends to be heavy and may not provide the proper drainage and aeration needed for young seedlings. Seed starting mixes are typically light, sterile, and well-draining, providing an optimal environment for seed germination.
4. Soil Nutrients: Although seed starting mixes provide a suitable medium for germination, they often lack nutrients. To provide your pepper seedlings with essential nutrients, you can enrich the seed starting mix with compost or a balanced organic fertilizer. This will help kickstart their growth and ensure healthy development.
5. Moisture Retention: Opt for a mix that has good moisture retention capabilities while still allowing for proper drainage. The soil should hold moisture well without becoming waterlogged. This balance is crucial to prevent seed rot and enable seedling development.
6.
7. Labeling: Don’t forget to label your containers with the pepper variety and sowing date. This will ensure you can keep track of different varieties and monitor the growth and development of each seedling.
Choosing the right containers and soil sets the foundation for healthy seedling development. By providing adequate space, proper drainage, and nutrient-rich soil, you are giving your pepper seeds the best chance of thriving. In the next section, we will discuss how to sow pepper seeds indoors and initiate the germination process.
Sowing Pepper Seeds Indoors
Sowing pepper seeds indoors is a critical step in the seed starting process. Here are some guidelines to ensure successful germination and healthy seedling development:
1. Timing: Start sowing pepper seeds indoors approximately 8-10 weeks before the last expected frost date in your area. Peppers require warm temperatures to germinate and thrive, so this gives them ample time to grow before being transplanted outdoors.
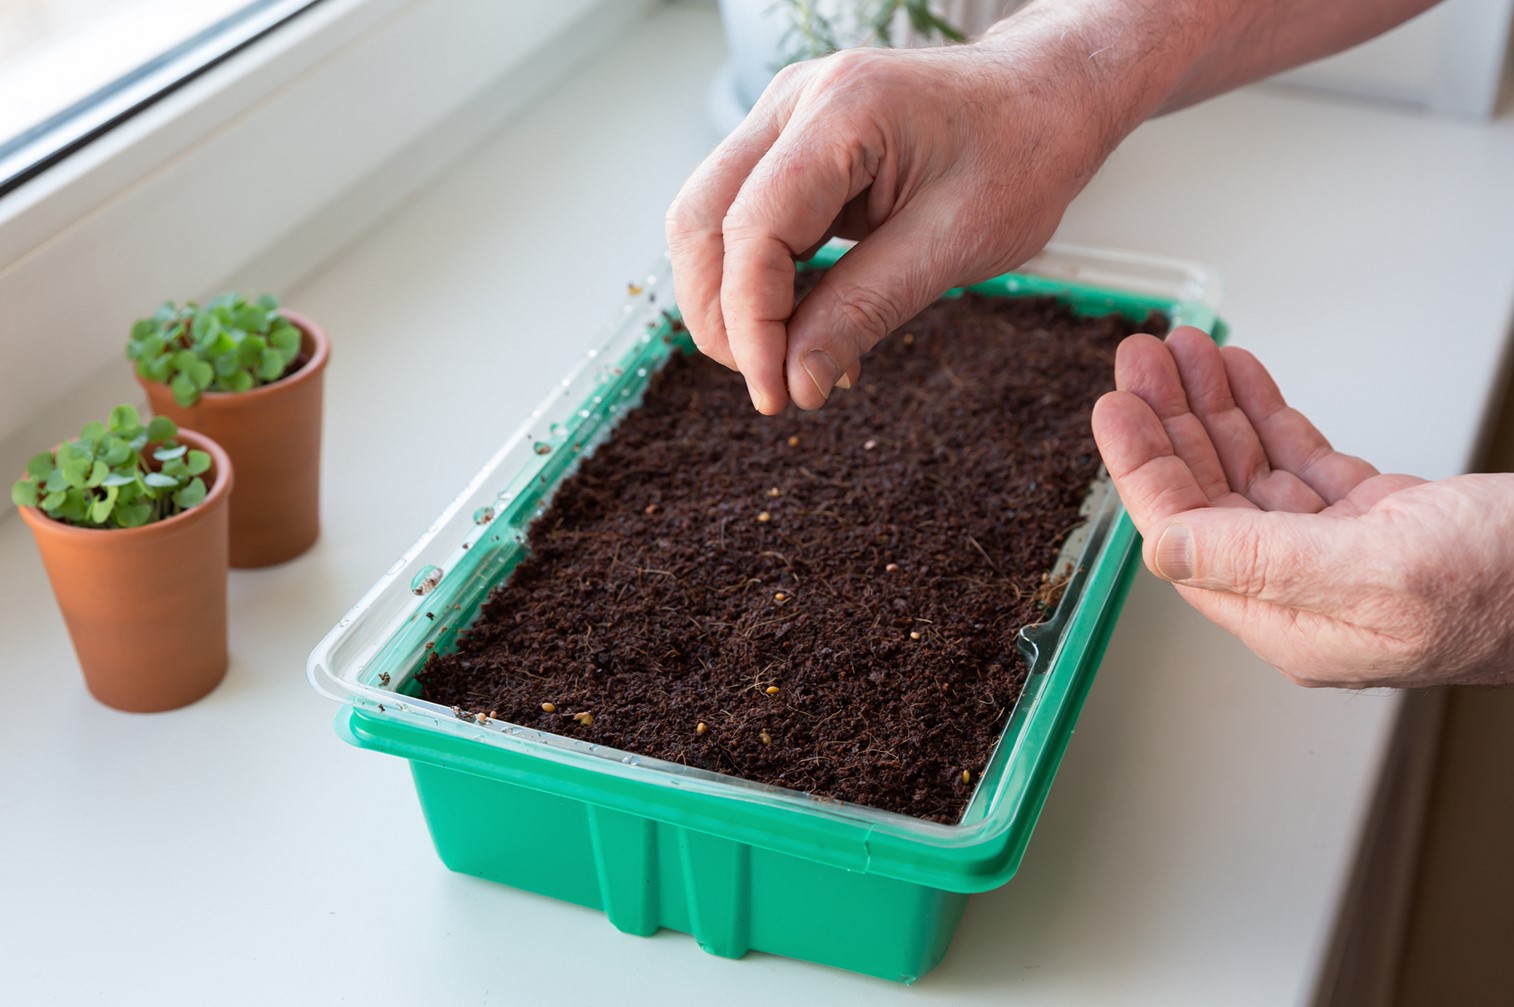
2. Preparation: Moisten the seed starting mix before filling your containers. This helps ensure even distribution of moisture and promotes consistent germination. Fill the containers with the moistened mix, leaving a small gap at the top.
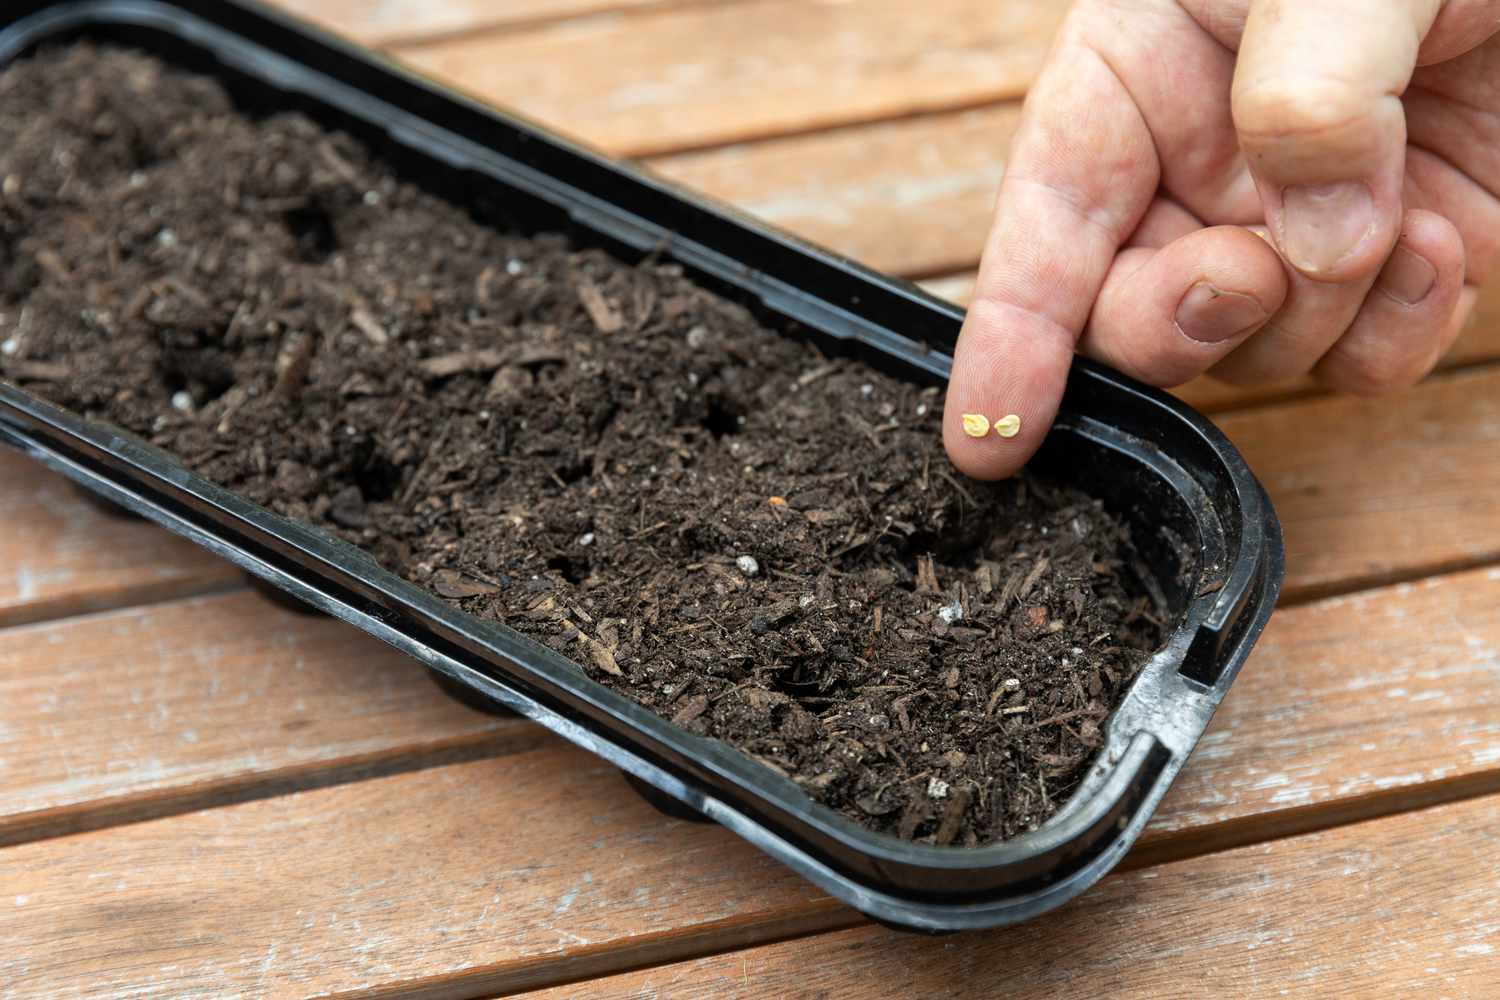
3. Sowing Depth: Pepper seeds should be sown at a depth of approximately ¼ to ½ inch. Use your finger or a pencil to create small holes in the seed starting mix, spacing them about 2 inches apart. Place one or two seeds in each hole and gently cover them with the mix.
4. Labeling: Label each container with the pepper variety and the date of sowing. This will help you keep track of the different varieties and monitor their growth progress.
5. Watering: After sowing the seeds, thoroughly water the containers from the bottom. Place the containers in a tray or shallow dish filled with water and allow the mix to absorb moisture through the drainage holes. Once the surface of the mix appears moist, remove the containers from the water tray and allow them to drain.
6. Covering: It’s usually recommended to cover the containers with a clear plastic dome or plastic wrap to create a greenhouse-like environment that retains moisture and heat. This helps speed up the germination process. Once the seeds start to sprout, remove the cover to allow for air circulation.
7. Location: Place the containers in a warm location where the temperature consistently ranges between 70-80°F (21-27°C). A heat mat or a warm spot in your house, like near a sunny window, can provide the optimal temperature for germination.
8. Germination: Pepper seeds typically germinate within 7-10 days, but it may take longer depending on the variety. Once the seedlings emerge, move them to a location with bright, indirect light or under grow lights to encourage healthy growth.
Remember to monitor the moisture levels in the containers and water them gently as needed. Continuous moisture is crucial for successful germination and early seedling growth.
By following these steps, you are giving your pepper seeds the best chance to germinate and develop into healthy seedlings. In the next section, we will discuss the importance of providing proper lighting and temperature for your growing pepper seedlings.
Providing Proper Lighting and Temperature
Proper lighting and temperature are crucial for the healthy growth of pepper seedlings. Here’s what you need to know to create an ideal environment for your growing plants:
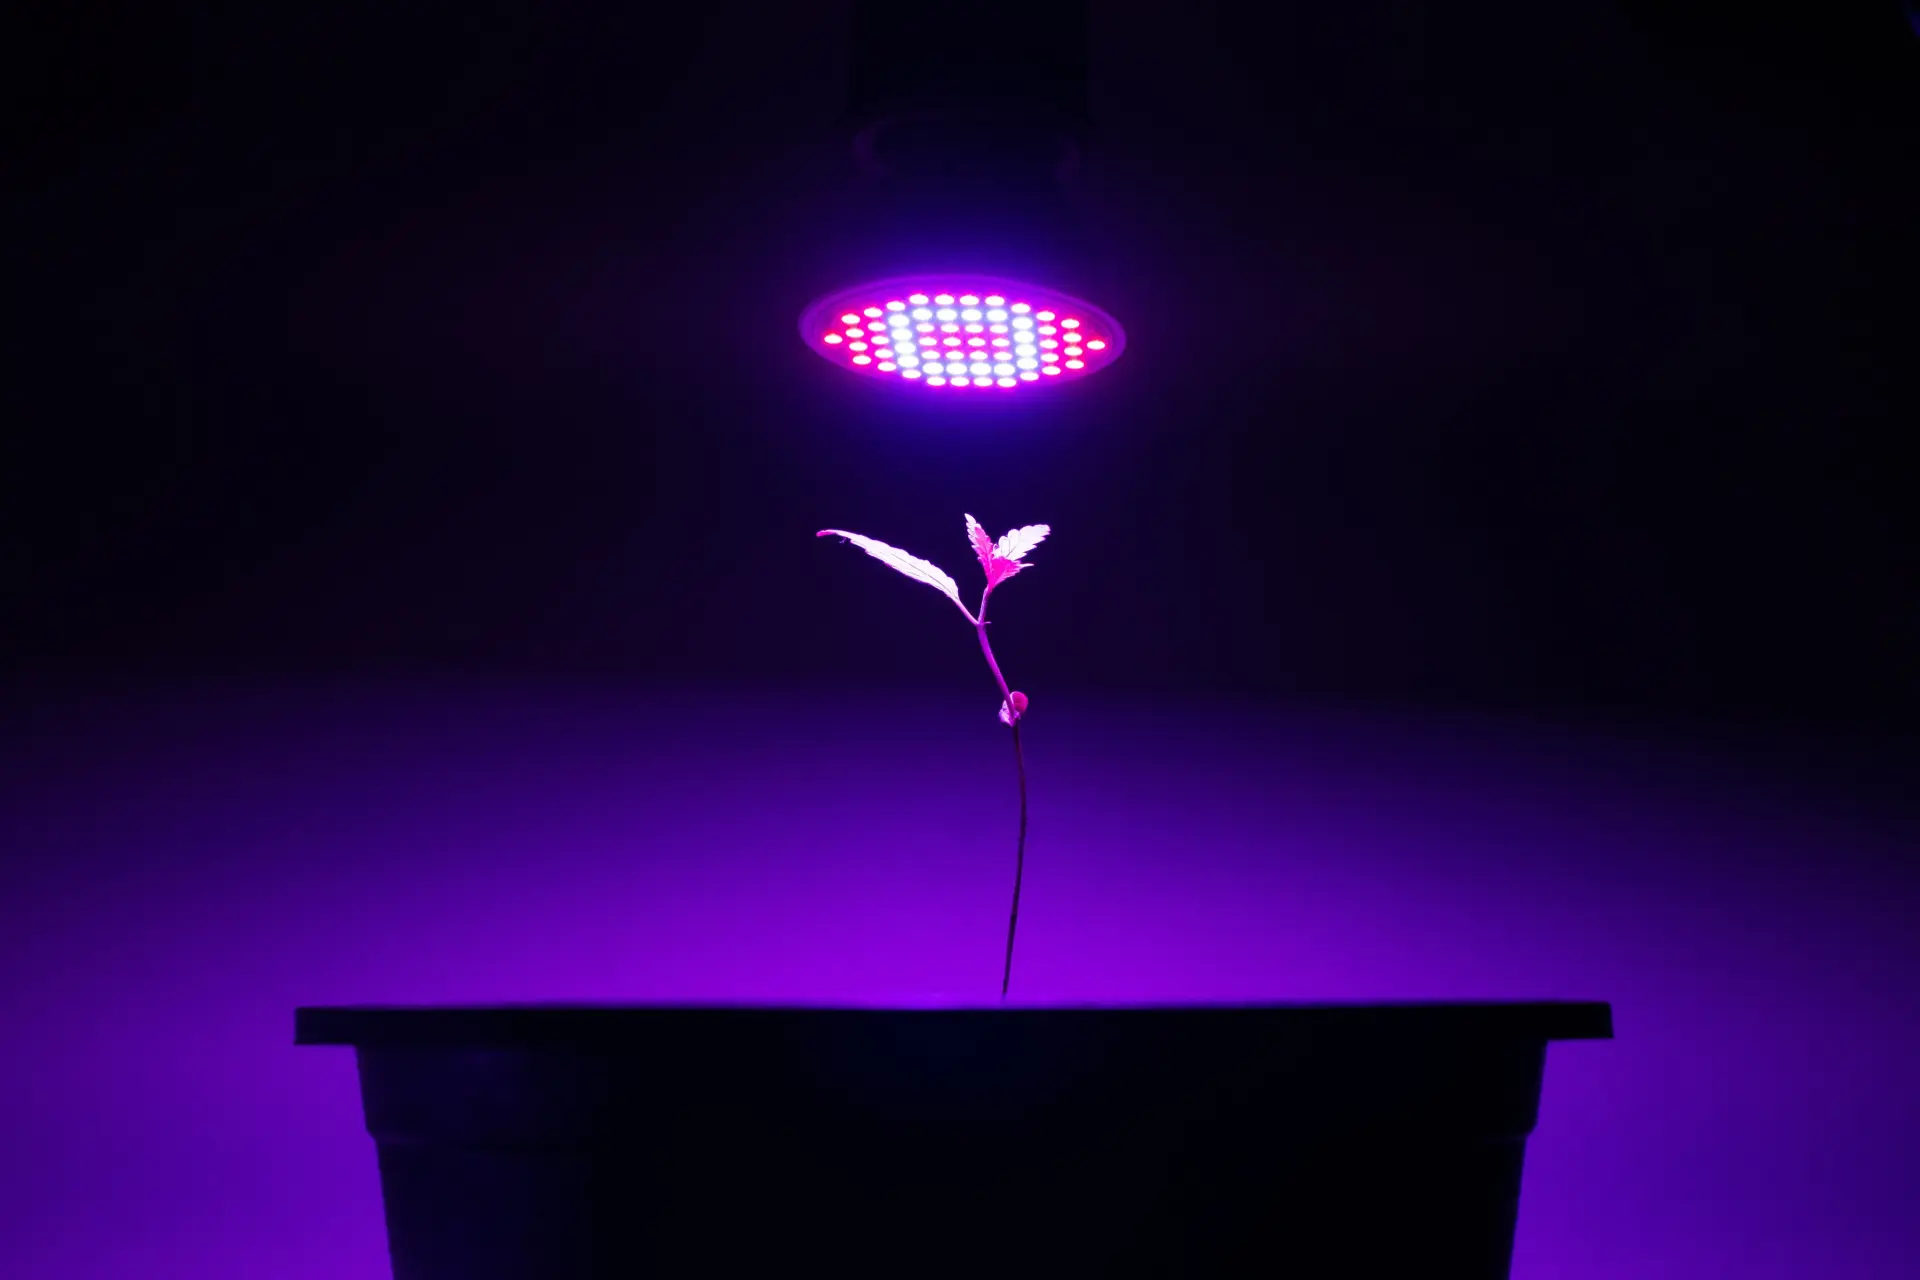
1. Lighting: Pepper seedlings require bright light to develop strong stems and leaves. If you are growing them indoors, natural sunlight may not always be sufficient, especially during the early stages. Supplemental lighting is often necessary. You can use fluorescent grow lights, LED lights, or high-intensity discharge (HID) lights to provide the adequate light spectrum needed for optimal growth.
– Position the lights 2-4 inches above the seedlings and adjust the height as they grow. Aim for a total of 14-16 hours of light per day as a general guideline.
– Keep the lights on for regulated periods, simulating natural daylight and allowing the seedlings to rest during the dark period.
2. Temperature: Pepper seedlings prefer warm temperatures for healthy growth. During the germination phase, maintaining a temperature of around 75-85°F (24-29°C) is ideal.
– Using a heat mat under the containers can help maintain consistent temperatures. Ensure the heat mat is set to the appropriate temperature and monitor it regularly to prevent overheating or scorching of the seedlings.
– Once the seedlings have emerged, gradually lower the temperature to around 70°F (21°C) during the day and slightly cooler at night. This temperature variation helps simulate outdoor conditions and strengthens the seedlings.
3. Air Circulation: Good air circulation is important for preventing damping-off, a fungal disease that can affect young seedlings. Providing gentle airflow through the use of a small fan or by opening a nearby window helps promote healthy growth and reduces the risk of fungal diseases.
4. Light and Dark Periods: While seedlings need ample light, they also require a period of darkness. Avoid leaving the lights on 24/7 as this can inhibit growth and create stress for the plants. Aim for a consistent light and dark schedule, allowing the seedlings to rest during the designated dark period.
Proper lighting and temperature regulation ensure that your pepper seedlings develop into strong and healthy plants. By providing adequate light, maintaining the right temperature, and promoting air circulation, you will give your seedlings the best chance of thriving. In the next section, we will discuss watering and fertilizing techniques to support the growth of your pepper seedlings.
Start pepper seeds indoors 8-10 weeks before the last frost date in your area. Use a seed starting mix, provide warmth, light, and consistent moisture for successful germination.
Read more: When To Start Hot Pepper Seeds Indoors
Watering and Fertilizing Pepper Seedlings
Keeping your pepper seedlings well-watered and adequately fertilized is essential for their healthy growth and development. Here are some tips to ensure proper watering and fertilization:
1. Watering: Pepper seedlings require consistent moisture, but overwatering can lead to rot and other fungal issues. Follow these guidelines for watering your seedlings:
– Use a gentle watering technique, such as a spray bottle or a fine nozzle watering can, to avoid displacing the soil or damaging the delicate seedlings.
– Water seedlings when the top inch of the soil feels dry to the touch. Avoid letting the soil completely dry out, as it can stress the plants.
– Aim to keep the soil consistently moist, but not waterlogged. Proper drainage is crucial to prevent root rot. Ensure that the containers have drainage holes to allow excess water to escape.
2. Fertilizing: While seed starting mixes usually contain enough nutrients for initial growth, pepper seedlings benefit from additional fertilization as they grow. Use the following guidelines:
– Start fertilizing with a diluted, balanced liquid fertilizer when the seedlings have developed their first set of true leaves. Follow the instructions on the fertilizer package for proper dilution ratios.
– Apply the fertilizer once every two weeks to provide a steady supply of nutrients. Avoid over-fertilizing, as this can lead to nutrient burn or stunted growth.
– Transition to a fertilizer higher in phosphorus and potassium, such as a bloom booster or tomato-specific fertilizer, once the seedlings start flowering. These nutrients promote flower and fruit development.
– Always water the seedlings well before applying fertilizer to avoid burning the roots.
3. Organic Options: If you prefer organic methods, you can use compost tea or organic fertilizers specifically formulated for seedlings. These options provide slow-release nutrients and enhance soil health.
4. Observation: Pay attention to the appearance of your pepper seedlings. If they start to show signs of nutrient deficiency, such as yellowing leaves or stunted growth, adjust your fertilization regimen accordingly. Too much fertilizer can also cause leaf burn, so monitor the seedlings for any signs of nutrient excess.
Remember, moderation is key when it comes to watering and fertilizing your pepper seedlings. Providing consistent moisture and appropriate nutrient levels will help your seedlings grow into healthy plants ready for transplantation. In the next section, we will discuss the process of transplanting your pepper seedlings outdoors for optimal growth.
Transplanting Pepper Seedlings Outdoors
Transplanting your pepper seedlings outdoors is a crucial step in their growth journey. Here are some guidelines to ensure a successful transition:
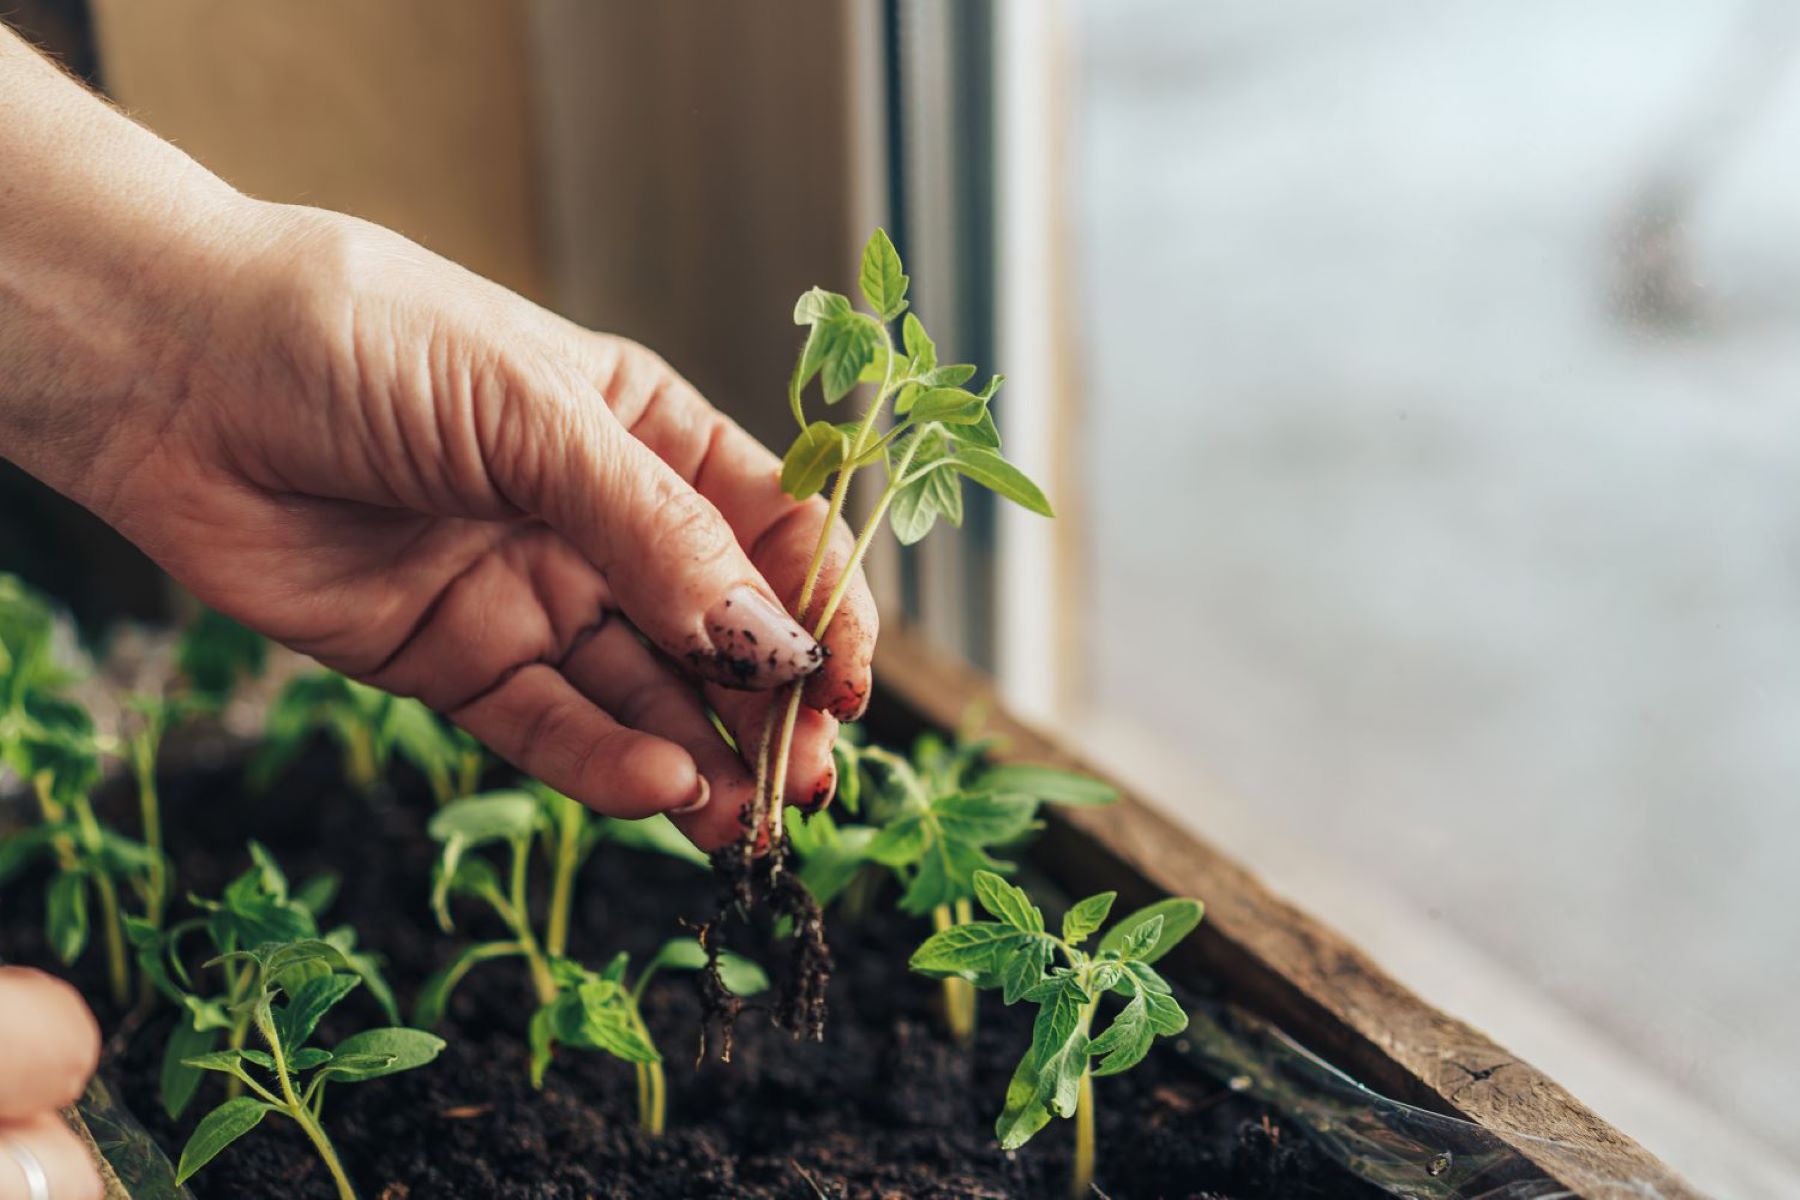
1. Timing: Wait until all risk of frost has passed and the soil has warmed up before transplanting your pepper seedlings. This is typically around 2-3 weeks after the last expected frost date in your area.
2. Hardening Off: Before transplanting, it’s important to gradually acclimate your seedlings to outdoor conditions through a process called hardening off. Start by placing your seedlings in a sheltered outdoor area for a few hours each day, gradually increasing their exposure to sunlight, wind, and temperature fluctuations over the course of a week. This helps them adjust to the outdoor environment before planting.
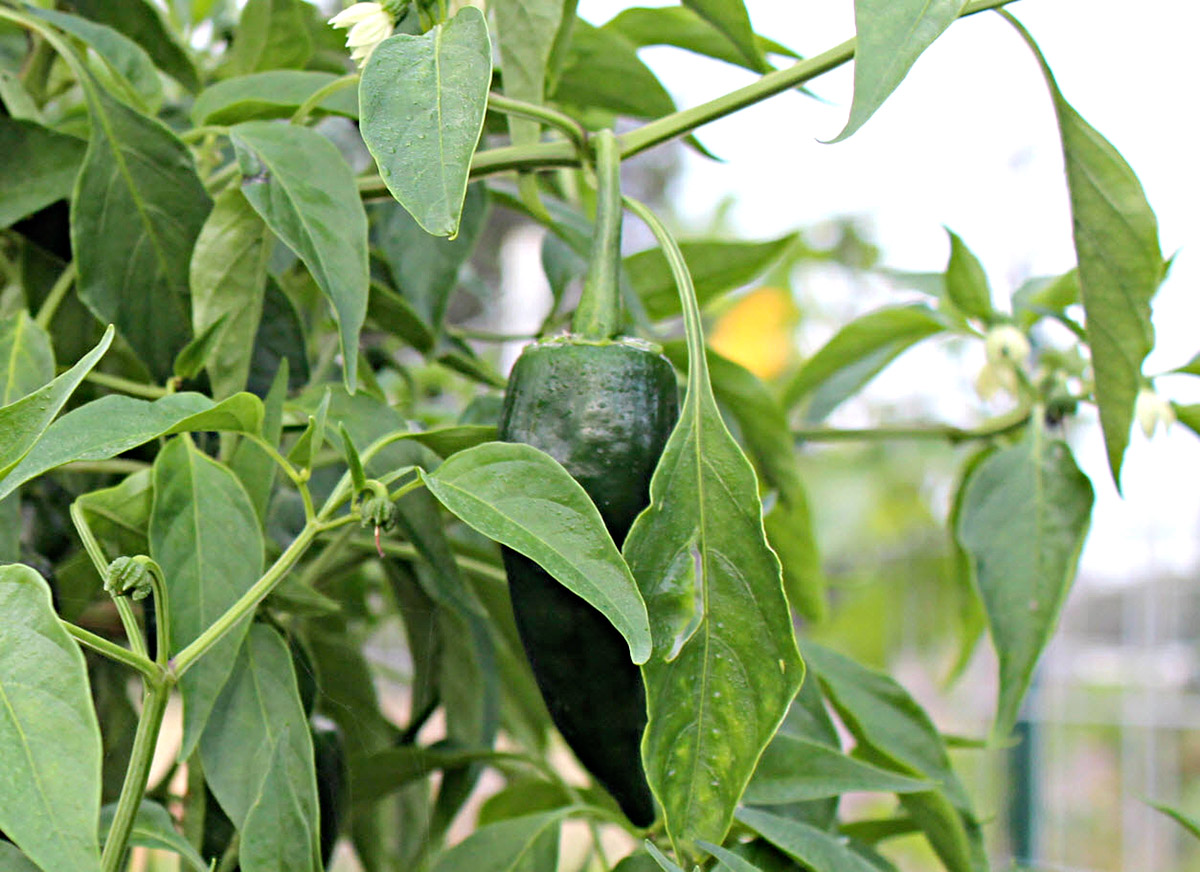
3. Site Selection: Choose a well-drained location with full sun exposure for your pepper plants. Peppers thrive in warm temperatures, so select a spot that receives at least 6-8 hours of direct sunlight per day.
4. Soil Preparation: Prepare the planting area by loosening the soil and removing any weeds or debris. Incorporate organic matter, such as compost or well-rotted manure, to improve soil fertility and drainage.
5. Transplanting Technique: To transplant the seedlings, dig a hole that is slightly larger than the root ball of the seedling. Gently remove the seedling from its container, taking care not to damage the roots. Place the seedling in the hole, ensuring that it is at the same soil level as it was in the container. Gently backfill the hole, pressing the soil around the base of the plant to secure it in place.
6. Spacing: Proper spacing is crucial to allow adequate air circulation and prevent overcrowding. Plant your pepper seedlings approximately 18-24 inches apart, leaving enough room for them to grow and spread.
7. Watering: After transplanting, water the seedlings thoroughly to settle the soil and provide moisture to the root zone. Maintain regular watering to keep the soil consistently moist, especially during dry periods.
8. Protective Measures: If the weather is still cool or there is a chance of frost, consider using protective measures such as row covers or cloches to shield the seedlings from extreme conditions. Remove these covers once the weather has warmed up consistently.
9. Mulching: Applying a layer of organic mulch around the base of the plants helps conserve moisture, control weeds, and regulate soil temperature. Use materials such as straw, wood chips, or compost as mulch.
10. Maintenance: After transplanting, continue to care for your pepper plants by providing regular watering, monitoring for pests or diseases, and applying appropriate fertilizers as the plants continue to grow.
By following these transplanting guidelines, you give your pepper seedlings a strong start in their outdoor environment. With proper care and maintenance, they will grow into robust plants that produce an abundance of flavorful peppers. In the next section, we will discuss common problems that may arise during the growth of pepper seedlings and offer troubleshooting tips.
Common Problems and Troubleshooting
Growing pepper seedlings can sometimes come with challenges, but with proper care and attention, most issues can be resolved. Here are some common problems you may encounter and troubleshooting tips:
1. Damping-off: Damping-off is a fungal disease that causes seedling rot at the soil level. To prevent this, ensure good air circulation, use sterilized containers and soil, avoid overwatering, and provide proper drainage. If damping-off occurs, remove affected seedlings and adjust watering practices.
2. Overwatering: Overwatering can lead to root rot and fungal diseases. To avoid overwatering, let the top inch of the soil dry out before watering again. Ensure containers have proper drainage and allow the plants to dry out slightly between waterings.
3. Nutrient Deficiency: Pale or yellow leaves may indicate a nutrient deficiency, commonly nitrogen or iron. Adjust your fertilization regimen by providing a balanced fertilizer or incorporating organic amendments like compost or fish emulsion into the soil.
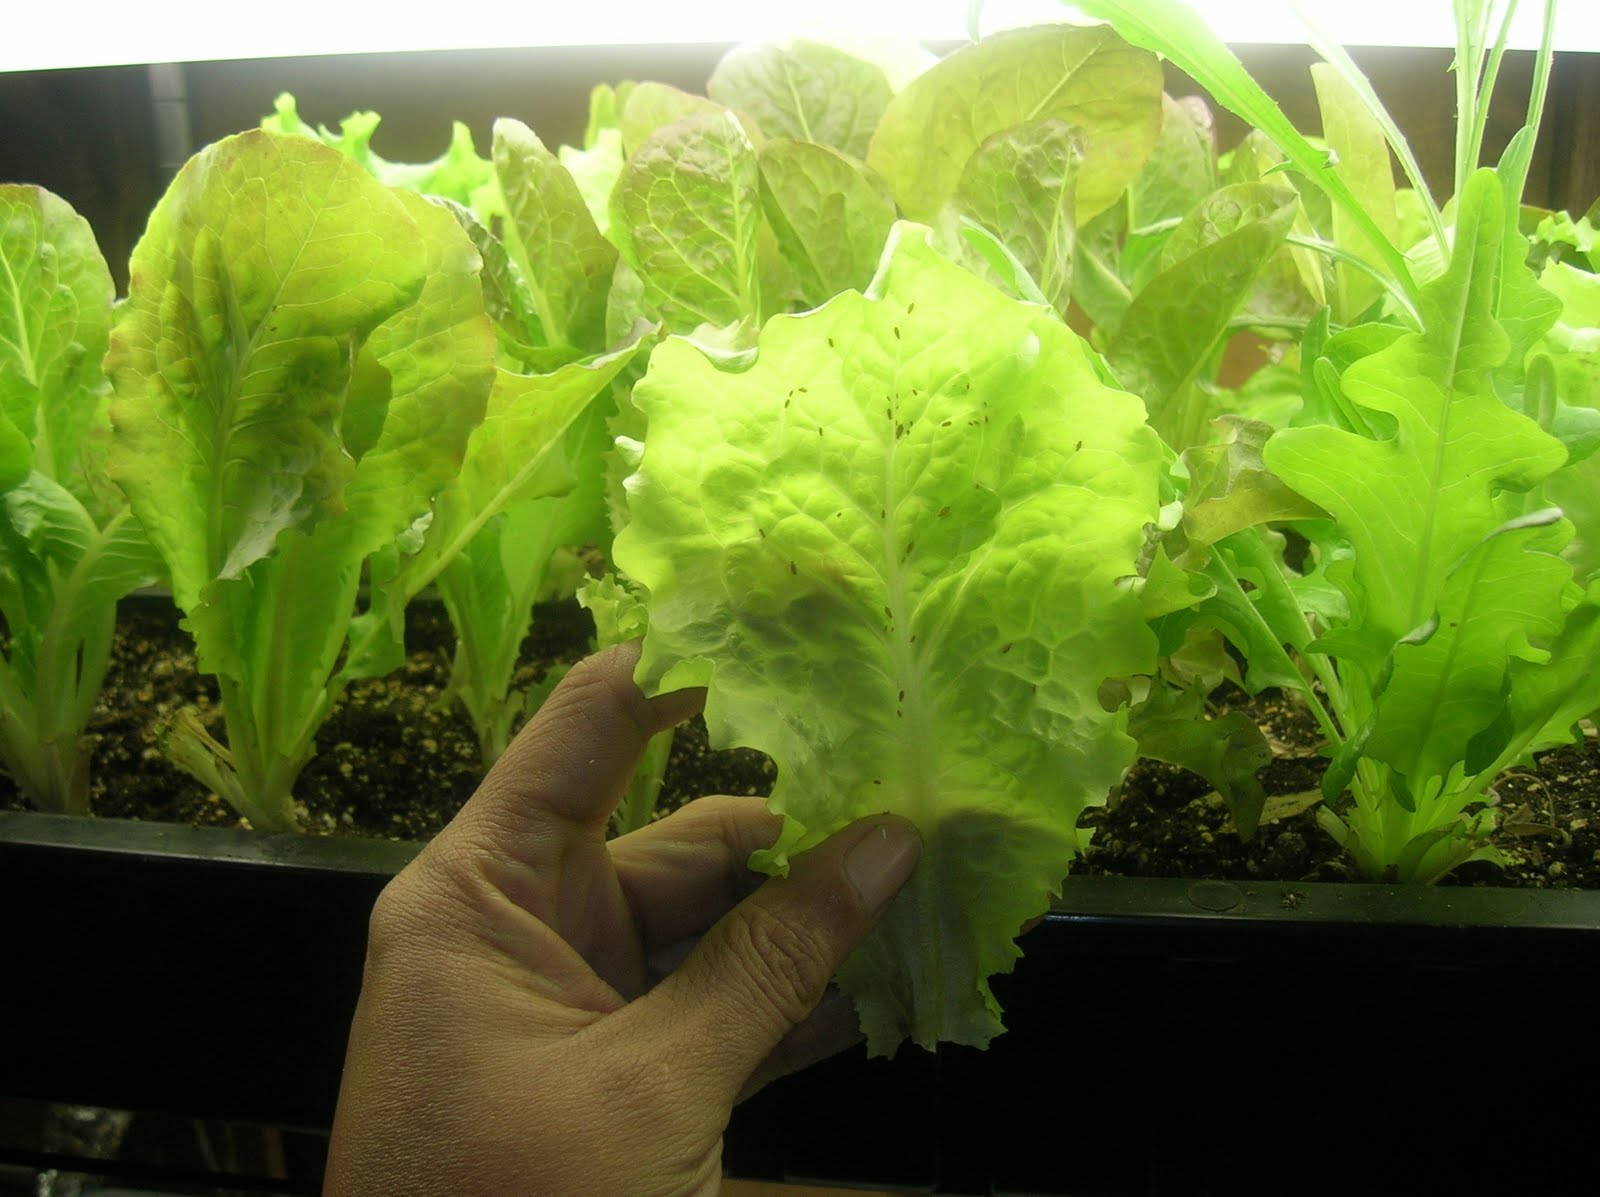
4. Pests: Common pests that can affect pepper seedlings include aphids, spider mites, and flea beetles. Regularly inspect your plants and remove any pests by hand. Consider using organic pest control methods like neem oil or insecticidal soaps.
5. Temperature Fluctuations: Extreme temperature fluctuations can stress seedlings. Keep the ambient temperature consistent by providing insulation during cold nights or placing the seedlings in a sheltered area. Maintain proper ventilation to prevent overheating during warm days.
6. Inadequate Light: Insufficient light can cause leggy growth and weak seedlings. Ensure your pepper seedlings receive at least 14-16 hours of bright, indirect light or use supplemental grow lights to provide the necessary light spectrum.
7. Improper Transplanting: Transplant shock can occur if seedlings are not properly handled during transplantation. Be gentle when removing seedlings from containers, avoid damaging the roots, and plant at the same soil level as they were in the containers.
8. Improper Pollination: If flowers fail to produce fruit, it may be due to inadequate pollination. Gently shake the plants to help distribute pollen or use a small brush to transfer pollen between flowers. You can also attract pollinators to your garden by planting flowers nearby.
9. Improper Pruning: Pruning pepper plants is not typically necessary unless you are growing them as perennial plants. Unnecessary pruning can stress the plants and reduce yield. Only prune if there are damaged or diseased branches.
10. Unsuitable Growing Conditions: Assess growing conditions such as sunlight, soil pH, and nutrient levels. Adjust as necessary to create optimal conditions for your pepper plants to thrive.
Remember, each growing environment is unique, and it may take some experimentation to find the best solutions for your specific challenges. Monitor your plants regularly, take prompt action when issues arise, and seek advice from local gardening resources or fellow gardeners if needed.
By being proactive and addressing problems as they arise, you can overcome common challenges and ensure the healthy growth and development of your pepper seedlings. With patience, care, and diligence, you’ll soon be enjoying a bountiful harvest of delicious peppers.
Conclusion
Starting pepper seeds indoors is a rewarding and effective method of growing healthy and productive pepper plants. By following the guidelines and best practices outlined in this article, you can set yourself up for success and maximize the potential of your pepper seedlings. From choosing the right containers and soil to providing proper lighting, temperature, watering, and fertilization, each step plays a crucial role in the development of strong and robust plants.
By starting seeds indoors, you gain control over the growing environment, ensuring optimal conditions for germination and early growth. You also have the opportunity to select from a wide variety of pepper seeds, allowing you to cultivate unique and flavorful peppers that may not be readily available in stores. Furthermore, starting seeds indoors extends the growing season, giving your peppers more time to mature and yield a bountiful harvest.
Throughout the process, it is important to be observant and proactive in addressing any challenges that may arise. Whether it’s pests, diseases, nutrient deficiencies, or environmental factors, taking prompt action and applying appropriate measures can help prevent or overcome potential setbacks.
As your pepper seedlings mature and develop, remember to harden them off before transplanting them outdoors. This gradual acclimation process will ensure a smooth transition and minimize stress on the plants. Once the seedlings are transplanted, provide them with the proper care and maintenance required to promote vigorous growth and fruit production.
With dedication and patience, your efforts will soon be rewarded with a harvest of vibrant, homegrown peppers that add a burst of flavor and color to your meals. So, roll up your sleeves, gather your supplies, and embark on the exciting journey of starting pepper seeds indoors. Happy gardening and enjoy the fruits of your labor!
Frequently Asked Questions about How Early To Start Pepper Seeds Indoors
Was this page helpful?
At Storables.com, we guarantee accurate and reliable information. Our content, validated by Expert Board Contributors, is crafted following stringent Editorial Policies. We're committed to providing you with well-researched, expert-backed insights for all your informational needs.

0 thoughts on “How Early To Start Pepper Seeds Indoors”