Home>Garden Essentials>How To Start Seeds Indoors Using Growing Lights
Garden Essentials
How To Start Seeds Indoors Using Growing Lights
Modified: August 30, 2024
Learn how to start seeds indoors using grow lights and create a flourishing garden. Discover expert tips and tricks for successful seed germination and plant growth.
(Many of the links in this article redirect to a specific reviewed product. Your purchase of these products through affiliate links helps to generate commission for Storables.com, at no extra cost. Learn more)
Introduction
Welcome to the world of starting seeds indoors! If you have a green thumb and a passion for gardening, you’ve probably heard of the benefits of starting seeds indoors. It allows you to extend the growing season, have more control over your plants’ environment, and get a head start on your garden. In this article, we will explore the ins and outs of starting seeds indoors using grow lights.
Starting seeds indoors has become increasingly popular among gardeners, whether they have limited outdoor space or simply want to maximize their plant varieties. It is a great way to get a jumpstart on the growing season, especially in regions with short or unpredictable summers.
By starting seeds indoors, you’ll have the opportunity to carefully nurture your plants from the very beginning. You’ll be able to control the temperature, lighting, and humidity levels, ensuring that your seedlings have the best conditions for healthy growth. Plus, you’ll have a wider selection of plant varieties to choose from, as many uncommon or exotic plants are not readily available as seedlings at local nurseries.
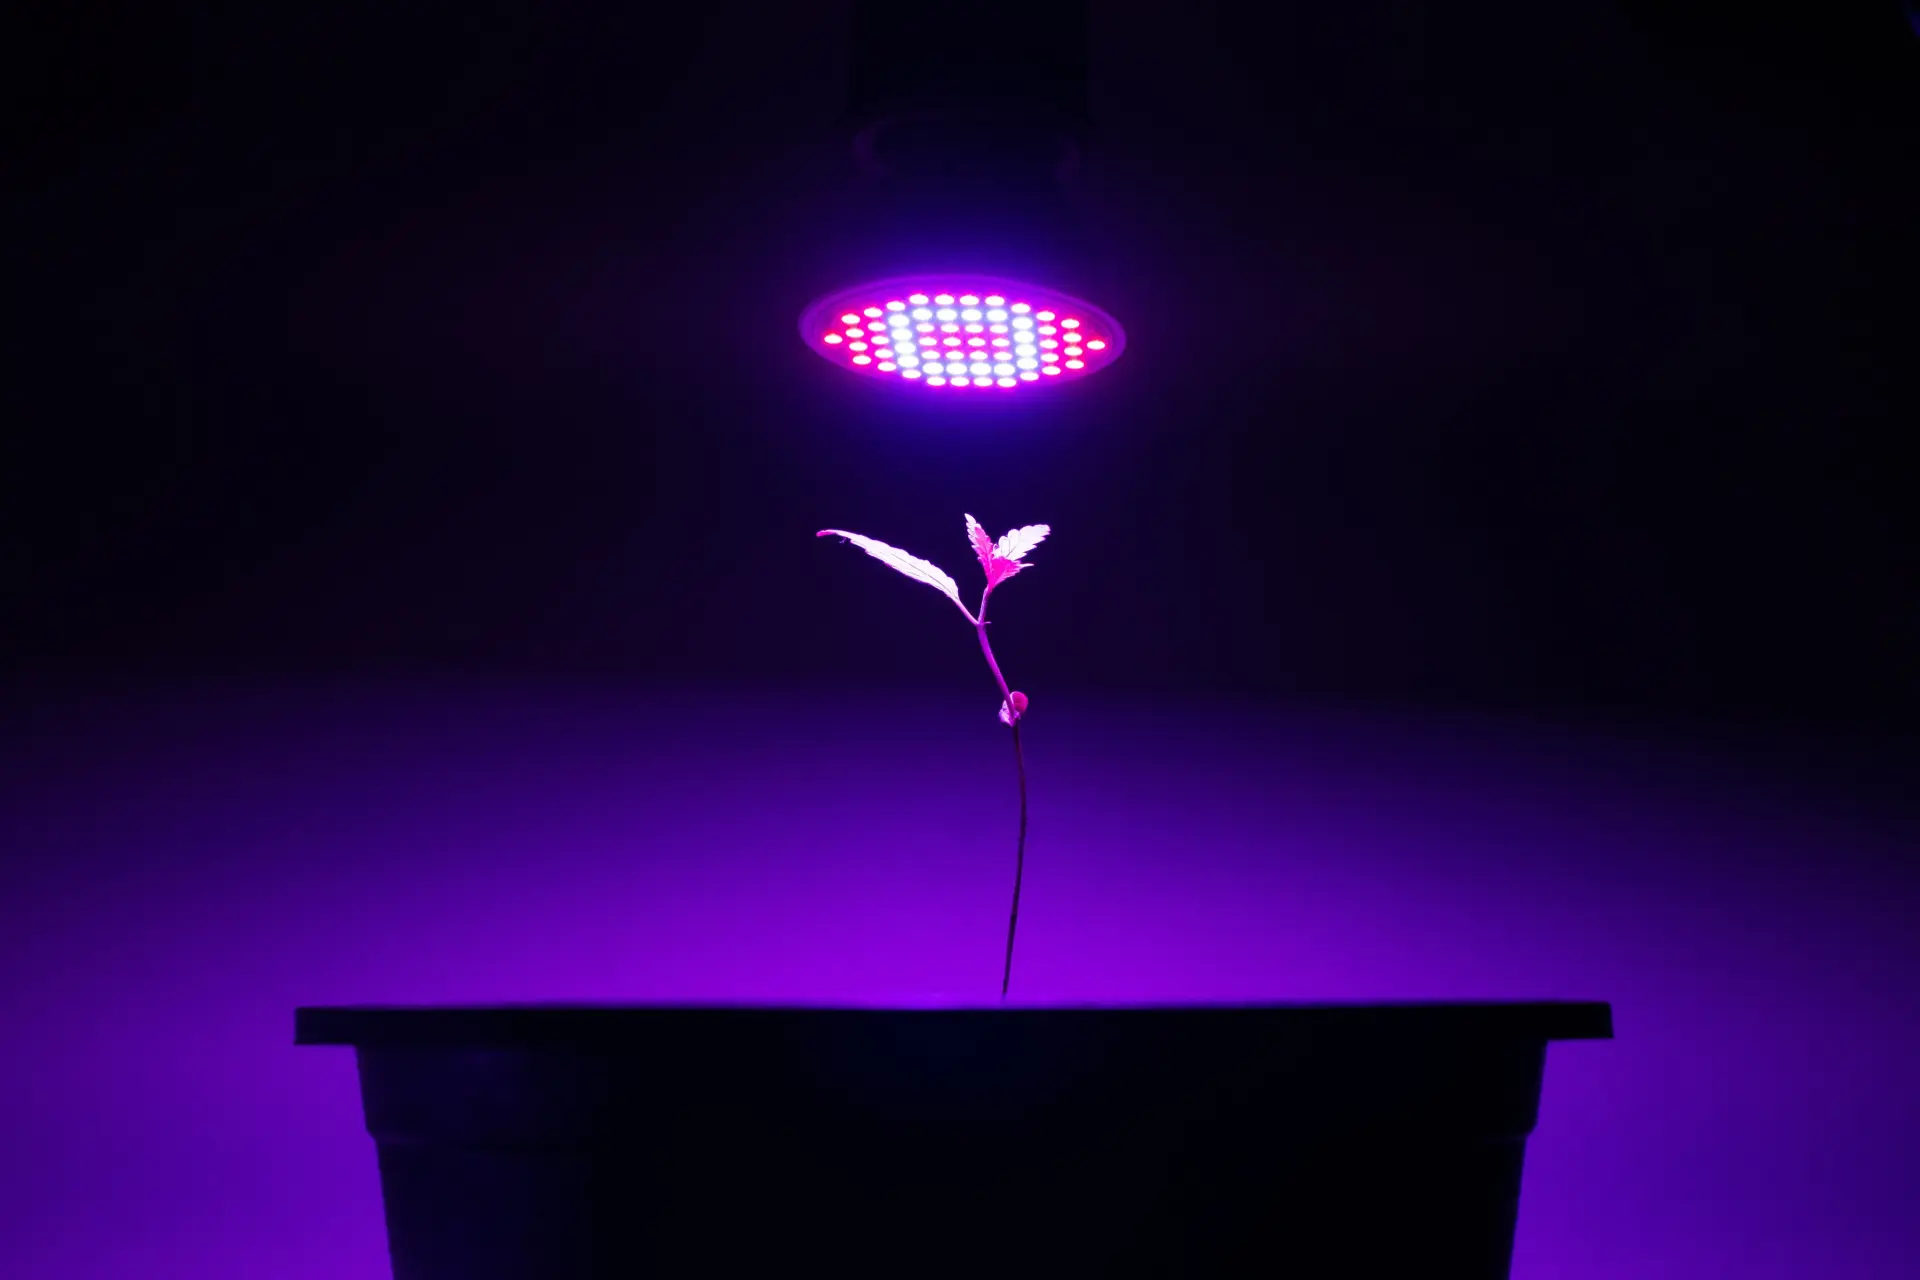
One of the key components in successfully starting seeds indoors is choosing the right grow lights. Since most seeds require adequate light for germination and early growth, providing the correct lighting conditions is crucial.
In the following sections, we will delve into the benefits of starting seeds indoors, discuss the different types of grow lights, explore the light requirements for seedlings, guide you in setting up a seed starting area, and provide tips on caring for your seedlings. By the end of this article, you’ll have the knowledge and confidence to start your own seeds indoors using grow lights.
Key Takeaways:
- Starting seeds indoors with grow lights extends the growing season, provides a wider variety of plants, and saves money compared to buying mature plants. It also offers full control over the growing environment, ensuring optimal conditions for seedlings.
- Proper care, including watering, lighting, and ventilation, is crucial for nurturing healthy seedlings. The hardening off process gradually exposes seedlings to outdoor conditions, reducing the risk of shock and ensuring a successful transition to the garden.
Read more: How To Use A Grow Light To Germinate
Benefits of Starting Seeds Indoors
Starting seeds indoors offers a wide range of benefits that can greatly enhance your gardening experience. Let’s explore some of the key advantages:
- Extended Growing Season: By starting seeds indoors, you can give your plants a head start before the outdoor growing season begins. This allows you to enjoy fresh produce and vibrant flowers for a longer period. You can even start early-season crops, like tomatoes or peppers, well before the last frost date in your region.
- Greater Variety: When you start seeds indoors, you have access to an extensive selection of plant varieties. You can experiment with unique and exotic plants that may not be available as seedlings at local nurseries. This opens up a world of possibilities for creating a diverse and interesting garden.
- Cost Savings: Purchasing seed packets is generally more cost-effective than buying mature plants. By starting your own seeds, you can grow multiple plants at a fraction of the price you would pay for individual seedlings. Additionally, you can save leftover seeds for future use, maximizing your investment.
- Controlled Growing Environment: When you start seeds indoors, you have full control over the growing conditions. You can provide the optimal levels of light, temperature, and humidity, ensuring that your seedlings receive the best possible start. This control also allows you to avoid pests, diseases, and harsh weather conditions that can hinder outdoor seed germination.
- Healthier Plants: The careful cultivation of seedlings indoors results in stronger, more vigorous plants. By providing proper nutrition and ideal growing conditions, you can nurture robust seedlings that are ready to thrive when transplanted into the garden. This increases their chances of survival and overall productivity.
- Personal Satisfaction: Starting seeds indoors offers a sense of accomplishment and a deeper connection to the growing process. Watching your seeds germinate and grow into healthy plants is immensely rewarding. It allows you to witness the full life cycle of your plants and develop a greater appreciation for nature’s miracles.
By taking advantage of these benefits, you can elevate your gardening experience and take pride in the results of your hard work. Starting seeds indoors is a fulfilling and enjoyable practice that will bring both beauty and abundance to your garden.
Choosing the Right Grow Lights
Grow lights are a vital component of starting seeds indoors. They provide the necessary light energy that plants need for photosynthesis and healthy growth. When choosing grow lights for your seedlings, consider the following factors:
- Light Source: There are several types of grow lights available, including fluorescent, LED (Light Emitting Diode), and HID (High-Intensity Discharge) lights. Fluorescent lights are popular among gardeners due to their affordability and versatility. LED lights are energy-efficient and have a longer lifespan, making them a sustainable choice. HID lights, such as metal halide and high-pressure sodium lights, are powerful options best suited for larger growing areas.
- Light Spectrum: Different stages of plant growth require specific light spectrums. For seedlings and early growth stages, a cool white or blue light spectrum simulates the daylight needed to promote healthy leaf and stem development. As plants mature and transition to flowering or fruiting, a warmer light spectrum, such as red or orange, is beneficial. Consider getting full-spectrum grow lights that provide a wide range of light wavelengths to support plants throughout their growth cycle.
- Light Intensity: The intensity of the light emitted by grow lights impacts plant growth and development. Measure light intensity using a light meter or refer to the manufacturer’s specifications. Seedlings typically require about 1000-2000 lumens per square foot. Ensure that your chosen grow lights provide enough intensity to meet the needs of your seedlings.
- Energy Efficiency: Opt for energy-efficient grow lights. LED lights are known for their energy-saving capabilities and can significantly reduce electricity costs compared to traditional lighting options. Look for lights with high energy efficiency ratings to maximize your savings without compromising on plant health.
- Heat Output: Some types of grow lights, such as HID lights, can produce a significant amount of heat. This can affect the temperature in your growing area and potentially harm delicate seedlings. Consider using cooling systems or opting for LED lights that emit minimal heat, allowing for closer placement to your plants without the risk of burning them.
When choosing grow lights, it’s important to consider the specific requirements of your seedlings and the setup of your indoor growing area. You may need to use a combination of different types of grow lights to meet the needs of different plant varieties. Experimentation and observation will help you determine the best lighting setup for optimal seedling growth and success.
Remember, proper lighting is crucial for healthy seedlings, and investing in quality grow lights will ensure your plants receive the light they need to thrive. So take the time to choose the right grow lights for your indoor gardening endeavors, and watch your seedlings flourish and grow into beautiful, productive plants.
Understanding Light Requirements for Seedlings
Proper lighting is essential for the successful growth of seedlings indoors. Understanding the light requirements of your seedlings will help you provide the optimal lighting conditions for healthy and robust plants. Here are some key factors to consider:
- Duration of Light: As a general rule, seedlings require around 14-16 hours of light each day. This extended exposure to light mimics the long summer days and promotes vigorous growth. Keep in mind that providing too much light can be just as detrimental as providing too little, so strive for a balance.
- Intensity of Light: Seedlings need bright light to develop properly. Place your grow lights close to the seedlings, maintaining a distance of 2-4 inches above the foliage. This ensures that the light intensity is adequate for stimulating photosynthesis. Regularly adjust the height of the lights as the seedlings grow to maintain the recommended distance.
- Light Spectrum: Different light spectrums are essential for distinct stages of plant growth. During the early stages, seedlings require cool white or blue light, which encourages compact, leafy growth. As the seedlings mature, they benefit from warmer light spectrums, such as red or orange, which promote flowering and fruiting. Full-spectrum grow lights, which provide a balanced combination of wavelengths, can be beneficial throughout the entire growth cycle of your seedlings.
- Light Distribution: Ensure that the light is evenly distributed across all the seedlings. If using fluorescent tube lights, consider rotating the trays regularly to prevent uneven growth. LED panel lights or adjustable grow light fixtures can help distribute light evenly, eliminating any weak or shaded areas that may hinder plant growth.
- Light Quality: In addition to providing the recommended duration, intensity, and spectrum of light, it’s also crucial to ensure the light source is of high quality. Invest in reputable grow lights that emit the appropriate wavelengths for efficient photosynthesis. Avoid using regular incandescent or household LED lights, as they may not provide the specific light requirements for healthy seedling growth.
- Natural Light Supplement: While artificial grow lights are essential for indoor seed starting, don’t discount the benefits of natural sunlight. If possible, place your seedlings near a south-facing window or use a translucent covering over the seed trays. This allows the seedlings to receive some natural sunlight, which contains a full spectrum of light wavelengths that can enhance plant growth and development.
Understanding the light requirements for your seedlings and providing the appropriate lighting conditions will ensure strong and healthy growth. Regular observation of your seedlings can help you gauge their response to the light and make any necessary adjustments. With the right lighting setup, your seedlings will develop into robust plants ready for transplanting into the garden.
Setting Up a Seed Starting Area
Creating a designated seed starting area is essential for successfully starting seeds indoors. A well-organized and properly equipped space will provide the optimal conditions for germination and seedling growth. Here are some steps to help you set up your seed starting area:
- Select an Appropriate Location: Choose a location that receives ample light, preferably near a south-facing window. If natural light is limited, consider setting up your seed starting area near artificial grow lights. Keep in mind that the area should be easily accessible for watering, monitoring, and maintaining the seedlings.
- Prepare the Surface: Place a waterproof tray or a plastic liner on your surface to protect it from moisture damage. This can be a table, shelf, or any flat surface large enough to accommodate your seed trays.
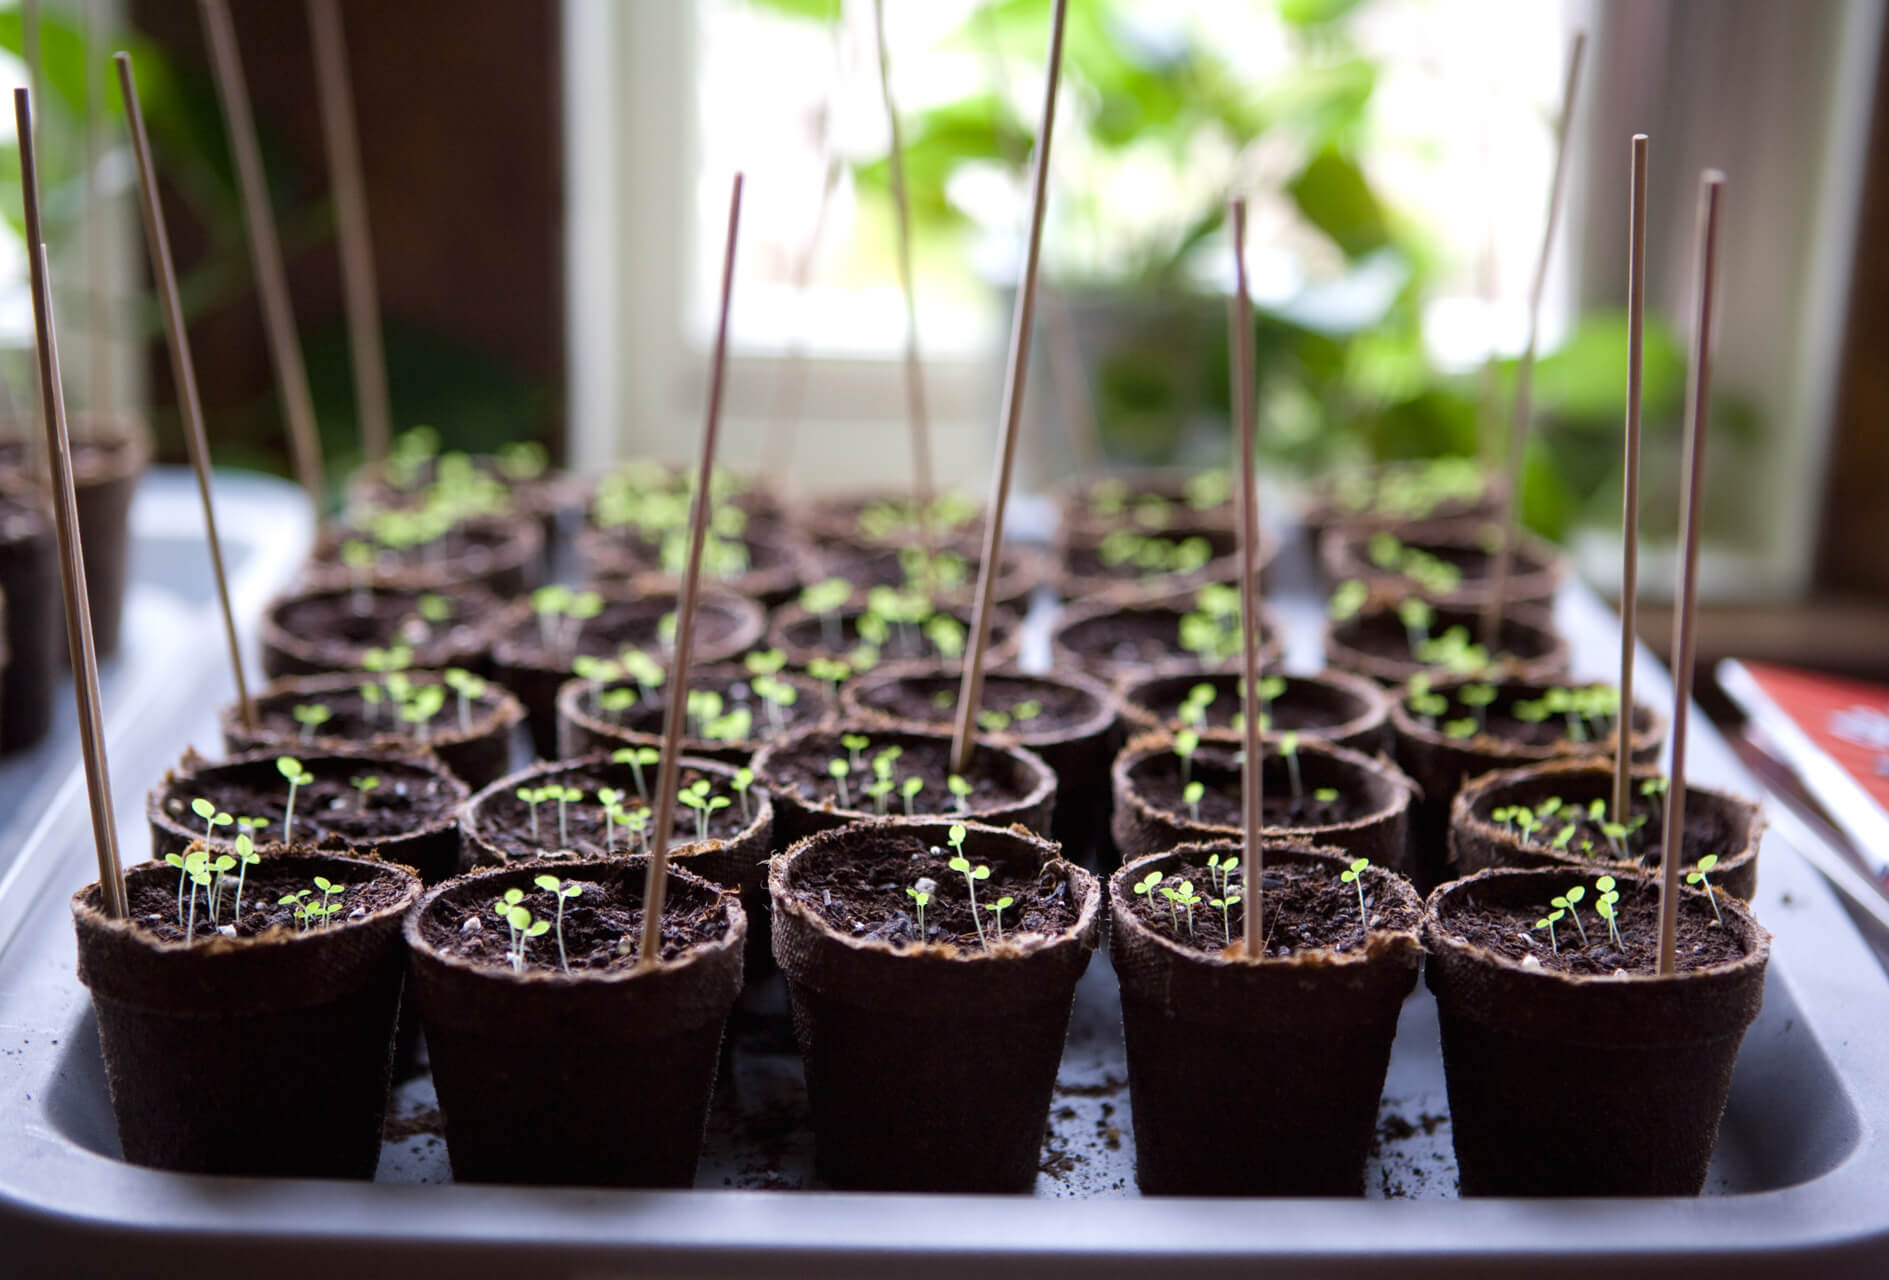
- Organize Your Supplies: Keep all your seed starting supplies within reach. This includes seed trays, seed starting cells or pots, labels, markers, soil, and any tools you may need. Utilize containers or organizers to keep your supplies neatly arranged and easily accessible.
- Provide Adequate Lighting: If using artificial grow lights, hang them overhead or mount them to ensure uniform light distribution. Adjust the height of the lights as your seedlings grow to maintain the recommended distance. If relying on natural light, position your seed trays near the window to maximize exposure.
- Control Temperature and Humidity: Maintaining a consistent temperature is crucial for successful seed germination. Use a thermometer to monitor and regulate the temperature in your seed starting area. Consider using a seedling heat mat to provide additional warmth if needed. To control humidity, cover your seed trays with a clear plastic dome or use a humidifier if the air is too dry. Avoid excessive moisture that can lead to fungal diseases.
- Ensure Proper Ventilation: Good air circulation is essential for preventing mold and promoting strong seedling growth. If using a plastic dome or cover, remove it periodically to allow fresh air to circulate. Use a small fan to gently circulate the air in the room if required.
- Maintain a Clean and Organized Space: Regularly clean your seed starting area, removing any debris, spent seedlings, or dead plant matter. Keep your supplies organized and ready for future use. This will help prevent the spread of diseases and pests and ensure a healthy start for your seedlings.
- Establish a Schedule: Create a seed starting calendar to keep track of sowing dates, expected germination times, and transplanting schedules. This will help you stay organized and ensure that your seedlings are ready for transplantation at the appropriate time.
By setting up a dedicated seed starting area with the right lighting, temperature control, and organization, you’ll be well-equipped to start your seeds indoors. This organized space will provide the optimum conditions for successful germination and healthy seedling development. Soon enough, you’ll have a bountiful collection of vibrant seedlings ready to be transferred to your garden.
Read more: How To Start Lettuce Seeds Indoors
Selecting the Right Containers
Choosing the right containers for starting your seeds is crucial for providing the optimal growing environment for your seedlings. The right containers will promote proper drainage, prevent overcrowding, and allow for easy transplanting. Consider the following factors when selecting containers for your seed starting:
- Size and Depth: The size and depth of the container should be appropriate for the type of seeds you are starting. Small seeds may require shallow containers, while larger seeds, like beans or peas, will benefit from deeper pots. Ensure there is enough space for the roots to develop without becoming overly crowded.
- Drainage: Good drainage is essential to prevent waterlogged soil and root rot. Choose containers with drainage holes at the bottom to allow excess water to escape. If using containers without drainage holes, you can create a layer of gravel or perlite at the bottom to improve drainage.
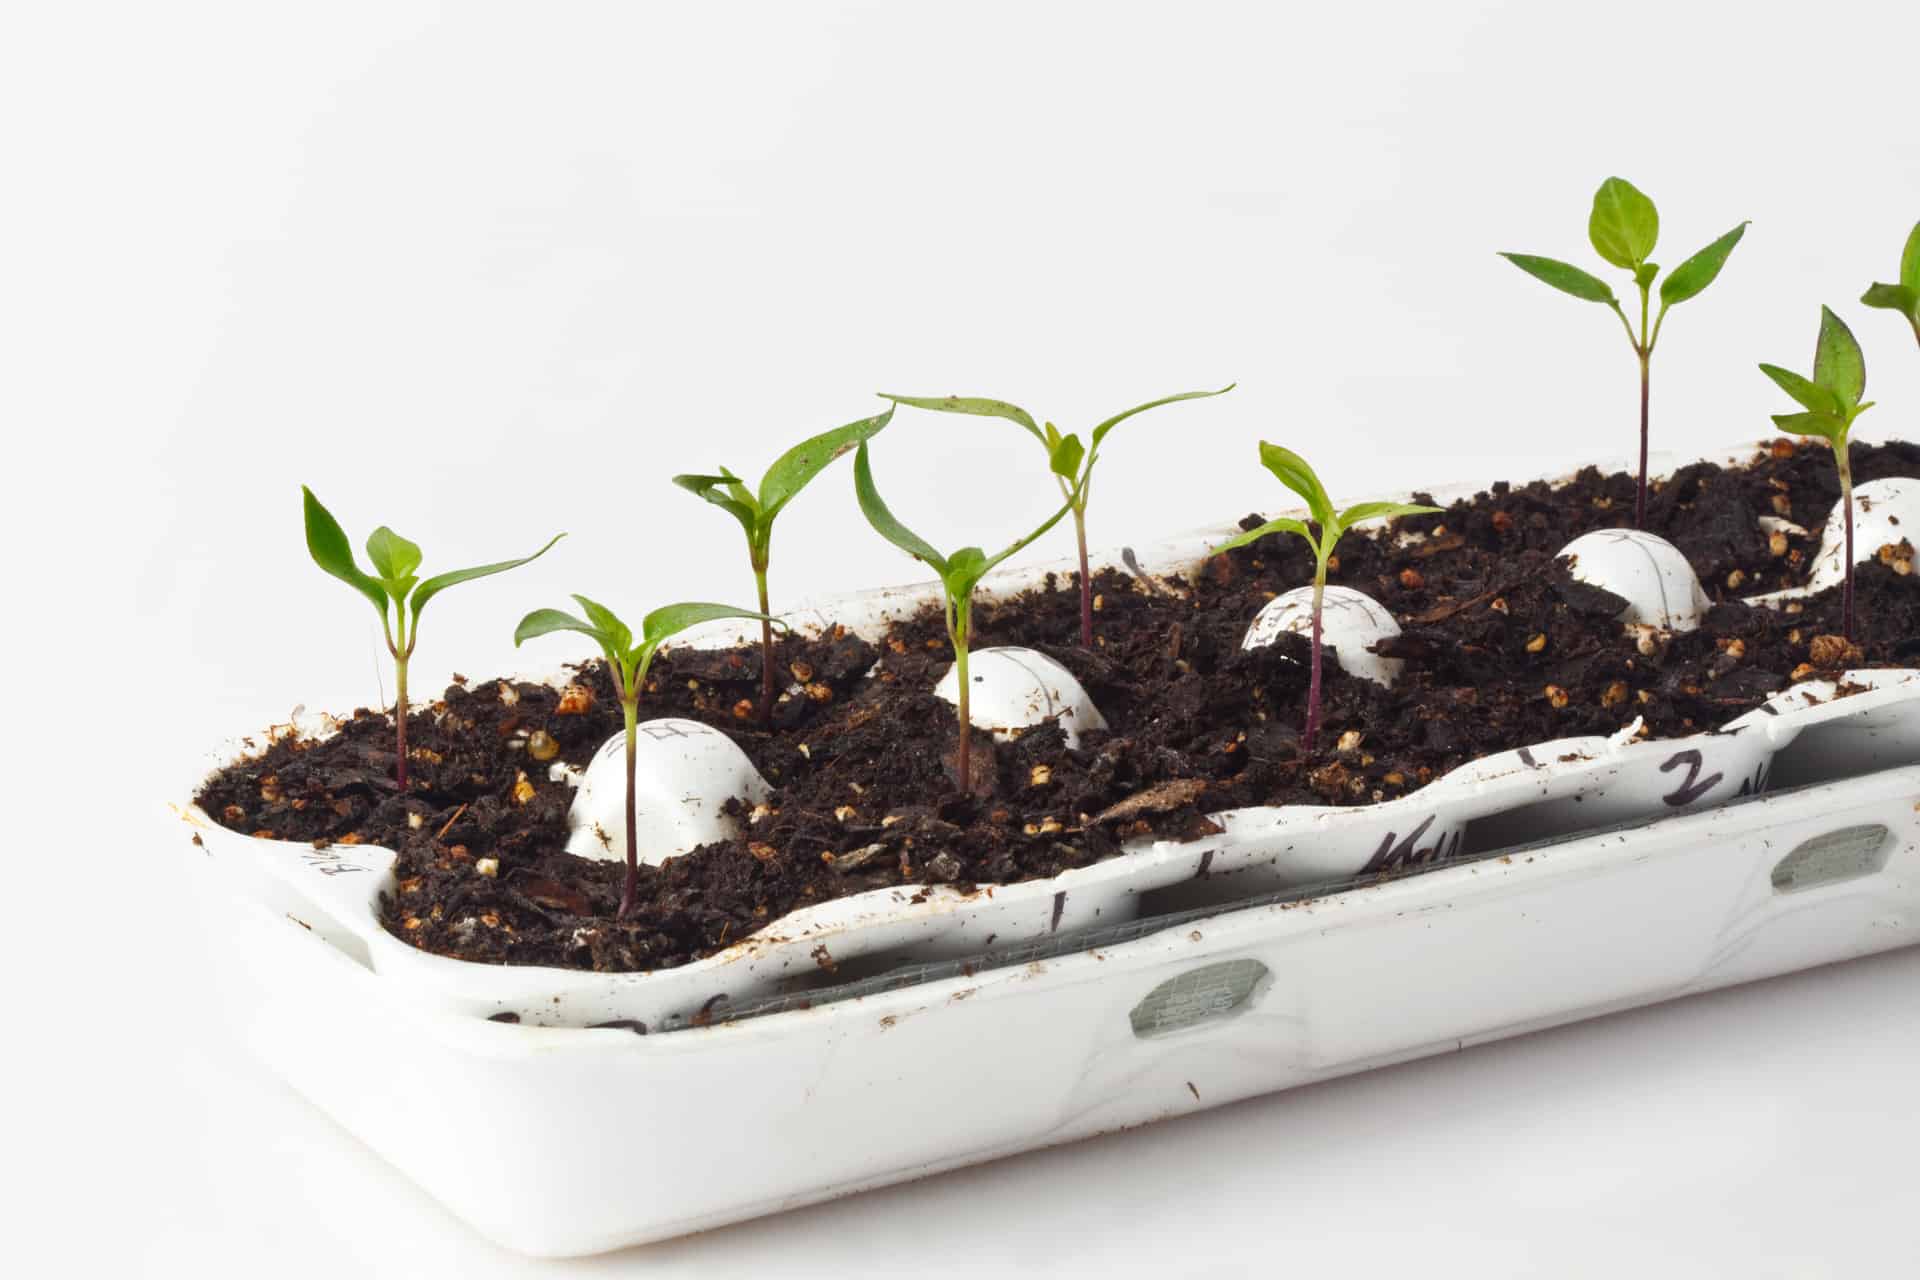
- Material: Seed starting containers come in various materials, including plastic, peat, and biodegradable options. Plastic containers are lightweight, durable, and easy to clean. Peat pots provide good drainage and can be directly planted into the ground, reducing transplant shock. Biodegradable pots, made from materials like coconut coir or molded paper, are environmentally friendly and can be planted directly into the soil.
- Reusability: Consider whether you want containers that can be reused for multiple growing seasons or if you prefer one-time use options. Reusable containers offer long-term cost savings and reduce waste, but they require proper cleaning and sterilization between uses to prevent the spread of diseases. Disposable containers, on the other hand, provide convenience and eliminate the need for cleaning.
- Availability and Cost: Assess the availability and cost of the containers you choose. Plastic containers are readily available and reasonably priced, while specialty biodegradable pots may be more expensive and harder to find. Consider your budget and local availability when making your container selection.
- Labeling: It’s important to be able to identify the different seed varieties. Choose containers that allow for easy labeling or consider using separate plant markers for each container. This will help you keep track of your seedlings and make it easier to transplant them when the time comes.
- Compatibility with Growing Medium: Ensure that your chosen containers are compatible with the growing medium you plan to use. Some containers may retain more moisture or dry out faster depending on the medium used, so consider the needs of your specific seeds and adjust accordingly.
When selecting containers, it’s essential to strike a balance between functionality, cost-effectiveness, and environmental considerations. Choose containers that best suit your needs and preferences, keeping in mind the specific requirements of your seedlings. With the right containers, you’ll create an ideal growing environment for your seeds, setting the stage for healthy and thriving seedlings.
Preparing the Growing Medium
A high-quality growing medium is essential for providing the necessary nutrients, aeration, and moisture retention for your seedlings. The right growing medium will support healthy root development and facilitate successful germination. Here are some steps to help you prepare the perfect growing medium:
- Choose a Seed Starting Mix: Look for a seed starting mix specifically formulated for seed germination and early growth. Seed starting mixes are typically lightweight, well-draining, and sterile to help prevent seedling diseases. Avoid using regular garden soil, as it may contain pests, pathogens, and weeds that can harm your delicate seedlings.
- Moisten the Mix: Before sowing your seeds, moisten the seed starting mix. Place the mix in a large container or tray and gradually add water while mixing until the mix is evenly damp, but not sopping wet. Allow the mix to absorb the water for a few hours or overnight before using.
- Ensure Adequate Aeration: Proper aeration is crucial for healthy root development. If your seed starting mix feels too compact or heavy, you can improve its aeration by adding perlite or vermiculite. These lightweight materials will improve drainage and help prevent soil compaction.
- Sterilize the Mix (Optional): If you are reusing containers or want to ensure maximum cleanliness, you can sterilize the seed starting mix before using it. This can be done by moistening the mix and then heating it in an oven at a temperature of around 180°F (82°C) for 30 minutes. Sterilizing the mix will help kill any pathogens or weed seeds that could potentially harm your seedlings.
- Fill Seed Starting Containers: Fill your chosen seed starting containers with the pre-moistened seed starting mix. Gently firm the mix to eliminate any air pockets but avoid compacting it too much. Leave a small gap between the top of the container and the surface of the mix to allow for watering without causing overflow.
- Label Containers: Label each container with the name of the plant variety to avoid confusion later on. Use waterproof markers or adhesive labels to ensure the labeling doesn’t smudge or wash away when watering.
Preparing the growing medium is an essential step in setting your seedlings up for success. The right mixture of nutrients, moisture retention, and aeration will provide the ideal environment for healthy seed germination and robust early growth. Take the time to carefully prepare your growing medium, and you’ll be rewarded with strong, vibrant seedlings ready for transplantation into your garden.
When starting seeds indoors, use grow lights to provide the necessary light for healthy seedling growth. Position the lights 2-3 inches above the seedlings and keep them on for 14-16 hours a day.
Sowing Seeds Indoors
Now that you have your seed starting area prepared and your growing medium ready, it’s time to sow your seeds. Sowing seeds indoors is an exciting step in the gardening process and requires attention to detail to ensure successful germination. Follow these steps to sow your seeds effectively:
- Read the Seed Packet: Each seed variety has specific requirements for sowing depth, spacing, and temperature. Read the information provided on the seed packet carefully to ensure you follow the recommended guidelines for optimal germination.
- Prepare Seed Cells or Containers: If using individual seed cells or containers, make a small hole or indentation in the center of each cell using a pencil or your fingertip. The depth should be according to the guidelines provided on the seed packet.
- Sow the Seeds: Place one or two seeds in each prepared cell or container. If sowing in larger containers, space the seeds according to the recommended spacing. Gently cover the seeds with a thin layer of the seed starting mix or vermiculite, following the depth guidelines on the seed packet.
- Mist or Water the Soil: After sowing the seeds, use a fine mist spray bottle or a watering can with a fine rose attachment to moisten the soil gently. Avoid using a heavy stream of water, as this can displace the seeds. Ensure the soil is evenly moist, but not saturated.
- Provide Bottom Heat (Optional): Certain seeds benefit from bottom heat to encourage germination. If recommended for the particular seed variety, place the seed tray on a seedling heat mat set to the appropriate temperature. This gentle warmth can promote quicker and more even germination.
- Cover with Plastic or Dome (Optional): Cover the seed tray with a clear plastic lid or a plastic wrap to create a mini greenhouse effect. This helps to retain moisture and create a humid environment that aids seed germination. Once the seeds have sprouted, remove the cover to prevent excessive moisture and allow for proper air circulation.
- Place in a Warm Location: Most seeds germinate best at warm temperatures. Find a warm spot in your home or greenhouse, ideally around 70-75°F (21-24°C). Placing the seed trays on top of a refrigerator or near a heating vent can provide the desired warmth for germination.
- Provide Adequate Lighting: Ensure that your seedlings receive adequate light immediately after sowing. If using artificial grow lights, keep them on for 14-16 hours a day, providing the required light intensity. If relying on natural light, place the seed trays near a south-facing window or provide supplemental lighting if needed.
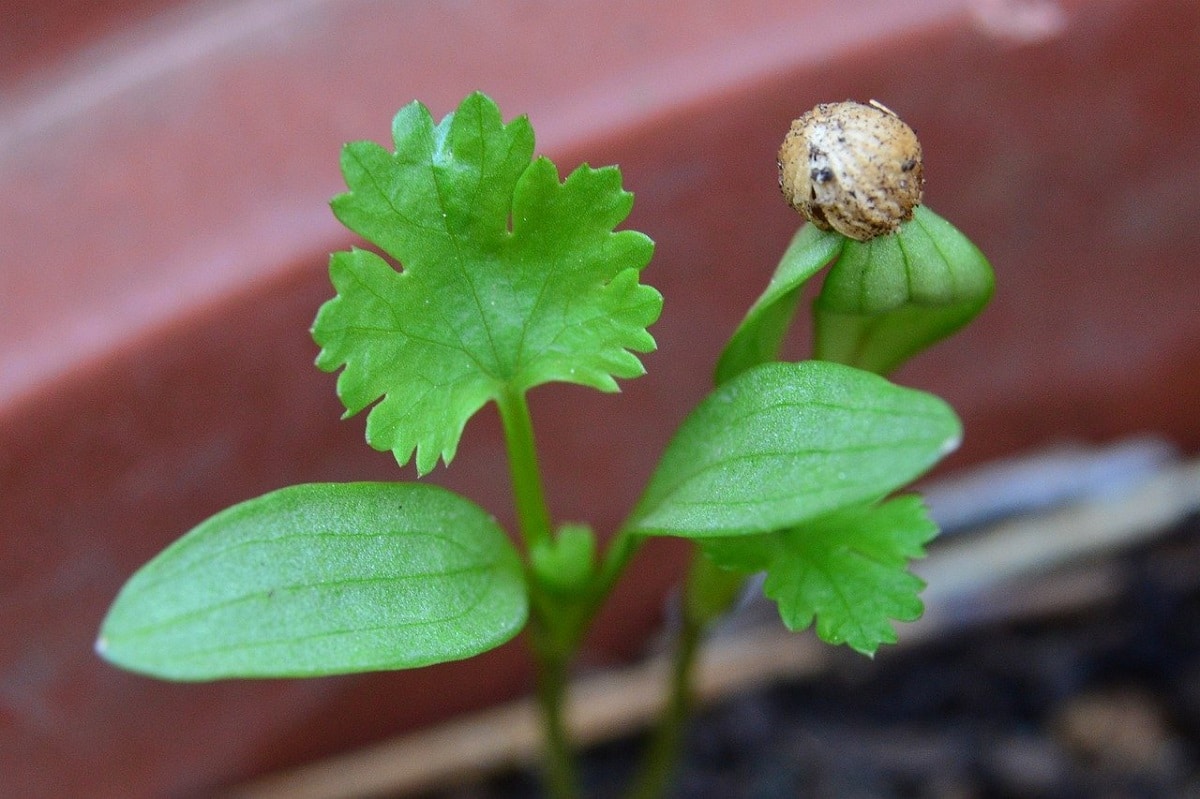
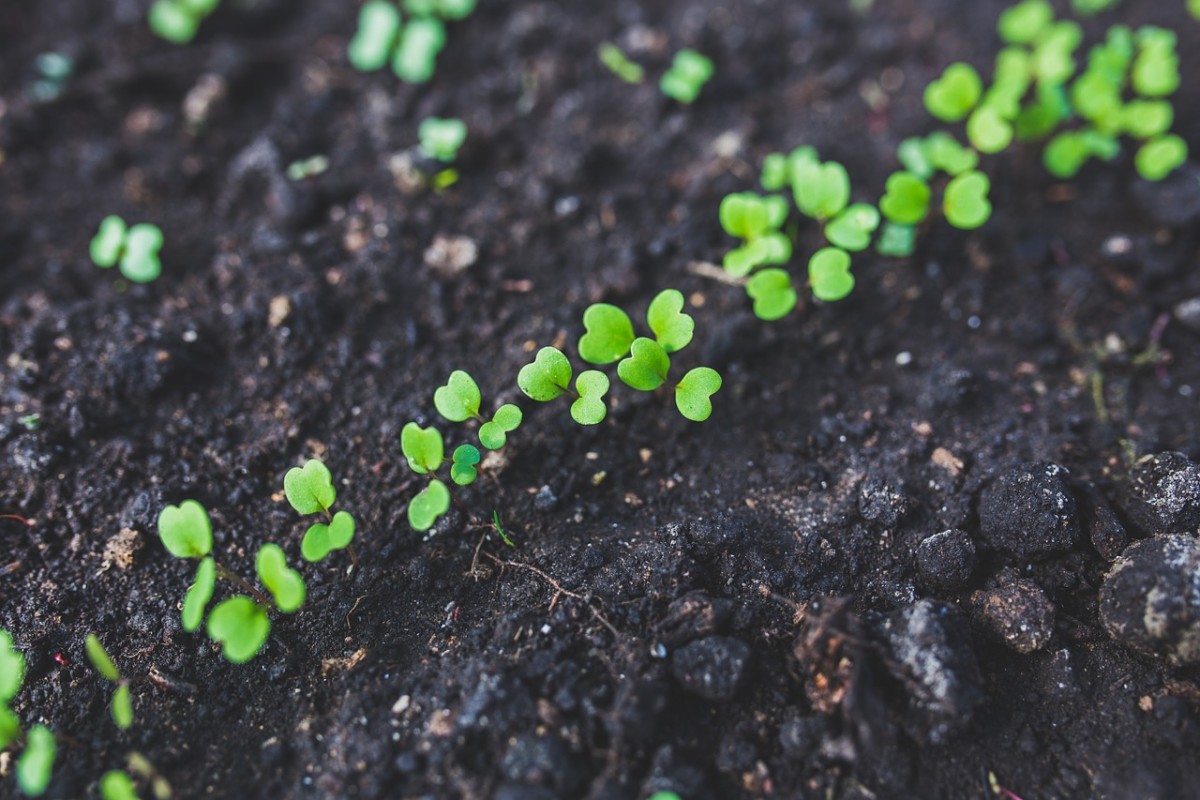
- Monitor Progress: Regularly check the seed trays to monitor moisture levels and observe signs of germination. Keep the soil consistently moist but not overly wet. Once germination occurs, remove any unsuccessful seeds to prevent mold or disease from spreading.
Remember, patience is key during the germination process. Some seeds may sprout quickly, while others may take several weeks. Be diligent in providing the appropriate care and monitoring the progress of your seedlings. Soon enough, you’ll be rewarded with tiny green shoots emerging from the soil, signaling the start of a successful indoor growing journey.
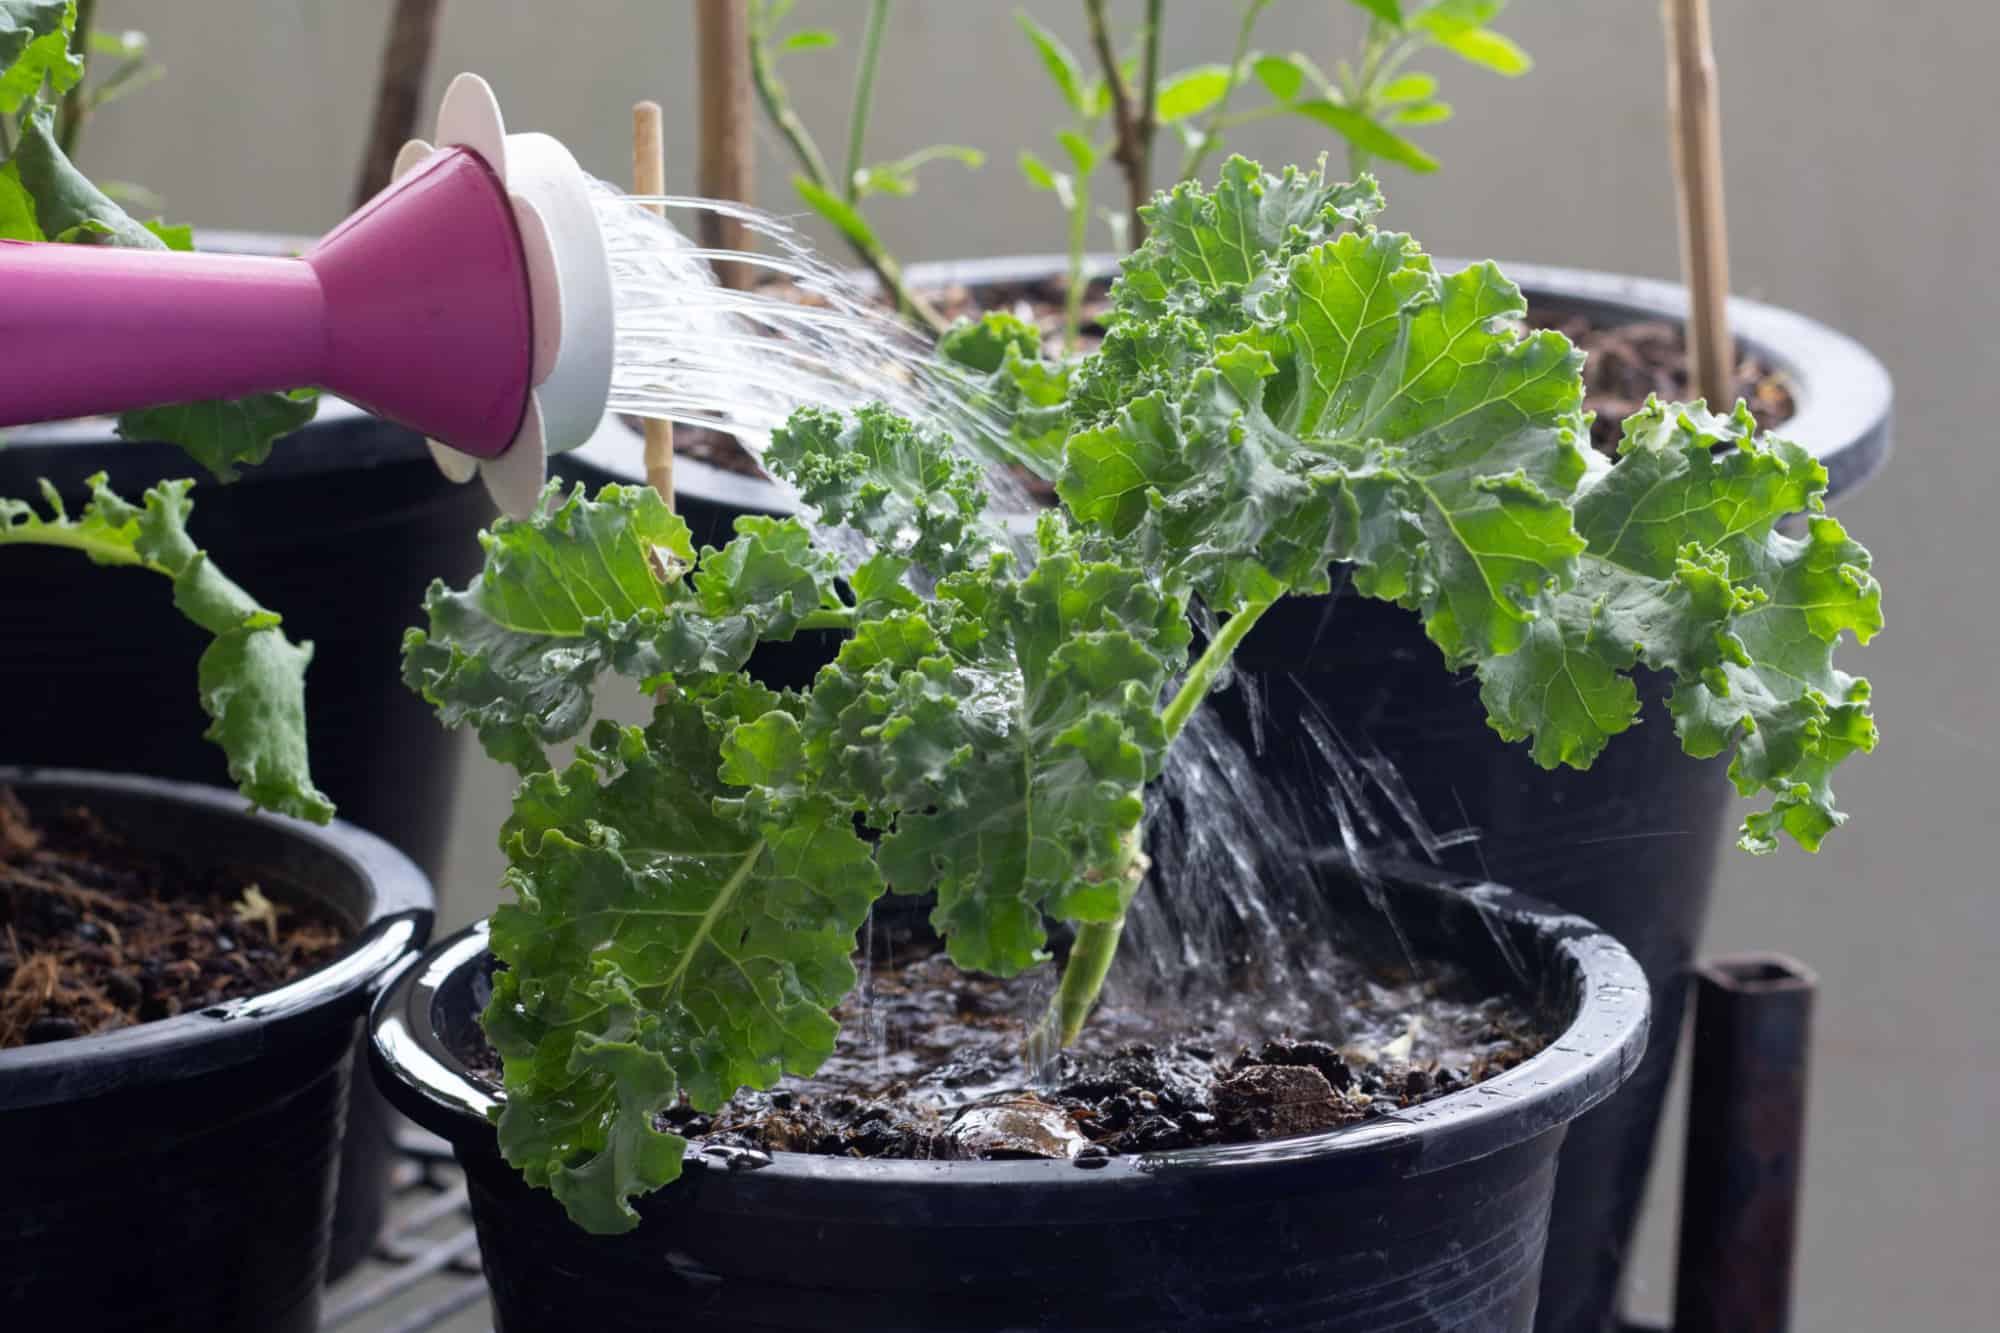
Providing Proper Watering and Humidity
Proper watering and humidity control are essential for the healthy growth of your seedlings. Consistent moisture and adequate humidity levels create a favorable environment for seed germination and the development of strong, robust plants. Follow these guidelines to ensure proper watering and humidity for your indoor seedlings:
- Watering:
- Be Gentle: When watering your seedlings, use a gentle approach to avoid dislodging or damaging the delicate plants. Use a watering can with a fine rose attachment or a mist spray bottle to provide a light and even application of water.
- Bottom Watering: For delicate seedlings, bottom watering can be an effective method. Place the seed tray or container in a shallow tray filled with water, and allow the soil to absorb moisture from the bottom. This ensures that the roots receive water without wetting the foliage excessively.
- Monitor Moisture Levels: Check the moisture level of the soil regularly. Stick your finger about an inch into the soil. If it feels dry at that depth, it’s time to water. Avoid letting the soil completely dry out or become waterlogged, as both extremes can be detrimental to the seedlings.
- Consistent Moisture: Aim for consistently moist soil without being overly wet. Uneven watering can lead to uneven growth and may cause stress or stunted development in your seedlings. Watering from the bottom can help maintain consistent moisture levels.
- Avoid Overhead Watering: Try to avoid watering the foliage of your seedlings. Excess water on the leaves can increase the risk of fungal diseases. Instead, direct your watering efforts towards the soil at the base of the plants.
- Humidity Control:
- Seedling Dome or Plastic Cover: During the initial stages of germination, when your seedlings are covered with a plastic dome or plastic wrap, the humidity levels are naturally higher. This helps prevent excessive moisture loss from the soil and creates a mini greenhouse effect to promote germination. Once the seedlings have sprouted, remove the cover to prevent high humidity levels that can lead to damping off or fungal diseases.
- Provide Air Circulation: Proper air circulation helps reduce excessive humidity and prevents the growth of mold and mildew. Use a small fan or open nearby windows to improve airflow in the room. Ensure that the fan is gentle to avoid causing stress to the delicate seedlings.
- Avoid Excess Humidity: While some humidity is beneficial for seedlings, excessive humidity can lead to fungal diseases. Monitor the humidity levels in your seed starting area and adjust accordingly. If the air feels excessively humid, consider using a dehumidifier or removing the dome or cover temporarily to allow for better airflow.
Remember, proper watering and humidity control are crucial for the health and development of your seedlings. By following these guidelines and monitoring your seedlings’ moisture needs, you’ll create an environment that promotes their growth and helps them thrive. With proper care, your seedlings will soon transform into healthy, robust plants ready for transplanting into your garden.
Read more: How To Start Pepper Seeds Indoors
Maintaining Optimal Temperature
Temperature plays a vital role in the growth and development of your indoor seedlings. Maintaining the optimal temperature range creates an environment that promotes healthy germination, strong root development, and overall vigorous growth. Follow these guidelines to maintain the ideal temperature for your seedlings:
- Refer to the Seed Packet: Different plant varieties have specific temperature requirements for germination. Check the information provided on the seed packet or in your gardening references to determine the optimum temperature range for your seeds.
- Provide Warmth for Germination: Most seeds germinate best in a slightly warmer environment. Aim to maintain a temperature range of 70-75°F (21-24°C) during the germination period. To achieve this, you can use a seedling heat mat placed underneath the seed trays or consider placing the trays on top of a warm surface, such as the refrigerator or near a heating vent.
- Avoid Extreme Temperature Fluctuations: Sudden temperature fluctuations can stress and damage young seedlings. Avoid placing your seedlings near drafts, open windows, or heating/cooling vents that can cause rapid temperature changes. Instead, choose a location with relatively stable temperatures to provide a consistent and nurturing environment.
- Nighttime Temperature: While higher temperatures are beneficial for germination and early growth, it’s essential to provide a slightly cooler environment during the night. Lowering the temperature by a few degrees, around 60-65°F (15-18°C), during the nighttime hours replicates natural outdoor temperature variations and promotes healthy plant development.
- Avoid Excessive Heat: Consistently high temperatures can negatively impact seedling growth and health. Avoid exposing your seedlings to temperatures above 80°F (27°C) as it can lead to wilting, stunted growth, or even plant damage. If necessary, use shading techniques or move the seedlings to a cooler location to prevent overheating.
- Monitor and Adjust: Regularly monitor the temperature in your seed starting area using a thermometer. Check the seedlings for any signs of temperature stress, such as wilting or yellowing leaves. If adjustments are needed, relocate the seed trays to a more suitable position or consider using a fan to regulate the temperature and promote air circulation.
By maintaining the optimal temperature range, you create an environment that supports healthy seedling growth and development. Monitoring and adjusting the temperature as needed will help prevent stress and maximize the potential of your indoor seedlings. With the right temperature conditions, your seedlings will thrive and prepare themselves for successful transplantation into your garden.
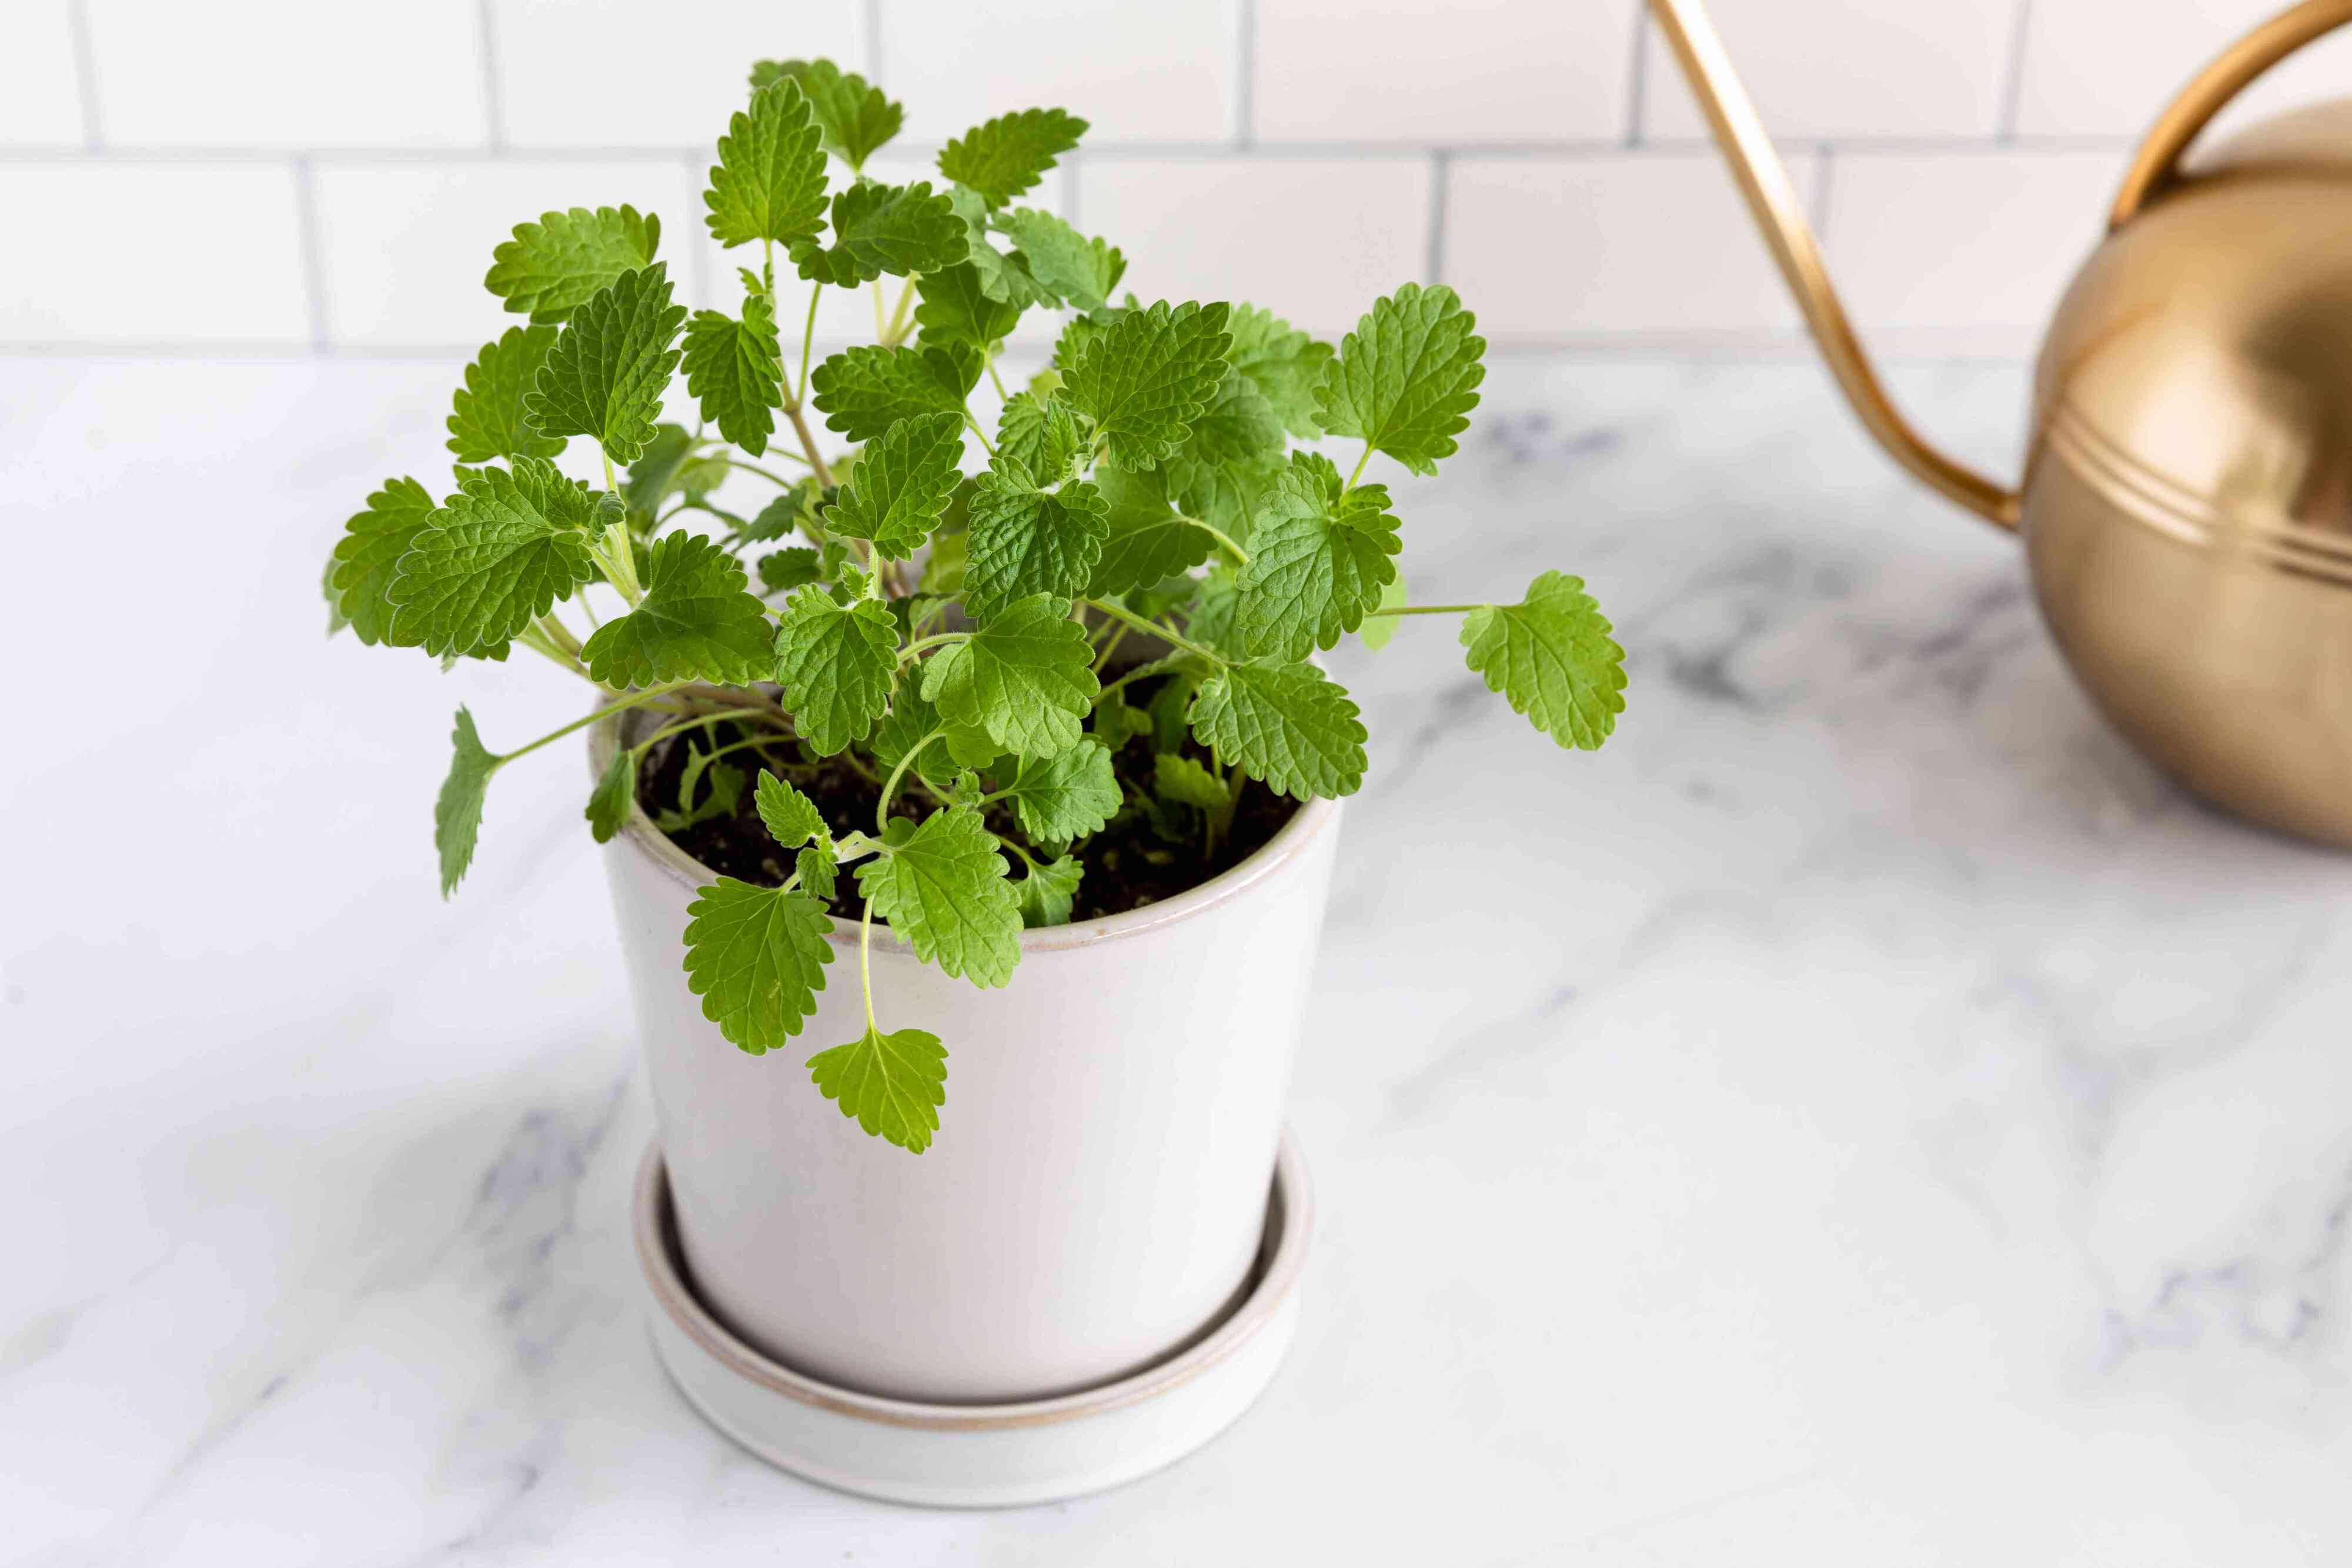
Caring for Seedlings
Caring for your seedlings is a critical aspect of ensuring their healthy growth and development. By providing the right care and attention, you’ll help your seedlings thrive and prepare them for transplantation into your garden. Here are some important care tips to keep in mind:
- Watering: Maintain a consistent moisture level in the soil by watering the seedlings as needed. Monitor the soil moisture regularly and water when the top inch of soil feels dry. Remember to water gently to avoid dislodging or damaging the delicate seedlings. Bottom watering can be an effective method to ensure the roots receive moisture without wetting the foliage excessively.
- Lighting: Seedlings require bright light to promote healthy growth. Provide adequate light for 14-16 hours a day if using artificial grow lights. Adjust the height of the lights as the seedlings grow to maintain the recommended distance. If relying on natural sunlight, ensure the seed trays are positioned near a south-facing window or use supplemental lighting if needed.
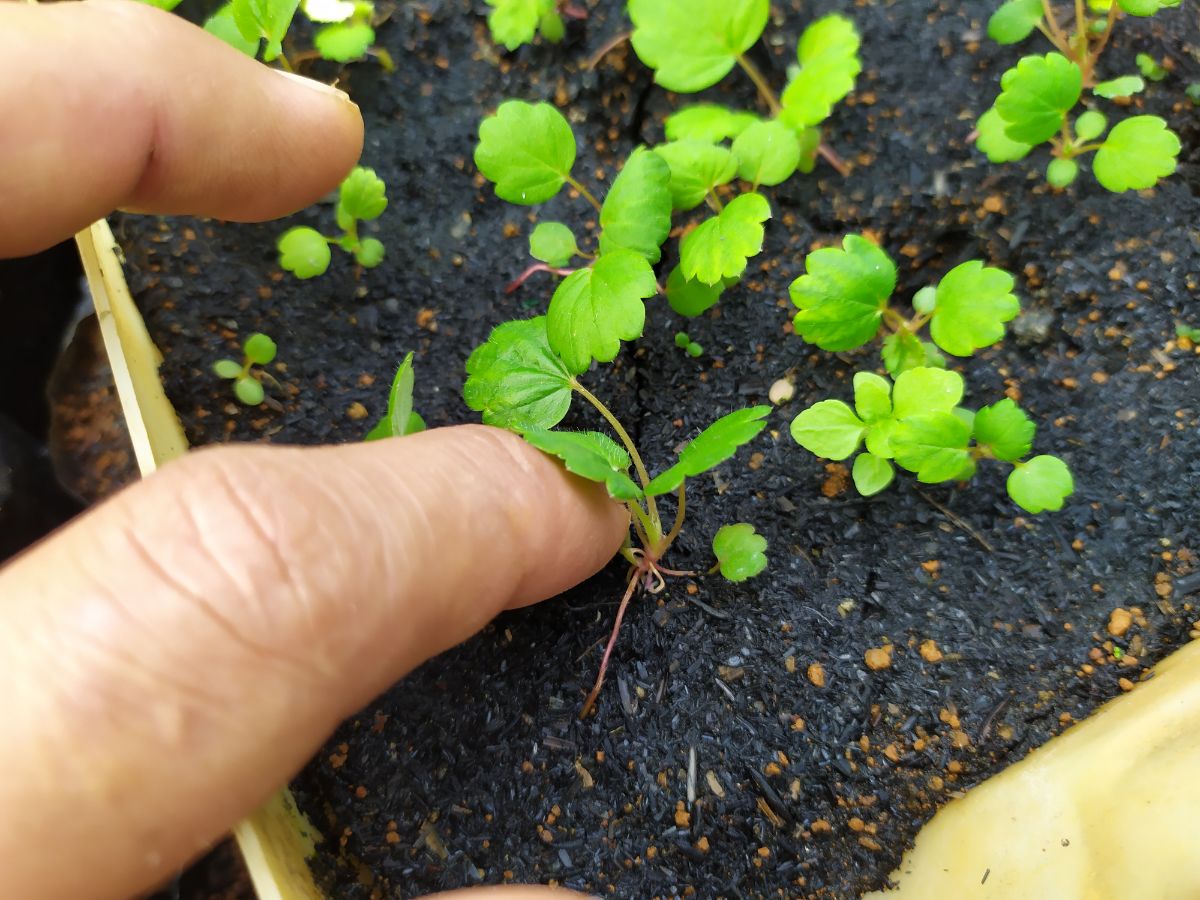
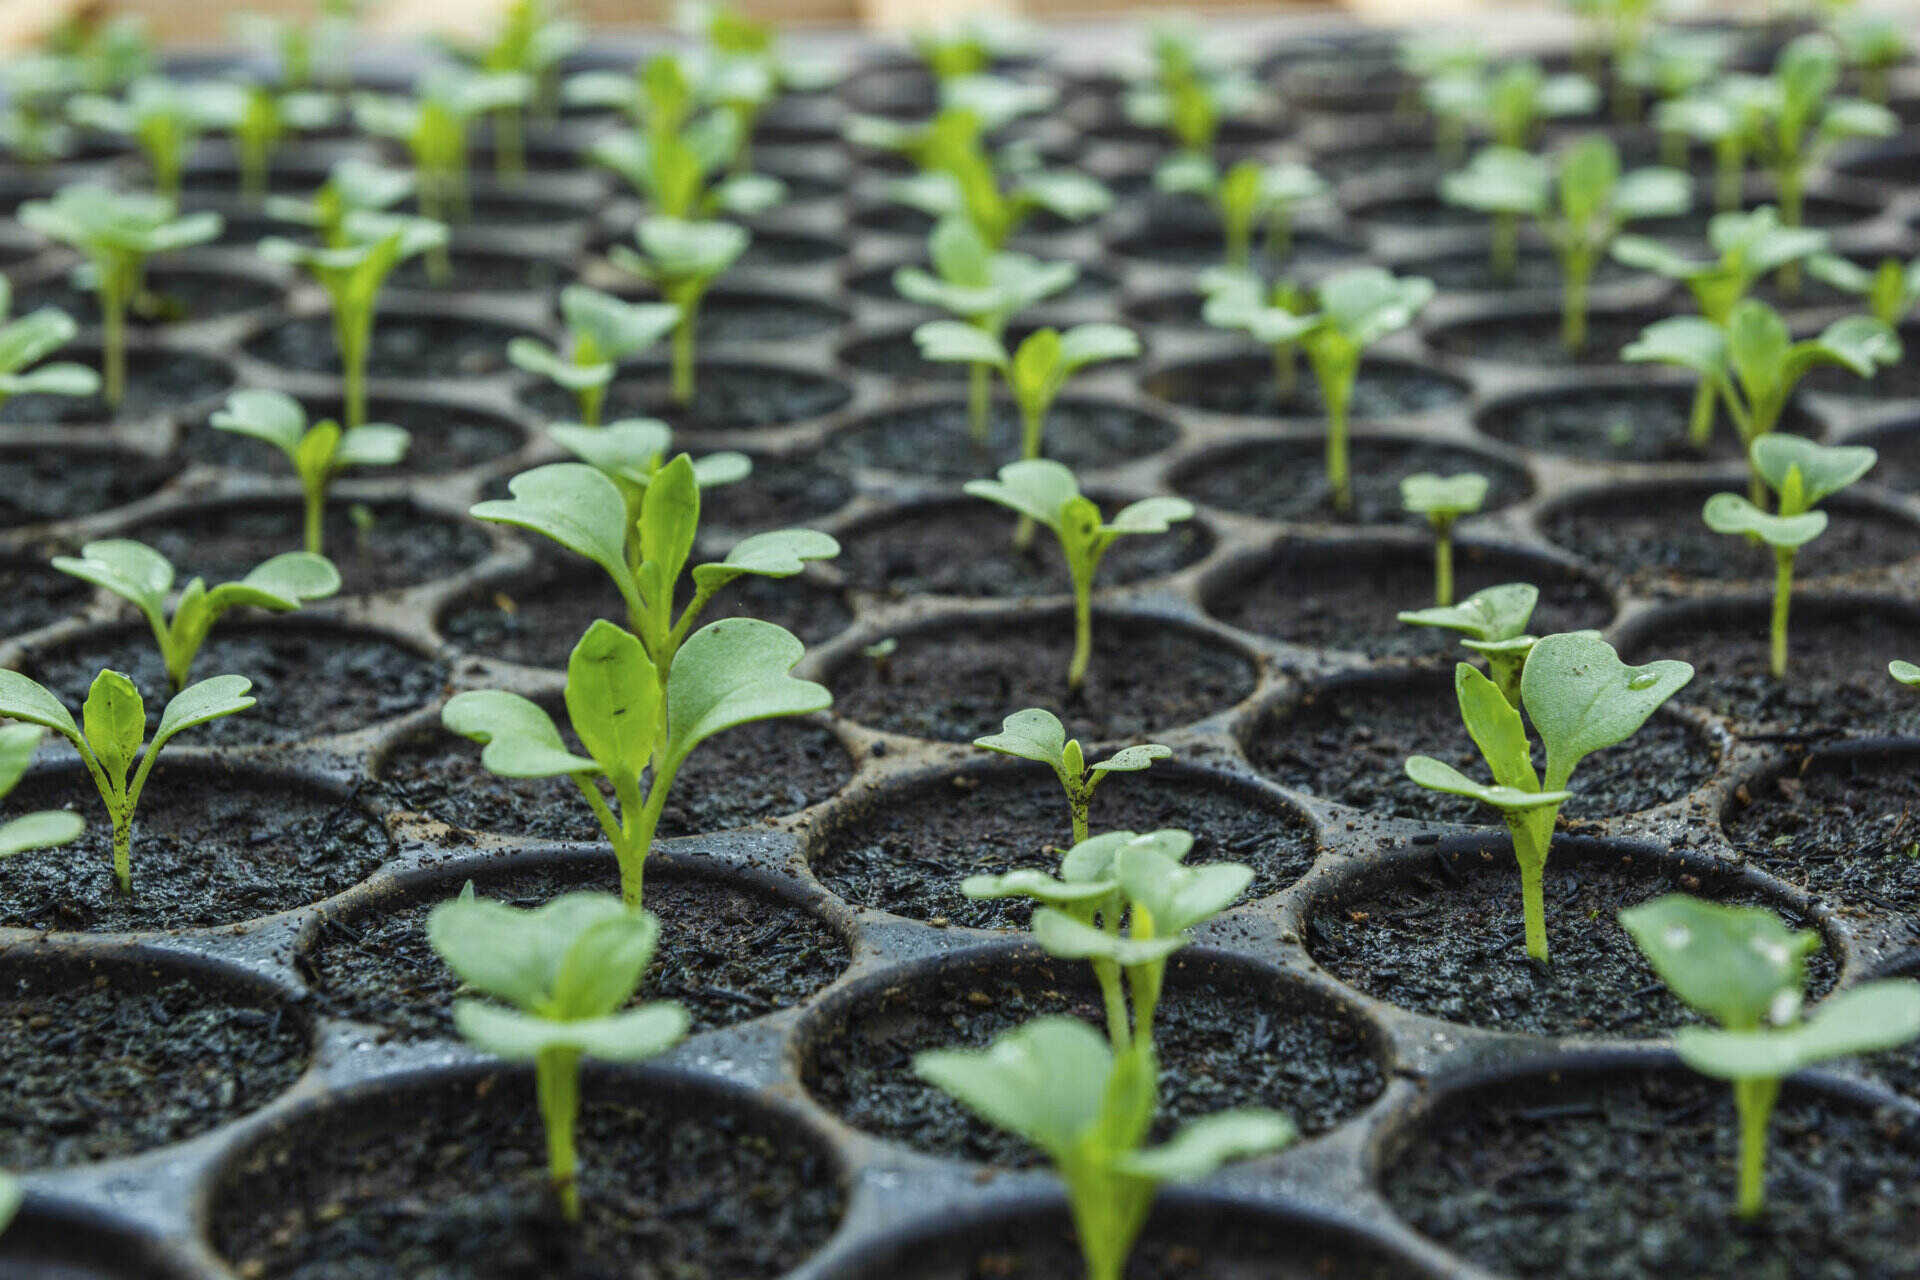
- Thinning: If multiple seedlings have sprouted in one cell or container, thin them out. Choose the healthiest and strongest-looking seedling and remove the others by gently snipping them at soil level. Thinning allows the remaining seedling to receive adequate nutrients, space, and light for optimal growth.
- Fertilizing: Most seedlings do not require immediate fertilization, as the nutrients in the seed starting mix are usually sufficient for the first few weeks. Once the true leaves have emerged, you can begin fertilizing with a diluted, balanced liquid fertilizer. Follow the package instructions for proper dilution ratios and frequency of application.
- Support: As your seedlings grow taller, some may require support to prevent them from bending or toppling over. Gently insert small stakes or use plant ties to provide support without damaging the delicate stems. Gradually increase the support as the seedlings continue to grow.
- Air Circulation: Proper air circulation helps prevent the growth of mold and mildew and encourages strong stems. Use a small fan or gently move the air around the seedlings regularly. Ensure that the airflow is not too strong or directly aimed at the seedlings, as it can cause stress or damage.
- Observation and Monitoring: Regularly inspect your seedlings for any signs of disease, pests, or nutrient deficiencies. Catching issues early allows you to take appropriate action and prevent further damage. Look for yellowing or discolored leaves, spots, wilting, or any unusual growth patterns.
- Transplanting: As the seedlings grow and develop their true leaves, they will outgrow their initial containers and require transplanting into larger pots or trays. Transplant the seedlings carefully, ensuring that the root ball remains intact and undisturbed. Use a well-draining potting mix when transplanting and gently firm the soil around the seedling.
- Hardening Off: Before transplanting seedlings into the garden, it’s crucial to gradually acclimate them to outdoor conditions. This process, known as hardening off, involves slowly exposing the seedlings to outdoor temperatures, sunlight, and wind over a period of 7-10 days. Start with a few hours of exposure and gradually increase the time each day until they are ready for full-time outdoor living.
By following these care guidelines, you’ll ensure your seedlings receive the attention and support they need to thrive. Remember to be patient and observant while caring for your seedlings. With proper care, your seedlings will grow into strong, healthy plants ready to grace your garden with beauty and productivity.
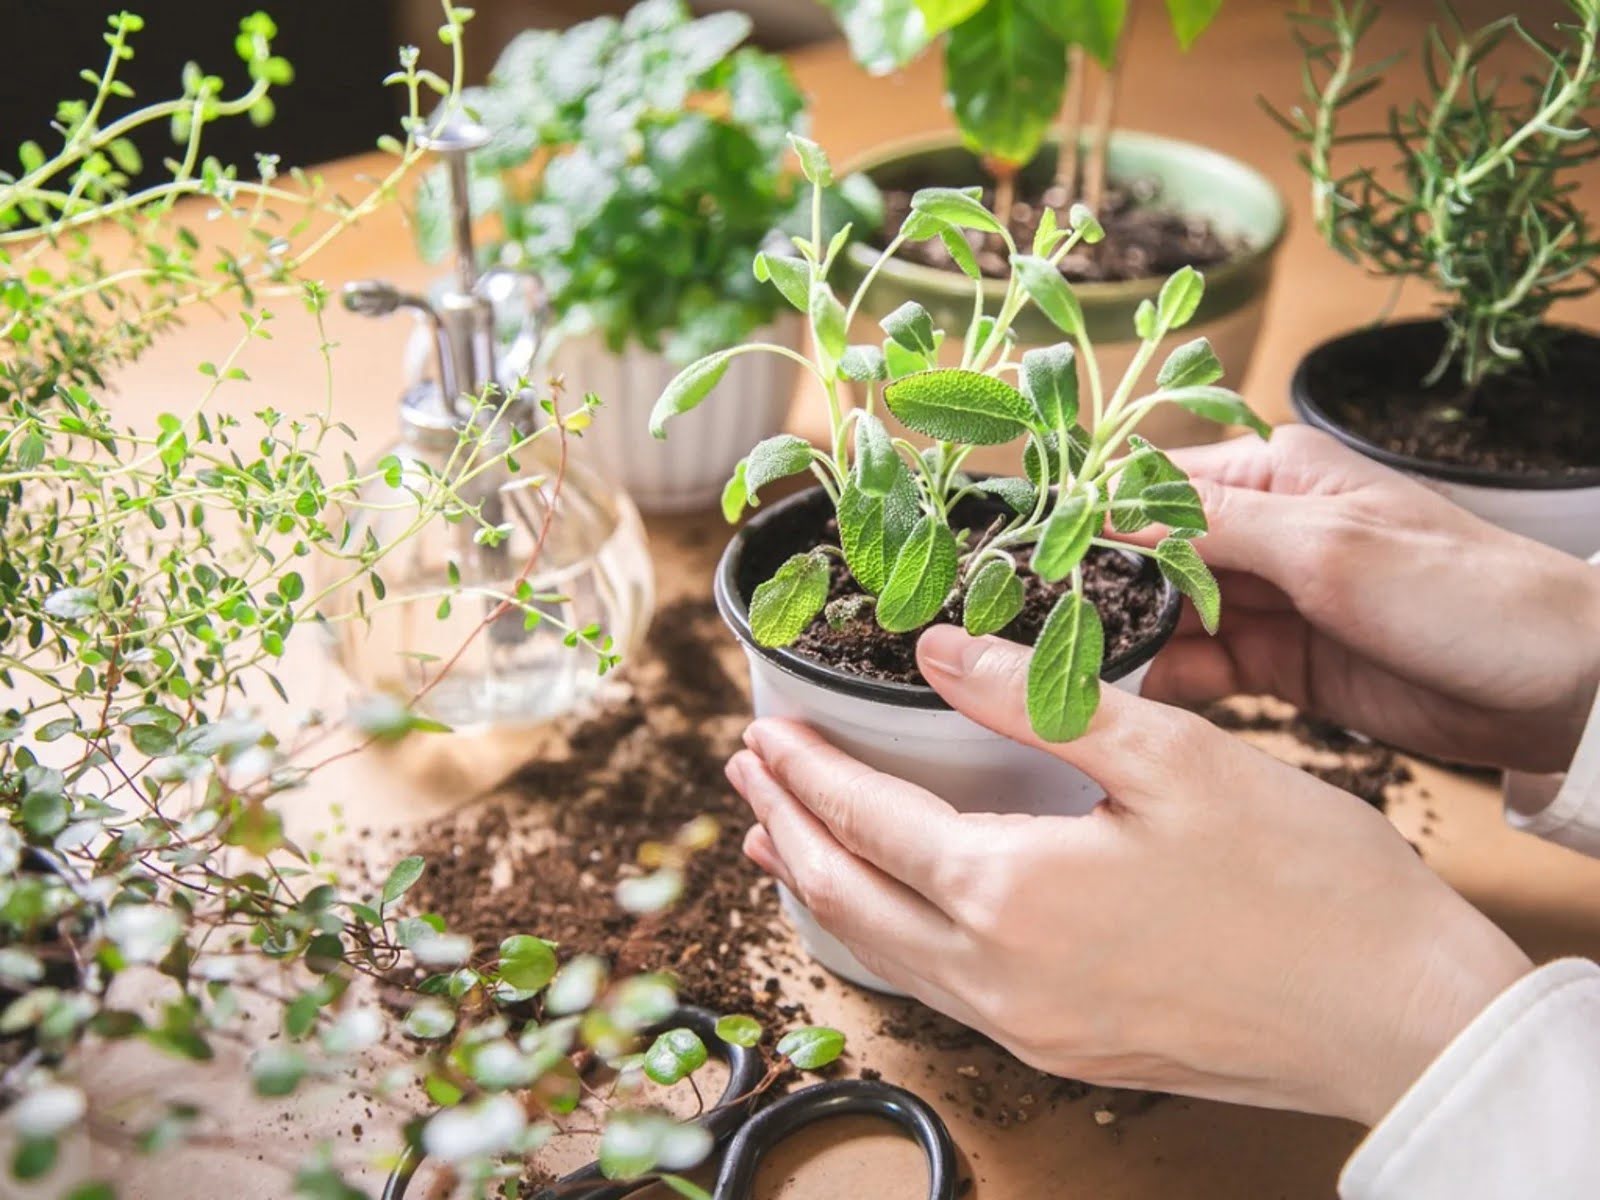
Transferring Seedlings to Larger Containers
As your seedlings grow and develop, they will outgrow their initial containers and require transplantation into larger pots or trays. This process, known as transplanting or potting-up, provides the seedlings with more space for root development and allows them to continue growing into healthy, mature plants. Follow these steps to successfully transfer your seedlings to larger containers:
- Choose the Right Containers: Select containers that are suitable in size for the stage of growth your seedlings have reached. The new containers should provide ample room for the roots to spread out. Consider using biodegradable pots, plastic pots, or seed trays for ease of transplanting and to minimize root disturbance.
- Prepare the New Containers: Fill the new containers with a well-draining potting mix, leaving enough space at the top to accommodate the seedlings and additional soil. Ensure the potting mix is moistened before transplanting to provide a gentle environment for the roots.
- Water the Seedlings: Thoroughly water the seedlings a few hours before transplanting. This helps ensure the soil is adequately moistened and facilitates the removal of the seedlings from their current containers without disturbing the root system excessively.
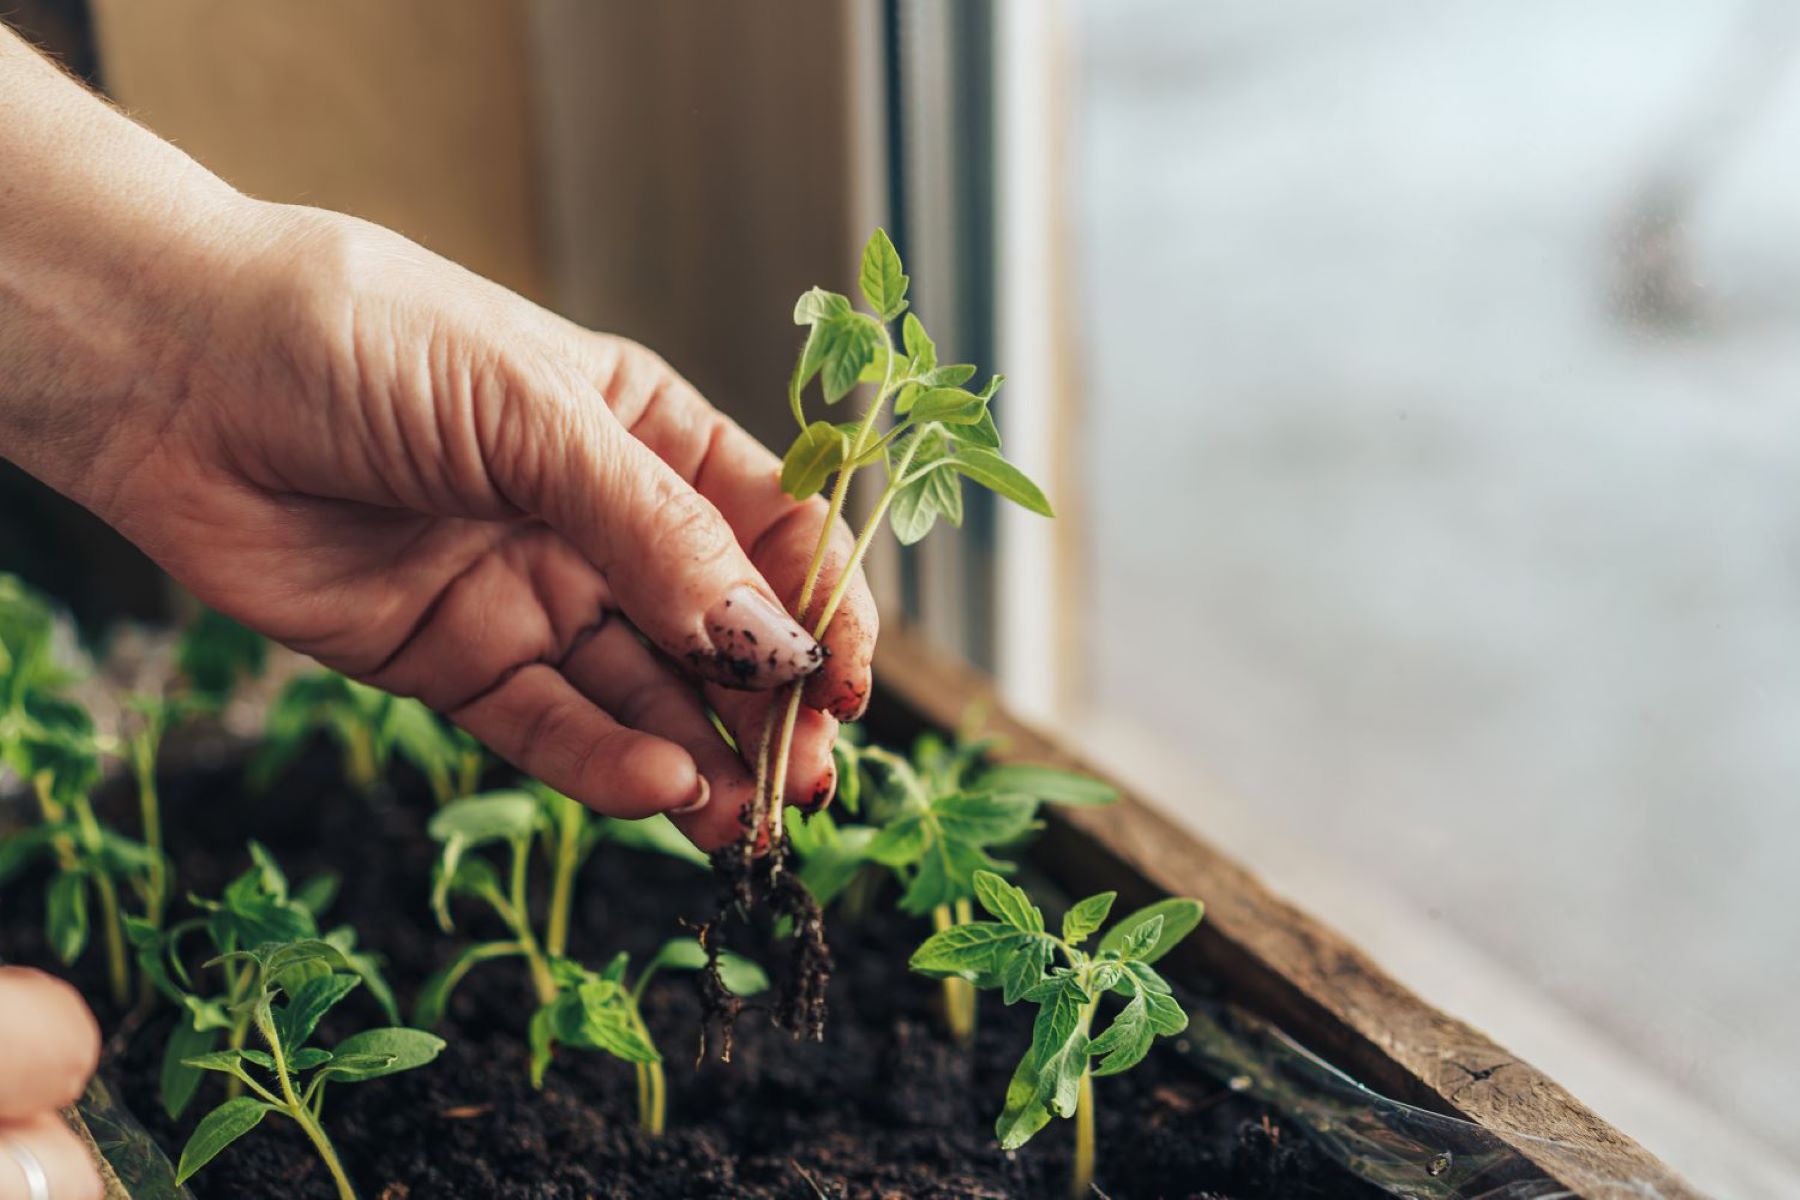
- Handle with Care: Gently remove the seedlings from their current containers, taking care to avoid damaging the delicate stems or roots. You can use your fingers or a small tool, such as a spoon or transplanting trowel, to carefully lift and loosen the seedlings from the soil.
- Plant at the Correct Depth: Plant the seedlings in the new containers at the same depth they were in their previous containers. Avoid planting too deep, as this can restrict root growth and potentially lead to issues with rot or disease. Firm the potting mix gently around the seedlings to provide stability.
- Water the Seedlings: After transplanting, give the seedlings a thorough watering to settle the soil and help establish the roots in the new containers. Ensure the water reaches the bottom of the containers and drains out properly. Allow the excess water to drain away to avoid waterlogged soil.
- Provide Adequate Light and Ventilation: Place the newly transplanted seedlings in a well-lit area that receives the appropriate amount of light for their specific requirements. Ensure good airflow to prevent disease and promote healthy growth. Avoid exposing the seedlings to direct sunlight immediately after transplanting, as they may be more sensitive to intense light at this stage.
- Maintain Proper Care: Continue to provide proper care for the transplanted seedlings, including regular watering, appropriate lighting, and any necessary fertilization. Monitor the seedlings for any signs of stress or issues and take prompt action if needed.
- Gradual Adaptation to Outdoor Conditions (If Applicable): If you plan to transplant the seedlings into the garden, remember to harden them off gradually before doing so. This involves exposing the seedlings to outdoor conditions gradually over a period of 7-10 days to acclimate them to direct sunlight, wind, and fluctuating temperatures.
Transferring seedlings to larger containers provides them with the space and nutrients they need to continue growing and thriving. By following these steps and providing proper care, you’ll set your seedlings up for success as they transition into the next phase of their growth journey. The reward will be healthy, mature plants ready to flourish in your garden.
Hardening Off Seedlings
Hardening off is a crucial step in transitioning seedlings from an indoor environment to the outdoor conditions they will face in the garden. This process gradually exposes the seedlings to outdoor elements, such as direct sunlight, wind, and fluctuating temperatures, helping them adjust and prevent shock. Follow these steps to successfully harden off your seedlings:
- Timing: Begin the hardening off process when the threat of frost has passed in your area, typically a few weeks before the planned transplant date. Start with mild weather conditions, gradually increasing exposure to more challenging outdoor elements.
- Start Slowly: Begin by placing the seedlings outside in a sheltered, shaded area for a few hours each day. Choose a location protected from direct sunlight, strong winds, and adverse weather conditions.
- Progressively Increase Exposure: Gradually increase the amount of time the seedlings spend outdoors over a period of 7-10 days. Add an additional hour or two each day, taking care to monitor the seedlings for any signs of stress.
- Choose the Right Time of Day: During the first few days of hardening off, it’s best to expose the seedlings to outdoor conditions during the milder parts of the day, such as early morning or late afternoon. This helps to avoid the intense midday sun or cooler nighttime temperatures.
- Monitor Weather Conditions: Keep a close eye on the weather forecast, especially during the hardening off period. Avoid exposing the seedlings to extreme weather conditions, such as heavy rain, strong winds, or unseasonably cold temperatures.
- Gradually Increase Exposure to Sunlight: As the seedlings become more accustomed to being outdoors, gradually expose them to direct sunlight. Start with a few hours of morning or late afternoon sun and gradually increase exposure to full sunlight over a few days. This process prepares the seedlings for the intensity of sunlight they will receive in the garden.
- Adjust Watering: Be mindful of the moisture needs of the seedlings during the hardening off period. Outdoor conditions and increased exposure to sunlight may cause the soil to dry out faster. Monitor the soil moisture and adjust your watering schedule accordingly to prevent wilting or drying out.
- Provide Wind Protection: Wind can be a significant stressor for young seedlings. Gradually expose them to gentle breezes, gradually increasing wind exposure over time. If necessary, use temporary windbreaks, such as garden fabric or fences, to protect the seedlings from strong winds during the initial stages of hardening off.
- Transplanting: After the hardening off period is complete, and the seedlings have acclimated to outdoor conditions, they are ready for transplantation into the garden. Choose a suitable planting location, prepare the soil, and transplant the seedlings following proper spacing and planting guidelines.
By properly hardening off your seedlings, you set them up for success in the garden. This gradual process helps the seedlings adjust to outdoor conditions, reducing the risk of shock and ensuring a smooth transition. With a little patience and diligence, your seedlings will thrive and flourish as they continue their growth journey in the garden.
Read more: When To Start Foxglove Seeds Indoors
Conclusion
Starting seeds indoors and caring for the resulting seedlings is an incredibly rewarding experience for any gardener. By providing the right conditions, from choosing the appropriate grow lights to maintaining optimal temperature, you can nurture your seedlings into healthy, thriving plants ready for transplantation into the garden.
The benefits of starting seeds indoors are numerous. You gain the ability to extend the growing season, have a wider variety of plant options, and save money compared to buying mature plants. Additionally, you have full control over the growing environment, ensuring that your seedlings receive the right amount of light, water, and nutrients.
Remember to choose the right containers for your seedlings, provide a suitable growing medium, and sow your seeds with care. Once your seedlings are established, it’s crucial to provide proper watering, lighting, ventilation, and nutrition. Keep a watchful eye for any signs of stress or disease, and take necessary actions to address them promptly.
The hardening off process is the final step before transplanting your seedlings into the garden. Gradually exposing them to outdoor conditions helps prevent shock and allows them to acclimate to the elements. Once hardened off, your seedlings are ready to be transplanted, contributing to a successful and productive garden.
Remember, patience and observation are key throughout the entire process of starting seeds indoors. Each step, from preparing the seed trays to caring for the seedlings, requires attention to detail and a nurturing touch. With dedication and proper care, you’ll have a vibrant and fruitful garden that all began with the tiny seeds nurtured into healthy seedlings.
So, embrace the joy of starting seeds indoors, and enjoy the satisfaction and beauty of a flourishing garden that you have lovingly cultivated from the very beginning.
Frequently Asked Questions about How To Start Seeds Indoors Using Growing Lights
Was this page helpful?
At Storables.com, we guarantee accurate and reliable information. Our content, validated by Expert Board Contributors, is crafted following stringent Editorial Policies. We're committed to providing you with well-researched, expert-backed insights for all your informational needs.
0 thoughts on “How To Start Seeds Indoors Using Growing Lights”