Home>Articles>How To Build A DIY Paver Patio In 9 Steps In Just One Day
Articles
How To Build A DIY Paver Patio In 9 Steps In Just One Day
Modified: January 24, 2024
Learn how to build a stunning DIY paver patio in just one day with our step-by-step guide. Find articles on all your patio needs, from materials to design ideas and more.
(Many of the links in this article redirect to a specific reviewed product. Your purchase of these products through affiliate links helps to generate commission for Storables.com, at no extra cost. Learn more)
Introduction
Building a DIY paver patio can transform your outdoor space, providing a beautiful and functional area for relaxation and entertainment. Whether you’re looking to create a cozy seating area or an expansive patio for hosting gatherings, constructing a paver patio is a rewarding project that can be completed in just one day.
Not only does a paver patio add value to your home, but it also offers a durable and low-maintenance outdoor surface. With proper planning and the right materials, you can easily create a stunning patio that will last for years to come.
In this article, we will guide you through the step-by-step process of building a DIY paver patio in just one day. We will cover everything from planning and measuring to laying the paver stones and adding finishing touches. So grab your tools and let’s get started on creating your dream outdoor space!
Key Takeaways:
- Building a DIY paver patio in just one day is achievable with careful planning, accurate measurements, and the right materials. From excavation to laying paver stones, each step contributes to creating a beautiful and functional outdoor space.
- Adding finishing touches, such as jointing sand and optional sealing, not only enhances the appearance of the patio but also provides protection against wear and tear. Regular maintenance ensures the longevity of the DIY paver patio, creating a welcoming space for relaxation and entertainment.
Read more: How To Build Patio Steps From Pavers
Materials and Tools Needed
Before you begin your DIY paver patio project, it’s important to gather all the necessary materials and tools. Having everything prepared in advance will save you time and ensure a smooth construction process. Here is a list of the materials and tools you will need:
Materials:
- Paver stones
- Sand
- Gravel
- Weed barrier
- Edge restraints
- Paver sealer (optional)
Tools:
- Tape measure
- String or rope
- Shovel
- Rake
- Tamper
- Level
- Masonry saw or power saw
- Rubber mallet
- Broom
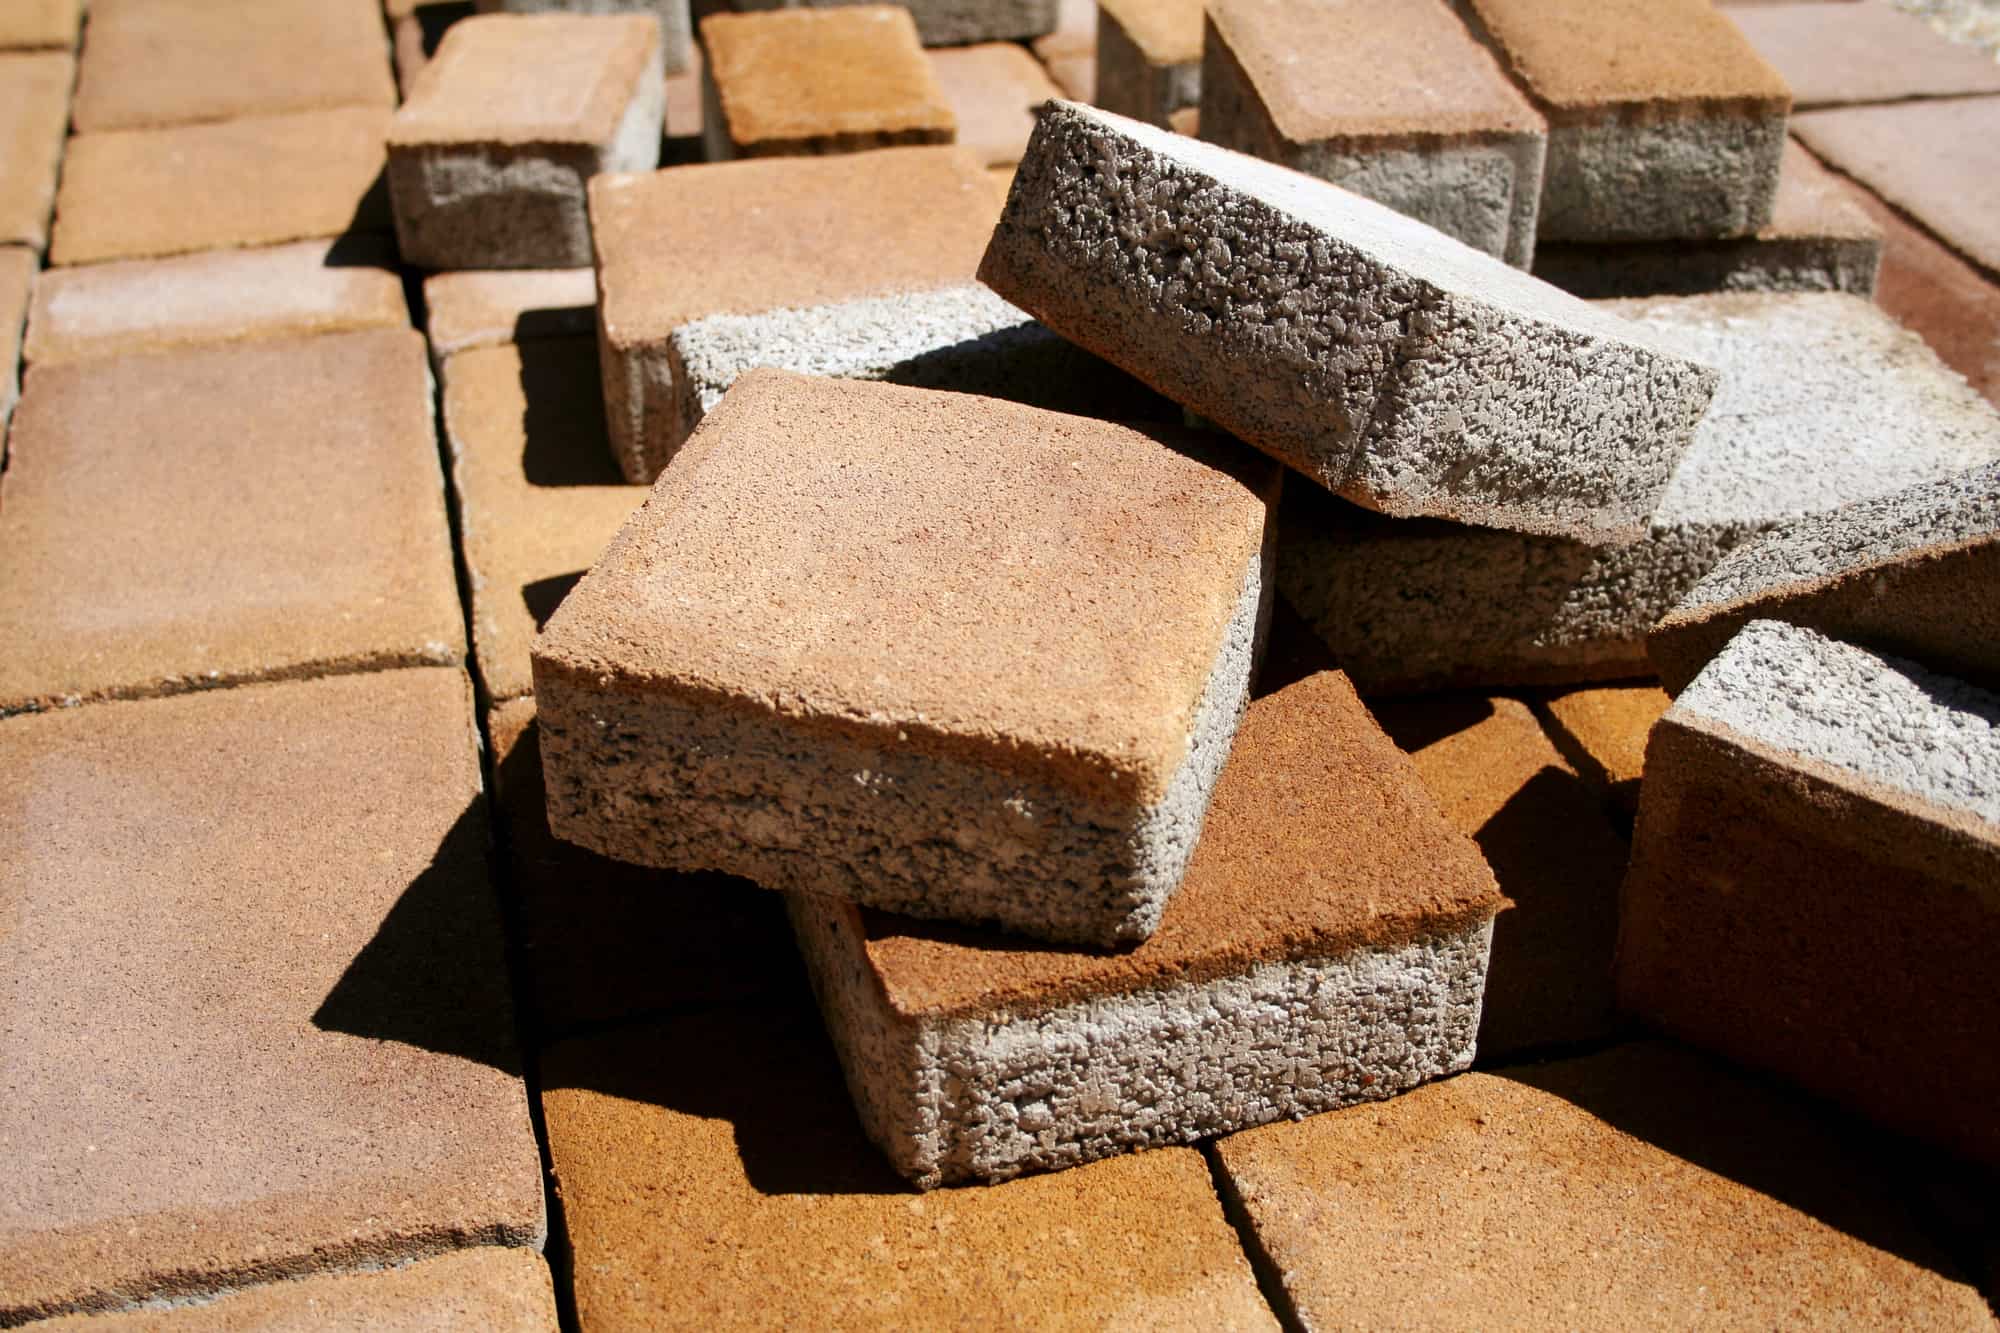
When selecting your paver stones, consider the size, color, and style that will complement your outdoor space. You can choose from a variety of materials such as concrete, brick, or natural stone, depending on your preference and budget.
The sand and gravel will be used to create a stable base for your patio, while the weed barrier will help prevent unwanted growth from coming through the cracks of the pavers. Edge restraints are necessary to hold the pavers in place and maintain the structural integrity of the patio.
Lastly, a paver sealer is optional but recommended for added protection and longevity of your patio. It helps to prevent stains, mold, and damage from UV rays.
Make sure to gather all the tools listed above before you begin construction. Having the right tools will allow for a smooth and efficient installation process.
Step 1: Planning and Measuring
The first step in building your DIY paver patio is careful planning and accurate measurements. This will ensure that you have the right amount of materials and a well-designed layout for your patio. Here’s what you need to do:
- Define the purpose: Determine how you intend to use your patio. Do you want a space for outdoor dining, lounging, or both? This will help you determine the size and shape of your patio.
- Choose the location: Select a suitable area in your yard for the patio. Consider factors such as sunlight exposure, proximity to the house, and any existing landscape features. Take measurements of the available space to determine the dimensions of your patio.
- Design the layout: Use graph paper or a design software to create a scaled layout of your patio. Consider the shape and any desired patterns or borders. This will give you a visual representation of how the patio will look.
- Mark the boundaries: Once you have finalized the layout, use stakes and string or spray paint to mark the boundaries of your patio. This will give you a clear outline to follow during the construction process.
- Measure the dimensions: Measure the length and width of the marked area to ensure accurate dimensions. Double-check your measurements to avoid any errors.
- Calculate the materials: Use the dimensions of your patio to calculate the amount of paver stones, sand, gravel, and other materials needed. Take into account the recommended depth and thickness for the base and paver stones.
Proper planning and measuring are essential to the success of your DIY paver patio project. Take your time in this step to ensure that you have a well-designed patio that meets your needs and fits perfectly in your outdoor space.
Read more: How To Build An Angled Deck Step-by-Step
Step 2: Marking the Patio Area
Once you have finished planning and measuring your DIY paver patio, it’s time to move on to marking the area. This step involves transferring the layout from your design onto the ground to create a clear outline for the patio. Here’s how to proceed:
- Gather your tools: Before you start marking the patio area, make sure you have all the necessary tools. These may include stakes, string, a measuring tape, and spray paint or chalk.
- Refer to your design layout: Take a look at your design layout and identify the corners and boundaries of the patio. This will serve as a reference point when marking the area.
- Place stakes: Start by placing stakes at the corners of the patio. Use a mallet or hammer to secure them firmly into the ground. These stakes will act as anchor points for the string.
- Create a boundary: Attach the string to the first corner stake and stretch it to the next corner stake. Pull the string taut and tie it securely to the stake. Repeat this process for all the remaining sides of the patio, connecting the stakes with the string to create a boundary.
- Check for accuracy: Use a measuring tape to ensure that the string is properly aligned and that the dimensions match your planned layout. Make any necessary adjustments to achieve accurate measurements.
- Mark the ground: Once you have confirmed the accuracy of the string boundaries, use spray paint or chalk to mark the location of the patio on the ground. Apply the paint or chalk along the outside edge of the string, creating a clear visual outline.
- Remove the string and stakes: Carefully remove the string and stakes from the ground, taking care not to disturb the markings. You now have a visible outline of your patio area.
Marking the patio area is a crucial step in ensuring that the construction process goes smoothly. It provides a clear reference point for excavating and laying the base materials. Take your time to ensure accurate markings, as they will serve as the foundation for the next steps in building your DIY paver patio.
Step 3: Excavating the Site
With the patio area marked, it’s time to move on to excavating the site. This step involves removing the existing soil and vegetation to create a level and stable base for your paver patio. Here’s a step-by-step guide on how to excavate the site:
- Gather your tools: Before you begin excavating, make sure you have the necessary tools, including a shovel, rake, and wheelbarrow. These will help you remove the soil efficiently.
- Clear the area: Start by clearing any debris, plants, or obstacles from the patio area. Trim and remove any grass or weeds using a shovel or a weed trimmer.
- Begin excavation: Use a shovel to start digging into the soil within the marked boundaries. Begin at one corner and work your way across the entire patio area. Remove the top layer of soil to a depth of about 6 to 8 inches. Adjust the depth based on the recommended thickness for the base and paver stones.
- Ensure a level surface: As you excavate, periodically use a level to check that the surface is even. This will help prevent any unevenness or sloping in your patio. Make adjustments as necessary by removing or adding soil.
- Dispose of the soil: As you dig, transfer the excavated soil to a wheelbarrow or a designated area. You can use this soil for other landscaping purposes or dispose of it accordingly.
- Compact the soil: Once the site is fully excavated, use a tamper to compact the soil. This will provide a solid base and increase stability for your patio. Additionally, rake the surface to remove any loose debris or stones.
Excavating the site is a crucial step in preparing the foundation for your DIY paver patio. Take your time to ensure that the area is clear of obstructions and that the soil is leveled and compacted properly. With the site excavated, you’re ready to move on to the next step: preparing the base for your patio.
Step 4: Preparing the Base
Now that you have excavated the site for your DIY paver patio, it’s time to move on to preparing the base. The base provides stability and prevents the pavers from shifting over time. Here’s a step-by-step guide on how to properly prepare the base:
- Gather your materials: Before you begin preparing the base, make sure you have all the necessary materials, including gravel and sand. These will create a strong and well-compacted base for your paver patio.
- Add a layer of gravel: Start by adding a layer of gravel to the excavated site. This layer should be about 4 to 6 inches thick, depending on the recommended depth for your specific paver stones. Spread the gravel evenly across the entire patio area.
- Compact the gravel: Use a tamper or a plate compactor to compact the gravel layer. This will help create a solid and stable base for your patio. Make sure to tamp down the gravel thoroughly, paying extra attention to the edges and corners.
- Add a layer of sand: Once the gravel is compacted, add a layer of sand on top. This layer should be about 1 inch thick. Spread the sand evenly over the gravel, using a rake or a shovel to level it.
- Level the sand: Use a straight 2×4 board or a level to evenly distribute the sand and create a smooth and level surface. Move the board in a sweeping motion across the sand, filling in any low spots and removing excess sand.
- Compact the sand: After leveling the sand, use a tamper or a plate compactor to lightly compact the sand layer. This will help ensure a solid and stable base for your paver stones.
- Check for levelness: Use a level to check that the sand base is even and level. Adjust as needed by adding or removing sand beneath the level areas.
By properly preparing the base, you are creating a solid foundation for your paver patio. The combination of gravel and sand provides stability and helps prevent the pavers from shifting or sinking over time. With the base prepared, you’re ready to move on to the next step: adding a weed barrier to prevent unwanted growth.
Step 5: Adding a Weed Barrier
To ensure that your DIY paver patio remains weed-free and maintains its appearance, it is essential to add a weed barrier. This layer prevents weed growth and minimizes the need for constant maintenance. Here’s how to add a weed barrier:
- Gather materials: Before you begin, gather the necessary materials, including a weed barrier fabric or landscape fabric, scissors, and landscape pins or staples.
- Prepare the area: Clear any debris or loose soil from the base of your patio. Make sure the surface is clean and dry before proceeding with the weed barrier installation.
- Measure and cut the weed barrier: Unroll the weed barrier fabric and lay it over the prepared base. Leave some extra fabric on the edges to fold up along the edge restraints later. Use scissors to cut the fabric to fit the size and shape of your patio area.
- Secure the weed barrier: Starting at one corner, gently fold back half of the weed barrier fabric. Use landscape pins or staples to secure the fabric to the base, placing them approximately 12 inches apart. Repeat this process for the other half of the fabric, ensuring it is taut and flat.
- Overlap the edges (if necessary): If your patio requires multiple pieces of weed barrier fabric, make sure to overlap them by a few inches. This will prevent any gaps that could lead to weed growth.
- Trim excess fabric: Once the weed barrier is secured, use scissors to trim any excess fabric along the edges. This will ensure a neat and clean appearance.
Adding a weed barrier is a crucial step in maintaining a weed-free paver patio. The barrier prevents weeds from growing through the joints of the pavers, reducing the time and effort spent on maintenance. With the weed barrier in place, you can now move on to laying the paver stones and bringing your patio to life!
When laying the pavers, use a rubber mallet to gently tap them into place and ensure they are level. This will help create a smooth and even surface for your patio.
Read more: How To Build A Step On A Patio
Step 6: Laying the Paver Stones
With the base and weed barrier in place, it’s time to move on to the exciting part – laying the paver stones! This step requires careful precision and attention to detail to ensure a level and visually appealing patio. Here’s how to lay the paver stones:
- Gather your materials: Before you begin, gather all the necessary materials such as the paver stones, a rubber mallet, a level, and a broom.
- Dry fit the pavers: Start by dry fitting the paver stones on the prepared base. Lay them out according to your design, leaving a small gap between each stone for jointing sand. This step allows you to visualize the final look of your patio and make any adjustments before permanently installing the stones.
- Start in one corner: Begin laying the paver stones in one corner of the patio, working your way outward. Take care to follow the pattern or design you have chosen. Use a rubber mallet to tap each stone gently into place, ensuring they are level with the adjacent stones.
- Check for levelness: As you lay each paver stone, use a level to confirm that they are even and flat. Adjust as necessary by adding or removing sand beneath the stones.
- Use a string line: To maintain straight lines and consistent spacing between the paver stones, use string lines as guides. Pull a string tightly between two stakes along the edge of the patio and use it as a reference when laying the stones.
- Fill the gaps: Once all the paver stones are laid, sweep fine sand across the surface, filling the gaps between the stones. Use a broom to ensure the sand is evenly distributed and settle it in place.
- Compact the pavers: Use a plate compactor or walk-behind compactor to gently pack the paver stones into the sand. This will create a secure and stable surface.
- Inspect for levelness and adjust: After compacting, check that the paver stones are still level and adjust as necessary. Use a level to ensure the patio surface is even and uniform.
As you lay the paver stones, take your time to ensure they are properly aligned and level. The precision and attention to detail in this step will ultimately determine the overall appearance and functionality of your DIY paver patio. Once the stones are in place, you are ready to move on to the next step: cutting pavers if necessary.
Step 7: Cutting Pavers (if necessary)
When creating a DIY paver patio, you may encounter situations where paver stones need to be cut to fit particular areas or to achieve desired designs. Cutting pavers allows for a more precise and customized fit. Here’s how to cut pavers if necessary:
- Gather your tools: Before you begin, gather the necessary tools, including safety glasses, a tape measure, a pencil or chalk, a masonry saw or power saw equipped with a diamond blade, and a clamp or vise.
- Plan the cuts: Determine which paver stones need to be cut and mark them with a pencil or chalk. Take precise measurements, allowing for the necessary adjustments and gaps.
- Put on safety gear: Prioritize your safety by wearing protective glasses to shield your eyes from any potential debris during the cutting process.
- Secure the paver stone: Clamp the paver stone firmly in a vise or use a clamp to secure it in place. This will help ensure stability and accuracy while cutting.
- Make the cuts: Use the marked lines as a guide and carefully cut the paver stone along the desired line using a masonry saw or power saw equipped with a diamond blade. Apply gentle pressure and let the saw do the work for you. Take your time to ensure a clean and accurate cut. It’s crucial to follow the manufacturer’s instructions and safety guidelines for your specific saw.
- Check the fit: After making the cuts, place the newly cut paver stone into position and check the fit. Make any necessary adjustments or additional cuts as needed.
- Clean up debris: After all the cuts have been made, carefully clean up any debris or dust produced during the cutting process. This will ensure a clean and safe working environment.
Cutting paver stones may be necessary to achieve a precise fit and desired design for your paver patio. Remember to prioritize safety, take accurate measurements, and use the appropriate tools for the task. With the pavers cut and in place, you can now move on to the next step: installing edge restraints to secure the patio.
Step 8: Installing Edge Restraints
Installing edge restraints is an important step in ensuring the stability and longevity of your DIY paver patio. Edge restraints secure the paver stones in place, preventing shifting or spreading over time. Here’s how to install edge restraints:
- Gather your materials: Before you begin, gather the necessary materials, including edge restraints, stakes, a rubber mallet, and a level.
- Prepare the area: Clear any debris or loose soil from the edges of your patio. Make sure the surface is clean and level before proceeding with the installation of the edge restraints.
- Position the edge restraints: Start by positioning the edge restraints along the outer edges of your patio. Ensure that they are flush against the paver stones and align with the desired shape and pattern of your patio.
- Secure the edge restraints: Use stakes to secure the edge restraints in place. Drive the stakes through the pre-drilled holes in the edge restraints and into the ground, ensuring they are firmly anchored. Use a rubber mallet to tap the stakes in if necessary.
- Check for levelness: Use a level to confirm that the edge restraints are level and even. Make any adjustments as needed by adding or removing soil beneath the restraints.
- Trim excess edge restraints: Once the restraints are secured and level, use a saw or bolt cutters to trim any excess length from the edge restraints. This will provide a clean and finished appearance.
- Inspect the installation: Take a step back and inspect the installation of the edge restraints. Ensure that they are secure, level, and properly aligned with the paver stones. Make any final adjustments if necessary.
Installing edge restraints is a crucial step in maintaining the integrity and stability of your DIY paver patio. The restraints prevent the paver stones from shifting and maintain the desired shape of your patio. With the edge restraints in place, you’re ready to move on to the final step: adding the finishing touches and sealing the patio.
Step 9: Finishing Touches and Sealing the Patio
With the main construction of your DIY paver patio complete, it’s time for the final step: adding the finishing touches and sealing the patio. This step will enhance the overall look of your patio and provide additional protection against wear and tear. Here’s what you need to do:
- Clean the surface: Before sealing the patio, ensure that the surface is clean and free from any debris or loose particles. Sweep the entire patio to remove dirt, dust, and remnants from the construction process.
- Apply jointing sand: Fill the gaps between the paver stones with jointing sand. Use a broom to sweep the sand across the surface, ensuring that it fills the joints completely. This will help stabilize the pavers and prevent them from shifting.
- Compact the sand: Utilize a plate compactor or walk-behind compactor to gently compact the jointing sand. This will help settle the sand into the gaps between the pavers and create a more secure and stable surface.
- Remove excess sand: After compacting, sweep off any excess sand from the surface of the patio using a broom. Ensure that the joints are filled evenly with the sand and that the surface is clean and uniform.
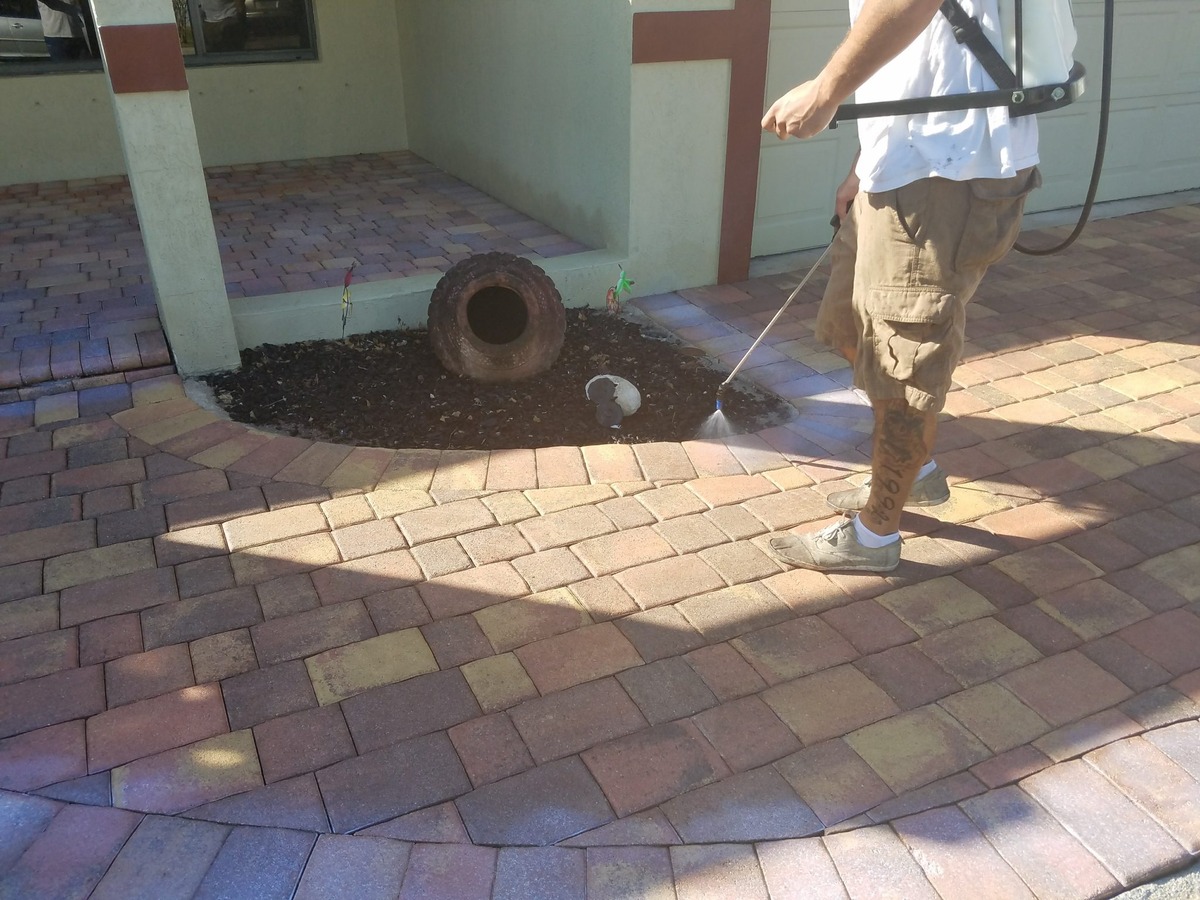
- Seal the patio (optional but recommended): Consider applying a paver sealer to protect and enhance the appearance of your patio. Choose a high-quality sealer suitable for the type of pavers you have used. Follow the manufacturer’s instructions for application, ensuring that the patio is clean and dry before proceeding.
- Apply the sealer: Use a roller or sprayer to apply the sealer evenly across the surface of the patio. Make sure to cover all the paver stones and the joints. Allow the sealer to cure according to the manufacturer’s instructions before using the patio.
- Enjoy your new paver patio: Once the sealer has cured, your DIY paver patio is ready to be enjoyed! Arrange your outdoor furniture, add some potted plants, and create a welcoming space for relaxation and entertainment.
By adding the finishing touches and sealing the patio, you are not only enhancing its appearance but also protecting it from the elements and extending its lifespan. Regular maintenance, such as sweeping and reapplying sealer as needed, will keep your patio looking beautiful for years to come.
Congratulations on successfully completing your DIY paver patio project! Now it’s time to sit back, relax, and enjoy the fruits of your labor.
Read more: How To Build A Raised Paver Patio
Conclusion
Building a DIY paver patio is a fulfilling and rewarding project that can transform your outdoor space into a functional and visually appealing area. By following the nine steps outlined in this guide, you can create a beautiful patio that adds value to your home and provides a place for relaxation and entertainment.
Starting with careful planning and precise measurements, you can design a patio that perfectly suits your needs and fits seamlessly into your outdoor area. Excavating the site and preparing a solid base ensures the stability and durability of your patio, while adding a weed barrier helps to prevent unwanted growth and maintenance hassles.
Laying the paver stones requires attention to detail, ensuring they are level and aesthetically pleasing. Cutting pavers, if necessary, allows for a customized fit and desired design. Installing edge restraints keeps the pavers securely in place and maintains the integrity of the patio over time.
Completing the project with the finishing touches, like applying jointing sand and optionally sealing the patio, adds a polished look and provides added protection against wear and tear. With the final step completed, your DIY paver patio is ready to be enjoyed and admired.
Remember, maintaining your patio is essential to its longevity. Regular sweeping, reapplying jointing sand, and inspecting for any necessary repairs will keep your patio looking its best for years to come.
So, gather your materials, roll up your sleeves, and embark on this exciting DIY venture. Your new paver patio will not only enhance your outdoor space but also provide a place for creating cherished memories with family and friends.
Frequently Asked Questions about How To Build A DIY Paver Patio In 9 Steps In Just One Day
Was this page helpful?
At Storables.com, we guarantee accurate and reliable information. Our content, validated by Expert Board Contributors, is crafted following stringent Editorial Policies. We're committed to providing you with well-researched, expert-backed insights for all your informational needs.


0 thoughts on “How To Build A DIY Paver Patio In 9 Steps In Just One Day”