Home>Gardening & Outdoor>Landscaping Ideas>How To Build A Raised Garden Bed Against A Fence
Landscaping Ideas
How To Build A Raised Garden Bed Against A Fence
Modified: August 30, 2024
Learn how to create a raised garden bed against a fence with our expert landscaping ideas. Discover tips for maximizing space and creating a beautiful garden.
(Many of the links in this article redirect to a specific reviewed product. Your purchase of these products through affiliate links helps to generate commission for Storables.com, at no extra cost. Learn more)
Introduction
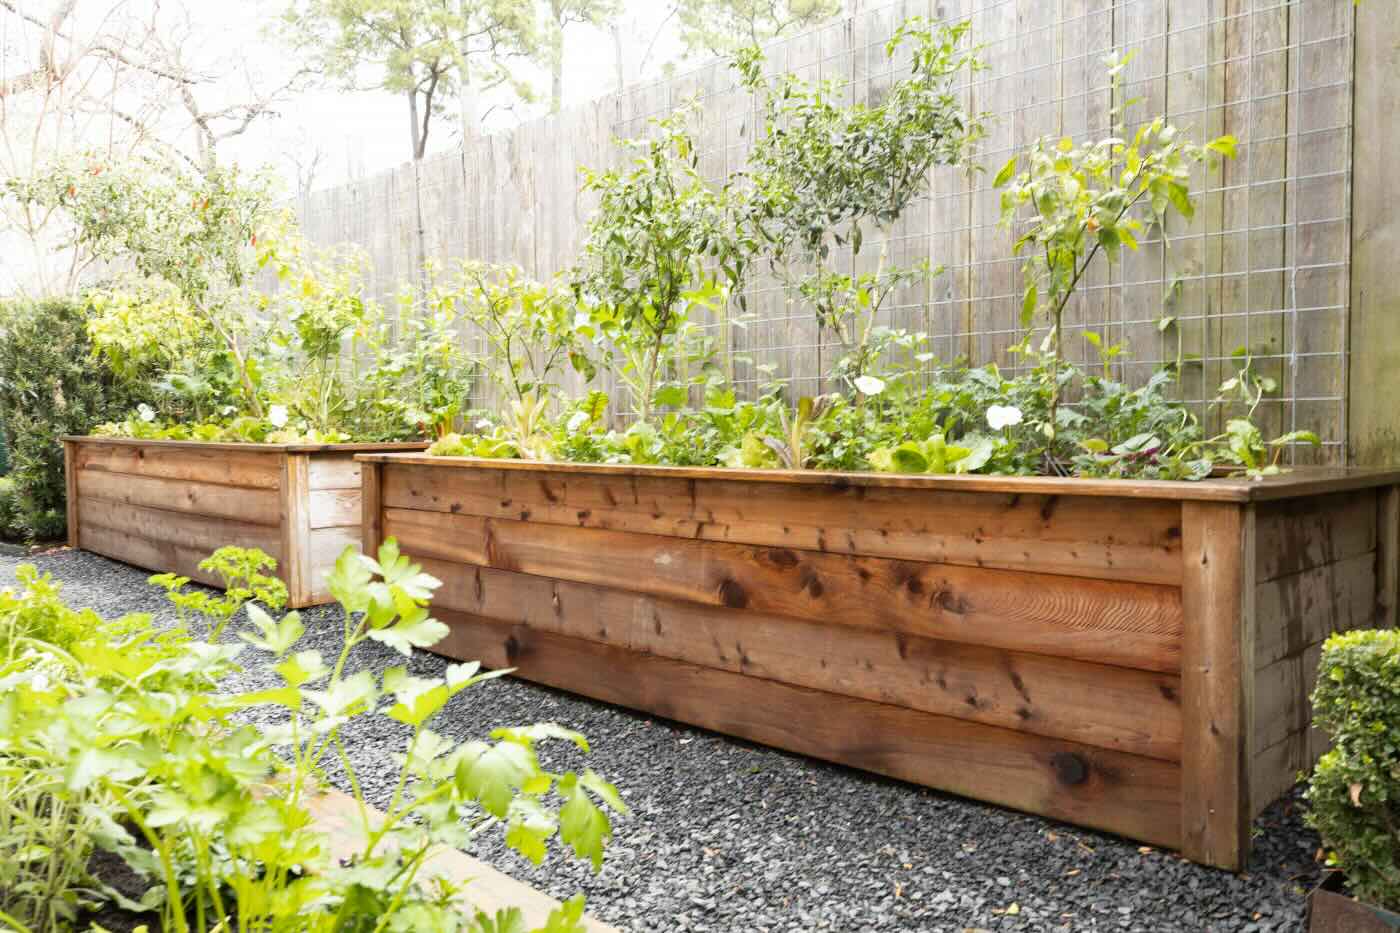
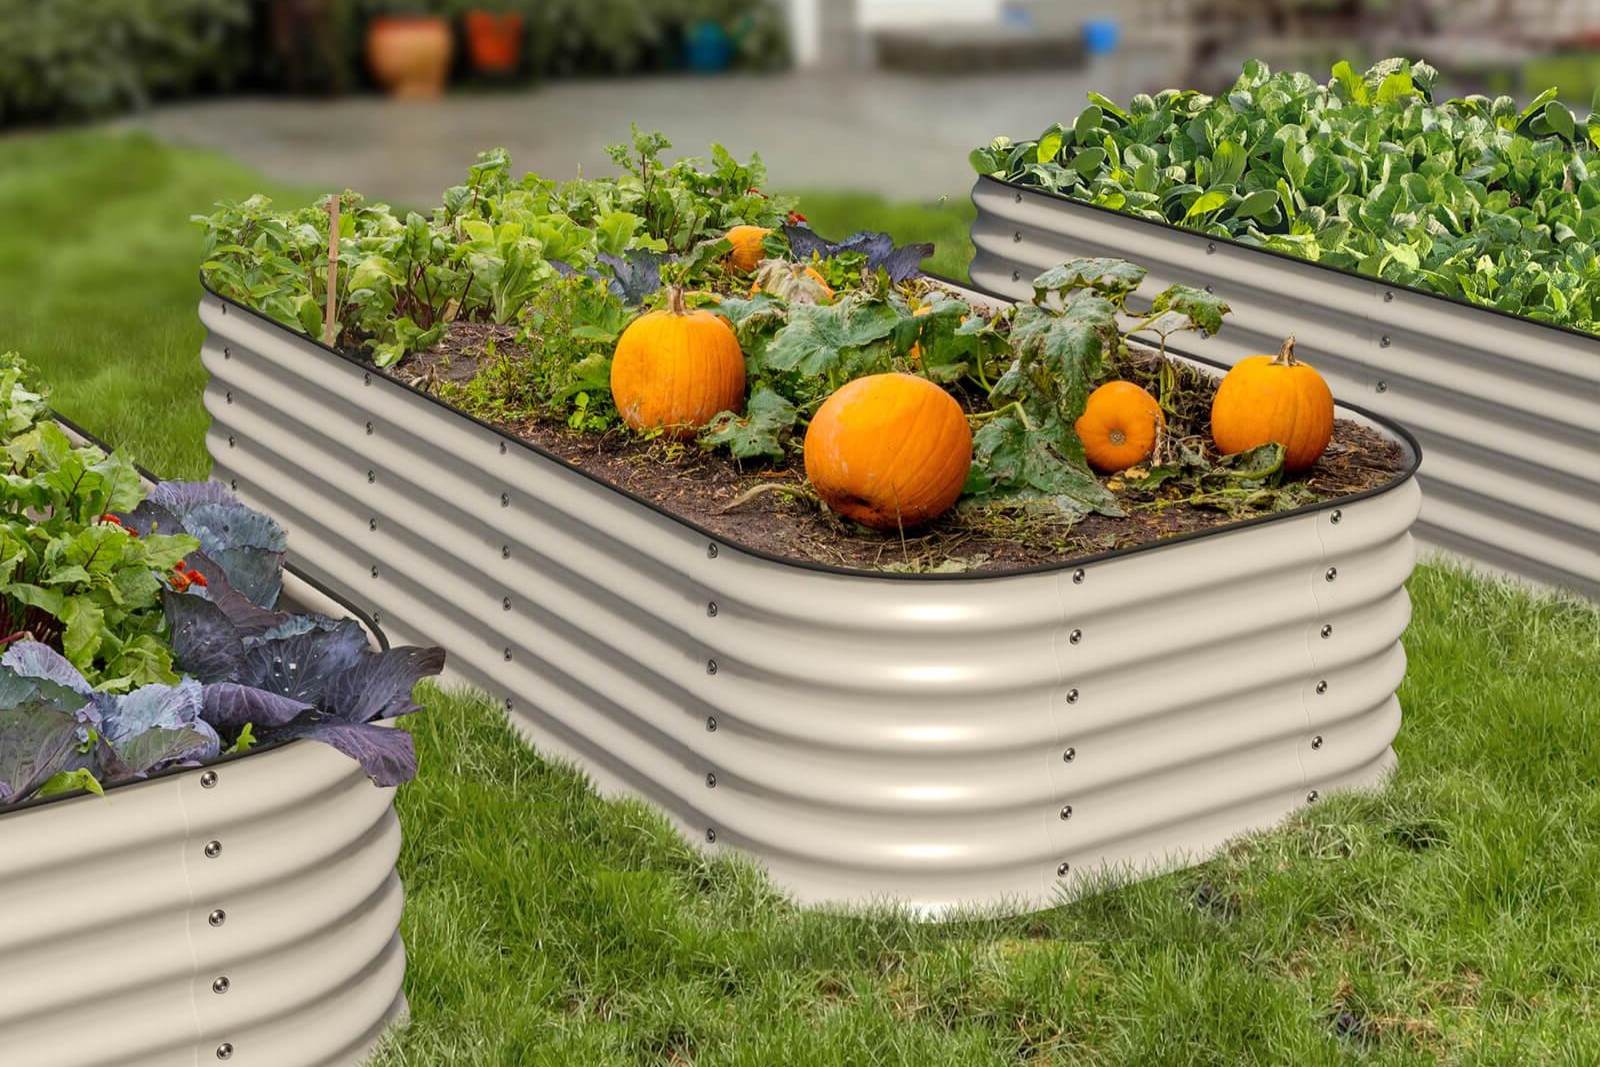
Building a raised garden bed against a fence is a fantastic way to maximize space and create a beautiful, functional garden area. Whether you're a seasoned gardener or just starting out, this project offers numerous benefits. By utilizing vertical space, you can transform a plain fence into a thriving garden, adding visual interest and greenery to your outdoor space.
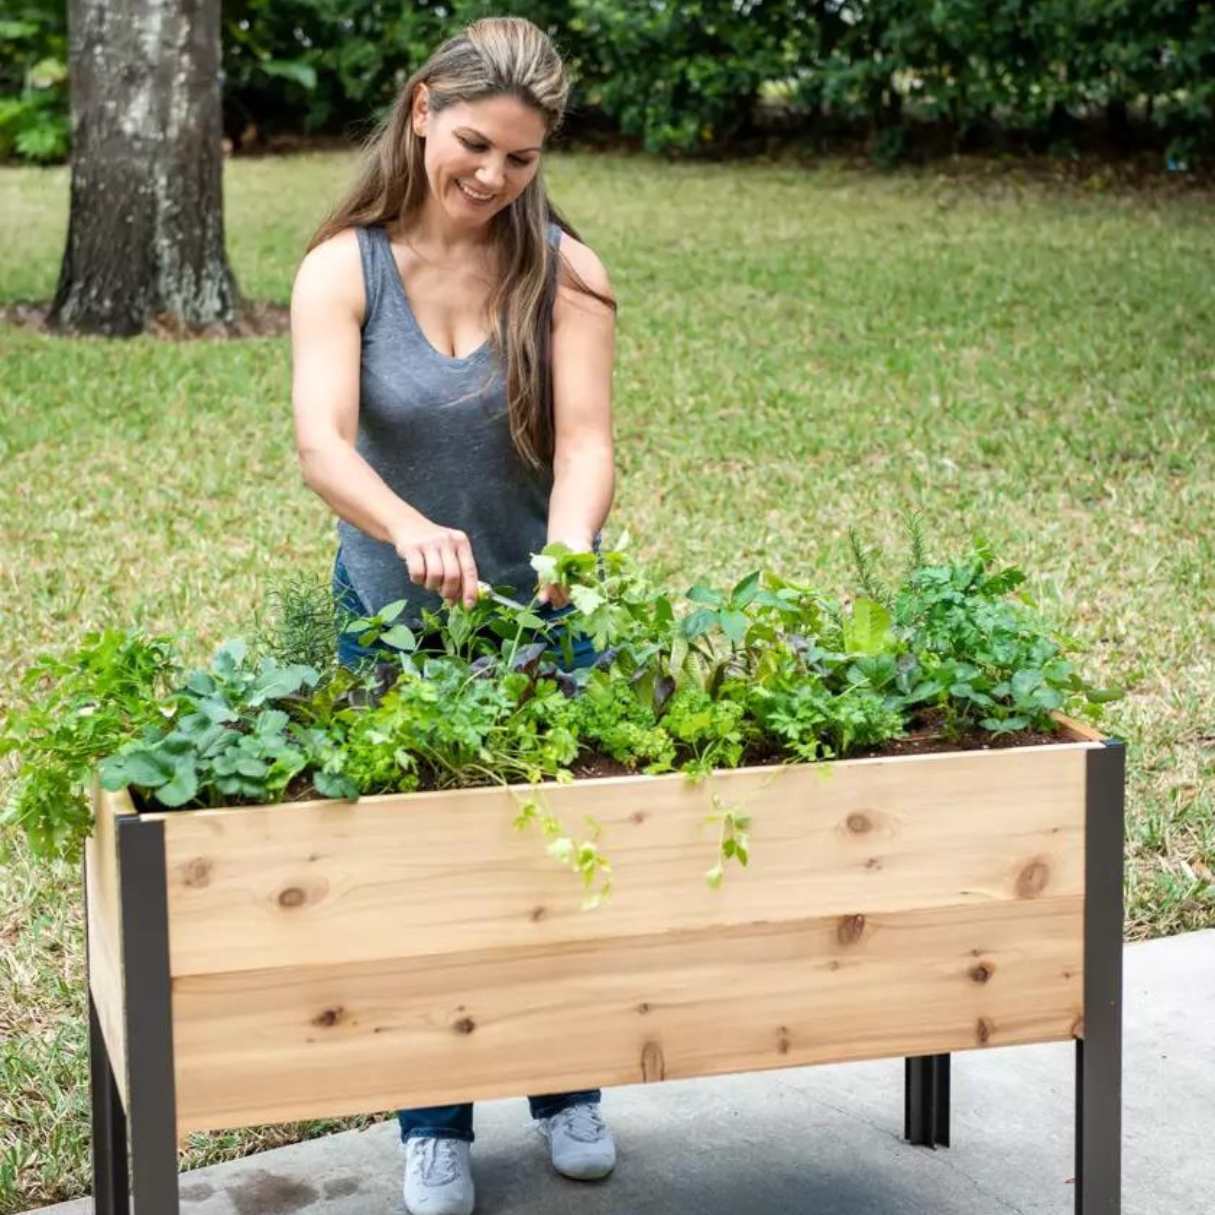
Raised garden beds offer several advantages over traditional in-ground gardens. They provide better drainage, prevent soil compaction, and offer easier access for planting, weeding, and harvesting. Additionally, they can be filled with high-quality soil, customized to suit the specific needs of the plants you wish to grow.
One of the most appealing aspects of building a raised garden bed against a fence is the opportunity to grow a wide variety of plants, even in limited space. From vibrant flowers to fresh herbs and vegetables, the possibilities are endless. This project allows you to create a lush, vertical garden that not only enhances the aesthetic appeal of your outdoor area but also provides a sustainable source of fresh produce and flowers.
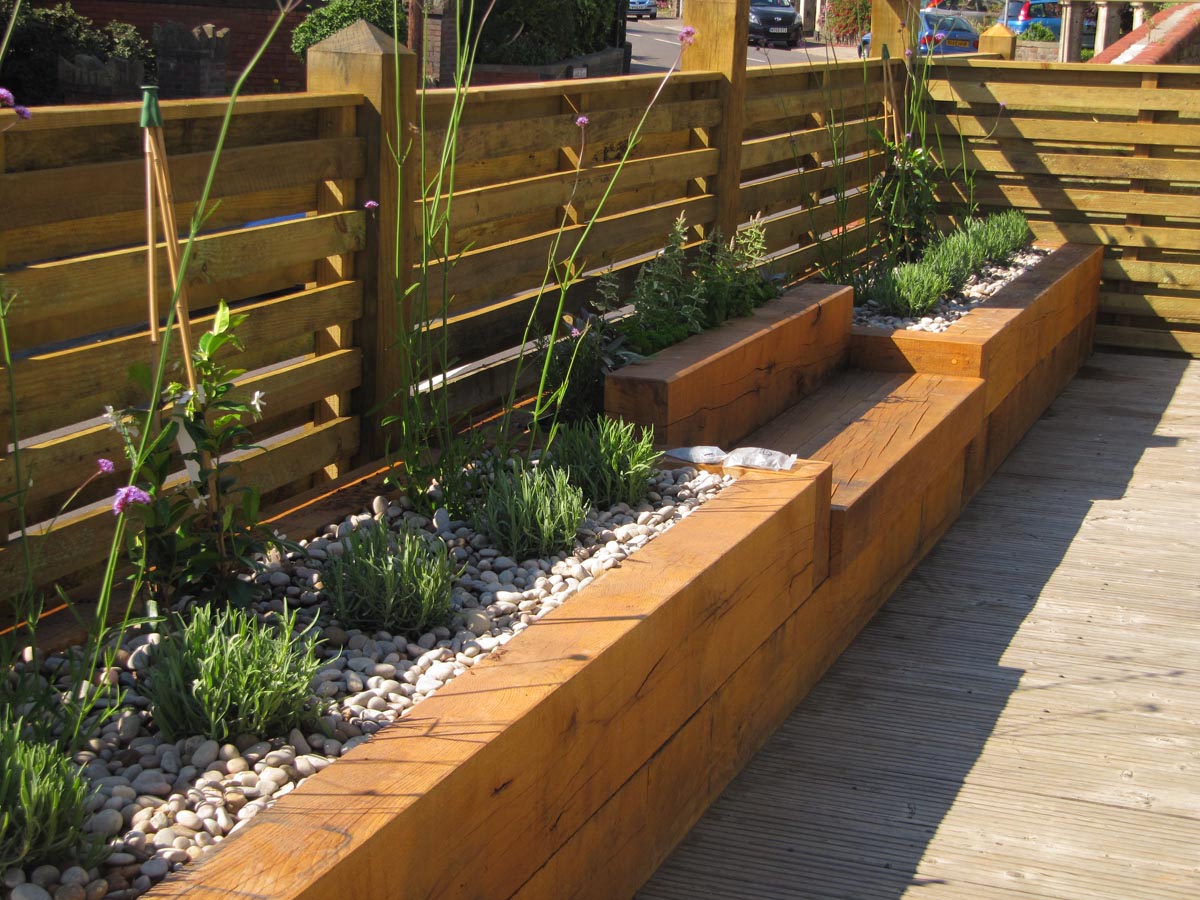
Furthermore, by incorporating a raised garden bed against a fence, you can effectively utilize underutilized space, making the most of every inch of your outdoor area. This is especially beneficial for those with small yards or limited gardening space. It's a creative way to make the most of your available area while adding a touch of natural beauty to your surroundings.
In this comprehensive guide, we will walk you through the step-by-step process of building a raised garden bed against a fence. From choosing the ideal location to planting your garden, you'll gain the knowledge and confidence to embark on this rewarding project. So, roll up your sleeves, gather your materials, and let's get started on creating a stunning raised garden bed against your fence!
Key Takeaways:
- Building a raised garden bed against a fence maximizes space, enhances visual appeal, and provides a sustainable source of fresh produce and vibrant flowers. It’s a creative way to make the most of limited outdoor space.
- By carefully selecting the location, gathering materials, and planting a diverse array of vegetation, you can transform underutilized vertical space into a flourishing and productive garden. It’s a rewarding and space-efficient way to connect with nature and enjoy the rewards of gardening.
Read more: How To Build A Stone Raised Garden Bed
Step 1: Choose the Location
Selecting the right location for your raised garden bed against a fence is crucial for the success of your gardening endeavors. The ideal spot should receive an adequate amount of sunlight, typically at least six hours per day, to ensure that your plants thrive. Take note of how the sunlight moves across your yard throughout the day, as this will help you determine the best placement for your garden bed.
Consider the proximity to water sources as well. It's beneficial to position the garden bed within reach of a water hose or irrigation system to simplify the watering process. Additionally, assess the accessibility of the location. Ensure that there is enough space around the garden bed for you to comfortably tend to your plants, whether it's watering, weeding, or harvesting.
Furthermore, take into account the existing landscaping and the layout of your outdoor space. Consider how the raised garden bed will complement the overall aesthetic of your yard. You may want to choose a location that enhances the visual appeal of your outdoor area, adding a touch of natural beauty to the surroundings.
It's also important to evaluate the soil quality in the chosen location. While raised garden beds allow for more control over the soil used, it's still beneficial to start with a relatively level and well-draining area. If the soil in your chosen spot is compacted or of poor quality, you may need to make additional preparations to ensure optimal growing conditions for your plants.
Lastly, think about the specific plants you intend to grow in the raised garden bed. Some plants may have specific sunlight and space requirements, so it's essential to consider these factors when choosing the location. By carefully assessing these various aspects, you can select the perfect spot for your raised garden bed against the fence, setting the stage for a flourishing and visually appealing garden space.
Step 2: Measure and Mark the Area
Before diving into the construction of your raised garden bed against the fence, it's essential to accurately measure and mark the designated area. This crucial step sets the foundation for the entire project, ensuring that the garden bed fits seamlessly into the chosen space.
Begin by using a measuring tape to determine the dimensions of the area where the raised garden bed will be situated. Take precise measurements of the length, width, and height of the space, accounting for any existing features such as posts, gates, or other structures along the fence. By doing so, you'll have a clear understanding of the available space and can plan the size and shape of the garden bed accordingly.
Once you have the measurements, use marking tools such as stakes, spray paint, or chalk to outline the boundaries of the garden bed area. This visual guide will help you visualize the layout and ensure that the bed aligns with the fence in a visually appealing and practical manner.
Consider the overall design and aesthetics of your outdoor space when marking the area. The shape and placement of the garden bed should complement the existing landscape, enhancing the visual appeal of the entire area. Additionally, take into account any surrounding features, such as pathways or other garden elements, to ensure that the placement of the raised bed creates a harmonious and balanced look.
As you mark the area, envision how the garden bed will integrate with the fence. Consider whether you want the bed to run parallel to the fence or if you prefer a perpendicular orientation. Visualizing the layout at this stage will help you make informed decisions about the design and placement of the raised garden bed.
By meticulously measuring and marking the area, you lay the groundwork for a well-planned and visually pleasing raised garden bed against the fence. This thoughtful approach sets the stage for the subsequent construction steps, ensuring that the garden bed seamlessly integrates with the existing outdoor space while providing an attractive and functional gardening area.
Step 3: Gather Materials
Gathering the necessary materials is a pivotal step in the process of building a raised garden bed against a fence. By ensuring that you have all the required items on hand, you can streamline the construction process and avoid unnecessary delays. Here's a comprehensive list of materials you'll need to bring your garden bed to life:
Wood for the Frame
Select high-quality, weather-resistant wood for constructing the frame of the raised garden bed. Cedar and redwood are popular choices due to their durability and natural resistance to decay and insect damage. The wood should be thick enough to provide structural integrity while withstanding outdoor elements.
Screws or Nails
Choose corrosion-resistant screws or nails to secure the wooden frame. These fasteners should be suitable for outdoor use to ensure the longevity of the garden bed.
Level
A level is essential for ensuring that the frame is constructed evenly and sits flush against the fence. This tool will help you achieve a balanced and stable structure for your garden bed.
Drill or Hammer
Depending on the fasteners you choose, you'll need a drill with appropriate bits or a hammer to assemble the wooden frame securely.
Landscape Fabric
Landscape fabric serves as a barrier between the soil and the wooden frame, preventing soil erosion and prolonging the life of the wood. It also aids in maintaining proper drainage within the garden bed.
Read more: How To Build A Cedar Raised Garden Bed
Soil
Select high-quality soil suitable for the types of plants you intend to grow. Consider factors such as drainage, nutrient content, and pH levels to ensure optimal growing conditions for your garden.
Compost and Mulch
Compost enriches the soil with essential nutrients, promoting healthy plant growth. Mulch helps retain moisture, suppresses weed growth, and insulates the soil, creating a favorable environment for your plants.
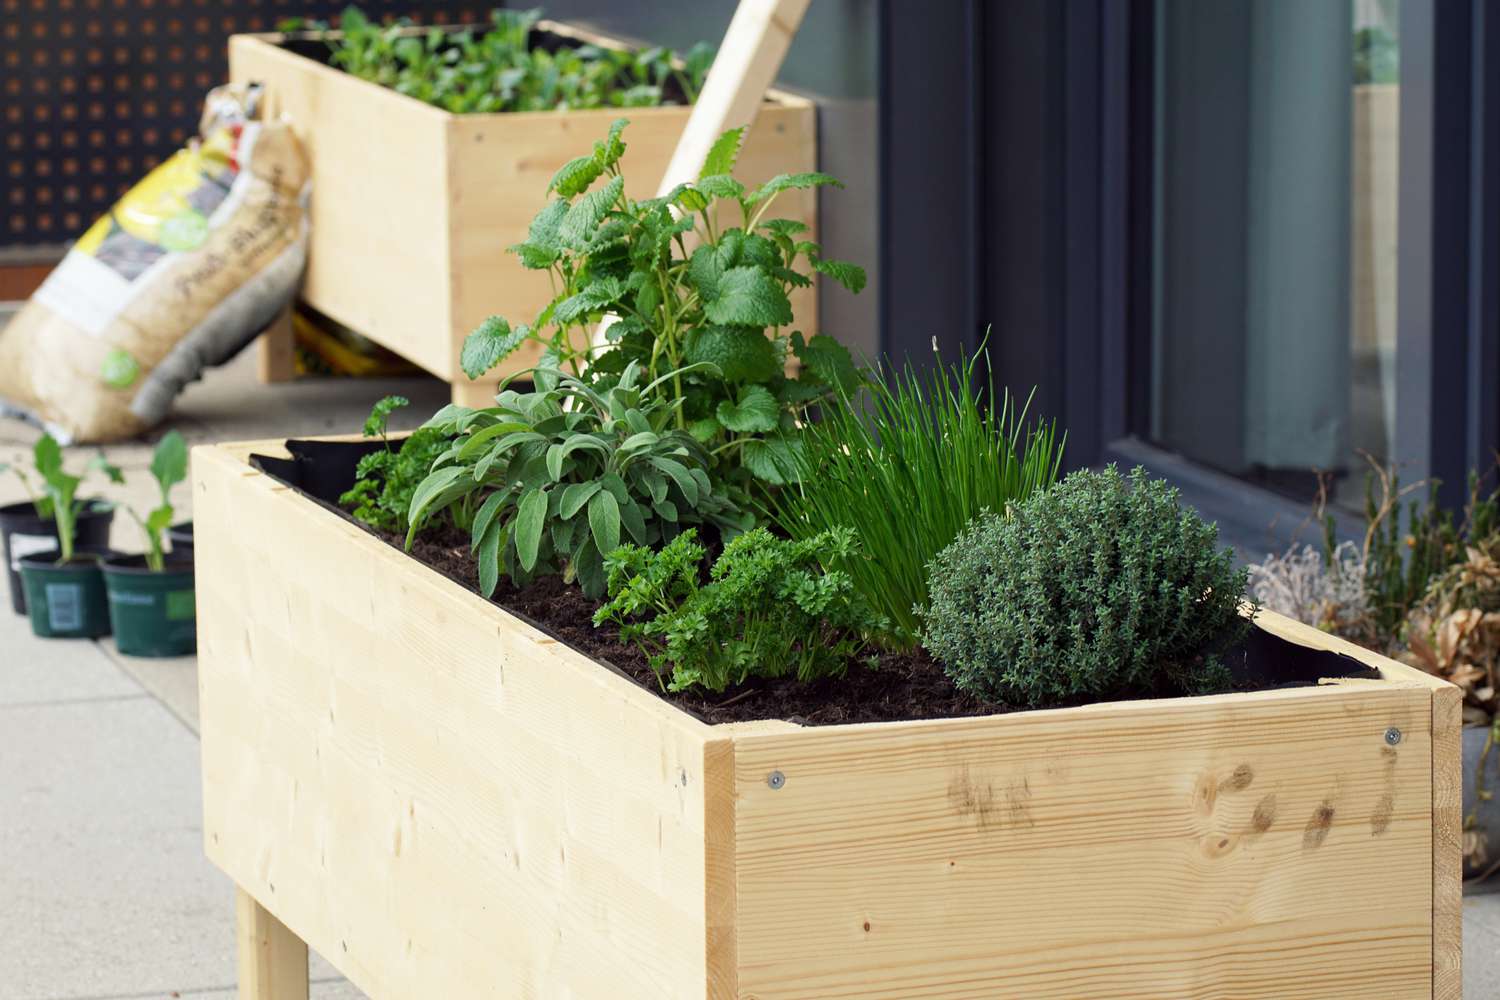
Plants or Seeds
Choose a variety of plants or seeds that thrive in the chosen location and climate. Consider the sunlight exposure and space available when selecting the vegetation for your raised garden bed.
Watering Can or Hose
Ensure you have a reliable watering can or hose to provide the necessary hydration for your plants. Consistent watering is crucial for the success of your garden.
By gathering these materials, you'll be well-prepared to embark on the construction of your raised garden bed against the fence. With the right materials at your disposal, you can proceed to the next steps with confidence, knowing that you have everything needed to create a thriving and visually appealing garden space.
Step 4: Build the Frame
Constructing the frame of the raised garden bed is a pivotal stage in bringing your gardening vision to life. The frame provides structural support, defines the shape of the bed, and serves as a crucial element in ensuring the longevity of your garden space. Here's a detailed guide to building the frame for your raised garden bed against the fence.
Selecting the Wood
Opt for high-quality, weather-resistant wood for the frame, such as cedar or redwood, known for their durability and natural resistance to decay and pests. The wood should be at least 2 inches thick to provide stability and withstand outdoor elements. Ensure that the wood is sourced from sustainable and responsibly managed forests for an eco-friendly approach to your gardening project.
Cutting the Wood to Size
Using precise measurements based on the area marked in the previous step, carefully cut the wood to the required lengths for the sides of the garden bed. If you're using multiple pieces of wood to create the frame, ensure that the corners align seamlessly to form a cohesive structure. This step is crucial in achieving a uniform and visually appealing frame for your garden bed.
Assembling the Frame
Lay out the cut pieces of wood in the designated area against the fence, forming the perimeter of the garden bed. Use a level to ensure that the frame is even and sits flush against the fence. Secure the corners and joints by drilling pilot holes and fastening the wood with corrosion-resistant screws or nails. This step is essential for creating a stable and durable frame that can withstand the weight of the soil and plants.
Adding the Bottom Support
To reinforce the frame and prevent soil erosion, consider adding a bottom support layer. This can be achieved by attaching additional pieces of wood or slats across the bottom of the frame. This support layer not only enhances the structural integrity of the garden bed but also provides a barrier to keep the soil in place, promoting long-term stability and functionality.
Applying Landscape Fabric
Once the frame is assembled, line the interior with landscape fabric to create a barrier between the soil and the wood. This fabric helps prevent soil erosion, promotes proper drainage, and extends the lifespan of the wooden frame by minimizing direct contact with moisture and soil. Ensure that the fabric is securely in place, covering the entire interior of the frame.
By meticulously following these steps, you'll successfully build a sturdy and well-structured frame for your raised garden bed against the fence. The frame serves as the foundation for the next phases of the project, setting the stage for filling the bed with soil and bringing your garden to life. With the frame in place, you're one step closer to creating a vibrant and flourishing garden space that enhances the beauty of your outdoor area.
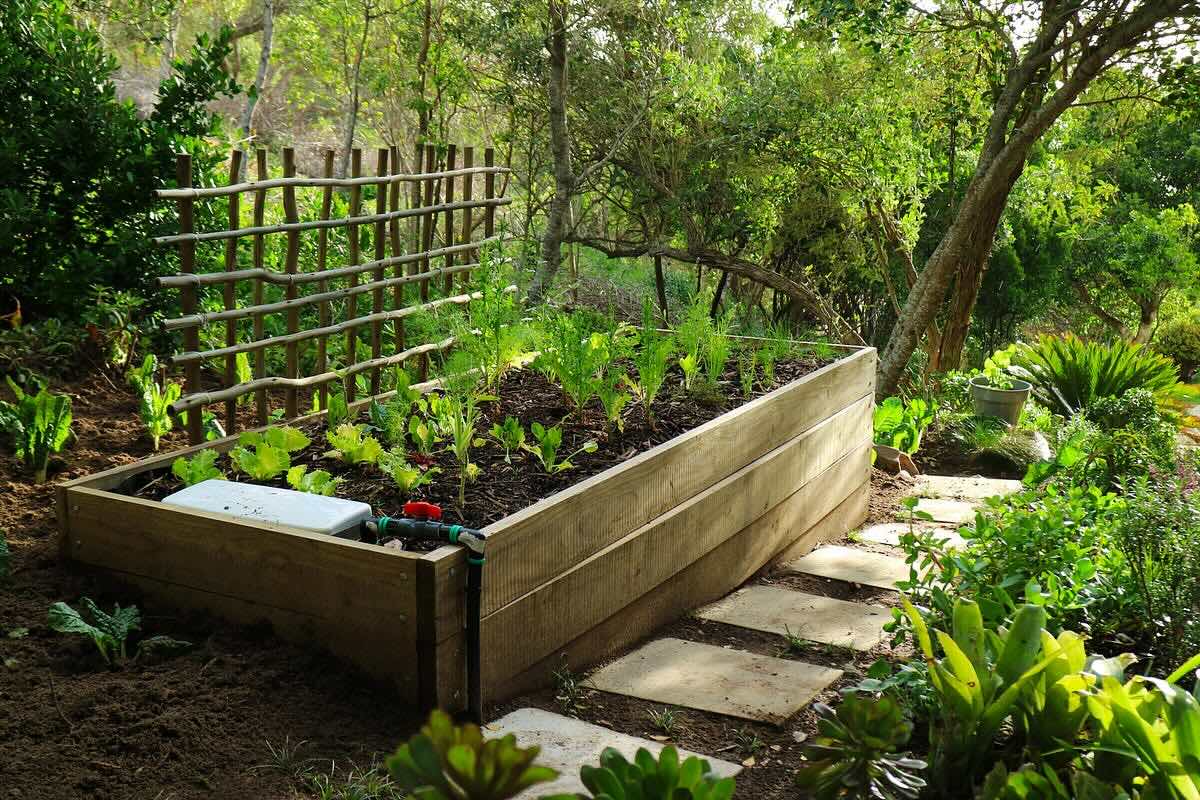
Step 5: Attach the Frame to the Fence
Attaching the frame of the raised garden bed to the fence is a crucial step that ensures stability and structural integrity. By securely fastening the frame to the fence, you create a seamless and visually appealing integration of the garden bed with the existing outdoor space. Here's a detailed guide on how to effectively attach the frame to the fence:
Positioning the Frame
Carefully position the assembled frame against the fence, ensuring that it aligns evenly and complements the overall layout of the outdoor area. Take into account any existing features on the fence, such as posts or gates, and adjust the placement of the frame accordingly. This step is essential for creating a harmonious and balanced visual impact while maximizing the use of vertical space.
Securing the Frame
Using appropriate fasteners, such as screws or brackets, secure the frame to the fence at strategic points along its length. Ensure that the fasteners are corrosion-resistant and suitable for outdoor use to withstand exposure to the elements. By anchoring the frame securely to the fence, you create a stable and durable structure that can support the weight of the soil and plants.
Checking Alignment
Verify that the frame is level and securely attached to the fence by using a level and visually inspecting the attachment points. This step is crucial for ensuring that the garden bed maintains a uniform and visually appealing appearance. Additionally, double-check the alignment to guarantee that the frame sits flush against the fence, creating a seamless transition between the garden bed and the vertical surface.
Reinforcing Support
Consider reinforcing the attachment points with additional fasteners or braces to further enhance the stability of the frame. This extra reinforcement provides added support, especially in areas where the frame meets the fence posts or other structural elements. By reinforcing the attachment, you create a robust and reliable connection that withstands the pressures of gardening activities and environmental factors.
Finishing Touches
Once the frame is securely attached to the fence, inspect the overall alignment and stability. Make any necessary adjustments to ensure that the attachment is solid and visually pleasing. This step sets the stage for the subsequent phases of the project, allowing you to proceed with confidence knowing that the frame is firmly integrated with the fence.
By following these detailed steps, you'll effectively attach the frame of the raised garden bed to the fence, creating a seamless and visually striking garden space. The secure attachment ensures that the garden bed is well-supported and enhances the overall aesthetic of your outdoor area, setting the stage for the final phases of the project.
Step 6: Fill the Bed with Soil
Filling the raised garden bed with soil is a pivotal step that lays the groundwork for a thriving and productive garden. The quality and composition of the soil directly impact the growth and health of your plants, making it essential to approach this step with careful consideration and attention to detail.
Begin by selecting high-quality soil that is well-suited for the types of plants you intend to grow. Opt for a nutrient-rich, well-draining soil mix that provides a hospitable environment for your plants' root systems. Consider factors such as moisture retention, aeration, and nutrient content when choosing the soil, ensuring that it aligns with the specific needs of your selected vegetation.
When filling the bed with soil, aim for a uniform and level distribution to create an even growing surface for your plants. Use a garden rake or shovel to spread the soil evenly, taking care to fill any corners or gaps within the frame. Ensure that the soil reaches the desired height within the bed, providing ample depth for robust root development and plant growth.
As you fill the bed with soil, consider incorporating organic matter such as compost to enrich the soil and promote fertility. Compost serves as a natural source of essential nutrients, enhancing the soil's structure and supporting healthy plant growth. Additionally, consider adding a layer of mulch on top of the soil to conserve moisture, suppress weed growth, and regulate soil temperature, creating an optimal growing environment for your plants.
Throughout the filling process, periodically assess the soil level and texture to ensure that it aligns with your gardening goals. Take the time to gently compact the soil to eliminate air pockets and create a stable foundation for planting. By carefully tending to the soil as you fill the bed, you set the stage for a flourishing and productive garden space.
Once the bed is filled with soil, take a moment to appreciate the progress made in creating a vibrant and inviting garden area. The rich, fertile soil sets the stage for planting a diverse array of vegetation, from colorful flowers to bountiful vegetables, allowing you to bring your gardening vision to life within the raised bed against the fence. With the soil in place, you're one step closer to reaping the rewards of your gardening efforts and enjoying the beauty of a thriving garden space.
Step 7: Plant Your Garden
With the raised garden bed against the fence now filled with nutrient-rich soil, it's time to bring your gardening vision to life by planting a diverse array of vegetation. This step marks the exciting transition from preparation to realization, as you carefully select and position the plants that will thrive in this elevated garden space.
Begin by considering the layout and design of your garden bed. Visualize how different plants will complement each other and contribute to the overall aesthetic appeal of the space. Whether you're envisioning a vibrant display of colorful flowers, a lush herb garden, or a bountiful assortment of vegetables, thoughtful planning is key to creating a harmonious and visually striking garden.
When selecting plants, take into account their sunlight and spacing requirements. Position sun-loving plants in areas that receive ample sunlight, while providing shade-tolerant varieties with suitable locations within the bed. Consider the mature size of the plants to ensure that they have adequate space to thrive without overcrowding each other.
As you begin planting, pay attention to the recommended planting depth and spacing for each type of vegetation. Use a hand trowel or gardening tool to create evenly spaced holes in the soil, gently placing the plants into their designated spots. Take care to position the plants at the appropriate depth, ensuring that their root systems are adequately covered with soil for stability and nourishment.
Once the plants are in place, gently pat the soil around the base of each plant to secure them in position. Water the newly planted garden bed thoroughly, providing the essential hydration needed to establish the plants in their new environment. Consistent watering is crucial during the initial phase of planting to promote healthy root development and acclimatization.
Consider adding a layer of mulch around the base of the plants to conserve moisture, suppress weed growth, and regulate soil temperature. Mulch also contributes to the overall visual appeal of the garden bed, creating a polished and cohesive look while providing practical benefits for plant health.
As you complete the planting process, take a moment to admire the transformation of the raised garden bed against the fence. The carefully selected and thoughtfully positioned plants breathe life into the space, infusing it with color, texture, and vitality. With the garden now planted, you've created a captivating and productive vertical garden that enhances the beauty of your outdoor area.
By following these steps, you've successfully built and cultivated a raised garden bed against the fence, creating a thriving and visually appealing garden space that enriches your outdoor environment. As you tend to your garden and witness the growth and blossoming of your plants, you'll experience the joy and satisfaction of nurturing a flourishing garden within this innovative and space-efficient setting.
Conclusion
In conclusion, the process of building a raised garden bed against a fence is a rewarding endeavor that offers a multitude of benefits. From maximizing space and creating a visually striking garden area to fostering the growth of a diverse array of plants, this project presents an opportunity to transform underutilized vertical space into a flourishing and productive garden.
By carefully selecting the location, measuring and marking the area, gathering the necessary materials, and constructing the frame, you lay the groundwork for a successful gardening venture. The thoughtful integration of the garden bed with the fence not only maximizes space but also enhances the overall aesthetic appeal of the outdoor area.
Filling the bed with nutrient-rich soil and planting a diverse array of vegetation marks the culmination of the project, bringing your gardening vision to life within the elevated garden space. The careful selection and positioning of plants contribute to the creation of a harmonious and visually striking garden that adds natural beauty and vitality to your surroundings.
As you tend to your garden and witness the growth and blossoming of your plants, you'll experience the joy and satisfaction of nurturing a flourishing garden within this innovative and space-efficient setting. The raised garden bed against the fence serves as a testament to the creative utilization of space, offering a sustainable source of fresh produce, vibrant flowers, and lush greenery.
Furthermore, the vertical garden space provides an opportunity to connect with nature, engage in gardening activities, and create a tranquil and inviting outdoor environment. Whether you're a seasoned gardener or just beginning to explore the world of gardening, the raised garden bed against the fence offers a versatile and visually appealing canvas for cultivating your green thumb.
In essence, the process of building and cultivating a raised garden bed against a fence is a testament to the transformative power of gardening. It allows you to make the most of limited space, infuse your outdoor area with natural beauty, and enjoy the rewards of nurturing a thriving garden. This innovative approach to gardening not only enhances the visual appeal of your surroundings but also provides a sustainable and fulfilling outlet for expressing your creativity and love for nature.
Frequently Asked Questions about How To Build A Raised Garden Bed Against A Fence
Was this page helpful?
At Storables.com, we guarantee accurate and reliable information. Our content, validated by Expert Board Contributors, is crafted following stringent Editorial Policies. We're committed to providing you with well-researched, expert-backed insights for all your informational needs.

0 thoughts on “How To Build A Raised Garden Bed Against A Fence”