Home>Gardening & Outdoor>Landscaping Ideas>How To Build A Raised Garden Bed With Corrugated Metal
Landscaping Ideas
How To Build A Raised Garden Bed With Corrugated Metal
Modified: August 30, 2024
Learn how to create a stylish raised garden bed using corrugated metal for a modern landscaping idea. Discover step-by-step instructions and tips for a beautiful garden design.
(Many of the links in this article redirect to a specific reviewed product. Your purchase of these products through affiliate links helps to generate commission for Storables.com, at no extra cost. Learn more)
Introduction
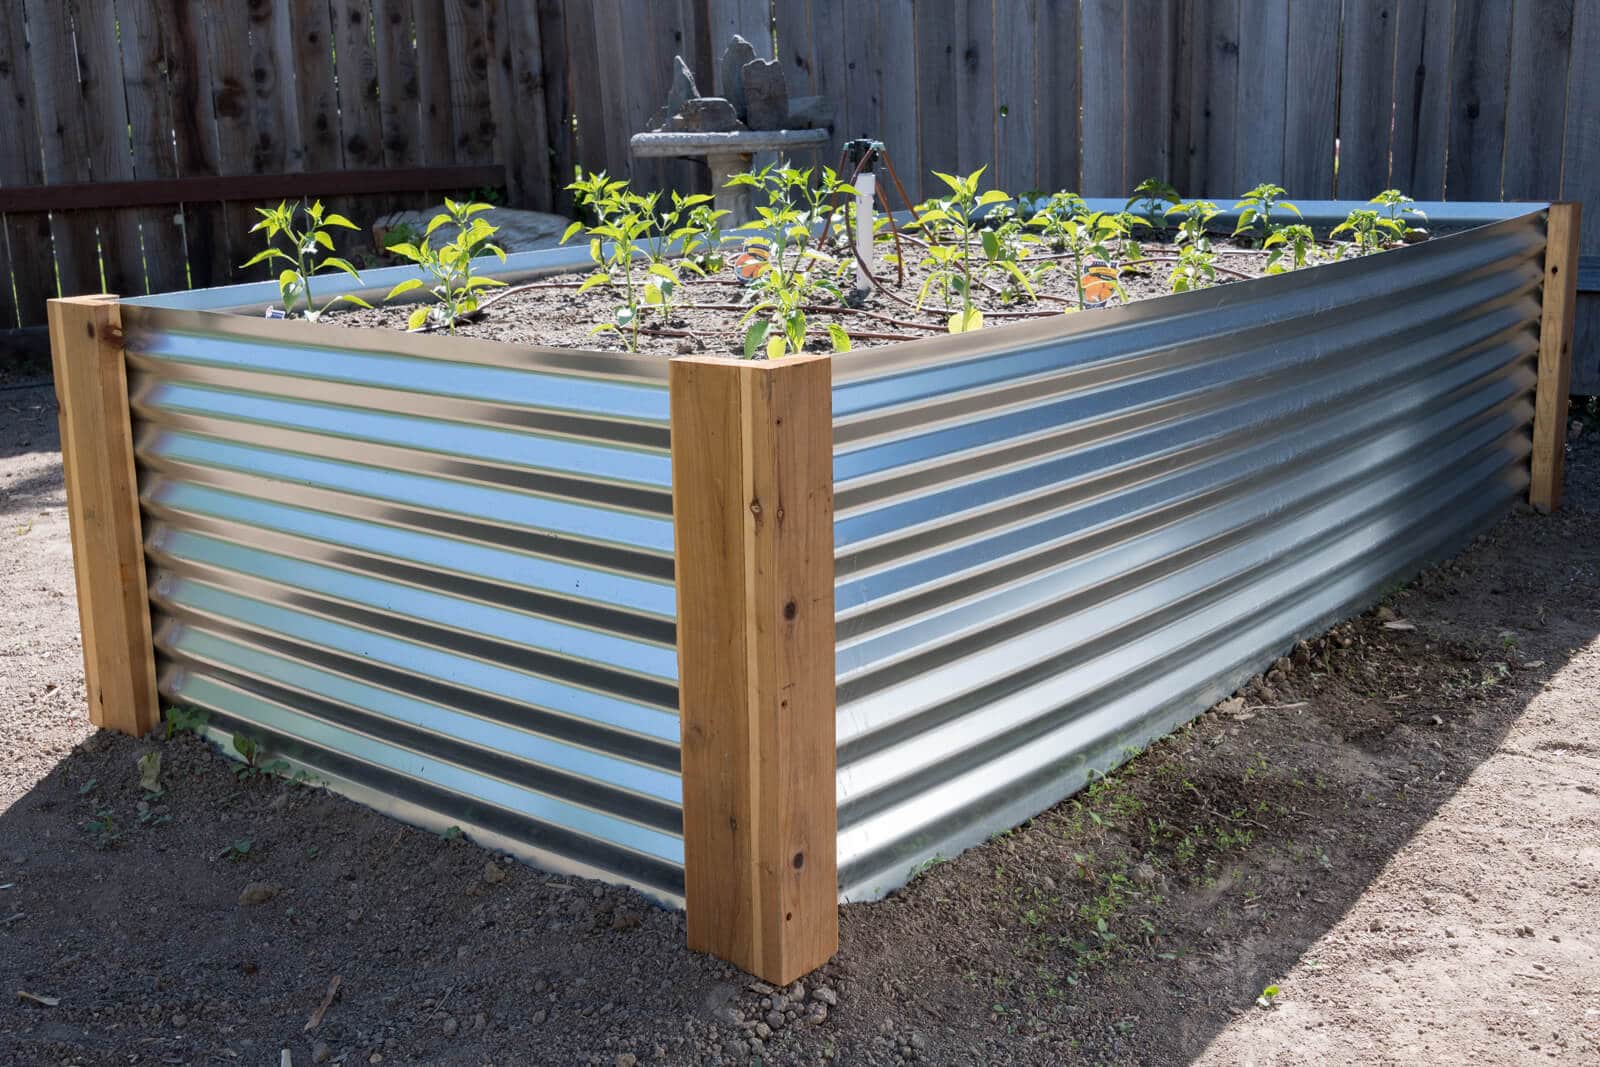
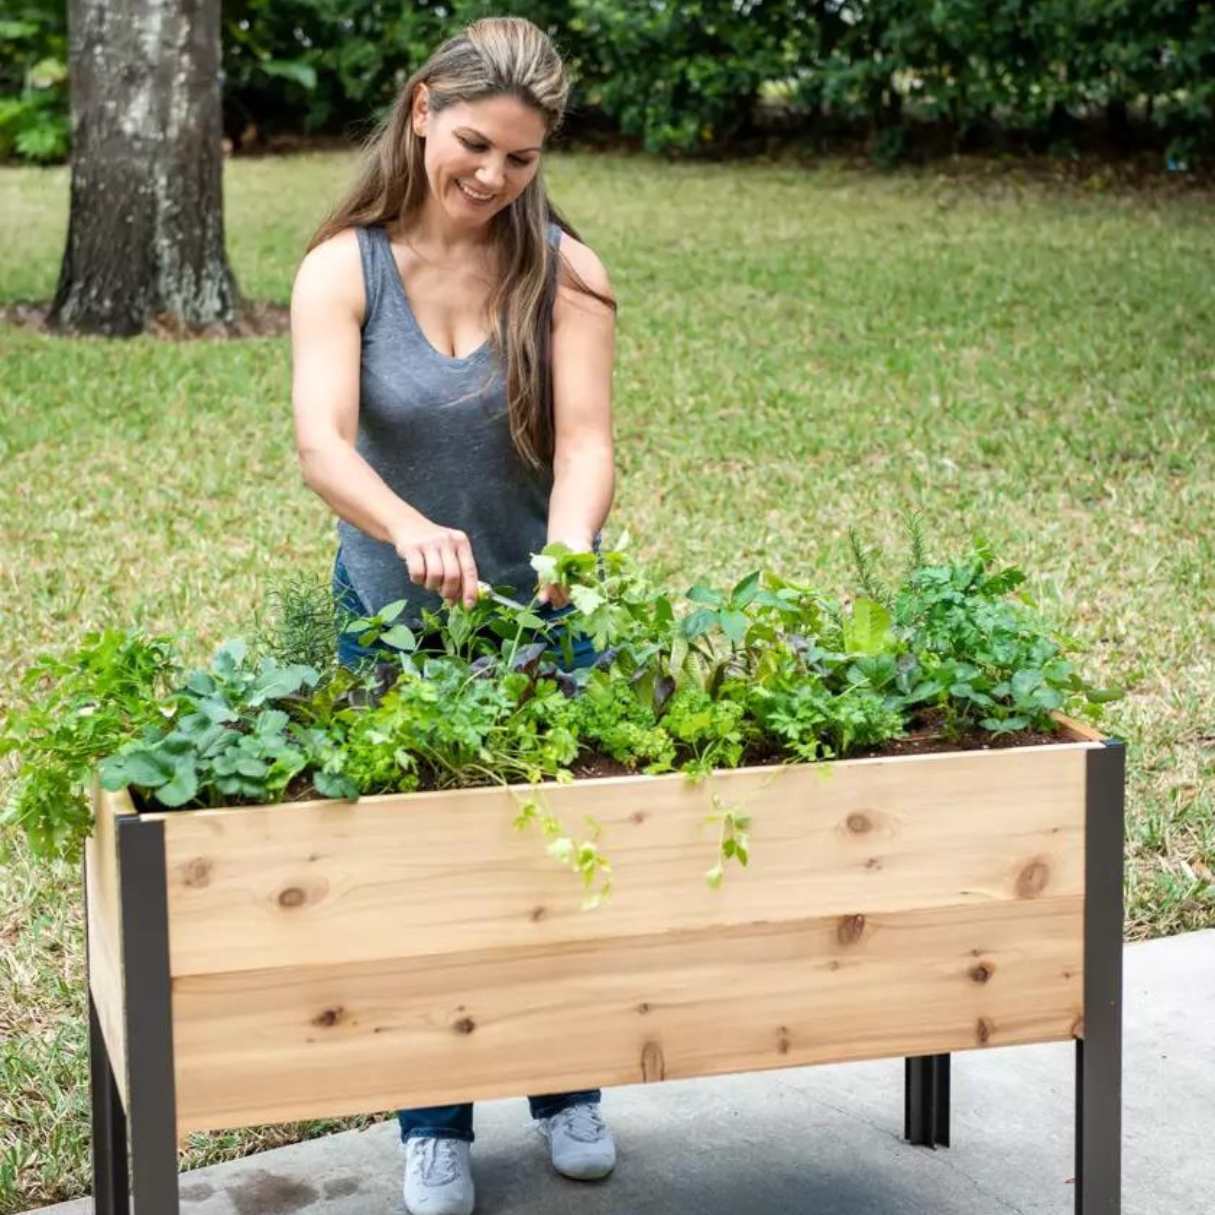
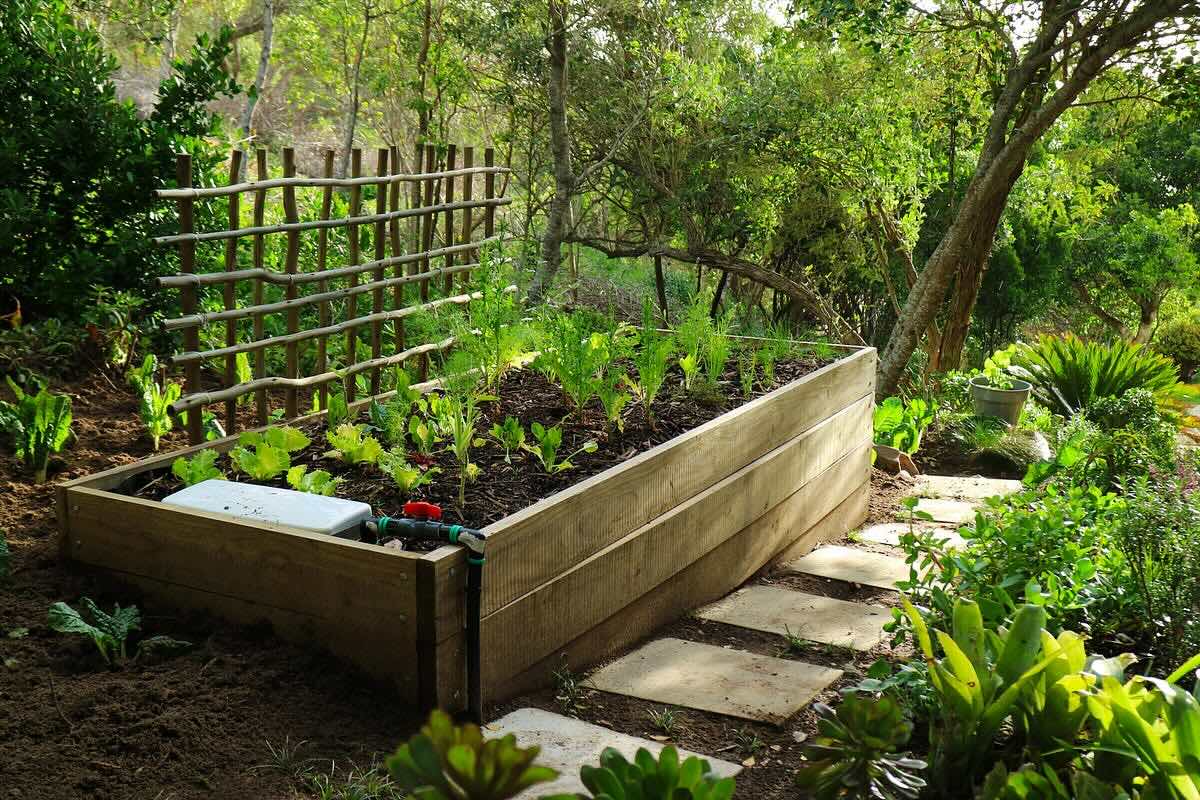
Are you looking to elevate your gardening game and add a touch of modern flair to your outdoor space? Building a raised garden bed with corrugated metal might just be the perfect project for you. This innovative and stylish approach to gardening not only offers practical benefits but also adds a contemporary aesthetic to your landscape.
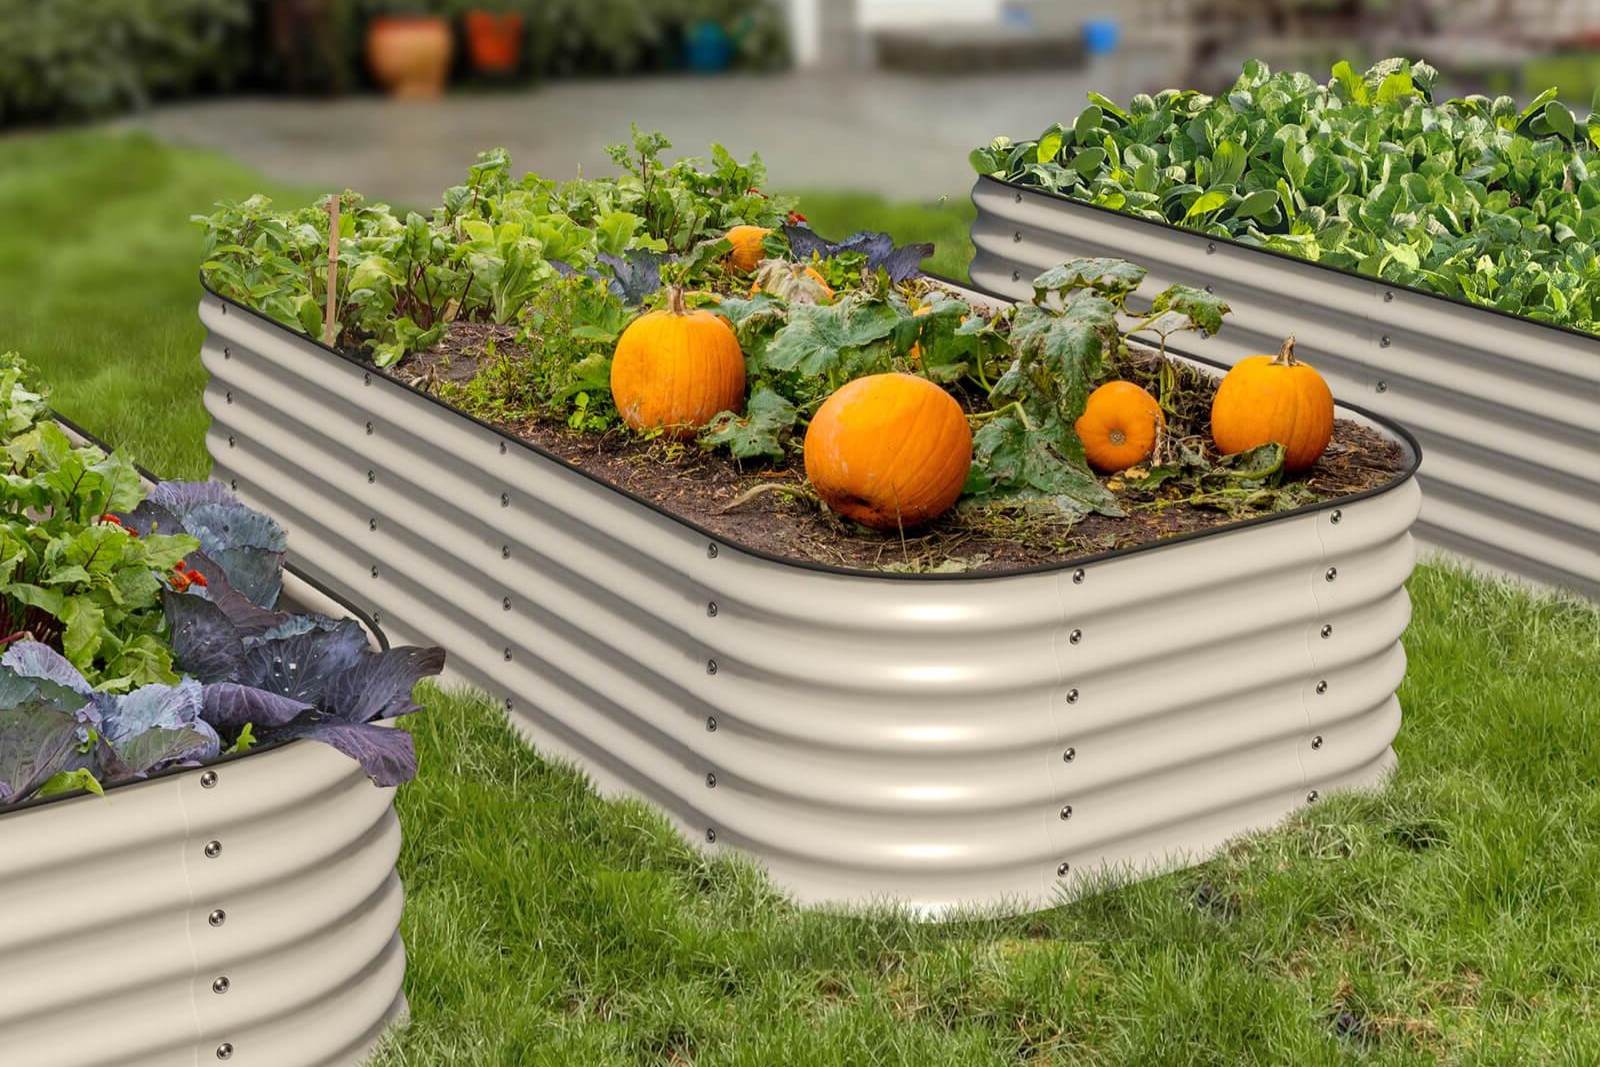
By constructing a raised garden bed with corrugated metal, you can create a defined and organized space for your plants while adding a visually striking element to your garden. The use of corrugated metal as a building material provides durability and structural integrity, ensuring that your garden bed will withstand the test of time and the elements.
In this comprehensive guide, we will walk you through the step-by-step process of building a raised garden bed with corrugated metal. From gathering the necessary materials and tools to planting your first seeds, you will gain the knowledge and confidence to embark on this rewarding DIY project. Whether you are a seasoned gardener or a novice enthusiast, this guide is designed to equip you with the essential information needed to bring your vision to life.
So, roll up your sleeves, grab your tools, and get ready to embark on a journey of creativity and productivity. Building a raised garden bed with corrugated metal is not only a practical endeavor but also a chance to express your personal style and cultivate a thriving garden oasis. Let's dive into the details and unleash your gardening potential with this exciting and innovative project.
Key Takeaways:
- Building a raised garden bed with corrugated metal is a fun and stylish way to create a modern garden space. It’s a rewarding DIY project that adds beauty and functionality to your outdoor area.
- Careful planning, precise measurements, and thoughtful plant selection are key to creating a thriving garden in your raised bed. It’s a creative and fulfilling journey that brings nature to your doorstep.
Read more: How To Build A Stone Raised Garden Bed
Step 1: Gather Materials and Tools
Before diving into the construction of your raised garden bed with corrugated metal, it's essential to gather all the necessary materials and tools. By ensuring that you have everything at your disposal, you can streamline the building process and minimize interruptions. Here's a comprehensive list of the items you'll need to get started:
Materials:
- Corrugated Metal Sheets: These will serve as the primary material for constructing the walls of your raised garden bed. Opt for high-quality, weather-resistant corrugated metal to ensure longevity.
- Lumber or Metal Posts: You'll need these to create the frame and support structure for the garden bed. Pressure-treated lumber or galvanized metal posts are ideal for withstanding outdoor conditions.
- Screws or Nails: Choose corrosion-resistant fasteners to secure the metal sheets to the frame and ensure structural stability.
- Landscape Fabric: This will be used to line the interior of the bed, preventing soil erosion and weed growth while allowing for proper drainage.
- Soil: Select a high-quality, nutrient-rich soil mix suitable for the types of plants you intend to grow in your raised bed.
- Compost and Mulch: These organic materials will enrich the soil and promote healthy plant growth.
- Plants or Seeds: Depending on your gardening preferences, gather the plants or seeds you wish to cultivate in your raised garden bed.
Tools:
- Measuring Tape and Marker: These will be essential for accurately measuring and marking the dimensions of the metal sheets and frame components.
- Circular Saw or Tin Snips: Depending on the thickness of the corrugated metal, you'll need a suitable cutting tool to trim the sheets to the desired size.
- Drill and Drill Bits: A power drill will be necessary for creating pilot holes and driving screws into the metal and wood.
- Level: To ensure that the frame and metal sheets are installed evenly and securely.
- Work Gloves and Safety Goggles: Always prioritize safety when working with metal and power tools.
- Shovel or Garden Trowel: These tools will come in handy when filling the bed with soil and planting your garden.
By gathering these materials and tools, you'll be well-prepared to embark on the construction of your raised garden bed with corrugated metal. With everything in place, you can proceed to the next step with confidence, knowing that you have the necessary resources to bring your vision to fruition.
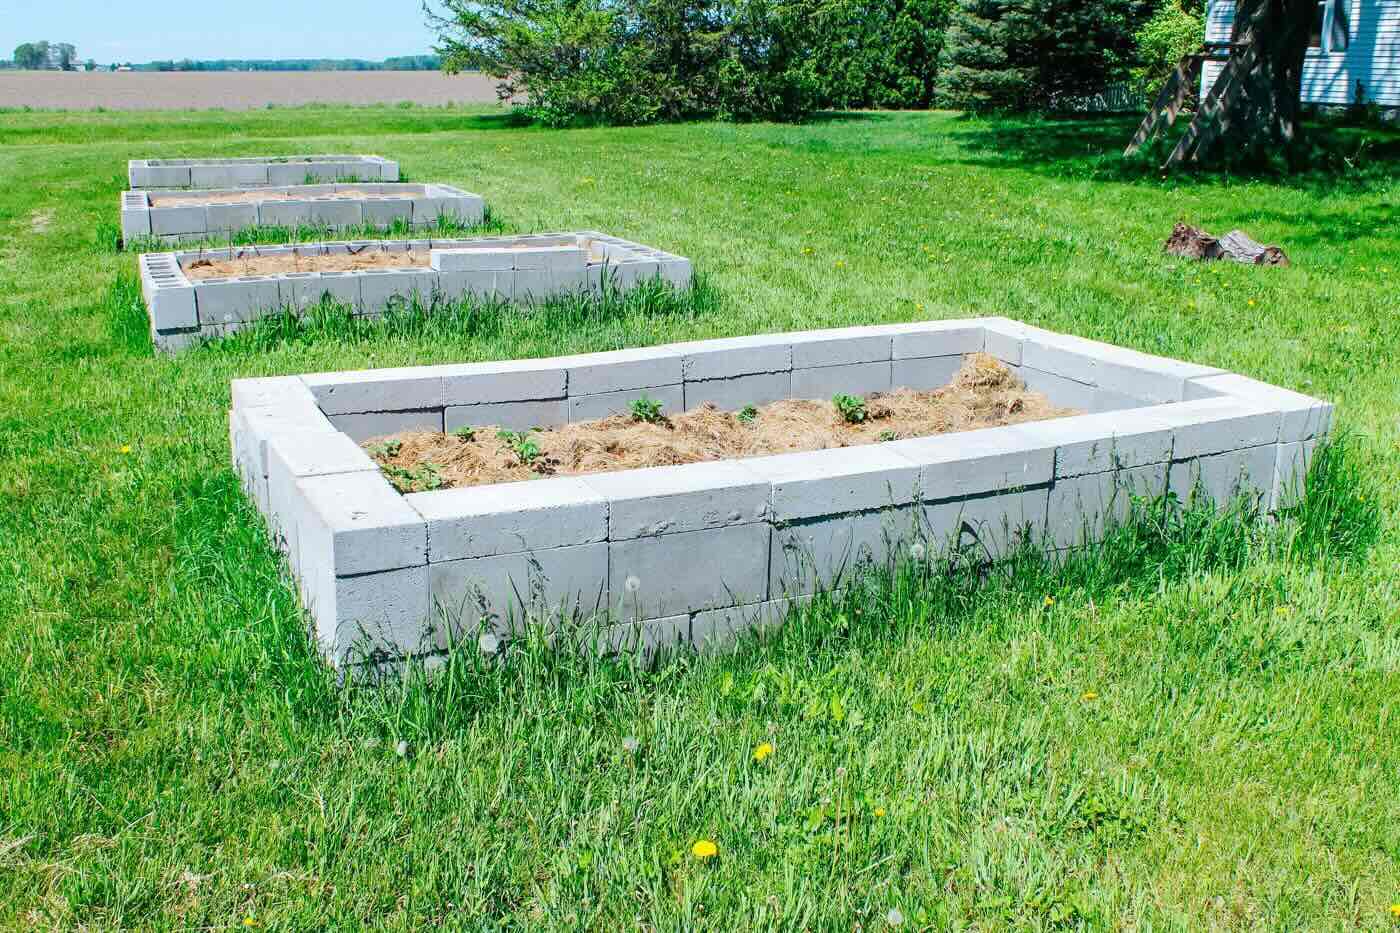
Step 2: Choose a Location
Selecting the ideal location for your raised garden bed with corrugated metal is a crucial decision that can significantly impact the success of your gardening endeavors. When choosing a location, several factors should be taken into consideration to ensure optimal growing conditions for your plants.
First and foremost, assess the amount of sunlight the area receives throughout the day. Most vegetable and flowering plants thrive in full sun, which typically equates to at least six hours of direct sunlight. Therefore, it's advisable to position your raised garden bed in an area that receives ample sunlight to promote healthy growth and abundant yields.
Additionally, consider the accessibility of the chosen location. Ensure that it is easily reachable for watering, weeding, and harvesting tasks. By placing the garden bed within close proximity to your home, you can conveniently monitor and tend to your plants, fostering a thriving and well-maintained garden space.
Furthermore, take into account the topography and drainage of the site. Opt for a level area that allows for proper water drainage to prevent waterlogging, which can be detrimental to plant roots. Adequate drainage is essential for maintaining the health of your plants and preventing water-related issues such as root rot.
Another aspect to consider is the proximity to utilities and potential obstructions. Ensure that the chosen location is clear of underground utility lines and large obstructions such as trees or structures that could impede the growth of your plants or hinder future maintenance of the garden bed.
Lastly, consider the aesthetic appeal of the location. A raised garden bed with corrugated metal can serve as a visually striking feature in your outdoor space. Choosing a location that complements the overall landscape and adds to the visual appeal of your garden can enhance the ambiance of your outdoor environment.
By carefully evaluating these factors and selecting a suitable location, you can set the stage for a successful gardening experience. The chosen location should provide the necessary sunlight, accessibility, drainage, and aesthetic harmony to support the growth and vitality of your plants, ultimately contributing to a flourishing and visually appealing garden space.
Step 3: Measure and Cut the Metal
Precise measurements and accurate cuts are essential when working with corrugated metal to ensure a seamless and structurally sound raised garden bed. Before cutting the metal sheets, it's crucial to measure the dimensions of the bed's walls carefully. Begin by determining the desired height and length of each metal sheet, taking into account the overall size of the garden bed.
Using a measuring tape and marker, mark the measurements directly onto the corrugated metal sheets. When marking the sheets, it's advisable to use a straight edge or a level to ensure that the lines are straight and uniform. This step is crucial for achieving clean and precise cuts, which will contribute to the overall visual appeal and structural integrity of the garden bed.
Once the measurements are marked, it's time to proceed with cutting the metal sheets to the appropriate size. Depending on the thickness of the corrugated metal, a suitable cutting tool such as a circular saw or tin snips should be used. When using a circular saw, it's recommended to use a carbide-tipped blade designed for cutting metal to achieve clean and accurate cuts.
When cutting the metal sheets, prioritize safety by wearing work gloves and safety goggles to protect against sharp edges and metal shavings. Proceed to carefully follow the marked lines, ensuring steady and controlled movements to achieve precise cuts. If using tin snips, opt for aviation snips designed for cutting metal, as they provide enhanced cutting leverage and maneuverability.
After cutting the metal sheets to the required dimensions, it's essential to deburr the edges to remove any sharp or jagged edges that may pose a safety hazard or cause damage to the landscape fabric and soil. This can be achieved using a metal file or a deburring tool to smooth out the cut edges, resulting in a clean and safe finish.
By meticulously measuring and cutting the corrugated metal sheets with precision and attention to detail, you can ensure that the walls of your raised garden bed fit together seamlessly, creating a visually appealing and structurally robust enclosure for your plants. This meticulous approach sets the stage for the subsequent assembly of the garden bed, laying the foundation for a successful and aesthetically pleasing gardening space.
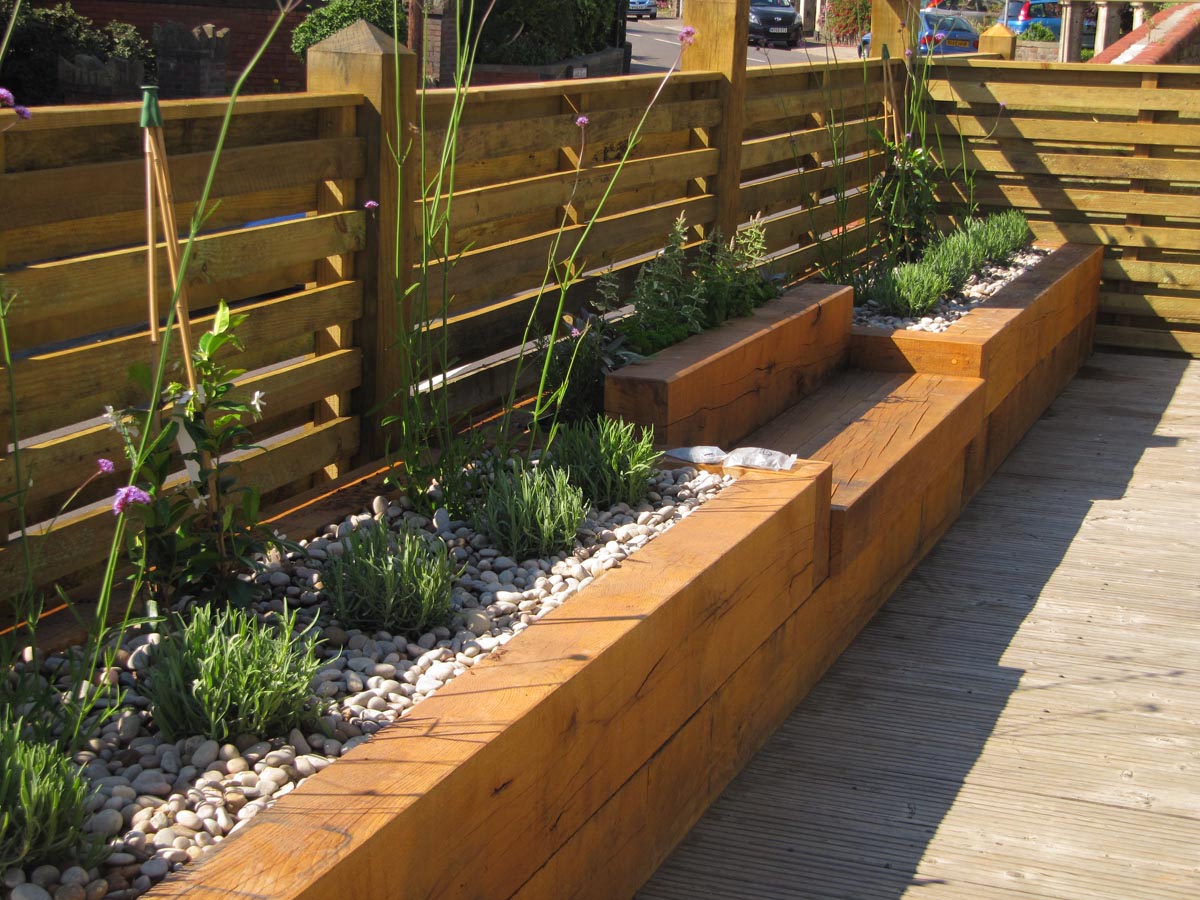
Step 4: Assemble the Frame
With the corrugated metal sheets cut to size, it's time to move on to the assembly of the frame, a critical step in constructing a sturdy and durable raised garden bed. The frame serves as the support structure for the metal walls and provides the foundation for the bed's overall stability and integrity.
Begin by positioning the lumber or metal posts in the designated location for the raised garden bed. If using lumber, it's essential to select pressure-treated or rot-resistant wood to ensure longevity, especially when in direct contact with the soil. Alternatively, galvanized metal posts offer excellent durability and are resistant to corrosion, making them an ideal choice for the frame.
Using a measuring tape and level, carefully position the frame components to ensure that they are aligned and level. This step is crucial for achieving a uniform and balanced structure that will support the weight of the metal sheets and the soil within the bed.
Once the frame components are in position, it's time to attach the corrugated metal sheets to the frame. Begin by pre-drilling pilot holes in the metal sheets to prevent distortion and facilitate the insertion of screws or nails. Position the metal sheets against the frame, ensuring a snug fit and even alignment.
Secure the metal sheets to the frame using corrosion-resistant screws or nails, driving them through the pre-drilled pilot holes. It's important to space the fasteners evenly along the length of the metal sheets to ensure that they are securely attached to the frame, providing structural stability and preventing shifting or warping over time.
As the metal sheets are affixed to the frame, periodically check for levelness and alignment to make any necessary adjustments. This attention to detail during the assembly process will contribute to the overall visual appeal and structural integrity of the raised garden bed.
Once all the metal sheets are securely attached to the frame, the basic structure of the raised garden bed with corrugated metal is complete. This marks a significant milestone in the construction process, setting the stage for the next steps of preparing the site, filling the bed with soil, and planting your garden.
By meticulously assembling the frame and attaching the corrugated metal sheets with precision and care, you have laid the groundwork for a visually striking and robust raised garden bed. This foundational structure will serve as the centerpiece of your garden, providing a defined and organized space for cultivating a thriving and aesthetically pleasing array of plants.
Step 5: Prepare the Site
With the frame and metal walls of your raised garden bed securely in place, the next crucial step is to prepare the site where the bed will be situated. This phase of the project involves creating the optimal environment for your garden bed, ensuring that it is primed for successful plant growth and long-term sustainability.
The first task in preparing the site is to clear the area of any debris, rocks, or vegetation that may impede the placement of the raised garden bed. By creating a clean and level surface, you can establish a solid foundation for the bed and minimize potential obstructions that could hinder the growth of your plants.
Following the clearing of the site, it's essential to lay down a layer of landscape fabric within the bed's interior. The landscape fabric serves multiple purposes, including weed suppression, moisture retention, and soil stabilization. By effectively preventing weed growth and promoting proper drainage, the landscape fabric contributes to a healthy and low-maintenance gardening environment.
Once the landscape fabric is in place, it's time to fill the raised garden bed with high-quality soil. Select a nutrient-rich soil mix suitable for the types of plants you intend to grow, ensuring that it provides the essential nutrients and drainage properties necessary for healthy plant development. As you fill the bed with soil, periodically tamp it down to eliminate air pockets and create a firm and stable foundation for planting.
In addition to soil, incorporating compost and mulch into the bed can further enrich the growing environment for your plants. Compost adds valuable organic matter and nutrients to the soil, while mulch helps retain moisture, suppress weeds, and regulate soil temperature. These organic materials contribute to the overall fertility and health of the soil, laying the groundwork for thriving plant growth.
As the site preparation nears completion, take a moment to assess the overall aesthetics and functionality of the raised garden bed within its designated location. Ensure that the bed is level, stable, and visually harmonious with its surroundings, creating an inviting and well-integrated element within your outdoor space.
By meticulously preparing the site for your raised garden bed, you are setting the stage for a flourishing and visually captivating garden oasis. The attention to detail in clearing the area, laying landscape fabric, filling the bed with soil, and incorporating organic materials establishes a solid foundation for the subsequent planting phase, ultimately contributing to the long-term success and beauty of your garden.
When building a raised garden bed with corrugated metal, make sure to use gloves to protect your hands from sharp edges. Also, consider adding a layer of landscape fabric to prevent weeds from growing.
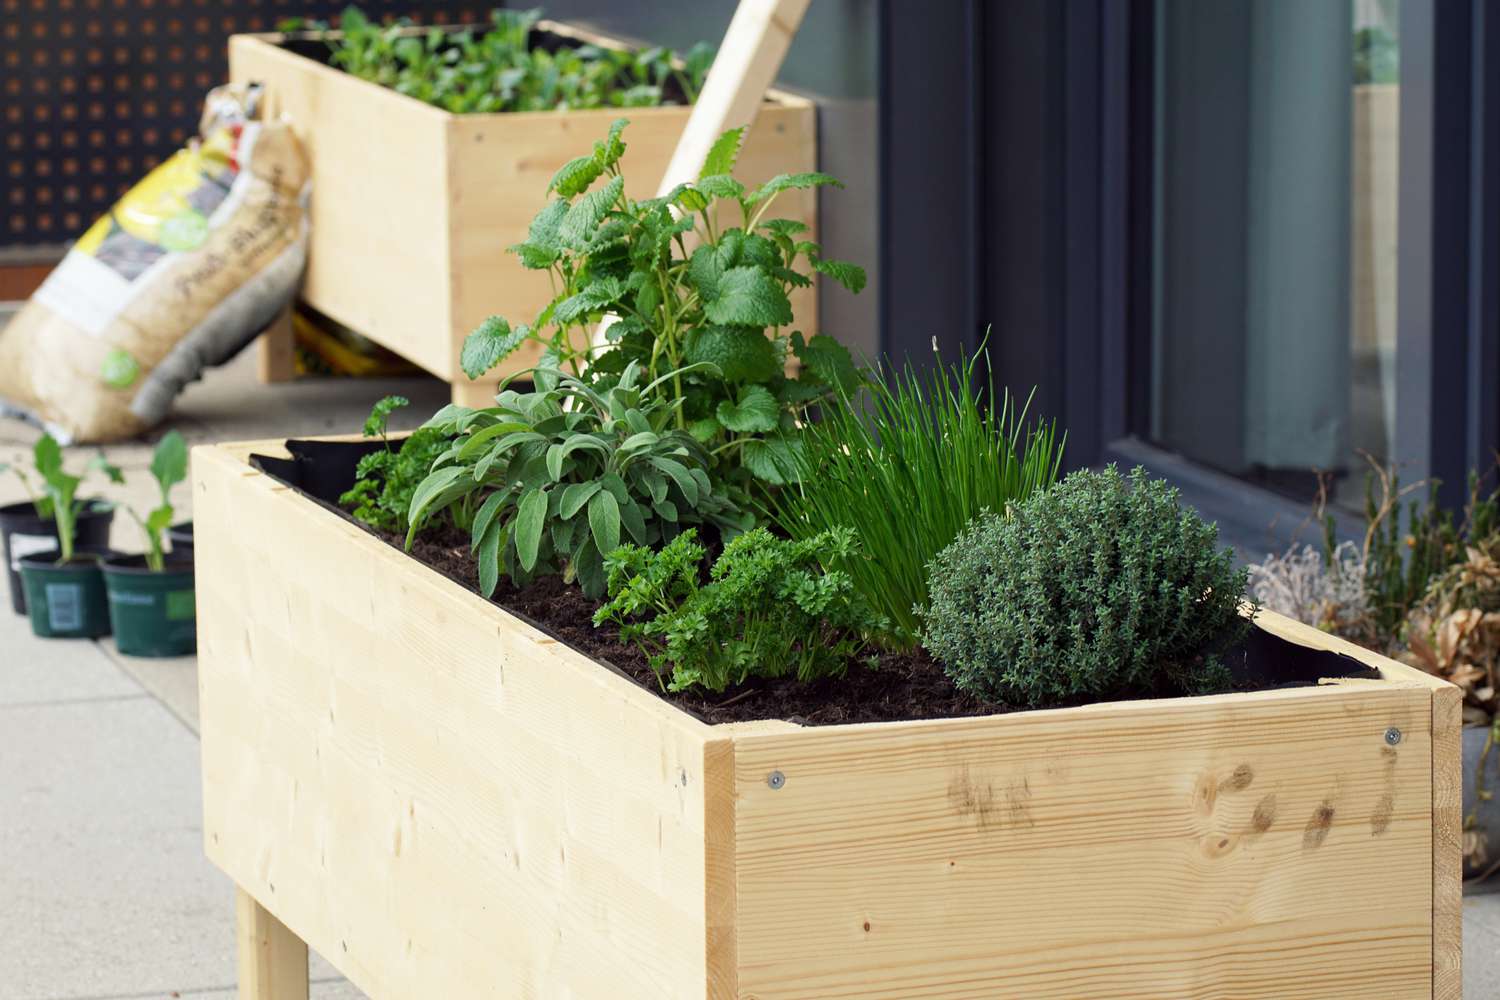
Step 6: Fill the Bed with Soil
Filling the raised garden bed with soil is a pivotal step that directly impacts the health and vitality of your plants. The soil composition and quality play a significant role in providing essential nutrients, proper drainage, and a conducive environment for plant roots to thrive. As you embark on this phase of the project, attention to detail and a focus on soil selection are paramount to the success of your garden.
When filling the bed with soil, opt for a high-quality, well-balanced soil mix that is specifically formulated for raised bed gardening. This type of soil typically consists of a blend of topsoil, compost, and organic matter, offering a nutrient-rich foundation for plant growth. The soil mix should provide adequate drainage while retaining moisture, creating an optimal environment for root development and overall plant health.
As you add the soil to the raised bed, distribute it evenly and level it out using a garden rake or trowel. Ensure that the soil is uniformly spread across the entire bed, reaching the desired depth to accommodate the root systems of the plants you intend to cultivate. Tamping down the soil gently as you fill the bed helps eliminate air pockets and creates a firm, stable foundation for planting.
Consider the specific requirements of the plants you plan to grow and tailor the soil mix accordingly. For example, if you intend to cultivate vegetables, herbs, or flowering plants, select a soil mix that aligns with the unique needs of each plant variety. Some plants may thrive in well-draining, loamy soil, while others may benefit from a soil mix enriched with additional organic matter.
Incorporating organic materials such as compost and aged manure into the soil mix can further enhance its fertility and structure. These organic amendments contribute valuable nutrients and beneficial microorganisms to the soil, promoting robust plant growth and overall soil health. Additionally, the addition of organic matter aids in moisture retention and supports a thriving ecosystem within the raised bed.
As you fill the bed with soil, take the opportunity to assess the soil depth and composition, ensuring that it aligns with the specific requirements of your chosen plants. By providing a nutrient-rich, well-aerated, and properly balanced soil environment, you are laying the groundwork for a flourishing and bountiful garden within your raised bed.
By meticulously filling the raised garden bed with a carefully selected soil mix, you are creating an optimal growing environment that sets the stage for the successful cultivation of a diverse array of plants. The attention to detail in soil selection and preparation contributes to the long-term health and productivity of your garden, fostering a thriving and visually captivating outdoor space.
Read more: How To Build A Corrugated Metal Fence
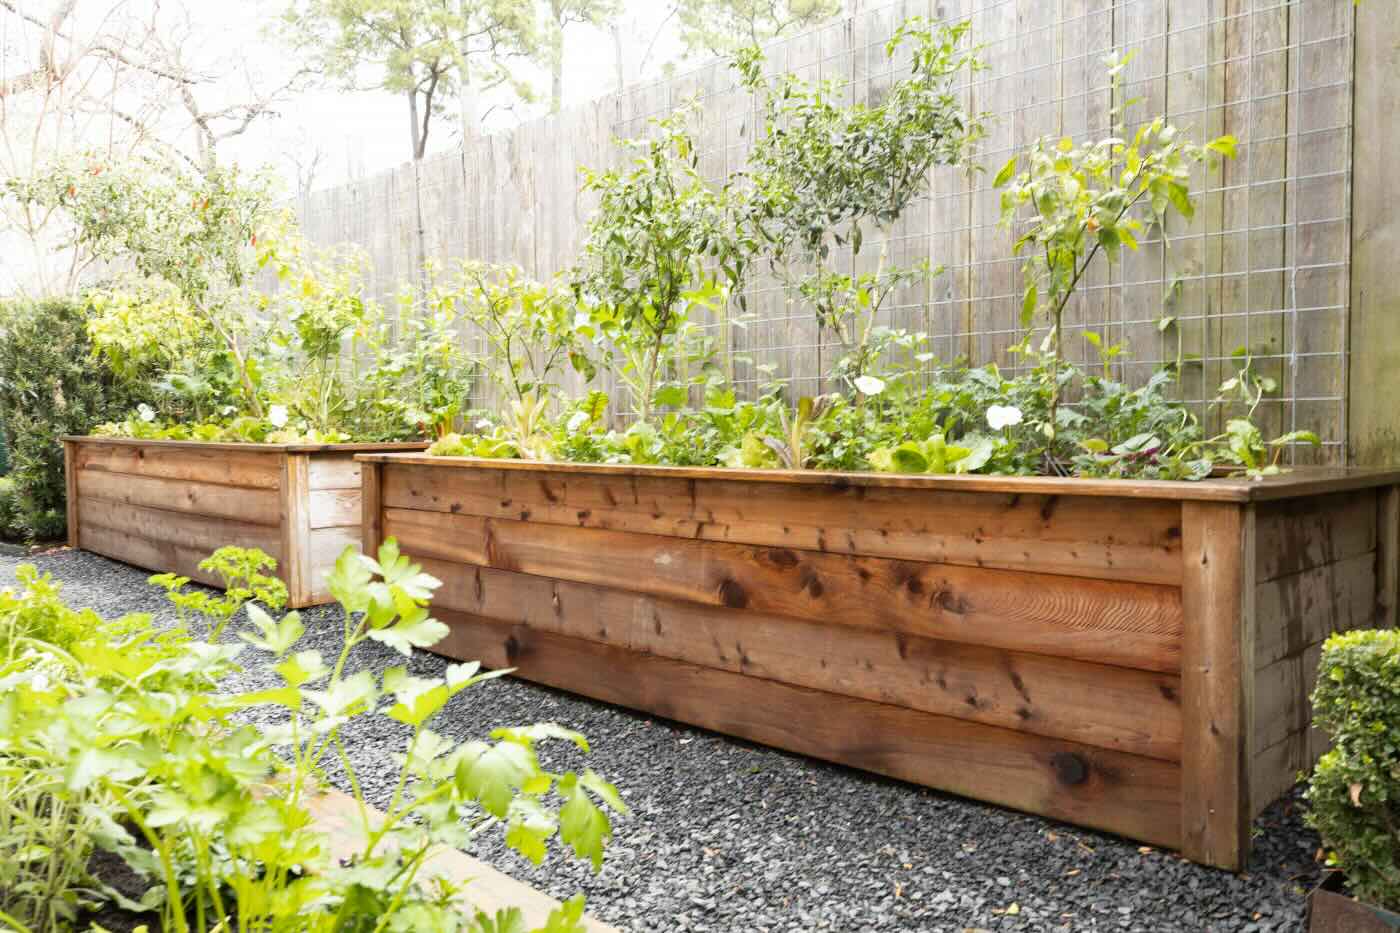
Step 7: Plant Your Garden
With the raised garden bed meticulously prepared and filled with nutrient-rich soil, it's time to embark on the exciting and rewarding process of planting your garden. This phase of the project marks the culmination of your efforts, as you bring life to the raised bed and set the stage for a flourishing and visually captivating array of plants.
Begin by carefully planning the layout of your garden within the raised bed. Consider the specific requirements and growth habits of the plants you intend to cultivate, taking into account factors such as spacing, sunlight exposure, and potential interactions between different plant varieties. By strategically arranging your plants, you can optimize their growing conditions and create a harmonious and visually appealing garden space.
As you proceed with planting, handle the seedlings or young plants with care, ensuring that their delicate roots are gently placed into the soil at the appropriate depth. Pay attention to the recommended planting depths and spacing guidelines for each plant variety, as these factors directly influence their growth and development. By providing ample space and proper planting depths, you can promote healthy root systems and robust growth for your garden plants.
Consider incorporating a diverse selection of plants, including vegetables, herbs, flowers, or ornamental foliage, to create a vibrant and multifaceted garden within the raised bed. This diversity not only adds visual interest but also contributes to a thriving ecosystem, attracting beneficial pollinators and fostering a balanced and sustainable garden environment.
As you plant your garden, take into account the seasonal and climatic considerations that may impact the growth of your plants. Align your planting schedule with the appropriate growing season for each plant variety, ensuring that they have the best opportunity to thrive and produce bountiful yields or vibrant blooms.
After planting, provide the newly established garden with ample water to support the initial growth and establishment of the plants. Monitor the moisture levels in the soil and adjust your watering regimen as needed to maintain optimal growing conditions for your garden.
By planting your garden with precision and care, you are breathing life into the raised bed and setting the stage for a visually captivating and productive outdoor space. The thoughtful selection and arrangement of plants, coupled with attention to their individual needs, contribute to the creation of a thriving and harmonious garden within your raised bed.
As you complete the planting phase, take a moment to admire the transformation of the raised garden bed into a vibrant and inviting oasis of greenery and color. Your efforts in planting the garden have not only brought beauty and vitality to your outdoor space but have also set the stage for a season of growth, abundance, and enjoyment within your own cultivated paradise.
Conclusion
In conclusion, the journey of building a raised garden bed with corrugated metal has been a rewarding and transformative experience, culminating in the creation of a visually striking and bountiful garden oasis. From the initial gathering of materials and tools to the meticulous preparation of the site and the thoughtful planting of the garden, every step has contributed to the realization of a thriving and aesthetically captivating outdoor space.
The process began with careful planning and preparation, as the necessary materials and tools were assembled to embark on the construction of the raised garden bed. The selection of high-quality corrugated metal, sturdy lumber or metal posts, and corrosion-resistant fasteners laid the foundation for a durable and long-lasting structure. The attention to detail in measuring and cutting the metal sheets, along with the precise assembly of the frame, ensured that the raised bed would stand as a testament to craftsmanship and functionality.
Choosing the ideal location for the raised garden bed was a pivotal decision, as it set the stage for the successful growth of the plants. The careful consideration of sunlight exposure, accessibility, drainage, and aesthetic harmony within the chosen location created an optimal environment for the garden to thrive. The meticulous preparation of the site, including the clearing of debris, the placement of landscape fabric, and the filling of the bed with nutrient-rich soil, established a solid foundation for the subsequent planting phase.
As the garden bed was filled with carefully selected soil and organic amendments, the stage was set for the exciting and fulfilling process of planting a diverse array of plants. The thoughtful layout and arrangement of vegetables, herbs, flowers, and ornamental foliage within the raised bed created a vibrant and harmonious garden space. The attention to seasonal and climatic considerations, coupled with the nurturing care provided to the newly planted garden, ensured that the plants had the best opportunity to thrive and flourish.
In the end, the raised garden bed with corrugated metal stands as a testament to creativity, productivity, and the transformative power of gardening. The culmination of this project has not only added a modern and stylish element to the outdoor space but has also created a sanctuary of natural beauty and abundance. As the garden continues to grow and evolve, it will serve as a source of joy, inspiration, and connection to the natural world, enriching the lives of those who tend to it and revel in its splendor.
Frequently Asked Questions about How To Build A Raised Garden Bed With Corrugated Metal
Was this page helpful?
At Storables.com, we guarantee accurate and reliable information. Our content, validated by Expert Board Contributors, is crafted following stringent Editorial Policies. We're committed to providing you with well-researched, expert-backed insights for all your informational needs.
0 thoughts on “How To Build A Raised Garden Bed With Corrugated Metal”