Home>Gardening & Outdoor>Landscaping Ideas>How To Build A Wood Raised Garden Bed

Landscaping Ideas
How To Build A Wood Raised Garden Bed
Modified: February 18, 2024
Learn how to create a beautiful wood raised garden bed with our landscaping ideas. Enhance your outdoor space with our step-by-step guide.
(Many of the links in this article redirect to a specific reviewed product. Your purchase of these products through affiliate links helps to generate commission for Storables.com, at no extra cost. Learn more)
Introduction
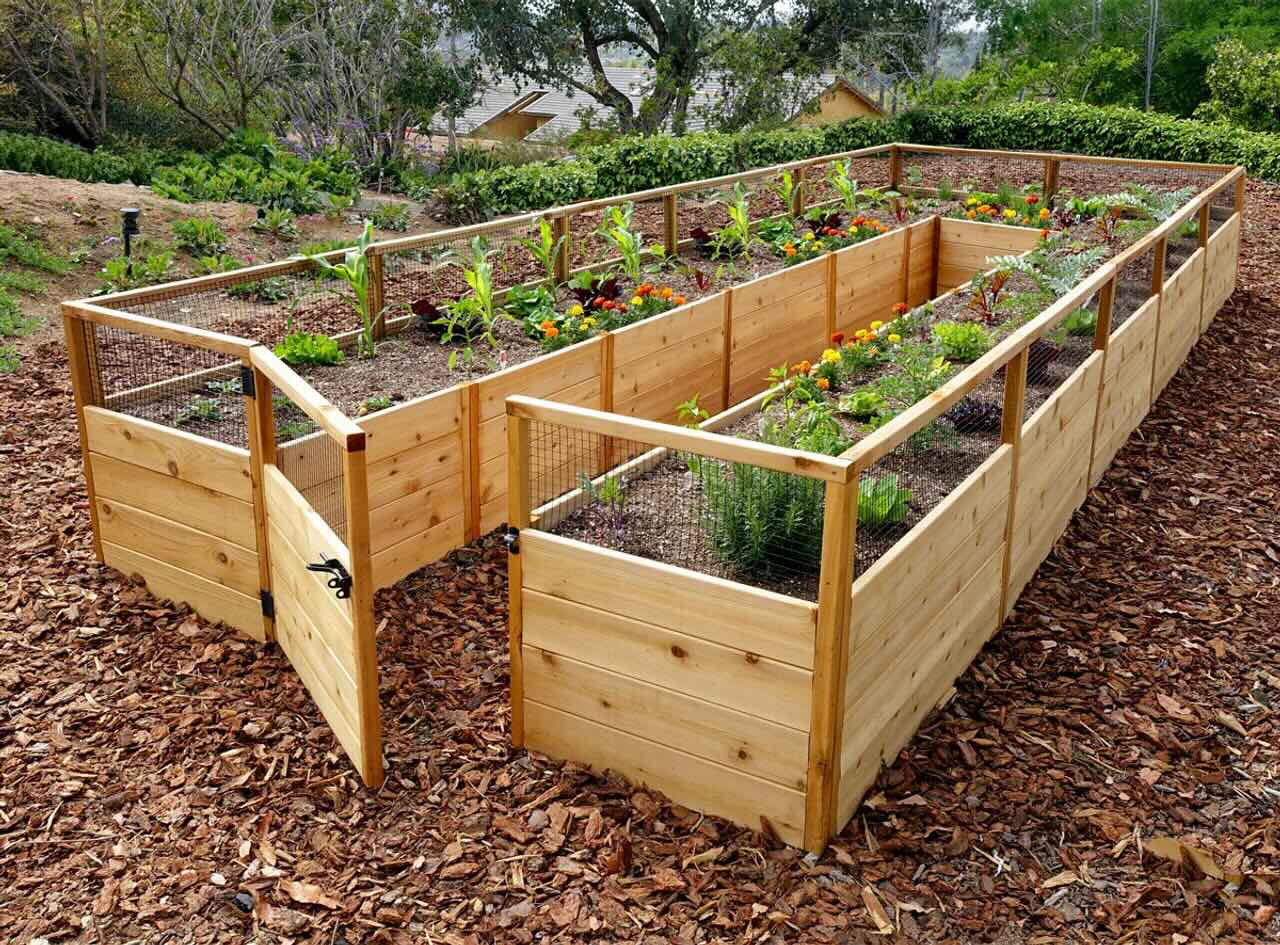
Are you ready to elevate your gardening game and create a stunning focal point in your outdoor space? Building a wood raised garden bed is an excellent way to add visual appeal to your landscape while providing a practical and efficient environment for growing a variety of plants. Whether you're a seasoned gardener or just starting out, this DIY project offers a rewarding experience that allows you to exercise your creativity and nurture a thriving garden.
By constructing a wood raised garden bed, you can take control of the growing conditions, ensuring optimal soil quality, drainage, and accessibility for planting and maintenance. This elevated structure not only adds a touch of elegance to your garden but also offers several practical benefits. It provides better soil drainage, reduces the risk of soil compaction, and minimizes the intrusion of weeds and pests. Additionally, the raised design makes it easier to tend to your plants, especially for individuals with limited mobility.
In this comprehensive guide, we will walk you through the step-by-step process of building a wood raised garden bed, from gathering the necessary materials and tools to planting your favorite flowers, herbs, or vegetables. Whether you envision a small, quaint bed for your patio or a larger, more elaborate structure for your backyard, this project is customizable to suit your preferences and available space.
With a few basic carpentry skills and a passion for gardening, you can embark on this fulfilling journey to create a beautiful and functional wood raised garden bed. So, roll up your sleeves, grab your tools, and let's get started on this enriching endeavor that will transform your outdoor oasis into a vibrant and bountiful haven for plant life.
Key Takeaways:
- Building a wood raised garden bed offers a fun and rewarding DIY project that adds beauty to your garden while providing a practical space for growing plants. It’s a creative and fulfilling way to nurture a thriving garden oasis.
- By carefully planning the location, assembling the bed, and planting a variety of flora, you can create a vibrant and bountiful garden. Embrace the journey of tending to your garden and enjoy the wonders of nature.
Read more: How To Build A Cedar Raised Garden Bed
Step 1: Gather Materials and Tools
Before diving into the construction of your wood raised garden bed, it's essential to gather all the necessary materials and tools. By ensuring that you have everything at your disposal, you can streamline the building process and minimize interruptions. Here's a comprehensive list of items you'll need to bring your garden bed to life:
Materials:
- Wood: Select high-quality, untreated lumber such as cedar or redwood, as they are durable and naturally resistant to decay. The dimensions will depend on the size of the bed you intend to build.
- Galvanized Screws or Nails: Opt for corrosion-resistant fasteners to ensure the longevity of your garden bed.
- Landscape Fabric: This will help prevent weeds from infiltrating the bed while allowing proper drainage.
- Cardboard or Newspaper: Use this as a biodegradable barrier to further deter weed growth.
- Soil: Choose a high-quality, well-draining soil mix suitable for the types of plants you plan to grow.
Tools:
- Measuring Tape: Essential for accurately determining the dimensions of the garden bed.
- Saw: Depending on the type of wood you choose, you may need a handsaw or a power saw to cut the lumber to the desired lengths.
- Drill or Hammer: For assembling the wood pieces and fastening the screws or nails.
- Level: To ensure the bed is constructed on even ground.
- Gloves and Safety Glasses: Protect your hands and eyes during the construction process.
- Wheelbarrow or Garden Cart: For transporting soil and other materials to the construction site.
By gathering these materials and tools, you'll be well-equipped to embark on the construction of your wood raised garden bed. With careful planning and attention to detail in this initial phase, you'll set the stage for a smooth and enjoyable building experience. Now that you have everything you need, it's time to move on to the next step and bring your vision to fruition.
Step 2: Choose a Location
Selecting the ideal location for your wood raised garden bed is a crucial decision that significantly impacts the success of your gardening endeavors. The chosen spot should receive an adequate amount of sunlight, typically six to eight hours per day, to support the healthy growth of plants. Additionally, consider the accessibility of the location, ensuring that it is convenient for watering, maintenance, and harvesting.
When assessing potential sites for your garden bed, take note of any existing landscaping features, such as trees, shrubs, or structures, that could affect sunlight exposure and root competition. It's important to choose a relatively level area to facilitate the construction process and ensure the stability of the bed once it's in place. If the ground is uneven, you may need to make adjustments by leveling the surface or using additional supports to accommodate the slope.
Furthermore, consider the proximity to a water source to simplify the task of watering your plants. While raised garden beds generally require less water than traditional ground-level gardens, easy access to water will make the maintenance process more efficient. Additionally, if you plan to grow edible plants, such as vegetables or herbs, choosing a location away from potential sources of contamination, such as chemical runoff or air pollution, is essential for producing safe and healthy crops.
Take into account the aesthetic appeal of the chosen location, as the garden bed will become a prominent feature in your outdoor space. Consider how it will complement the overall design of your landscape and whether it will create an attractive focal point. By strategically placing the garden bed, you can enhance the visual appeal of your garden while creating a harmonious and inviting atmosphere.
Before finalizing the location, it's advisable to observe the area at different times of the day to assess the sunlight exposure and potential shade patterns. By carefully evaluating these factors, you can make an informed decision that maximizes the growing conditions for your plants and contributes to the overall beauty of your outdoor environment.
Once you've identified the perfect spot for your wood raised garden bed, you're ready to move on to the next step in the construction process, bringing you one step closer to cultivating a flourishing garden oasis right in your own backyard.
Read more: How To Build A Waist-High Raised Garden Bed
Step 3: Measure and Cut the Wood
Accurate measurements and precise cuts are essential for constructing a sturdy and visually appealing wood raised garden bed. Before you begin cutting the wood, it's crucial to have a clear plan and design for the dimensions of your garden bed. Whether you're building a small bed for a patio or a larger one for your backyard, the process remains the same.
Start by measuring and marking the lengths of the wood according to your desired bed dimensions. Use a measuring tape to ensure accuracy, and mark the cut lines with a pencil or a carpenter's pencil. If you're using multiple pieces of wood for the sides of the bed, ensure that the measurements are consistent to maintain uniformity in the appearance of the bed.
Once the wood is marked, it's time to make the cuts. Depending on the type of wood and your personal preference, you can use a handsaw or a power saw for this step. Ensure that the cuts are straight and clean to achieve a professional-looking result. If you're using a power saw, take appropriate safety precautions and use a guide to maintain precision.
After cutting the wood to the required lengths, it's advisable to sand the edges to remove any rough or splintered areas. This not only enhances the appearance of the bed but also reduces the risk of injury during the assembly and maintenance of the garden bed.
As you proceed with measuring and cutting the wood, pay attention to the details and strive for accuracy. Taking the time to ensure precise measurements and clean cuts will contribute to the overall quality and durability of your wood raised garden bed. With this step completed, you're now ready to move on to the exciting phase of assembling the bed, bringing you closer to the fulfillment of your gardening aspirations.
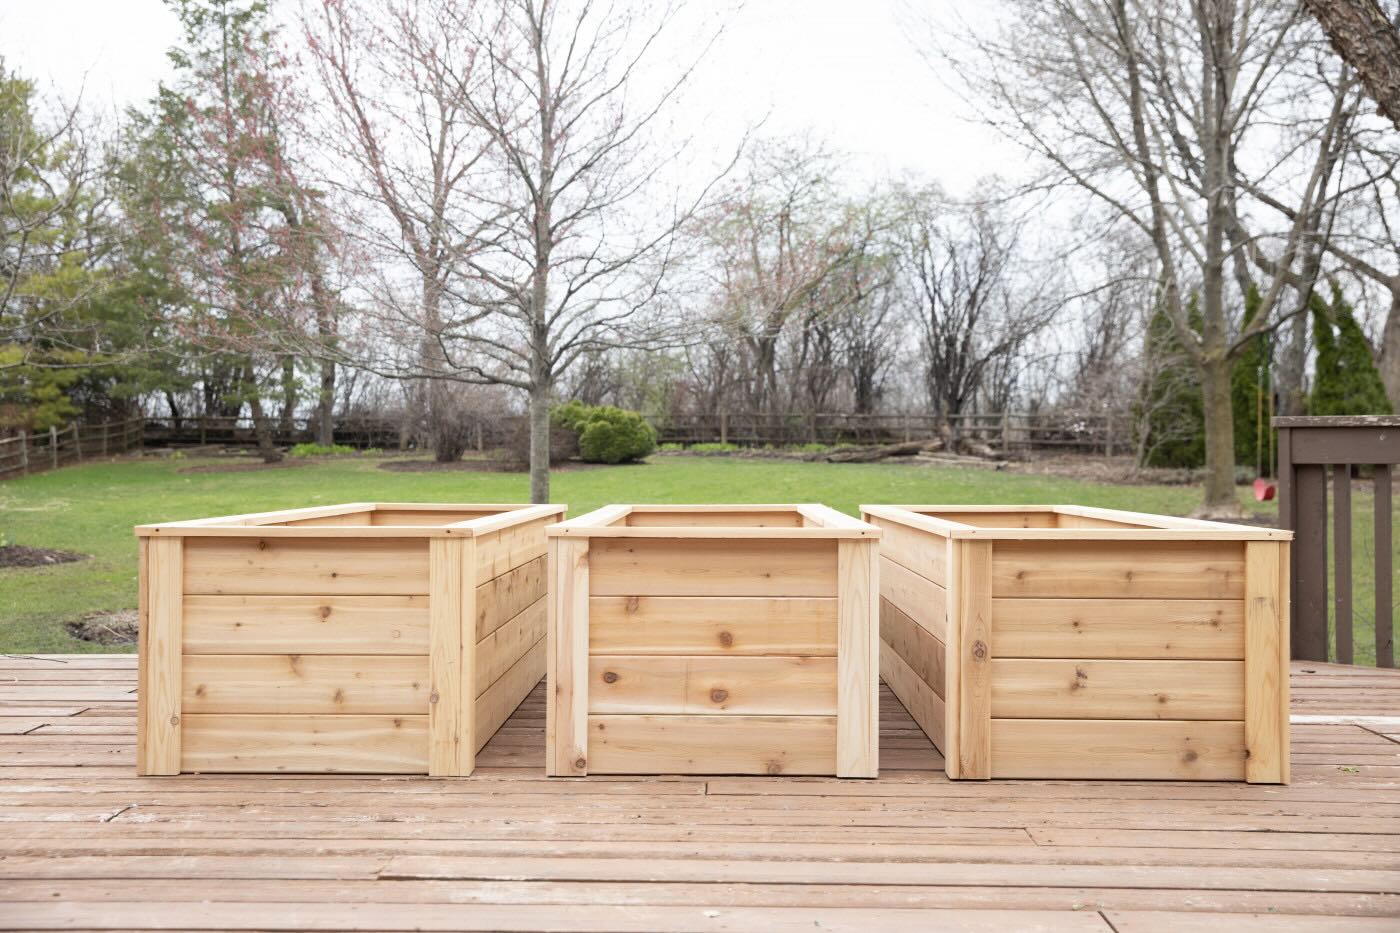
Step 4: Assemble the Bed
With the wood pieces cut to the appropriate lengths, it's time to bring your wood raised garden bed to life through the assembly process. This step is where the individual components come together to form a cohesive and functional structure that will serve as the foundation for your garden. Follow these steps to ensure a smooth and successful assembly:
-
Lay Out the Pieces: Begin by laying out the wood pieces in the designated location where the garden bed will be installed. Arrange the pieces according to their intended positions, ensuring that the corners align perfectly and the overall shape of the bed matches your design.
-
Secure the Corners: Using galvanized screws or nails, fasten the corners of the bed together. Pre-drilling pilot holes may be necessary to prevent the wood from splitting during the fastening process. Ensure that the corners are square and the wood pieces are securely connected to form a stable framework.
-
Add Support: For longer sides of the bed, consider adding support in the middle to prevent bowing or warping over time. This can be achieved by installing additional vertical or horizontal pieces of wood inside the bed to reinforce its structure.
-
Line the Bed: Once the frame is assembled, line the interior of the bed with landscape fabric to prevent soil from directly contacting the wood. This protective barrier helps extend the lifespan of the wood by reducing moisture exposure and inhibiting the growth of weeds.
-
Fill the Bed: With the assembly complete, fill the bed with high-quality soil, ensuring it is evenly distributed and level. Consider amending the soil with organic matter or compost to enrich its fertility and provide an optimal growing environment for your plants.
-
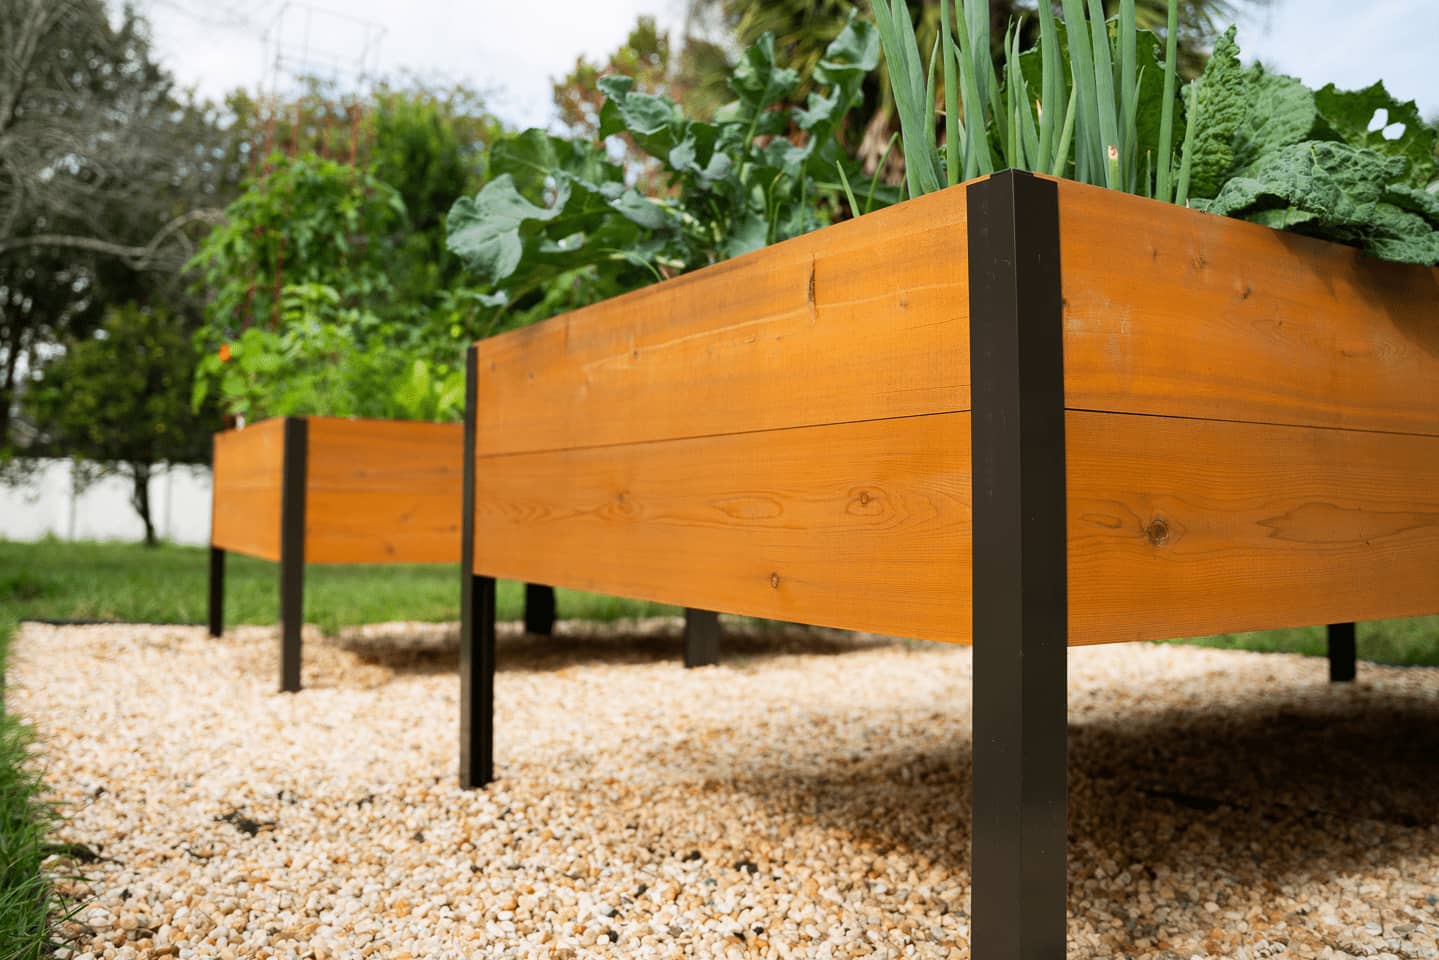
Optional Finishing Touches: Depending on your preference, you may choose to add finishing touches such as decorative trim, caps for the corners, or a protective sealant for the wood. These enhancements can contribute to the aesthetic appeal and longevity of the garden bed.
By meticulously following these steps, you can assemble a wood raised garden bed that not only meets your functional gardening needs but also adds a touch of elegance to your outdoor space. With the bed now assembled, you're ready to proceed to the next phase of this enriching journey – filling it with soil and planting your favorite flowers, herbs, or vegetables.
When building a wood raised garden bed, make sure to use untreated, rot-resistant wood such as cedar or redwood to prevent chemicals from leaching into your soil.
Step 5: Fill with Soil
Filling your wood raised garden bed with soil is a pivotal step that sets the stage for successful plant growth and flourishing greenery. The quality and composition of the soil directly impact the health and productivity of your garden, making it essential to approach this task with care and attention to detail.
When selecting soil for your raised bed, opt for a high-quality, well-draining mix that provides a balanced environment for plant roots to thrive. A blend of topsoil, compost, and organic matter offers a nutrient-rich foundation that promotes robust plant growth. Consider the specific needs of the plants you intend to grow and tailor the soil mixture accordingly, ensuring it aligns with their preferred growing conditions.
As you fill the bed with soil, distribute it evenly and level it to create a uniform surface. Take care to avoid compacting the soil excessively, as this can hinder root development and water penetration. Aim for a loose, aerated soil structure that facilitates healthy root growth and allows for proper drainage.
Depending on the depth of your raised bed, you may need a substantial amount of soil to achieve the desired level. Be mindful of the volume required and plan accordingly to ensure you have an ample supply on hand. Consider using a wheelbarrow or garden cart to transport the soil to the construction site, making the process more efficient and manageable.
Once the bed is filled with soil, take a moment to appreciate the transformation that has taken place. The sight of the rich, fertile soil nestled within the sturdy wooden frame is a testament to the potential and promise of the garden bed. It's a canvas awaiting the colorful strokes of nature's palette, ready to be adorned with the vibrant hues of flowers, the lush foliage of herbs, or the bountiful yield of vegetables.
With the bed now filled with soil, you're poised to embark on the final phase of this rewarding journey – planting your garden and witnessing the beauty and abundance that will soon grace your outdoor sanctuary. As you prepare to bring your garden to life, take pride in the craftsmanship and dedication that have culminated in the creation of a captivating and nurturing space for plant growth.
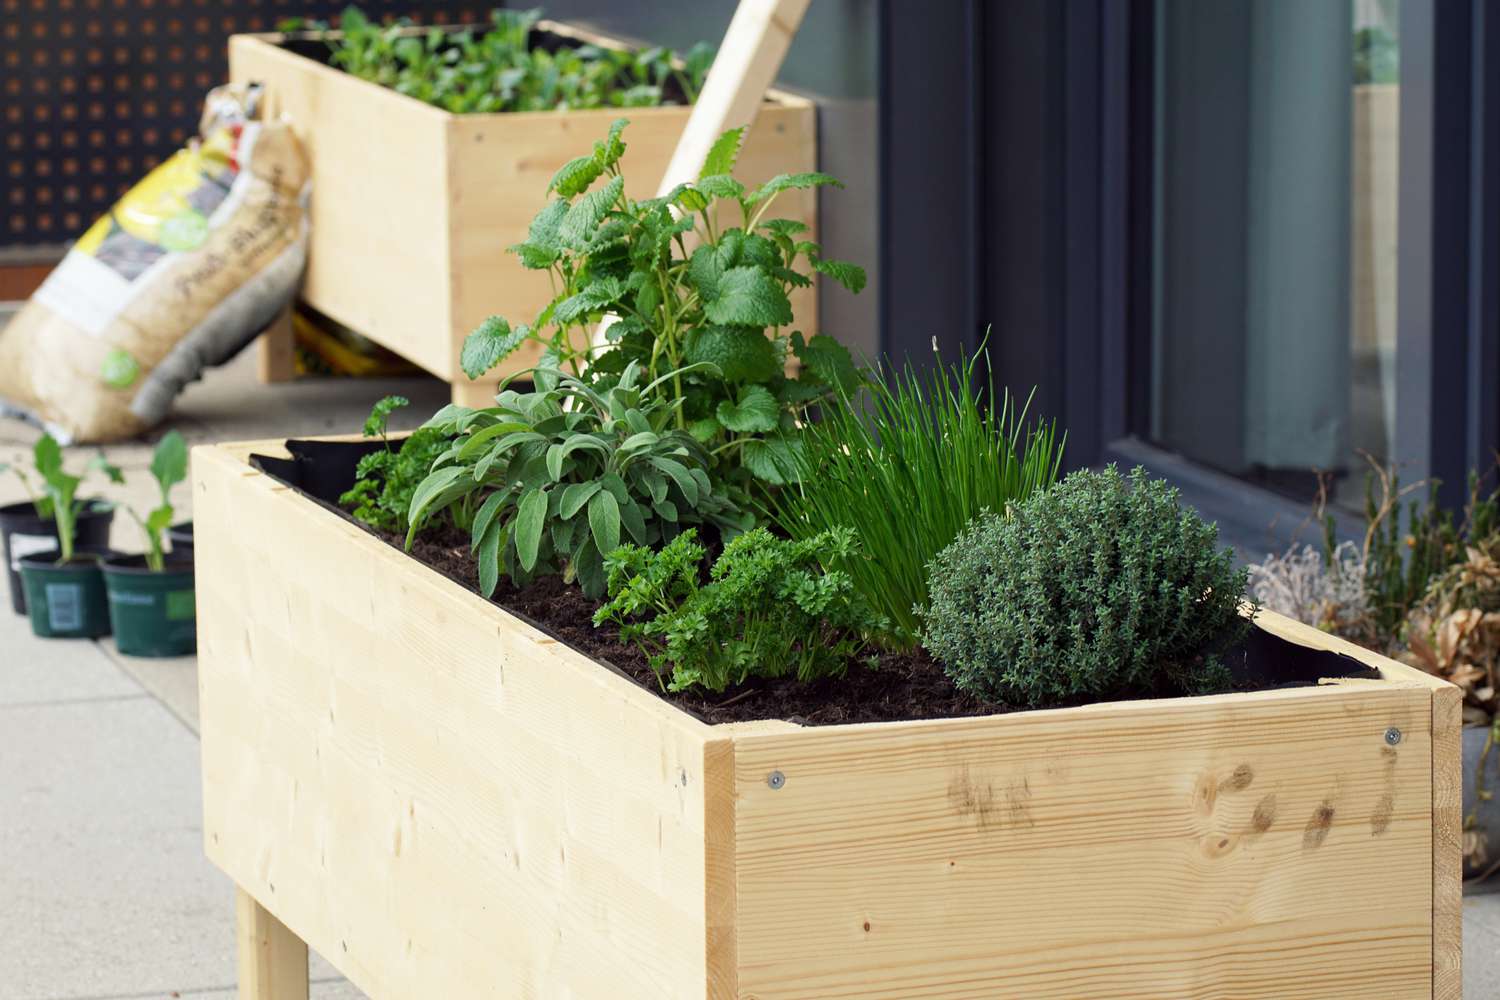
Step 6: Plant Your Garden
With the wood raised garden bed assembled and filled with nutrient-rich soil, the stage is set for the most gratifying phase of this endeavor – planting your garden. This step marks the transition from construction to cultivation, as you breathe life into the carefully crafted space and witness the transformation from a blank canvas to a thriving oasis of greenery and blooms.
Before delving into the planting process, take a moment to envision the garden of your dreams. Consider the types of plants that resonate with your preferences and the overall aesthetic you wish to achieve. Whether you envision a vibrant tapestry of flowers, a fragrant herb garden, or a bountiful array of vegetables, this is your opportunity to bring your vision to fruition.
Start by selecting high-quality plants or seeds from a reputable nursery or supplier. Choose varieties that are well-suited to the growing conditions in your area and align with the sunlight exposure and climate of your garden. If you're cultivating edible plants, such as vegetables or herbs, consider the culinary delights they will contribute to and the nourishment they will provide.
When positioning the plants within the garden bed, take into account their mature size and spacing requirements. Arrange them thoughtfully, considering their growth habits and the visual impact they will collectively create. Whether you opt for a structured layout or a more naturalistic arrangement, aim to achieve a harmonious balance that showcases the unique characteristics of each plant while contributing to the overall beauty of the garden.
As you plant each specimen, handle them with care, gently loosening the roots and ensuring they are positioned at the appropriate depth. Provide ample space for growth and consider the potential height and spread of the plants as they mature. As you place them in the soil, envision the future landscape of your garden, filled with vibrant colors, lush foliage, and the promise of a bountiful harvest.
Once the plants are nestled in their new home, water them thoroughly to help them establish roots and acclimate to their surroundings. Consider applying a layer of mulch to conserve moisture, suppress weeds, and insulate the soil, providing a nurturing environment for the newly planted garden.
As you stand back and admire the freshly planted garden bed, take pride in the transformation that has taken place. The culmination of your efforts has yielded a space teeming with potential and promise, ready to flourish under your attentive care. With each passing day, the garden will evolve, offering a spectacle of growth, beauty, and the simple joys of tending to a thriving ecosystem.
In the coming weeks and months, as you nurture your garden, observe the gradual unfurling of leaves, the emergence of blossoms, and the development of fruits and vegetables. Embrace the rhythm of nature as it unfolds within the confines of your wood raised garden bed, and revel in the satisfaction of witnessing the fruits of your labor come to fruition.
As you embark on this journey of cultivation, may your garden be a source of inspiration, tranquility, and delight, enriching your outdoor space and nourishing your soul with the boundless wonders of nature.
Conclusion
As we conclude this comprehensive guide to building a wood raised garden bed, it's evident that this DIY project offers a fulfilling and enriching experience for gardening enthusiasts and novices alike. From the initial stages of gathering materials and selecting the perfect location to the meticulous process of measuring, cutting, and assembling the wood, each step has contributed to the creation of a functional and visually appealing garden bed.
The journey culminates in the transformative act of filling the bed with nutrient-rich soil and planting a diverse array of flora, ushering in a new chapter of growth and vitality. The wood raised garden bed stands as a testament to the harmonious blend of craftsmanship and nature, offering a canvas for creativity and a sanctuary for plant life to thrive.
As you gaze upon the completed garden bed, brimming with the promise of blossoms, herbs, or vegetables, take pride in the craftsmanship and dedication that have brought this vision to life. The bed represents not only a physical structure but a space teeming with potential, ready to evolve into a vibrant tapestry of colors, scents, and flavors.
Embrace the journey of tending to your garden, nurturing it with care and attention as it undergoes the wondrous transformation from seedlings to mature plants. Witness the subtle nuances of growth, the emergence of blooms, and the joy of harvesting the fruits of your labor. The wood raised garden bed serves as a conduit for connection with nature, offering a sanctuary where the simple act of gardening becomes a source of inspiration and tranquility.
As you embark on this journey of cultivation, may your wood raised garden bed become a focal point of beauty and abundance, enriching your outdoor space and providing a haven for relaxation and contemplation. Let it stand as a testament to the enduring bond between human hands and the earth, where the act of nurturing a garden yields not only a bountiful harvest but also a profound sense of fulfillment and connection to the natural world.
In the seasons to come, may your wood raised garden bed flourish, offering a spectacle of life and vitality that enriches your surroundings and nourishes your spirit. Embrace the joys of gardening, and may your garden be a source of endless wonder and delight, a living testament to the transformative power of nature and the enduring rewards of cultivating a thriving ecosystem.
Frequently Asked Questions about How To Build A Wood Raised Garden Bed
Was this page helpful?
At Storables.com, we guarantee accurate and reliable information. Our content, validated by Expert Board Contributors, is crafted following stringent Editorial Policies. We're committed to providing you with well-researched, expert-backed insights for all your informational needs.


0 thoughts on “How To Build A Wood Raised Garden Bed”