Home>Gardening & Outdoor>Landscaping Ideas>How To Place Pavers On Grass
Landscaping Ideas
How To Place Pavers On Grass
Modified: October 18, 2024
Learn how to place pavers on grass with these landscaping ideas. Create a beautiful outdoor space with our step-by-step guide.
(Many of the links in this article redirect to a specific reviewed product. Your purchase of these products through affiliate links helps to generate commission for Storables.com, at no extra cost. Learn more)
Introduction
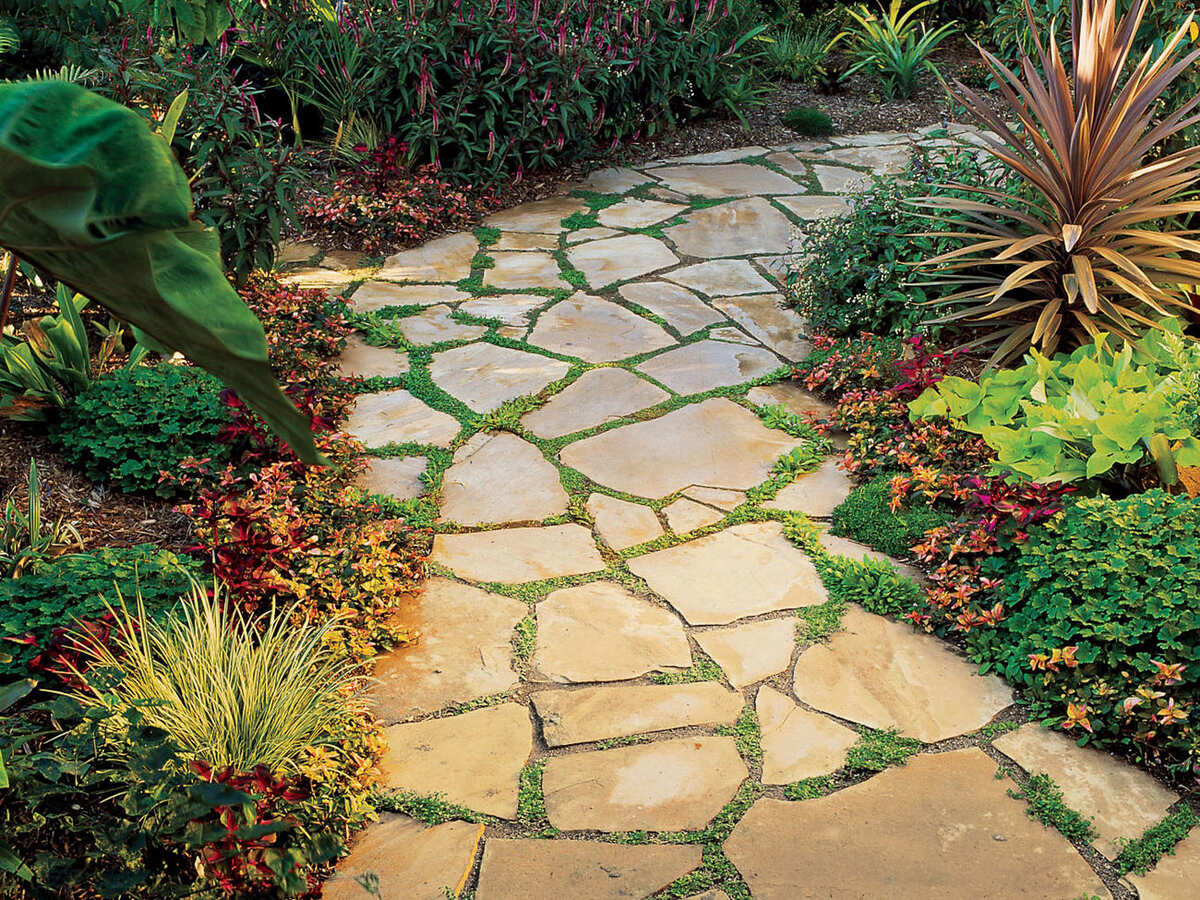
Welcome to the world of outdoor landscaping! If you’re looking to enhance the visual appeal of your yard or create a charming pathway through your garden, placing pavers on grass can be an excellent way to achieve both functionality and aesthetics. Whether you’re envisioning a cozy patio area for outdoor gatherings or a picturesque walkway to showcase your garden, this comprehensive guide will walk you through the process of placing pavers on grass, ensuring that your project is not only visually stunning but also structurally sound.
By following the steps outlined in this guide, you’ll be able to transform your outdoor space into a captivating oasis that seamlessly blends with the natural landscape. So, roll up your sleeves, gather your materials, and let’s dive into the rewarding journey of creating a stunning paver feature on your grassy terrain!
Key Takeaways:
- Transform your outdoor space with pavers on grass by gathering materials, preparing the area, laying the base, placing the pavers, filling the gaps, and compacting for a stunning and enduring result.
- Enhance your yard with pavers on grass by following steps to gather materials, prepare the area, lay the base, place the pavers, fill the gaps, and compact for a visually appealing and structurally sound outcome.
Read more: How To Remove Grass Between Pavers
Step 1: Gather Materials
Before embarking on your paver-placing venture, it’s essential to gather all the necessary materials and tools. Ensuring that you have everything at your disposal will streamline the process and prevent interruptions once you’ve commenced the project.
Here’s a comprehensive list of materials and tools you’ll need:
- Pavers: Select the type, size, and color of pavers that best complement your landscape and design preferences. Whether you opt for classic brick pavers, sleek concrete pavers, or natural stone pavers, ensure that they are suitable for use on grassy surfaces.
- Gravel: This will serve as the base for your pavers, providing stability and proper drainage. Choose a high-quality gravel that is well-suited for outdoor use and can withstand varying weather conditions.
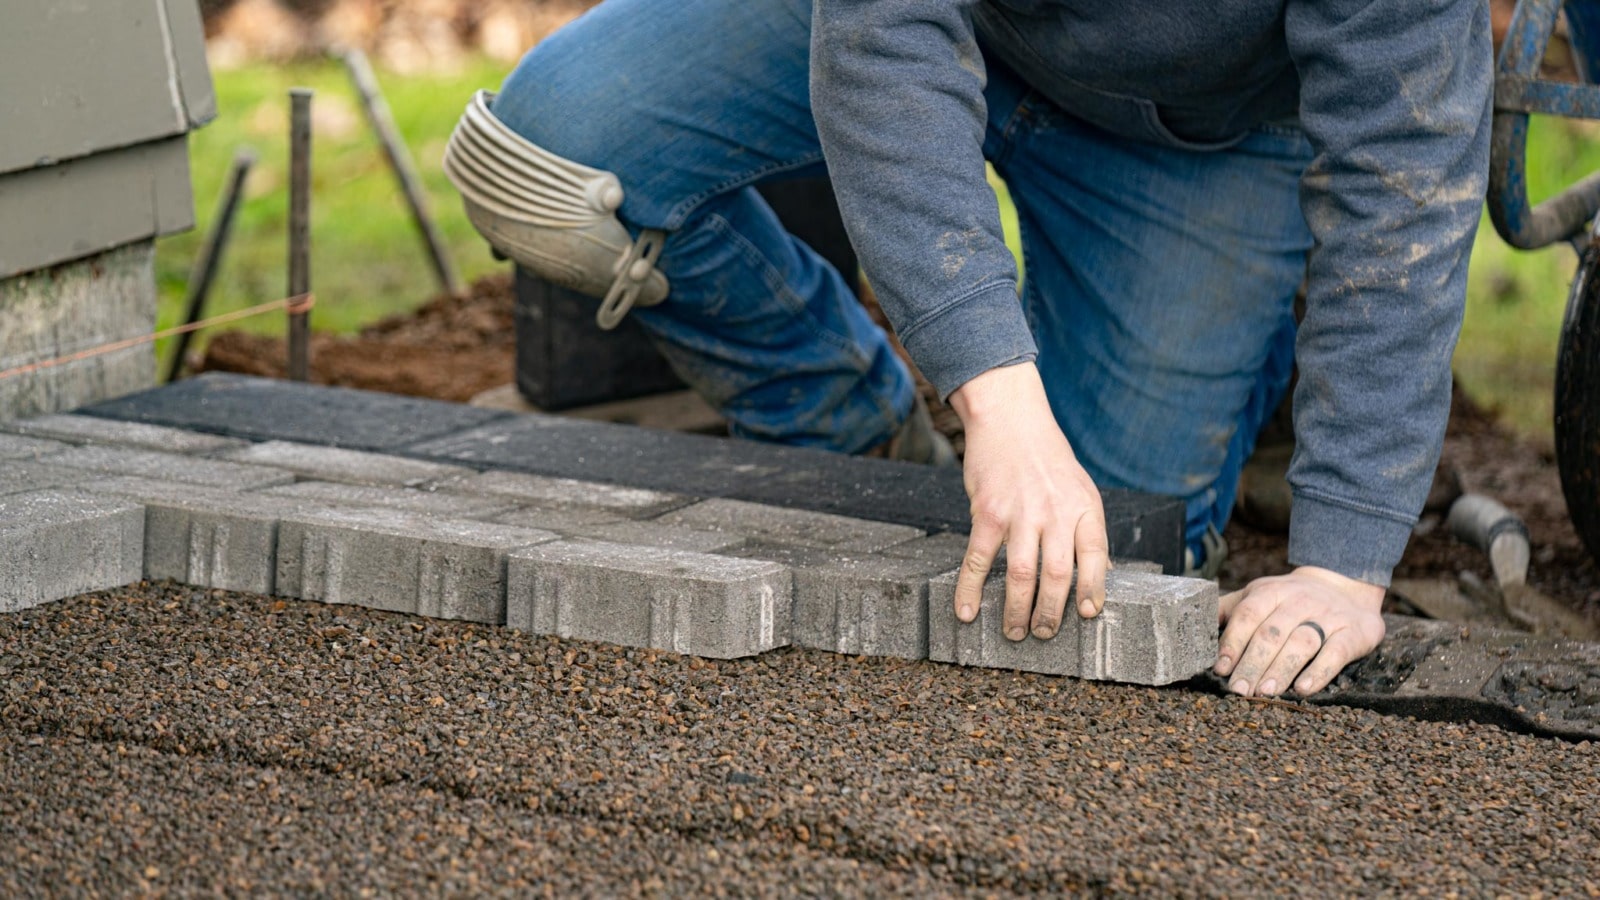
- Edging Material: To maintain the integrity of your paver installation, you’ll need edging material such as plastic or metal paver restraints. These will keep the pavers in place and prevent shifting over time.
- Landscape Fabric: Utilize landscape fabric to inhibit weed growth and promote long-term stability beneath the pavers.
- Shovel and Rake: These basic tools are essential for preparing the grassy area and distributing the base materials evenly.
- Plate Compactor: A plate compactor is crucial for compacting the base and pavers, ensuring a solid and level surface.
- Broom and Hose: These will be used for cleaning the pavers and completing the finishing touches once they are in place.
- Protective Gear: Prioritize safety by wearing gloves, protective eyewear, and sturdy footwear throughout the project.
By gathering these materials and tools, you’ll be well-equipped to proceed with confidence, knowing that you have everything needed to bring your paver placement project to fruition.
Step 2: Prepare the Area
Preparing the designated area is a crucial preliminary step that sets the foundation for a successful paver installation. By meticulously preparing the grassy surface, you’ll create an optimal environment for the pavers to thrive and endure. Follow these essential sub-steps to prepare the area effectively:
- Mark the Layout: Begin by outlining the area where the pavers will be placed. Use marking paint or stakes and string to define the boundaries, ensuring a clear visual guide for the installation process.
- Remove Sod and Vegetation: With a shovel, carefully remove the existing grass and any vegetation within the marked area. This step is vital for establishing a level surface and preventing organic growth beneath the pavers.
- Excavate the Soil: Dig to a depth that accommodates the gravel base and the thickness of the pavers. The depth will vary depending on the specific requirements of your project and the type of pavers being used. Aim for a uniform depth throughout the prepared area.
- Compact the Soil: Utilize a hand tamper to compact the excavated soil, creating a stable foundation for the subsequent layers. This step is essential for minimizing shifting and settling over time.
- Install Landscape Fabric: Lay landscape fabric over the compacted soil, extending it to cover the entire excavated area. This fabric will act as a barrier, inhibiting weed growth and promoting long-term stability beneath the pavers.
By diligently completing these preparation steps, you’ll establish a well-structured foundation that sets the stage for a seamless and enduring paver placement. With the area meticulously prepared, you’re ready to progress to the next phase of the installation process, laying the base for your pavers.
Step 3: Lay the Base
With the area meticulously prepared, it’s time to lay the base that will provide the essential support and stability for your pavers. The base layer serves as a critical component in ensuring the longevity and durability of your paver installation. Follow these fundamental sub-steps to effectively lay the base for your pavers:
- Add Gravel: Begin by evenly distributing a layer of gravel over the prepared area. The gravel should be spread to achieve a uniform depth, typically ranging from 2 to 4 inches, depending on the specific requirements of your project.
- Compact the Gravel: Utilize a plate compactor to firmly compact the gravel base. This process is essential for establishing a solid and level foundation that can withstand the weight of the pavers and promote proper drainage.
- Verify the Level: Use a long, straight board or a screed to confirm that the compacted gravel base is level and even across the entire area. Making necessary adjustments at this stage will contribute to the overall stability and uniformity of the paver surface.
- Add a Layer of Sand: Following the gravel base, distribute a layer of coarse sand over the compacted gravel. The sand layer should be approximately 1 inch in depth and serves as a cushioning and leveling agent for the pavers.
- Screed the Sand: Use a straight board or screed to evenly distribute and level the sand layer. This step is crucial for creating a smooth and uniform surface that facilitates the placement of the pavers.
By meticulously laying the base according to these guidelines, you’ll establish a solid and level foundation that optimally supports the pavers. With the base in place, you’re now prepared to embark on the exciting phase of placing the pavers onto the prepared grassy surface.
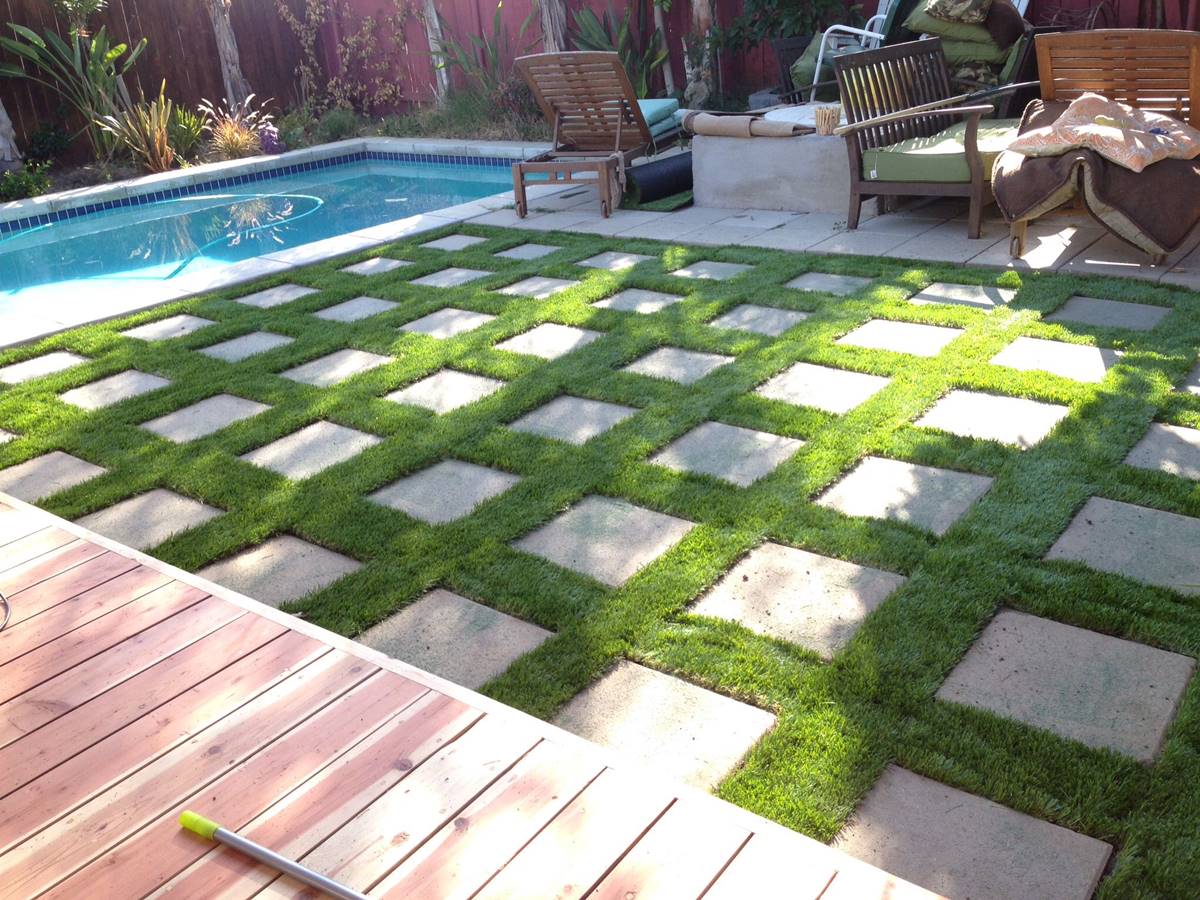
Before placing pavers on grass, make sure to prepare the area by removing the grass and digging a base for the pavers. Use a layer of sand or gravel to create a stable foundation for the pavers to sit on.
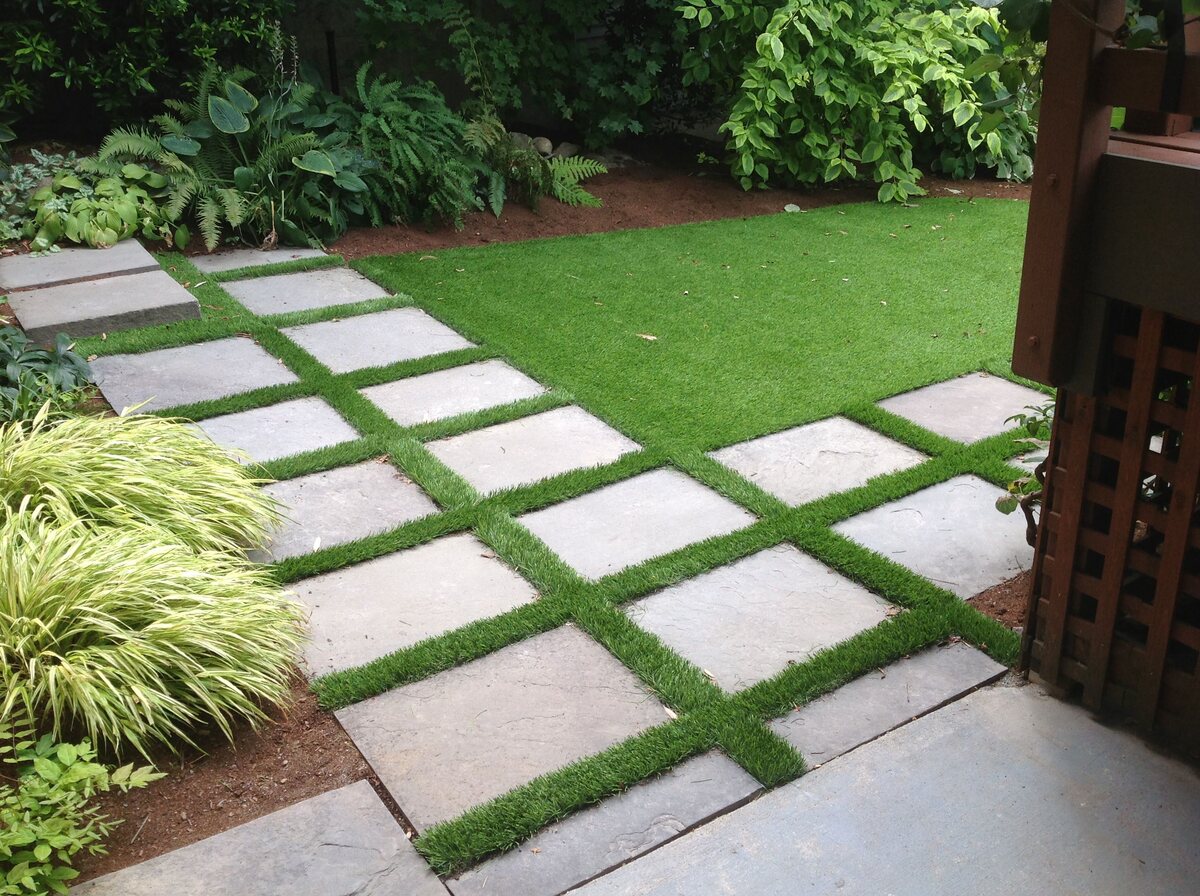
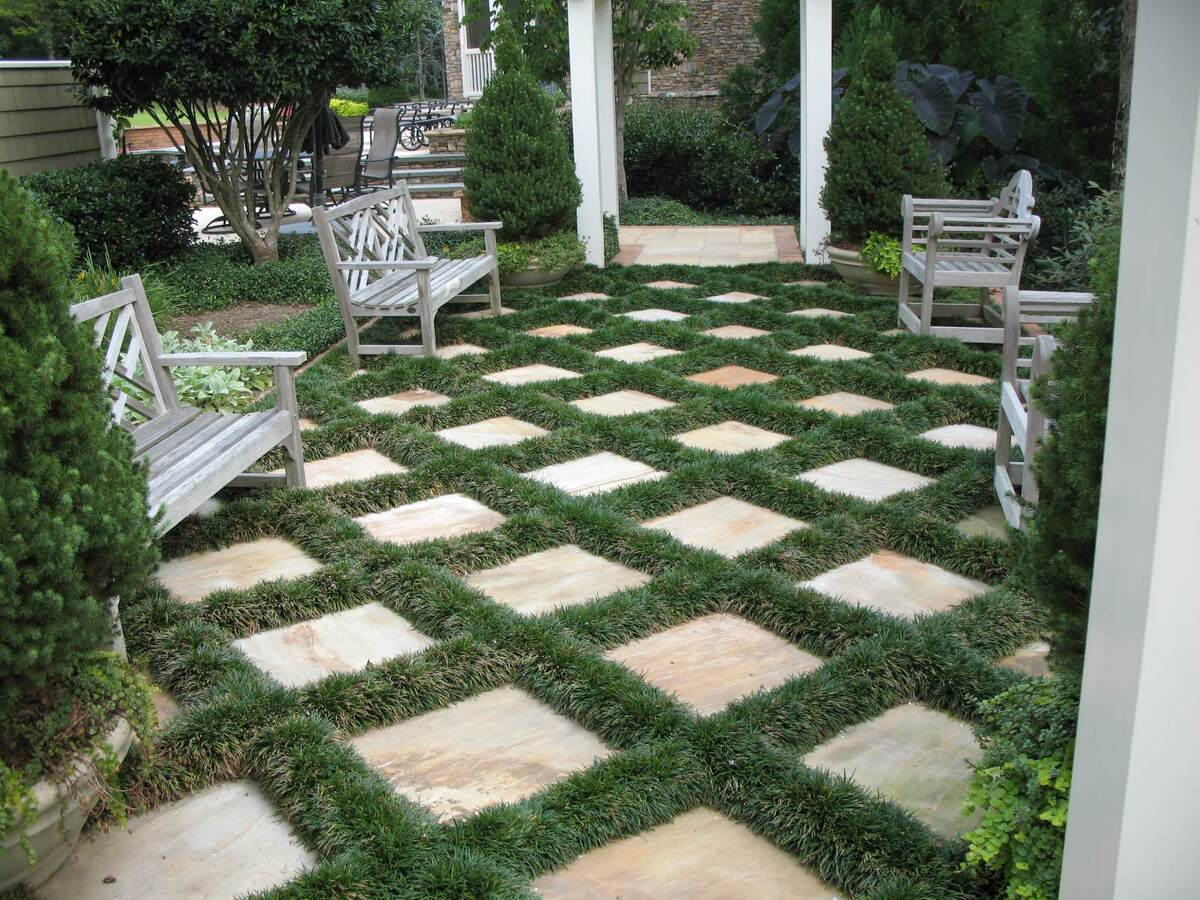
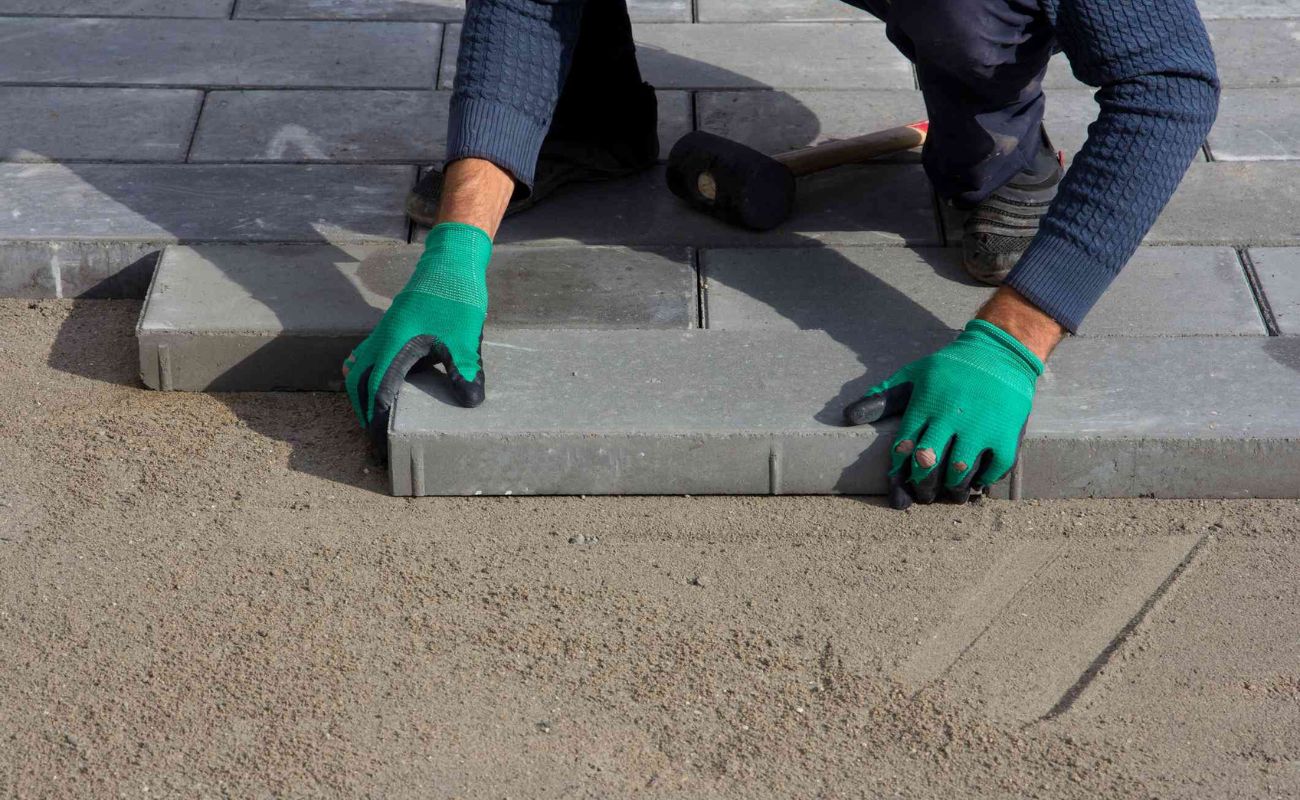
Step 4: Place the Pavers
As you approach the pivotal stage of placing the pavers, meticulous attention to detail and precision will ensure an aesthetically pleasing and structurally sound outcome. Follow these essential sub-steps to effectively place the pavers onto the prepared grassy surface:
- Begin at the Edge: Commence the paver placement at one edge of the prepared area, working from a fixed point such as a patio or existing structure. This approach will provide a clear starting reference and guide the alignment of the pavers.
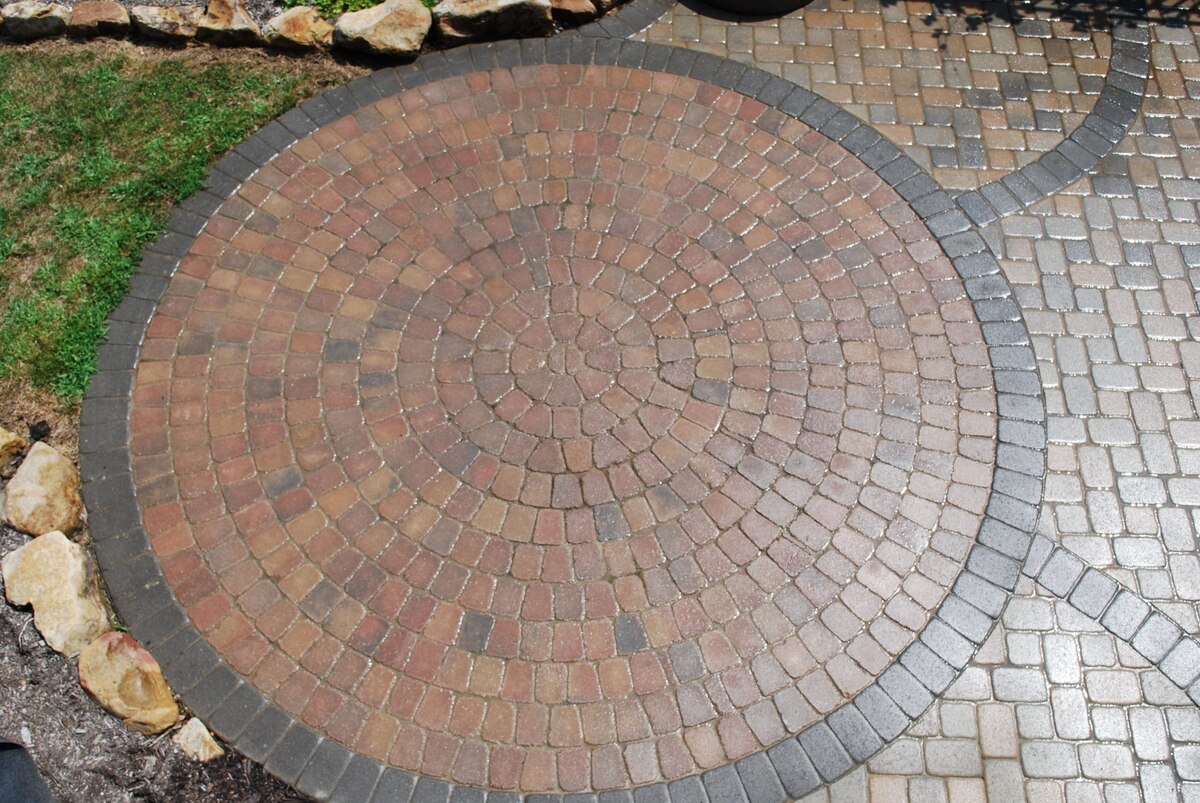
- Adhere to the Chosen Pattern: If you’re utilizing a specific pattern or design, such as herringbone or basket weave, adhere to the predetermined layout as you place the pavers. Ensuring consistency in the pattern will contribute to a visually appealing and cohesive finished surface.
- Set the Pavers in Place: Carefully position each paver onto the sand bed, gently pressing it down to achieve a level and snug fit. Take care to maintain uniform spacing between the pavers, utilizing spacers if necessary to achieve the desired gap width.
- Check for Alignment and Level: Regularly assess the alignment and levelness of the placed pavers using a straight edge or level. Making real-time adjustments will help maintain a uniform and visually pleasing surface as the installation progresses.
- Cut Pavers as Needed: If the layout requires partial pavers to fit within the designated area, use a paver saw or chisel to accurately cut the pavers to the required dimensions. This step allows for a seamless integration of the pavers, ensuring a polished and custom fit.
By meticulously following these sub-steps, you’ll seamlessly position the pavers, creating a visually captivating and structurally resilient surface that harmonizes with the surrounding landscape. With the pavers in place, you’re one step closer to completing your transformative paver placement project.
Read more: What Is A Paver Patio
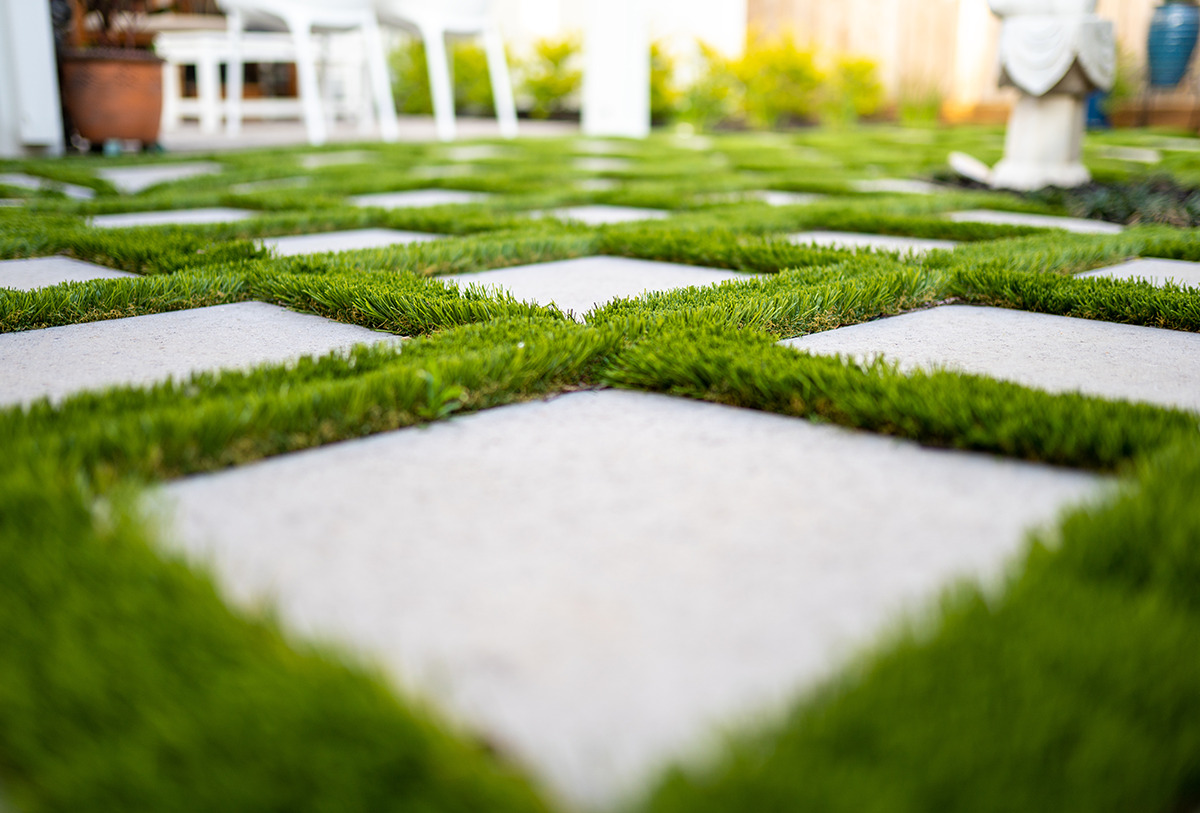
Step 5: Fill the Gaps
With the pavers securely in place, the next critical step involves filling the gaps between the pavers to enhance stability and visual cohesion. Follow these essential sub-steps to effectively fill the gaps and achieve a polished finish:
- Choose Jointing Material: Select a suitable jointing material, such as polymeric sand or traditional paver sand, to fill the gaps between the pavers. The chosen material should align with the aesthetic and functional requirements of your project.
- Apply the Jointing Material: Carefully pour the selected jointing material over the paver surface, ensuring that it evenly fills the gaps and covers the entire area. Use a broom or brush to work the material into the joints, allowing for a thorough and uniform application.
- Compact the Jointing Material: Utilize a plate compactor or hand tamper to gently compact the jointing material into the gaps between the pavers. This process promotes stability and helps secure the pavers in position.
- Remove Excess Material: After compacting the jointing material, use a broom or brush to sweep away any excess material from the paver surface. This will reveal the finished gaps and prevent the accumulation of surplus jointing material.
- Apply a Sealant (Optional): If desired, consider applying a sealant over the completed paver surface to enhance durability and resist weed growth. Select a high-quality sealant suitable for the specific type of pavers and jointing material used in your project.
By diligently following these sub-steps, you’ll achieve a cohesive and visually appealing paver surface with filled gaps that contribute to the overall stability and longevity of the installation. With the gaps filled and the surface refined, your paver placement project is nearing its completion, leaving you with a stunning and functional addition to your outdoor space.
Step 6: Compact the Pavers
As the final phase of your paver placement project, compacting the pavers is a crucial step that enhances the stability and longevity of the entire installation. Follow these essential sub-steps to effectively compact the pavers and ensure a solid and enduring surface:
- Prepare the Plate Compactor: Prior to compacting the pavers, ensure that the plate compactor is in optimal working condition. Verify that the plate is clean and free of debris, and that the compactor is suitable for use on the specific type of pavers you’ve installed.
- Begin Compaction: Starting from one edge of the paver surface, carefully maneuver the plate compactor across the entire area, applying even pressure to compact the pavers and the jointing material. Work methodically to cover the entire surface, overlapping each pass slightly for comprehensive compaction.
- Repeat the Compaction Process: After completing the initial compaction, make a second pass over the paver surface to ensure thorough and uniform compaction. This additional step contributes to the overall stability and resilience of the paver installation.
- Assess the Surface: Upon completing the compaction process, visually inspect the paver surface to ensure that the pavers and jointing material are uniformly settled and secure. Address any areas that may require additional compaction to achieve the desired stability.
- Perform Final Clean-Up: Use a broom or brush to sweep away any residual debris or jointing material from the paver surface. This final clean-up step will reveal the polished and compacted paver installation, ready to showcase its enduring beauty and functionality.
By meticulously following these sub-steps, you’ll effectively compact the pavers, creating a solid and resilient surface that can withstand the demands of outdoor use and maintain its visual allure for years to come. With the pavers compacted and the installation process concluded, you can take pride in the transformation of your outdoor space and the creation of a captivating paver feature on your grassy terrain.
Conclusion
Congratulations on successfully completing the transformative journey of placing pavers on grass! Through meticulous preparation, precise placement, and thorough compaction, you’ve created a stunning and functional addition to your outdoor space. As you admire the beautifully arranged pavers seamlessly integrated with the natural landscape, you can take pride in the enduring craftsmanship and visual appeal of your accomplishment.
By following the comprehensive steps outlined in this guide, you’ve not only created a captivating paver surface but also gained valuable insights into the intricate process of paver placement. Your newfound expertise empowers you to embark on future landscaping endeavors with confidence and creativity, knowing that you have the knowledge and skills to bring your outdoor visions to life.
Whether you’ve established a charming patio area for outdoor gatherings, a picturesque walkway to showcase your garden, or a delightful focal point within your landscape, the placement of pavers on grass has undoubtedly enhanced the allure and functionality of your outdoor environment.
As you bask in the satisfaction of a job well done, take a moment to appreciate the enduring beauty and versatility of your newly placed pavers. Their seamless integration with the grassy terrain not only elevates the aesthetic appeal of your outdoor space but also provides a durable and inviting surface for leisure and enjoyment.
Embrace the joy of outdoor living as you revel in the artful fusion of nature and craftsmanship exemplified by your paver placement project. Your dedication and attention to detail have yielded a captivating and enduring feature that enriches the ambiance of your outdoor sanctuary.
With the completion of this project, you’ve not only enhanced your outdoor space but also embarked on a rewarding journey of creativity, craftsmanship, and the art of harmonizing human design with the natural world. Your paver placement project stands as a testament to your ability to transform visions into tangible, enduring beauty.
Celebrate your achievement, savor the tranquil allure of your enhanced outdoor space, and revel in the timeless elegance of your newly placed pavers on grass.
Now that you've mastered placing pavers on grass, why not spruce up your garden's boundaries with stylish yet practical designs? Our guide on garden fence ideas offers creative solutions tailored to any landscaping needs. Dive into this treasure of inspiration and transform your outdoor space into a stunning, private oasis.
Frequently Asked Questions about How To Place Pavers On Grass
Was this page helpful?
At Storables.com, we guarantee accurate and reliable information. Our content, validated by Expert Board Contributors, is crafted following stringent Editorial Policies. We're committed to providing you with well-researched, expert-backed insights for all your informational needs.


0 thoughts on “How To Place Pavers On Grass”