Articles
How To Install A Walkway With Pavers
Modified: January 6, 2024
Learn how to install a beautiful walkway using pavers with our informative articles. Get step-by-step instructions and expert advice for a successful DIY project.
(Many of the links in this article redirect to a specific reviewed product. Your purchase of these products through affiliate links helps to generate commission for Storables.com, at no extra cost. Learn more)
Introduction
Installing a walkway with pavers is a great way to enhance the beauty and functionality of your outdoor space. Whether you want to add a path to your garden, create a stylish entrance to your home, or connect different areas of your yard, a paver walkway offers durability and aesthetic appeal. In this comprehensive guide, we will walk you through the steps to install a walkway with pavers, from planning and preparation to finalizing the finishing touches.
Before embarking on your project, it is essential to have a clear vision of your desired walkway design. Consider factors such as the pathway’s function, design style, and the overall landscape aesthetic. This will help you make informed decisions throughout the installation process and ensure a result that aligns with your goals.
Additionally, be sure to check local regulations and obtain any necessary permits, as some areas may have specific guidelines for walkway construction. It is always best to start your project with the right knowledge and ensure compliance with any applicable rules or codes.
Now that you are prepared and ready to transform your outdoor space, let’s dive into the step-by-step process of installing a walkway with pavers. By following these guidelines, you can create a beautiful and functional walkway that will enhance your property’s value and enjoyment for years to come.
Key Takeaways:
- Transform your outdoor space with a stunning paver walkway by following a comprehensive step-by-step guide. From planning and preparation to final finishing touches, create a durable and visually appealing addition to your property.
- Enhance the functionality and aesthetic appeal of your outdoor oasis by installing a paver walkway. Enjoy the process of transforming your space and take pride in the value it adds to your property.
Step 1: Planning and Preparation
Before you begin any construction project, it is crucial to plan and prepare accordingly. This step will help you avoid potential pitfalls and ensure a smooth installation process for your paver walkway. Here are some key aspects to consider during the planning and preparation phase:
- Design and Layout: Start by visualizing the desired layout and design of your walkway. Consider factors such as the purpose of the walkway, the shape, size, and any distinguishing features you want to incorporate. Sketching out your ideas on paper or using design software can provide a clearer vision of your project.
- Pathway Dimensions: Measure and determine the dimensions of your walkway. This includes the width, length, and any desired curves or angles. It is essential to ensure that the pathway is wide enough to accommodate foot traffic comfortably.
- Material Selection: Choose the type of paver you want to use for your walkway. Pavers come in various sizes, shapes, colors, and materials, such as concrete, brick, or natural stone. Consider the aesthetic appeal, durability, and maintenance requirements of each material to make an informed decision.
- Site Assessment: Evaluate the area where you plan to install the walkway. Take note of any slopes, drainage issues, or existing structures that may affect the installation. It is important to address any potential obstacles or considerations before proceeding.
- Tools and Materials: Make a list of the tools and materials you will need for the project, including shovels, a wheelbarrow, a level, a compactor, and safety equipment. Gathering these items ahead of time will save you trips to the hardware store during the installation.
- Budgeting: Determine your budget for the walkway project. Consider the cost of materials, tools, and any additional expenses, such as hiring professional help or renting equipment. Having a clear budget will help you make wise choices and stay within your financial means.
By thoroughly planning and preparing for your paver walkway installation, you can ensure that the project runs efficiently and successfully. This step will set the foundation for a stunning and long-lasting addition to your outdoor space.
Step 2: Gather Materials and Tools
Now that you have completed the planning and preparation phase, it’s time to gather all the necessary materials and tools for your paver walkway installation. Having everything at your disposal before you begin will streamline the process and prevent delays. Here’s a list of the essential items you will need:
- Pavers: Purchase the desired type and quantity of pavers for your walkway. Consider factors such as the size, shape, and color that align with your design vision. Order a few extra pavers to account for any breakage or mistakes during installation.
- Base Material: Depending on your project requirements, you may need base material such as gravel, crushed stone, or sand. This material serves as a foundation for your walkway, providing stability and drainage. Calculate the required amount based on the dimensions of your walkway.
- Edging Material: Edging helps contain the pavers and maintain the walkway’s shape. Choose a suitable edging material, such as plastic, metal, or concrete, based on your design preferences and durability needs.
- Leveling and Compacting Tools: A leveling tool, such as a screed board or a long straightedge, will ensure that your walkway is even and flat. Additionally, a compactor or tamper is necessary to compact the base material and create a firm surface.
- Cutting Tools: If you anticipate the need to cut pavers to fit specific areas or curves, acquire a cutting tool such as a paver splitter or a wet saw. These tools will enable you to achieve precise cuts and ensure a professional-looking installation.
- Work Gloves and Safety Gear: Protect your hands and body during the installation process by wearing work gloves and appropriate safety gear, including safety glasses and sturdy footwear.
- Additional Equipment: Depending on the scope of your project, you may need additional tools such as a wheelbarrow for transporting materials, a garden hose for water usage, and a broom for cleaning the paver joints.
- Other Materials: Don’t forget to gather other necessary materials such as landscape fabric, jointing sand, and any adhesive or sealant if required for your specific project.
Once you have collected everything on your materials and tools checklist, ensure that they are easily accessible and organized at your worksite. Having everything in one place will save you time and energy as you progress through the installation steps. With all the necessary materials and tools at hand, you are ready to move forward to the next phase of the walkway installation process.
Step 3: Clear and Level the Area
With the materials and tools gathered, it’s time to move on to the next step of installing your paver walkway: clearing and leveling the area. This critical stage sets the foundation for a stable and uniform surface for your walkway. Here’s how to clear and level the area:
- Remove any existing obstacles: Begin by clearing the area of any vegetation, rocks, debris, or other obstacles that may interfere with the installation process. This includes pulling out weeds, trimming overgrown grass or plants, and removing any existing walkway materials.
- Mark the boundaries: Use string lines and stakes to mark the boundaries of your walkway and establish the desired width and shape. This will provide a guide to follow during the excavation and leveling process.
- Excavate the area: Use a shovel or a mini excavator to remove the top layer of soil in the designated walkway area. Excavate to a depth that accommodates the base material and paver thickness, typically about 6-8 inches for a standard walkway. Ensure that the excavation is even throughout the entire pathway.
- Assess the slope: Check the slope or gradient of the excavated area to allow for proper drainage. It is recommended to have a slight slope away from any structures or towards a designated drainage area. Use a level and a long straightedge to ensure a consistent slope along the walkway.
- Compact the soil: After excavating, use a hand tamper or a plate compactor to compact the soil in the area. This step ensures a firm and stable base for the walkway. Compact the soil thoroughly, paying extra attention to any areas that may be prone to settling or erosion.
- Check for evenness: Use a level to check the evenness of the compacted soil. Make adjustments as needed to ensure a level surface throughout the entire walkway area.
Clearing and leveling the area is an essential step in the installation process, as it provides a solid foundation for your walkway. By following these guidelines, you will create a smooth and even surface to support the pavers and ensure a visually appealing end result. Once this step is complete, you are ready to proceed to the next stage of installing edging for your walkway.
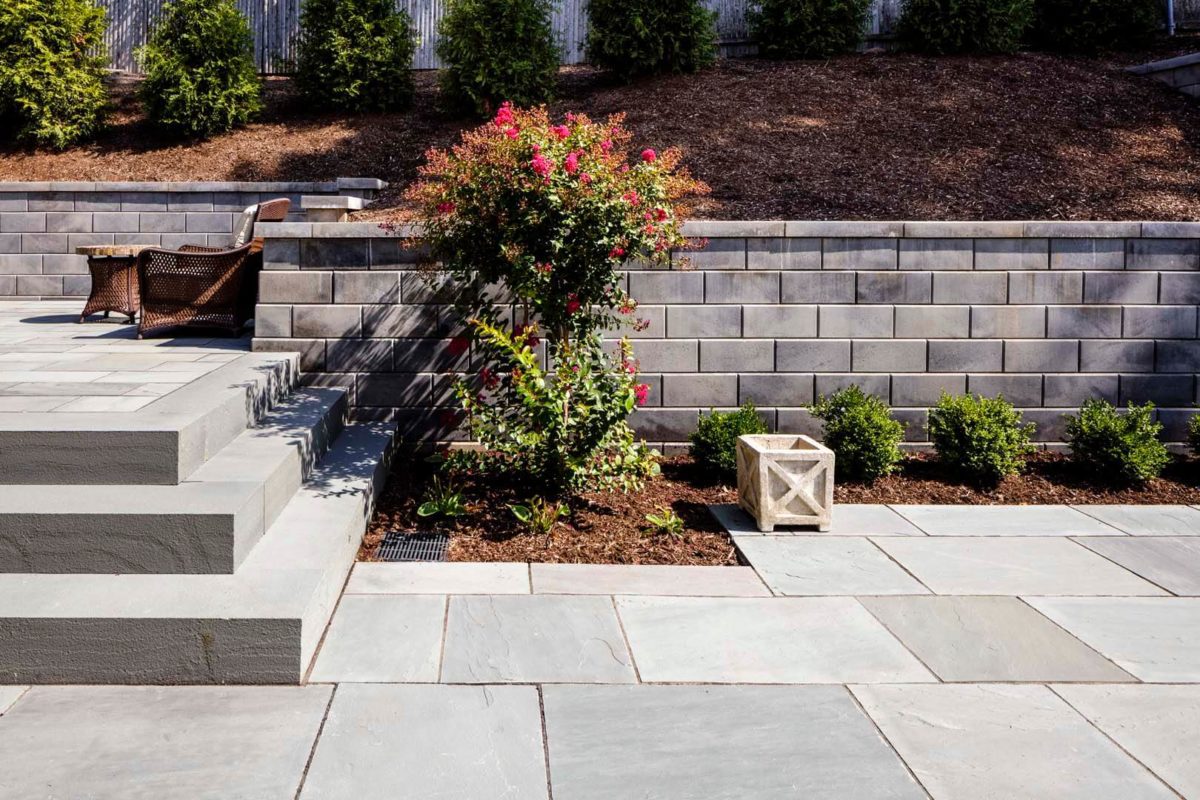
Step 4: Install Edging
Once the area has been cleared and leveled, it’s time to move on to the next step of installing your paver walkway: installing edging. Edging serves as a border, containing the pavers and providing stability and definition for your walkway. Here’s how to install edging:
- Choose the type of edging: There are various options for edging materials, including plastic, metal, or concrete. Select a type of edging that complements your design preferences and provides the desired level of durability. Measure and determine the amount of edging required based on the dimensions of your walkway.
- Prepare the area: Clear any debris or remaining loose soil from the walkway area. Ensure that the edges of the pathway are smooth and even, removing any uneven soil or rocks.
- Place the edging: Begin by laying out the edging material along the borders of the walkway. Use a rubber mallet or a hammer to insert stakes or connectors into the ground to secure the edging in place. Ensure that the edging is flush with the top of the pavers to provide a clean and professional appearance.
- Connect multiple pieces: If your walkway requires multiple sections of edging, connect them securely according to the manufacturer’s instructions. This will maintain the continuity and structure of your walkway.
- Check for evenness: Use a level to ensure that the edging is straight and level along the entire walkway. Make adjustments as needed to maintain a consistent height and alignment.
- Backfill and compact: Fill in the space between the edging and the excavated area with soil or sand. This will provide additional stability for the edging and prevent movement. Compact the backfilled material using a hand tamper or a plate compactor to create a firm and stable border for your walkway.
By installing edging, you create a defined border for your paver walkway, enhancing its appearance and functionality. The edging helps keep the pavers in place and prevents them from shifting or spreading over time. Once the edging is securely installed, you are ready to move on to the next step of laying out the pavers for your walkway.
Read more: How To Build A Paver Walkway On A Slope
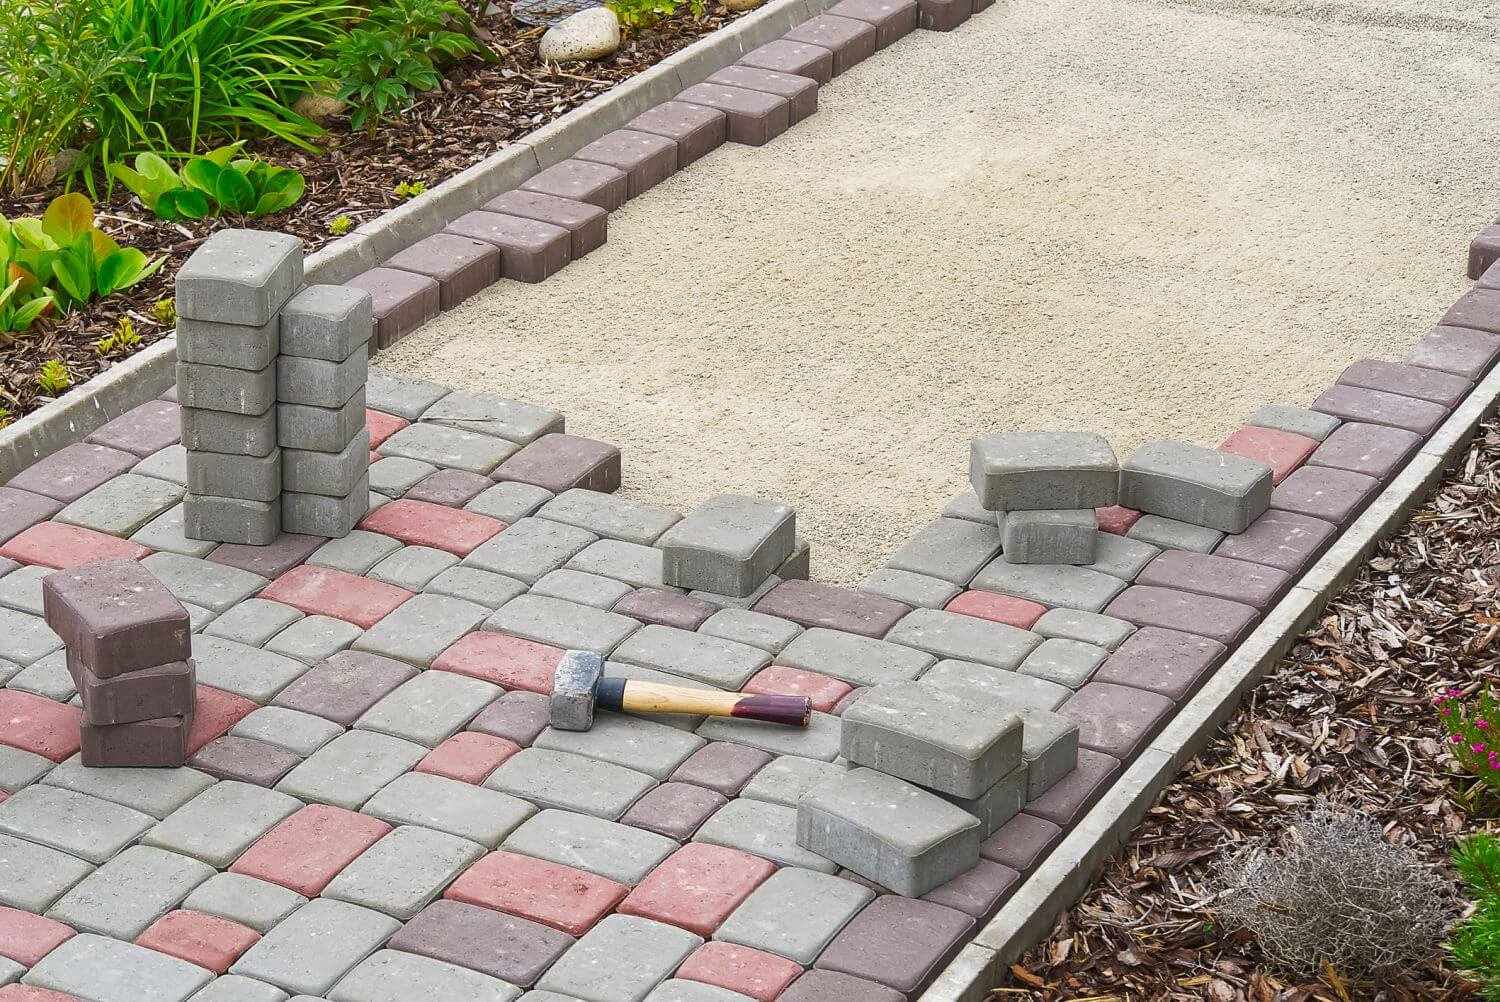
Step 5: Lay Out the Pavers
With the edging in place, it’s time to start laying out the pavers for your walkway. This step allows you to visualize the final look of the walkway and make any necessary adjustments before proceeding with the installation. Here’s how to lay out the pavers:
- Start from one end: Begin laying out the pavers from one end of the walkway. Place the first paver directly against the edging, ensuring a snug fit. This will serve as the starting point for the rest of the pavers.
- Create uniform spacing: Use plastic spacers or your finger to create consistent spacing between each paver. The size of the spacer will depend on the desired gap between the pavers, typically ranging from 1/8 inch to 1/4 inch. This spacing allows for jointing material to be added later.
- Stay aligned: As you lay each paver, ensure that its edges are in line with the adjacent pavers. Use a level or a straightedge to check for evenness and adjust as necessary. This step is crucial for achieving a professional and visually appealing walkway.
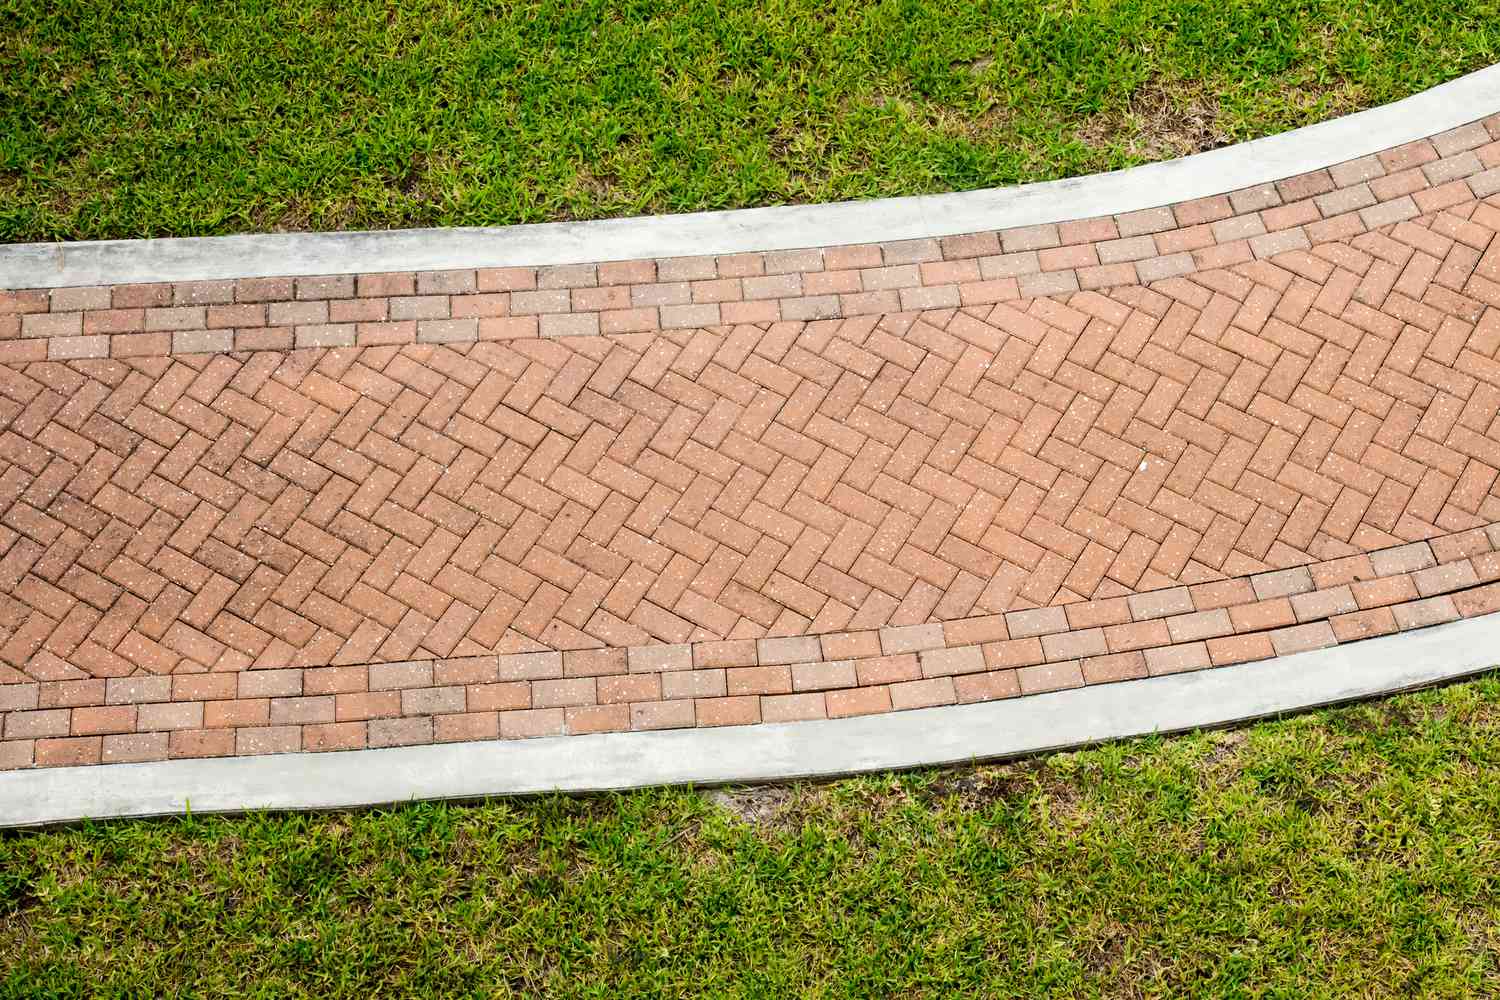
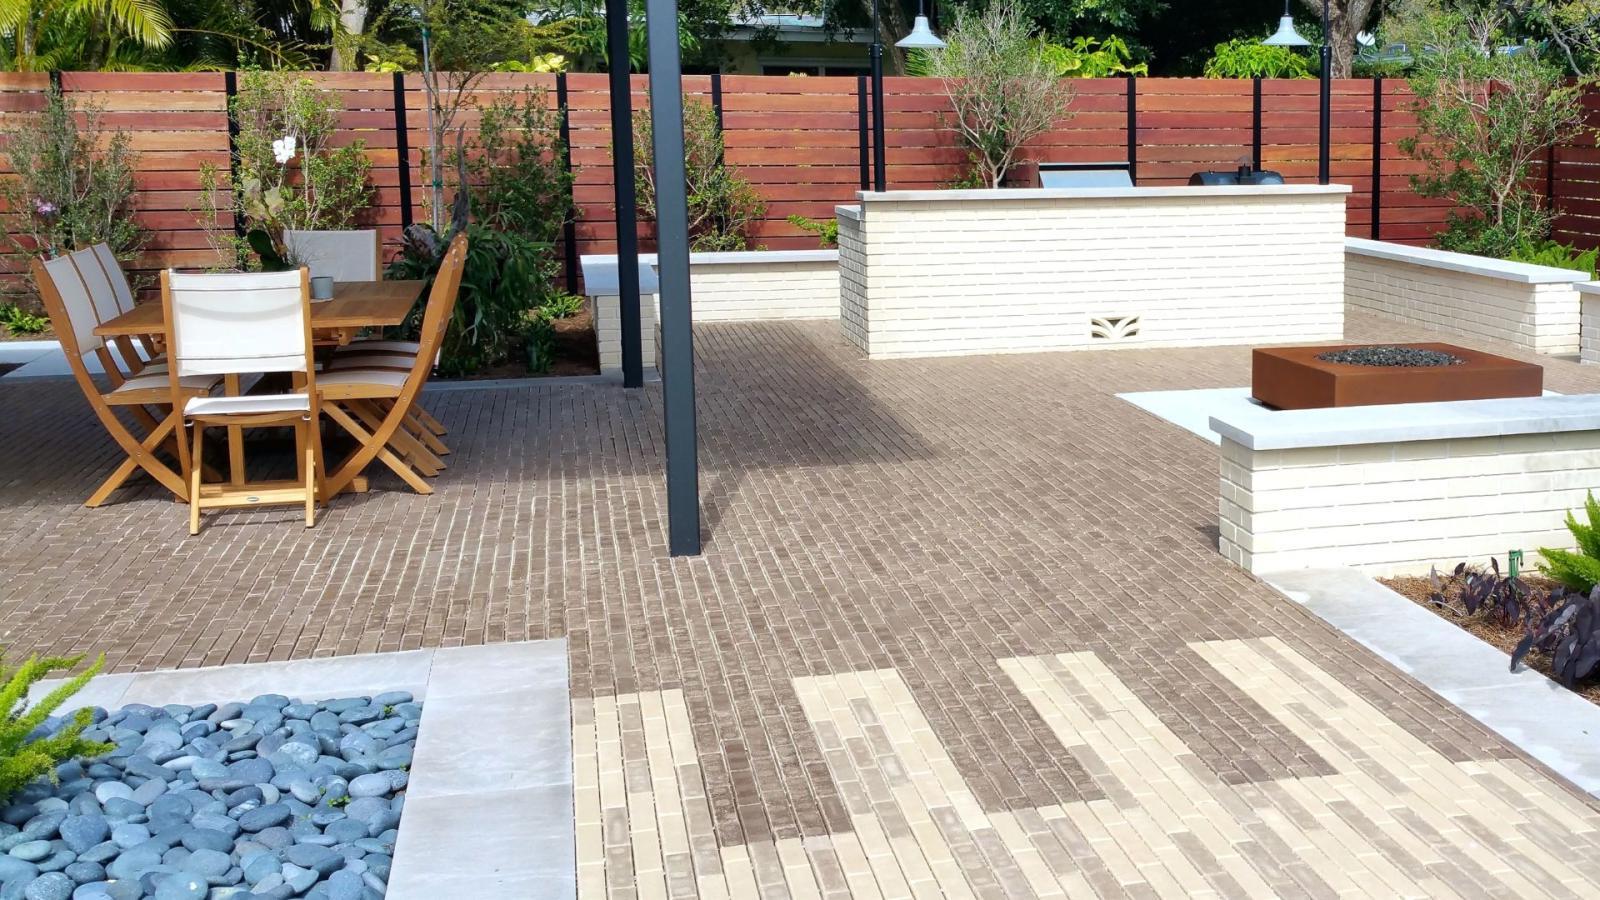
- Create patterns: Consider creating different patterns or designs with your pavers to add visual interest to the walkway. For example, you can alternate the direction of the pavers, create a herringbone pattern, or incorporate different colors or sizes for a unique look. Experiment with different layouts to find the most appealing arrangement.
- Make adjustments: During the layout process, you may need to make adjustments to ensure a proper fit. This can involve cutting pavers to fit specific areas or curves using a paver splitter or a wet saw. Take measurements carefully and make precise cuts to maintain the integrity of the layout.
- Step back and assess: Once all the pavers are laid out, step back and assess the overall look of the walkway. Check for any unevenness, misalignments, or areas that need further adjustment. This is your opportunity to make any necessary changes or tweaks before proceeding to the next step.
Laying out the pavers allows you to visualize the final result and make any necessary refinements. Take your time during this step to ensure the pavers are correctly positioned and aligned. Once you are satisfied with the layout, you are ready to move on to the next phase of cutting pavers if necessary.
Before starting to install a walkway with pavers, make sure to properly prepare the base by excavating and compacting the soil to ensure a stable foundation for the pavers.Step 6: Cut Pavers if Necessary
In some cases, you may need to cut pavers to fit specific areas or curves in your walkway. This step allows you to achieve a precise and tailored fit, ensuring a seamless and professional-looking installation. Here’s how to cut pavers if necessary:
- Measure carefully: Take accurate measurements of the space where you need to cut the pavers. Use a tape measure or a straightedge to determine the required size and shape.
- Mark the paver: Transfer the measurements onto the paver, clearly marking the cutting line. Use a pencil or a marker to ensure visibility during the cutting process.
- Choose a cutting method: There are different methods you can use to cut pavers, depending on the quantity and complexity of the cuts. Common cutting tools include a paver splitter, a chisel and hammer, or a wet saw. Select the most appropriate tool for your specific needs.
- Follow safety precautions: When using cutting tools, always prioritize safety. Wear protective goggles and gloves to protect your eyes and hands from debris. Adhere to the manufacturer’s instructions for the specific cutting tool you are using.
- Make the cuts: Using the chosen cutting tool, carefully follow the marked cutting lines to create the desired shape or size of the paver. Take your time and apply steady pressure to ensure clean and accurate cuts.
- Smooth rough edges: After making the cuts, use a masonry file or sandpaper to smooth any rough or jagged edges of the cut pavers. This will ensure a seamless fit with the rest of the walkway.
- Test the fit: Once the cuts and smoothing are complete, test the cut paver in the designated area of the walkway to ensure it fits properly. Make any necessary adjustments or refinements as needed before proceeding.
By cutting the pavers to fit specific areas or curves, you can achieve a customized and professional finish for your walkway. Take your time during this step to ensure accurate measurements and precise cuts. With the cut pavers ready, you are now prepared to move on to the next phase of installing the base for your walkway.
Step 7: Install the Base
With the pavers laid out and any necessary cuts made, it’s time to move on to installing the base for your walkway. The base provides stability, support, and proper drainage for the pavers. Here’s how to install the base:
- Prepare the base material: Depending on your project requirements, you will need a base material such as gravel, crushed stone, or sand. Calculate the required amount based on the dimensions of your walkway and ensure a consistent depth of about 4-6 inches.
- Remove the pavers: Carefully remove the pavers from the walkway area, setting them aside in an organized manner. This will create a clean workspace for installing the base.
- Excavate the base area: Dig out the area to the required depth for the base material. Ensure that the excavation is even and well-compacted.
- Add the base material: Pour the base material into the excavated area. Use a rake or shovel to spread the material evenly, taking care to maintain a consistent depth. Compact the base material using a plate compactor or tamper to create a firm and level surface.
- Check for evenness: Use a level or a straightedge to check the evenness of the base. Make any necessary adjustments to ensure a flat surface throughout the entire walkway area.
- Moisten and compact: Spray water lightly over the base material to help it settle and compact further. Use a plate compactor or tamper to compact the base material again, ensuring it is well-compressed and stable.
- Reinstall the pavers: Begin placing the pavers back in their designated positions on the compacted base. Gently press each paver into the base material, ensuring a snug fit and maintaining the desired pattern or layout of the walkway.
- Check for level and alignment: Use a level or a straightedge to check the levelness and alignment of the pavers. Make any necessary adjustments by adding or removing base material below individual pavers as needed.
By properly installing the base for your walkway, you create a solid foundation that will support the pavers and ensure long-term stability. Take your time during this step to ensure an even and compacted base that will contribute to the durability of your walkway. With the base installed, you are ready to move on to setting the pavers in place in the next step.
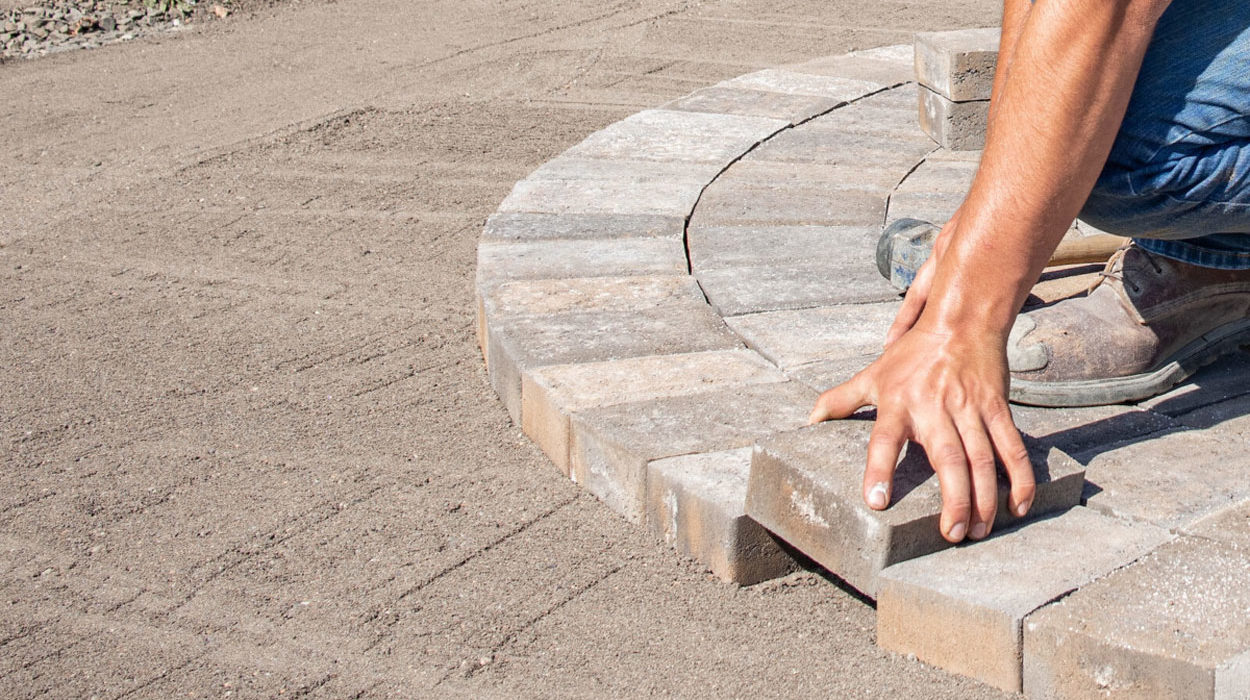
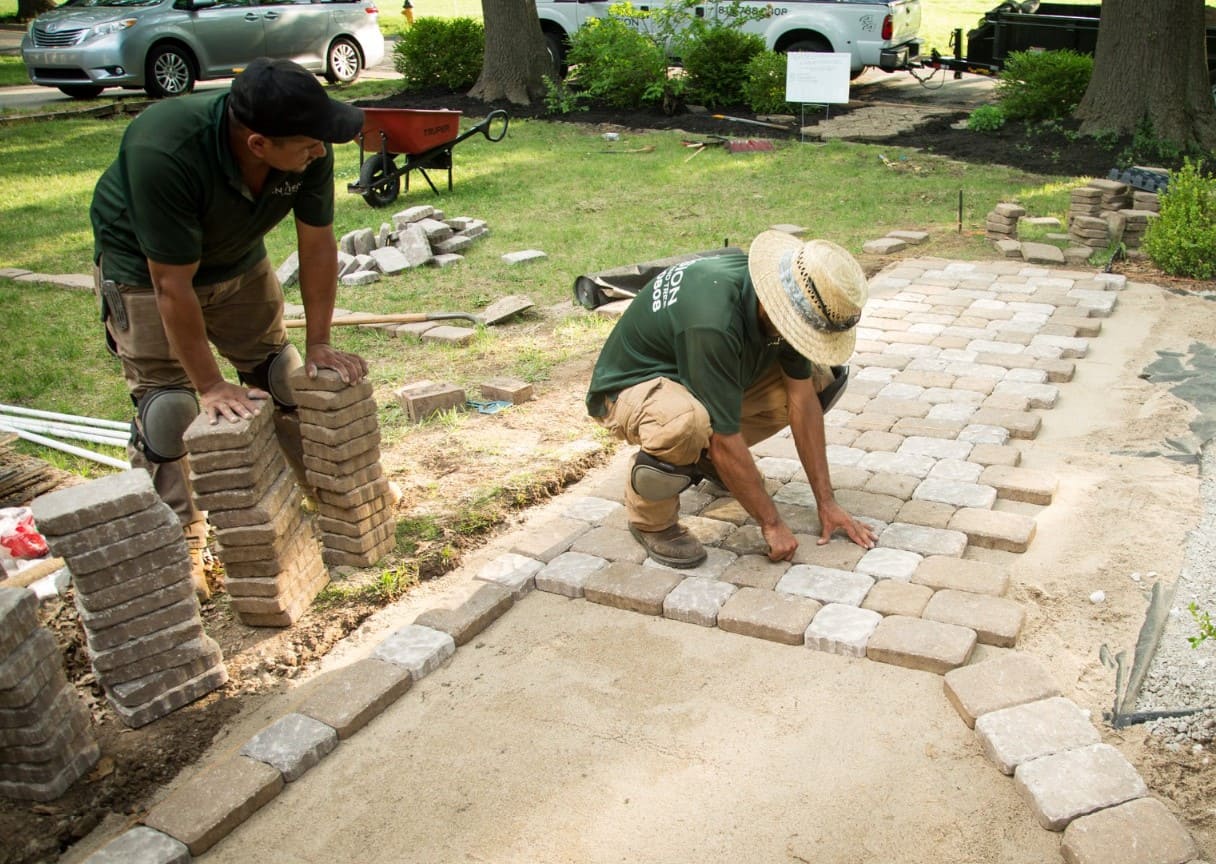
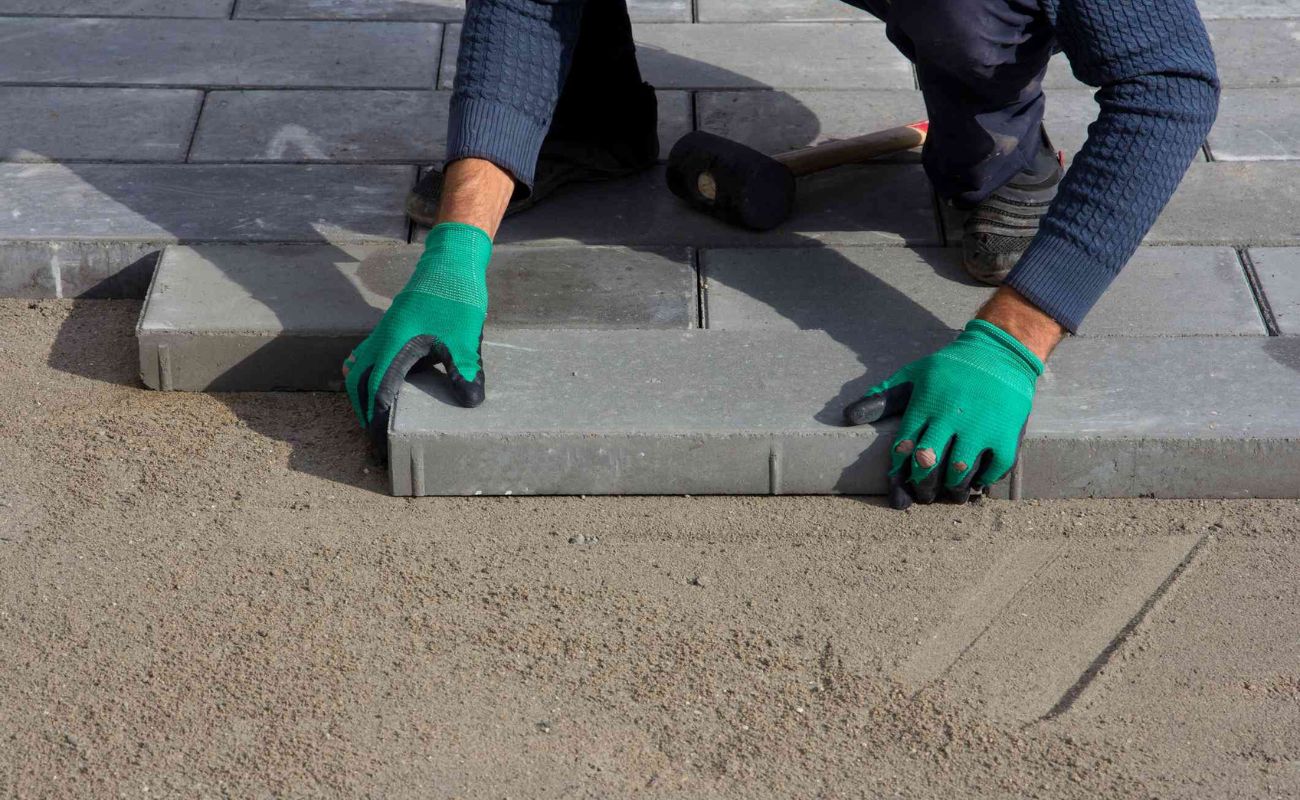
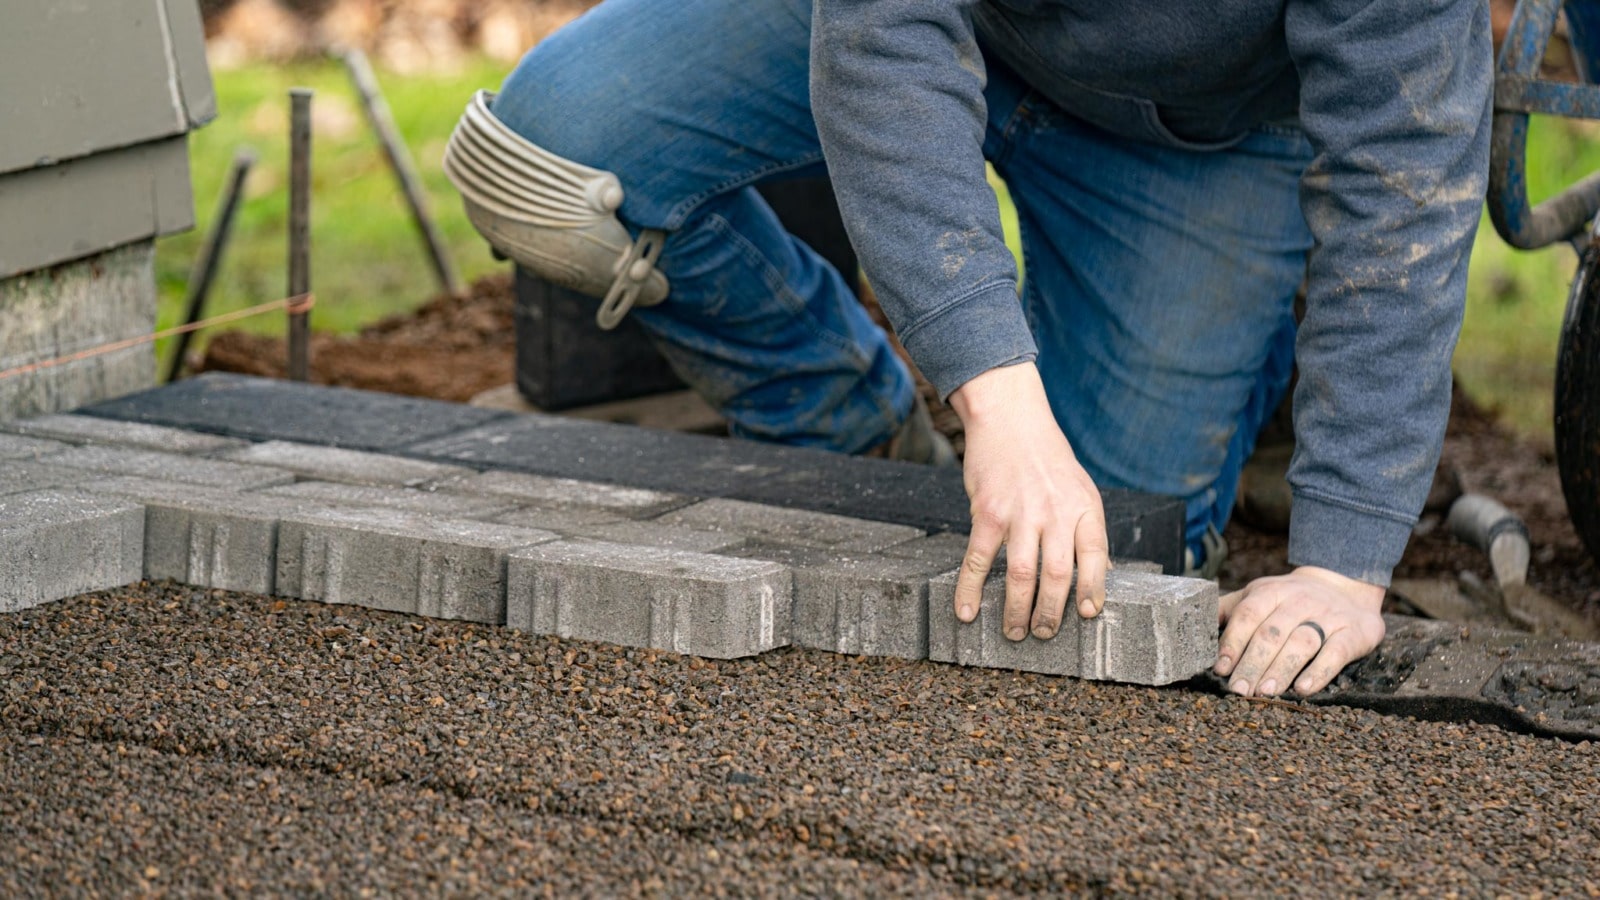
Step 8: Set the Pavers in Place
With the base prepared, the next step in installing your walkway is setting the pavers in place. This step involves carefully positioning the pavers on top of the base, ensuring a secure and visually appealing installation. Here’s how to set the pavers in place:
- Begin at one end: Start at one end of the walkway and work your way towards the other end. This will ensure a logical and systematic installation.
- Place the first paver: Position the first paver at the starting point, gently pressing it into the base material. Ensure it is snug against the edging and aligned with the surrounding pavers.
- Continue with the pattern: Follow your predetermined pattern or design as you place the remaining pavers. Maintain consistent spacing between each paver, using plastic spacers or your finger as a guide.
- Check for level and alignment: Use a level or a straightedge to ensure that each paver is level and aligned with the adjacent pavers. Make any necessary adjustments by adding or removing base material beneath individual pavers.
- Tap pavers into place: Use a rubber mallet to gently tap each paver into place, ensuring a secure fit. Take care not to apply excessive force that could crack or damage the pavers.
- Check for uniformity: Periodically step back and assess the overall look of the walkway. Check for any unevenness, misalignments, or areas that need further adjustment. Make necessary modifications to maintain a consistent and visually pleasing installation.
- Handle irregular shapes: If you encounter paver shapes that require creative placement, such as curves or irregular edges, take your time to find the best fit. Adjust the spacing and angle of neighboring pavers to accommodate these unique shapes.
- Reposition as needed: During the setting process, you may need to reposition pavers to ensure better alignment or fill any noticeable gaps. Be patient and make the necessary adjustments to achieve a seamless and cohesive look.
By setting the pavers in place with precision and care, you create a walkway that not only offers functionality but also enhances the aesthetic appeal of your outdoor space. Take your time during this step to ensure each paver is securely positioned and aligned with the surrounding pavers. With the pavers set in place, you are ready to move on to filling the joints in the next step.
Read more: How Much Does A Paver Walkway Cost
Step 9: Fill the Joints
Once the pavers are securely set in place, the next step in installing your walkway is filling the joints between the pavers. Joint filling serves multiple purposes, such as enhancing the stability of the pavers, preventing weed growth, and adding to the overall visual appeal. Here’s how to fill the joints:
- Select the appropriate jointing material: Choose a jointing material that suits your preferences and the requirements of your walkway. Common options include polymeric sand, regular sand, or a mixture of sand and cement.
- Prepare the joints: Before applying the jointing material, ensure that the joints between the pavers are clean and free of debris. Use a brush or a broom to remove any loose dirt or debris from the surface of the pavers and the joints.
- Apply the jointing material: Pour the chosen jointing material onto the walkway surface, specifically targeting the joints between the pavers. Use a broom or a brush to sweep the material into the joints, ensuring even distribution and filling them to the desired level.
- Compact and settle: After applying the jointing material, lightly mist the walkway with water to activate the binding properties of the material, if applicable. Allow the jointing material to settle for a few minutes or follow the manufacturer’s instructions for the recommended waiting time.
- Compact again: Using a plate compactor or a tamper, carefully compact the jointing material into the joints. This step aids in further settling and helps achieve a secure and stable joint fill. Follow the compaction instructions specific to the jointing material you are using.
- Remove excess material: Once the joints are firmly filled, use a broom or a brush to remove any excess jointing material from the surface of the pavers. This will help achieve a clean and neat appearance.
- Inspect and fill gaps: After removing the excess jointing material, inspect the walkway for any remaining gaps or voids between the pavers. Fill these areas carefully using additional jointing material, ensuring a seamless and consistent joint fill throughout the entire walkway.
- Clean the surface: Lastly, clean the surface of the pavers using a gentle spray of water to remove any residue or dust from the jointing process. Allow the walkway to fully dry before proceeding to the final step of the installation.
Filling the joints between the pavers not only contributes to the aesthetic appeal of your walkway but also adds stability and durability. Take your time during this step to ensure proper joint filling and removal of excess material. Once the joints are filled and the surface is cleaned, you are ready to move on to the final step of compacting and finishing your walkway.
Step 10: Compact and Finish the Walkway
After filling the joints between the pavers, the final step in installing your walkway is to compact and finish the surface. This step ensures the stability and longevity of the walkway while giving it a polished and professional appearance. Here’s how to compact and finish your walkway:
- Inspect the joints: Begin by inspecting the joints between the pavers to ensure they are compacted and filled adequately. If any gaps or voids are present, apply additional jointing material and compact it again.
- Compact the pavers: Use a plate compactor or a tamper to firmly compact the pavers. This process helps set them in place, ensuring a secure and stable walkway surface. Follow the manufacturer’s instructions for the compaction process based on the type of paver and jointing material being used.
- Apply a sealant (optional): Depending on the type of pavers and your preference, you may choose to apply a sealant to the surface of the walkway. A sealant can enhance the color, protect against stains and weathering, and make cleaning easier. Follow the instructions provided by the sealant manufacturer for proper application.
- Sweep off excess: Use a broom or a brush to sweep off any excess jointing material or debris from the surface of the walkway. Pay attention to the joints and crevices to ensure a clean and tidy finish.
- Finalize the edging: Inspect the edging to ensure it is secure and properly aligned. Make any necessary adjustments or repairs to ensure a seamless and consistent edging for your walkway.
- Test the walkway: Take a walk on the newly installed walkway to ensure its stability and functionality. Test different areas and pay attention to any irregularities or potential issues that need addressing.
- Finishing touches: Add any final touches to enhance the aesthetic appeal of your walkway. This could include adding decorative elements, installing lighting fixtures, or adding landscaping features around the walkway.
- Maintenance and upkeep: To keep your walkway looking its best, establish a regular maintenance routine. This may include sweeping off debris, removing weeds, and periodically resealing the pavers. Regular maintenance will help extend the lifespan and beauty of your walkway.
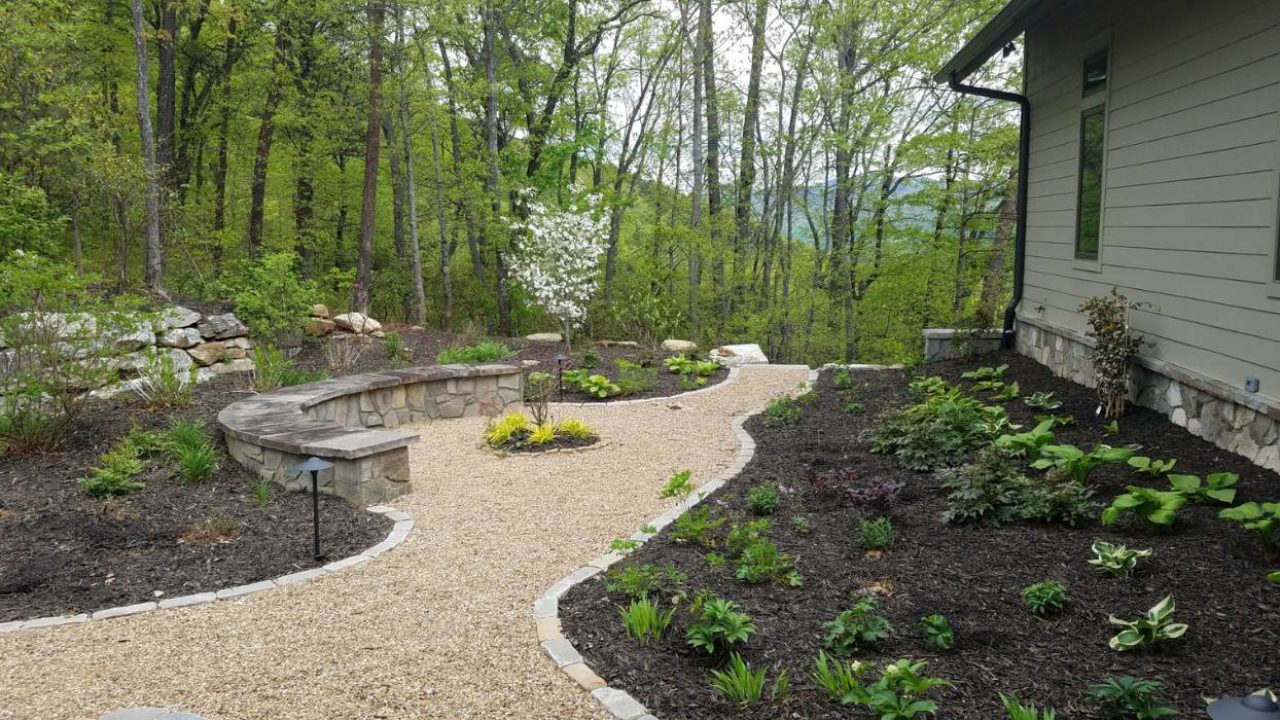
By compacting and finishing your walkway, you ensure that it is stable, aesthetically pleasing, and ready for years of use. Take your time during this final step to pay attention to detail and complete any necessary adjustments or repairs. Once completed, step back and admire your beautifully installed walkway that will enhance the functionality and visual appeal of your outdoor space.
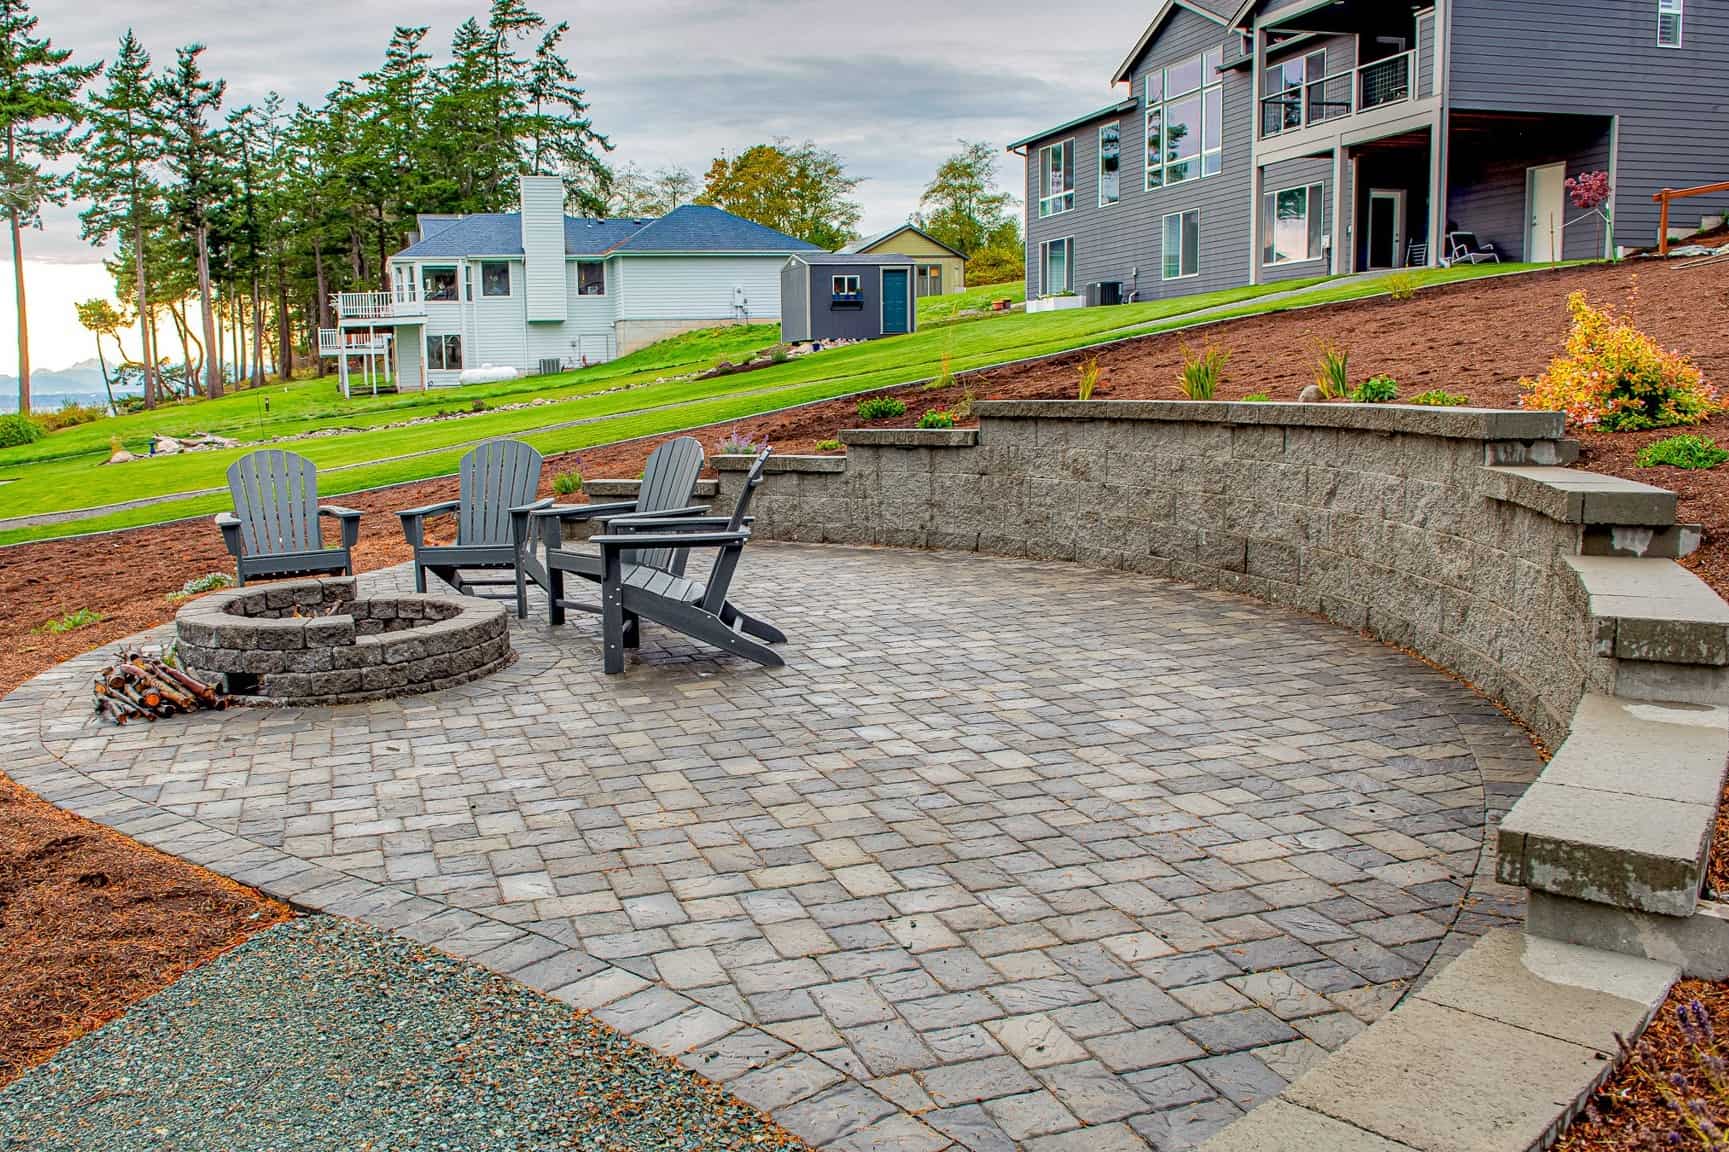
Conclusion
Congratulations! You have successfully completed the installation of a walkway with pavers. By following the step-by-step guide outlined in this article, you have transformed your outdoor space into a functional and visually stunning area. Installing a paver walkway not only adds value to your property but also enhances the overall aesthetic appeal.
Throughout the installation process, you learned how to plan and prepare, gather the necessary materials and tools, clear and level the area, install edging, lay out the pavers, cut them if necessary, and properly set them in place. You also learned how to fill the joints, compact the walkway, and add those final finishing touches that make all the difference.
Remember to maintain your walkway by regularly cleaning, inspecting, and undertaking any necessary repairs or maintenance tasks. This will help ensure its longevity and its continuous ability to enhance your outdoor space.
Now that your walkway is complete, it’s time to enjoy the fruits of your labor. Take a leisurely stroll, invite friends and family over, or simply spend time relaxing in your enhanced outdoor oasis. Your newly installed paver walkway will not only provide a practical path but also become a focal point that adds charm and elegance to your property.
Thank you for following this guide, and we hope you find joy and satisfaction in your newly installed walkway. Happy walking!
Frequently Asked Questions about How To Install A Walkway With Pavers
Was this page helpful?
At Storables.com, we guarantee accurate and reliable information. Our content, validated by Expert Board Contributors, is crafted following stringent Editorial Policies. We're committed to providing you with well-researched, expert-backed insights for all your informational needs.
0 thoughts on “How To Install A Walkway With Pavers”