Home>Furniture>Outdoor Furniture>How To Build A Freestanding Patio Cover
Outdoor Furniture
How To Build A Freestanding Patio Cover
Modified: August 27, 2024
Discover the best way to build a sturdy and stylish freestanding patio cover. Enhance your outdoor space with our step-by-step guide and expert tips. Find the right outdoor-furniture for your patio.
(Many of the links in this article redirect to a specific reviewed product. Your purchase of these products through affiliate links helps to generate commission for Storables.com, at no extra cost. Learn more)
Introduction
Welcome to the world of outdoor furniture! Whether you have a spacious backyard, a cozy patio, or a beautiful garden, adding outdoor furniture can transform any outdoor space into a relaxing and inviting retreat. From lounging in the sun to entertaining guests, having the right outdoor furniture can enhance your outdoor living experience and make your outdoor space an extension of your home.
When it comes to outdoor furniture, there is a wide range of options to choose from, ranging from traditional wooden furniture to modern and stylish designs made from materials such as aluminum, wicker, and even recycled plastics. The key is to select outdoor furniture that not only suits your style and preferences but is also durable, weather-resistant, and easy to maintain.
In this comprehensive guide, we will explore everything you need to know about outdoor furniture, from choosing the right materials to cleaning and maintaining your furniture to ensure its longevity. So, if you’re ready to create a comfortable and inviting outdoor space, let’s dive in!
With the right outdoor furniture, you can create a functional and beautiful outdoor space for relaxing, entertaining, and enjoying the great outdoors. Whether you’re looking to furnish a small balcony or a sprawling backyard, there are a few key factors to consider when selecting outdoor furniture:
- Materials: The materials used in outdoor furniture play a crucial role in its durability, weather-resistance, and overall aesthetics. Common materials include wood, metal, wicker, and plastic. Each material has its own unique characteristics and maintenance requirements. It’s important to choose a material that suits your climate, style preferences, and budget.
- Comfort: Outdoor furniture should not only be visually appealing but also comfortable. Look for furniture with cushions or padding that provide adequate support and comfort. Consider factors such as seat depth, backrest angle, and armrest height to ensure a comfortable seating experience.
- Functionality: Consider how you plan to use your outdoor space. Are you looking for dining furniture for outdoor meals and gatherings, or do you prefer lounge chairs for sunbathing and relaxation? Think about the activities you enjoy and select furniture that suits your needs.
- Size and Scale: Measure your outdoor space carefully before purchasing furniture. Ensure that the furniture you choose fits comfortably in your space without overcrowding or overwhelming it. Also, consider the scale of the furniture in relation to the surrounding landscape and architecture.
- Maintenance: Outdoor furniture is exposed to the elements, so it’s important to choose furniture that is easy to clean and maintain. Some materials may require regular cleaning, refinishing, or protection from UV rays. Consider the level of maintenance you are willing to undertake and choose accordingly.
Now that we have covered the key considerations when selecting outdoor furniture, let’s dive deeper into each step of the process, from planning and designing to maintaining and protecting your investment. Whether you’re a seasoned outdoor enthusiast or just starting to explore the world of outdoor living, this guide will provide you with the knowledge and inspiration you need to create a beautiful and functional outdoor space.
Key Takeaways:
- Planning and Designing
Before building outdoor furniture, plan your space, measure carefully, and consider sun exposure. Choose a style and research materials to create a functional and inviting outdoor area. - Finishing Touches
After building your outdoor furniture, add cushions, lighting, greenery, and personal touches. Keep it organized and create a welcoming atmosphere for outdoor enjoyment.
Read more: How To Build A Covered Patio
Step 1: Planning and Designing
Before you start purchasing outdoor furniture, it’s important to plan and design your outdoor space to ensure that it meets your needs and suits your style. Here are some steps to follow when planning and designing your outdoor area:
- Assess your needs: Consider how you intend to use your outdoor space. Do you want it to be a relaxing oasis for lounging and reading? Or do you plan to entertain guests and host outdoor dinners? Understanding your needs will help you determine the type of furniture and the layout required for your outdoor space.
- Measure your space: Take accurate measurements of your outdoor area to determine the amount of space available for your furniture. Consider any existing structures or features that might impact the layout, such as trees, fences, or outdoor amenities.
- Create a layout: Sketch a rough layout of your outdoor space and allocate areas for specific activities. For example, designate a spot for dining, lounging, or a play area for children. This will help you visualize the arrangement and ensure that you make the best use of the space available.
- Consider the sun and shade: Take note of the sun’s trajectory throughout the day and identify areas of shade and sun exposure. This will help you determine where to place seating areas or install shade structures like umbrellas or pergolas to provide relief from the sun.
- Choose a style: Decide on the overall aesthetic you want to achieve in your outdoor space. Whether you prefer modern, rustic, coastal, or eclectic styles, selecting a theme will guide your furniture choices and help create a cohesive and visually appealing outdoor area.
- Research outdoor furniture materials: Explore different outdoor furniture materials and their pros and cons. Consider factors such as durability, weather-resistance, maintenance requirements, and budget. Common materials include teak, aluminum, wrought iron, rattan, and synthetic wicker. Choose a material that suits your style, climate, and maintenance preferences.
- Consider furniture arrangement: Think about how you want to arrange your furniture to create functional and inviting seating areas. Arrange furniture in a way that encourages conversation and social interaction. Leave enough space between pieces for easy movement and accessibility.
- Add accessories: Enhance your outdoor space further by incorporating accessories like cushions, outdoor rugs, throw pillows, and lighting. These accessories not only add comfort but also add a decorative touch and create a cozy ambiance.
- Think about storage: Consider where you will store your outdoor furniture during the offseason or when not in use. If you don’t have enough indoor storage space, look for furniture that is stackable or foldable for easy storage.
By carefully planning and designing your outdoor space, you can ensure that it meets your needs, reflects your style, and provides the perfect setting for outdoor relaxation and entertainment. Once you have a clear vision of your outdoor area, it’s time to move on to the next step of gathering materials and tools for building your outdoor furniture.
Step 2: Gathering Materials and Tools
Now that you have planned and designed your outdoor space, it’s time to gather the materials and tools you will need to build your outdoor furniture. Here are the essential items you’ll need:
- Furniture Materials: Depending on the type of outdoor furniture you’re planning to build, you’ll need specific materials such as wood, metal, or synthetic wicker. Choose high-quality materials that are suitable for outdoor use and can withstand the elements.
- Hardware: You’ll need a variety of hardware items such as screws, nails, bolts, and connectors to assemble your furniture. Make sure to choose hardware that is corrosion-resistant and suitable for outdoor use.
- Tools: Gather the necessary tools to complete your outdoor furniture project. Some common tools you may need include a drill, saw, sander, tape measure, screwdriver, and clamps. Having the right tools will make the assembly process easier and more efficient.
- Protective Gear: Safety should always be a priority when working with tools and materials. Wear protective gear such as safety glasses, gloves, and a dust mask to protect yourself from any potential hazards.
- Finishing Supplies: Depending on the materials you choose, you may need finishing supplies such as paint, stain, or sealant to protect your furniture and enhance its appearance. Follow the manufacturer’s instructions for proper application.
- Optional Accessories: If you plan to add additional features or decorative elements to your outdoor furniture, gather the necessary accessories such as cushions, umbrellas, or table covers. These accessories can enhance the comfort and aesthetic appeal of your furniture.
Before purchasing materials, make a detailed list of everything you need to ensure that you don’t miss anything. Consider the size and design of your furniture project to calculate the required quantities accurately.
When selecting materials, choose those that are sturdy, weather-resistant, and suitable for your climate. For example, if you’re planning to build wooden furniture, opt for weather-resistant wood species such as teak, cedar, or acacia. If you’re using metal, choose materials that are rust-proof and can withstand outdoor conditions.
Consider the style and theme of your outdoor space when choosing materials. Different materials have unique textures, colors, and finishes that can complement your overall design. Experiment with different combinations to achieve the desired look.
Finally, gather all the tools you need for the project. Check that your tools are in good working condition, and if necessary, purchase or borrow any missing or specialized tools required for your specific project.
With all the necessary materials and tools gathered, you’re ready to move on to the next step: preparing the site for building your outdoor furniture.
Step 3: Preparing the Site
Once you have gathered all the materials and tools you need, it’s time to prepare the site where you will be building your outdoor furniture. Proper site preparation is essential for a successful and long-lasting project. Here are the steps to follow:
- Clean the Area: Remove any debris, plants, or obstacles from the site where you will be placing your furniture. Clearing the area ensures a clean and level surface to work on.
- Level the Ground: Use a level and a shovel to level the ground where your furniture will be placed. This step is crucial to ensure stability and prevent any wobbling or unevenness in your furniture.
- Mark the Layout: Referencing your design and layout plans, mark the area where each piece of furniture will be placed using stakes or chalk. This will give you a visual guide to follow during the construction process.
- Consider Drainage: If your outdoor space is prone to pooling water or excessive moisture, consider incorporating proper drainage solutions. This can include installing French drains or creating a slight slope in the ground to allow water to drain away from the furniture.
- Check for Utility Lines: Before digging or placing any structures, check for the presence of underground utility lines. Contact your local utility company to ensure that it’s safe to proceed without damaging any utilities.
- Prepare the Foundation: Depending on the type of furniture you’re building, you may need to prepare a solid foundation. This can include pouring concrete footings, laying a gravel base, or constructing a deck or patio.
- Create a Weed Barrier: To prevent weed growth and unwanted vegetation under your furniture, consider laying a weed barrier such as landscape fabric or a layer of mulch or gravel.
- Treat the Site for Pests: Depending on your location, you may need to take measures to prevent pests such as termites or ants from damaging your furniture. Use appropriate pest control measures as needed.
- Organize Work Area: Set up a designated work area near the site with easy access to your tools and materials. This will help keep the construction process organized and efficient.
By properly preparing the site, you’ll create a strong foundation for your outdoor furniture and ensure that it is stable and long-lasting. Take the time to complete these preliminary steps carefully, as they will greatly impact the overall quality and durability of your outdoor furniture project.
Once the site is fully prepared, you’re ready to move on to the next step: digging post holes for your furniture’s support structure. Stay tuned for step 4 of our guide as you continue building your outdoor furniture!
Step 4: Digging Post Holes
Now that you have prepared the site for your outdoor furniture, it’s time to dig post holes to provide a strong and stable foundation. The post holes will support the structure of your furniture and ensure that it remains securely in place. Here’s a step-by-step guide for digging post holes:
- Measure and Mark: Using your design plans as a reference, measure and mark the exact locations where the post holes will be dug. Ensure that the measurements are accurate and the marks are clearly visible.
- Determine Hole Depth: Determine the appropriate depth for your post holes based on the size and weight of your furniture. Typically, a depth of around 1/3 to 1/2 of the total height of the post is recommended for stability.
- Gather Digging Tools: For digging post holes, you will need a post hole digger or an auger, a shovel, and a wheelbarrow for removing the excavated soil.
- Start Digging: Begin digging the first post hole by positioning the post hole digger at the marked spot. Use a downward pressure and a twisting motion to dig into the ground. Remove the loose soil from the hole and place it in the wheelbarrow for disposal or later use.
- Check Hole Depth: Periodically check the depth of the hole using a measuring tape or a level to ensure that it matches the desired depth. Make adjustments as needed, digging deeper or adding soil to achieve the correct depth.
- Repeat the Process: Follow the same process to dig the remaining post holes according to your design plans. Keep them evenly spaced and aligned to ensure a uniform and balanced structure.
- Clear the Holes: Once all the post holes are dug, remove any debris or loose soil from the holes. Use a shovel or a brush to clean the sides and bottom of each hole, ensuring a smooth and sturdy surface for the posts.
- Consider Adding Gravel: To improve drainage and stability, consider adding a layer of gravel at the bottom of each post hole before inserting the posts. The gravel will provide a solid base and prevent the posts from shifting or sinking over time.
Remember to take breaks as needed and stay hydrated during the digging process, especially if you are working under the sun or in hot weather. It’s also important to observe safety precautions and use proper lifting techniques to prevent any strain or injury.
Once all the post holes are dug and cleared, you’re ready to move on to the next step: setting the posts for your outdoor furniture. Stay tuned for step 5 of our guide as you continue building your outdoor furniture!
When building a freestanding patio cover, make sure to use sturdy materials such as pressure-treated wood or metal to ensure durability and stability.
Read more: How To Build A Wood Patio Cover
Step 5: Setting the Posts
With the post holes dug, it’s time to move on to the next step: setting the posts for your outdoor furniture. Properly setting the posts is crucial for the stability and longevity of your furniture. Here’s a step-by-step guide on how to set the posts:
- Prepare the Posts: Before placing the posts in the holes, make sure they are well-prepared. Trim any excess length or remove any sharp edges to ensure a safe and clean installation.
- Add Gravel Base: If you haven’t already done so, consider adding a layer of gravel at the bottom of each post hole. This will improve drainage and provide a solid base for the posts.
- Apply a Preservative: To protect the wood from rot and decay, consider applying a wood preservative to the portion of the posts that will be buried in the ground. Follow the manufacturer’s instructions for proper application and drying time.
- Insert the Posts: Carefully place the posts into their respective holes, ensuring they are aligned and level. You may need the help of a friend or an assistant to hold the posts in place while you fill the holes with soil.
- Fill the Holes: Use the excavated soil or a mixture of soil and gravel to fill the post holes around the posts. Gradually add the soil while tamping it down gently to secure the posts in place. Ensure that the posts remain level and properly aligned during this process.
- Check for Plumb: Use a level to check if each post is plumb, meaning it is perfectly vertical. Make any necessary adjustments by adding or removing soil until the posts are straight and aligned.
- Compact the Soil: After filling the holes and ensuring the posts are plumb, compact the soil around the posts using a tamper or the back of a shovel. This will provide further stability and prevent soil settling.
- Allow Time for Settling: Leave the posts undisturbed for a period of time, allowing the soil to settle and compact naturally. This will ensure a solid foundation and minimize any future shifting or movement of the posts.
- Consider Additional Support: Depending on the size and weight of your furniture, you may need to reinforce the posts with additional supports or braces. This will provide extra stability and prevent any wobbling or swaying of the furniture.
Remember to work carefully and take your time during this step to ensure that the posts are properly set and aligned. Take breaks as needed and observe safety precautions, especially when handling heavy posts or working with others.
Once the posts are securely set in the ground, you’re ready to move on to the next step: framing the patio cover. Stay tuned for step 6 of our guide as you continue building your outdoor furniture!
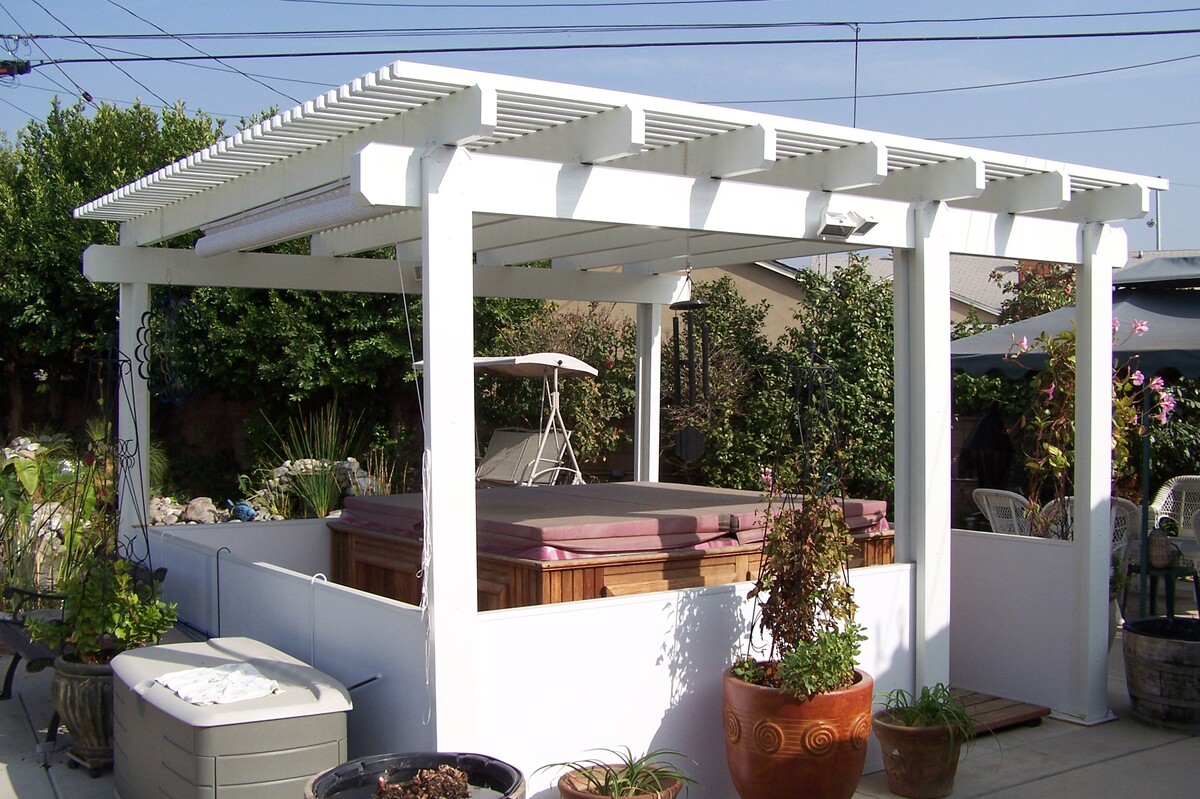
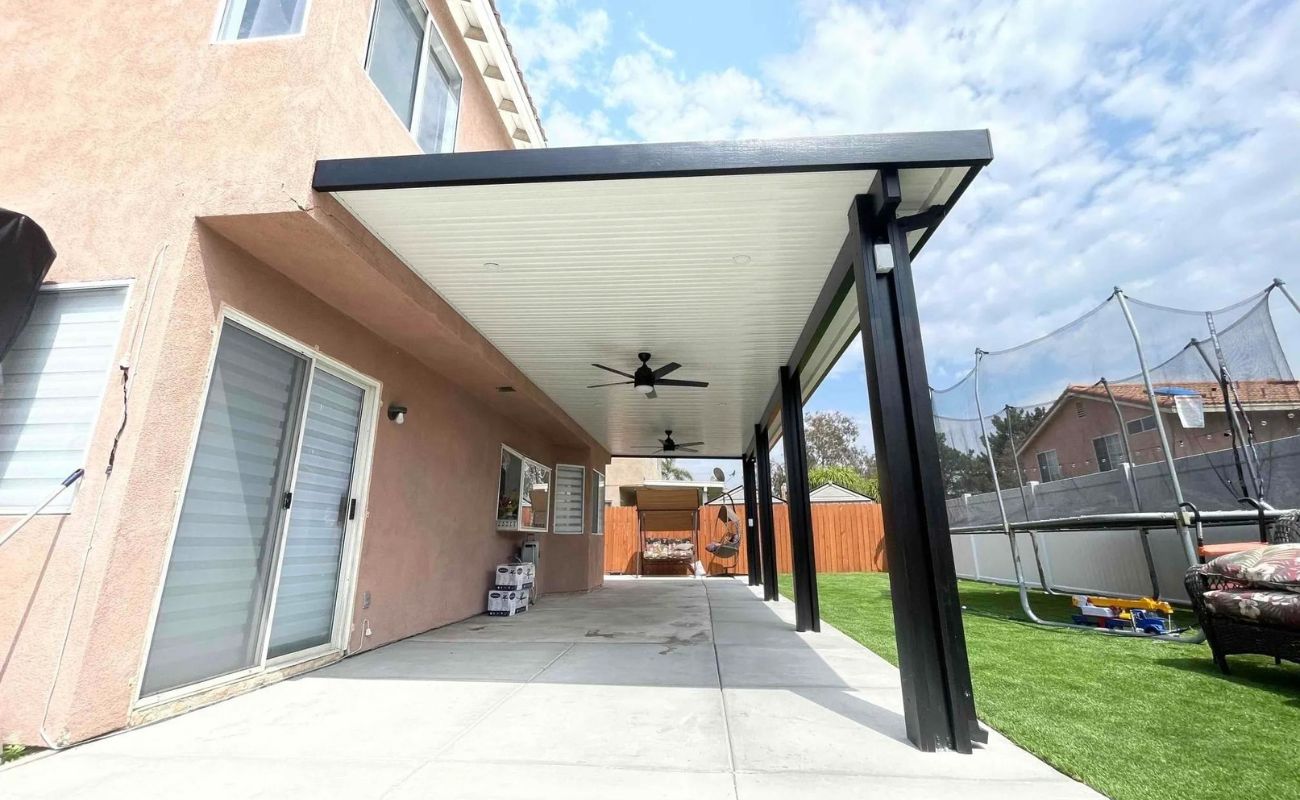
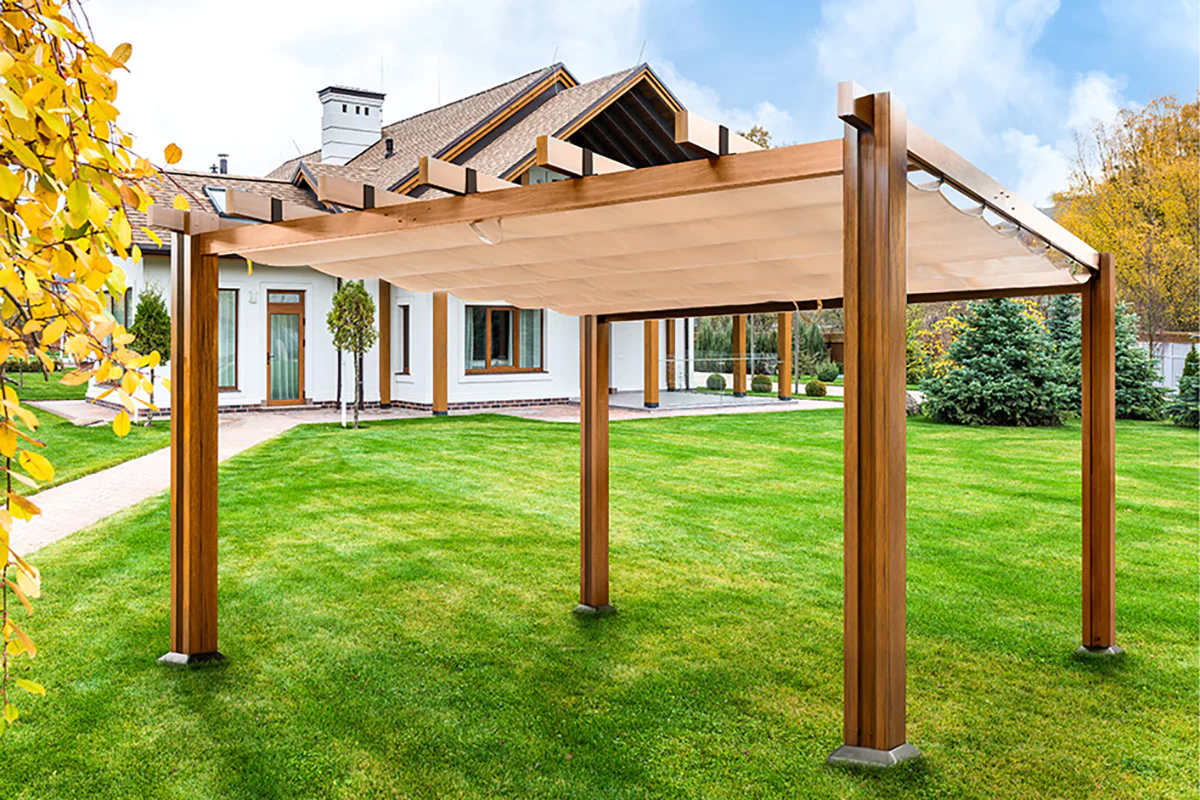
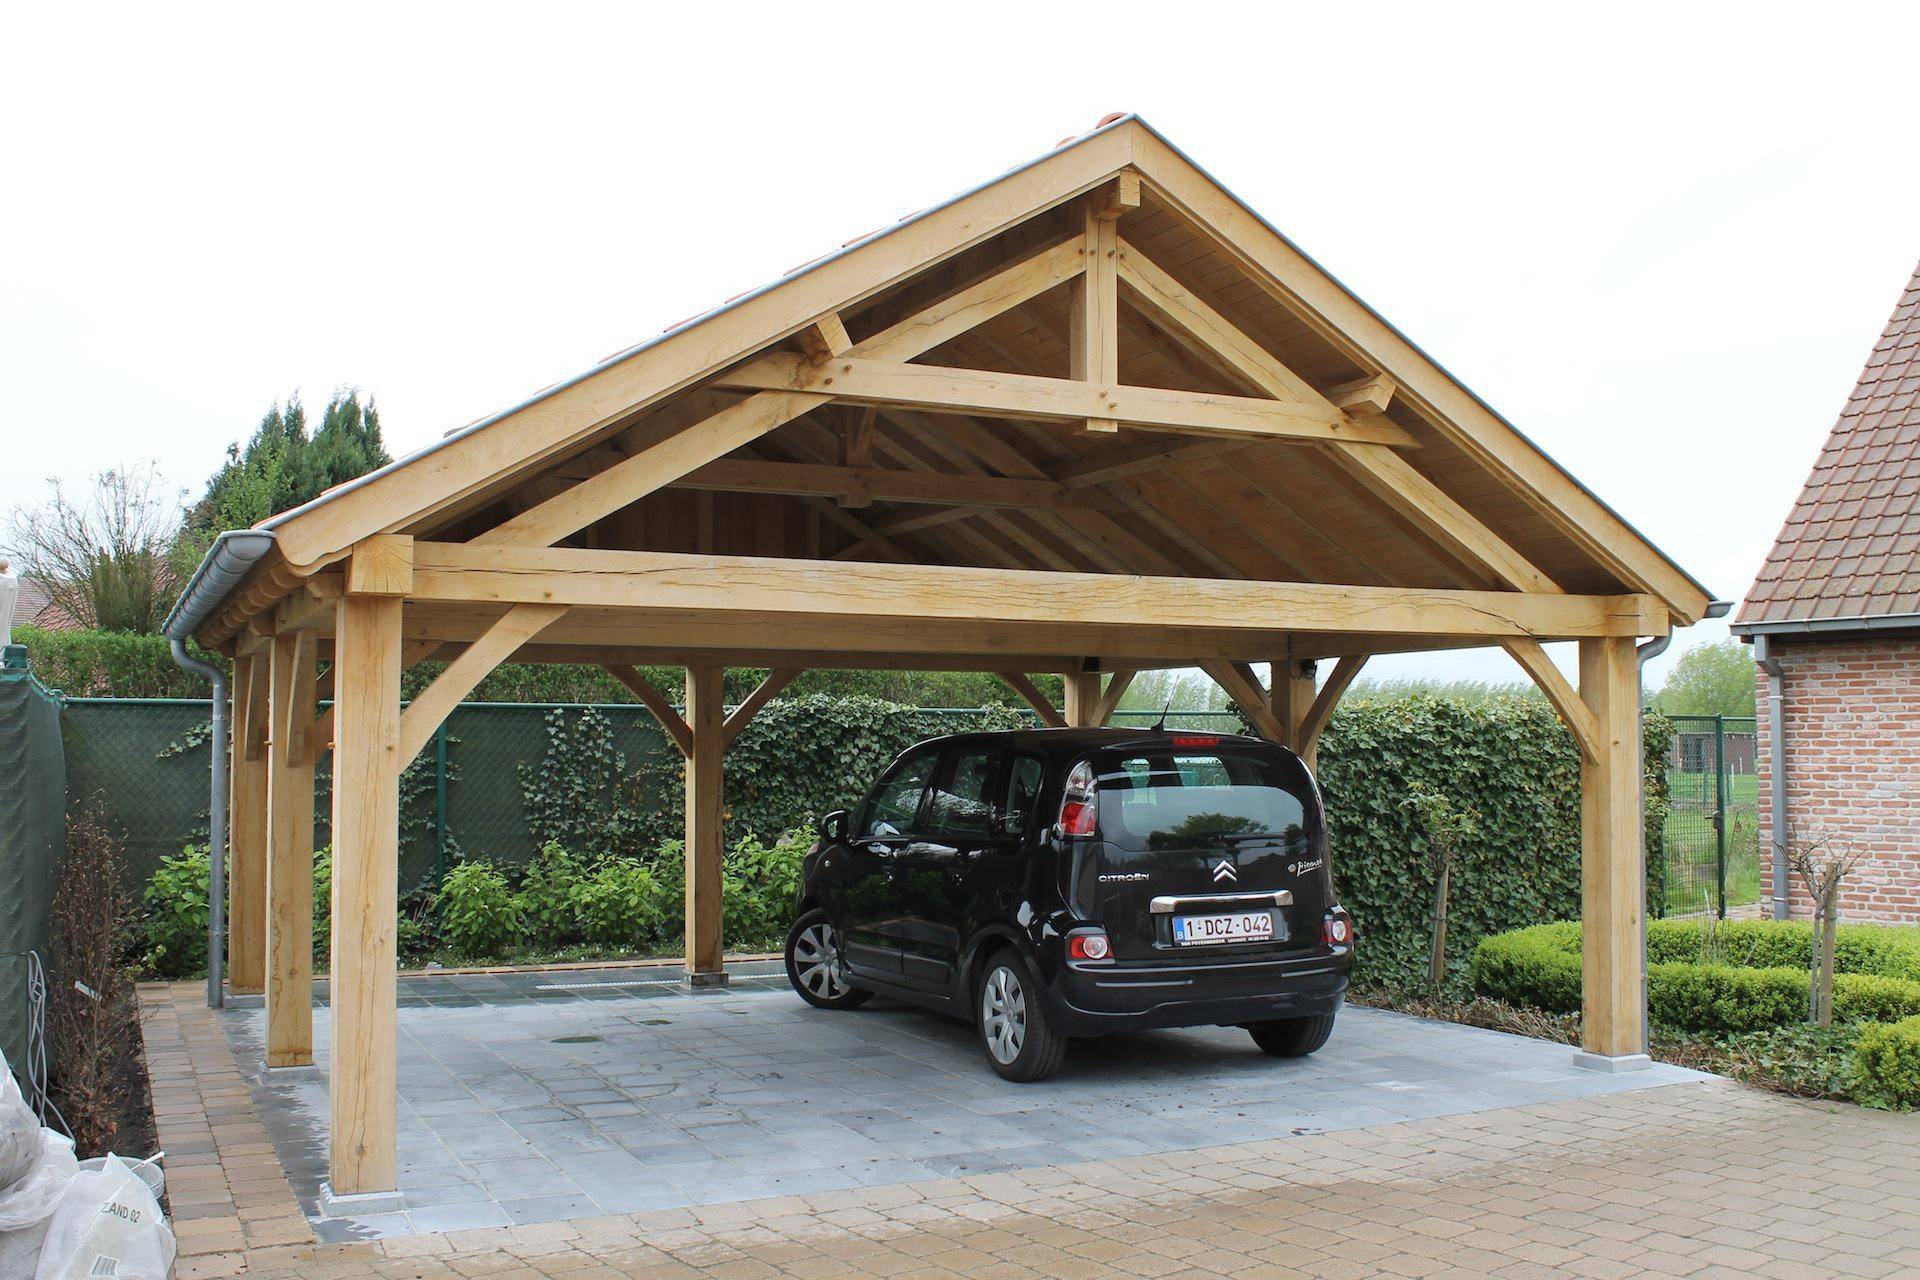
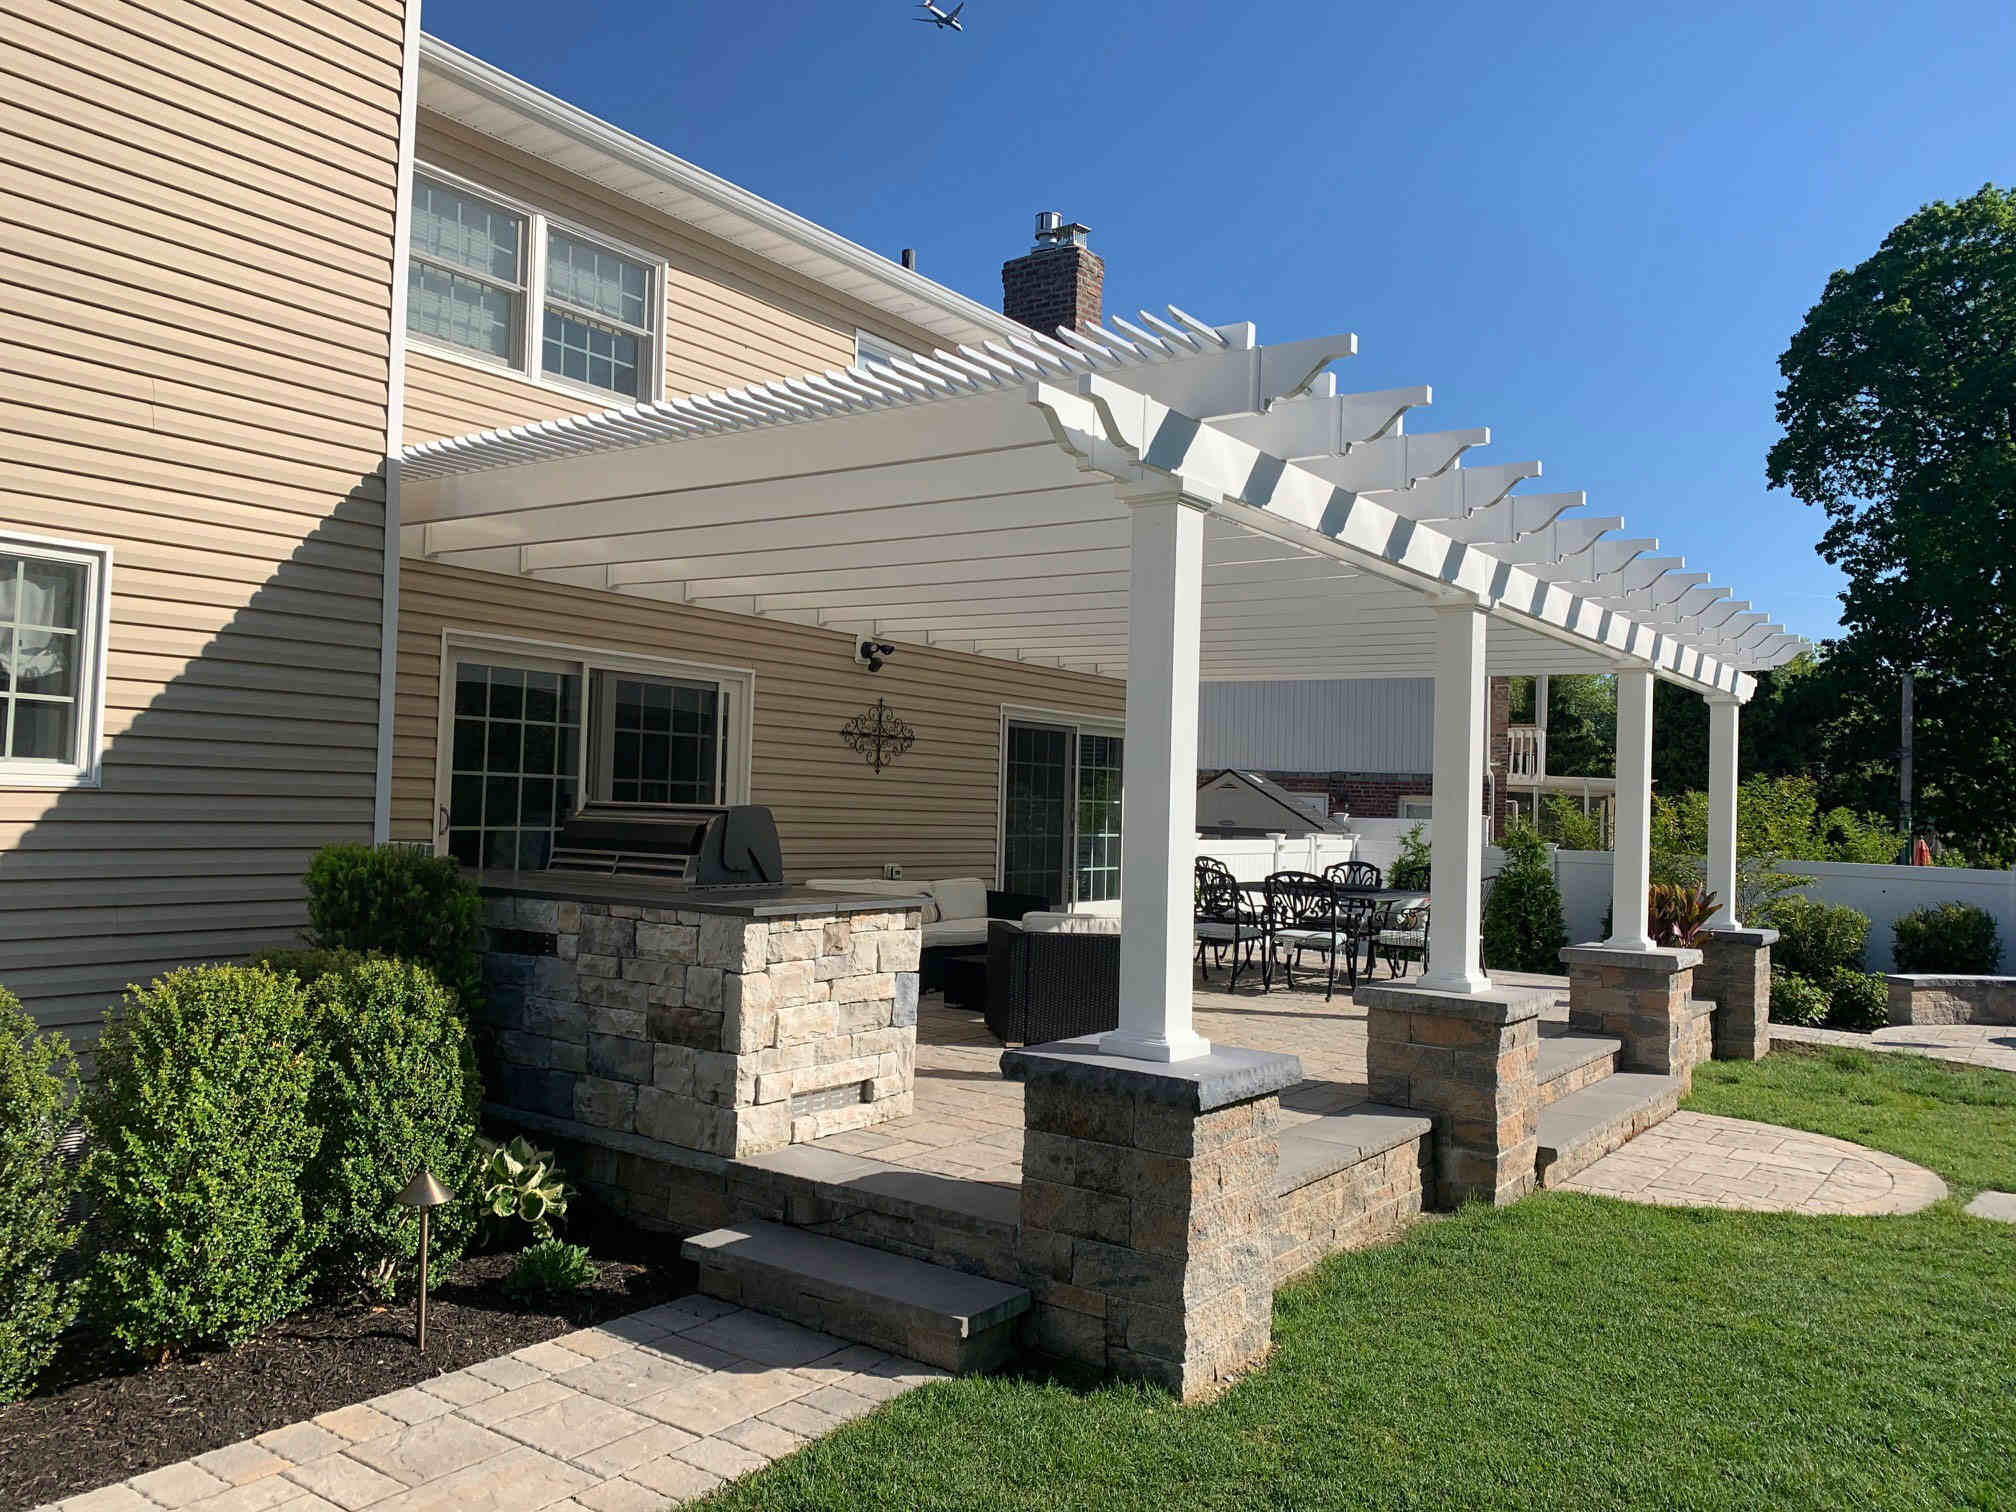
Step 6: Framing the Patio Cover
Now that the posts are securely set, it’s time to move on to the next step: framing the patio cover. The frame will provide the structure and support for your outdoor furniture. Here’s a step-by-step guide on how to frame the patio cover:
- Gather the Materials: Collect all the necessary materials for framing the patio cover, including the lumber, brackets, screws, and any additional hardware required.
- Measure and Cut the Lumber: Measure and cut the lumber according to your design plans and specifications. Use a saw or a miter saw to achieve accurate and precise cuts.
- Attach the Beams: Begin by attaching the beams to the posts. Use brackets or hardware specifically designed for outdoor use to secure the beams to the top of the posts. Make sure the beams are level and properly aligned.
- Add Support Joists: Install support joists perpendicular to the beams, connecting them using appropriate brackets or hardware. Ensure that the joists are evenly spaced and securely attached to the beams.
- Install Cross Braces: Depending on your design, you may need to install cross braces for additional stability and support. Use brackets or hardware to attach the cross braces diagonally between the beams and joists.
- Secure the Frame: Once all the components are in place, check for squareness and make any necessary adjustments. Secure the frame by driving screws or nails through the joints to ensure a strong and stable structure.
- Check Level and Plumb: Use a level and a plumb line to ensure that the frame is level horizontally and plumb vertically. Make any necessary adjustments by adding shims or repositioning the frame components.
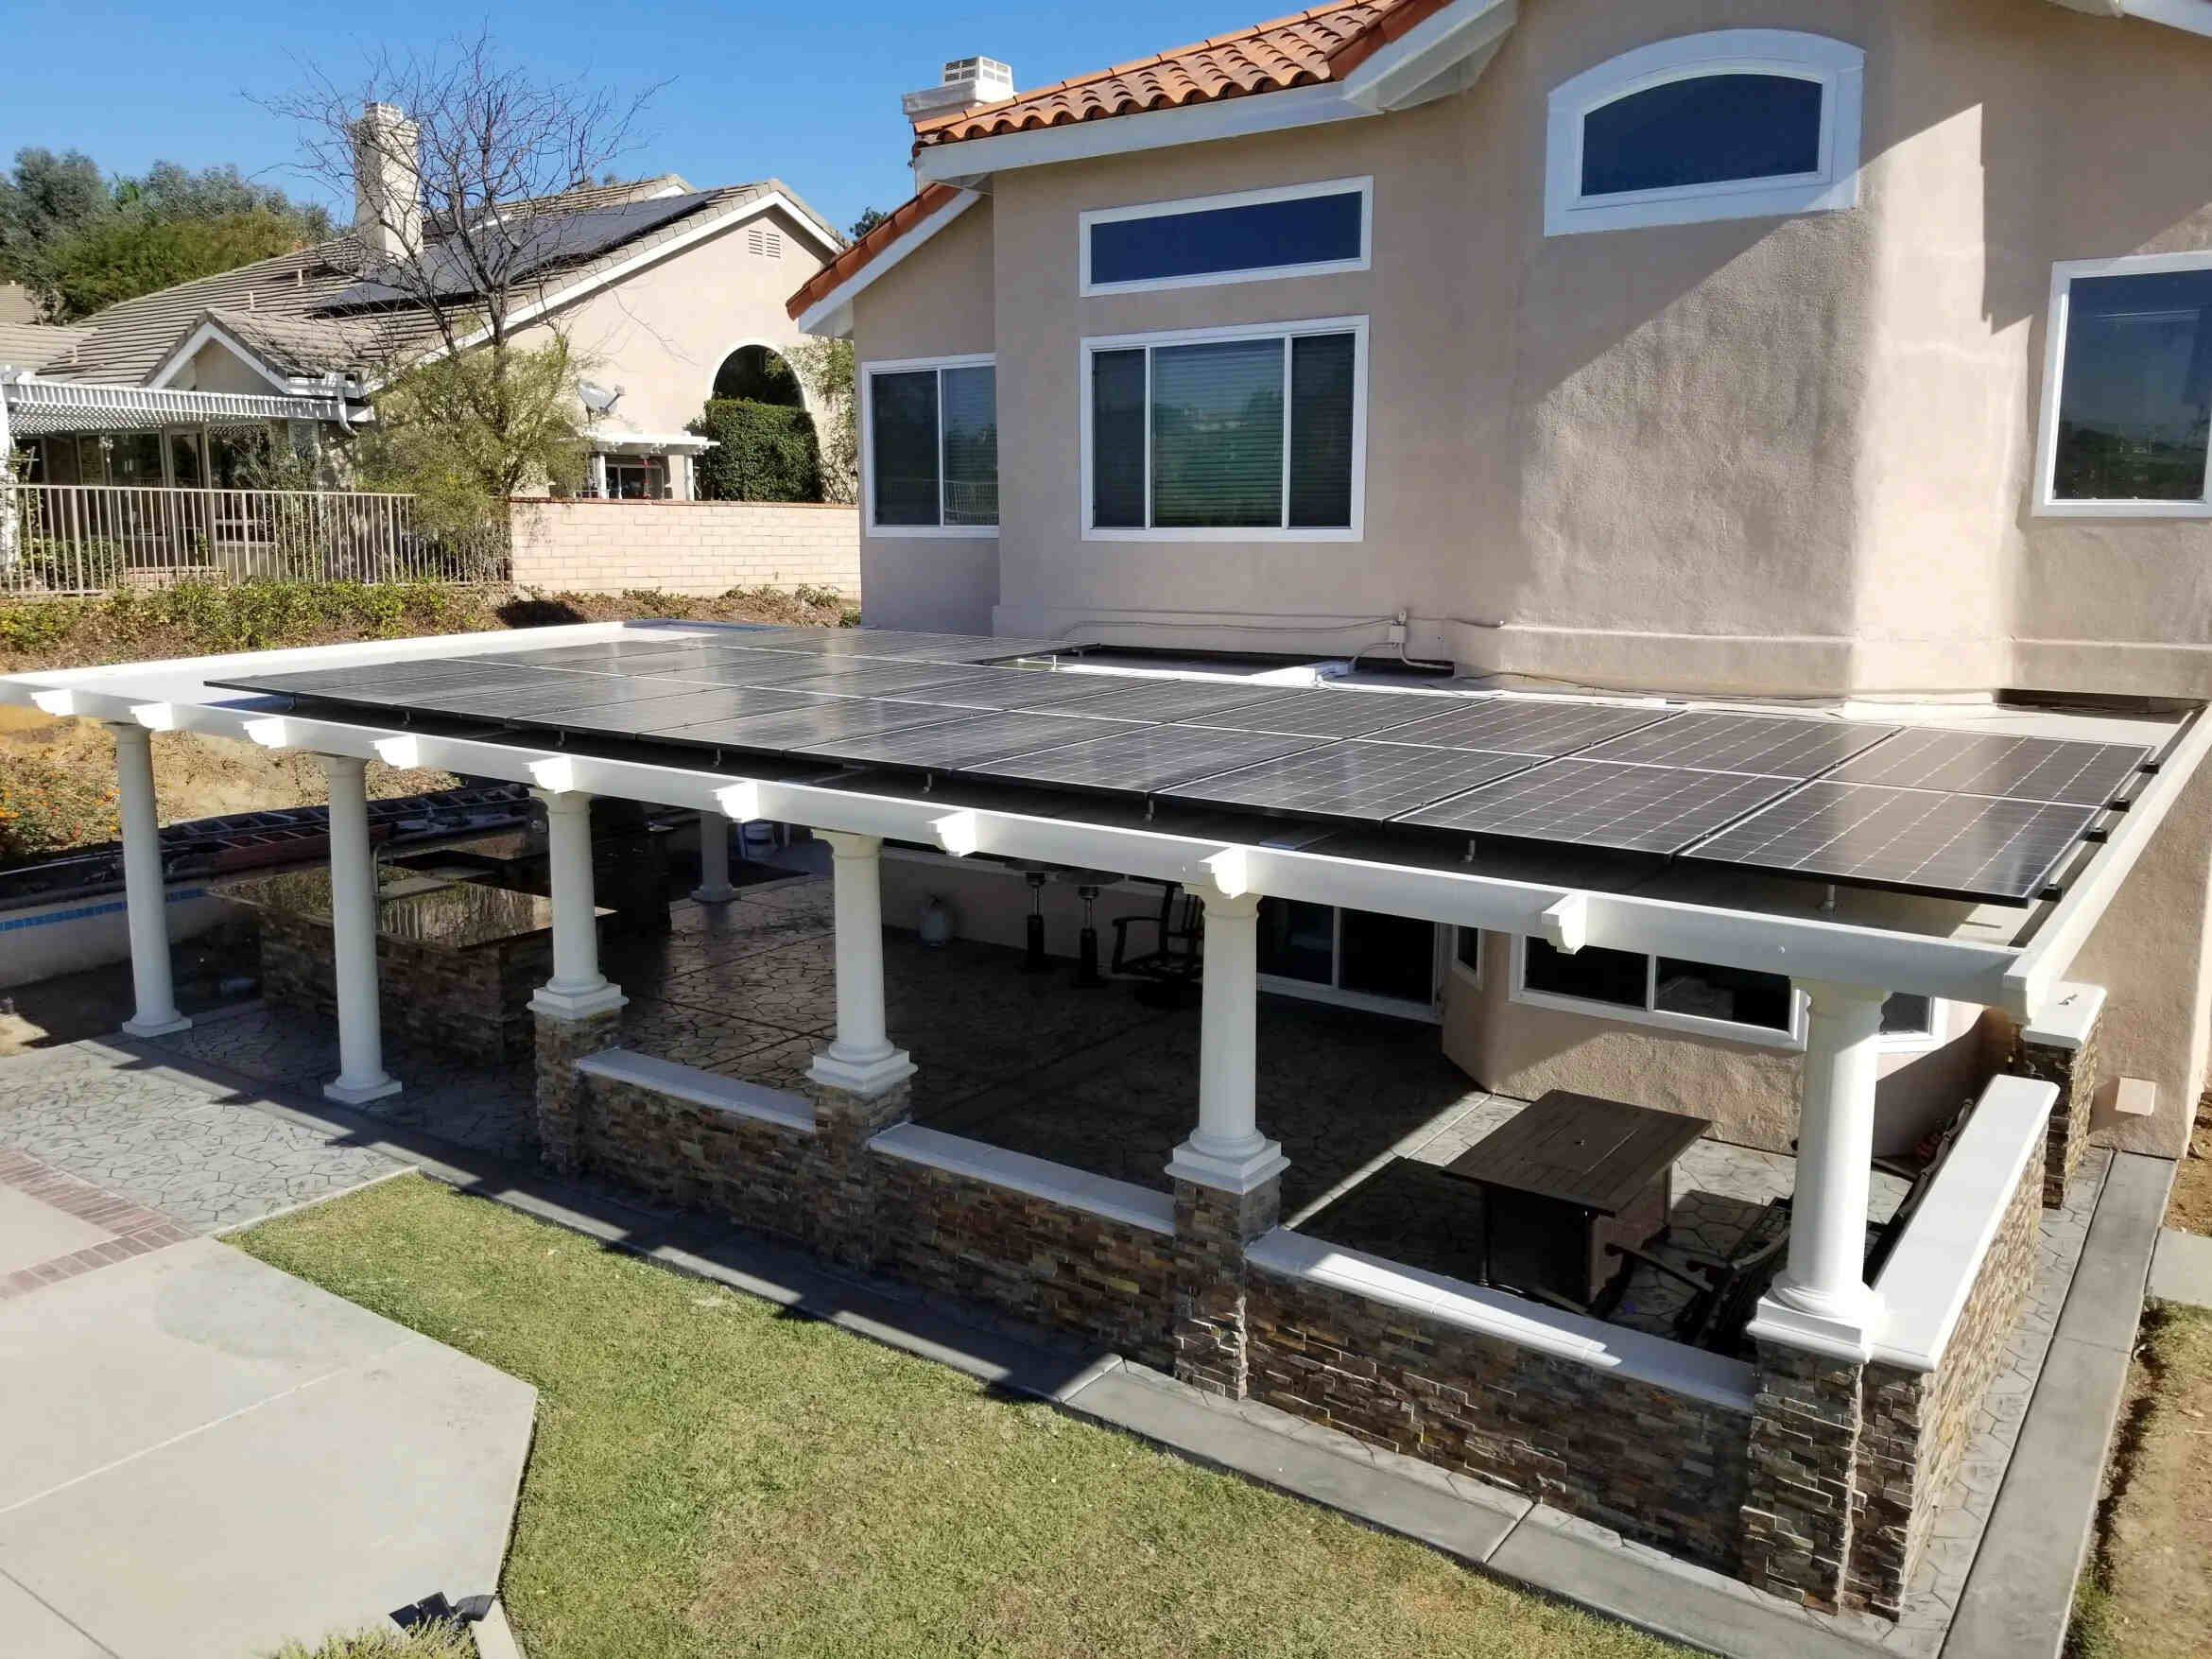
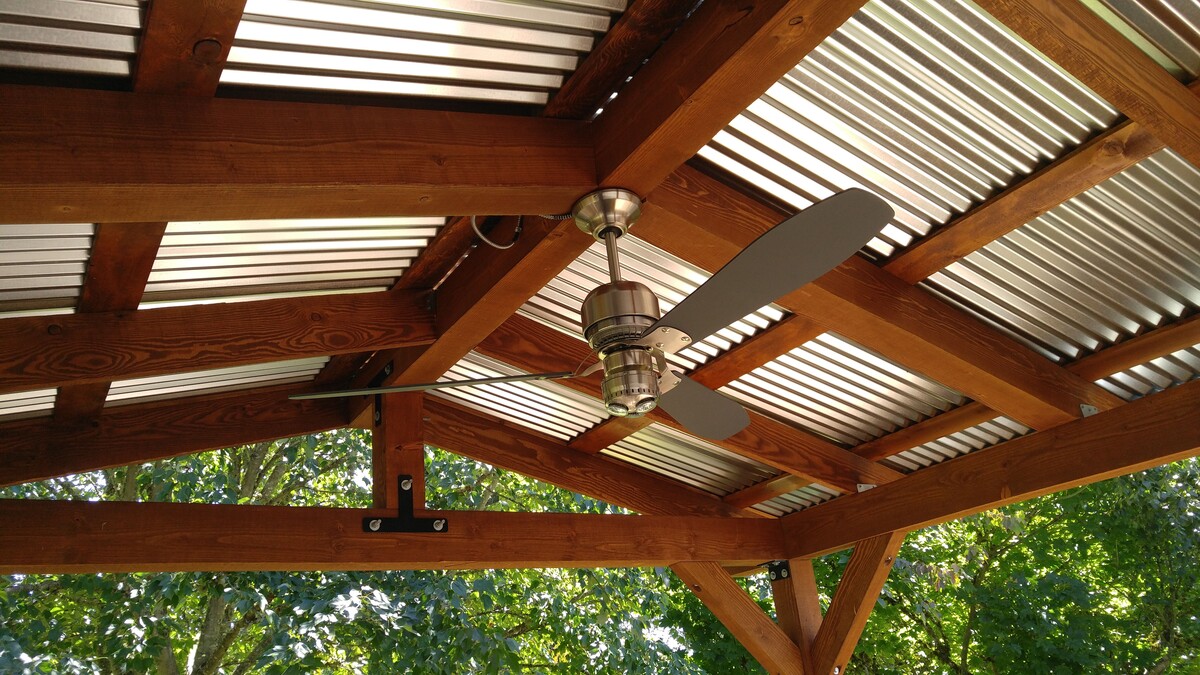
- Consider Roofing Materials: Depending on your design preferences and the weather conditions in your area, choose the appropriate roofing materials. Options can include corrugated metal panels, polycarbonate sheets, or even a fabric shade cover.
- Install Roofing Materials: Install the selected roofing materials according to the manufacturer’s instructions. Attach the roofing panels or secure the fabric shade cover to the frame, ensuring they are weather-resistant and properly fastened.
- Add Finishing Touches: To enhance the aesthetics of the patio cover, consider adding decorative elements such as trim, paint, or stain. Apply a protective finish to the wood to prolong its lifespan and maintain its appearance.
Take your time during the framing process to ensure that all components are properly aligned, securely attached, and level. Check your work at each step to maintain the integrity of the structure.
Once the patio cover is framed and the roofing materials are installed, you’re ready to move on to the next step: adding the finishing touches to complete your outdoor furniture project. Stay tuned for step 7 of our guide as you continue building your outdoor oasis!
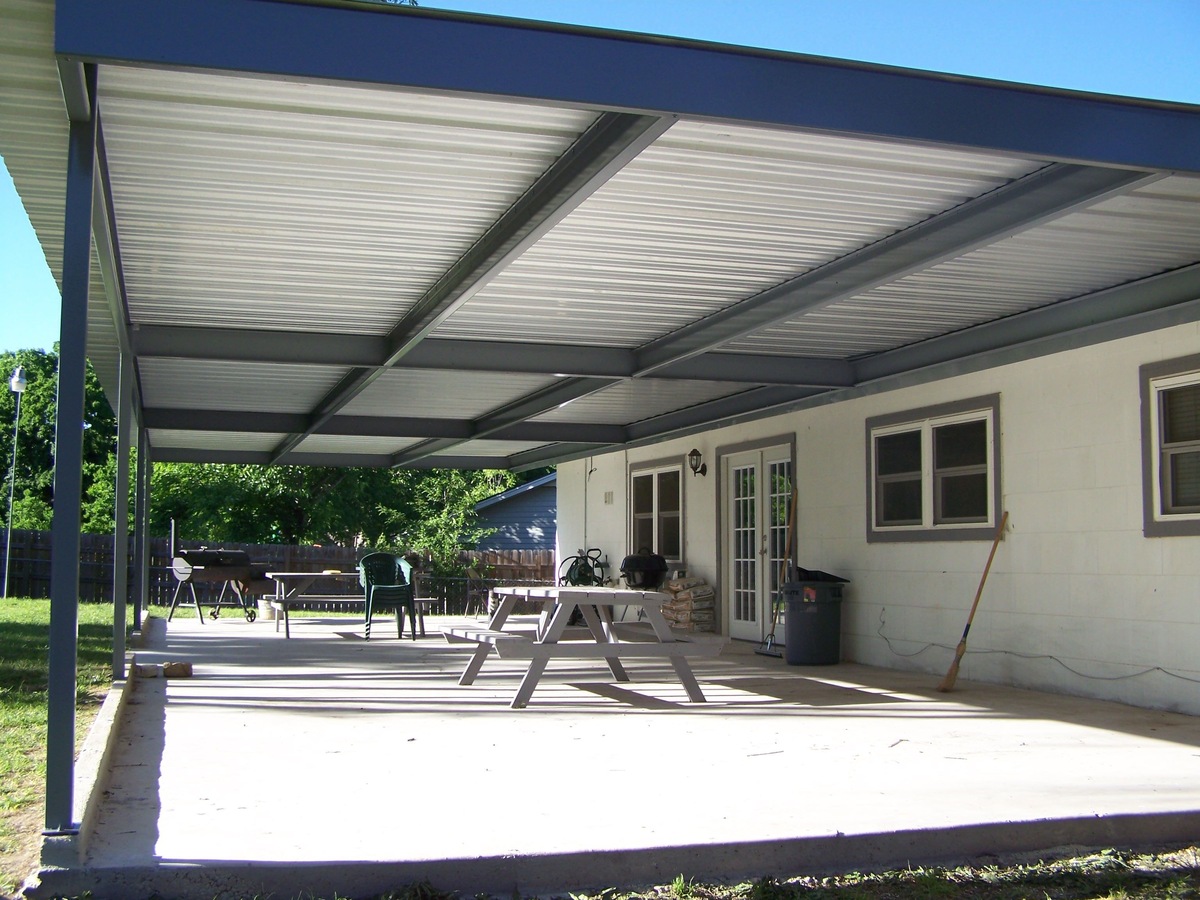
Step 7: Installing Roofing Materials
With the patio cover fully framed, it’s time to move on to the next step: installing the roofing materials. The roofing materials will not only provide protection from the elements but also add the finishing touch to your outdoor furniture project. Here’s a step-by-step guide on how to install the roofing materials:
- Choose the Right Roofing Material: Consider factors such as durability, weather-resistance, style, and budget when selecting the roofing material. Common options include corrugated metal panels, polycarbonate sheets, or even a fabric shade cover.
- Prepare the Roofing Area: Ensure that the roof area is clean and free of debris. Remove any dust, leaves, or other elements that may affect the installation or performance of the roofing material.
- Measure and Cut the Roofing Materials: Using the appropriate tools, carefully measure and cut the roofing materials to fit the dimensions of your patio cover. Follow the manufacturer’s instructions for precise measurements and cuts.
- Start from the Bottom: Begin installing the roofing materials from the bottom of the roof area and work your way up. This will help with water drainage and prevent any water infiltration under the roofing material.
- Attach the Roofing Material: Depending on the roofing material chosen, use the recommended fasteners or adhesives to secure it to the frame. For metal panels, use screws with rubber washers to prevent water leakage. For polycarbonate sheets, use specialized clips or channels for secure installation.
- Overlap the Roofing Material: Ensure that each piece of roofing material overlaps the previous one, creating a watertight seal. Follow the manufacturer’s guidelines for the recommended overlap distance.
- Seal the Joints: Apply a weather-resistant sealant to the joints and seams of the roofing materials to prevent water penetration. This will add an extra layer of protection against leaks and ensure the longevity of your patio cover.
- Check for Proper Drainage: After installing the roofing materials, check for proper water drainage. Ensure that any gaps or openings are properly sealed to prevent water from seeping through and causing damage.
- Secure the Roofing Material: Double-check that all the roofing materials are securely attached to the frame. Tighten any loose fasteners and make any necessary adjustments to ensure a stable and durable roof.
- Inspect the Roofing: Take a step back and inspect the entire roofing area to ensure that it is properly installed and aesthetically pleasing. Make any necessary touch-ups or corrections as needed.
During the installation process, follow the manufacturer’s instructions and guidelines for the specific roofing material you have chosen. Pay extra attention to details such as overlap, sealing, and drainage to ensure a watertight and long-lasting patio cover.
With the roofing materials installed, you’re almost done with your outdoor furniture project. In the next step, we will explore adding the finishing touches to complete your outdoor oasis. Stay tuned for step 8 of our guide as you put the final touches on your outdoor furniture masterpiece!
Step 8: Adding Finishing Touches
Congratulations! You’re in the final step of building your outdoor furniture masterpiece. Step 8 involves adding the finishing touches that will truly bring your outdoor space to life. Here are some ideas to consider:
- Accessorize with Cushions: Add comfort and style to your outdoor furniture by accessorizing with cushions. Choose cushions that are weather-resistant and complement the color scheme of your outdoor space.
- Incorporate Outdoor Lighting: Enhance the ambiance of your outdoor area by incorporating outdoor lighting. String lights, lanterns, or pathway lights can create a warm and inviting atmosphere for evening gatherings.
- Introduce Greenery: Bring your outdoor space to life by adding plants and greenery. Place potted plants strategically around your furniture to add natural beauty and a refreshing touch to your outdoor oasis.
- Add a Side Table: Consider adding a side table or two near your seating area. This provides a convenient spot to rest drinks, snacks, or decorative items while enjoying your outdoor space.
- Include Shade Solutions: If your outdoor area lacks natural shade, incorporate shade solutions such as umbrellas, awnings, or a pergola. These additions will protect you from the sun and provide a comfortable outdoor retreat.
- Personalize with Outdoor Decor: Infuse your unique style into the outdoor space by incorporating outdoor decor. This can include wall art, sculptures, wind chimes, or even a personalized doormat.
- Consider Outdoor Rugs: Add a cozy and inviting touch by placing an outdoor rug under your furniture. Outdoor rugs not only provide comfort but also define the seating area and add a pop of color or pattern.
- Install Privacy Screens: If privacy is a concern, installing privacy screens or trellises can create a secluded and intimate atmosphere. These additions can also serve as a beautiful backdrop for your outdoor furniture.
- Add Fire Elements: Extend the usability of your outdoor space into the cooler months by incorporating fire elements such as a fire pit or an outdoor fireplace. This provides warmth, coziness, and a focal point for gatherings.
- Keep it Organized: Lastly, ensure that your outdoor space remains organized and clutter-free. Consider storage options such as outdoor storage benches or deck boxes to neatly store cushions, gardening tools, and other accessories.
Remember to consider the overall style and theme of your outdoor space when adding the finishing touches. Keep in mind that less is often more – a few well-chosen accessories can make a big impact.
By incorporating these finishing touches, you’ll create an inviting and personalized outdoor space that you’ll love spending time in. Take a step back, admire your hard work, and get ready to enjoy your newly created outdoor oasis.
With Step 8 complete, you have successfully completed the process of building your outdoor furniture. Enjoy the fruits of your labor, and make memories in your beautiful outdoor retreat!
Read more: How Much To Build A Covered Patio
Conclusion
Congratulations on completing the journey of building your outdoor furniture! By following the step-by-step process outlined in this guide, you have created a functional and beautiful outdoor space that you can truly enjoy and be proud of. Now, it’s time to sit back, relax, and reap the rewards of your hard work.
Throughout this guide, we discussed the importance of planning and designing your outdoor space to meet your needs and reflect your style. We explored the process of gathering materials and tools, preparing the site, digging post holes, setting the posts, framing the patio cover, installing roofing materials, and adding the finishing touches.
Remember, outdoor furniture should not only be aesthetically pleasing but also durable, comfortable, and weather-resistant. By selecting the right materials, properly setting the foundation, and paying attention to the details, you have ensured that your outdoor furniture will stand the test of time and provide you with years of enjoyment.
Enhance your outdoor space further by incorporating accessories like cushions, lighting, greenery, and personal touches that reflect your style and create a welcoming atmosphere. Whether you’re hosting outdoor gatherings, enjoying a quiet moment of relaxation, or simply soaking in the beauty of nature, your outdoor furniture has transformed your outdoor area into a haven.
As you enjoy your newly created outdoor oasis, be sure to care for your furniture by cleaning it regularly and taking necessary precautions to protect it from the elements. This will help maintain its beauty and prolong its lifespan.
Thank you for joining us on this journey of building outdoor furniture. We hope that this guide has provided you with the knowledge and inspiration to create a space where you can unwind, entertain, and make lasting memories. So, go ahead and make the most of your outdoor retreat, and embrace the joys of outdoor living!
Frequently Asked Questions about How To Build A Freestanding Patio Cover
Was this page helpful?
At Storables.com, we guarantee accurate and reliable information. Our content, validated by Expert Board Contributors, is crafted following stringent Editorial Policies. We're committed to providing you with well-researched, expert-backed insights for all your informational needs.


0 thoughts on “How To Build A Freestanding Patio Cover”