Home>Gardening & Outdoor>Outdoor Structures>How To Build A 12×12 Shed
Outdoor Structures
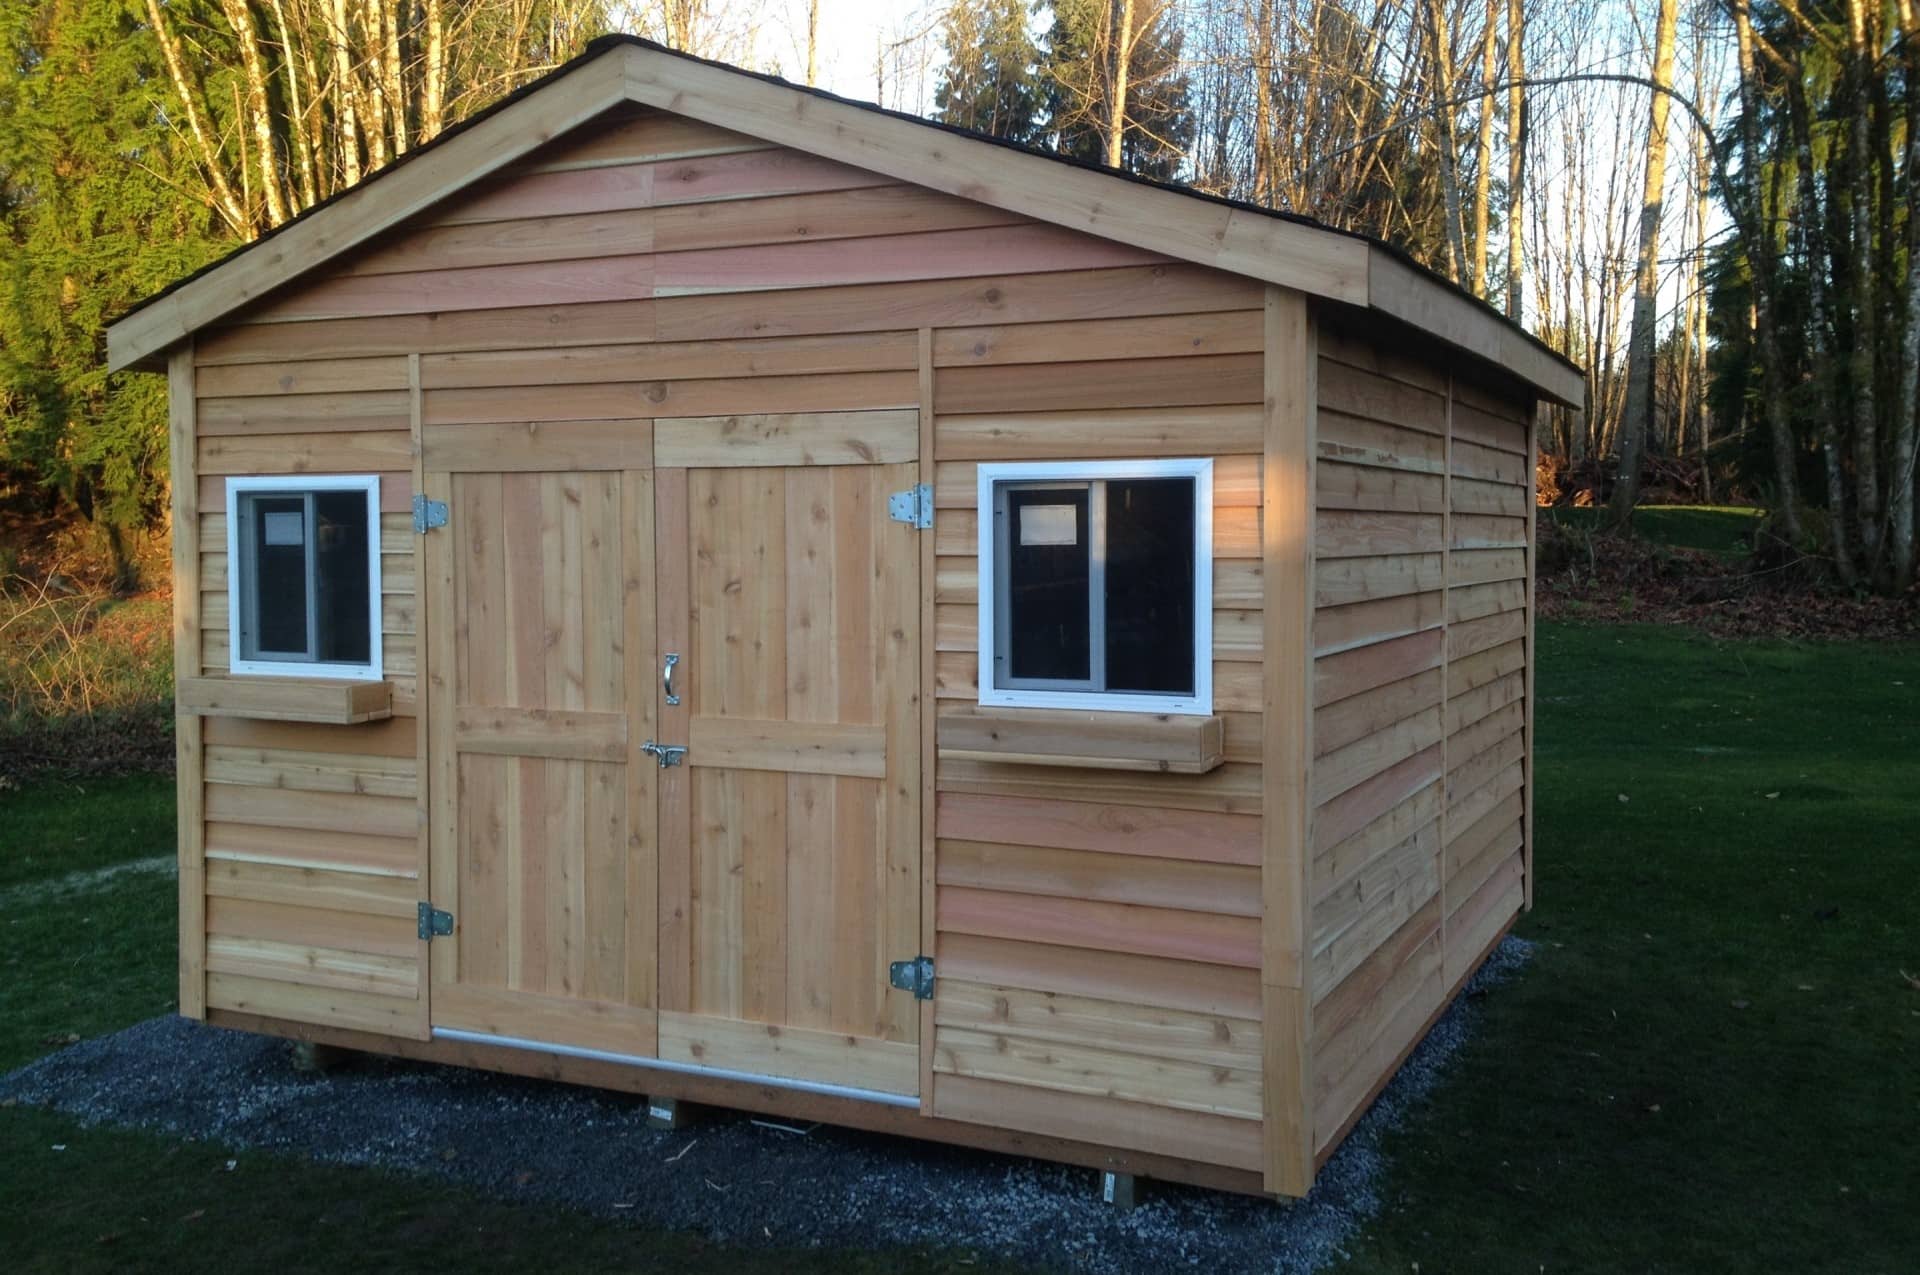
How To Build A 12×12 Shed
Modified: October 18, 2024
Learn how to build a sturdy 12x12 shed for your outdoor space with our comprehensive guide. Discover expert tips and tricks for constructing outdoor structures.
(Many of the links in this article redirect to a specific reviewed product. Your purchase of these products through affiliate links helps to generate commission for Storables.com, at no extra cost. Learn more)
Introduction
Welcome to the world of DIY shed building! Whether you're a seasoned craftsman or a novice do-it-yourself enthusiast, constructing a 12×12 shed can be a rewarding and practical project. A well-built shed not only provides valuable storage space for your outdoor equipment, tools, and supplies but also adds aesthetic appeal to your property.
In this comprehensive guide, we will walk you through the step-by-step process of building a 12×12 shed from the ground up. From initial planning and preparation to the finishing touches, you'll gain valuable insights and practical tips to help you tackle this project with confidence.
Building a shed is more than just assembling pieces of wood and fastening them together; it's a journey that allows you to unleash your creativity, hone your carpentry skills, and create a functional structure that complements your outdoor space. Whether you envision a traditional barn-style shed, a modern minimalist design, or a charming rustic retreat, this guide will provide you with the knowledge and inspiration to bring your vision to life.
Throughout this guide, we'll explore the essential steps involved in constructing a 12×12 shed, including gathering materials and tools, building a sturdy foundation, framing the structure, installing the roof, adding siding and doors, and adding finishing touches. Each phase of the construction process will be accompanied by practical tips, expert advice, and insights to help you navigate potential challenges and achieve professional-looking results.
So, roll up your sleeves, gather your tools, and get ready to embark on a fulfilling journey of craftsmanship and creativity. By the end of this guide, you'll be well-equipped to take on the challenge of building a 12×12 shed that not only meets your practical needs but also reflects your unique style and personality. Let's dive in and unleash your inner builder!
Key Takeaways:
- Building a 12×12 shed involves meticulous planning, gathering materials, constructing a sturdy foundation, framing the structure, installing the roof, adding siding and doors, and finishing touches. It’s a rewarding journey that unleashes creativity and craftsmanship.
- Completing a 12×12 shed is a testament to dedication and craftsmanship, offering a valuable addition to outdoor living. It’s not just a structure but a space that enhances lifestyle and brings joy and functionality to daily routines.
Read more: How Build A Shed
Planning and Preparation
Before diving into the construction process, meticulous planning and thorough preparation are essential for a successful shed-building project. Here are the key steps to consider:
- Check Local Regulations: Begin by checking with your local authorities regarding zoning laws, building codes, and permit requirements for constructing a shed on your property. Compliance with these regulations is crucial to avoid potential legal issues down the road.
- Select an Ideal Location: Choose a suitable location for your shed, considering factors such as sunlight exposure, drainage, and proximity to existing structures. Ensure that the chosen area provides a level and stable foundation for the shed.
- Determine Shed Functionality: Define the intended use of the shed, whether it’s for storing gardening tools, housing outdoor equipment, serving as a workshop, or a multifunctional space. This will influence the design, layout, and features of the shed.
- Create a Detailed Plan: Sketch out a detailed plan for your 12×12 shed, including the layout, dimensions, window and door placements, and any additional features you wish to incorporate. A well-thought-out plan serves as a roadmap for the construction process.
- Estimate Material Requirements: Calculate the quantity of lumber, roofing materials, fasteners, and other supplies needed for the project. This step will help you create an accurate budget and prevent unnecessary delays due to material shortages.
- Gather Necessary Tools: Ensure that you have all the essential tools and equipment required for shed construction, including a circular saw, hammer, level, tape measure, drill, and safety gear. Having the right tools on hand will streamline the building process.
By investing time in comprehensive planning and meticulous preparation, you’ll set a solid foundation for the shed-building journey ahead. With a clear understanding of local regulations, a well-defined plan, and the necessary tools and materials, you’ll be ready to move on to the next phase: gathering materials and tools.
Gathering Materials and Tools
With the planning phase complete, it’s time to gather the essential materials and tools needed to bring your 12×12 shed to life. Here’s a comprehensive list to guide you through this crucial step:
Materials:
- Lumber: Purchase high-quality lumber in the appropriate dimensions for framing the walls, roof, and floor of the shed. Pressure-treated lumber is recommended for durability and resistance to decay.
- Roofing Materials: Select roofing shingles or metal panels to protect your shed from the elements. Ensure that the chosen materials are suitable for the local climate and provide adequate insulation and weatherproofing.
- Fasteners: Stock up on nails, screws, and other fasteners required for securing the various components of the shed. Opt for galvanized or stainless steel fasteners to prevent corrosion and ensure long-term structural integrity.
- Foundation Materials: Depending on your chosen foundation type, acquire concrete blocks, gravel, or concrete mix to create a stable and level base for the shed.
- Exterior Siding: Choose from options such as wood siding, vinyl siding, or T1-11 plywood to clad the exterior walls of the shed. Consider the aesthetic appeal, durability, and maintenance requirements of each siding material.
- Doors and Windows: If your shed design includes doors and windows, procure these components, ensuring they are appropriately sized and designed for outdoor use.
- Insulation and Vapor Barrier: If you plan to insulate your shed for year-round use, acquire insulation materials and a vapor barrier to regulate temperature and moisture levels inside the structure.
Tools:
- Circular Saw: A reliable circular saw is essential for cutting lumber to the required dimensions with precision.
- Hammer and Nails: Ensure you have a sturdy hammer and a plentiful supply of nails for framing and fastening components together.
- Level and Tape Measure: Accurate measurements and leveling are critical in shed construction, so equip yourself with a quality level and a durable tape measure.
- Power Drill: A power drill with screwdriver bits will streamline the installation of fasteners and hardware.
- Roofing Tools: If you’re installing traditional shingles, gather roofing nails, a utility knife, and a roofing nail gun for efficient and secure installation.
- Protective Gear: Prioritize safety by obtaining protective gear, including goggles, work gloves, and a dust mask, to safeguard yourself during the construction process.
By assembling the necessary materials and tools in advance, you’ll ensure a smooth and efficient construction process, minimizing delays and interruptions. With your shed blueprint in hand and the required supplies at your disposal, you’re ready to move on to the next phase: building the foundation.
Read more: How To Build A Shed
Building the Foundation
The foundation serves as the anchor for your shed, providing stability and preventing moisture from seeping into the structure. Here’s a step-by-step guide to building a solid foundation for your 12×12 shed:
Choose the Foundation Type:
Depending on your local climate, soil composition, and personal preferences, you can opt for a concrete slab, concrete blocks, or a skid foundation. Each type offers unique benefits in terms of durability, cost, and ease of installation.
Prepare the Site:
Clear the chosen site of any debris, vegetation, and rocks. Use a shovel and a rake to level the ground, ensuring that it’s uniformly flat and free from any obstructions that could affect the foundation’s stability.
Mark the Layout:
Using stakes and string, mark the perimeter of the shed’s foundation, ensuring that the corners are square and the dimensions match your shed plan. This step is crucial for maintaining the structural integrity and alignment of the foundation.
Read more: How To Build A Bar Shed
Excavate the Area:
If you’re opting for a concrete foundation, excavate the marked area to the required depth, typically 4 to 6 inches, taking into account the thickness of the concrete slab. For a skid foundation, dig holes for the concrete blocks or footings that will support the shed’s floor joists.
Add Gravel and Compact:
Spread a layer of gravel evenly across the excavated area to create a stable base for the foundation. Use a compactor or hand tamper to compact the gravel, ensuring a firm and level surface that will support the foundation materials.
Pour Concrete or Install Blocks:
If you’ve chosen a concrete foundation, pour the concrete into the excavated area, leveling it with a screed and smoothing the surface with a trowel. For a skid foundation, position and level the concrete blocks or footings to provide support for the shed’s floor joists.
Cure the Concrete:
If you’ve poured a concrete slab, allow it to cure for the recommended time as per the manufacturer’s instructions. This crucial step ensures that the concrete achieves its full strength and durability before you begin framing the shed.
By following these steps, you’ll establish a sturdy and level foundation that forms the basis for the rest of the shed construction. With the foundation in place, you’re ready to progress to the next phase: constructing the frame of your 12×12 shed.
Read more: How To Build A Tuff Shed
Constructing the Frame
The frame of your 12×12 shed forms the structural skeleton, providing support for the walls, roof, and doors. Here’s a detailed guide to constructing the frame with precision and durability:
Prepare the Lumber:
Begin by cutting the pressure-treated lumber to the dimensions specified in your shed plan. Use a circular saw to make precise cuts, ensuring that the pieces are uniform and accurately sized for framing the walls, roof, and floor.
Assemble the Floor Frame:
Lay out the pressure-treated 2×6 or 2×8 lumber to create the frame for the shed’s floor. Use joist hangers and galvanized nails to secure the floor joists, ensuring they are evenly spaced and properly aligned. This step forms a sturdy base for the rest of the shed’s structure.
Erect the Wall Frames:
Construct the wall frames by attaching vertical studs between the top and bottom plates, following the dimensions outlined in your shed plan. Ensure that the corners are square and use diagonal bracing to maintain the structural integrity of the wall frames.
Read more: How To Build Rafters For A Shed
Add Door and Window Openings:
If your shed design includes doors and windows, frame the openings accordingly, taking precise measurements to accommodate the chosen door and window sizes. This step ensures that the openings are ready for the next phase of installing doors and windows.
Create the Roof Trusses:
If you’re opting for a traditional gable roof, assemble the roof trusses using the cut lumber according to the roof pitch specified in your shed plan. Secure the truss components with metal truss plates and ensure that they are uniform and structurally sound.
Raise and Secure the Frames:
With the individual wall frames and roof trusses constructed, raise them into position and secure them to the foundation using anchor bolts or brackets. Ensure that the frames are plumb, level, and securely anchored to form a stable and square structure.
Install Blocking and Bracing:
Add additional blocking and bracing as needed to reinforce the frame’s stability and prevent any potential shifting or movement. This step is crucial for ensuring the long-term structural integrity of the shed.
By meticulously following these steps, you’ll create a robust and precisely constructed frame for your 12×12 shed. With the frame in place, you’re ready to move on to the next phase: installing the roof to provide protection and shelter for your outdoor space.
Read more: How To Build A Roof For A Shed
Installing the Roof
The roof of your 12×12 shed serves as a crucial element, providing protection from the elements and completing the structure’s overall appearance. Here’s a comprehensive guide to installing the roof with precision and durability:
Prepare the Roofing Materials:
Prior to installation, gather the roofing materials, whether traditional asphalt shingles, metal panels, or another roofing option. Ensure that you have the necessary underlayment, drip edge, and flashing to provide a weatherproof barrier for the shed.
Sheath the Roof:
Begin by sheathing the roof with exterior-grade plywood or oriented strand board (OSB), securing the panels to the roof trusses with galvanized nails or screws. This step forms a solid base for the roofing materials and reinforces the structural integrity of the roof.
Apply Underlayment:
Install roofing underlayment over the sheathed roof, providing an additional layer of protection against moisture and ensuring a watertight seal. Properly overlap the underlayment to prevent water infiltration and safeguard the shed’s interior.
Read more: How To Build Garden Shed
Install Drip Edge and Flashing:
Secure drip edge along the eaves of the roof to direct water away from the shed’s walls. Additionally, install flashing around roof penetrations, such as vents and chimneys, to prevent water intrusion and maintain the integrity of the roof’s structure.
Apply Roofing Materials:
Depending on your chosen roofing material, carefully install asphalt shingles, metal panels, or other roofing products according to the manufacturer’s guidelines. Ensure proper fastening and overlapping to create a durable and weather-resistant roof surface.
Complete Ridge and Hip Caps:
Finish the roof installation by adding ridge caps or hip caps, depending on the roof design, to provide a professional and weatherproof finish. Properly securing these components ensures that the shed’s roof is sealed and protected from wind and water infiltration.
Inspect and Seal:
Thoroughly inspect the completed roof for any potential gaps, loose fasteners, or areas requiring additional sealing. Address any issues promptly to ensure that the roof provides long-term protection and durability for your 12×12 shed.
By meticulously following these steps, you’ll create a robust and precisely installed roof for your 12×12 shed. With the roof in place, you’re ready to move on to the next phase: adding siding and doors to complete the exterior enclosure of your shed.
Read more: How To Build A Firewood Shed
Adding Siding and Doors
As you near the completion of your 12×12 shed, adding siding and doors is a pivotal phase that enhances the structure’s functionality and aesthetic appeal. Here’s a comprehensive guide to adding siding and doors with precision and attention to detail:
Select Siding Materials:
Choose the siding material that best suits your shed’s design and your preferences. Options include wood siding, vinyl siding, T1-11 plywood, or metal panels. Consider factors such as durability, maintenance requirements, and visual appeal when making your selection.
Prepare the Siding:
Prior to installation, prepare the siding materials by cutting them to the required dimensions and ensuring that they are properly primed or treated for outdoor use. This step sets the stage for a seamless and professional siding installation.
Install the Siding:
Begin installing the siding from the bottom of the shed, ensuring that each piece overlaps the one below it to prevent water infiltration. Use galvanized nails or screws to secure the siding to the wall frames, maintaining consistent spacing and alignment for a polished appearance.
Read more: How To Build A Base For A Shed
Add Trim and Corner Boards:
Enhance the visual appeal of the shed by adding trim and corner boards to the exterior corners and edges. This step provides a finished look to the shed’s exterior and helps protect the edges of the siding from moisture and wear.
Choose and Install Doors:
Select doors that align with your shed’s design and functionality, whether it’s a single or double door, sliding doors, or overhead doors. Install the doors according to the manufacturer’s instructions, ensuring they are level, plumb, and properly sealed to prevent drafts and moisture infiltration.
Add Windows and Hardware:
If your shed design includes windows, install them in the designated openings, ensuring they are properly sealed and provide adequate natural light and ventilation. Additionally, add hardware such as handles, hinges, and locks to complete the functionality and security of the doors.
Seal and Finish:
Thoroughly inspect the installed siding, doors, and windows for any gaps, loose components, or areas requiring additional sealing. Address any issues promptly to ensure that the shed’s exterior is weatherproof, secure, and visually appealing.
By meticulously following these steps, you’ll complete the exterior enclosure of your 12×12 shed with precision and attention to detail. With the siding and doors in place, you’re ready to add the finishing touches that will elevate the functionality and visual appeal of your newly constructed outdoor space.
Read more: How To Build A Shed House
Finishing Touches
As you near the completion of your 12×12 shed construction, incorporating finishing touches adds both functionality and visual appeal to the structure. Here’s a comprehensive guide to adding the final details with precision and attention to detail:
Interior Finishing:
If you intend to use the shed as a workspace or storage area, consider finishing the interior with insulation, drywall, or paneling. This step enhances comfort and usability while providing a polished and professional appearance to the interior space.
Paint or Stain:
Choose a high-quality exterior paint or stain to protect and enhance the appearance of the shed’s exterior. Select a color that complements your property’s aesthetic and landscape while ensuring long-lasting protection against the elements.
Accessorize and Organize:
Add shelves, hooks, and storage solutions to optimize the shed’s functionality and organization. Incorporating accessories such as tool racks, workbenches, and storage bins creates a tailored space that meets your specific needs and maximizes efficiency.
Read more: How To Build An Outhouse Shed
Landscaping and Pathways:
Enhance the shed’s surroundings by creating pathways, adding landscaping features, and integrating it seamlessly into your outdoor space. Consider planting shrubs, installing outdoor lighting, and creating a welcoming approach to the shed’s entrance.
Security and Lighting:
Ensure the shed is equipped with adequate lighting and security features to enhance usability and safety. Install motion-sensing lights, secure locks, and possibly a security system to safeguard the shed and its contents.
Maintenance and Care:
Establish a routine maintenance plan to keep the shed in optimal condition. Regularly inspect the structure for any signs of wear, address any maintenance needs promptly, and keep the surrounding area clean and well-maintained.
Showcase Personal Touches:
Add personal touches such as decorative accents, potted plants, or custom signage to infuse the shed with your unique style and personality. These details transform the shed into a personalized and inviting space that reflects your individual tastes.
By meticulously incorporating these finishing touches, you’ll elevate the functionality, visual appeal, and overall experience of your 12×12 shed. With the completion of these final details, you’ll have transformed your vision into a tangible and valuable addition to your outdoor space.
Read more: How To Build A Motorcycle Shed
Conclusion
Congratulations on successfully completing the construction of your 12×12 shed! What began as a vision has now materialized into a functional, aesthetically pleasing, and valuable addition to your outdoor space. Throughout this journey, you’ve demonstrated creativity, craftsmanship, and a commitment to creating a structure that meets your practical needs while reflecting your unique style and personality.
Building a shed is more than just assembling materials; it’s a journey that allows you to unleash your creativity, hone your carpentry skills, and create a space that enhances your property. By meticulously following the steps outlined in this guide, you’ve not only constructed a shed but also cultivated a sense of pride and accomplishment in bringing your vision to life.
As you stand back and admire the completed shed, take a moment to appreciate the skills you’ve developed, the challenges you’ve overcome, and the satisfaction of seeing your hard work come to fruition. Whether you’ve created a practical storage space, a workshop, or a multifunctional retreat, your shed stands as a testament to your dedication and craftsmanship.
As you begin to utilize the shed for its intended purpose, whether it’s storing gardening tools, housing outdoor equipment, pursuing DIY projects, or simply enjoying a peaceful retreat, may it serve you well and enrich your outdoor living experience. The shed is not merely a structure but a space that has the potential to enhance your lifestyle and bring joy and functionality to your daily routines.
Remember that the completion of the shed is not the end of the journey but the beginning of a new chapter. Embrace the opportunity to personalize and optimize the space, incorporating organizational solutions, landscaping enhancements, and personal touches that make it truly your own. As the seasons change and your needs evolve, the shed will adapt and grow alongside you, becoming an integral part of your outdoor lifestyle.
Thank you for entrusting this guide to be a part of your shed-building journey. May the shed bring you years of practical use, creative inspiration, and a sense of fulfillment as you enjoy the fruits of your labor. Here’s to the successful completion of your 12×12 shed and the exciting possibilities that await within its walls.
Frequently Asked Questions about How To Build A 12x12 Shed
Was this page helpful?
At Storables.com, we guarantee accurate and reliable information. Our content, validated by Expert Board Contributors, is crafted following stringent Editorial Policies. We're committed to providing you with well-researched, expert-backed insights for all your informational needs.


0 thoughts on “How To Build A 12×12 Shed”