Home>Gardening & Outdoor>Outdoor Structures>How To Build A Small Garden Tool Shed By Bosch
Outdoor Structures
How To Build A Small Garden Tool Shed By Bosch
Published: December 21, 2023
Learn how to build a small garden tool shed with Bosch and create a functional outdoor structure for your gardening needs. Explore step-by-step instructions and expert tips.
(Many of the links in this article redirect to a specific reviewed product. Your purchase of these products through affiliate links helps to generate commission for Storables.com, at no extra cost. Learn more)
Introduction
Are you tired of rummaging through your garage or cluttered garden for your tools every time you need to tend to your plants or work on a DIY project? A small garden tool shed could be the perfect solution to your storage woes. Not only will it keep your gardening equipment organized and easily accessible, but it can also add a charming touch to your outdoor space.
In this guide, we'll walk you through the step-by-step process of building a small garden tool shed that's not only practical but also aesthetically pleasing. Whether you're a seasoned DIY enthusiast or a novice looking to embark on your first construction project, this comprehensive overview, complete with tips and insights, will equip you with the knowledge and confidence to bring your vision to life.
From selecting the ideal location for your shed to adding the finishing touches, we've got you covered. So, grab your tool belt and let's embark on this rewarding journey of creating a functional and stylish haven for your gardening essentials.
Key Takeaways:
- Planning and preparation are crucial for building a small garden tool shed. Consider the shed’s size, location, and materials needed, and allocate sufficient time for the project to avoid feeling overwhelmed.
- The construction of a small garden tool shed involves careful attention to detail, from building the foundation to adding doors and windows. Finishing touches, such as protective finishes and interior organization, enhance the shed’s functionality and visual appeal.
Read more: How To Live In A Tool Shed Or Small Building
Planning and Preparation
Before diving into the construction process, meticulous planning and thorough preparation are essential. Start by envisioning the size and design of your small garden tool shed. Consider the amount of space you have available and the specific items you intend to store. This will help you determine the dimensions and layout that best suit your needs.
Next, check with your local building authorities to inquire about any permits or regulations that may apply to constructing a shed on your property. It’s crucial to adhere to any zoning laws and obtain the necessary approvals before proceeding. Additionally, familiarize yourself with any utility lines or underground cables in the proposed construction area to avoid any complications during excavation.
As you plan, create a detailed list of materials and tools required for the project. This may include lumber, nails, roofing materials, hinges, and more. Assess your existing tools and determine if there are any additional items you need to acquire. It’s also wise to consider safety equipment such as gloves, goggles, and a hard hat to ensure a secure working environment.
Furthermore, sketch a rough blueprint or utilize shed-building software to visualize the layout and structural elements of your shed. This will serve as a valuable reference throughout the construction process, helping you stay organized and focused on your goals.
Lastly, allocate sufficient time for the project, factoring in potential setbacks and unexpected delays. Setting realistic timelines and milestones will enable you to approach the construction methodically and reduce the likelihood of feeling overwhelmed.
By investing time in meticulous planning and thorough preparation, you’ll lay a solid foundation for the successful realization of your small garden tool shed, setting the stage for a rewarding and enjoyable construction experience.
Choosing the Right Location
Selecting the optimal location for your small garden tool shed is a critical decision that can significantly impact its functionality and visual appeal. Begin by surveying your outdoor space and identifying a spot that offers convenient access to your gardening area while complementing the overall aesthetics of your landscape.
Consider positioning the shed in an area that receives an adequate amount of sunlight throughout the day, as this can help prevent dampness and maintain a favorable environment for storing tools and equipment. Additionally, assess the terrain to ensure that the chosen location is relatively level, minimizing the need for extensive groundwork and facilitating the construction process.
Furthermore, take into account the proximity to existing structures such as your home, fences, or trees. Ensure that the shed’s placement allows for sufficient clearance from these elements, preventing potential obstructions and simplifying maintenance tasks in the future.
Another crucial factor to consider is accessibility. Aim to position the shed in a location that is easily reachable from your garden or work area, reducing the time and effort required to retrieve and return tools as you engage in various outdoor projects.
Moreover, contemplate the visual impact of the shed within your landscape. Strive to integrate the structure harmoniously with its surroundings, whether through complementary color schemes, landscaping features, or strategic placement that enhances the overall appeal of your outdoor space.
By thoughtfully selecting the right location for your small garden tool shed, you can optimize its functionality, ensure longevity, and contribute to the cohesive and inviting atmosphere of your outdoor environment. This deliberate approach sets the stage for a successful and rewarding addition to your property.
Gathering Materials and Tools
With the location chosen and the plans in place, the next step in building your small garden tool shed is gathering the necessary materials and tools. This phase is crucial for ensuring a smooth and efficient construction process.
Begin by compiling a comprehensive list of materials needed for the project. This typically includes lumber for the frame and walls, roofing materials, fasteners such as nails and screws, as well as any additional components such as windows, doors, and hardware. Consider the specific design and dimensions of your shed to accurately estimate the quantity of materials required.
When selecting lumber, prioritize quality and durability. Opt for pressure-treated or weather-resistant wood to safeguard the structure against the elements and prolong its lifespan. Additionally, assess the roofing options available, taking into account factors such as climate, aesthetics, and longevity to choose the most suitable roofing material for your shed.
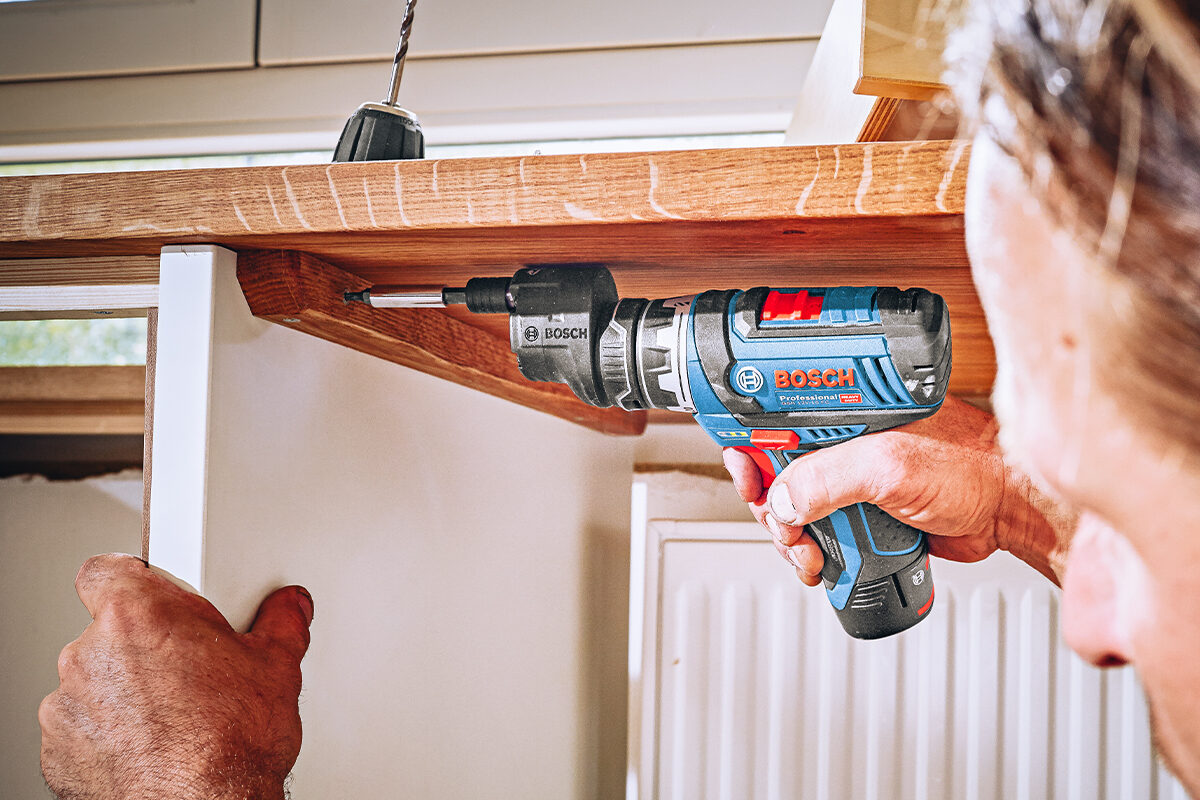
As for tools, ensure that you have a well-equipped arsenal to tackle the construction process effectively. Essential tools may include a circular saw, hammer, level, tape measure, screwdriver, and a power drill. Depending on the complexity of your shed design, you may also require specialized tools for tasks such as roofing installation, window fitting, and door assembly.
It’s important to prioritize safety during this phase by acquiring personal protective equipment (PPE) such as gloves, safety goggles, and a dust mask. These items are vital for safeguarding yourself against potential hazards and ensuring a secure working environment throughout the construction process.
Once you have compiled your list of materials and ensured the availability of essential tools, consider sourcing them from reputable suppliers or hardware stores. Prioritize quality and reliability when acquiring materials, as this can significantly impact the structural integrity and longevity of your small garden tool shed.
By meticulously gathering the required materials and tools, you’ll set the stage for a successful and efficient construction process, laying the groundwork for bringing your shed design to fruition with confidence and precision.
Building the Foundation
The foundation serves as the anchor of your small garden tool shed, providing stability and structural support. Before commencing construction, it’s essential to carefully plan and execute this critical phase to ensure the longevity and resilience of your shed.
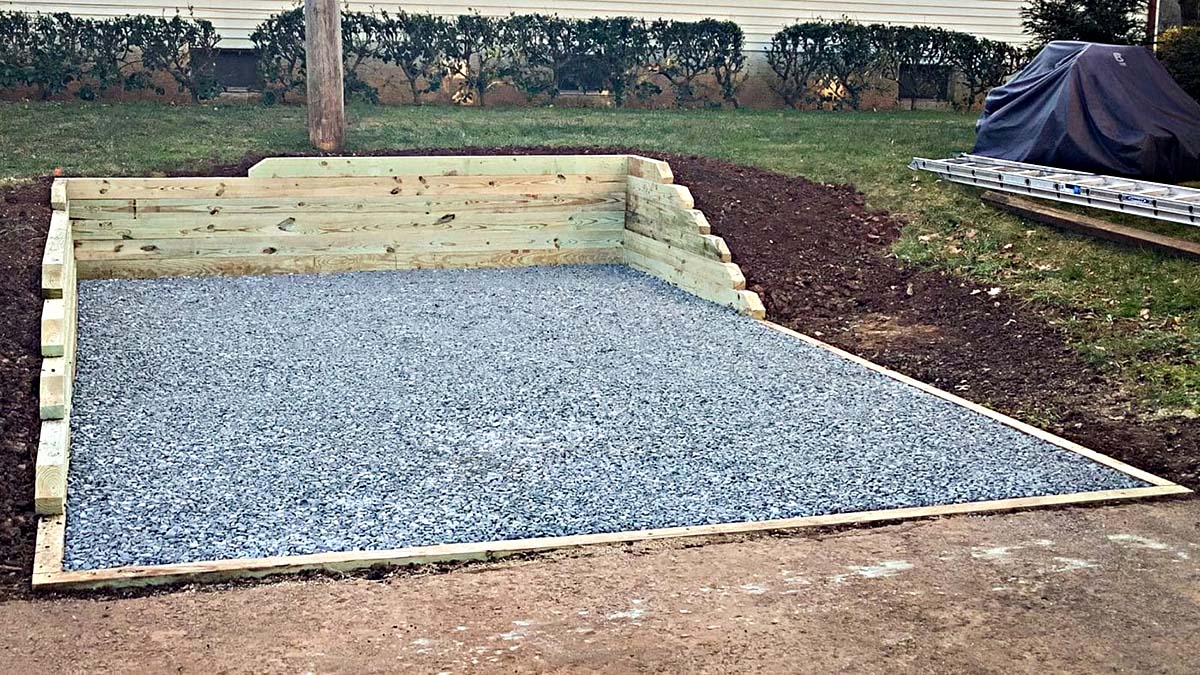
Start by preparing the site for the foundation. Clear the designated area of any debris, vegetation, and rocks, ensuring a clean and level surface for construction. If necessary, use a shovel or a small excavator to excavate the soil to the required depth, accounting for factors such as frost lines and local building codes.
Next, consider the foundation type best suited for your shed. Common options include concrete slabs, concrete blocks, or pressure-treated skids. The choice of foundation will depend on factors such as soil composition, climate, and personal preference. Concrete slabs offer durability and resistance to moisture, making them ideal for regions with high humidity or frequent precipitation. Alternatively, pressure-treated skids or blocks may be suitable for smaller sheds or areas with well-drained soil.
Once the foundation type is determined, proceed with the construction process. If pouring a concrete slab, ensure that it is accurately leveled and properly cured to prevent future structural issues. For pressure-treated skids or blocks, meticulously position and secure them to form a stable base for the shed.
Throughout the foundation construction, prioritize precision and attention to detail to guarantee a solid and level base for the subsequent stages of the shed assembly. Utilize a level and measuring tools to verify the accuracy of the foundation, making any necessary adjustments to achieve optimal alignment and stability.
It’s important to note that the foundation represents a fundamental element of your shed’s structural integrity, directly impacting its resilience against environmental factors and ensuring its long-term functionality. By dedicating careful consideration and meticulous execution to this phase, you’ll lay a robust groundwork for the successful construction of your small garden tool shed.
When building a small garden tool shed, make sure to choose a level and well-drained location for the shed. This will help prevent water damage and ensure the stability of the structure.
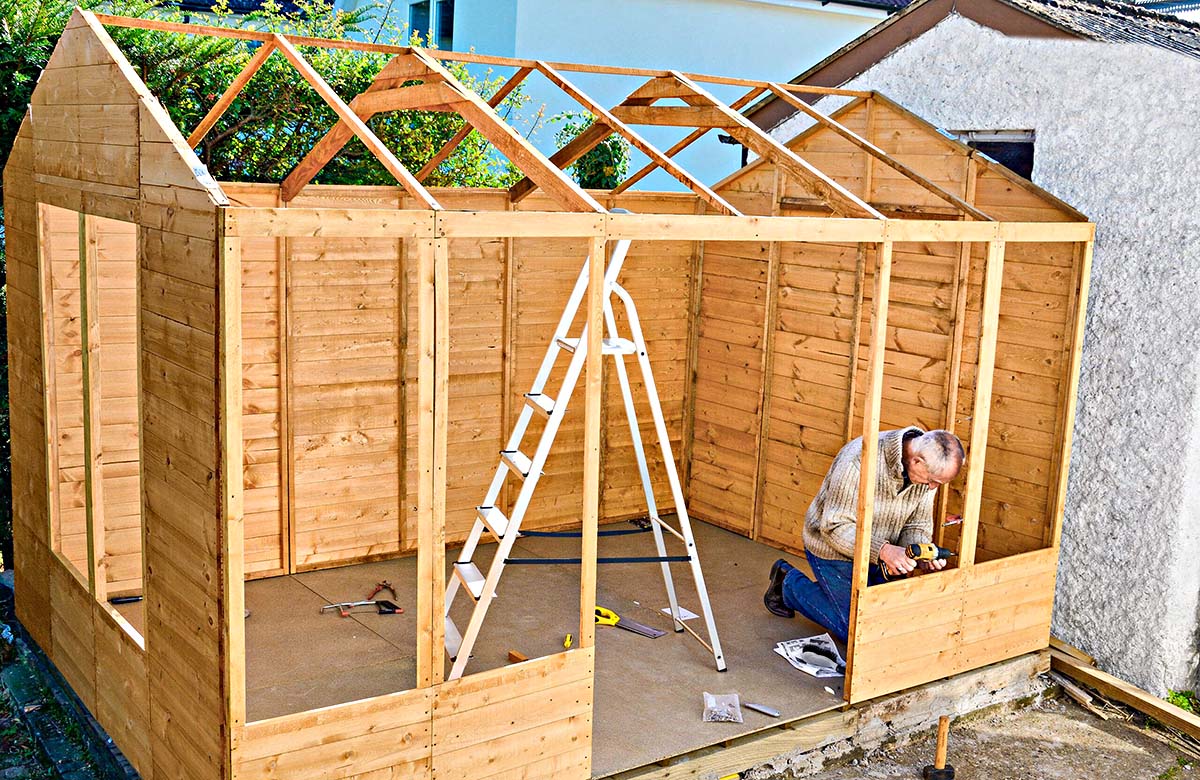
Constructing the Frame
The frame forms the skeleton of your small garden tool shed, providing the structure with strength, stability, and the framework for the walls and roof. As you embark on this phase of construction, meticulous attention to detail and precision are paramount to ensure a sturdy and durable framework.
Begin by assembling the lumber according to the dimensions outlined in your shed plans. If using dimensional lumber, take care to select straight, undamaged pieces to form the primary framework. Utilize a saw and measuring tools to cut the lumber to the required lengths, ensuring accuracy and uniformity to facilitate seamless assembly.
When constructing the frame, focus on creating a robust and square structure. Use framing squares and level tools to verify the precision of your assembly, making necessary adjustments to achieve perpendicular angles and uniform dimensions. This meticulous approach will contribute to the overall stability and alignment of the shed’s framework.
As you progress, securely fasten the frame components using appropriate fasteners such as nails or screws. Prioritize structural integrity by employing construction-grade fasteners and techniques, reinforcing critical joints and connections to withstand the forces exerted on the shed over time.
Moreover, consider incorporating additional bracing or cross-supports within the frame to enhance its rigidity and resistance to external pressures. This can be particularly beneficial in regions prone to high winds or heavy snow loads, bolstering the shed’s ability to withstand adverse weather conditions.
Throughout the frame construction process, maintain a keen eye for detail and a commitment to precision. Regularly assess the alignment, squareness, and overall integrity of the frame, addressing any discrepancies promptly to ensure a solid and reliable foundation for the subsequent stages of shed assembly.
By dedicating meticulous care and precision to the construction of the frame, you’ll establish a robust and resilient skeleton for your small garden tool shed, setting the stage for the seamless integration of walls, roof, and additional features as the construction progresses.
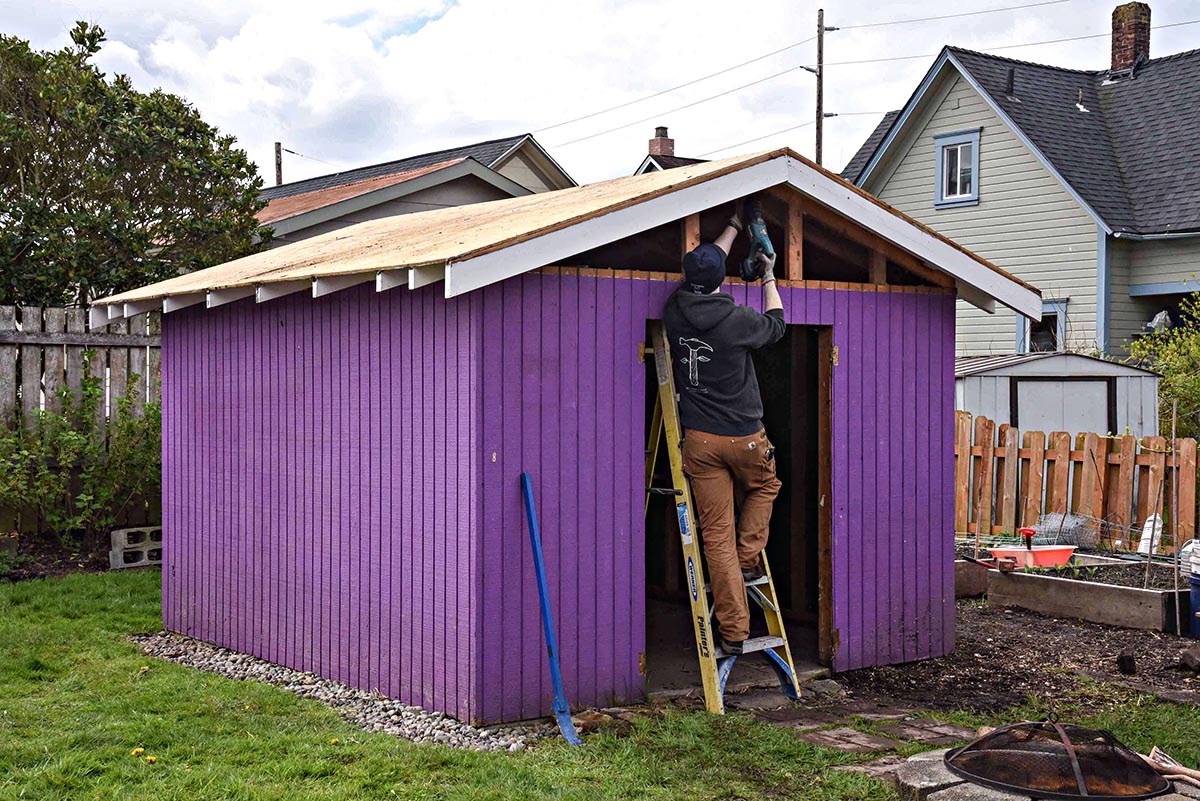
Installing the Roof
As you approach the installation of the roof on your small garden tool shed, meticulous planning and precision are vital to ensure optimal protection, durability, and visual appeal. The roof serves as a critical component, safeguarding the shed’s interior from the elements and contributing to its overall structural integrity.
Begin by selecting the appropriate roofing material based on factors such as climate, aesthetics, and longevity. Common options include asphalt shingles, metal roofing panels, or corrugated fiberglass. Assess the specific requirements of your shed and choose a material that aligns with your preferences and practical considerations.
Prior to installing the roofing material, prepare the roof deck by ensuring it is clean, dry, and free of any protrusions or debris. This preparatory step is essential for facilitating a smooth and secure installation process, minimizing the risk of damage or imperfections in the finished roof.
When installing asphalt shingles, begin at the eaves and work your way upwards, overlapping the shingles to create a watertight barrier. Utilize roofing nails to secure the shingles, adhering to manufacturer guidelines for proper placement and fastening techniques. Pay careful attention to the alignment and uniformity of the shingle rows to achieve a professional and effective roofing installation.
If opting for metal roofing panels, carefully measure and cut the panels to fit the dimensions of the roof deck. Use specialized fasteners and sealants designed for metal roofing to secure the panels, ensuring a tight seal and resistance to water infiltration. Additionally, consider the installation of ridge caps and flashing to further enhance the weatherproofing and aesthetic appeal of the roof.
For corrugated fiberglass or polycarbonate roofing, prioritize proper alignment and fastening to prevent potential leaks and ensure long-term durability. Secure the panels according to manufacturer recommendations, taking care to maintain consistent spacing and overlap to maximize their protective capabilities.
Throughout the roofing installation, prioritize safety by utilizing appropriate personal protective equipment, especially when working at elevated heights. Exercise caution and adhere to best practices for ladder safety and fall prevention to mitigate the risk of accidents during the installation process.
By approaching the roof installation with meticulous attention to detail and a commitment to precision, you’ll ensure that your small garden tool shed is equipped with a durable, weather-resistant roof that not only protects its contents but also enhances its visual appeal and longevity.
Adding Doors and Windows
As you progress with the construction of your small garden tool shed, the addition of doors and windows represents a pivotal stage that enhances functionality, aesthetics, and overall usability. Thoughtful consideration and precision are essential as you integrate these elements into the structure, ensuring seamless operation and visual appeal.
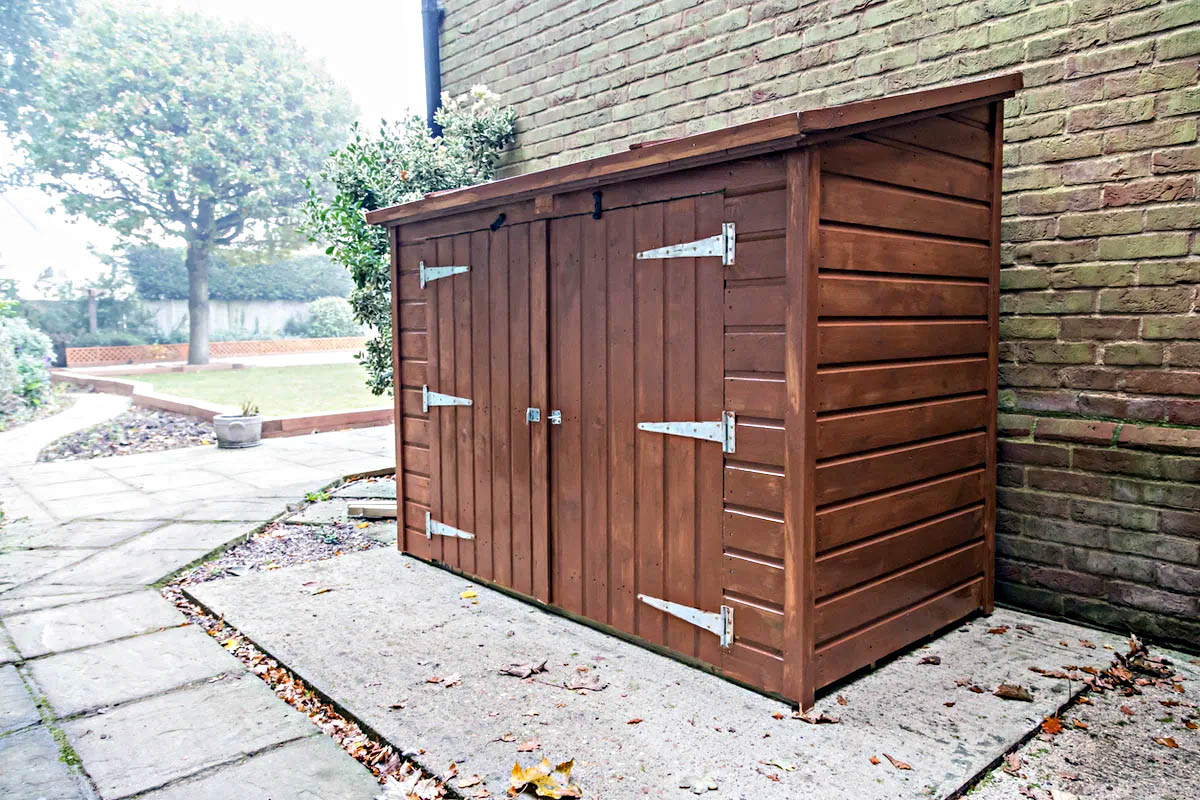
When selecting and installing doors, prioritize functionality, security, and weatherproofing. Choose a door that suits the dimensions of the shed and aligns with your design preferences. Whether opting for a pre-hung door unit or assembling a custom door, ensure that it fits snugly within the door opening, providing a secure and insulated barrier against the elements.
As you install the door, meticulously align and secure the hinges, ensuring smooth operation and a proper seal when closed. Consider the addition of weather-stripping and threshold components to minimize air infiltration and maintain a comfortable interior environment within the shed.
Windows contribute to the shed’s ambiance and ventilation while allowing natural light to illuminate the interior. Select windows that complement the shed’s design and provide adequate airflow. When installing windows, meticulously seal the perimeter to prevent water infiltration and drafts, ensuring a secure and weathertight fit within the window openings.
Consider the strategic placement of windows to optimize natural light and ventilation within the shed, enhancing its usability and creating a pleasant environment for various activities such as gardening, woodworking, or storage.
Throughout the installation of doors and windows, prioritize precision and attention to detail, ensuring that they are aligned, sealed, and operational. This meticulous approach will contribute to the overall functionality, security, and visual appeal of your small garden tool shed, enhancing its usability and contributing to a welcoming and well-appointed interior space.
Finishing Touches
As the construction of your small garden tool shed nears completion, attention to detail and thoughtful finishing touches will elevate the functionality, aesthetics, and overall appeal of the structure. This phase allows you to add personalized elements and refine the shed’s appearance, creating a polished and inviting space for your gardening endeavors and storage needs.
Consider applying a protective finish to the exterior surfaces of the shed, such as paint or stain, to enhance its resistance to the elements and infuse it with your desired color scheme. Choose a high-quality outdoor finish that complements your landscape and reflects your personal style, ensuring long-lasting protection and visual impact.
Furthermore, prioritize the installation of gutters and downspouts to manage rainwater and prevent potential water damage to the shed and its surroundings. Properly positioned gutters will redirect water away from the structure, safeguarding its foundation and prolonging its longevity.
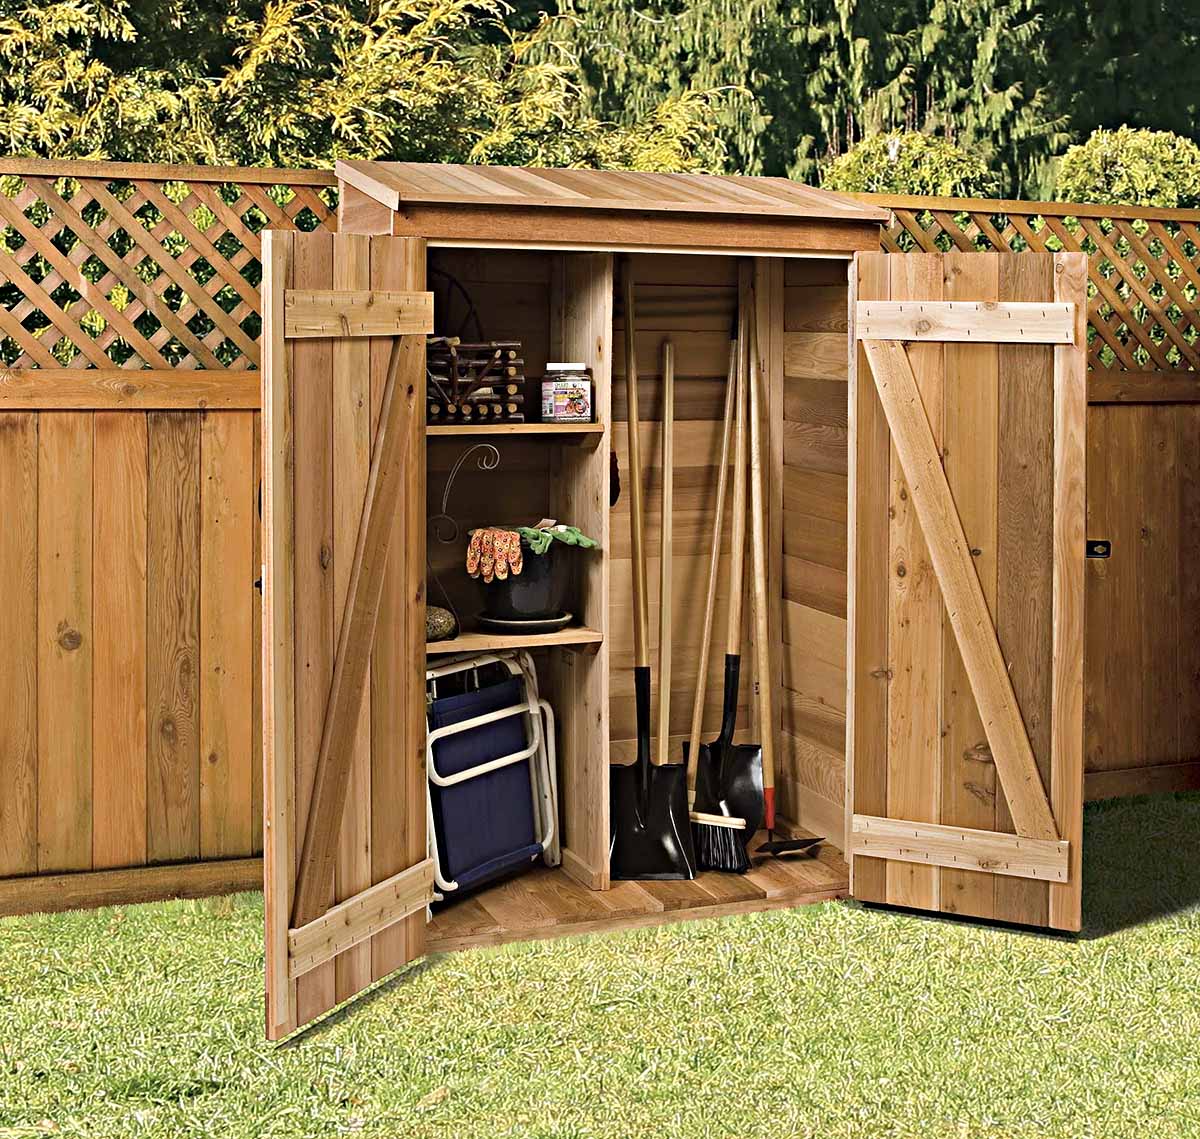
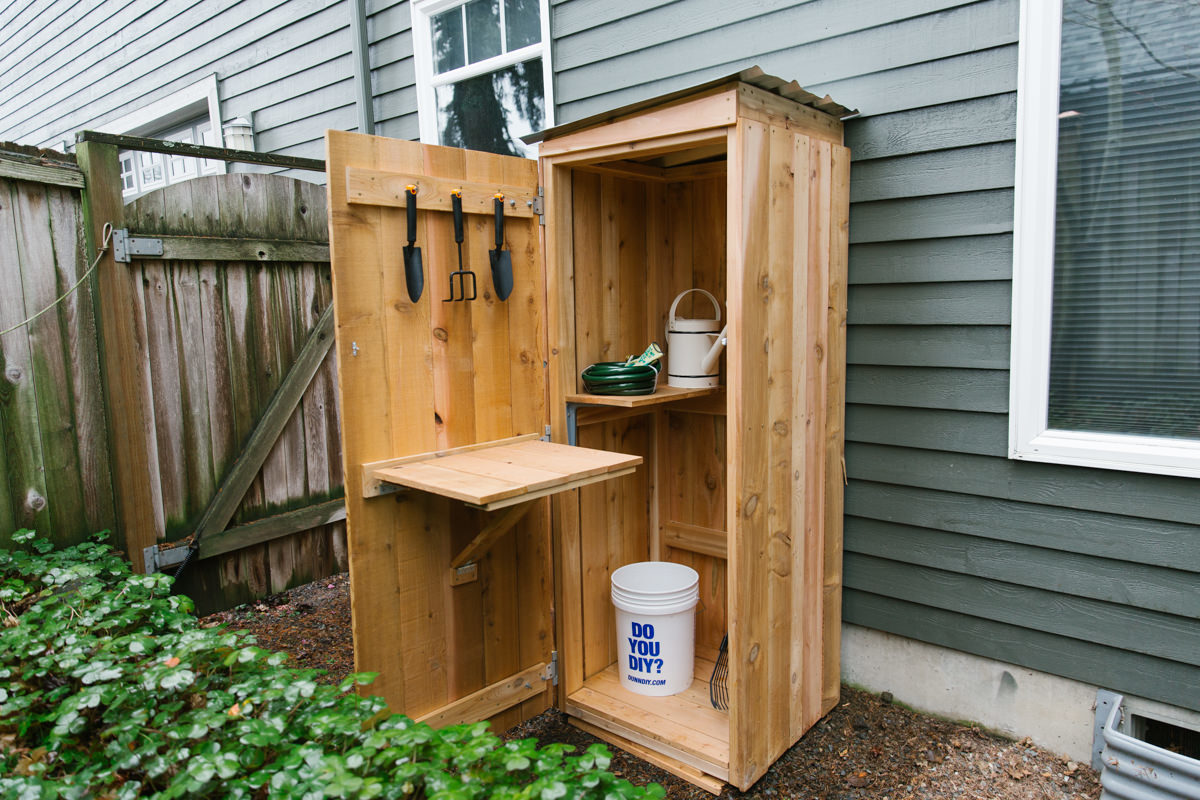
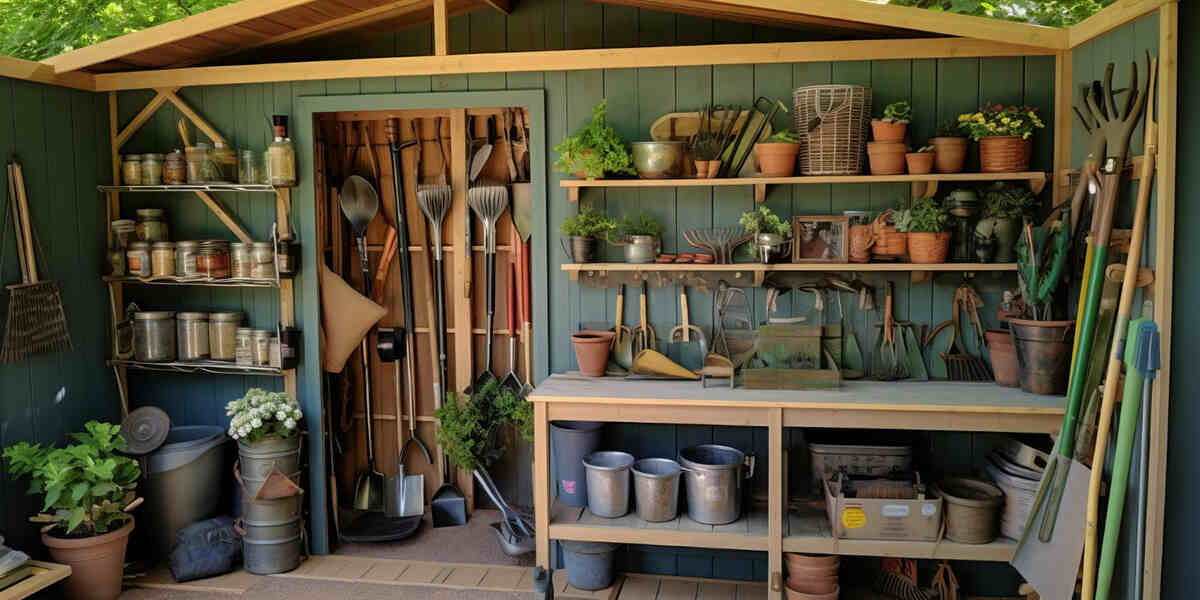
Inside the shed, optimize organization and functionality by incorporating storage solutions such as shelves, hooks, and tool racks. These additions will enhance the usability of the space, keeping your gardening tools and supplies neatly arranged and easily accessible for your outdoor projects.
Additionally, consider implementing interior lighting to illuminate the shed’s interior during low-light conditions, enhancing its practicality and enabling you to work comfortably at any time of day. Solar-powered lighting fixtures or low-voltage LED options are efficient and environmentally friendly choices for shed illumination.
Finally, infuse your personality into the shed’s ambiance by adding decorative elements such as potted plants, outdoor artwork, or personalized signage. These touches will imbue the space with character and charm, creating a welcoming and visually appealing environment that reflects your passion for gardening and outdoor activities.
By meticulously attending to these finishing touches, you’ll transform your small garden tool shed into a functional, visually captivating, and personalized retreat within your outdoor space. These thoughtful details will elevate the shed’s utility and aesthetics, culminating in a rewarding and satisfying addition to your property.
Read more: How To Shingle A Small Tool Shed
Conclusion
Congratulations on successfully completing the construction of your small garden tool shed! This endeavor has not only provided you with a practical storage solution for your gardening equipment but has also enriched your outdoor space with a functional and visually appealing structure. As you reflect on the journey from planning and preparation to the meticulous execution of each construction phase, you can take pride in the craftsmanship and dedication invested in bringing your shed to life.
Throughout the process, you’ve demonstrated the creativity and resourcefulness required to transform a vision into a tangible, functional space. The careful selection of materials, precise construction of the frame, and thoughtful installation of doors, windows, and the roof have culminated in a well-appointed and resilient structure that will serve your gardening and DIY needs for years to come.
As you admire the finished shed, take a moment to appreciate the attention to detail and personalized touches that have enhanced its usability and aesthetic appeal. The protective finish, interior organization solutions, and personalized decorative elements have infused the shed with your unique style and contributed to its seamless integration within your outdoor environment.
Moreover, the construction process has undoubtedly enriched your skills and knowledge, empowering you to embark on future projects with confidence and a deeper understanding of woodworking, construction techniques, and outdoor structure design. The experience gained from building your small garden tool shed has not only added value to your property but has also fostered a sense of accomplishment and pride in your DIY capabilities.
As you embrace the shed as a functional and cherished addition to your outdoor space, it’s essential to maintain and care for it to ensure its longevity and continued functionality. Regular maintenance, such as inspecting the roof, treating the exterior finish, and organizing the interior space, will preserve the shed’s integrity and safeguard your gardening tools and supplies.
In conclusion, the construction of your small garden tool shed has been a fulfilling and rewarding journey, showcasing your creativity, craftsmanship, and dedication to enhancing your outdoor living experience. As you embark on future projects and continue to enjoy the benefits of your shed, may it serve as a testament to your passion for DIY endeavors and your commitment to creating a functional and inviting outdoor environment.
Frequently Asked Questions about How To Build A Small Garden Tool Shed By Bosch
Was this page helpful?
At Storables.com, we guarantee accurate and reliable information. Our content, validated by Expert Board Contributors, is crafted following stringent Editorial Policies. We're committed to providing you with well-researched, expert-backed insights for all your informational needs.


0 thoughts on “How To Build A Small Garden Tool Shed By Bosch”