Home>Gardening & Outdoor>Outdoor Structures>How To Build A Garden Tool Shed

Outdoor Structures
How To Build A Garden Tool Shed
Modified: February 23, 2024
Learn how to build a durable garden tool shed for your outdoor space. Get expert tips and ideas for creating functional outdoor structures.
(Many of the links in this article redirect to a specific reviewed product. Your purchase of these products through affiliate links helps to generate commission for Storables.com, at no extra cost. Learn more)
Introduction
Welcome to the world of DIY outdoor projects! Building a garden tool shed is not only a practical endeavor but also a rewarding one. Imagine having a dedicated space to store all your gardening tools, supplies, and equipment, keeping them organized and easily accessible whenever you need them. Whether you're a seasoned DIY enthusiast or a novice looking to embark on your first major construction project, this guide will walk you through the step-by-step process of building a garden tool shed that suits your needs and complements your outdoor space.
In this comprehensive guide, we'll cover everything from the initial planning and preparation to the final finishing touches. You'll learn how to select the ideal location for your shed, gather the necessary materials and tools, and construct a sturdy foundation to support the structure. We'll delve into the intricacies of building the shed walls, installing a reliable roof, and adding doors and windows for functionality and aesthetics. Moreover, we'll explore the finishing touches that will transform your shed into a practical and visually appealing addition to your garden.
Throughout this journey, we'll emphasize the importance of thoughtful planning, safety precautions, and attention to detail. By the end of this guide, you'll be equipped with the knowledge and confidence to tackle the construction of a garden tool shed, elevating your outdoor space and enhancing your gardening experience. So, roll up your sleeves, gather your enthusiasm, and let's embark on this fulfilling and enriching DIY adventure together!
Key Takeaways:
- Planning and preparation are crucial for building a garden tool shed. Consider the shed’s purpose, size, location, and necessary permits to lay a solid foundation for a successful DIY project.
- Adding doors, windows, and finishing touches transforms a shed into a functional and visually appealing space. Organize the interior, apply exterior finishes, and personalize the shed to create a welcoming environment for gardening pursuits.
Read more: How To Build A Lean Tool Shed
Step 1: Planning and Preparation
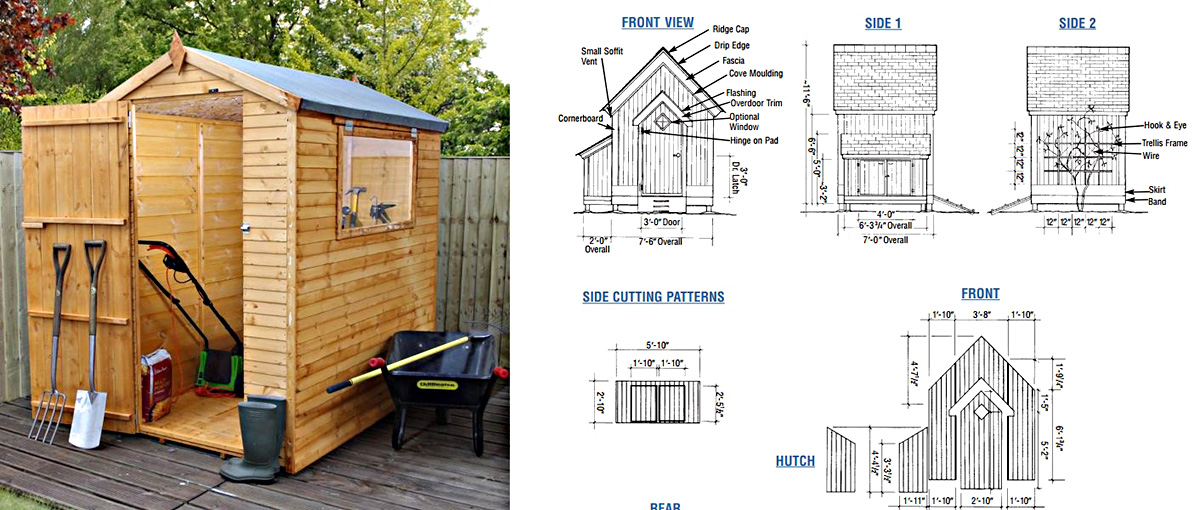
Before diving into the construction of your garden tool shed, meticulous planning and thorough preparation are essential for a successful outcome. Start by envisioning the purpose of your shed. Will it solely serve as a storage space for gardening tools, or do you plan to use it as a workshop for various DIY projects? Understanding the intended use will guide the design and size of the shed.
Next, consider the dimensions of the shed based on the available space in your garden. Measure the area where the shed will be located, ensuring that it complies with any local building codes or regulations. Additionally, take into account the natural elements, such as sunlight and wind direction, to optimize the shed’s positioning for both convenience and functionality.
Once you have a clear vision of the shed’s purpose and size, create a detailed plan or blueprint. This plan should include the layout, dimensions, and material list, serving as a roadmap for the construction process. If you’re new to creating blueprints, numerous online resources and software tools can assist you in generating a professional and accurate plan.
With the blueprint in hand, it’s time to secure any necessary permits or approvals required by local authorities. Building codes and permit regulations vary by location, so it’s crucial to research and adhere to the specific requirements in your area. Obtaining the proper permits ensures that your shed complies with safety standards and legal guidelines.
As you progress through the planning phase, consider the type of foundation suitable for your shed. Whether it’s a concrete slab, gravel base, or skids, the foundation plays a pivotal role in providing stability and durability to the structure. Evaluate the soil composition and drainage in the chosen area to determine the most suitable foundation type for your shed.
Lastly, compile a comprehensive list of materials and tools required for the construction. This list should encompass everything from lumber and roofing materials to nails, screws, and specialized tools. By organizing and gathering all the necessary components in advance, you’ll streamline the construction process and minimize disruptions once building commences.
By meticulously planning and preparing for the construction of your garden tool shed, you’ll lay a solid foundation for a successful and fulfilling DIY project. Stay tuned as we delve into the next crucial step: choosing the right location for your shed.
Step 2: Choosing the Right Location
When it comes to building a garden tool shed, the location is not just about convenience; it’s a strategic decision that can significantly impact the shed’s functionality and longevity. Before breaking ground, carefully assess your outdoor space to identify the optimal location for your shed.
First and foremost, consider proximity. Ideally, your shed should be situated close to the areas where you frequently engage in gardening activities. This ensures that your tools and supplies are easily accessible, saving you time and effort as you transition between gardening tasks and shed storage.
Furthermore, take into account the natural elements that can influence the shed’s environment. Position the shed to maximize sunlight exposure, especially if you plan to utilize it as a potting or seed-starting area. Additionally, consider wind direction to shield the shed from strong gusts and prevent potential damage to the structure.
Another critical factor to consider is the ground condition. Ensure that the chosen location has proper drainage to prevent water accumulation around the shed. Standing water can compromise the shed’s foundation and lead to moisture-related issues over time. If necessary, make any adjustments to the terrain or drainage system to create an optimal setting for your shed.
Moreover, take note of any underground utilities or cables in the designated area. Contact your local utility companies to mark the locations of underground lines before digging to avoid accidental damage or disruption to essential services.
As you evaluate potential locations, consider the visual impact of the shed on your garden landscape. While the shed serves a practical purpose, it can also contribute to the overall aesthetics of your outdoor space. Strive to position the shed in a way that complements the existing features of your garden and enhances its visual appeal.
Lastly, familiarize yourself with any local zoning regulations or neighborhood covenants that may dictate the placement of structures within your property. Adhering to these guidelines ensures that your shed’s location aligns with legal requirements and community standards.
By thoughtfully selecting the right location for your garden tool shed, you’ll create a harmonious and functional addition to your outdoor environment. Stay tuned as we delve into the next step: gathering the materials and tools necessary for the construction process.
Step 3: Gathering Materials and Tools
With the planning phase complete and the shed’s location determined, it’s time to focus on gathering the essential materials and tools required for the construction process. A well-prepared inventory of materials and a comprehensive set of tools are crucial for ensuring a smooth and efficient building experience.
Begin by creating a detailed list of materials based on the shed’s blueprint and design specifications. The primary materials typically include lumber for framing, sheathing, and trim, as well as roofing materials, such as shingles or metal panels. Additionally, consider the necessary hardware, such as nails, screws, and fasteners, to secure the structural components and ensure stability.
When selecting lumber, prioritize quality and durability. Pressure-treated or rot-resistant lumber is ideal for withstanding outdoor conditions and safeguarding the shed against moisture and decay. Take precise measurements to minimize waste and ensure that the lumber dimensions align with the design outlined in your blueprint.
In addition to lumber and roofing materials, allocate space on your list for windows, doors, and any desired accessories, such as shelving units or hooks for tool storage. These components contribute to the functionality and usability of the shed, so it’s essential to include them in your material inventory.
Once the material list is finalized, it’s time to assemble the necessary tools for the construction process. Basic hand tools, including hammers, screwdrivers, levels, and tape measures, are essential for framing and assembly. Power tools, such as a circular saw, drill, and nail gun, expedite the construction process and ensure precise cuts and fastenings.
Furthermore, consider specialized tools specific to the shed’s construction, such as a chalk line for marking guidelines, a framing square for ensuring accurate right angles, and a roofing nailer for efficient installation of roofing materials. Having the right tools at your disposal streamlines the building process and minimizes the potential for errors or setbacks.
As you gather materials and tools, consider the logistics of transportation and storage. Ensure that the materials are safely stored in a dry and secure location, protecting them from exposure to the elements and potential damage. Organize the tools in a readily accessible manner, allowing for easy retrieval during the construction phase.
By meticulously compiling the necessary materials and tools, you’ll set the stage for a structured and efficient construction process. Stay tuned as we progress to the next step: building the foundation, the fundamental support system for your garden tool shed.
Step 4: Building the Foundation
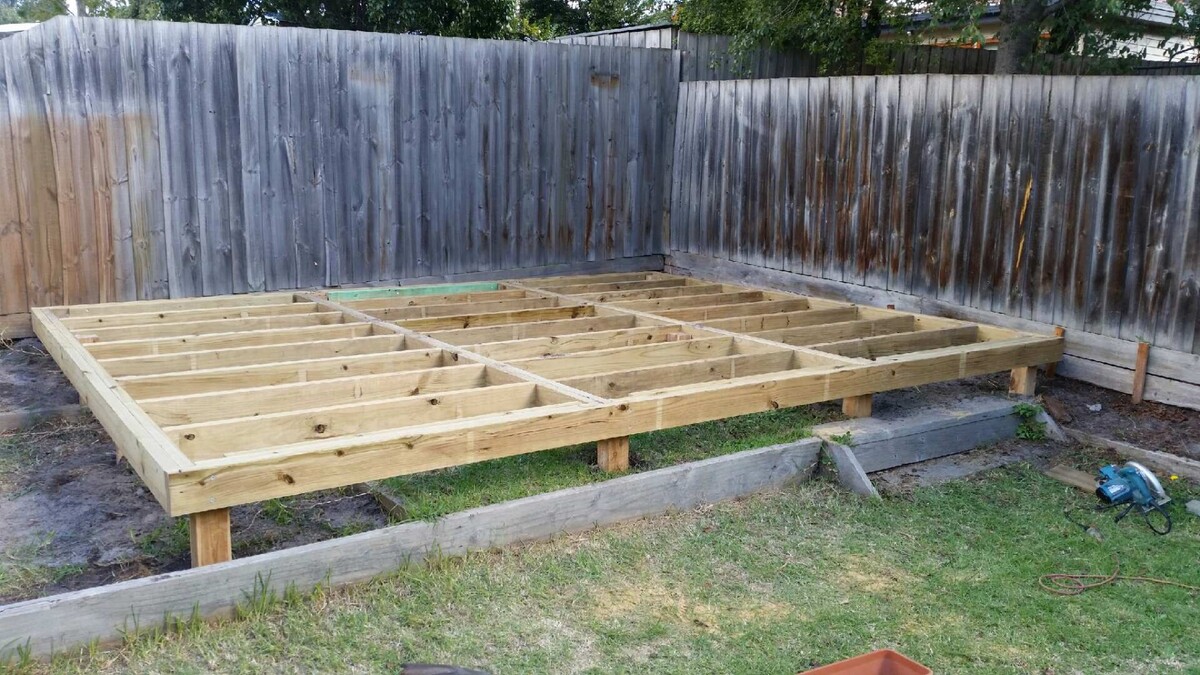
The foundation serves as the backbone of your garden tool shed, providing stability and structural integrity. Before embarking on the construction of the shed walls and roof, it’s crucial to establish a solid foundation that can withstand the test of time and environmental factors.
Begin by clearing and leveling the ground in the chosen location for the shed. Remove any debris, rocks, or vegetation, and use a shovel or a rented skid-steer loader to create a level surface. A level foundation ensures the even distribution of weight and prevents structural issues in the future.
Next, determine the most suitable foundation type based on your shed’s design and the ground conditions. Common foundation options include concrete slabs, gravel pads, and skids. Concrete slabs provide a durable and permanent foundation, ideal for larger sheds and long-term stability. Gravel pads offer a cost-effective and relatively simple foundation solution, while skids, or runners, elevate the shed above the ground, promoting airflow and minimizing moisture-related issues.
If you opt for a concrete slab, the next step involves preparing the formwork and pouring the concrete. Constructing formwork involves creating a mold for the concrete to ensure it cures into the desired shape and dimensions. Use sturdy lumber and stakes to outline the formwork, ensuring that it is level and square before pouring the concrete. Once the formwork is in place, pour the concrete and use a screed board to level and smooth the surface, creating a solid foundation for the shed.
For gravel pads, excavate the area to a suitable depth, typically around 4 to 6 inches, and compact the soil to create a stable base. Lay a geotextile fabric to prevent weed growth and promote drainage, then add a layer of gravel and compact it thoroughly to establish a firm and level foundation for the shed.
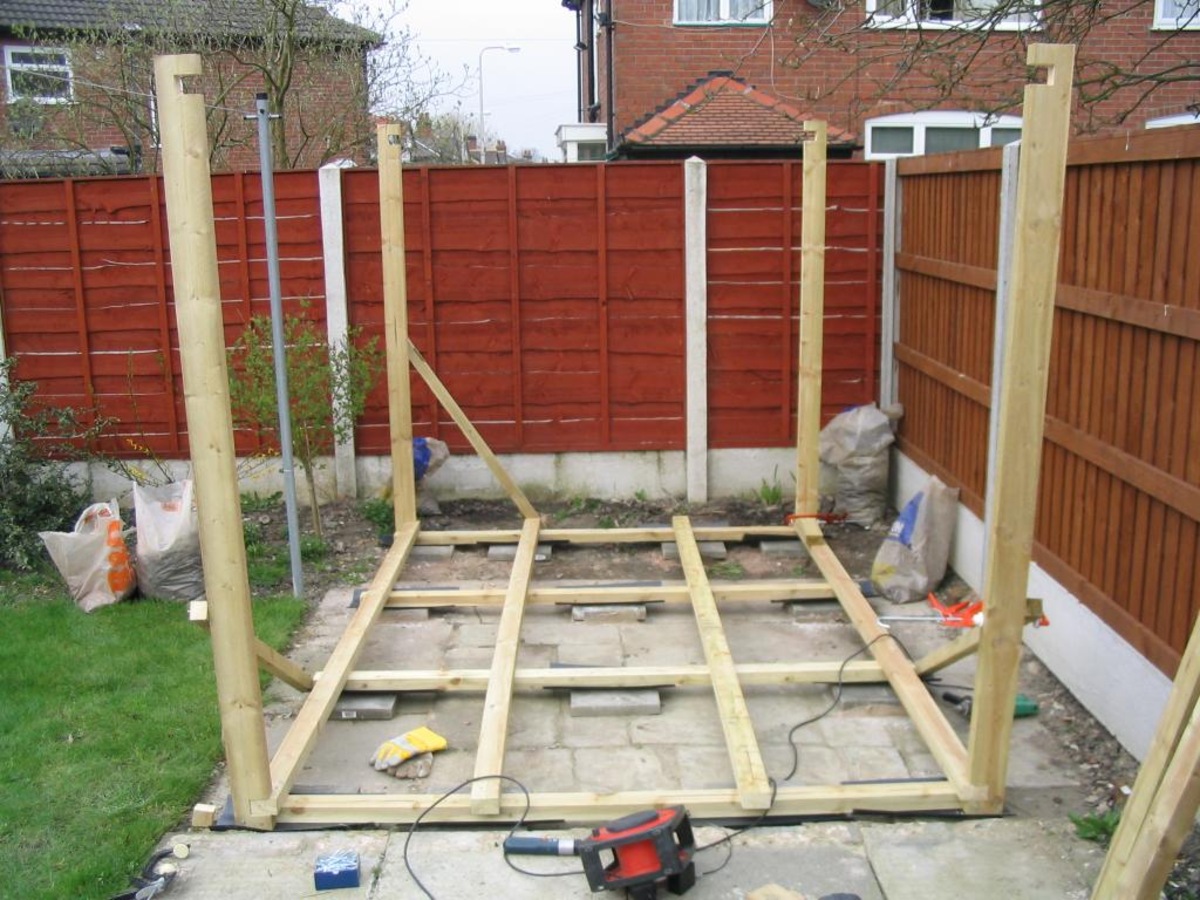
If utilizing skids, position pressure-treated lumber or precast concrete blocks to support the shed. Ensure that the skids are level and properly spaced to accommodate the shed’s dimensions. This approach provides flexibility in relocating the shed if necessary and minimizes ground contact, reducing the risk of moisture-related damage.
Regardless of the foundation type, meticulous attention to detail and precision is paramount to ensure a stable and durable base for your garden tool shed. With the foundation in place, you’re poised to progress to the next phase: constructing the shed walls, the defining framework of your outdoor storage space.
When building a garden tool shed, make sure to choose a level location and use pressure-treated lumber to prevent rot. Proper ventilation is also important to prevent mold and mildew.
Read more: How To Build A Foundation For A Tool Shed
Step 5: Constructing the Shed Walls
As you transition from laying the foundation to constructing the shed walls, you’re embarking on a pivotal phase of the building process. The walls form the structural framework of the shed, defining its shape, strength, and overall integrity. Whether you’re building the walls on the ground and raising them into position or constructing them in place, careful attention to detail and precision is essential.
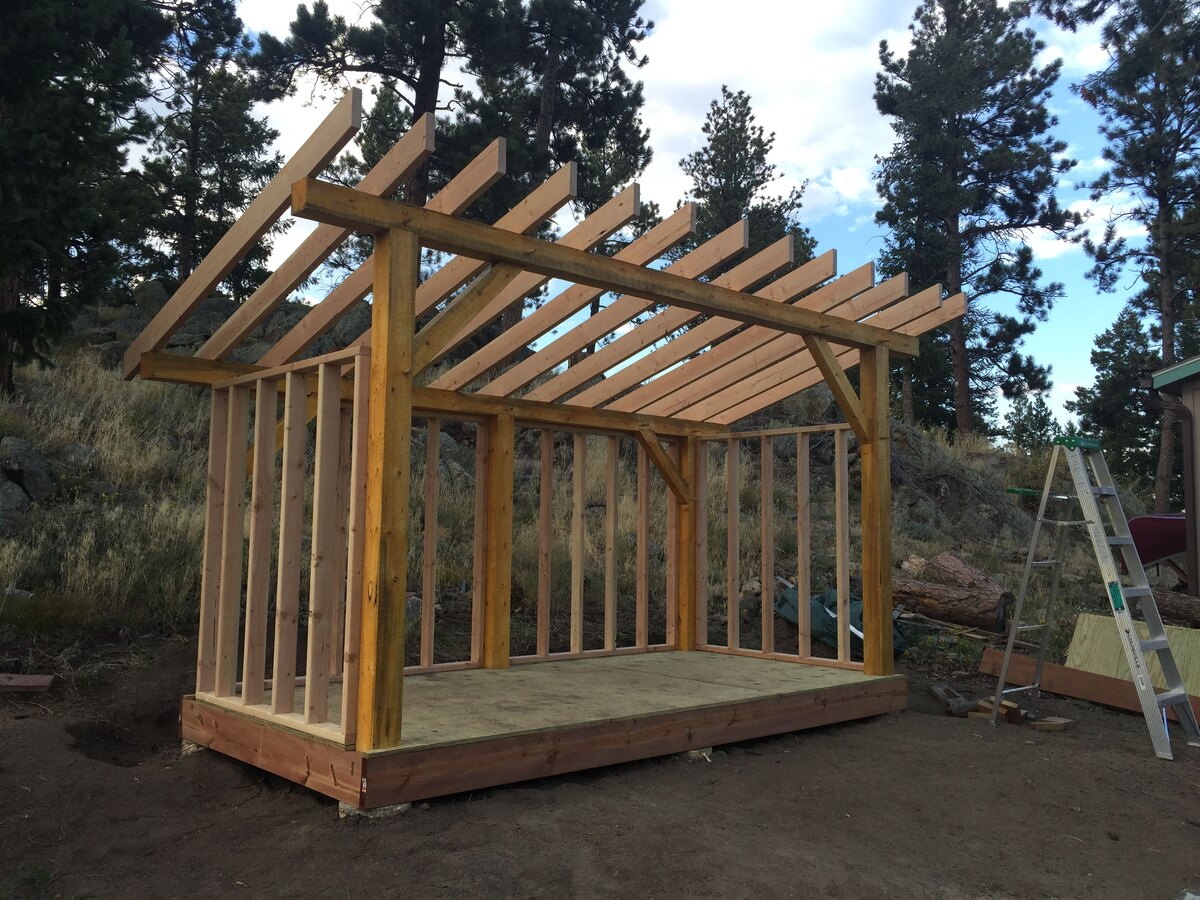
Begin by assembling the necessary lumber and framing materials as per the shed’s blueprint and design specifications. The framing typically consists of vertical studs, horizontal plates, and additional bracing to reinforce the structure. Use pressure-treated or rot-resistant lumber for the bottom plates to safeguard against moisture and decay.
When cutting the lumber for the wall framing, ensure precise measurements and accurate angles to facilitate seamless assembly. A circular saw or miter saw is invaluable for achieving clean and precise cuts, contributing to the stability and alignment of the walls.
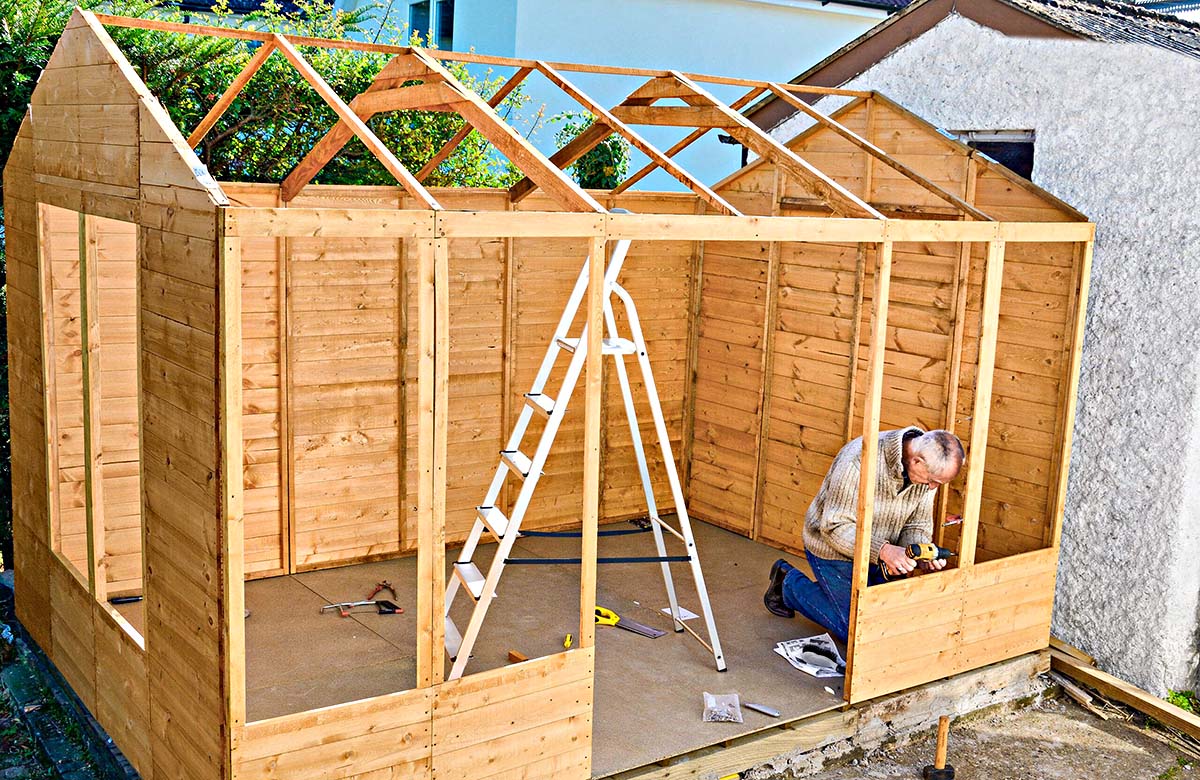
Once the individual wall components are prepared, it’s time to assemble the framing. Lay out the bottom plates and position the studs according to the blueprint, ensuring consistent spacing and alignment. Secure the components using nails or screws, and use a level to verify that the walls are plumb and square, essential for ensuring structural integrity and facilitating the installation of doors and windows.
As you progress with the framing, consider incorporating openings for doors and windows based on your shed’s design. These openings not only enhance the shed’s functionality but also contribute to ventilation and natural light. Carefully frame the door and window openings, ensuring that they align with the shed’s layout and dimensions.
For added stability and rigidity, consider adding diagonal bracing or sheathing to the exterior side of the framed walls. Sheathing, typically in the form of plywood or oriented strand board (OSB), reinforces the structure and provides a solid base for attaching exterior siding or cladding. Additionally, install headers above door and window openings to support the load and maintain the structural integrity of the walls.
With the walls framed and braced, carefully inspect the assembly to ensure that it aligns with the shed’s blueprint and design. Address any discrepancies or misalignments before proceeding to the next phase, setting the stage for the installation of the shed’s roof, a critical element that protects the structure and its contents from the elements.
Step 6: Installing the Roof
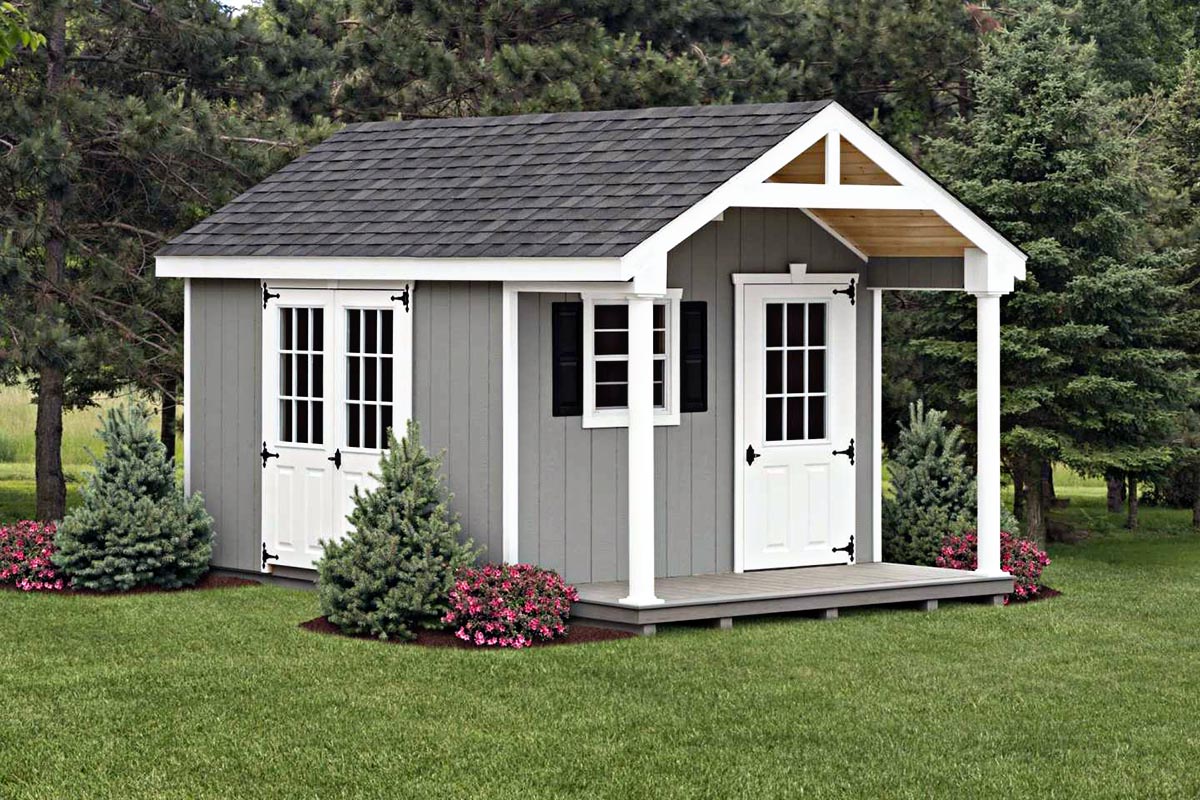
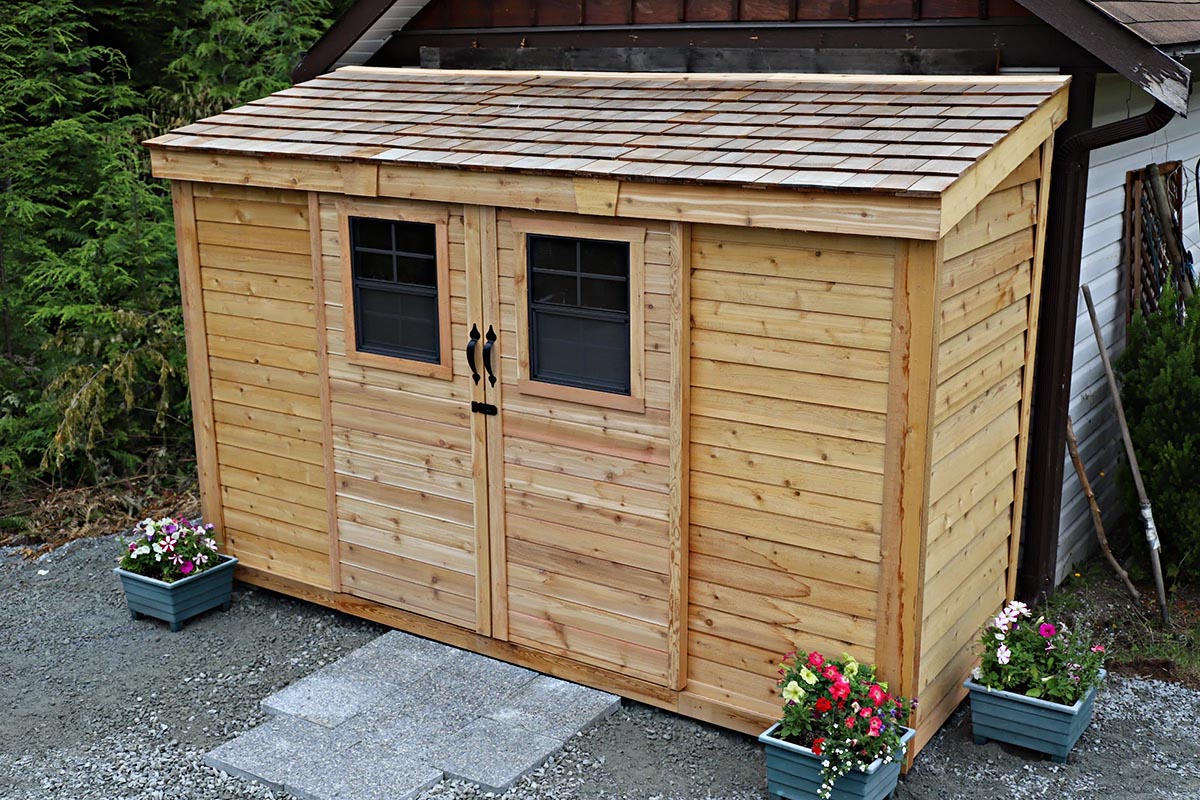
As you approach the installation of the roof for your garden tool shed, you’re reaching the culmination of the structural assembly. The roof not only provides protection from the elements but also contributes to the shed’s overall aesthetics and functionality. Whether you opt for a traditional gable roof, a practical lean-to design, or a stylish gambrel roof, meticulous attention to detail and precision is crucial for a successful installation.
Before commencing the roof installation, it’s essential to select and gather the necessary roofing materials. Common options include asphalt shingles, metal roofing panels, or cedar shakes, each offering distinct aesthetics and durability. Additionally, gather the essential roofing components, such as underlayment, drip edge, and flashing, to ensure a watertight and secure roof system.
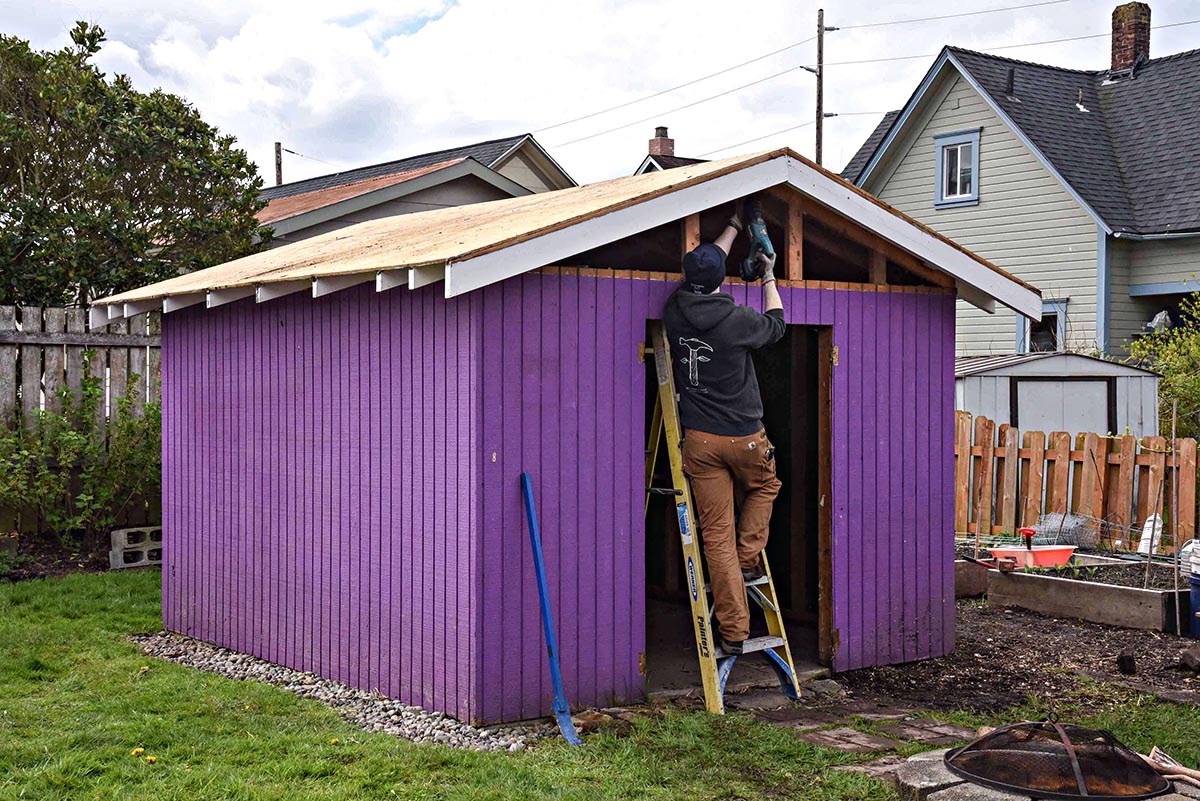
Start by installing the roof sheathing, typically plywood or OSB, over the framed walls. Secure the sheathing to the framing using nails or screws, ensuring a solid and even base for the roofing materials. Prioritize proper alignment and overhangs to facilitate efficient water runoff and protect the shed’s exterior walls.
Next, apply the roofing underlayment to provide an additional layer of protection against moisture and ensure a watertight seal. The underlayment acts as a barrier between the sheathing and the roofing material, safeguarding the interior of the shed from potential water infiltration.
When it comes to the roofing material, whether it’s asphalt shingles or metal panels, follow the manufacturer’s guidelines for installation. Begin at the bottom edge of the roof and work your way upward, overlapping the roofing material to prevent water penetration. Pay close attention to the alignment and fastening of the roofing material to achieve a uniform and secure finish.
As you progress with the roofing installation, incorporate the necessary flashing and drip edge to ensure proper water drainage and prevent water from seeping into vulnerable areas, such as roof valleys and eaves. Flashing, typically made of metal, is applied around roof penetrations, such as vents and chimneys, to create a watertight seal and protect against leaks.
Once the roofing material is installed and the flashing is in place, take the time to inspect the roof for any potential gaps, loose fastenings, or imperfections. Address any identified issues promptly to ensure the roof’s resilience and longevity.
With the roof securely installed, your garden tool shed is one step closer to completion. The next phase involves adding doors and windows, enhancing the shed’s functionality and visual appeal. Stay tuned as we delve into the next step: integrating doors and windows into the shed’s structure.
Step 7: Adding Doors and Windows
As you approach the final stages of constructing your garden tool shed, the addition of doors and windows marks a significant step in enhancing the shed’s functionality, aesthetics, and overall appeal. These elements not only facilitate access and ventilation but also contribute to the shed’s visual character, transforming it into a welcoming and practical space for your gardening endeavors.
When selecting doors for your shed, consider factors such as durability, security, and ease of operation. Opt for a sturdy exterior door constructed from materials that can withstand outdoor conditions. Whether you choose a hinged door, a sliding door, or a roll-up door, ensure that it complements the shed’s design and provides ample clearance for moving tools and equipment in and out of the shed.
Prior to installing the door, frame the doorway opening to accommodate the door’s dimensions. Use precise measurements and a level to ensure that the door frame is plumb and square, allowing for seamless installation and proper functioning of the door. Once the door is in place, verify that it opens and closes smoothly, adjusting the hinges and hardware as needed to achieve a perfect fit.
Windows not only brighten the interior of the shed but also promote air circulation and ventilation. When selecting windows, prioritize options that are designed for outdoor structures and are resistant to moisture and damage. Consider the size and placement of the windows to maximize natural light and airflow while maintaining the shed’s structural integrity.
Similar to the door installation process, frame the window openings to accommodate the chosen window dimensions. Ensure that the window frames are securely anchored and sealed to prevent water infiltration and maintain energy efficiency. Once the windows are in place, verify that they open and close smoothly, providing adequate ventilation and natural light for the shed’s interior.
As you integrate doors and windows into the shed’s structure, pay attention to weatherproofing and sealing to safeguard the interior from the elements. Apply weather-stripping around the door and window frames to create a tight seal, preventing drafts and moisture intrusion. Additionally, consider installing window shutters or awnings to enhance the shed’s visual appeal while providing additional protection from inclement weather.
With doors and windows seamlessly integrated into the shed’s structure, the project is nearing completion. The final step involves adding finishing touches and organizing the interior to create a functional and well-appointed storage space. Stay tuned as we explore the last phase: applying finishing touches and organizing the garden tool shed.
Step 8: Finishing Touches and Organization
As you approach the culmination of your garden tool shed construction, the focus shifts to adding the finishing touches that elevate the shed’s visual appeal and functionality. From applying exterior finishes to organizing the interior space, these final steps transform the shed into a practical and aesthetically pleasing asset for your gardening endeavors.
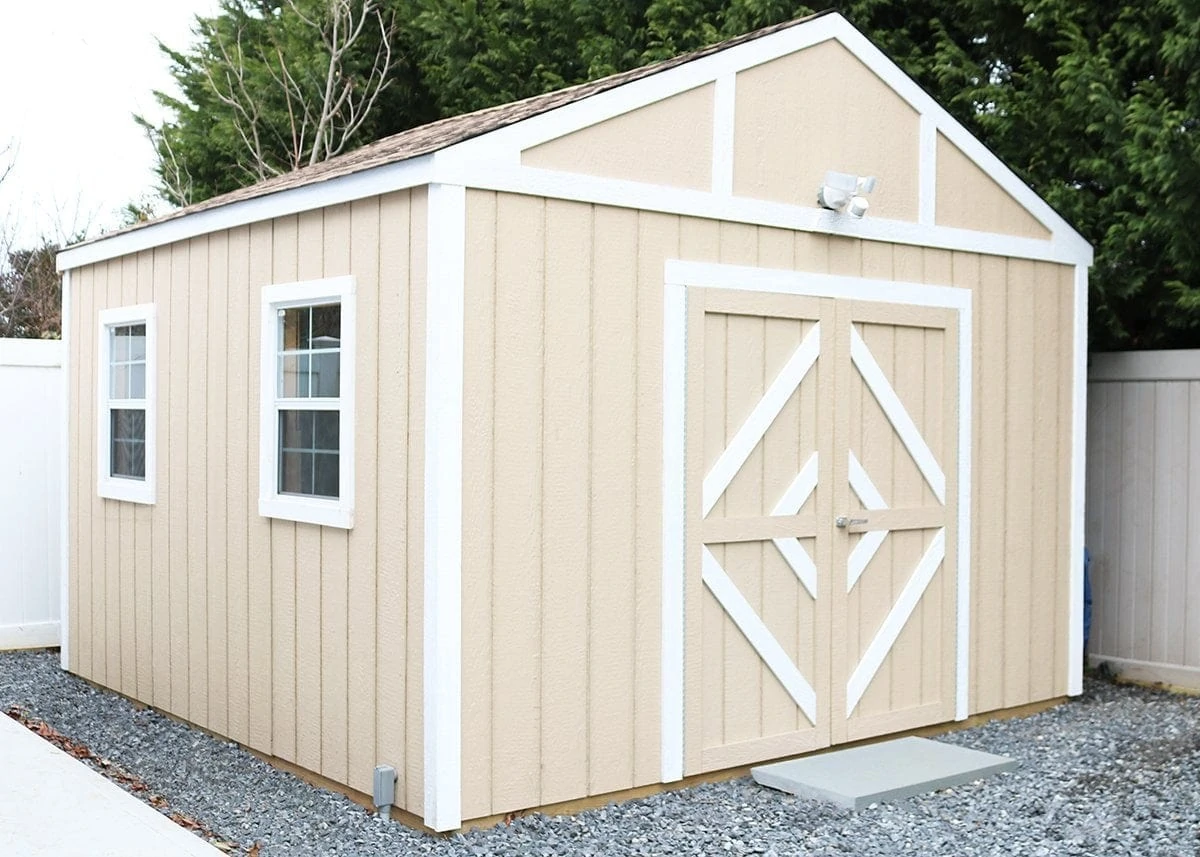
Begin by applying exterior finishes to protect the shed from the elements and enhance its appearance. Consider options such as exterior paint, wood stain, or weather-resistant sealants, choosing a finish that complements your garden’s aesthetic and provides long-lasting protection for the shed’s exterior surfaces. Apply the finish according to the manufacturer’s guidelines, ensuring thorough coverage and even application.
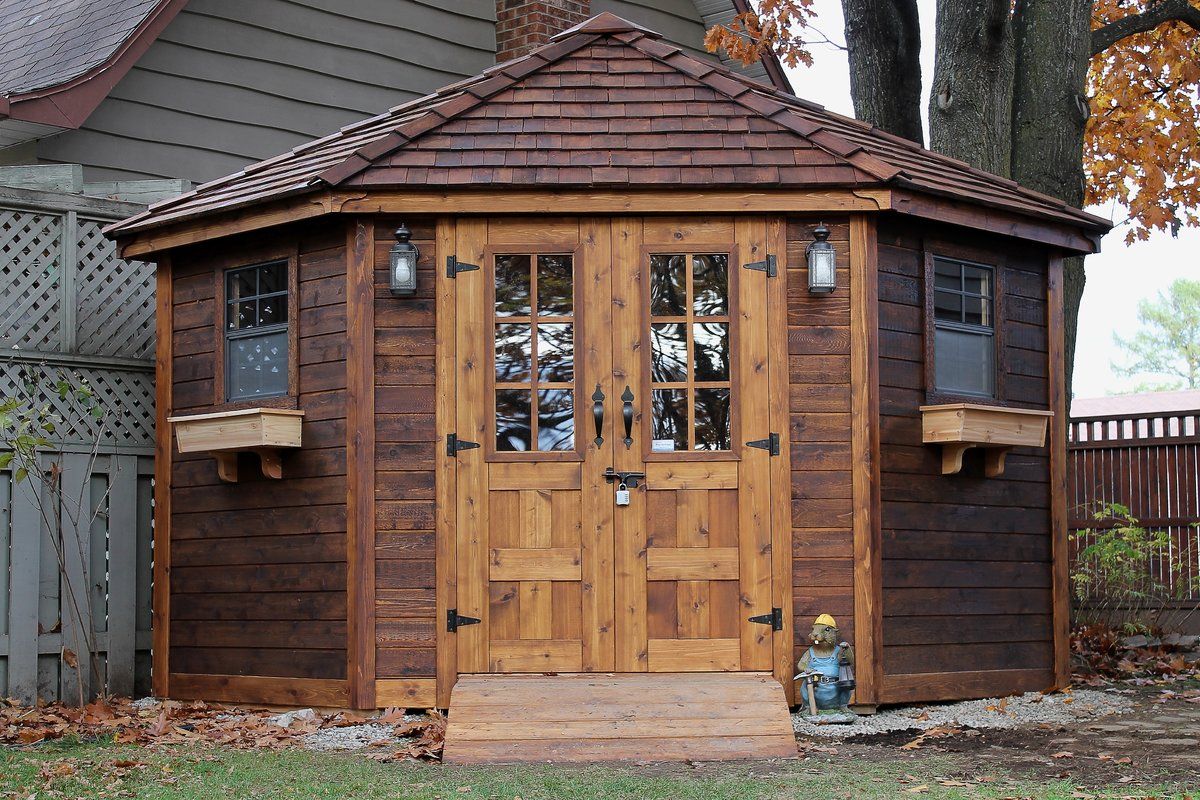
Additionally, consider incorporating decorative elements, such as trim details, window boxes, or trellises, to infuse the shed with charm and personality. These embellishments not only enhance the shed’s visual appeal but also create opportunities for showcasing potted plants, hanging tools, and adding decorative touches that reflect your gardening style.
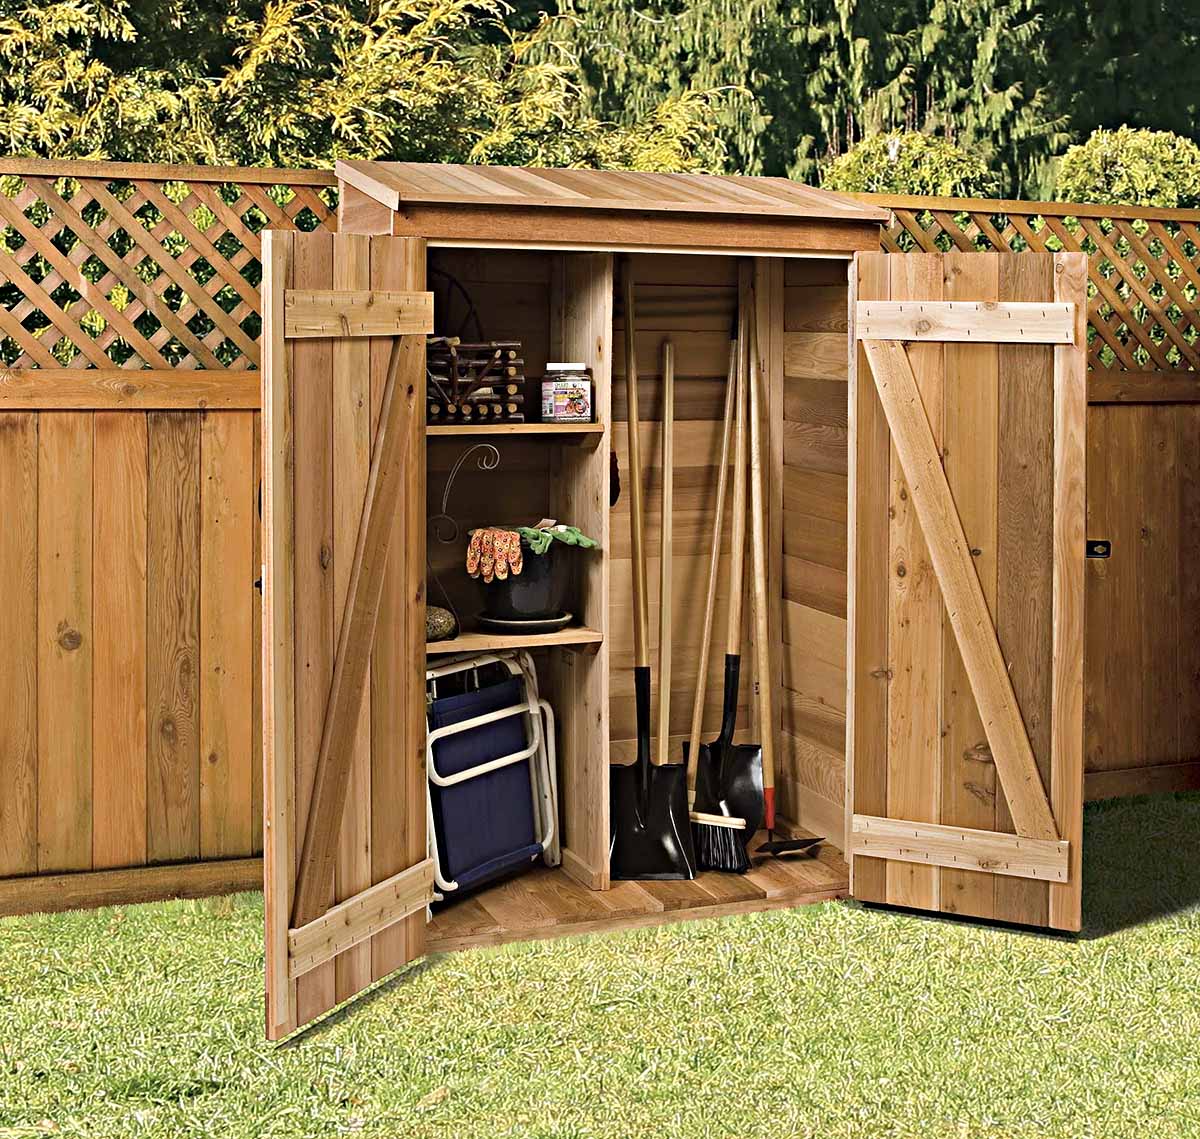
Turning attention to the shed’s interior, prioritize organization and functionality. Install shelving units, pegboards, and hooks to create efficient storage solutions for your gardening tools, supplies, and equipment. Utilize clear storage bins or labeled containers to keep smaller items organized and easily accessible, promoting a tidy and functional workspace.
Consider incorporating a workbench or potting station within the shed, providing a dedicated area for planting, repotting, and tending to your garden. Equip the workbench with essential tools, potting soil, and containers, creating a convenient and centralized space for nurturing your plants and engaging in gardening projects.
To optimize the shed’s functionality, ensure adequate lighting for tasks that extend into the evening hours. Install overhead lighting or task lighting to illuminate the shed’s interior, enhancing visibility and enabling you to work comfortably during low-light conditions.
Finally, personalize the shed’s interior with decorative touches that reflect your gardening passion. Hang inspirational garden signs, display vibrant artwork, or incorporate elements of greenery to infuse the space with warmth and character, creating a welcoming environment for your gardening pursuits.
With the finishing touches in place and the shed’s interior organized, your garden tool shed stands as a testament to your dedication to gardening and DIY craftsmanship. Whether it’s a sanctuary for your gardening tools or a tranquil retreat for nurturing your plants, the shed embodies the fulfillment of your vision and the embodiment of your outdoor sanctuary.
Congratulations on completing the construction of your garden tool shed! Your dedication and attention to detail have culminated in a functional, beautiful, and personalized space that enriches your gardening experience. As you step back and admire the fruits of your labor, take pride in knowing that your garden tool shed is not just a structure, but a reflection of your passion for gardening and your commitment to creating a harmonious outdoor environment.
Read more: How To Build Shelves For A Tool Shed
Conclusion
Congratulations on successfully completing the construction of your garden tool shed! As you reflect on this transformative journey, it’s evident that your dedication, creativity, and craftsmanship have converged to create a valuable and enriching addition to your outdoor space. The journey from meticulous planning and preparation to the final finishing touches has not only resulted in a functional storage space for your gardening tools but has also woven a narrative of passion, ingenuity, and the fulfillment of a vision.
Building a garden tool shed transcends the mere act of construction; it embodies the embodiment of your commitment to gardening, DIY craftsmanship, and the cultivation of an outdoor sanctuary. The shed stands as a testament to your ability to envision, plan, and bring to life a structure that harmonizes with your garden landscape and fulfills your practical needs.
Throughout this transformative process, you’ve embraced the nuances of selecting the ideal location, gathering materials and tools, and meticulously crafting the foundation, walls, roof, doors, and windows. Each step has been imbued with your unique touch, attention to detail, and the unwavering pursuit of excellence.
As you stand within the completed shed, surrounded by the tools of your gardening trade and the ambiance of a purposeful space, take a moment to appreciate the culmination of your efforts. The shed is not merely a structure; it’s a reflection of your dedication to nurturing your garden, cultivating your creativity, and fostering an environment that embodies your passion for the natural world.
As the door of your garden tool shed opens to reveal the organized interior, the personalized touches, and the promise of countless gardening endeavors, it signifies not just a physical space, but a gateway to inspiration, productivity, and the unfurling of your gardening journey.
Embrace the shed as a sanctuary, a workshop, and a haven that encapsulates the essence of your gardening aspirations. Whether it’s a respite for quiet contemplation, a hub for planting and potting, or a haven for storing your cherished gardening tools, the shed symbolizes the convergence of practicality and passion in your outdoor realm.
As you embark on the next chapters of your gardening adventures, may the shed stand as a steadfast companion, a testament to your creativity, and a canvas for your horticultural pursuits. The completion of the garden tool shed signifies not just the end of a construction project, but the beginning of a new chapter in your gardening narrative, enriched by the presence of a purposeful and beautifully crafted space.
Once again, congratulations on the successful completion of your garden tool shed. The journey from concept to creation has been a testament to your unwavering dedication and the enduring spirit of your gardening passion. As you continue to tend to your garden and nurture your outdoor sanctuary, may the shed stand as a tangible reminder of your ability to transform vision into reality and create a space that embodies the essence of your gardening journey.
Frequently Asked Questions about How To Build A Garden Tool Shed
Was this page helpful?
At Storables.com, we guarantee accurate and reliable information. Our content, validated by Expert Board Contributors, is crafted following stringent Editorial Policies. We're committed to providing you with well-researched, expert-backed insights for all your informational needs.


0 thoughts on “How To Build A Garden Tool Shed”