Home>Home Appliances>Bathroom Appliances>How To Use A Water Flosser Without Making A Mess

Bathroom Appliances
How To Use A Water Flosser Without Making A Mess
Modified: February 18, 2024
Learn how to use a water flosser effectively in your bathroom without creating a mess. Discover tips and techniques for a cleaner flossing experience. Ideal for bathroom-appliances enthusiasts.
(Many of the links in this article redirect to a specific reviewed product. Your purchase of these products through affiliate links helps to generate commission for Storables.com, at no extra cost. Learn more)
Introduction
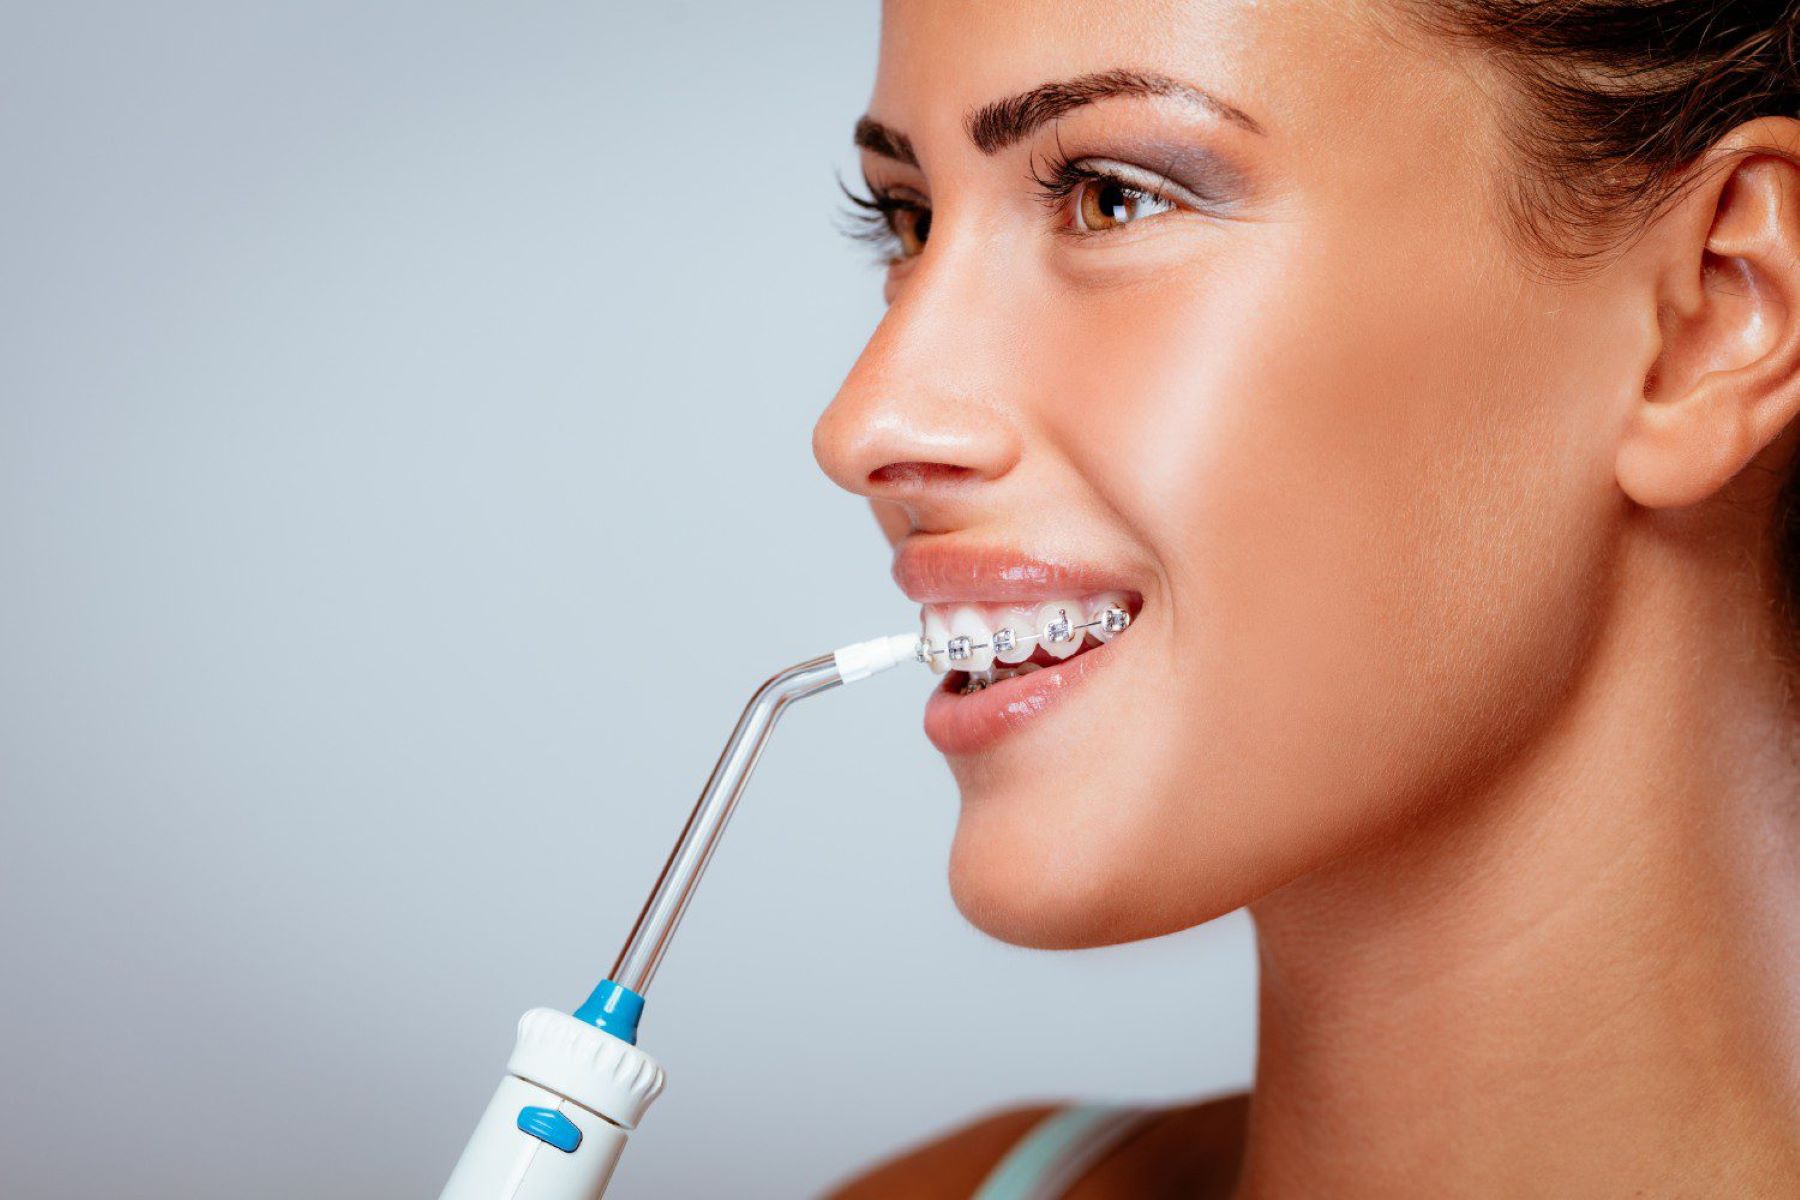
Using a water flosser is an effective way to maintain optimal oral hygiene and keep your gums healthy. However, it's not uncommon for first-time users to encounter a messy experience when using this device. The good news is that with the right technique, you can use a water flosser without creating a mess. In this guide, we'll walk you through the step-by-step process of using a water flosser effectively, ensuring a clean and hassle-free experience every time.
Whether you're new to water flossing or looking to refine your technique, mastering the art of using a water flosser without making a mess is essential for a seamless oral care routine. By following the simple yet crucial steps outlined in this guide, you'll be able to harness the full benefits of this innovative dental tool while minimizing any potential mess. So, let's dive into the details and discover how to use a water flosser with ease and precision.
Key Takeaways:
- Master the art of using a water flosser without making a mess by following simple steps like filling the reservoir, leaning over the sink, and starting on a low setting. These techniques ensure a clean and hassle-free flossing experience.
- Incorporate strategic measures like using a towel to catch splashes and emptying/cleaning the flosser to maintain a mess-free water flossing routine. These proactive steps contribute to optimal oral hygiene and gum health.
Read more: How Do You Use A Bidet Without Making A Mess
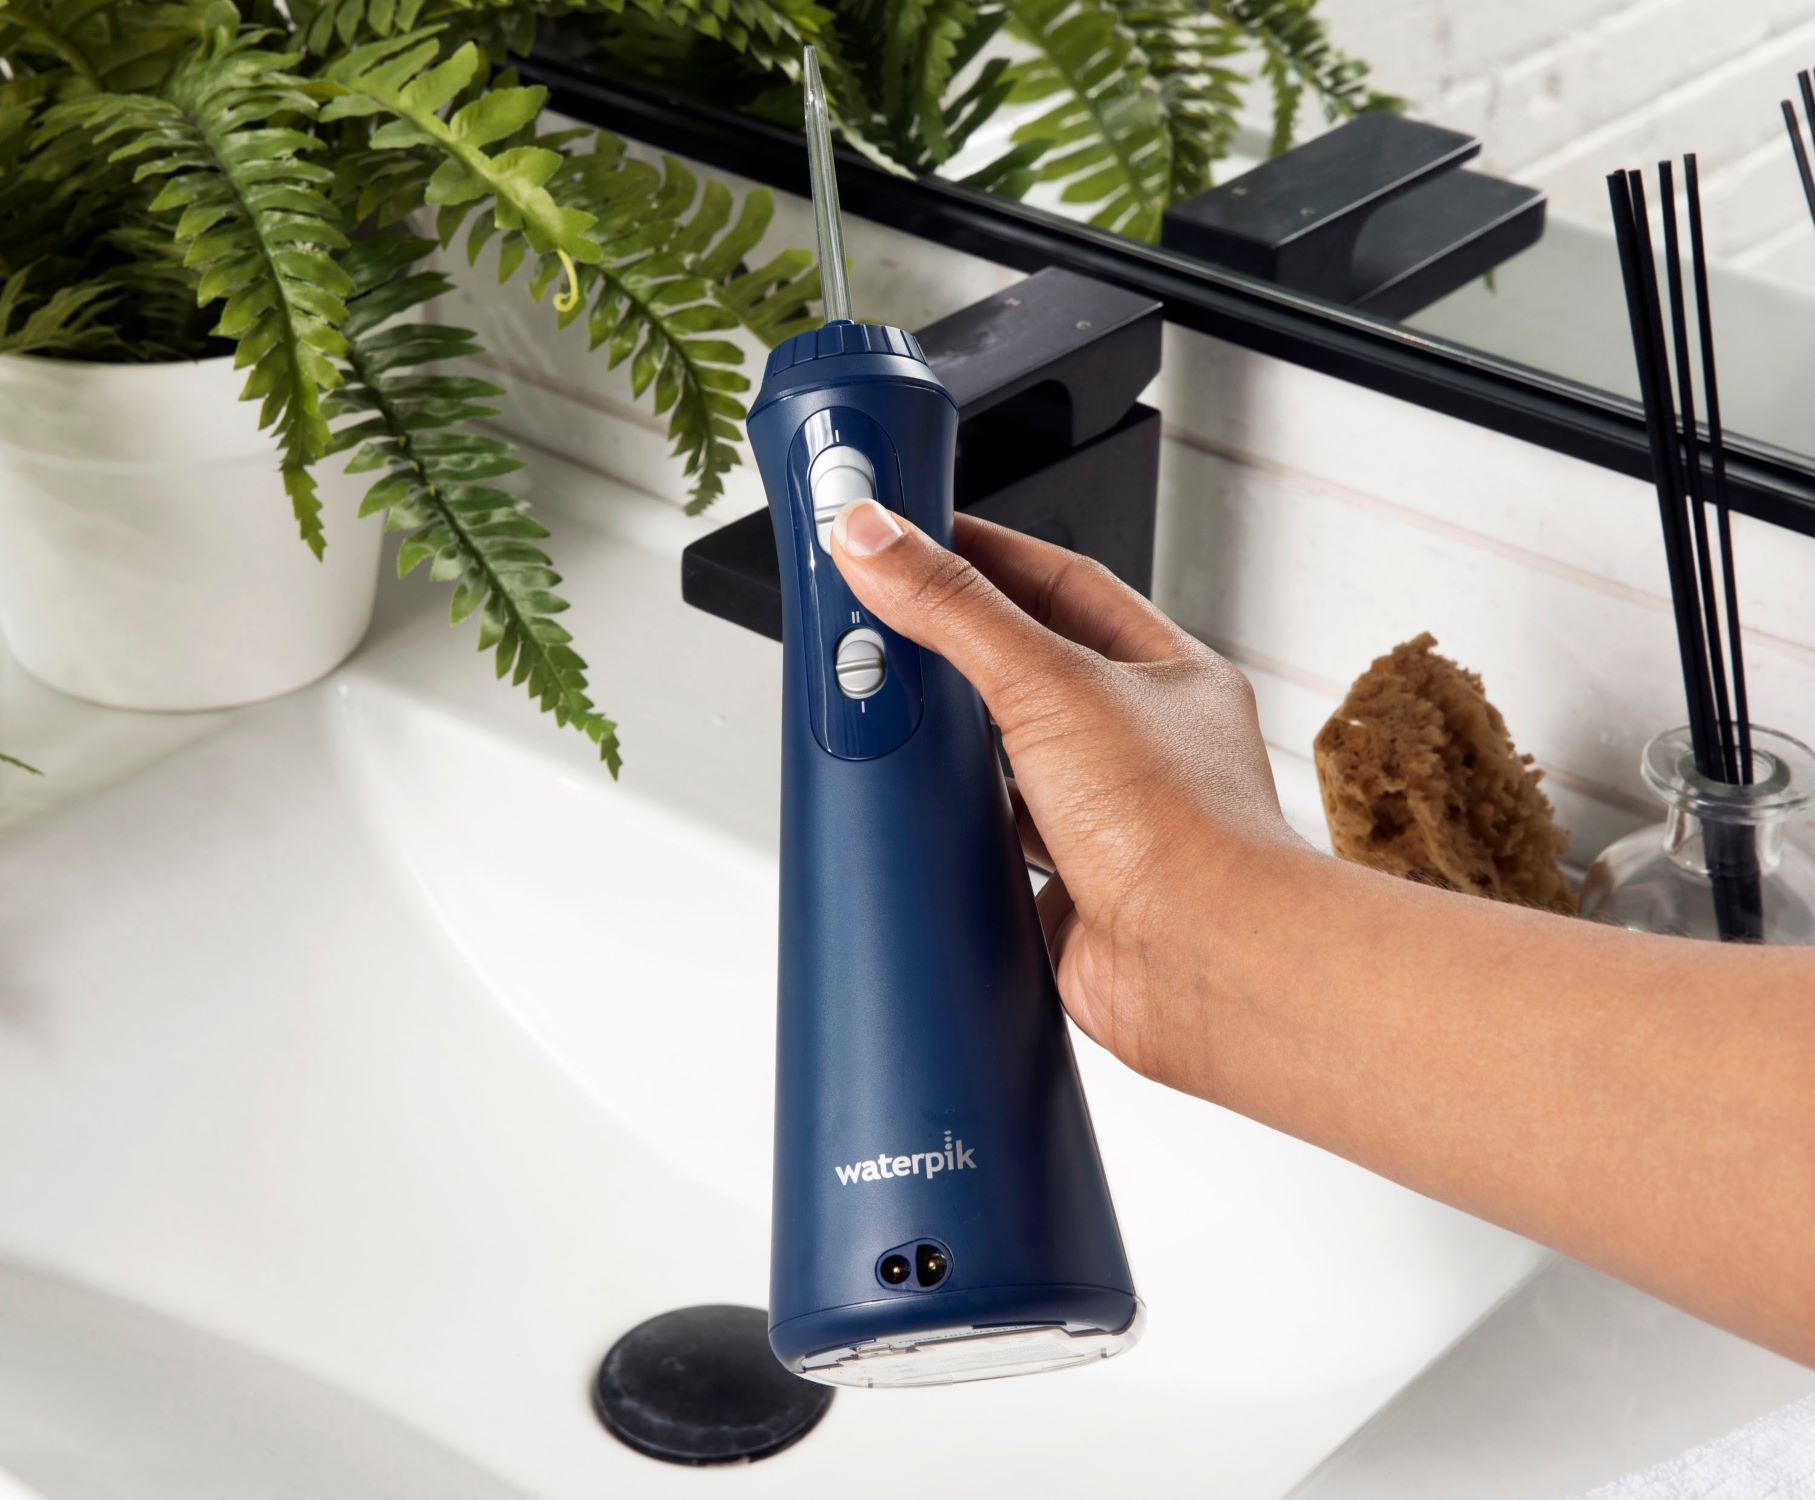
Step 1: Fill the Water Reservoir
Filling the water reservoir of your water flosser is the first and crucial step in ensuring a mess-free experience. Here's how to do it effectively:
-
Prepare Clean Water: Before filling the reservoir, ensure that you're using clean, lukewarm water. Using lukewarm water can help make the flossing experience more comfortable, especially if you have sensitive teeth or gums.
-
Remove the Reservoir: Most water flossers have a detachable water reservoir. Remove it from the main unit by gently pulling it out. This makes it easier to fill and prevents accidental spillage onto the flosser's body.
-
Fill to the Mark: Check for the maximum fill line indicator on the reservoir. It's essential not to overfill the reservoir, as this can lead to water spillage during use. Add water to the reservoir, ensuring it reaches the recommended level.
-
Avoid Adding Other Substances: While some water flossers allow for the addition of mouthwash or antibacterial solutions to the water reservoir, it's best to stick to using plain water, especially when aiming to minimize mess. Adding other substances can increase the risk of splashing and may require more thorough cleaning afterward.
-
Securely Reattach the Reservoir: Once the reservoir is filled to the appropriate level, securely reattach it to the main unit. Ensure that it clicks into place, indicating a proper seal to prevent any leaks during use.
By following these steps, you can effectively fill the water reservoir of your water flosser, setting the stage for a mess-free and efficient flossing experience. This initial preparation ensures that you have the right amount of water to effectively clean between your teeth and along the gumline without creating any unnecessary mess.
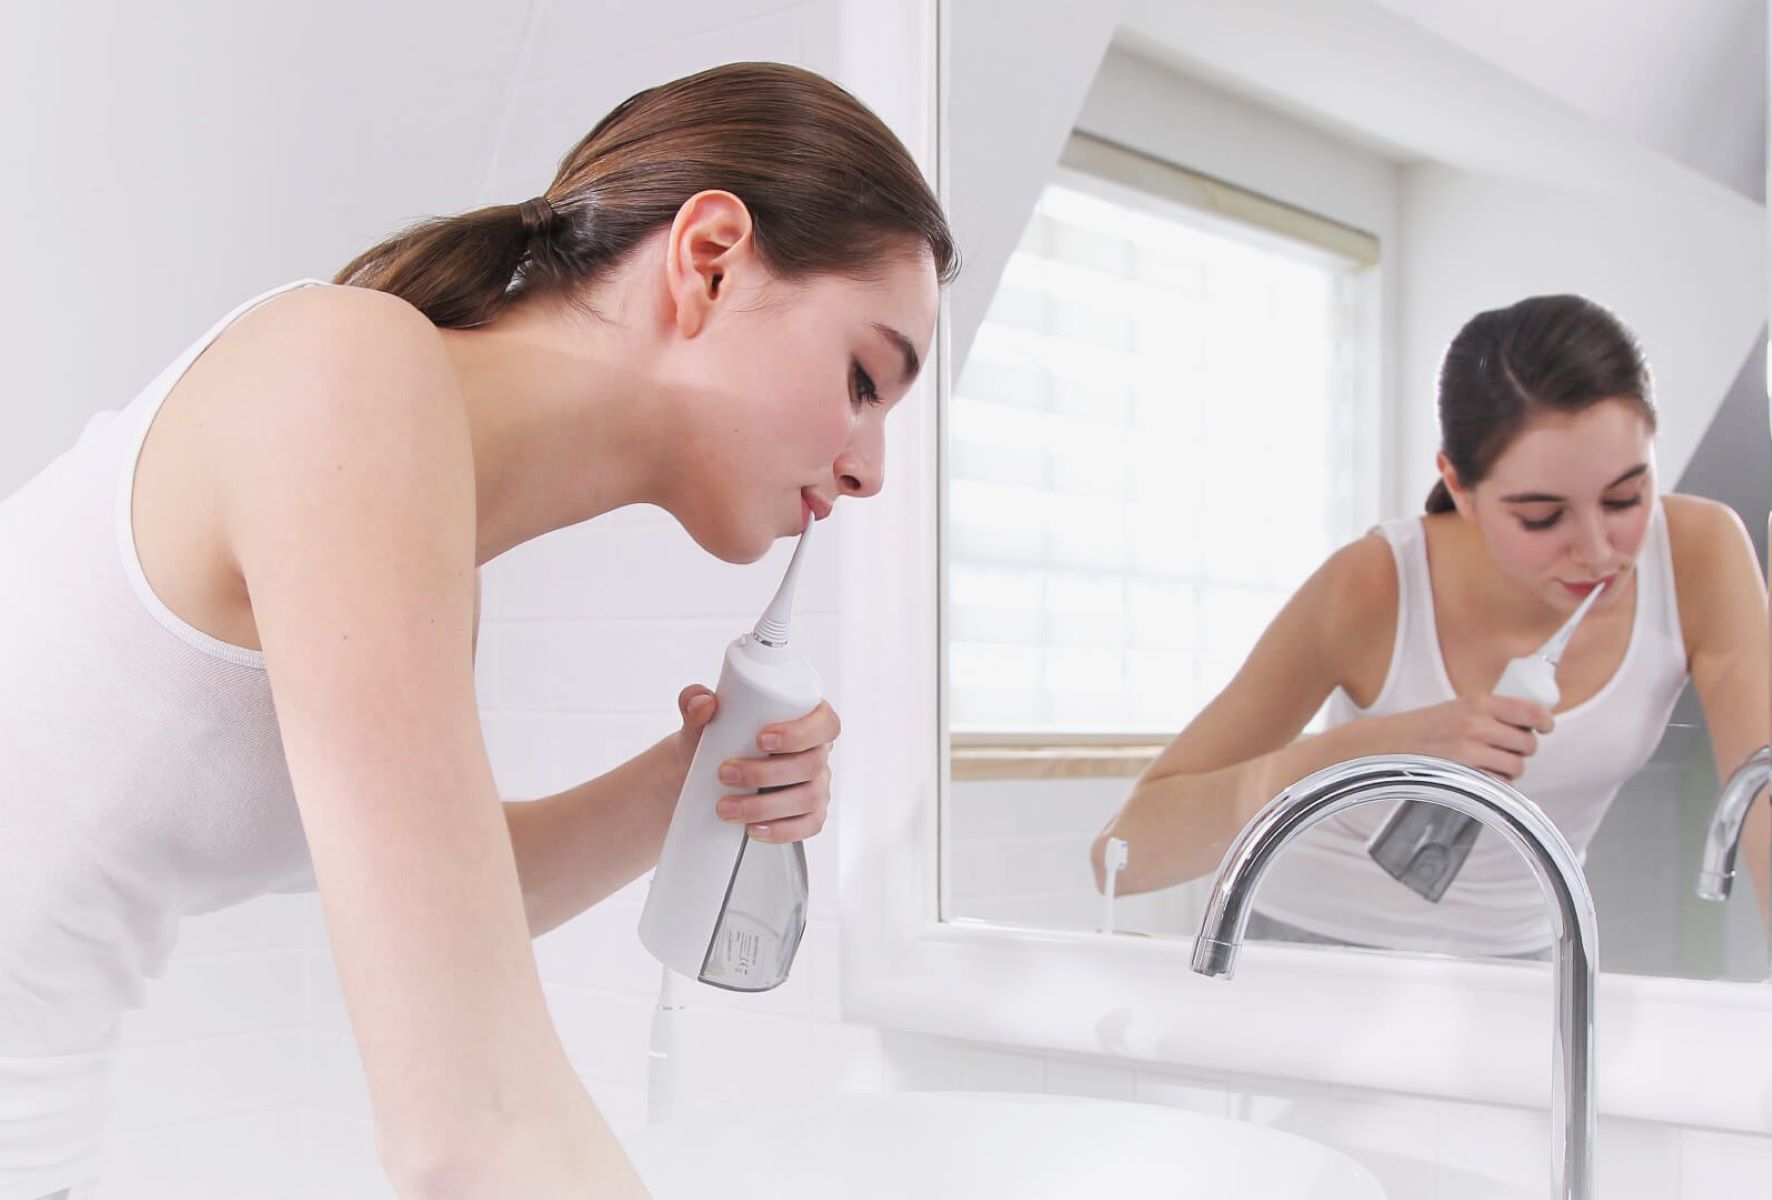
Step 2: Lean Over the Sink
Once the water flosser is filled and ready for use, the next crucial step is to position yourself correctly to minimize any potential mess. Here's a detailed guide on how to lean over the sink effectively while using a water flosser:
-
Find a Comfortable Position: Stand in front of the sink and find a comfortable stance. It's essential to have your feet firmly planted on the ground to maintain balance throughout the flossing process.
-
Adjust the Water Flosser Angle: Hold the water flosser at a slight downward angle, pointing the tip toward the sink's drain. This positioning ensures that any residual water or splashes are directed into the sink, minimizing the chances of creating a mess on the countertop or surrounding areas.
-
Lean Forward Gently: Lean your upper body slightly forward over the sink while maintaining a relaxed posture. This position allows you to maintain control over the water flosser while ensuring that any water or debris expelled during the flossing process is directed into the sink.
-
Maintain a Safe Distance: Position your face at a safe distance from the sink to avoid any potential splashing. While the water flosser is designed to direct water flow effectively, maintaining a reasonable distance can further reduce the risk of water reaching areas outside the sink.
-
Consider Using a Towel: Placing a small towel or washcloth at the bottom of the sink can provide an additional layer of protection against any unexpected splashes. This simple precaution can help catch any stray water and prevent it from spreading beyond the sink area.
By following these steps and maintaining a mindful posture, you can effectively lean over the sink while using a water flosser, minimizing the likelihood of creating a mess. This strategic positioning not only ensures a tidy flossing experience but also allows you to focus on effectively cleaning your teeth and gums without unnecessary distractions.
Remember, mastering the art of leaning over the sink while using a water flosser may take a bit of practice, but the payoff is a clean and hassle-free flossing routine that contributes to your overall oral health.
Step 3: Start on a Low Setting
When using a water flosser, it's essential to begin on a low setting to acclimate your gums and oral tissues to the water pressure. Starting on a low setting not only helps prevent potential mess but also allows for a gentle and controlled introduction to the flossing process. Here's a detailed exploration of how to effectively start on a low setting when using a water flosser:
-
Understand the Settings: Most water flossers come with adjustable pressure settings, typically ranging from gentle to more powerful pressures. Familiarize yourself with the settings available on your specific device, and locate the lowest pressure setting. This initial step sets the stage for a comfortable and mess-free flossing experience.
-
Activate the Flosser on Low: Before directing the water flow into your mouth, activate the water flosser on the lowest pressure setting. This allows you to gauge the intensity of the water flow and make any necessary adjustments before beginning the flossing process. Starting on a low setting minimizes the risk of sudden splashes or discomfort, providing a smooth transition into the flossing routine.
-
Gradually Increase if Needed: If the lowest setting feels comfortable and effective, there may be no need to increase the pressure. However, if you feel that a slightly higher pressure is required for thorough cleaning, gradually adjust the setting to a level that is both comfortable and efficient. This incremental approach allows you to maintain control over the water flow, reducing the likelihood of creating a mess during the flossing process.
-
Focus on Precision: As you begin flossing on the low setting, focus on precision and accuracy in directing the water flow along the gumline and between the teeth. This deliberate approach ensures that the water effectively removes debris and plaque without unnecessary splashing. By concentrating on targeted areas, you can maintain a tidy flossing experience while maximizing the benefits of water flossing.
-
Observe and Adjust: Throughout the flossing process, observe how your gums and teeth respond to the water pressure. If you notice any discomfort or excessive splashing, pause and make adjustments as needed. This attentive approach allows you to fine-tune the flossing experience, ensuring that you can effectively clean your teeth and gums without creating a mess.
Starting on a low setting when using a water flosser sets the foundation for a controlled and mess-free flossing experience. By following these steps and maintaining a mindful approach to pressure adjustment, you can harness the full benefits of water flossing while minimizing any potential mess or discomfort.
Step 4: Close Your Lips Around the Tip
Once you have adjusted the water flosser to a comfortable pressure setting, the next crucial step is to ensure a secure seal around the flosser's tip with your lips. This step is essential for directing the water flow effectively and minimizing any potential splashing. Here's a detailed exploration of how to close your lips around the tip of the water flosser for a mess-free flossing experience:
-
Maintain a Relaxed Posture: Before bringing the flosser tip to your mouth, ensure that your facial muscles are relaxed. Tension in the lips or jaw can affect the effectiveness of creating a seal and may lead to inadvertent splashing.
-
Position the Tip Correctly: Hold the water flosser tip at a slight angle to your gumline, ensuring that it's positioned for optimal water flow. This angle allows the water to effectively reach between your teeth and along the gumline, promoting thorough cleaning.
-
Close Your Lips Gently: Bring the flosser tip to your mouth and close your lips around it in a gentle and controlled manner. The goal is to create a secure seal without applying excessive pressure, allowing the water to flow into your mouth without escaping around the sides.
-
Maintain a Stable Grip: While closing your lips around the flosser tip, maintain a stable grip on the flosser handle. This ensures that you have full control over the device, minimizing the risk of accidental movements that could lead to splashing.
-
Direct the Water Flow: Once your lips are securely around the tip, activate the water flosser. Direct the water flow along the gumline and between your teeth, moving methodically from one area to another. By maintaining a consistent and deliberate approach, you can effectively clean your teeth and gums without creating a mess.
-
Be Mindful of Angles: As you move the flosser tip within your mouth, be mindful of the angles at which you direct the water flow. Adjust the position of the tip as needed to ensure comprehensive coverage while keeping the water directed into your mouth.
By following these steps and ensuring a secure seal around the flosser tip with your lips, you can effectively harness the benefits of water flossing while minimizing the likelihood of creating a mess. This technique allows for precise and controlled water flow, promoting thorough cleaning without unnecessary splashing or spillage.
Remember, mastering the art of closing your lips around the flosser tip may take a bit of practice, but the result is a tidy and efficient flossing routine that contributes to your overall oral health.
To use a water flosser without making a mess, lean over the sink and keep your lips closed around the flosser to prevent splashing. Start with the lowest pressure setting and gradually increase as needed.
Read more: How To Use Hand Mixer Without Making A Mess
Step 5: Move the Tip Along Your Gumline
Once you have established a secure seal around the flosser tip with your lips, it's time to focus on effectively maneuvering the tip along your gumline for comprehensive cleaning. This step is crucial for targeting plaque and debris that may be lodged along the gumline, promoting optimal oral hygiene and gum health. Here's a detailed exploration of how to move the flosser tip along your gumline for a thorough and mess-free flossing experience:
-
Begin at the Back: Start by directing the flosser tip to the back of your mouth, positioning it along the gumline of your molars. This strategic starting point allows you to work methodically from the rear teeth forward, ensuring that every area along the gumline receives thorough attention.
-
Maintain a Steady Motion: Activate the water flosser and begin moving the tip along the gumline in a steady, controlled motion. It's essential to maintain a consistent pace to ensure that the water effectively dislodges any trapped debris and stimulates the gum tissue without causing unnecessary splashing.
-
Focus on Each Tooth: As you progress along the gumline, pause briefly at each tooth to concentrate the water flow on the spaces between the teeth and the adjacent gum tissue. This targeted approach allows for precise cleaning and minimizes the risk of water escaping and creating a mess.
-
Angle for Optimal Coverage: Adjust the angle of the flosser tip as needed to ensure optimal coverage along the entire gumline. By angling the tip slightly towards the gum tissue, you can direct the water flow where it's most effective, promoting thorough cleaning without excess splashing.
-
Move Systematically: Work your way from the back teeth to the front, ensuring that the water flosser tip effectively reaches every area along the gumline. This systematic approach allows for comprehensive cleaning while minimizing the potential for creating a mess.
-
Be Mindful of Pressure: Throughout the process, be mindful of the pressure exerted by the water flow against your gums. Adjust the flosser settings or the angle of the tip if you notice any discomfort or excessive splashing, ensuring a comfortable and mess-free experience.
By following these steps and moving the flosser tip along your gumline with precision and care, you can effectively harness the benefits of water flossing while minimizing the likelihood of creating a mess. This targeted approach allows for thorough cleaning and gum stimulation, contributing to your overall oral health and hygiene.
Step 6: Use a Towel to Catch Any Splashes
Incorporating a simple yet effective strategy to minimize potential splashes during the water flossing process can significantly contribute to a mess-free experience. Using a towel to catch any splashes serves as a proactive measure to contain water and prevent it from reaching beyond the sink area. Here's a detailed exploration of how to utilize a towel strategically to enhance the cleanliness of your water flossing routine:
-
Select an Absorbent Towel: Choose a small, highly absorbent towel or washcloth to place at the bottom of the sink. Opting for a towel with excellent absorbency ensures that any stray water or splashes are captured effectively, preventing them from spreading onto the countertop or surrounding surfaces.
-
Position the Towel Securely: Before commencing the flossing process, position the towel at the base of the sink, ensuring that it covers the area where potential splashes are most likely to land. Smooth out the towel to create a flat surface, maximizing its ability to catch and absorb any water that may escape during flossing.
-
Maintain Visibility and Accessibility: While placing the towel in the sink, ensure that it does not obstruct the water drainage. It's essential to maintain visibility of the sink's drain and ensure that the towel does not impede the flow of water. This strategic positioning allows the towel to fulfill its role in catching splashes without interfering with the functionality of the sink.
-
Replace and Launder Regularly: To maintain optimal cleanliness and hygiene, make it a habit to replace the towel regularly and launder it as needed. This practice ensures that the towel remains effective in catching splashes and prevents the accumulation of moisture, contributing to a tidy and hygienic flossing environment.
By incorporating a towel to catch any splashes during the water flossing process, you can enhance the overall cleanliness and organization of your oral care routine. This simple yet impactful measure minimizes the risk of water reaching beyond the sink area, promoting a mess-free and efficient flossing experience.
Remember, the goal of using a towel to catch splashes is to complement your flossing technique and create a more controlled environment, allowing you to focus on thorough cleaning without unnecessary distractions. This proactive approach aligns with the overarching aim of achieving optimal oral hygiene and gum health through effective water flossing.
Step 7: Empty the Reservoir and Clean the Flosser
After completing your water flossing routine, it's essential to properly empty the reservoir and clean the flosser to maintain its functionality and hygiene. This final step ensures that your water flosser remains in optimal condition for future use while preventing any potential mess or buildup of bacteria. Here's a detailed guide on how to empty the reservoir and clean the flosser effectively:
-
Turn Off and Unplug: Before proceeding with emptying the reservoir and cleaning the flosser, ensure that the device is turned off and unplugged from the power source. This precautionary measure minimizes the risk of electrical mishaps and allows for safe handling during the cleaning process.
-
Empty the Reservoir: Remove the water reservoir from the main unit and empty any remaining water into the sink. It's important to completely empty the reservoir to prevent stagnant water from accumulating, which can lead to bacterial growth and odors over time.
-
Rinse the Reservoir: Thoroughly rinse the reservoir with clean water to remove any residual particles or buildup. Pay close attention to the corners and crevices to ensure that all areas are effectively cleaned. Additionally, consider using a mild soap or vinegar solution for a more comprehensive cleaning if recommended by the manufacturer.
-
Clean the Flosser Tip: If your water flosser comes with detachable tips, remove the tip and clean it according to the manufacturer's instructions. This typically involves rinsing the tip under running water and using a small brush to remove any debris or buildup. Proper maintenance of the flosser tip contributes to the overall cleanliness and effectiveness of the device.
-
Wipe the Exterior: Using a damp cloth, gently wipe the exterior of the flosser to remove any water spots or residue. This simple step helps maintain the appearance of the device and prevents the accumulation of grime or mineral deposits.
-
Allow for Drying: After cleaning the reservoir and flosser components, allow them to air dry thoroughly before reassembling the device. Proper drying prevents the growth of mold or mildew and ensures that the flosser is ready for future use.
-
Store Properly: Once the flosser and reservoir are clean and dry, reassemble the device and store it in a cool, dry place. Proper storage not only maintains the cleanliness of the flosser but also prolongs its lifespan.
By following these steps to empty the reservoir and clean the flosser, you can ensure that your water flosser remains in optimal condition, ready for your next flossing session. This proactive approach to maintenance contributes to a hygienic and mess-free flossing experience, allowing you to prioritize your oral health with confidence.
Conclusion
Mastering the art of using a water flosser without making a mess is a valuable skill that contributes to a seamless and effective oral care routine. By following the step-by-step process outlined in this guide, you can harness the full benefits of water flossing while minimizing any potential mess or inconvenience.
From filling the water reservoir to maneuvering the flosser tip along the gumline, each step is designed to promote a tidy and efficient flossing experience. By incorporating strategic techniques such as leaning over the sink, starting on a low setting, and using a towel to catch splashes, you can elevate your water flossing routine to a new level of cleanliness and precision.
The proactive approach of emptying the reservoir and cleaning the flosser after each use ensures that the device remains in optimal condition, ready for future flossing sessions. This final step not only maintains the functionality of the water flosser but also prevents any potential mess or buildup of bacteria, aligning with the overarching goal of promoting oral hygiene and gum health.
As you continue to incorporate these techniques into your water flossing routine, you'll find that the process becomes more intuitive and seamless. The initial learning curve gives way to a confident and controlled approach, allowing you to focus on the thorough cleaning of your teeth and gums without unnecessary distractions.
Ultimately, the ability to use a water flosser without creating a mess empowers you to prioritize your oral health with ease and precision. By embracing these techniques and refining your flossing routine, you can enjoy the benefits of a clean and healthy smile, knowing that your water flosser serves as a reliable tool in your daily oral care regimen.
With the knowledge and skills gained from this guide, you are well-equipped to embark on a mess-free water flossing journey, reaping the rewards of optimal oral hygiene and gum wellness. So, go ahead and embrace the art of using a water flosser with confidence, knowing that a clean and effective flossing experience awaits you each time you pick up the device.
Frequently Asked Questions about How To Use A Water Flosser Without Making A Mess
Was this page helpful?
At Storables.com, we guarantee accurate and reliable information. Our content, validated by Expert Board Contributors, is crafted following stringent Editorial Policies. We're committed to providing you with well-researched, expert-backed insights for all your informational needs.


0 thoughts on “How To Use A Water Flosser Without Making A Mess”