Home>Home Appliances>Lighting Appliances>How To Remove A Ceiling Light Cover Without Screws
Lighting Appliances
How To Remove A Ceiling Light Cover Without Screws
Modified: August 25, 2024
Learn how to easily remove a ceiling light cover without screws. Get step-by-step instructions for removing lighting appliances without any hassle.
(Many of the links in this article redirect to a specific reviewed product. Your purchase of these products through affiliate links helps to generate commission for Storables.com, at no extra cost. Learn more)
Introduction
Removing a ceiling light cover without screws may seem like a daunting task, but with the right guidance and tools, it can be a straightforward process. Whether you're looking to change a light bulb, clean the cover, or upgrade your lighting fixture, understanding the steps involved can make the task much more manageable.
Ceiling light covers come in various designs, from simple domes to intricate glass fixtures, and each type may require a different approach for removal. By familiarizing yourself with the specific type of cover you have, you can confidently proceed with the removal process without causing any damage.
In this comprehensive guide, we will walk you through the necessary steps to safely remove a ceiling light cover without screws. From gathering the essential tools to identifying the type of cover and executing the removal process, you'll gain valuable insights to simplify this task. Additionally, we'll explore the importance of proper cleaning and maintenance to ensure that your ceiling light cover remains in optimal condition.
Whether you're a DIY enthusiast or simply seeking to understand the process for future reference, this guide is designed to equip you with the knowledge and confidence to tackle this task effectively. So, let's dive into the step-by-step process and discover how to remove a ceiling light cover without screws.
Key Takeaways:
- Removing a ceiling light cover without screws is a manageable task with the right tools and techniques. Identifying the cover type and using gentle twisting or prying motions can help safely remove the cover for cleaning or maintenance.
- Proper cleaning and reinstallation of the cover are essential for maintaining the visual appeal and functionality of the ceiling light fixture. Using soft cloths, mild cleaners, and precision during reattachment can ensure a well-maintained and visually appealing lighting fixture.
Step 1: Gather the necessary tools
Before embarking on the task of removing a ceiling light cover without screws, it's essential to gather the appropriate tools to ensure a smooth and efficient process. Having the right tools at your disposal can significantly simplify the task and minimize the risk of damage to the fixture or cover. Here's a comprehensive list of the essential tools you'll need:
-
Ladder or Step Stool: Depending on the height of your ceiling, a stable ladder or step stool is crucial for safely reaching the light fixture. Ensure that the ladder is positioned on a level surface and that it can support your weight and provide adequate reach.
-
Non-Slip Gloves: Handling the ceiling light cover with non-slip gloves can provide a secure grip and prevent accidental slippage or dropping of the cover. Additionally, gloves can protect your hands from sharp edges or accumulated dust on the cover.
-
Soft Cloth or Microfiber Towel: Having a soft cloth or microfiber towel on hand is essential for cleaning the cover once it's removed. This will help remove any dust, dirt, or grime that may have accumulated over time, ensuring that the cover is clean and ready for reinstallation.
-
Flathead Screwdriver or Plastic Pry Tool: In the absence of screws, a flathead screwdriver or a plastic pry tool can be used to gently pry the cover from its fixture. These tools can help create leverage and carefully release the cover without causing damage to the surrounding area.
-
Safety Glasses: While removing the cover, it's advisable to wear safety glasses to protect your eyes from any debris or dust that may dislodge during the process. Safety glasses can provide an extra layer of protection and prevent potential eye injuries.
By ensuring that you have these essential tools at your disposal, you can approach the task of removing a ceiling light cover without screws with confidence and preparedness. With the necessary tools in hand, you'll be ready to proceed to the next step of identifying the type of ceiling light cover and executing the removal process effectively.
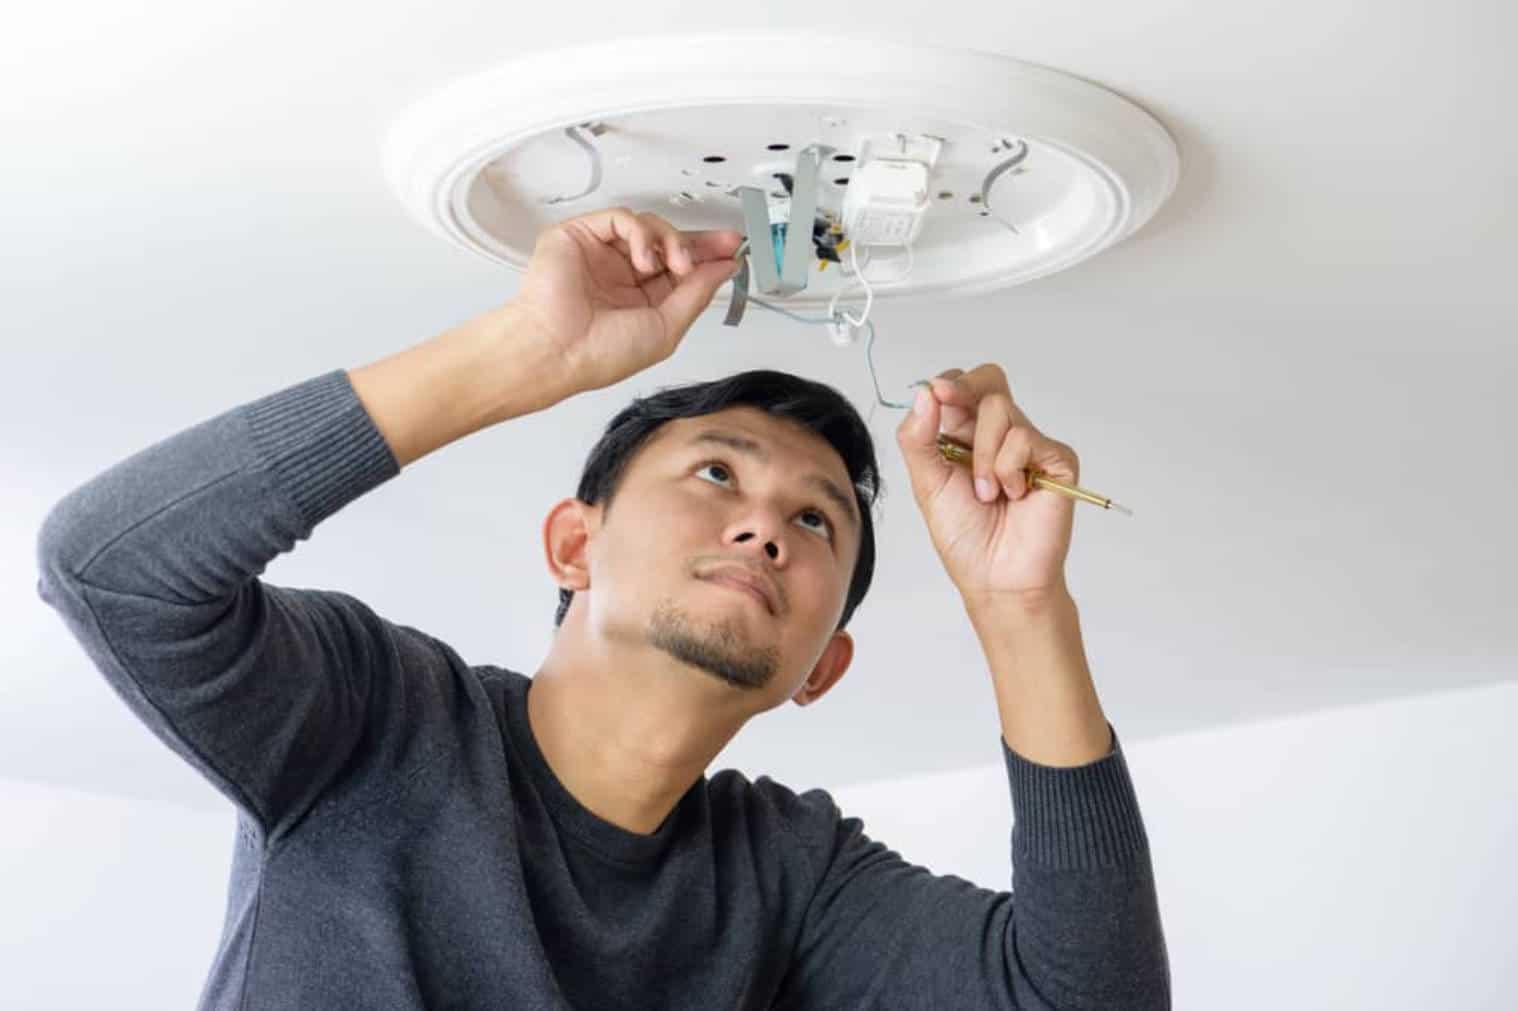
Step 2: Identify the type of ceiling light cover
Identifying the type of ceiling light cover is a crucial step in the process of removing it without screws. Different types of covers require distinct removal methods to ensure that the fixture remains undamaged. By understanding the specific characteristics of your ceiling light cover, you can proceed with confidence and precision.
Dome-Shaped Covers
Dome-shaped ceiling light covers are among the most common designs found in residential and commercial settings. These covers typically feature a smooth, curved surface that extends from the base of the fixture. To identify a dome-shaped cover, look for a seamless, rounded structure that encases the light bulb or fixture.
Flush-Mounted Covers
Flush-mounted ceiling light covers are characterized by their close proximity to the ceiling, creating a seamless and streamlined appearance. These covers are often secured in place by a twist-lock mechanism or clips, eliminating the need for visible screws. To identify a flush-mounted cover, observe the absence of external fasteners or protruding hardware.
Read more: How To Remove A Door Lock Without Screws
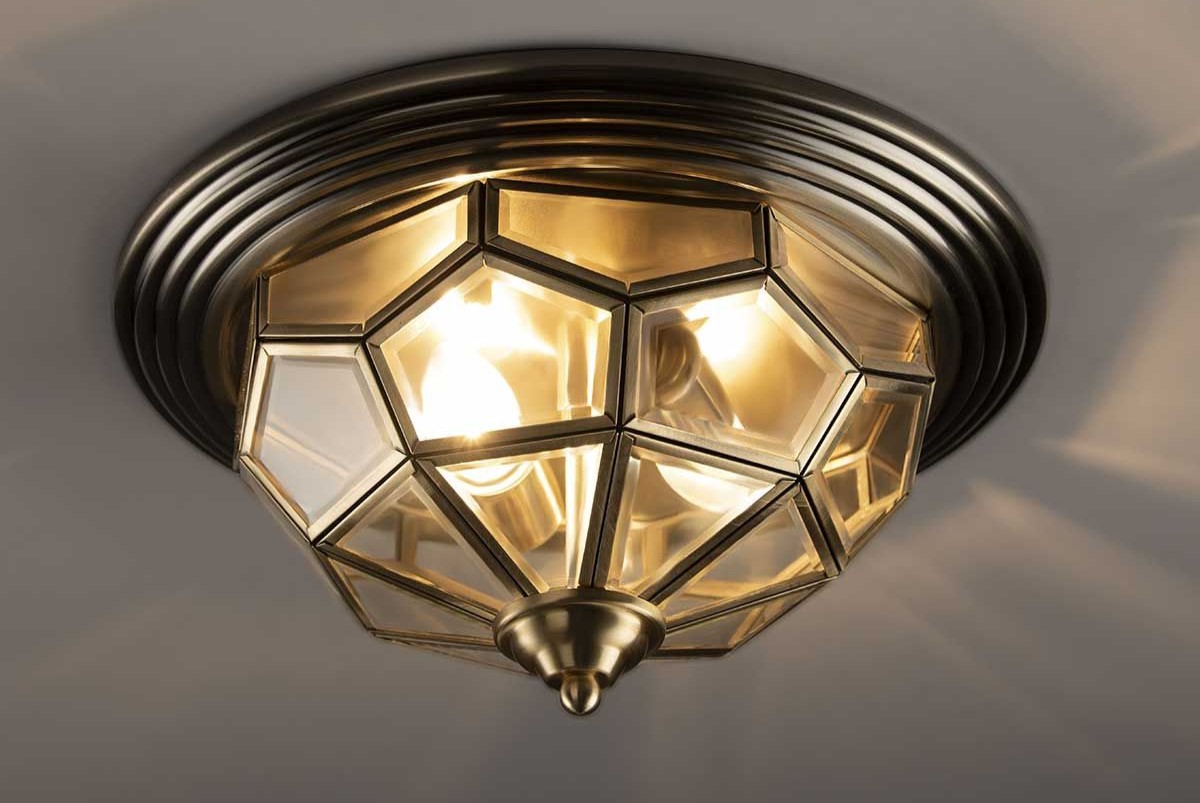
Glass or Acrylic Panel Covers
Ceiling light covers that incorporate glass or acrylic panels add a touch of elegance and sophistication to the fixture. These covers are commonly secured using a retaining ring or decorative finial, which holds the panel in place without the use of visible screws. To identify a glass or acrylic panel cover, look for a framed structure with a central panel that diffuses the light.
Decorative Pendant Covers
Decorative pendant covers are designed to enhance the aesthetic appeal of the ceiling light fixture, often featuring intricate patterns, textures, or embellishments. These covers may be attached using a decorative finial, a central screw, or a twist-lock mechanism concealed within the design. To identify a decorative pendant cover, examine the ornate details and any visible fastening components.
Retractable Blade Covers
Ceiling light fixtures with retractable or foldable blades, commonly known as ceiling fan lights, require a unique approach for cover removal. These covers are typically secured using a locking mechanism or a twist-and-lock system to ensure the blades remain stable during operation. To identify a retractable blade cover, look for a seamless integration of the blades with the surrounding fixture and any concealed locking features.
By identifying the specific type of ceiling light cover you have, you can tailor your approach to suit the design and fastening method, ensuring a successful removal process. Understanding the nuances of each cover type empowers you to proceed with confidence and precision, ultimately simplifying the task of removing the cover without screws.
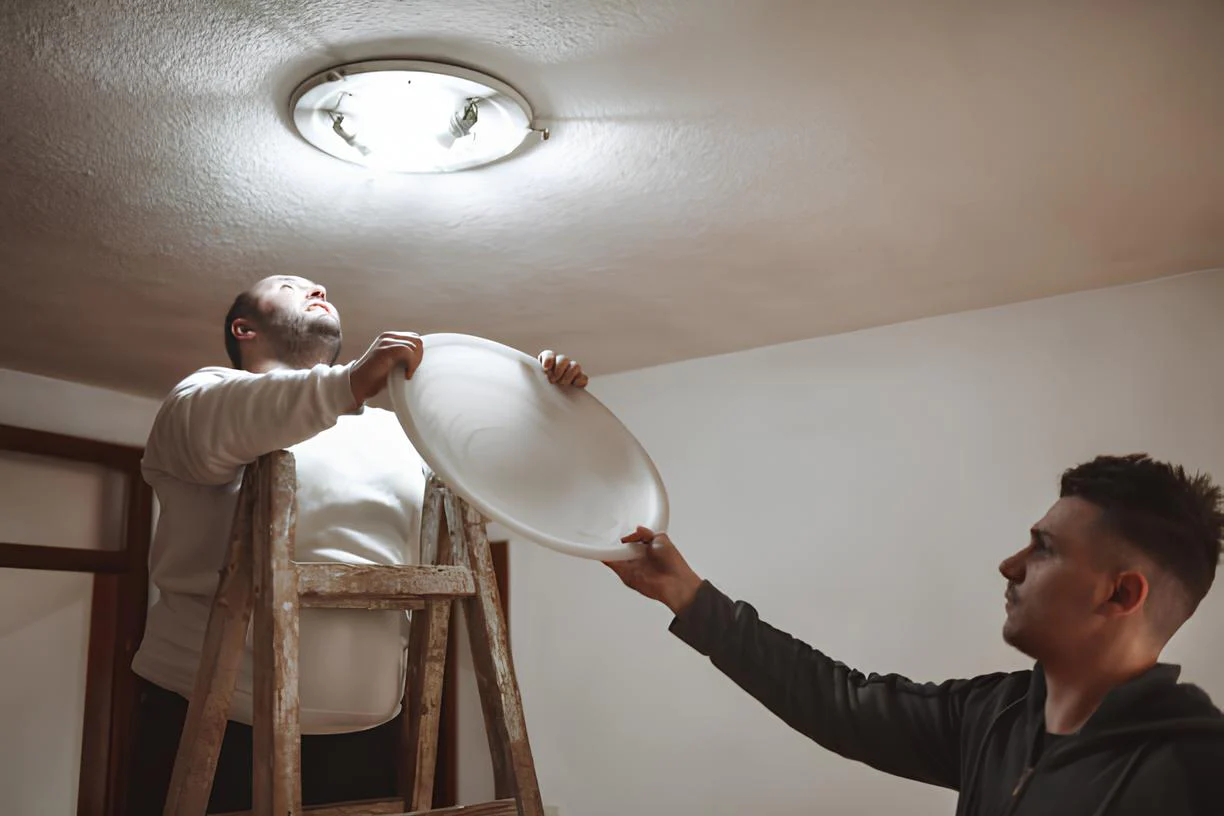
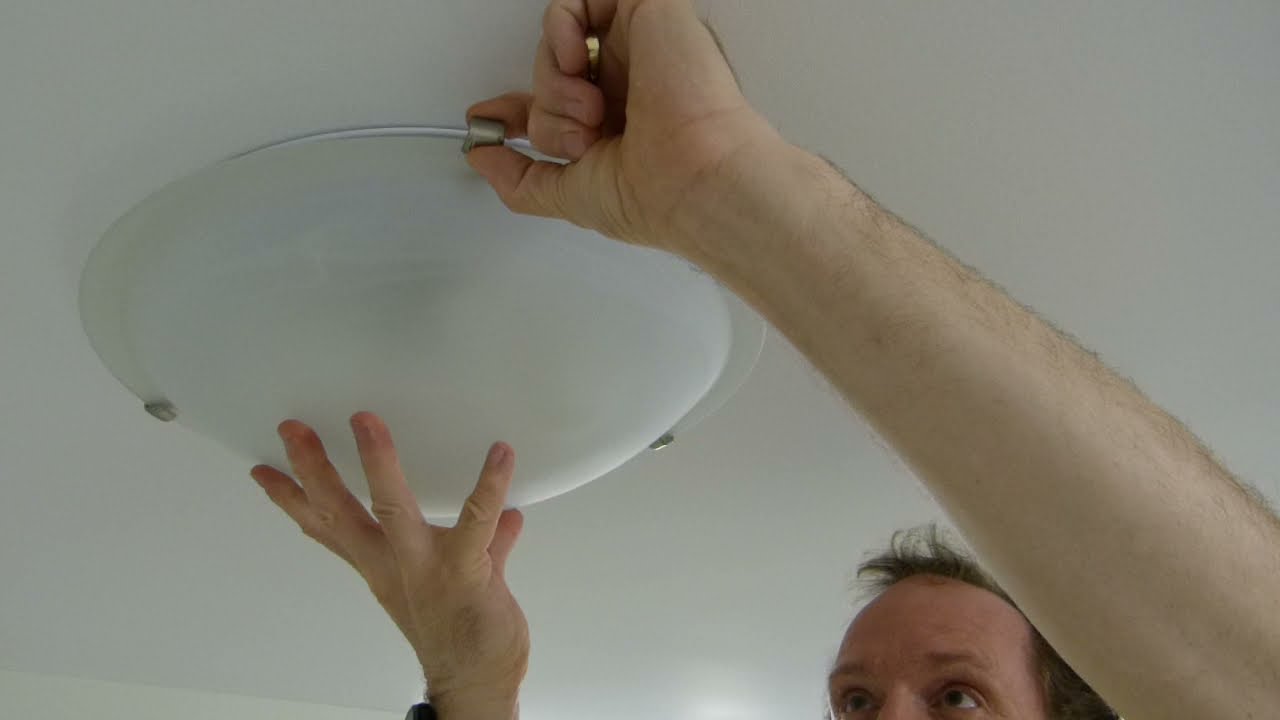
Step 3: Twist and remove the cover
Once you have gathered the necessary tools and identified the type of ceiling light cover, you are ready to proceed with the removal process. For covers that do not utilize screws, a common method involves twisting and carefully dislodging the cover from its fixture. This step-by-step guide will walk you through the process of twisting and removing the cover without causing any damage to the fixture or the cover itself.
Twist-Lock Mechanism
If your ceiling light cover features a twist-lock mechanism, start by identifying the locking points or tabs located around the perimeter of the cover. Using a gentle and steady motion, twist the cover in a counterclockwise direction to release it from the fixture. It's important to apply even pressure and avoid excessive force to prevent any sudden or abrupt movements that could lead to damage.
Clip-Based Retention
For covers secured by clips, carefully locate the position of each clip and determine the most effective approach for releasing them. Using a flathead screwdriver or a plastic pry tool, gently disengage the clips by applying slight pressure to the designated release points. As each clip is disengaged, continue to loosen the cover until it can be safely removed from the fixture.
Decorative Finial or Retaining Ring
In the case of covers held in place by a decorative finial or a retaining ring, assess the method of attachment and identify the appropriate technique for removal. Depending on the design, you may need to unscrew the finial in a counterclockwise direction or release the retaining ring by applying gentle pressure to disengage it from the fixture. Exercise caution to avoid any sudden movements that could compromise the integrity of the cover or the fixture.
Twist-and-Lock System
Ceiling light covers with a twist-and-lock system require a careful twisting motion to release them from the fixture. Begin by identifying the twist-lock points or markings on the cover and fixture. With a firm grip, rotate the cover in the specified direction to unlock it from the fixture, ensuring that the motion is smooth and controlled to prevent any jarring movements.
By following these specific techniques tailored to the type of cover you have, you can effectively twist and remove the cover without screws. It's essential to approach this process with patience and precision, ensuring that the cover is released smoothly and without any damage. Once the cover is successfully removed, proceed with the necessary cleaning and maintenance before reattaching it to the fixture.
This detailed approach to twisting and removing the cover provides a clear and effective method for handling various types of ceiling light covers, empowering you to navigate the removal process with confidence and expertise.
Step 4: Clean the cover and replace it
After successfully removing the ceiling light cover without screws, it's essential to prioritize the cleaning and maintenance of the cover before reattaching it to the fixture. This crucial step ensures that the cover remains in optimal condition and contributes to the overall aesthetic appeal of the lighting fixture. Additionally, thorough cleaning can help improve the quality of light emitted by the fixture and prevent the accumulation of dust and debris in the future.
Cleaning the Cover
-
Dust Removal: Begin by using a soft cloth or microfiber towel to gently wipe the interior and exterior surfaces of the cover. This will effectively remove any accumulated dust, ensuring that the cover is clean and free from debris.
-
Glass or Acrylic Panel Care: For covers featuring glass or acrylic panels, consider using a mild glass cleaner or a solution of water and vinegar to achieve a streak-free and polished finish. Apply the cleaner to the panel and carefully wipe it with a clean, dry cloth to remove any smudges or marks.
-
Detailed Cleaning: Inspect the cover for any stubborn stains or residue, and address them using a gentle cleaning solution or mild soap diluted in water. Avoid using abrasive cleaners or harsh chemicals that may damage the surface of the cover.
-
Drying Process: Once the cleaning process is complete, allow the cover to air dry or use a soft, dry cloth to gently remove any remaining moisture. Ensuring that the cover is completely dry is essential before proceeding with reinstallation.
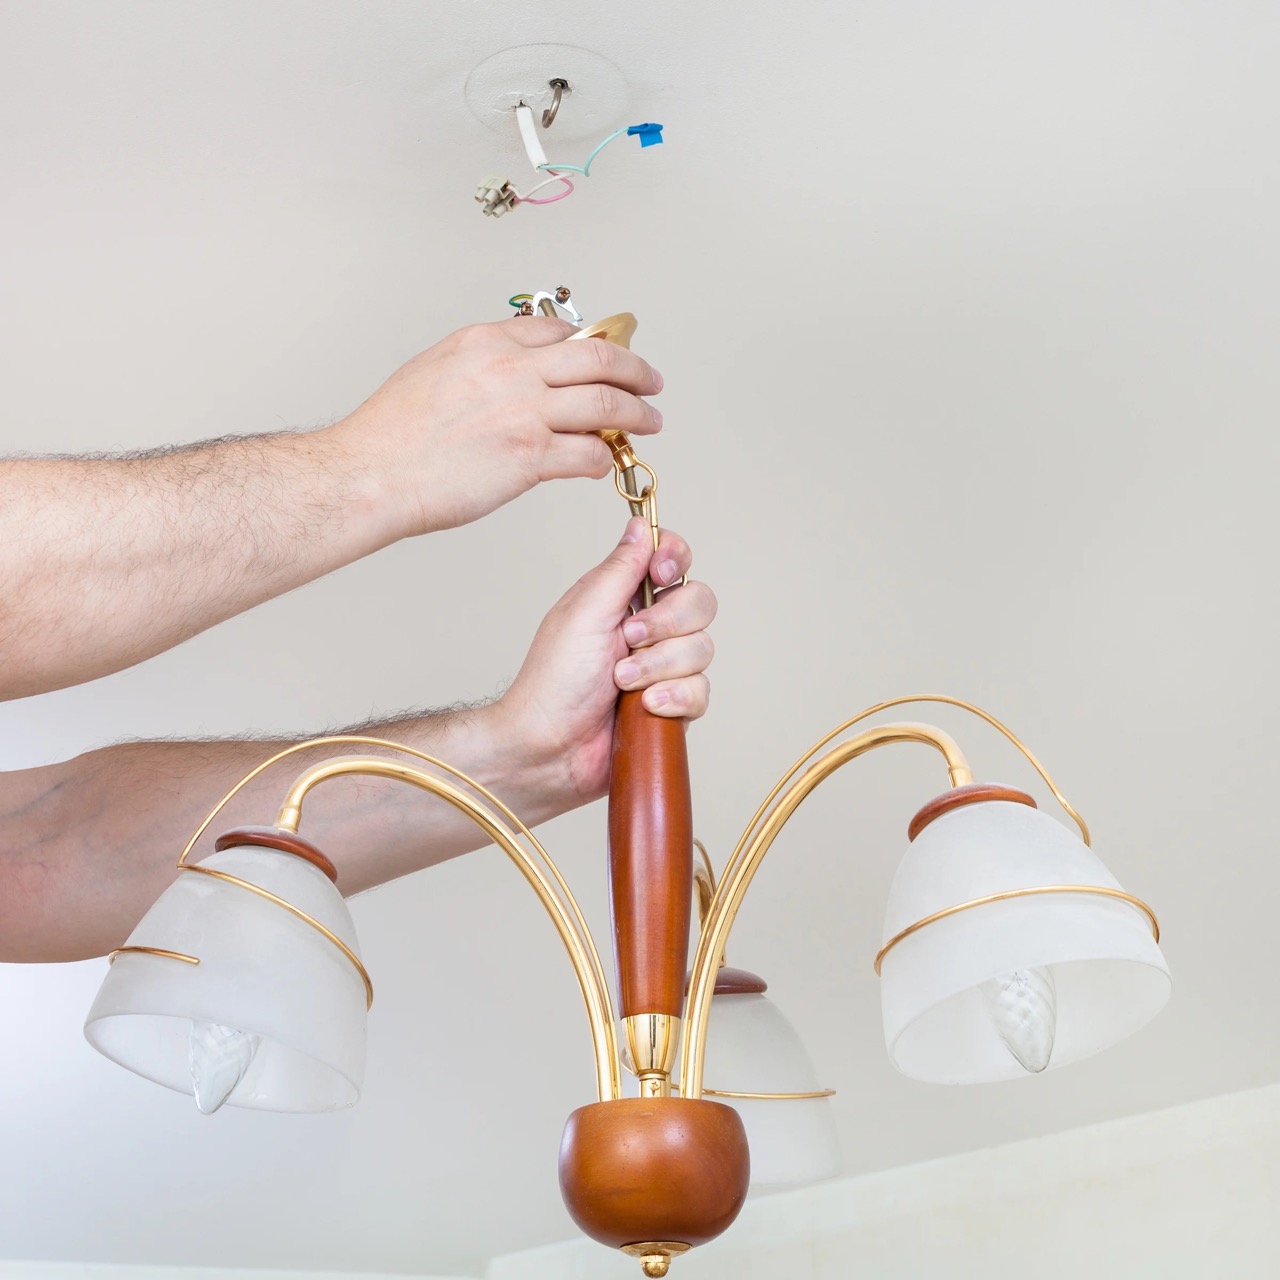
Replacing the Cover
-
Alignment and Positioning: Carefully align the cover with the fixture, ensuring that it is positioned correctly to facilitate a secure and flush fit. Take note of any alignment markers or indicators that may aid in the proper placement of the cover.
-
Twist-Lock or Locking Mechanism: If the cover utilizes a twist-lock or locking mechanism, follow the reverse motion of the removal process to securely lock the cover back into place. Ensure that the cover is twisted or locked in a clockwise direction to achieve a snug and stable attachment.
-
Clip-Based Retention: For covers secured by clips, gently press the cover into position, allowing the clips to engage securely with the fixture. Verify that each clip is properly fastened to prevent any movement or instability.
-
Finial or Retaining Ring: If the cover is held in place by a decorative finial or a retaining ring, carefully reattach the finial by screwing it in a clockwise direction or secure the retaining ring to maintain the cover's position.
By meticulously cleaning the cover and executing the reinstallation process with precision, you can ensure that the ceiling light cover is restored to its optimal condition and seamlessly integrated with the fixture. This attention to detail contributes to the overall maintenance and longevity of the lighting fixture, allowing you to enjoy a well-maintained and visually appealing ceiling light cover.
This comprehensive approach to cleaning and replacing the cover underscores the importance of meticulous care and precision, ultimately enhancing the functionality and aesthetic value of the ceiling light fixture.
Conclusion
In conclusion, the process of removing a ceiling light cover without screws is a task that demands careful consideration, attention to detail, and the right set of tools. By following the step-by-step guide outlined in this comprehensive article, you can confidently navigate the removal process and ensure that the cover is handled with precision and expertise.
Understanding the specific type of ceiling light cover you have is crucial, as it allows you to tailor your approach and techniques to suit the design and fastening method. Whether it's a dome-shaped cover, a flush-mounted design, a glass or acrylic panel cover, a decorative pendant cover, or a retractable blade cover, identifying the unique characteristics of your cover empowers you to proceed with confidence and precision.
The importance of gathering the necessary tools cannot be overstated, as having the right equipment at your disposal significantly simplifies the removal process and minimizes the risk of damage to the fixture or cover. From ladders and non-slip gloves to flathead screwdrivers and safety glasses, each tool plays a crucial role in ensuring a smooth and efficient removal experience.
The step-by-step process of twisting and removing the cover without screws provides a clear and effective method for handling various types of ceiling light covers. By carefully executing the removal techniques tailored to the specific cover type, you can ensure that the cover is released smoothly and without any damage, setting the stage for the subsequent cleaning and maintenance steps.
Thoroughly cleaning the cover and executing the reinstallation process with precision are essential components of the overall maintenance and care of the ceiling light fixture. By removing accumulated dust, addressing any stains or residue, and ensuring a secure and flush fit during reinstallation, you can maintain the optimal condition and visual appeal of the cover, contributing to the longevity and functionality of the lighting fixture.
In essence, the process of removing a ceiling light cover without screws is a blend of meticulous attention to detail, practical knowledge of cover types, and the application of the right tools and techniques. By following this comprehensive guide, you can approach this task with confidence and expertise, ensuring that your ceiling light cover is handled with care and precision, ultimately contributing to a well-maintained and visually appealing lighting fixture.
Frequently Asked Questions about How To Remove A Ceiling Light Cover Without Screws
Was this page helpful?
At Storables.com, we guarantee accurate and reliable information. Our content, validated by Expert Board Contributors, is crafted following stringent Editorial Policies. We're committed to providing you with well-researched, expert-backed insights for all your informational needs.

0 thoughts on “How To Remove A Ceiling Light Cover Without Screws”