Home>Home Appliances>Lighting Appliances>How To Remove An LED Ceiling Light
Lighting Appliances
How To Remove An LED Ceiling Light
Modified: August 25, 2024
Learn how to safely remove an LED ceiling light with our step-by-step guide. Discover the best practices for handling lighting appliances.
(Many of the links in this article redirect to a specific reviewed product. Your purchase of these products through affiliate links helps to generate commission for Storables.com, at no extra cost. Learn more)
Introduction
Removing an LED ceiling light may seem like a daunting task, but with the right guidance and a bit of know-how, it can be a straightforward process. Whether you're looking to replace the existing LED fixture with a new one or simply need to access the ceiling space for maintenance, understanding the step-by-step procedure is essential for a successful outcome.
LED ceiling lights have gained popularity for their energy efficiency, longevity, and sleek design. However, there are times when you may need to remove them, such as when upgrading to a different style or addressing electrical issues. Before embarking on this task, it's crucial to prioritize safety. Turning off the power supply to the light fixture and taking necessary precautions will ensure a secure and hassle-free removal process.
In this comprehensive guide, we will walk you through the essential steps to remove an LED ceiling light. From disconnecting the power source to carefully detaching the fixture, each stage is vital in ensuring a smooth and secure removal. By following these instructions and exercising caution, you can effectively remove the LED ceiling light without any complications.
So, if you're ready to delve into the world of lighting appliances and gain the confidence to tackle this task, let's get started on the journey to removing an LED ceiling light.
Key Takeaways:
- Safety First!
Turning off the power supply and using a non-contact voltage tester are crucial for a secure removal process. Prioritizing safety ensures a smooth and incident-free experience in removing an LED ceiling light. - Step-by-Step Removal
From disconnecting the power to removing the mounting bracket, each step is vital for a successful removal. Following the process with caution and patience leads to a seamless extraction of the LED light.
Read more: How To Remove Ceiling Light
Step 1: Turn off the Power
Before beginning the process of removing an LED ceiling light, the first and most crucial step is to turn off the power supply to the fixture. This is a fundamental safety measure that must not be overlooked. By cutting off the electricity, you eliminate the risk of electric shock and ensure a secure working environment.
To accomplish this, locate the circuit breaker or fuse box in your home. It's essential to identify the specific breaker or fuse that controls the power supply to the LED ceiling light. In some cases, the circuit breaker may be labeled, making it easier to pinpoint the correct switch. However, if the breakers are not labeled, you may need to enlist the help of a partner to assist you in identifying the correct one.
Once you've located the appropriate circuit breaker, switch it to the "off" position. Alternatively, if your home is equipped with fuses, remove the fuse that corresponds to the LED ceiling light. It's important to verify that the power has been successfully cut off by testing the light switch associated with the fixture. If the light does not turn on, you can proceed with confidence, knowing that the power has been effectively disconnected.
In addition to turning off the power at the circuit breaker or fuse box, it's advisable to use a non-contact voltage tester to double-check that the electrical wires are not live. This handheld device can detect the presence of electrical current without direct contact, providing an extra layer of safety assurance.
By diligently following these steps to turn off the power, you create a secure environment for the subsequent stages of removing the LED ceiling light. Prioritizing safety at the outset of the process sets the foundation for a smooth and incident-free removal experience.
With the power supply effectively turned off and safety measures in place, you are now ready to proceed to the next step in the removal process.
Remember, safety should always be the top priority when working with electrical fixtures, and taking the time to ensure the power is off is a critical initial step in the removal of an LED ceiling light.
Step 2: Remove the Cover
Once the power supply has been safely turned off, the next step in removing an LED ceiling light is to remove the cover. The cover of the LED ceiling light is typically held in place by screws or clips and serves as a protective barrier for the internal components of the fixture. Removing the cover provides access to the wiring and mounting bracket, allowing for the subsequent disconnection and removal of the fixture.
To begin, carefully inspect the perimeter of the LED ceiling light to identify the method used to secure the cover. In some models, the cover may be attached using screws, while others feature spring-loaded clips that hold the cover in place. Depending on the design of the fixture, you will need to use the appropriate tools to detach the cover securely.
If the cover is fastened with screws, use a screwdriver that matches the screw head type to carefully loosen and remove the screws. It's important to keep track of the screws and set them aside in a safe place to prevent misplacement. In the case of spring-loaded clips, gently press or pry the clips to release the cover from the fixture. Exercise caution to avoid applying excessive force that could damage the cover or the surrounding ceiling surface.
Once the fasteners are disengaged, carefully lower the cover from the LED ceiling light. It's essential to handle the cover with care to prevent any damage or breakage. Some covers may have a snug fit and require a gentle wiggle or slight rotation to release them from the fixture. Take your time and proceed patiently to avoid any mishaps during this step.
As the cover is removed, take note of any internal components or insulation material that may be present within the fixture. Ensure that these elements remain undisturbed and intact during the cover removal process. If there is any accumulated dust or debris on the cover, this is an opportune moment to clean it using a soft, dry cloth before setting it aside.
With the cover successfully detached, you have now gained access to the internal wiring and components of the LED ceiling light. This sets the stage for the subsequent steps of disconnecting the wires and removing the mounting bracket, bringing you closer to the completion of the removal process.
By carefully following the steps to remove the cover, you have taken a significant stride in the journey to remove an LED ceiling light. With the cover out of the way, the inner workings of the fixture are now within reach, setting the stage for the subsequent stages of the removal process.
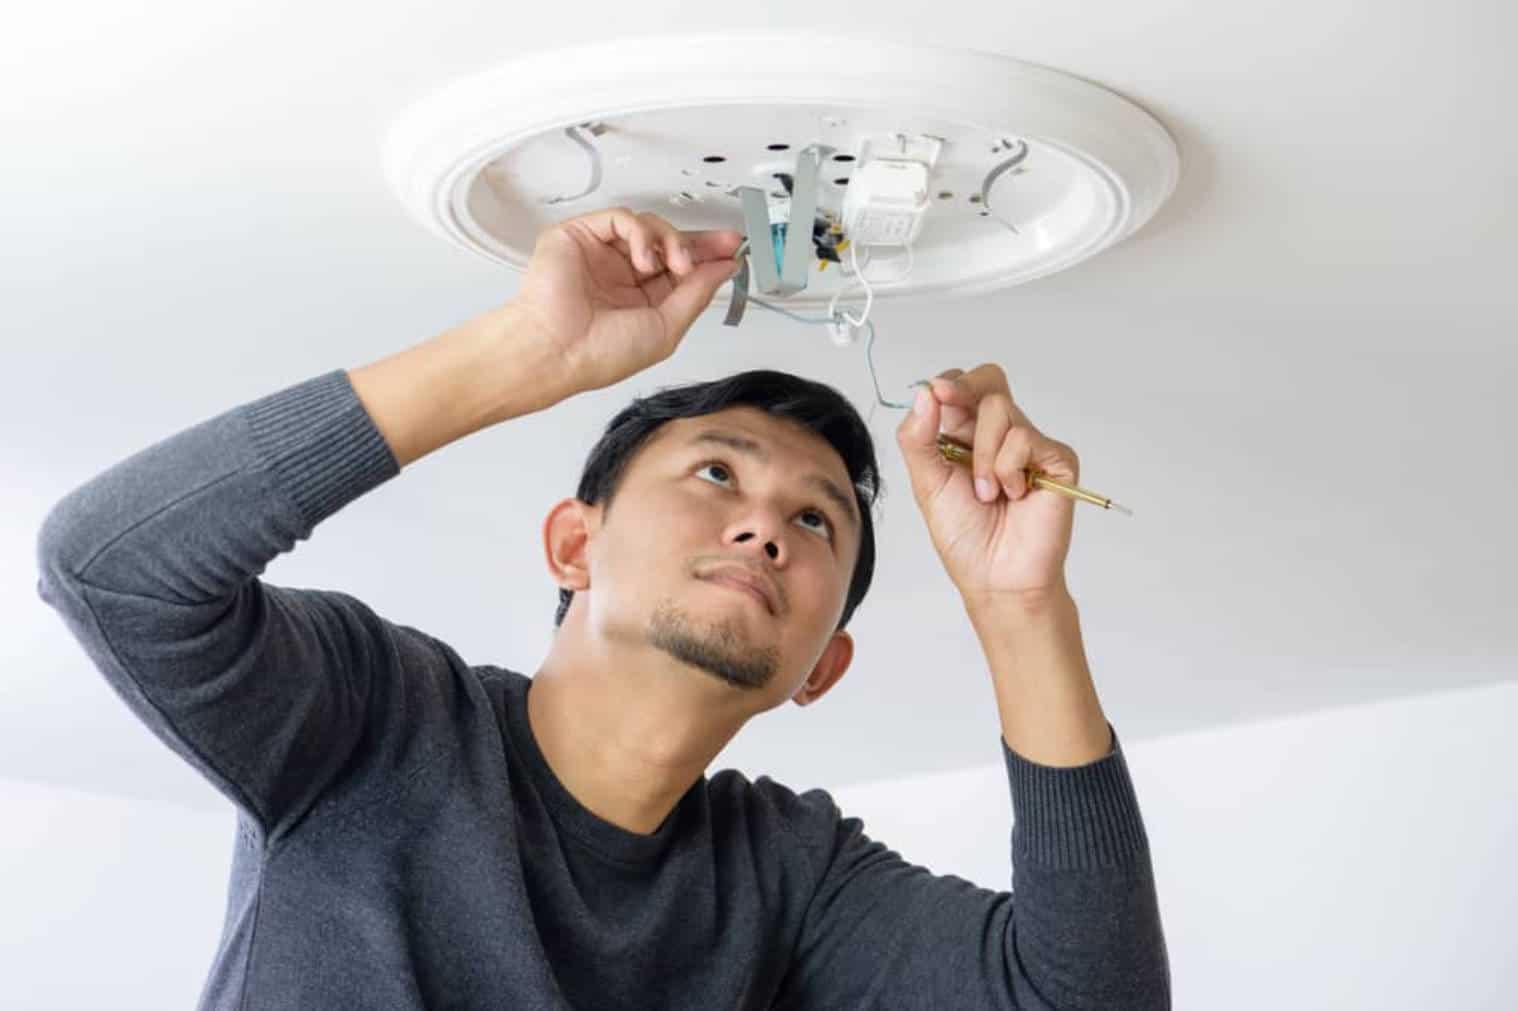
Step 3: Disconnect the Wires
With the cover successfully removed, the next critical step in removing an LED ceiling light is to disconnect the electrical wires. These wires supply power to the fixture and must be carefully detached to ensure a safe and seamless removal process.
Before proceeding, it's essential to exercise caution and ensure that the power supply to the LED ceiling light remains switched off. Verifying the absence of electrical current using a non-contact voltage tester adds an extra layer of safety assurance before handling the wires.
To begin the disconnection process, carefully examine the wiring configuration within the fixture. Typically, there will be a set of electrical wires connected to the LED light. These wires may be secured with wire nuts or connectors, and it's crucial to identify and understand the specific method of attachment used.
Using a pair of insulated wire strippers, carefully remove the wire nuts or connectors that secure the electrical wires. It's important to handle the wires gently and avoid applying excessive force to prevent damage to the insulation or the wires themselves. As the wire nuts are loosened, carefully separate the individual wires, ensuring that they do not come into contact with each other or any metal components within the fixture.
Once the wires are disconnected, it's advisable to use electrical tape to cover the exposed ends of the wires. This precautionary measure helps prevent accidental contact with live wires and reduces the risk of electrical hazards during the subsequent steps of the removal process.
As you proceed with disconnecting the wires, it's essential to maintain a focused and deliberate approach, ensuring that each wire is handled with care and precision. Taking the time to double-check the disconnection of the wires and confirming that they are safely isolated from the power source is crucial before advancing to the next stage.
By successfully disconnecting the electrical wires, you have completed a pivotal phase in the removal of the LED ceiling light. This step not only ensures the safety of the removal process but also sets the stage for the final stages of removing the mounting bracket and extracting the LED light from the ceiling.
With the wires safely disconnected and secured, you are now prepared to progress to the subsequent steps, bringing you closer to the successful removal of the LED ceiling light.
Before removing an LED ceiling light, make sure to turn off the power at the circuit breaker to avoid any electrical hazards. Use a ladder to reach the light, then carefully unscrew and remove the fixture. If necessary, disconnect the wiring and remove the mounting bracket to fully remove the light.
Step 4: Remove the Mounting Bracket
After safely disconnecting the electrical wires, the next crucial step in removing an LED ceiling light is to remove the mounting bracket. The mounting bracket serves as the anchor that secures the fixture to the ceiling, and its removal is essential to facilitate the extraction of the LED light from its position.
To begin this process, carefully inspect the mounting bracket to identify the method used to secure it to the ceiling. In most cases, the bracket is attached using screws that penetrate the ceiling surface and hold it in place. Additionally, there may be a central screw or bolt that fastens the bracket to the electrical junction box within the ceiling.
Using a suitable screwdriver or power drill with the appropriate bit, carefully loosen and remove the screws that secure the mounting bracket to the ceiling. It's important to support the weight of the fixture while removing the screws to prevent it from unexpectedly detaching from the ceiling surface. If there is a central screw or bolt, ensure that it is also carefully removed to release the bracket.
As the screws are disengaged, gently lower the mounting bracket from the ceiling. It's crucial to handle the bracket with care to avoid any damage to the surrounding ceiling area. Depending on the design of the fixture, the bracket may have a snug fit against the ceiling, requiring a gentle wiggle or slight rotation to release it completely.
Once the mounting bracket is detached, set it aside in a safe location, ensuring that it does not pose a tripping hazard or obstruction in the workspace. Additionally, take note of any insulation or wiring within the electrical junction box and ensure that these elements remain undisturbed during the bracket removal process.
With the mounting bracket successfully removed, you have cleared the final obstacle in the path to extracting the LED ceiling light. This pivotal step sets the stage for the seamless removal of the fixture from its position, bringing you closer to the completion of the removal process.
By diligently following the steps to remove the mounting bracket, you have achieved a significant milestone in the journey to remove an LED ceiling light. With the bracket out of the way, the fixture is now ready to be carefully extracted from the ceiling, marking the final stage of the removal process.
Read more: How To Change Light Bulb In The Ceiling
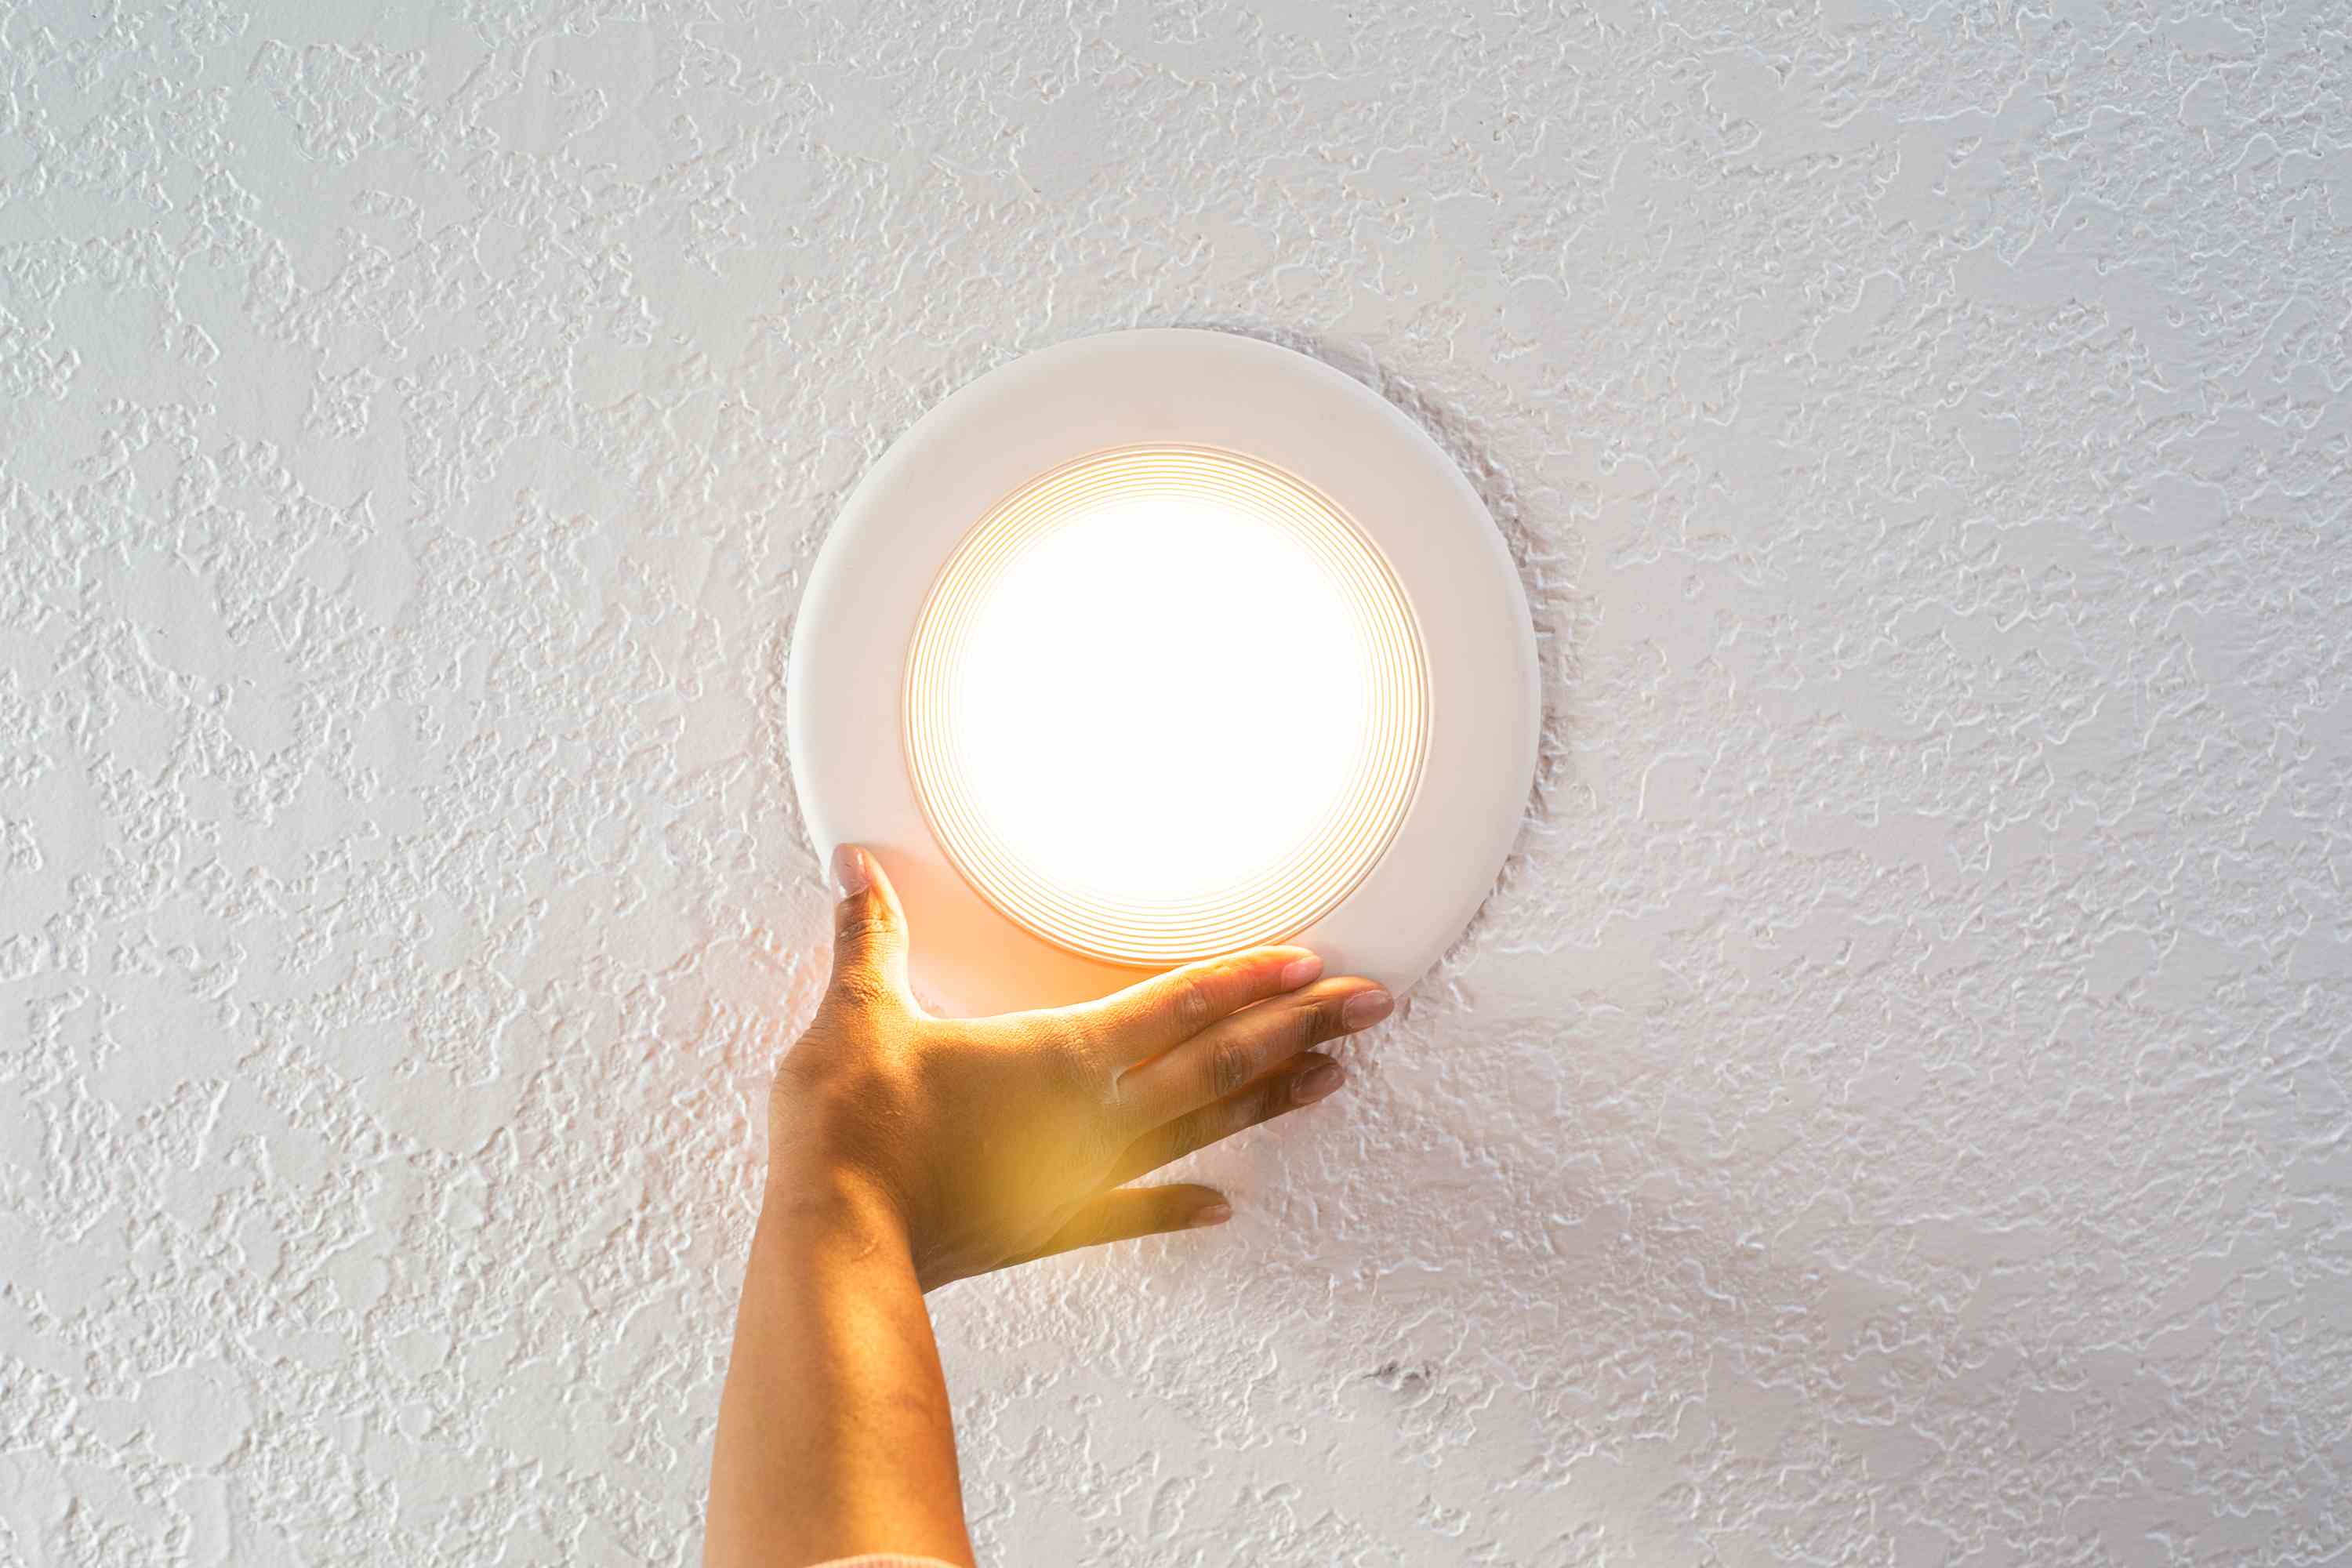
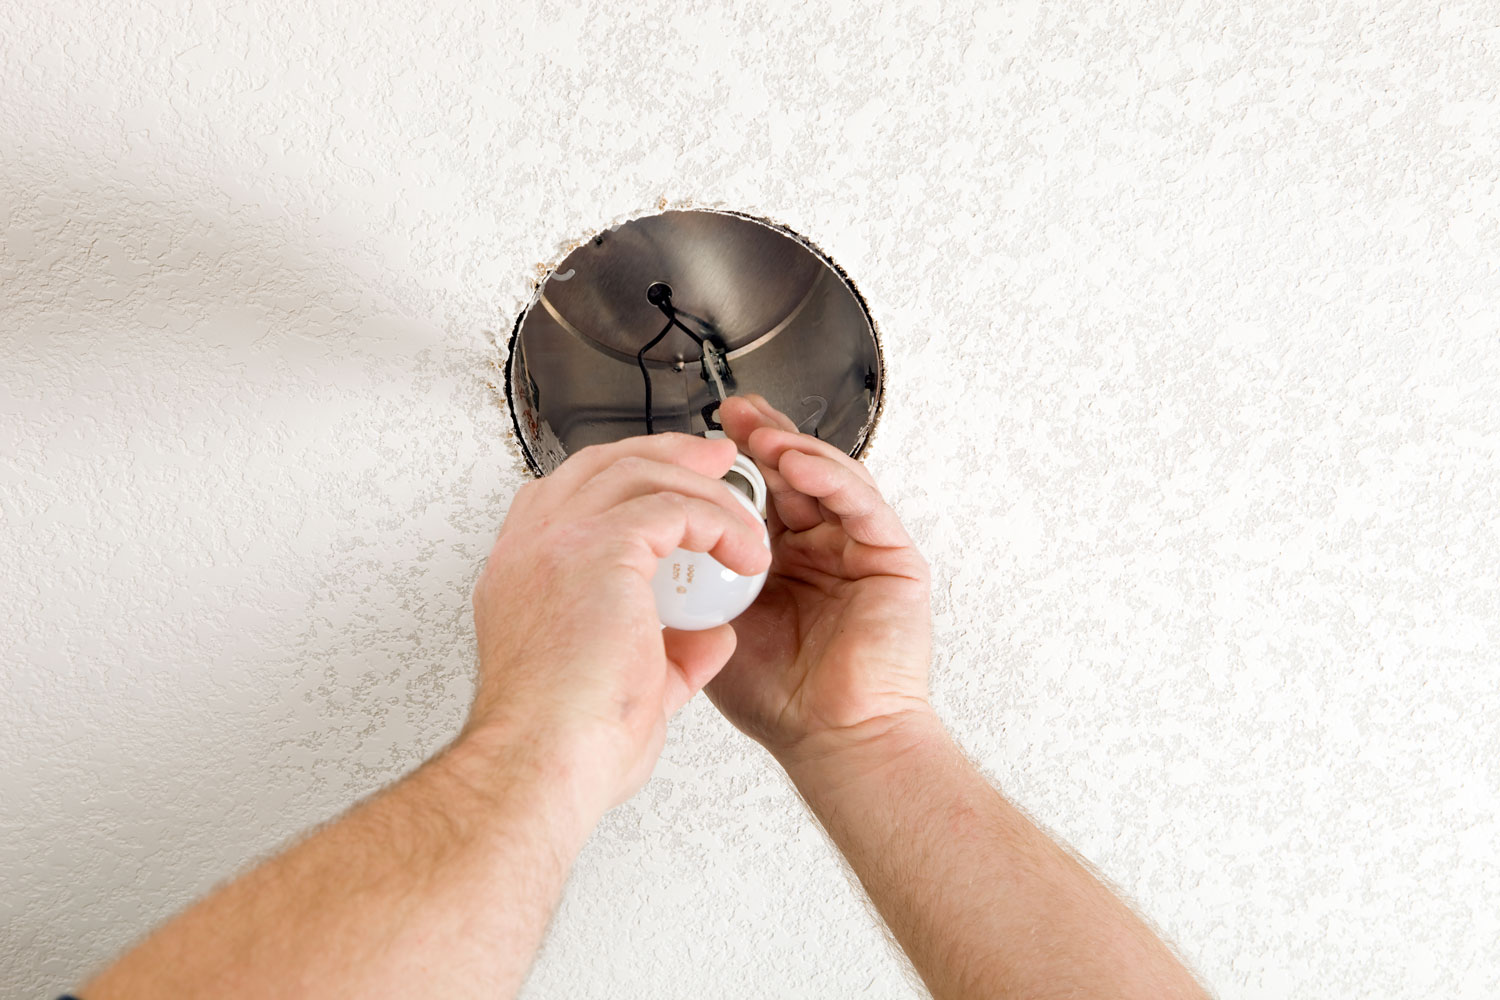
Step 5: Take Out the LED Light
With the cover removed, wires safely disconnected, and the mounting bracket detached, you have reached the culminating step in the process of removing an LED ceiling light. Taking out the LED light from its position requires a careful and methodical approach to ensure a smooth extraction without causing any damage to the fixture or the surrounding ceiling area.
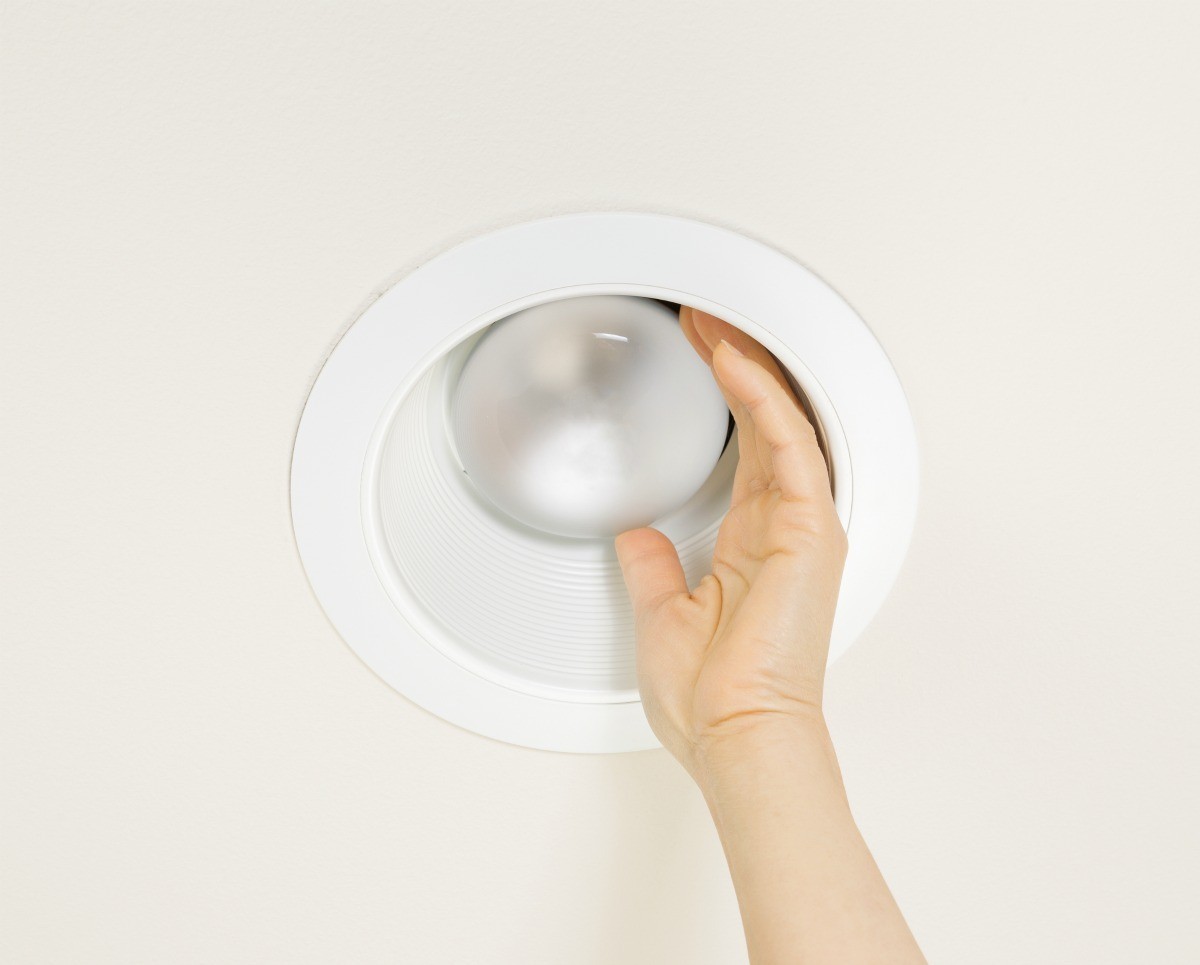
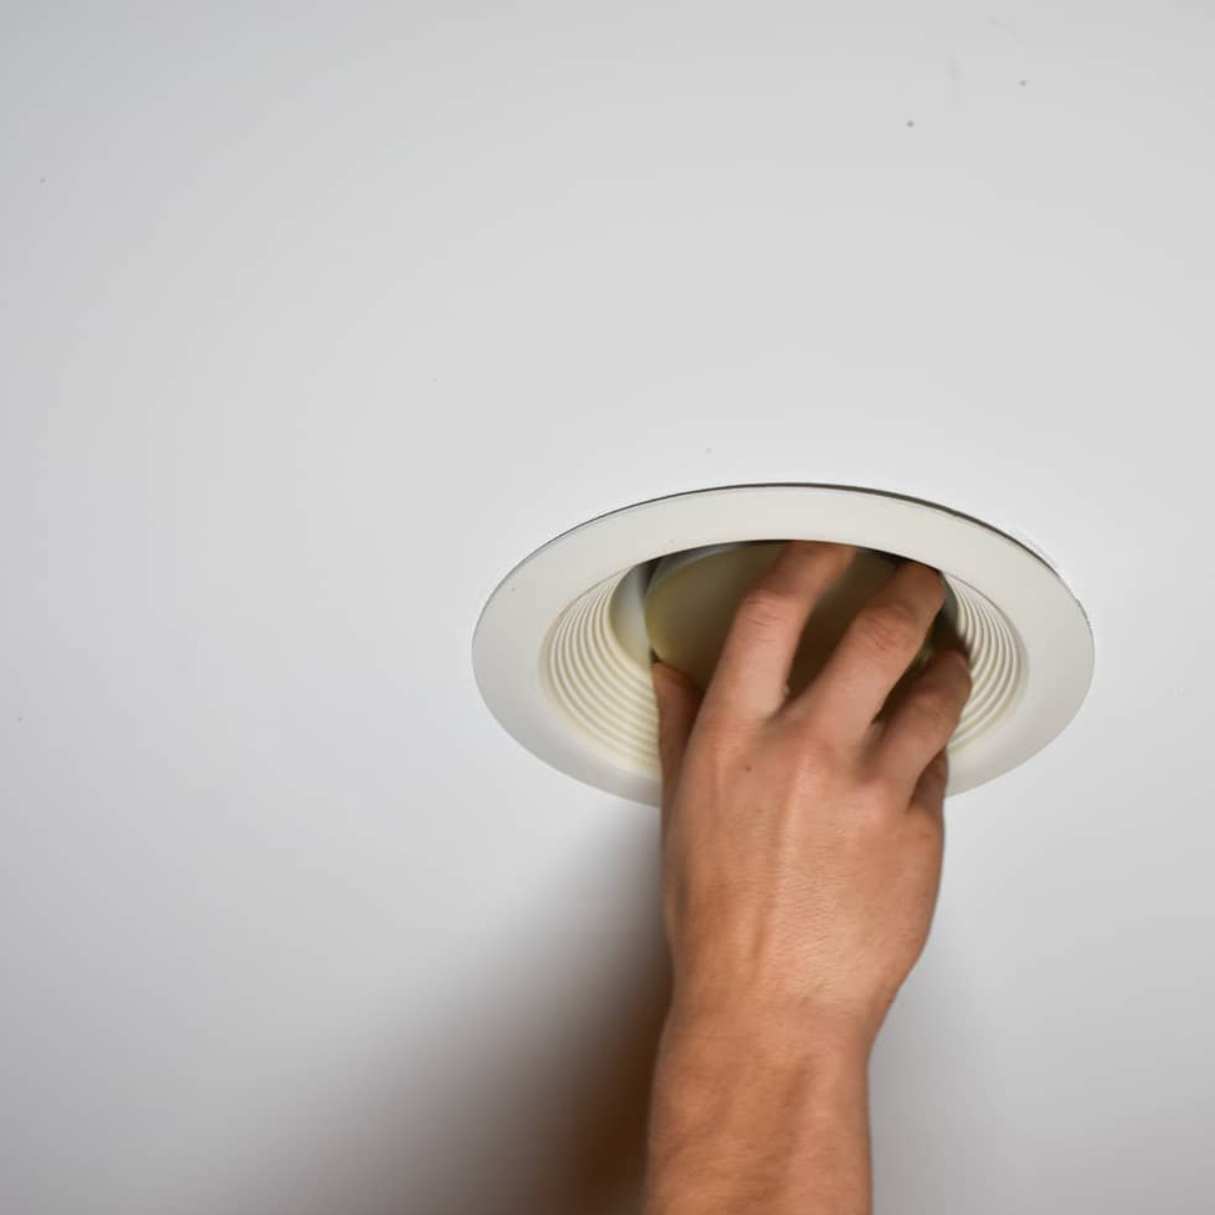
To begin, gently grasp the LED light fixture, ensuring that you have a secure hold on it. Depending on the design of the fixture, it may be held in place by clips, screws, or a twist-lock mechanism. Carefully inspect the fixture to identify the method used to secure it to the ceiling.
If the LED light is secured with clips, gently press or release the clips to disengage the fixture from the ceiling. Exercise caution to avoid applying excessive force that could damage the clips or the surrounding ceiling surface. In the case of screws, use the appropriate screwdriver to carefully loosen and remove them, allowing the fixture to be released from its position.
For fixtures with a twist-lock mechanism, carefully rotate the fixture in the designated direction to unlock it from the ceiling. It's important to proceed patiently and attentively, ensuring that the fixture is released smoothly without any abrupt movements.
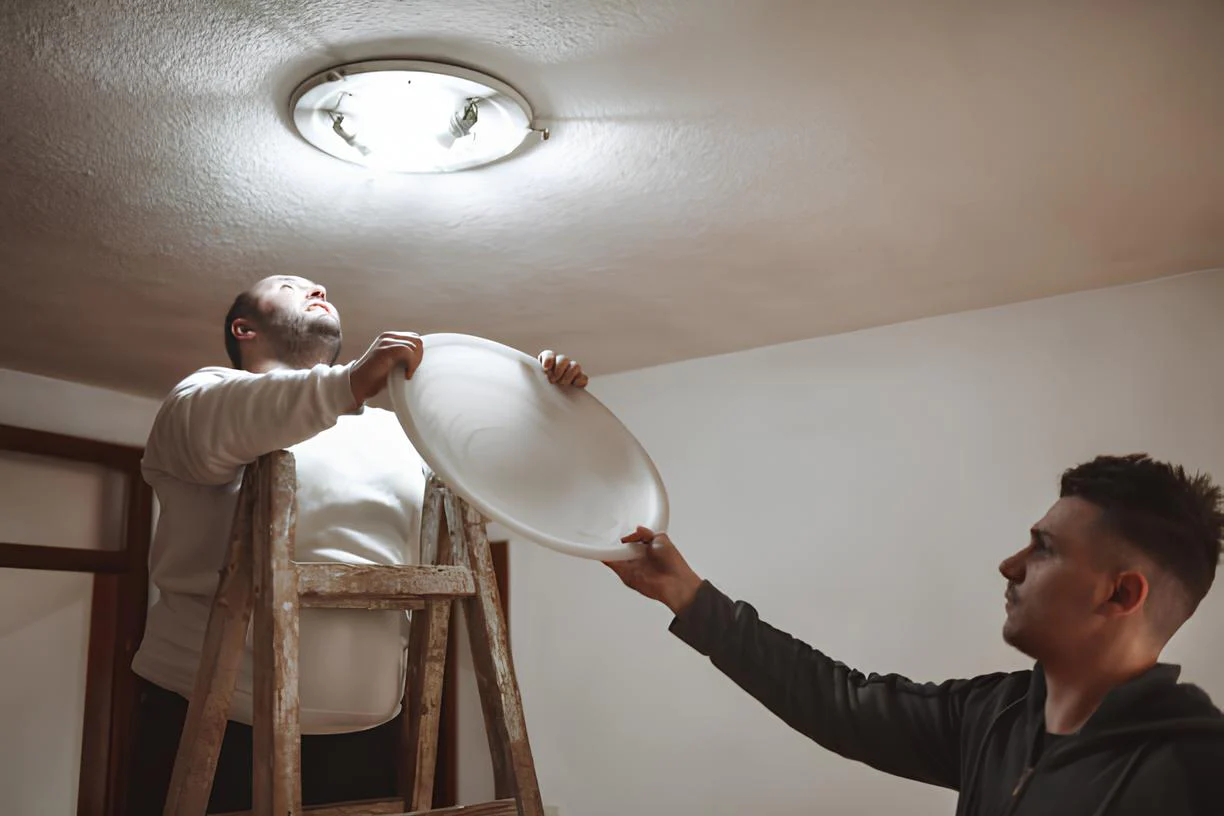
As the LED light fixture is disengaged from the ceiling, support its weight to prevent it from falling unexpectedly. Depending on the size and weight of the fixture, it may be helpful to have a partner assist you in safely lowering it to the ground.
Once the LED light is removed from its position, set it aside in a secure location, taking care to avoid any impact or damage during the handling process. Additionally, inspect the area from which the fixture was extracted to ensure that no wiring or insulation is disturbed, maintaining the integrity of the ceiling space.
With the LED light successfully taken out, you have completed the removal process, marking the culmination of the journey to remove an LED ceiling light. By following the step-by-step procedure and exercising caution at each stage, you have achieved the goal of safely and effectively removing the fixture.
As you reflect on the successful removal of the LED ceiling light, take a moment to appreciate the meticulous approach and attention to detail that contributed to a seamless extraction. Whether you're preparing to install a new fixture or addressing maintenance needs, the knowledge and expertise gained from this process will serve you well in your future endeavors with lighting appliances.
Conclusion
In conclusion, the process of removing an LED ceiling light encompasses a series of essential steps that culminate in the successful extraction of the fixture from its position. From turning off the power supply to carefully disengaging the mounting bracket, each stage plays a pivotal role in ensuring a safe and seamless removal experience.
Prioritizing safety at the outset by turning off the power supply is fundamental, setting the stage for the subsequent steps. This initial precaution creates a secure working environment and mitigates the risk of electrical hazards, laying the foundation for a smooth removal process.
The subsequent steps, including removing the cover, disconnecting the electrical wires, and detaching the mounting bracket, require a focused and deliberate approach. By meticulously following these procedures and exercising caution at each stage, the integrity of the fixture and the surrounding ceiling area is preserved, ensuring a successful removal outcome.
The culmination of the removal process, marked by the careful extraction of the LED light from its position, signifies the achievement of the ultimate goal. This final step, when executed with precision and attentiveness, results in the safe removal of the fixture, setting the stage for subsequent actions such as installing a new fixture or addressing maintenance needs.
As you reflect on the journey to remove an LED ceiling light, the knowledge and expertise gained from this process serve as valuable assets. Whether you're a homeowner embarking on a DIY project or a professional addressing lighting fixtures, the understanding of the removal process equips you with the confidence and capability to navigate similar tasks with proficiency.
In essence, the meticulous approach, attention to detail, and unwavering commitment to safety demonstrated throughout the removal process underscore the significance of these principles in all endeavors related to lighting appliances. By embracing these principles, you not only ensure the successful removal of an LED ceiling light but also cultivate a mindset of diligence and precision in all your future undertakings.
With the completion of the removal process, you have acquired a valuable skill set and the assurance that you can effectively navigate the intricacies of working with lighting fixtures. As you embark on future projects, may the knowledge gained from this journey serve as a guiding light, illuminating the path to successful endeavors in the realm of lighting appliances.
Now that you've mastered removing an LED ceiling light, why not tackle another fun project? If you're itching for a room refresh, learning how to install a light fixture could be just the upgrade your space needs. Also, keep your home running smoothly with essential home maintenance tips. Both guides are packed with practical advice to spruce up your living area and ensure everything operates seamlessly. Don't miss out—check them out now for more handy home improvement insights!
Frequently Asked Questions about How To Remove An LED Ceiling Light
Was this page helpful?
At Storables.com, we guarantee accurate and reliable information. Our content, validated by Expert Board Contributors, is crafted following stringent Editorial Policies. We're committed to providing you with well-researched, expert-backed insights for all your informational needs.


0 thoughts on “How To Remove An LED Ceiling Light”